

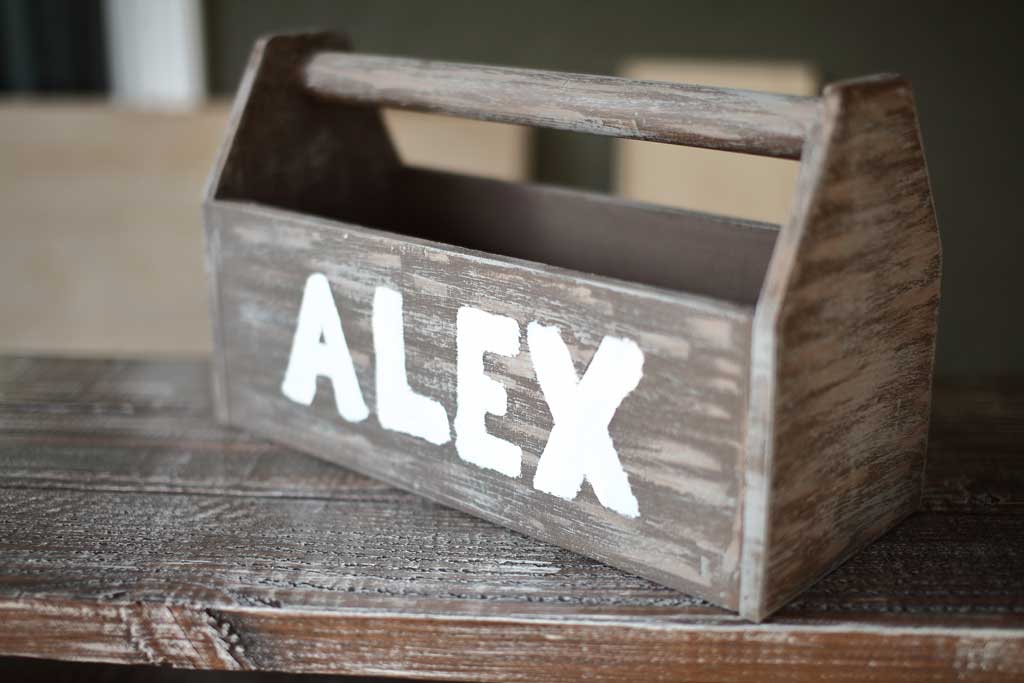
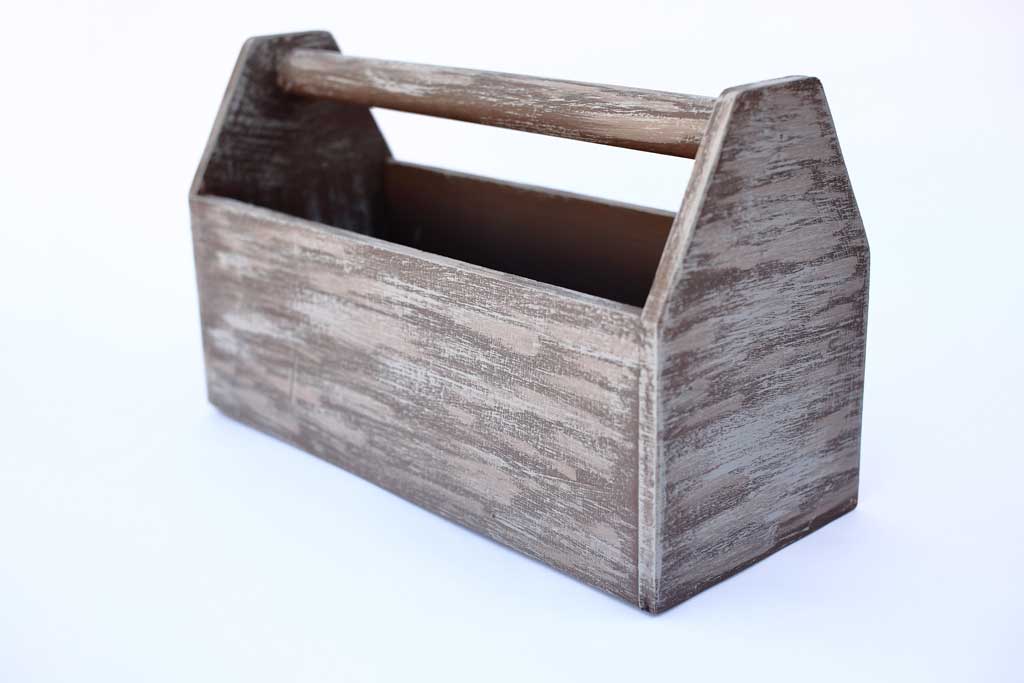
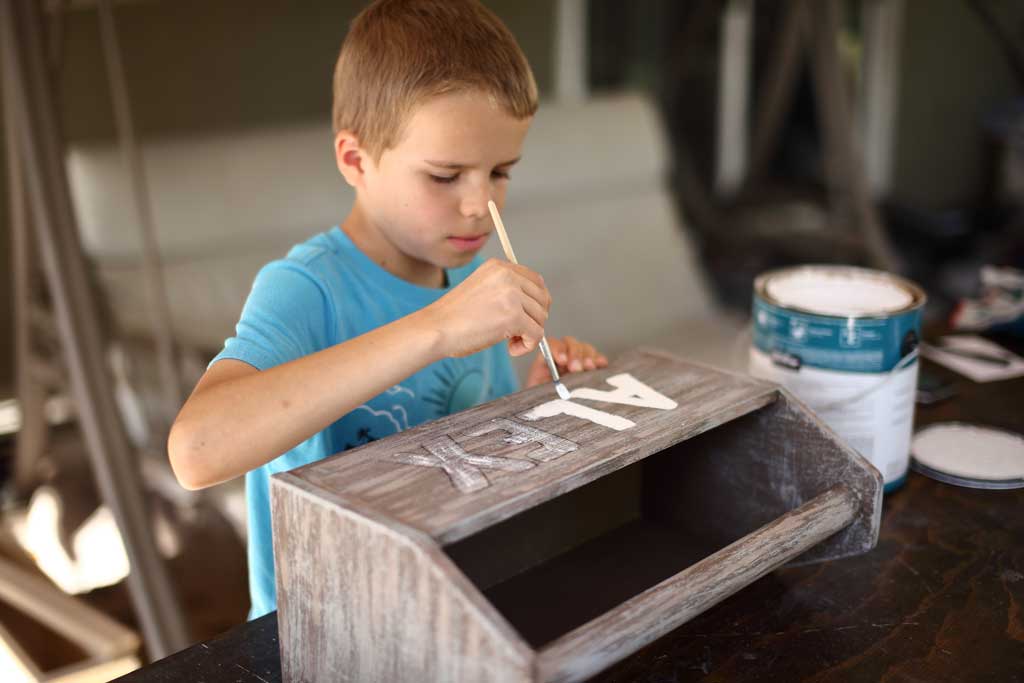


Every so often my son asks me to give him a simple project to work on. So we both agreed to make a DIY Wooden Tool Box so that he could store and organize his future tools. Currently, he doesn't have many tools, but as he grows up he'll be able to help with more complicated projects.
Tools
Other Tools
-
Table Saw

-
Hammer
Materials
Wood Products
- 1 Plywood , 3/4" Thick , Half Sheet
Hardware & Supplies
- 50 Finish Nails
Cut List & Parts
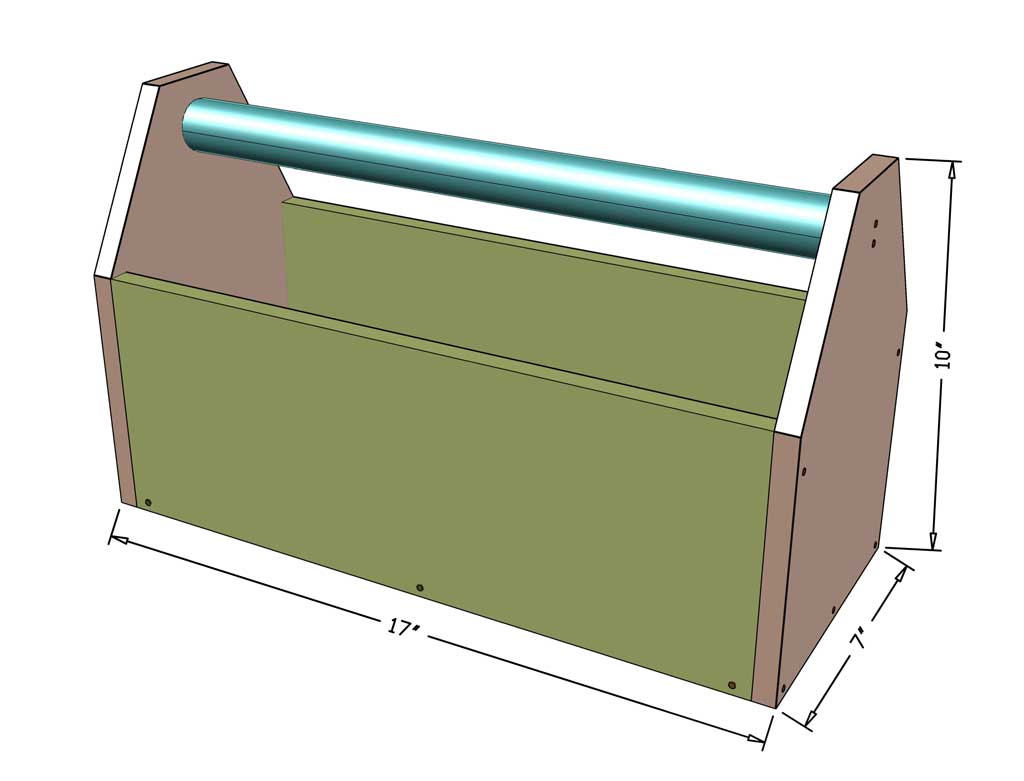
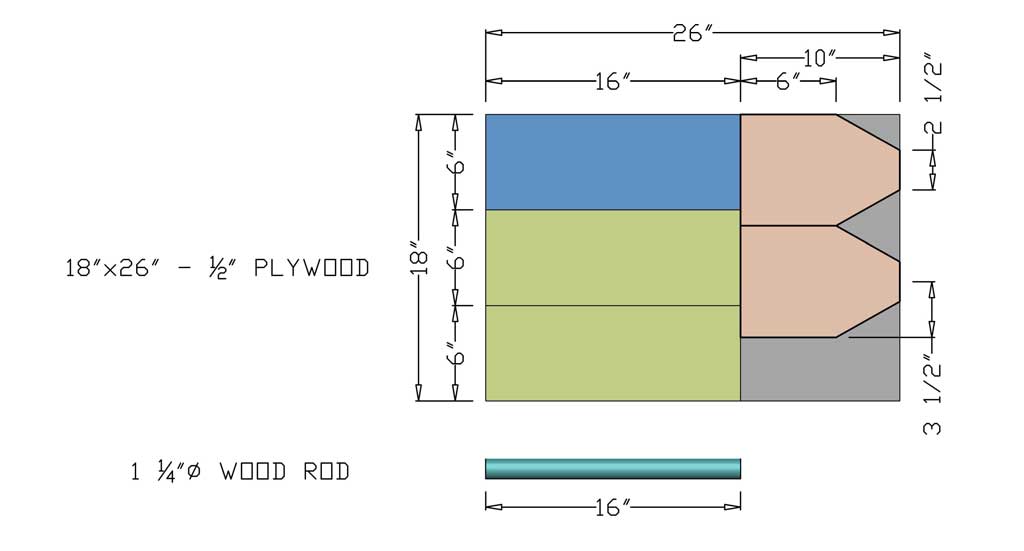
- 1 Plywood , 18"x26" - 1/2"
- 1 Dowel Rod , 1 1/4''
Directions
-
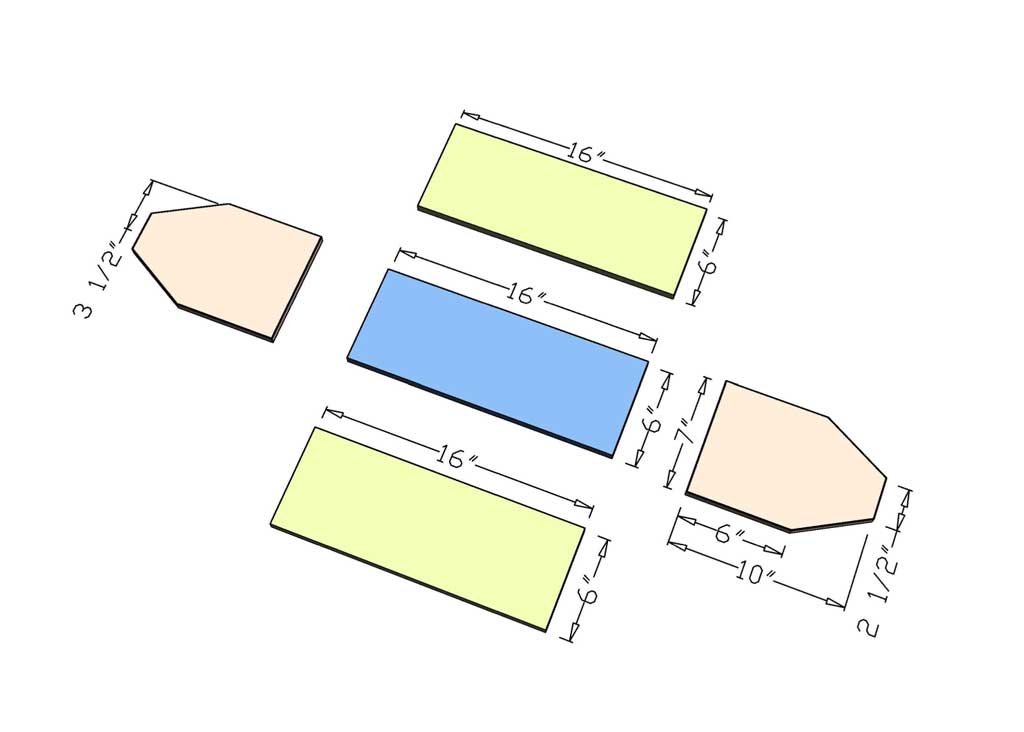
Step 1 - Cut all Pieces for Tool Bo
First, take 1/2" plywood and using a Table Saw cut all the pieces as shown on the picture. You will have one bottom, two side and two end pieces.
-
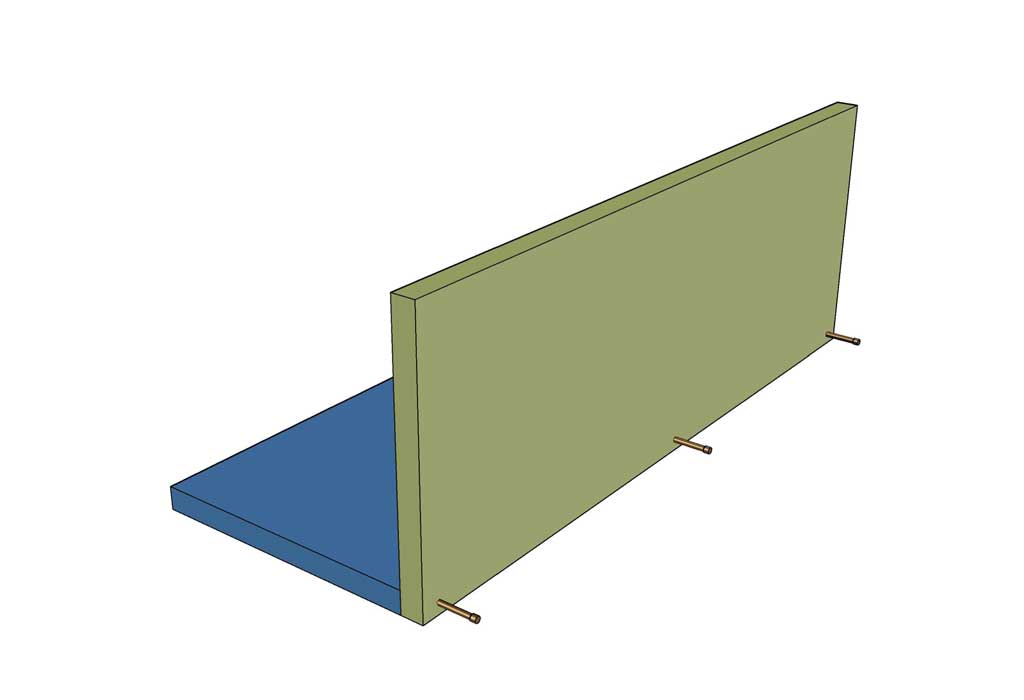
Step 2 - Nail Side Piece to Bottom
Now take one side piece and nail it to the bottom piece using finish nails.
-
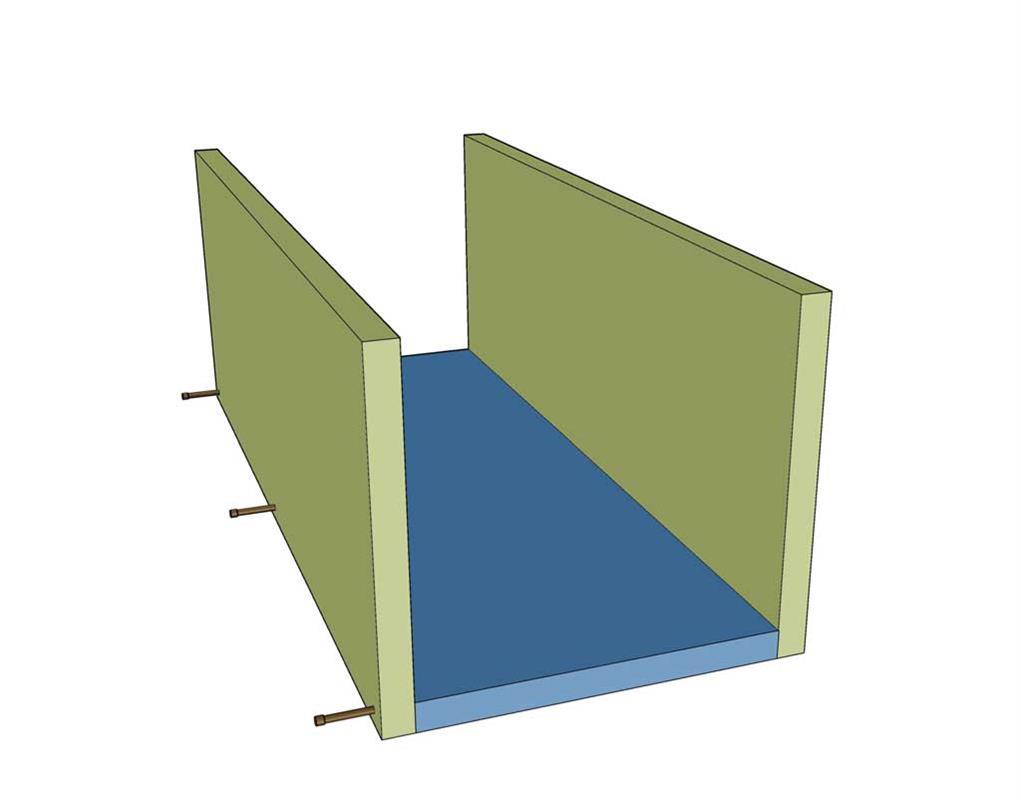
Step 3 - Nail the Other Side Piece
Then take the other side of the box and again nail it to the bottom piece.
-
Step 4 - Attach the End Pieces to t
After both sides are attached, nail both of the end pieces to the box.
-
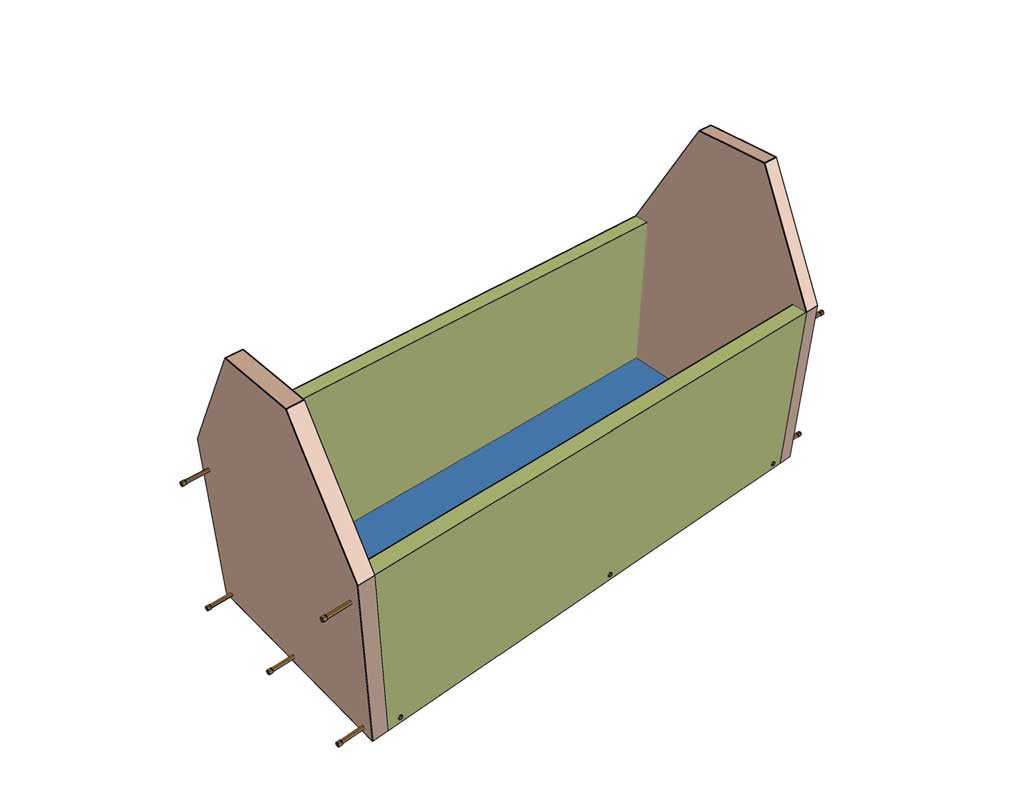
Step 5 - Attach the Dowel Rod and P
And finally take the 1 1/4" wooden dowel rod and insert it between the two end pieces and nail it with finish nails. Use two nails per side so that the wooden dowel rod would not twist. Now you can paint it. That's all, you're done with this DIY tool box.
