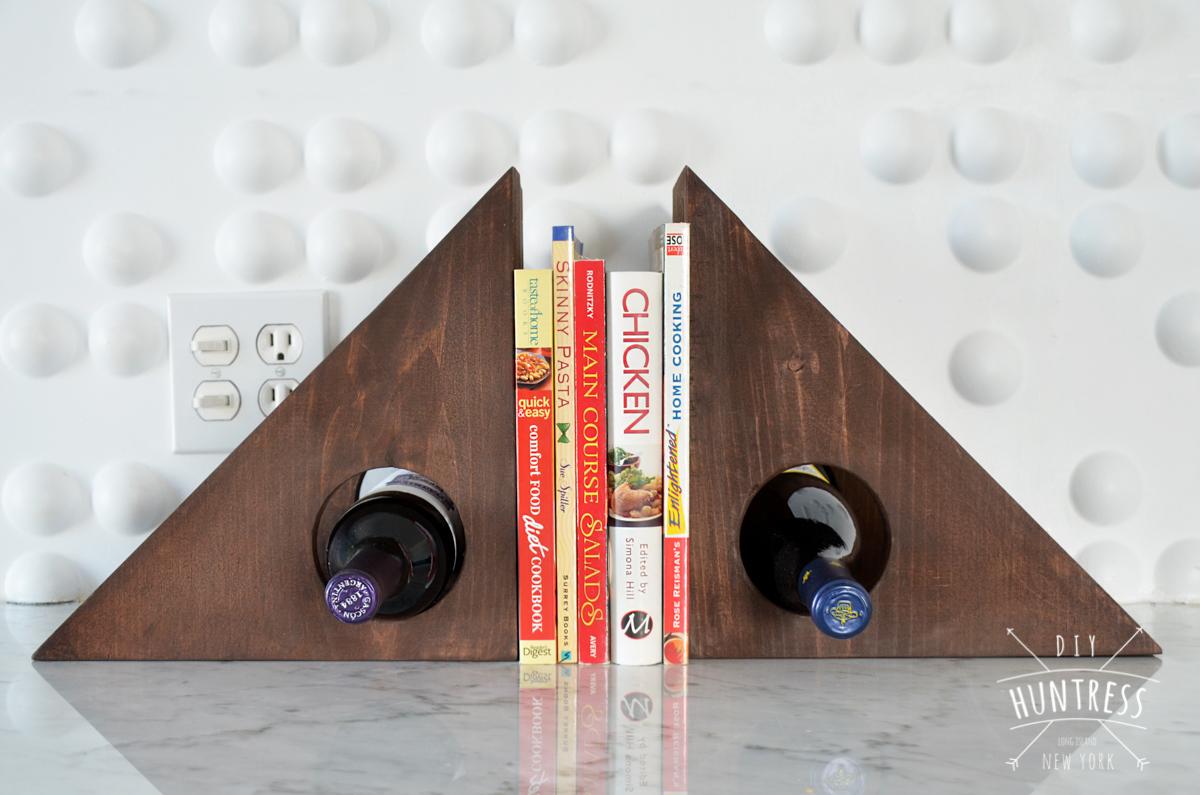
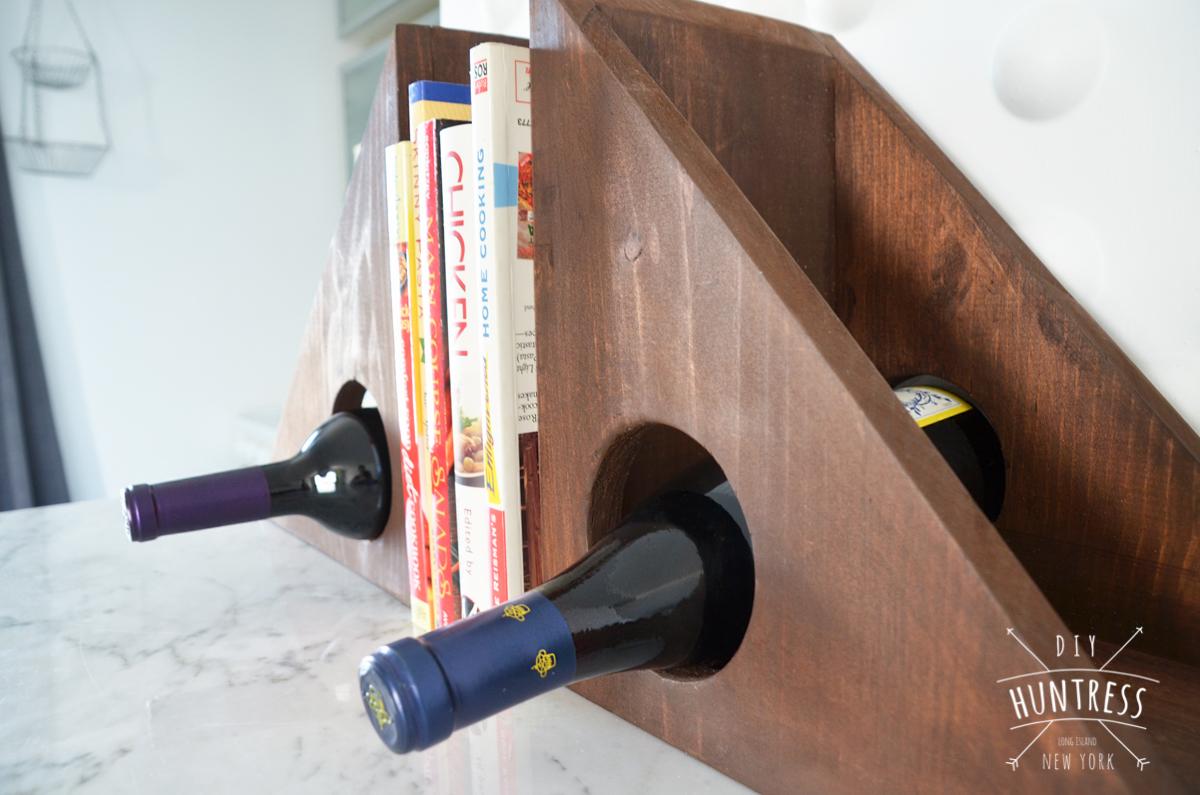


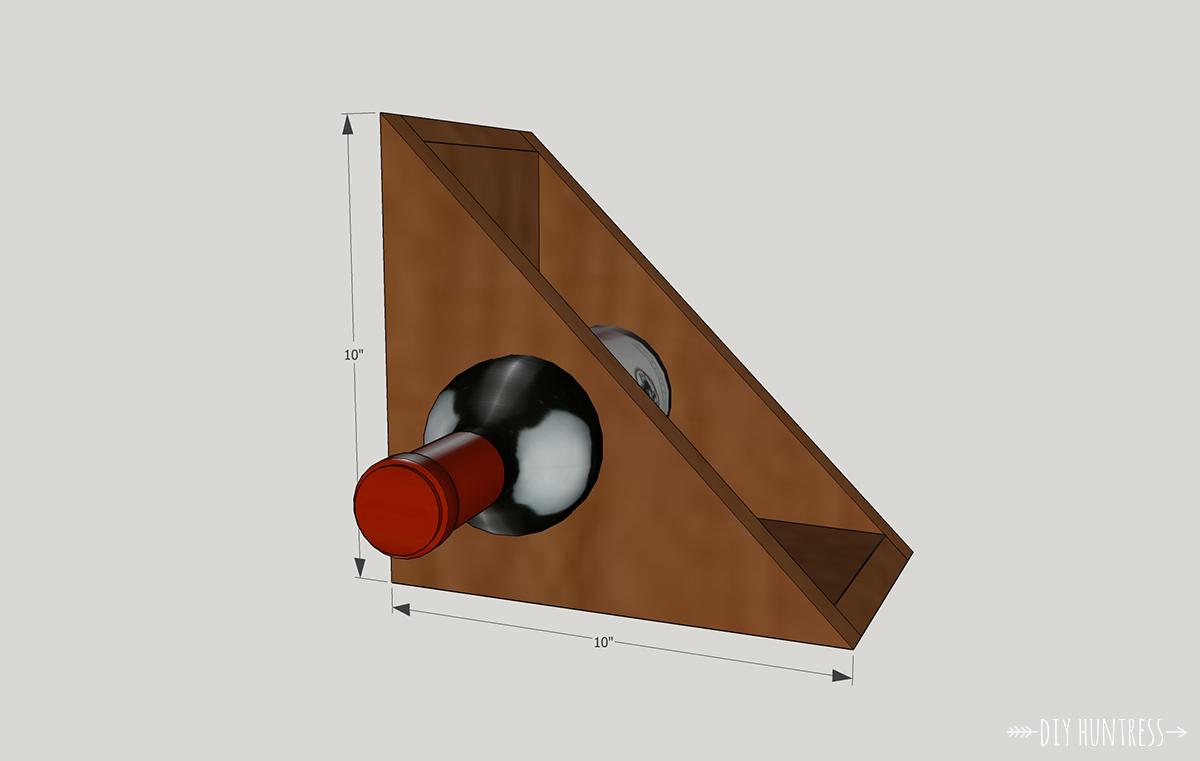
What's better than a wine rack? A wine rack that does more than just hold wine! Create this pair of multifunctional Wine Rack Book Ends in just a few easy steps and for right under $20 in lumber!
Tools
Kreg Tools


Other Tools
-
Miter Saw

-
Tape Measure
-
3.25 Inch Hole Saw
Materials
Wood Products
- 1 Board , 1x6 , 48"
- 1 Board , 1x10 , 48"
Hardware & Supplies
- 1 Wood Stain
- 8 1 1/4" Pocket Hole Screws
- 1 Wood Glue
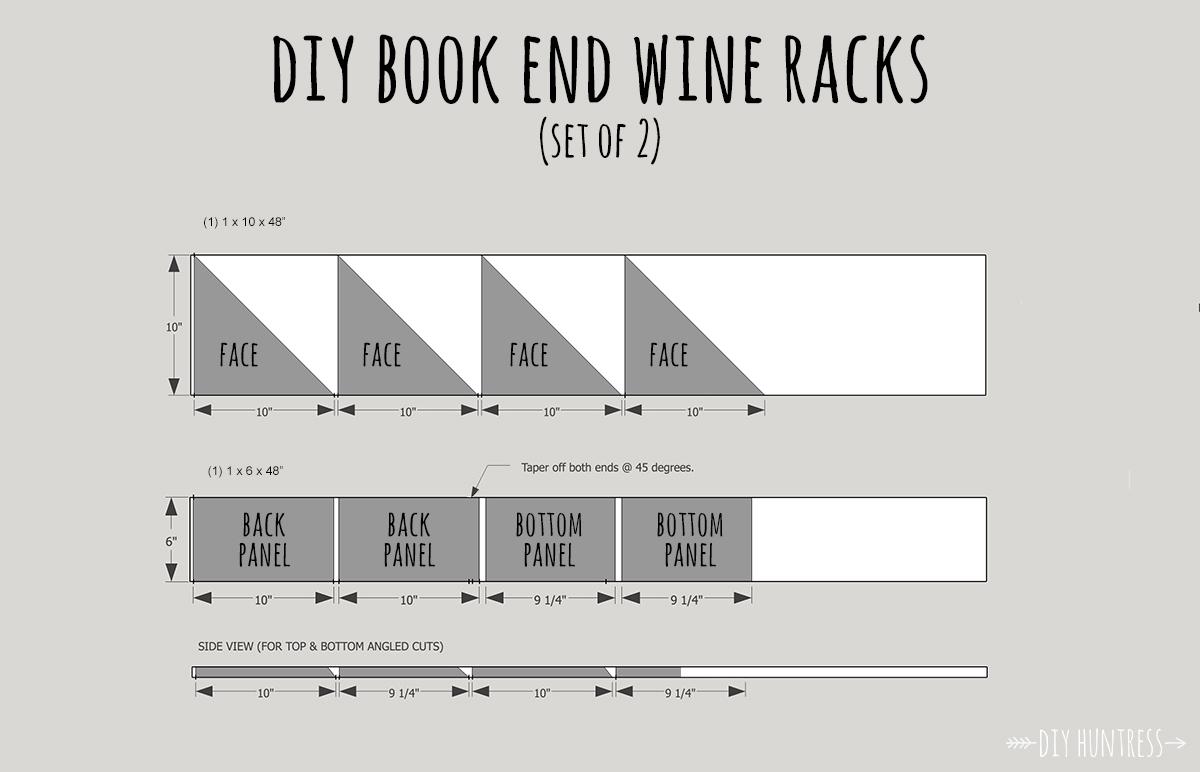
Cut List & Parts
- 4 Faces , 10x10 (see diagram)
- 2 Back Panels , 10 x 6 (see diagram)
- 2 Bottom Panels , 9 1/4" x 6 (see diagram)
Directions
-
Check Dimensions & Cut List
The plans for this project outline the steps to make one of the two wine holders in the set. To make a set of two, be sure to follow all steps twice. Check all dimensions and the cut list before starting.
-
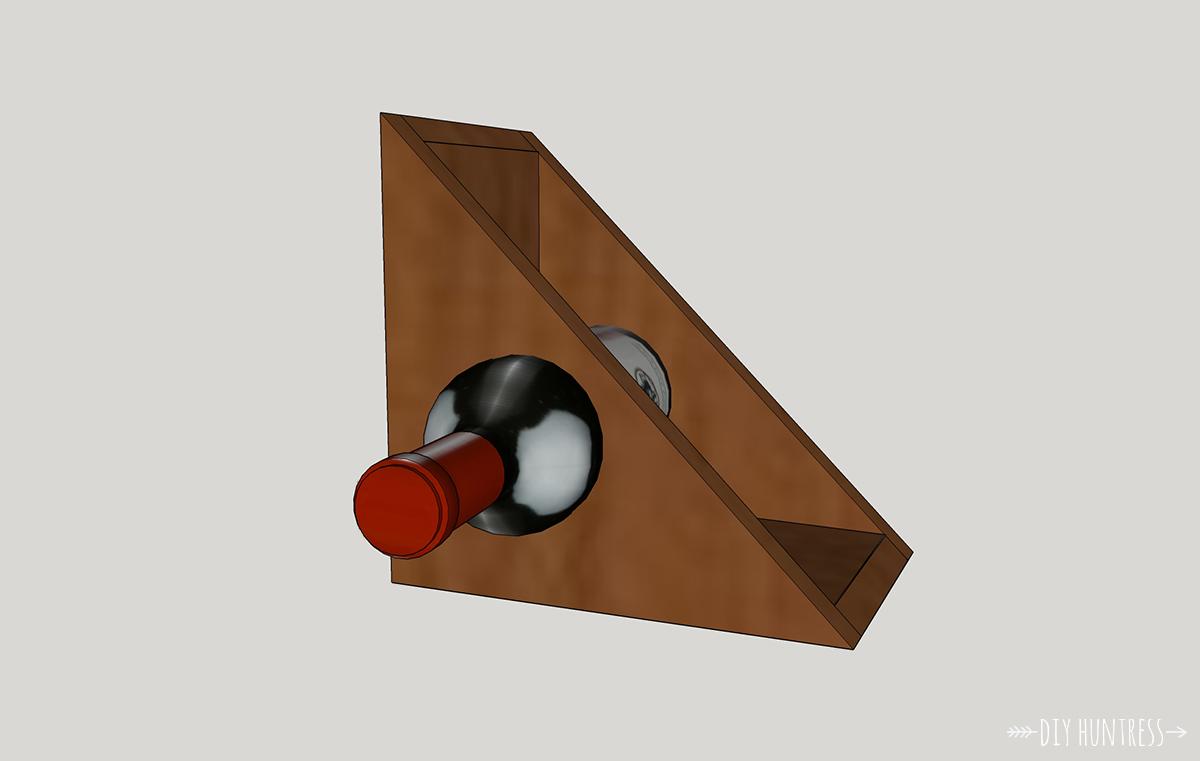
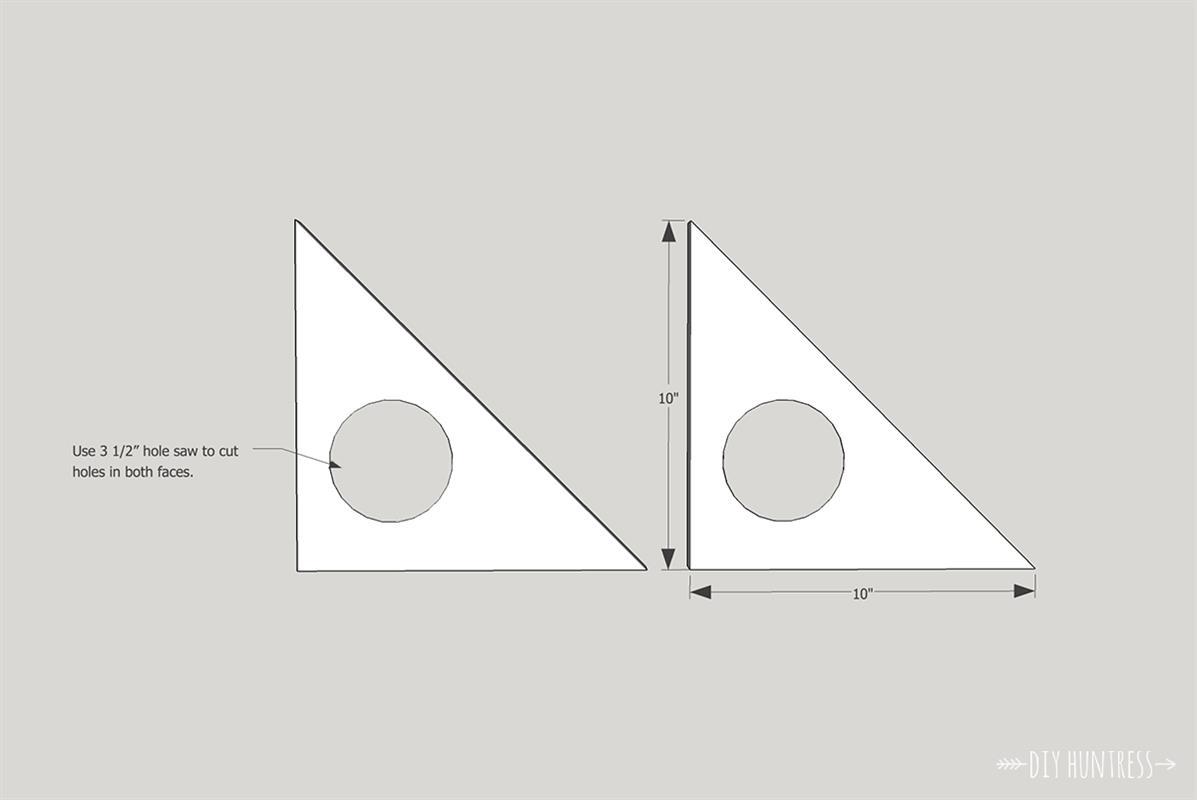
Create Holes
Drill holes into all of the faces of your wine racks using a 3 1/2" hole saw. Use a ruler to find the center of each face.
-
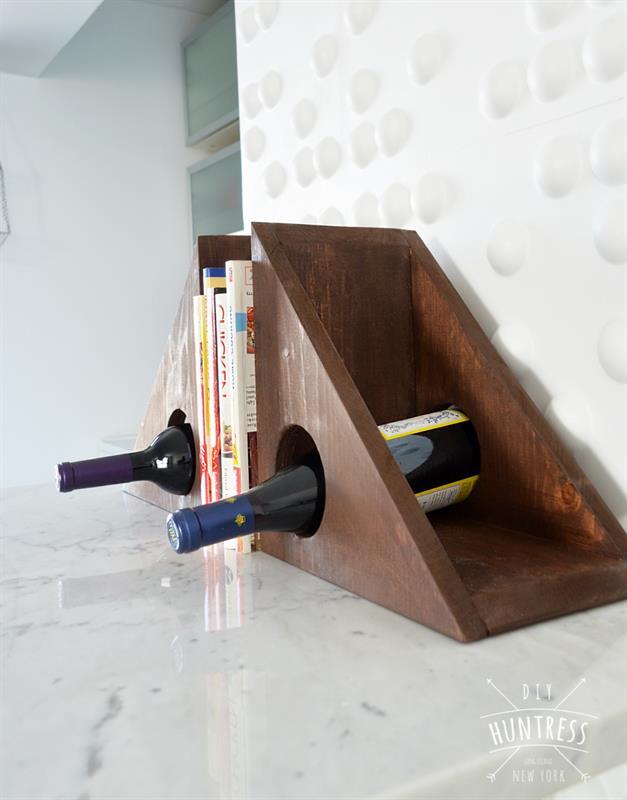
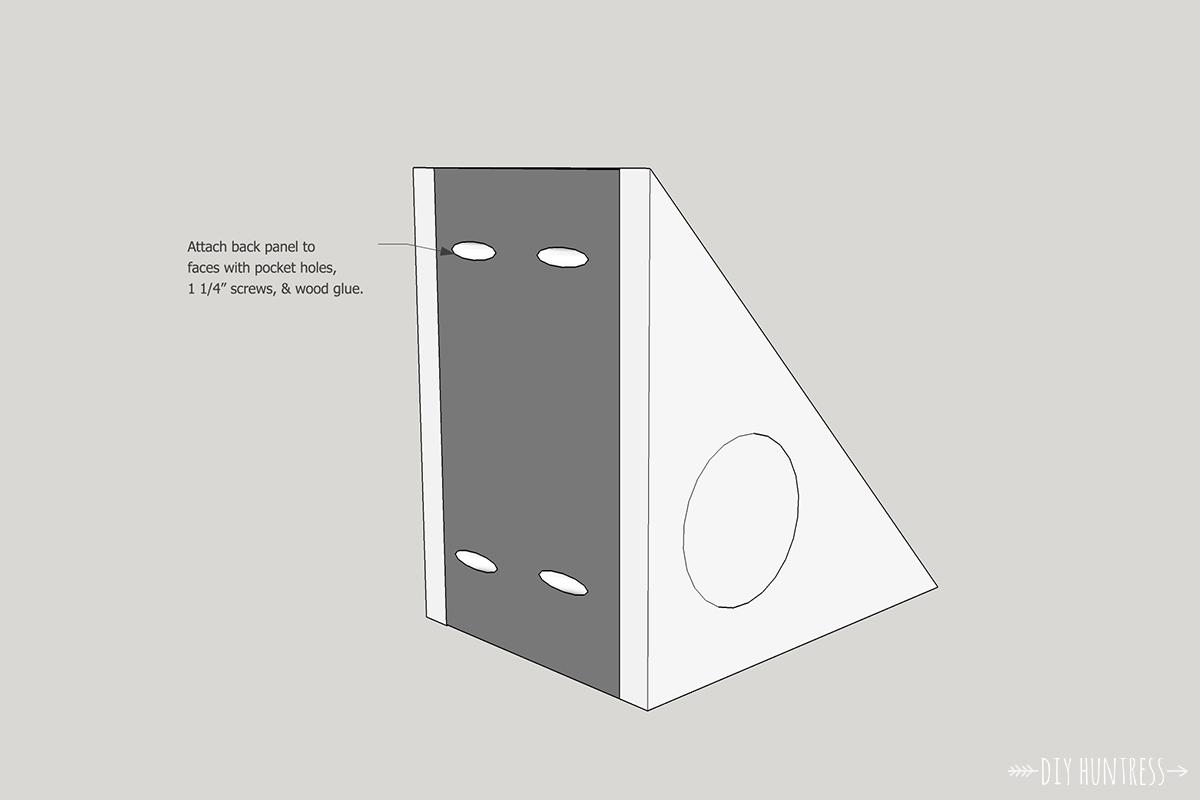
Add Back Panel
Add the 10" tall back panel to the wine rack. Be sure that you have cut the top of the panel at a 45 degree angle (with the longest side being the 10" side). Attach the panel using pocket 1 1/4" pocket holes screws and wood glue.
-
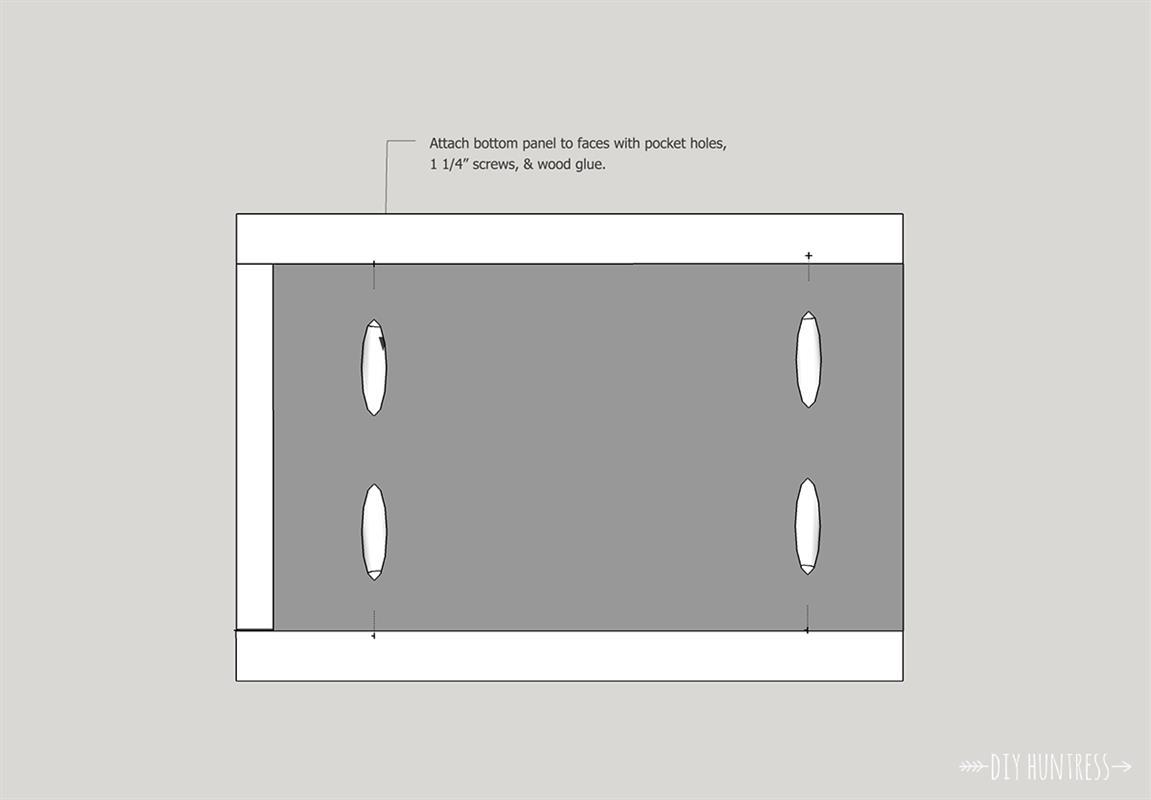
Add Bottom Panel
Attach the panel using pocket holes, 1 1/4" pocket holes screws and wood glue.
-
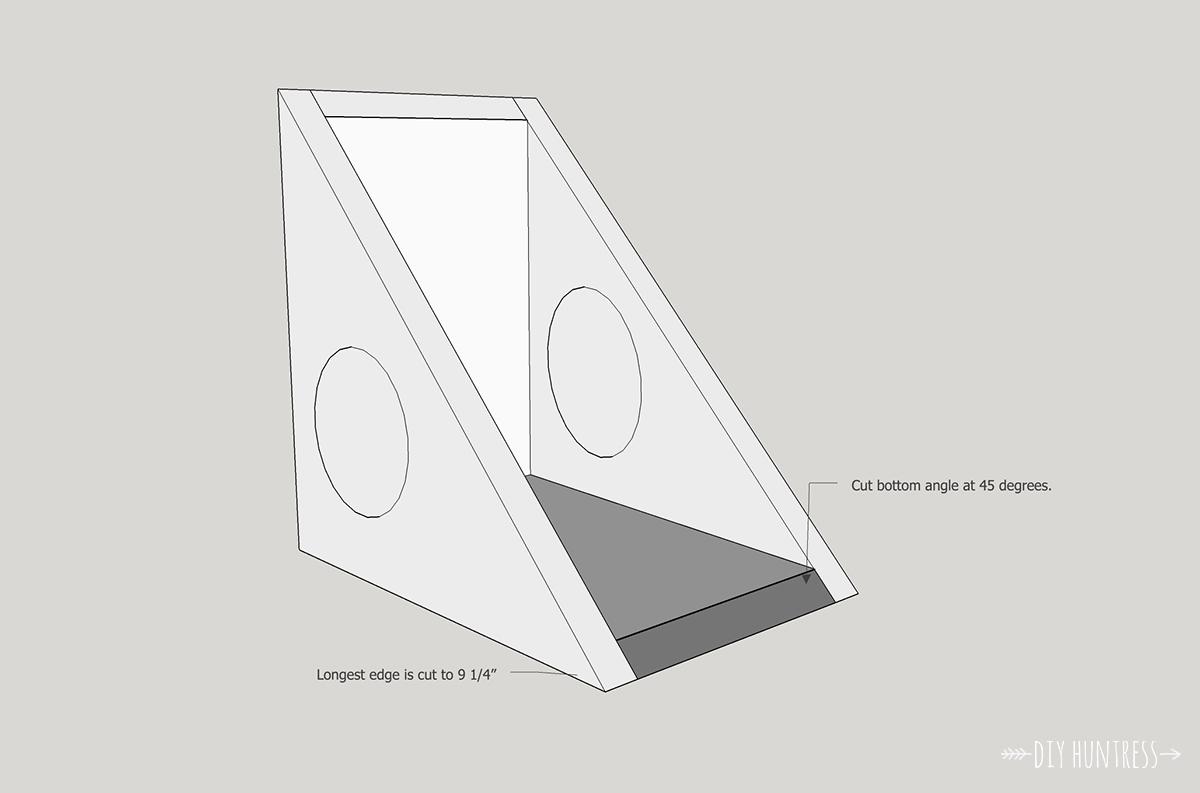
Fit Bottom Panel
Make sure to dry fit the back panel prior to attaching. One edge should be cut at 45 degrees, making the longest edge 9 1/4" long.
-
Finishing Touches
Use wood putty to fill pocket holes. Once dry, sand, and then stain your rack.