

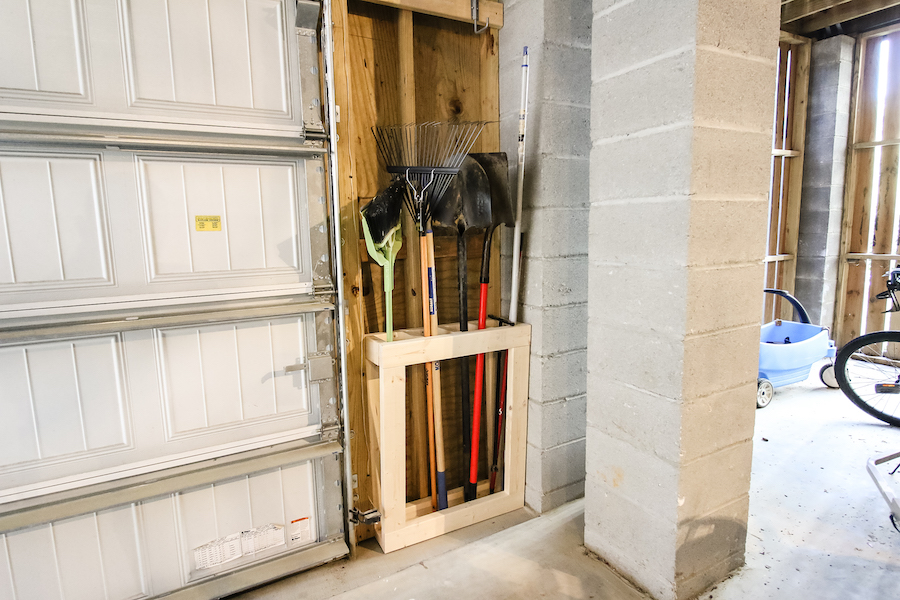

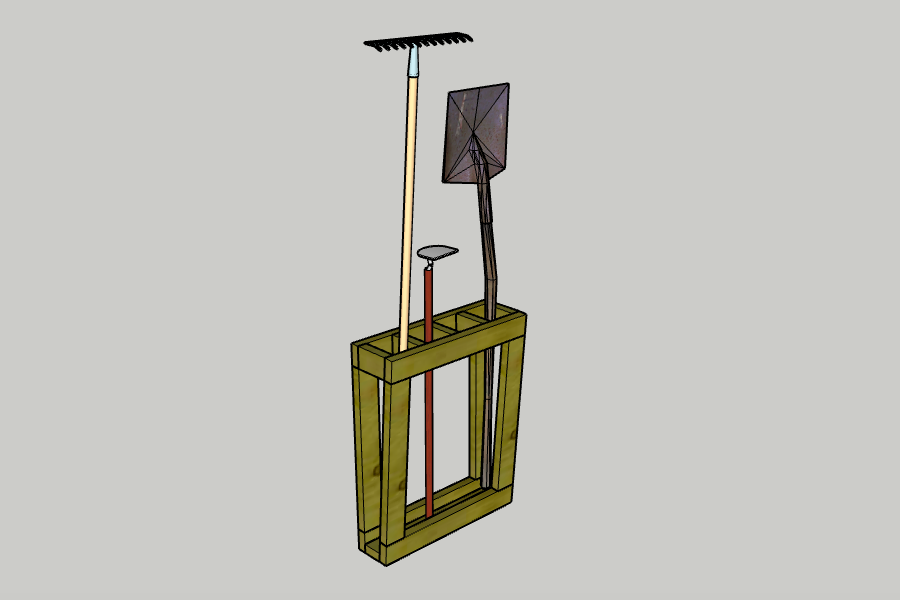


Starting to rake fall leaves and realize you need a better way to store your outdoor lawn and garden tools? Look no further than this DIY wall-mounted yard tool organizer!
Tools
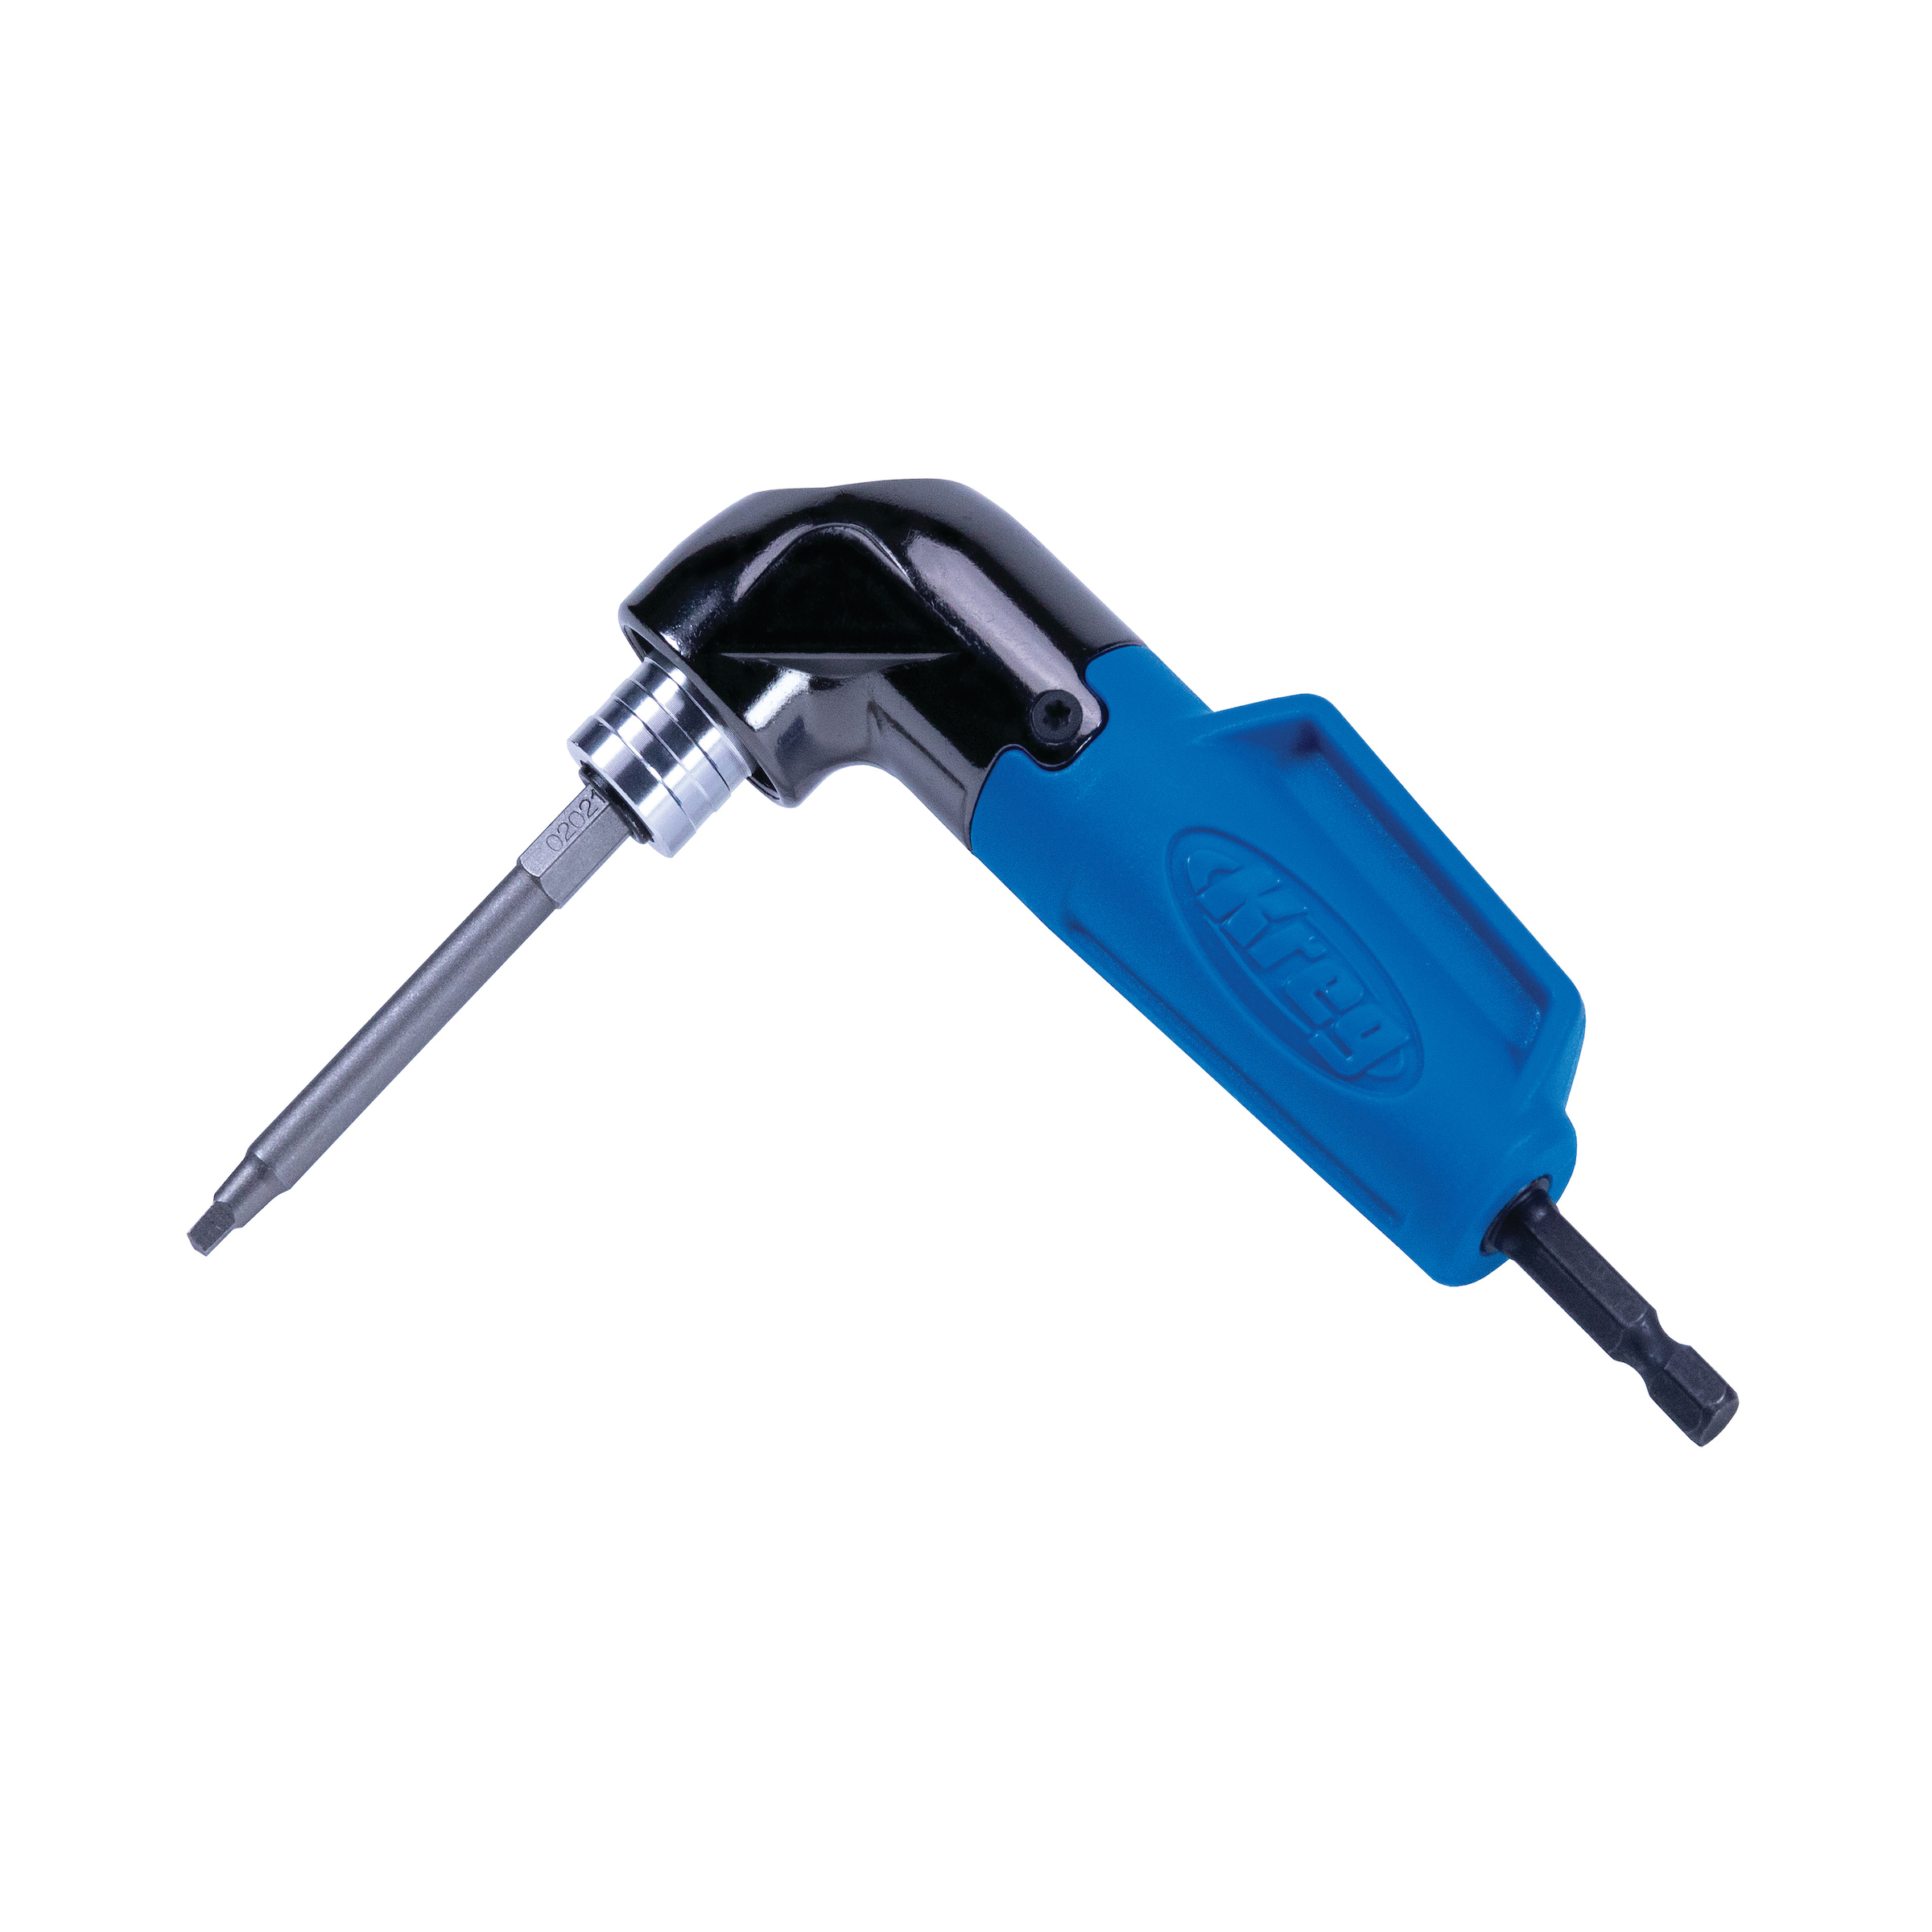
Kreg Tools


Other Tools
-
Miter saw

-
Table saw
-
Measuring tape
Materials
Wood Products
- 3 Boards (2x4) , 1 1/2" x 3 1/2" x 8'
Hardware & Supplies
- 1 Box of 2 ½” pocket hole screws (see tools list)
- 1 Wood Glue
Directions
-
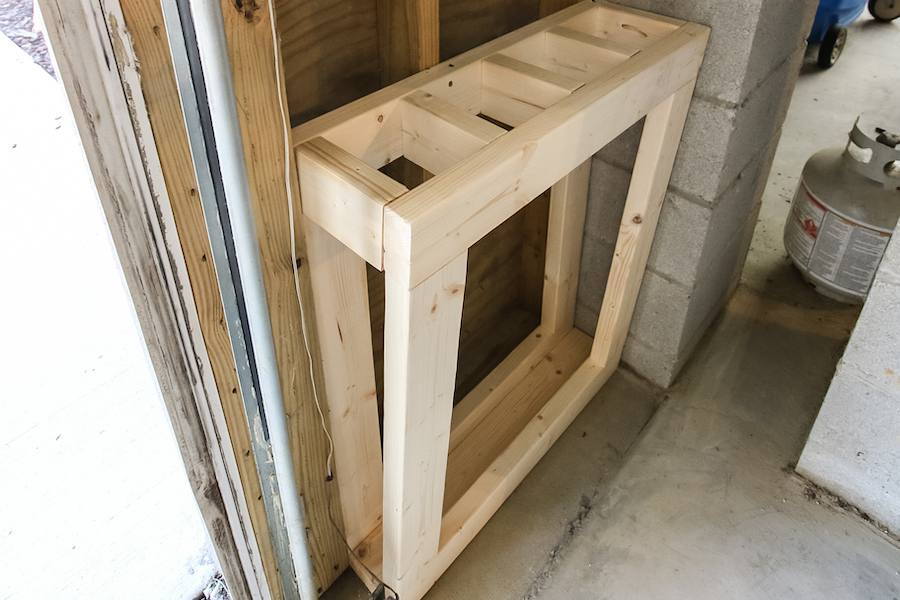
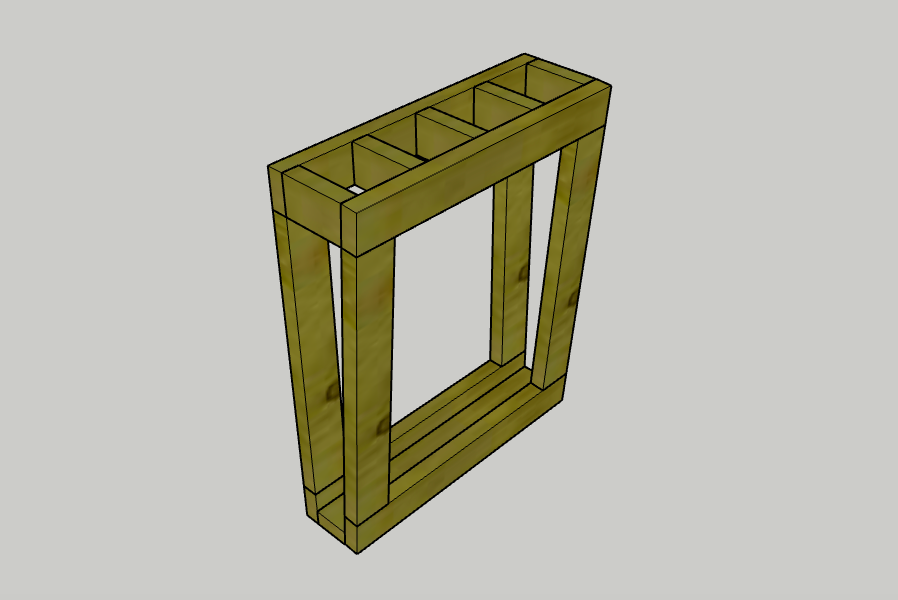
Step one- Build two panels
-Start by drilling two pocket holes in each end of the four Panel Sides.
-Using wood glue and 2 1/2" pocket hole screws, attach two Panel Sides at the end of the long edge of a Panel Top.
-Repeat to add a Panel Bottom to the other end of the Panel Sides.
-Repeat these steps to create a second, identical panel.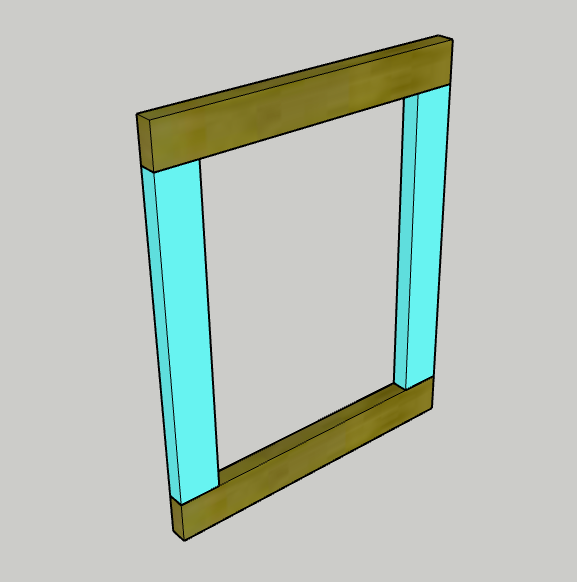
-
Step two- Attach base
-Using a table saw, cut a 5 degree bevel along one long edge of the Base.
-Drill three pocket holes on each long edge of the base on the now shorter side of the Base.
-Using wood glue and 2 1/2" pocket hole screws, place the flat side of the Base on the bottom edge of one of the Panel Bottoms and attach with screws.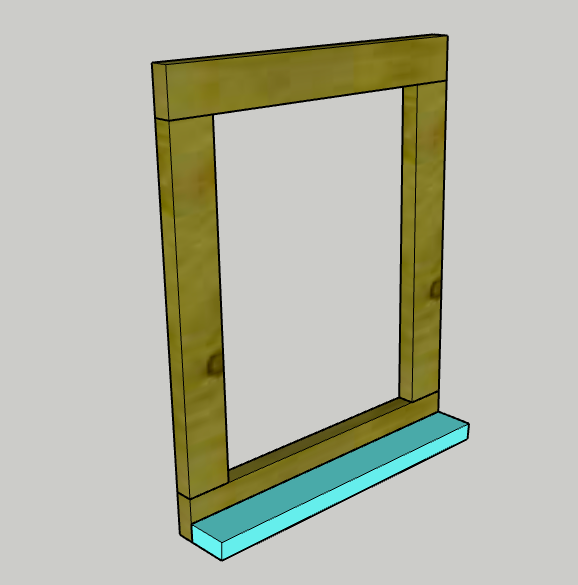
-
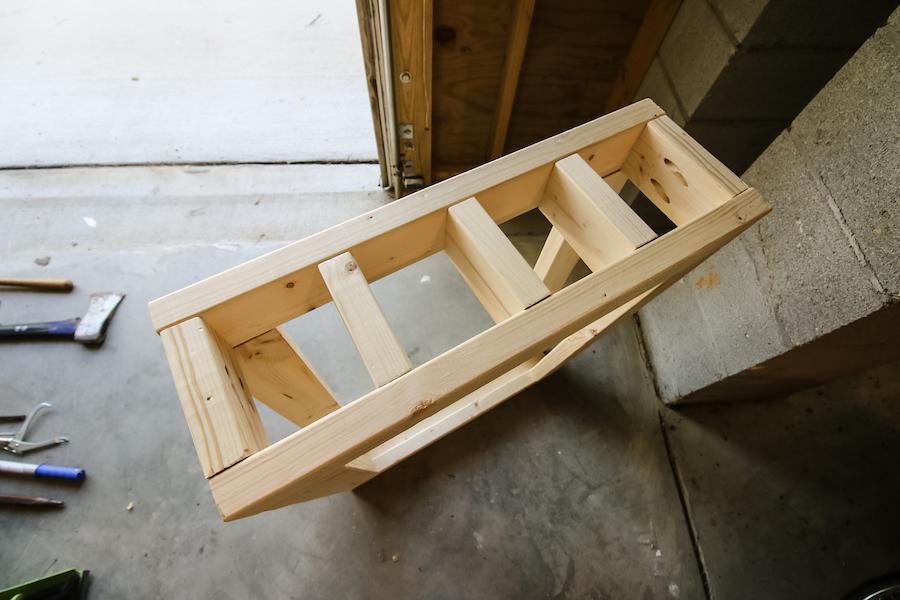
Step three- Attach dividers
-For each of the Dividers, cut a 5 degree miter on one end.
-Drill two pocket hole screws on each end of each Divider.
-Using wood glue and 2 1/2" pocket hole screws, attach the flat side of two Dividers on each end of the Panel Top.
-Repeat to add a center Divider and two more Dividers spaced out equally.
-Note you could space these Dividers out however you'd like to fit any special needs you might have.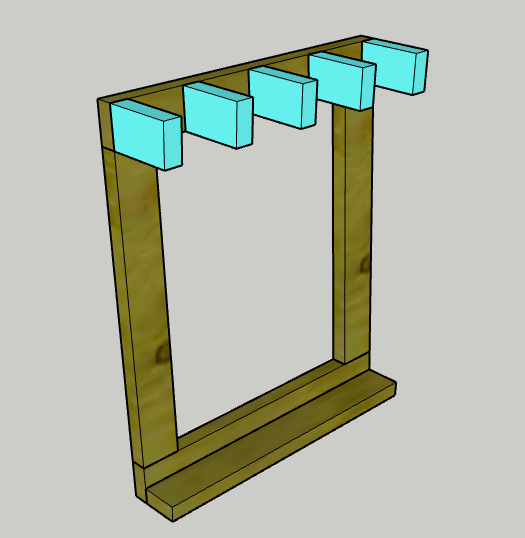
-
Step four- Attach second panel
-Lay out the second panel and spread wood glue on the ends of each Divider and the Base before placing it on the second panel.
-Use 2 1/2" pocket hole screws to attach the Base into the second panel before attaching the Dividers.
-Attaching the Dividers into the second panel is a great time to use the Kreg 90 degree pocket hole driver.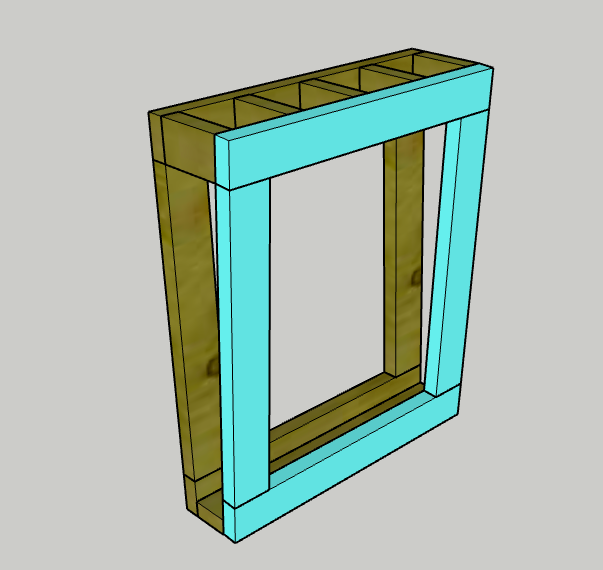
-
Step five- Install on wall
-Use 2 1/2" screws to mount your yard tool organizer into the studs in the wall.
-Load up the organizer with all of your yard tools for great organization!
-
Step six- Enjoy!
Enjoy your handiwork and tag @CharlestonCrafted on Instagram with a picture!