

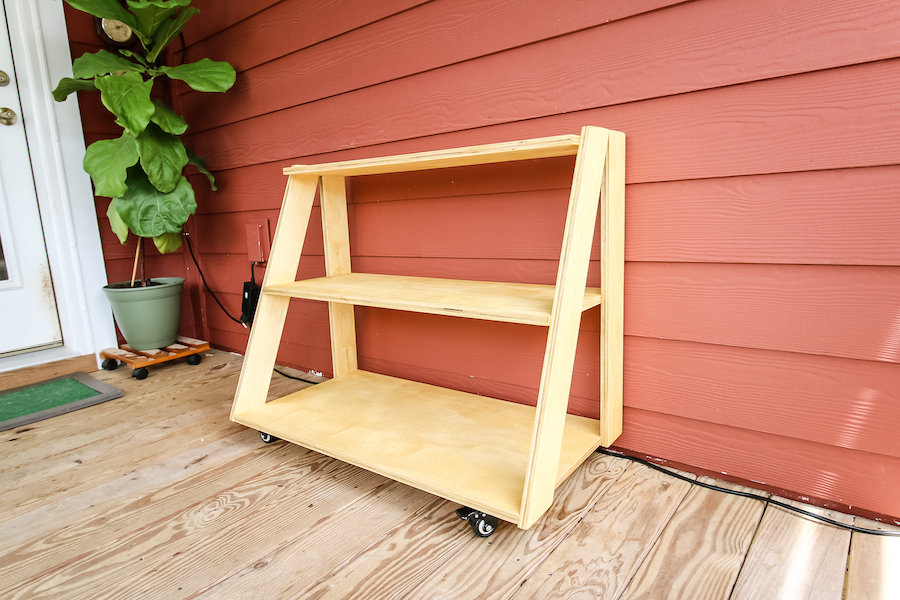
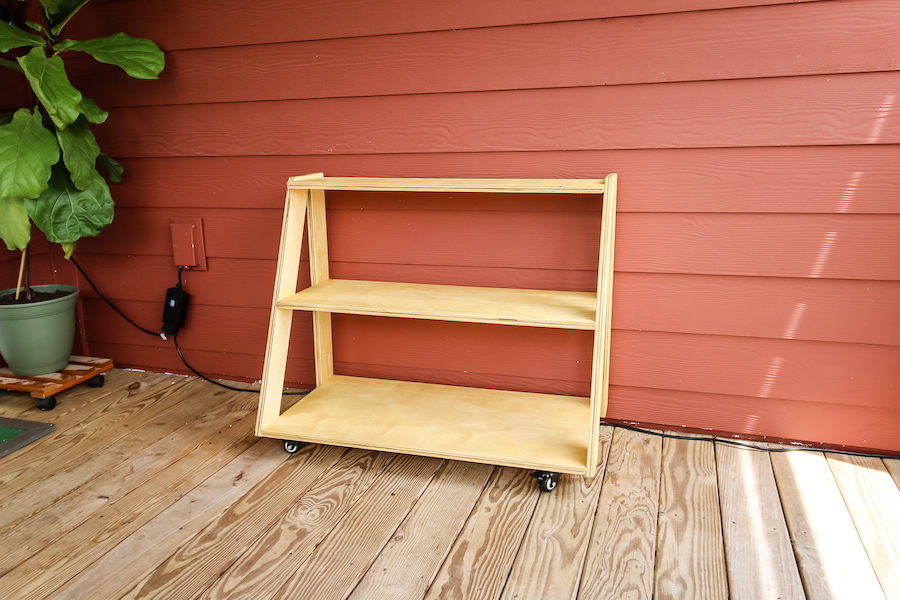
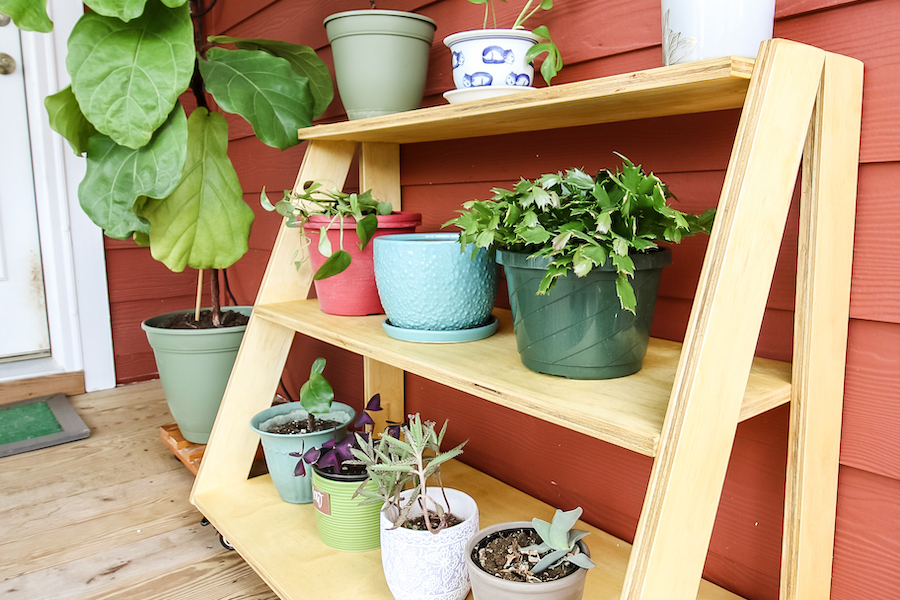
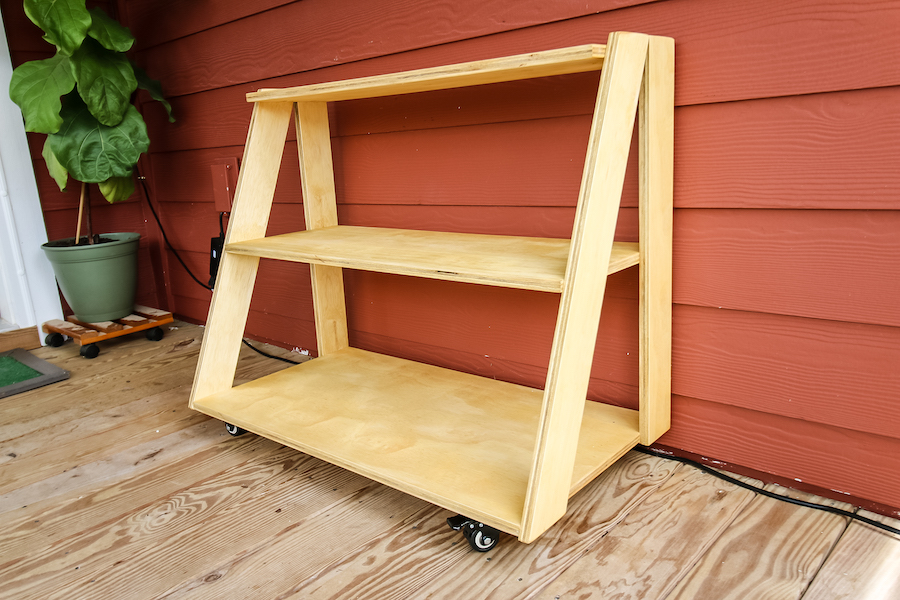
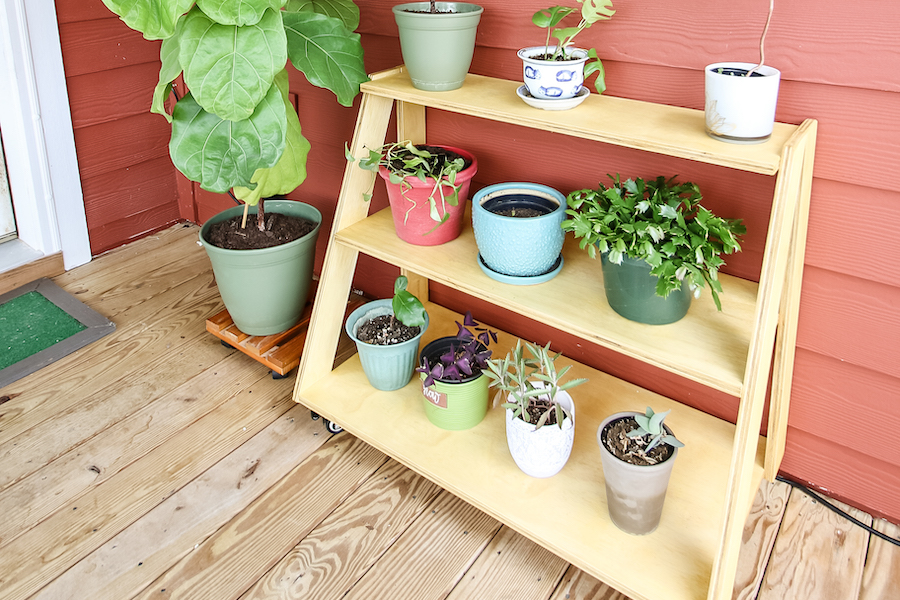


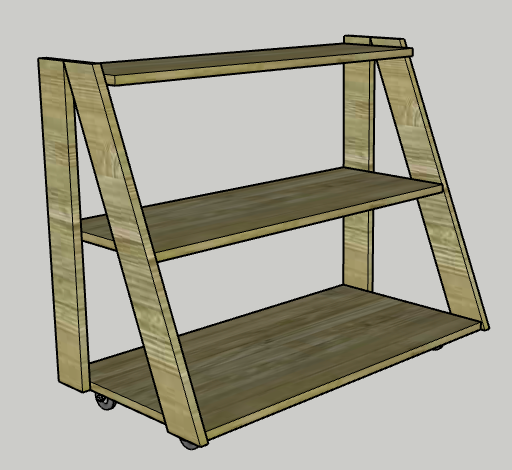
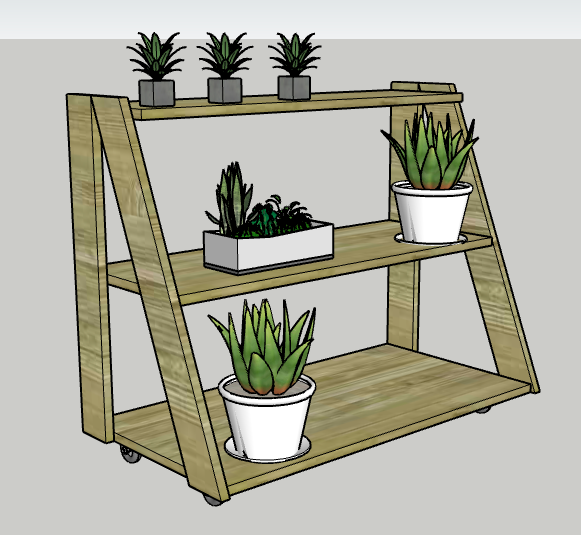
Check out how we built a DIY three-tiered rolling plant stand to hold all of our small potted plants on the porch. This is a great project for smaller potted plants that can be moved easily and looks great! Use it indoors or out to keep potted plants together or use for propagation.
Tools
Kreg Tools


Other Tools
-
Miter Saw

-
Measuring Tape
Materials
Wood Products
- .5 Sheet Plywood , 4' x 8 ' x 3/4"
Hardware & Supplies
- 1 Box of 1 1/4" Kreg pocket hole screws (See tools list)
- 4 Rolling casters
- 1 Wood glue
- 1 Protective sealant
Directions
-
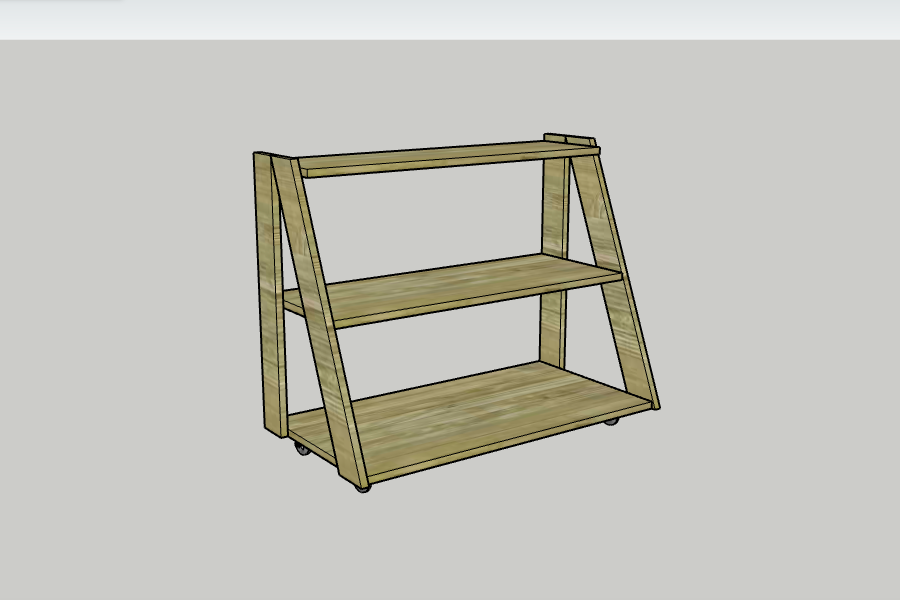
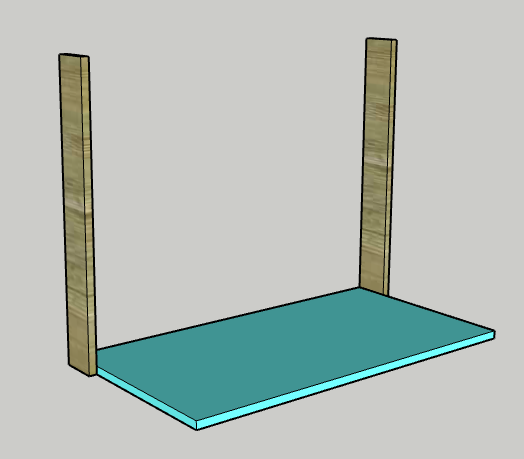
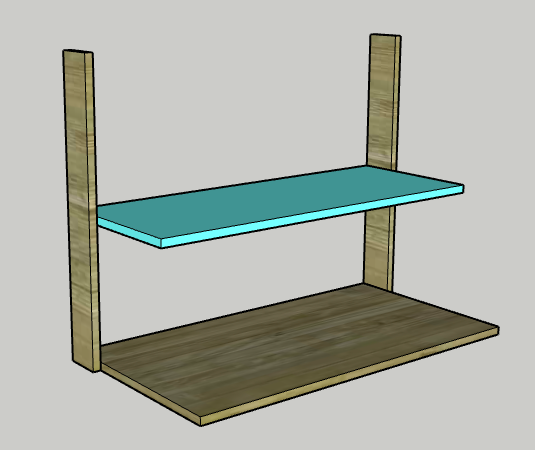
Attach Bottom Shelf
Drill two pocket holes on the far ends of each short side of the Bottom Shelf, with both holes within 3 1/2" of the long edge.
Using wood glue and pocket hole screws, attach the Bottom Shelf to the two Back Posts.
-
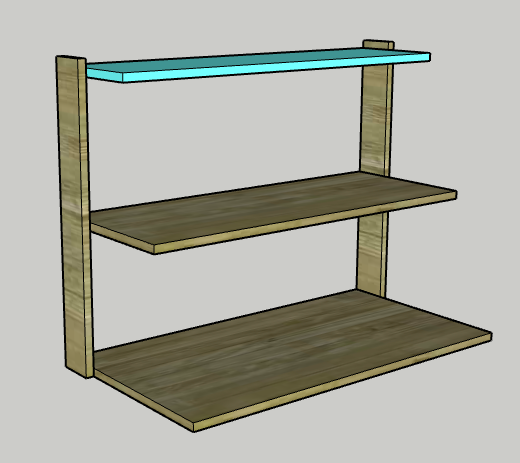
Attach middle shelf
Drill two pocket holes on the far ends of each short side of the Middle Shelf, with both holes within 3 1/2" of the long edge.
Using wood glue and pocket hole screws, attach the Middle Shelf to the two Back Posts 12" above the Bottom Shelf.
-
Attach top shelf
Drill two pocket holes on the far ends of each short side of the Top Shelf, with both holes within 3 1/2" of the long edge.
Using wood glue and pocket hole screws, attach the Top Shelf to the two Back Posts 12" above the Middle Shelf.
-
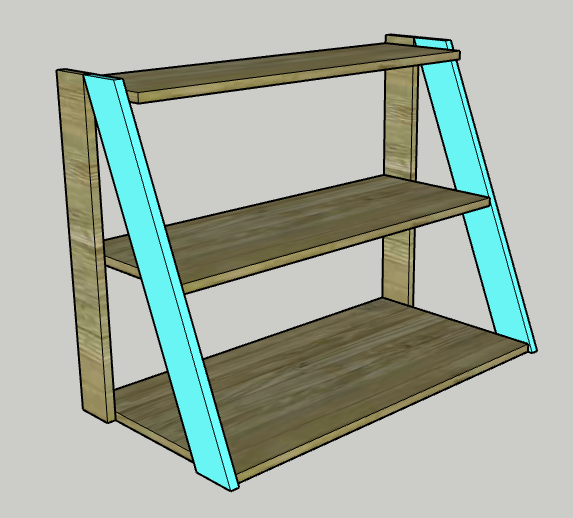
Attached angled posts
Using a miter saw, cut a 22.5 degree miter on one end of a Front Post.
Align the board to be flush with the top of a Back Post and mark where the board needs to be cut to be flush on the bottom of the Bottom Shelf.
Cut a parallel 22.5 degree miter at that mark and repeat for the other Front Post.
Using wood glue and pocket hole screws, attach each shelf to the Front Posts, ensuring each shelf is level.
-
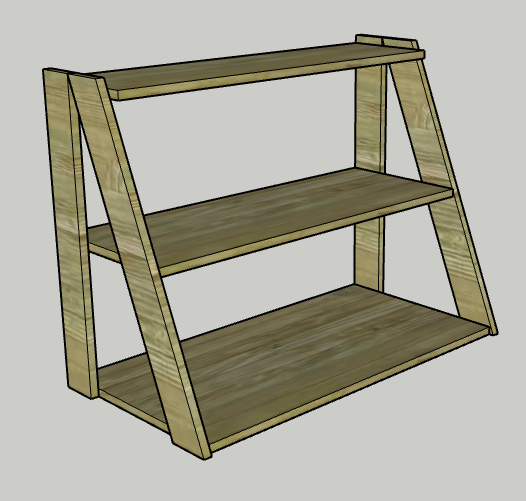
Seal for outdoor use
If using outdoors, ensure you use an outdoor sealant to protect it from weather and water from watering the plants.
If using indoors, add whatever stain you'd like, but ensure you add a protective coating to protect the piece from absorbing water.
-
Add casters
Attach casters to the underside of the Bottom Shelf for rolling.
-
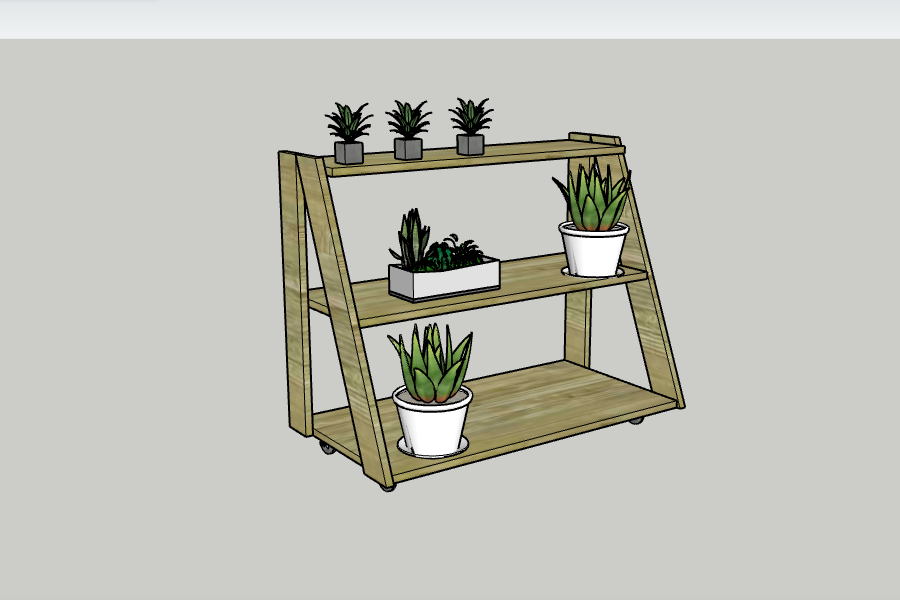
Fill with plants
Add your plants! Fill each shelf with different size pots and plants. Roll your planter to fit your needs and enjoy!
-
Enjoy!
Enjoy your handiwork and tag @CharlestonCrafted on Instagram with a picture!
Blog post – https://www.charlestoncrafted.com/diy-three-tiered-rolling-plant-stand/
Video for project – https://youtu.be/YtjONE1eE0g