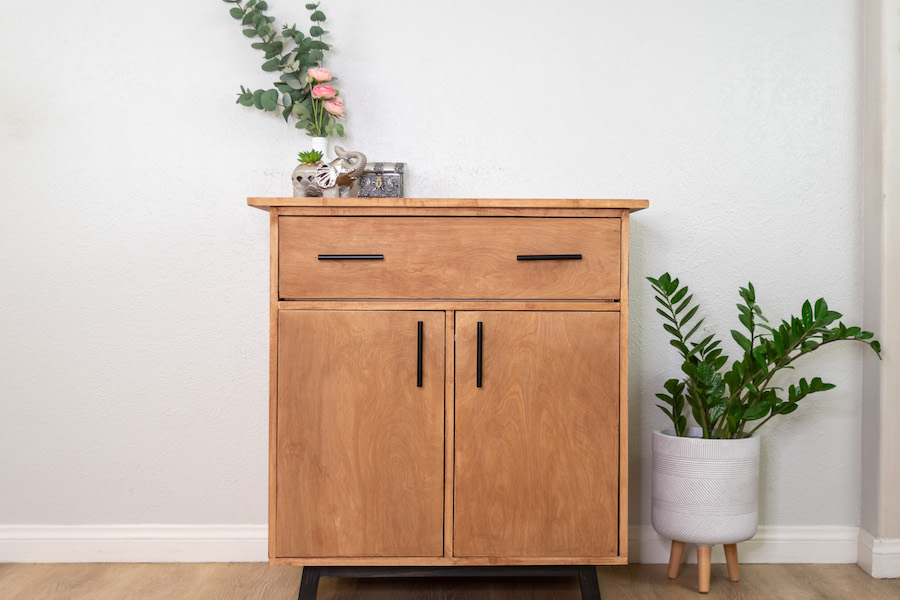


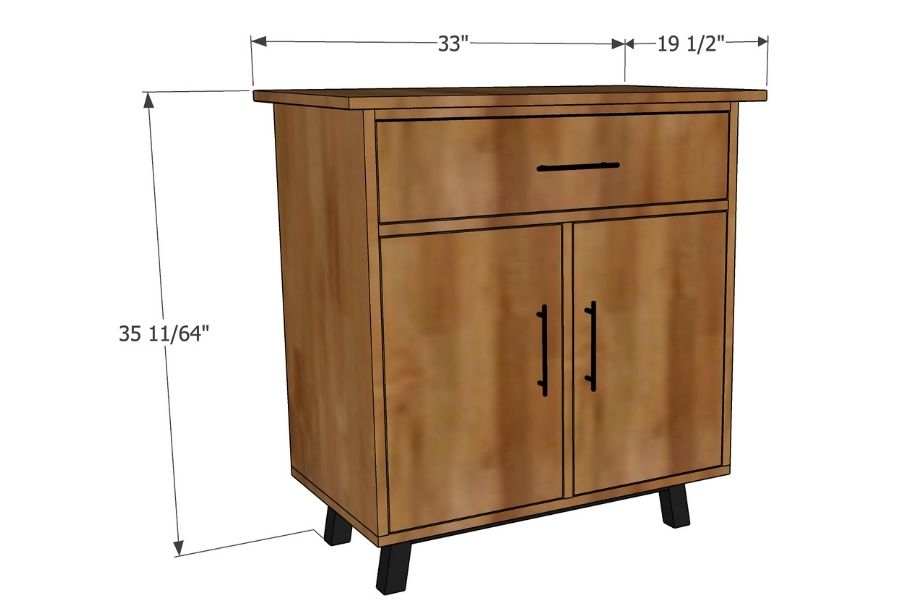
Build a simple storage cabinet with a drawer and doors with adjustable shelves. This easy-to-build versatile piece of furniture can be used in any room!
Tools
Kreg Tools


Other Tools
-
Staple Gun

-
Miter Saw
-
Table Saw (optional)
Materials
Wood Products
- 1.5 Sheet of plywood , ¾”
- .5 Sheet of plywood , ¼”
- 1 Board , 2x2x8
Hardware & Supplies
- 1 Box of 1 ¼” pocket hole screws (See tools list)
- 1 Box of 2” pocket hole screws (See tools list)
- 1 Box of 2 ½” pocket hole screws (See tools list)
- 4 Cabinet hardware of choice
- 1 Paint or stain in the color of choice
- 1 16” drawer slides
- 2 Inset frameless door hinges (2 pairs)
Cut List & Parts
- 2 ¾” plywood (Doors) , 20 ¼” x 13 ⅝”
- 1 ¾” plywood (Drawer Front) , 28 ¼” x 6 ½”
- 1 ¾” plywood (Top) , 33” x 19 ½”
- 1 ¾” plywood (Divider) , 20 ½” x 18”
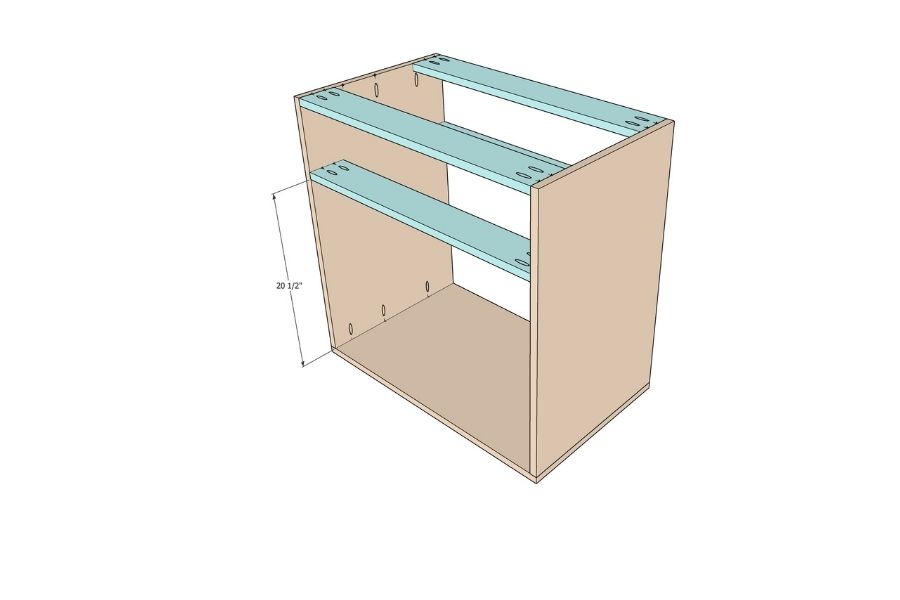
- 4 ¾” plywood (Rails) , 28 ½” x 4”
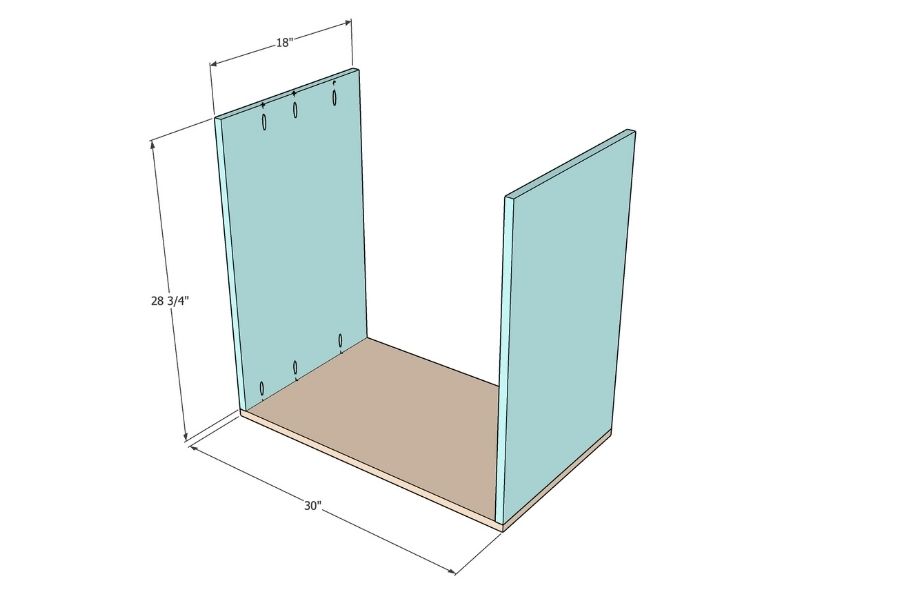
- 2 ¾” plywood (Sides) , 28 ¾” x 18”
- 1 ¾” plywood (Bottom) , 30” x 18”
- 2 ¾” plywood (Shelves) , 13” x 16”
- 2 ¾” plywood (Drawer long side) , 26” x 5”
- 2 ¾” plywood (Drawer short side) , 16” x 5”
- 1 ¾” plywood (Back support) , 28 ½” x 4”
- 1 ¼” plywood (Back) , 29 ½” x 22”
- 1 ¼” plywood (drawer bottom) (If not using dados) , 27 ½” x 16”
- 2 Boards (Legs) , 2x2x5" (long to short end at 10-degrees- parallelogram)
- 2 Boards (Long aprons) , 2x2x22" (short to short end at 10-degrees- trapezoid)
- 2 Boards (Short aprons) , 2x2x9 ½”

Directions
-
Prepare the boards
Make the cuts per the cut list. Review the plans and make pocket holes where needed. Pocket holes in plywood are made with ¾” setting on the pocket hole jig and pocket holes in the 2x2 is made with 1 ½” setting.
Apply edge banding to all the edges that will be visible.
-
Attach the sides
Attach the sides to the bottom using 1 ¼” pocket hole screws.
-
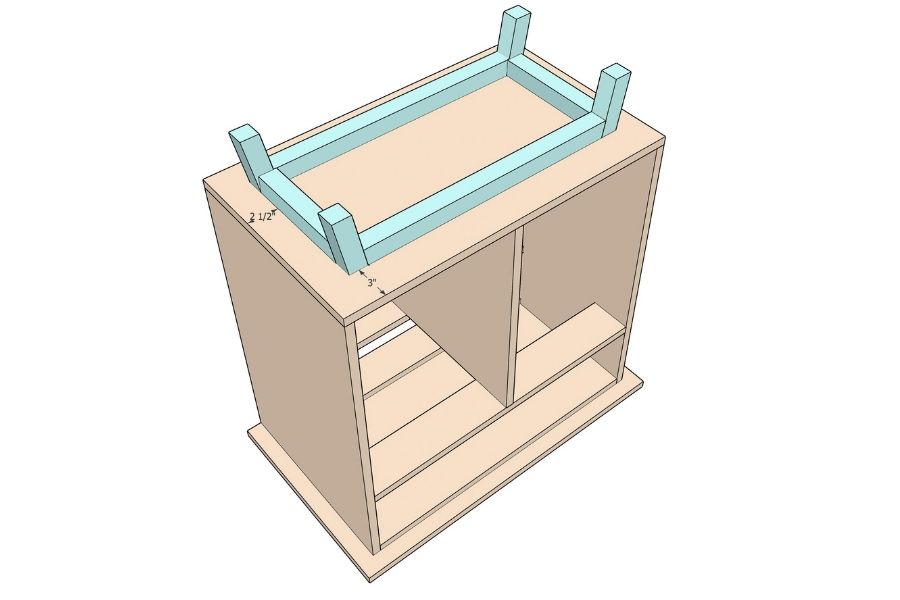
Attach the rails
The first set of rails is attached to the top of the cabinet using wood glue and 1 ¼” pocket hole screws.
The second set of rails is attached as shown below using pocket hole screws.
-
Attach the divider
Measure and mark the exact location of the center divider.
Add the divider. Make sure it is square and level prior to attaching with pocket hole screws.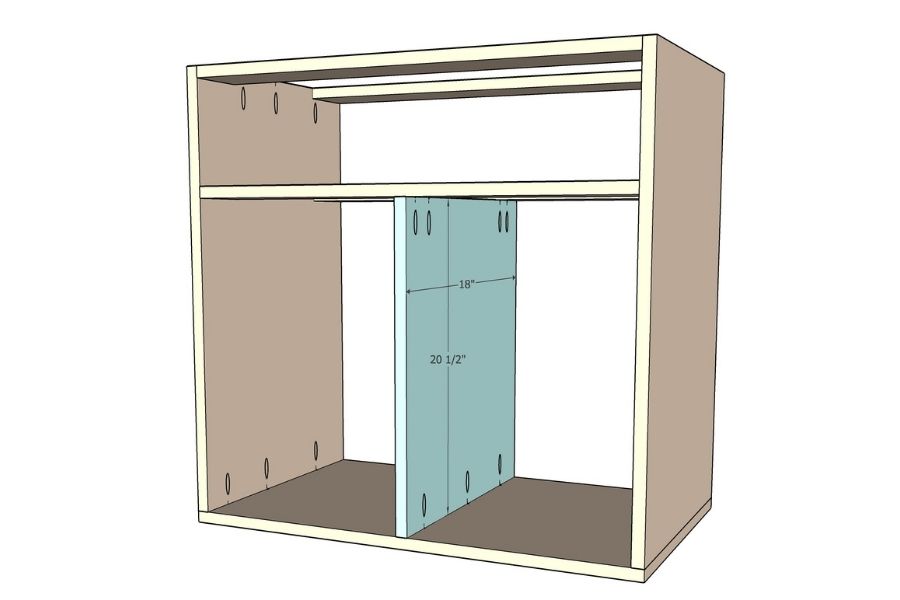
-
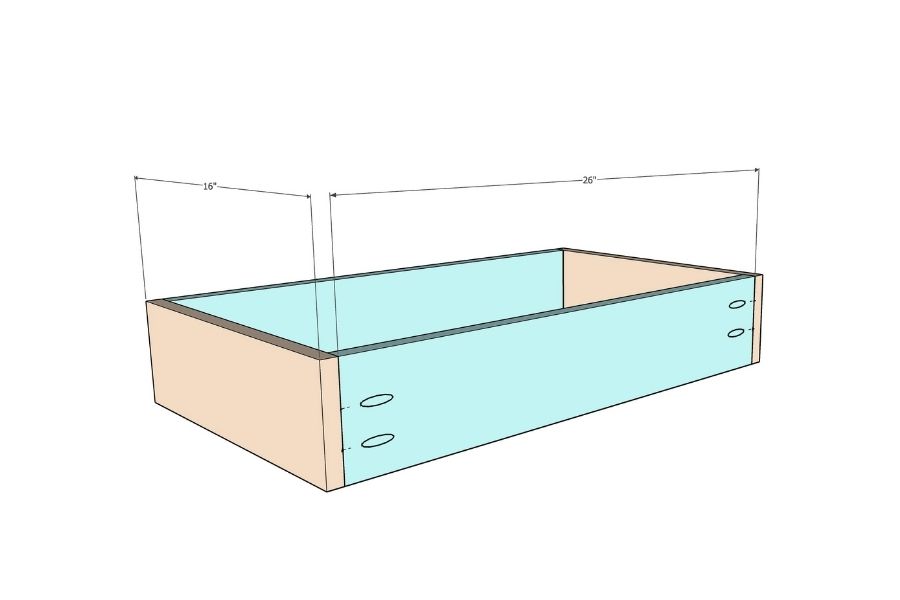
Build the drawer box
Build the drawer box as shown below.
The drawer box can be built two ways - either with the bottom sitting in a dado groove or on the outside.
Install the drawer slide and make sure the drawer works before removing it for the next step.
-
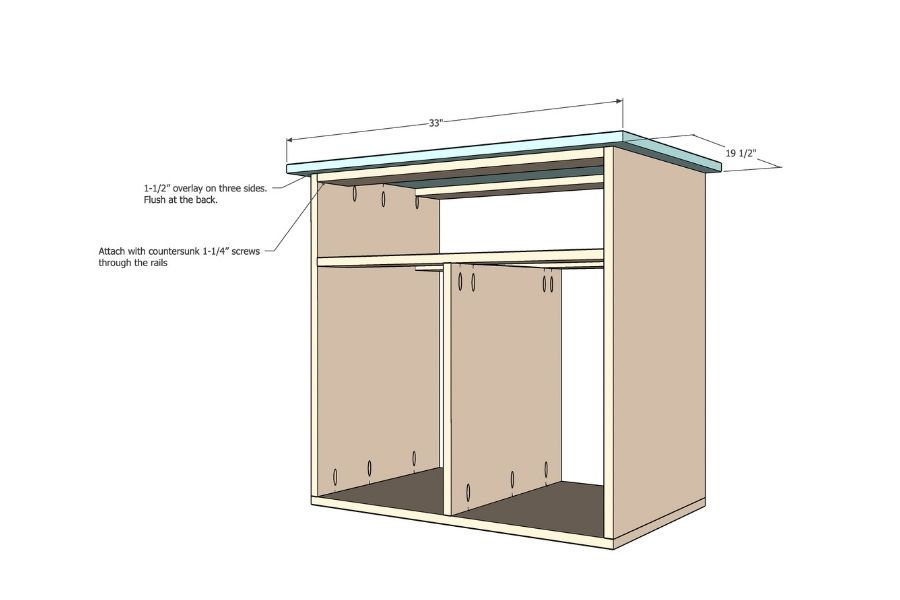
Attach the top
Make sure that the top is well centered before attaching with pocket hole screws through the sides and countersunk pocket hole screws in the rails.
-
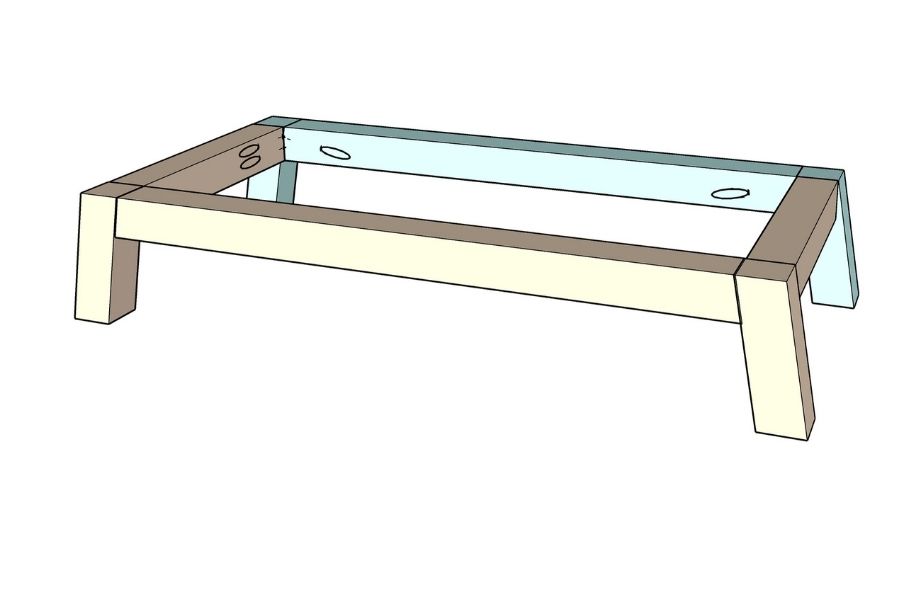
Build the base
Build the base using the 2x2 boards as shown.
-
Attach the base
Center and attach the base to the bottom of the cabinet frame using countersunk 2” pocket hole screws.
-
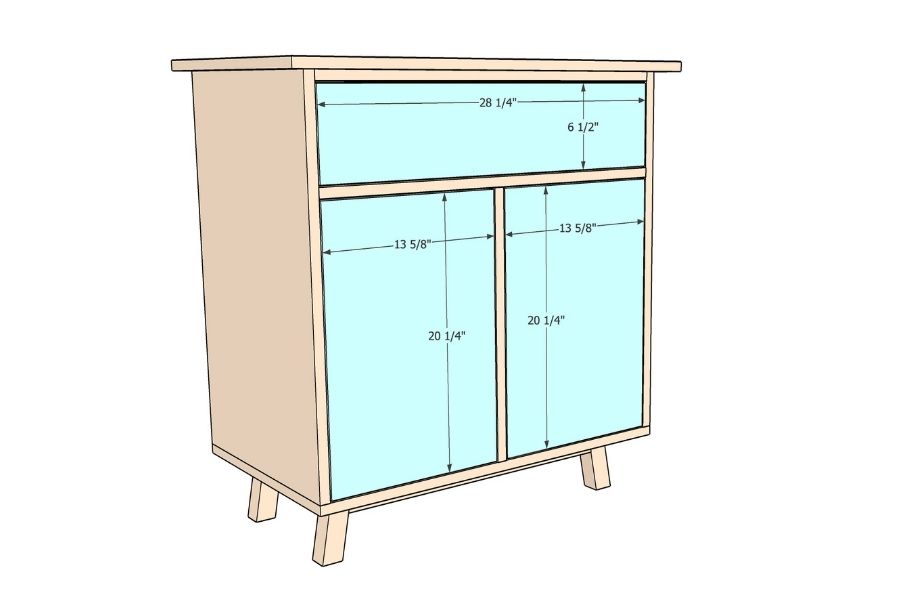
Install drawer and door
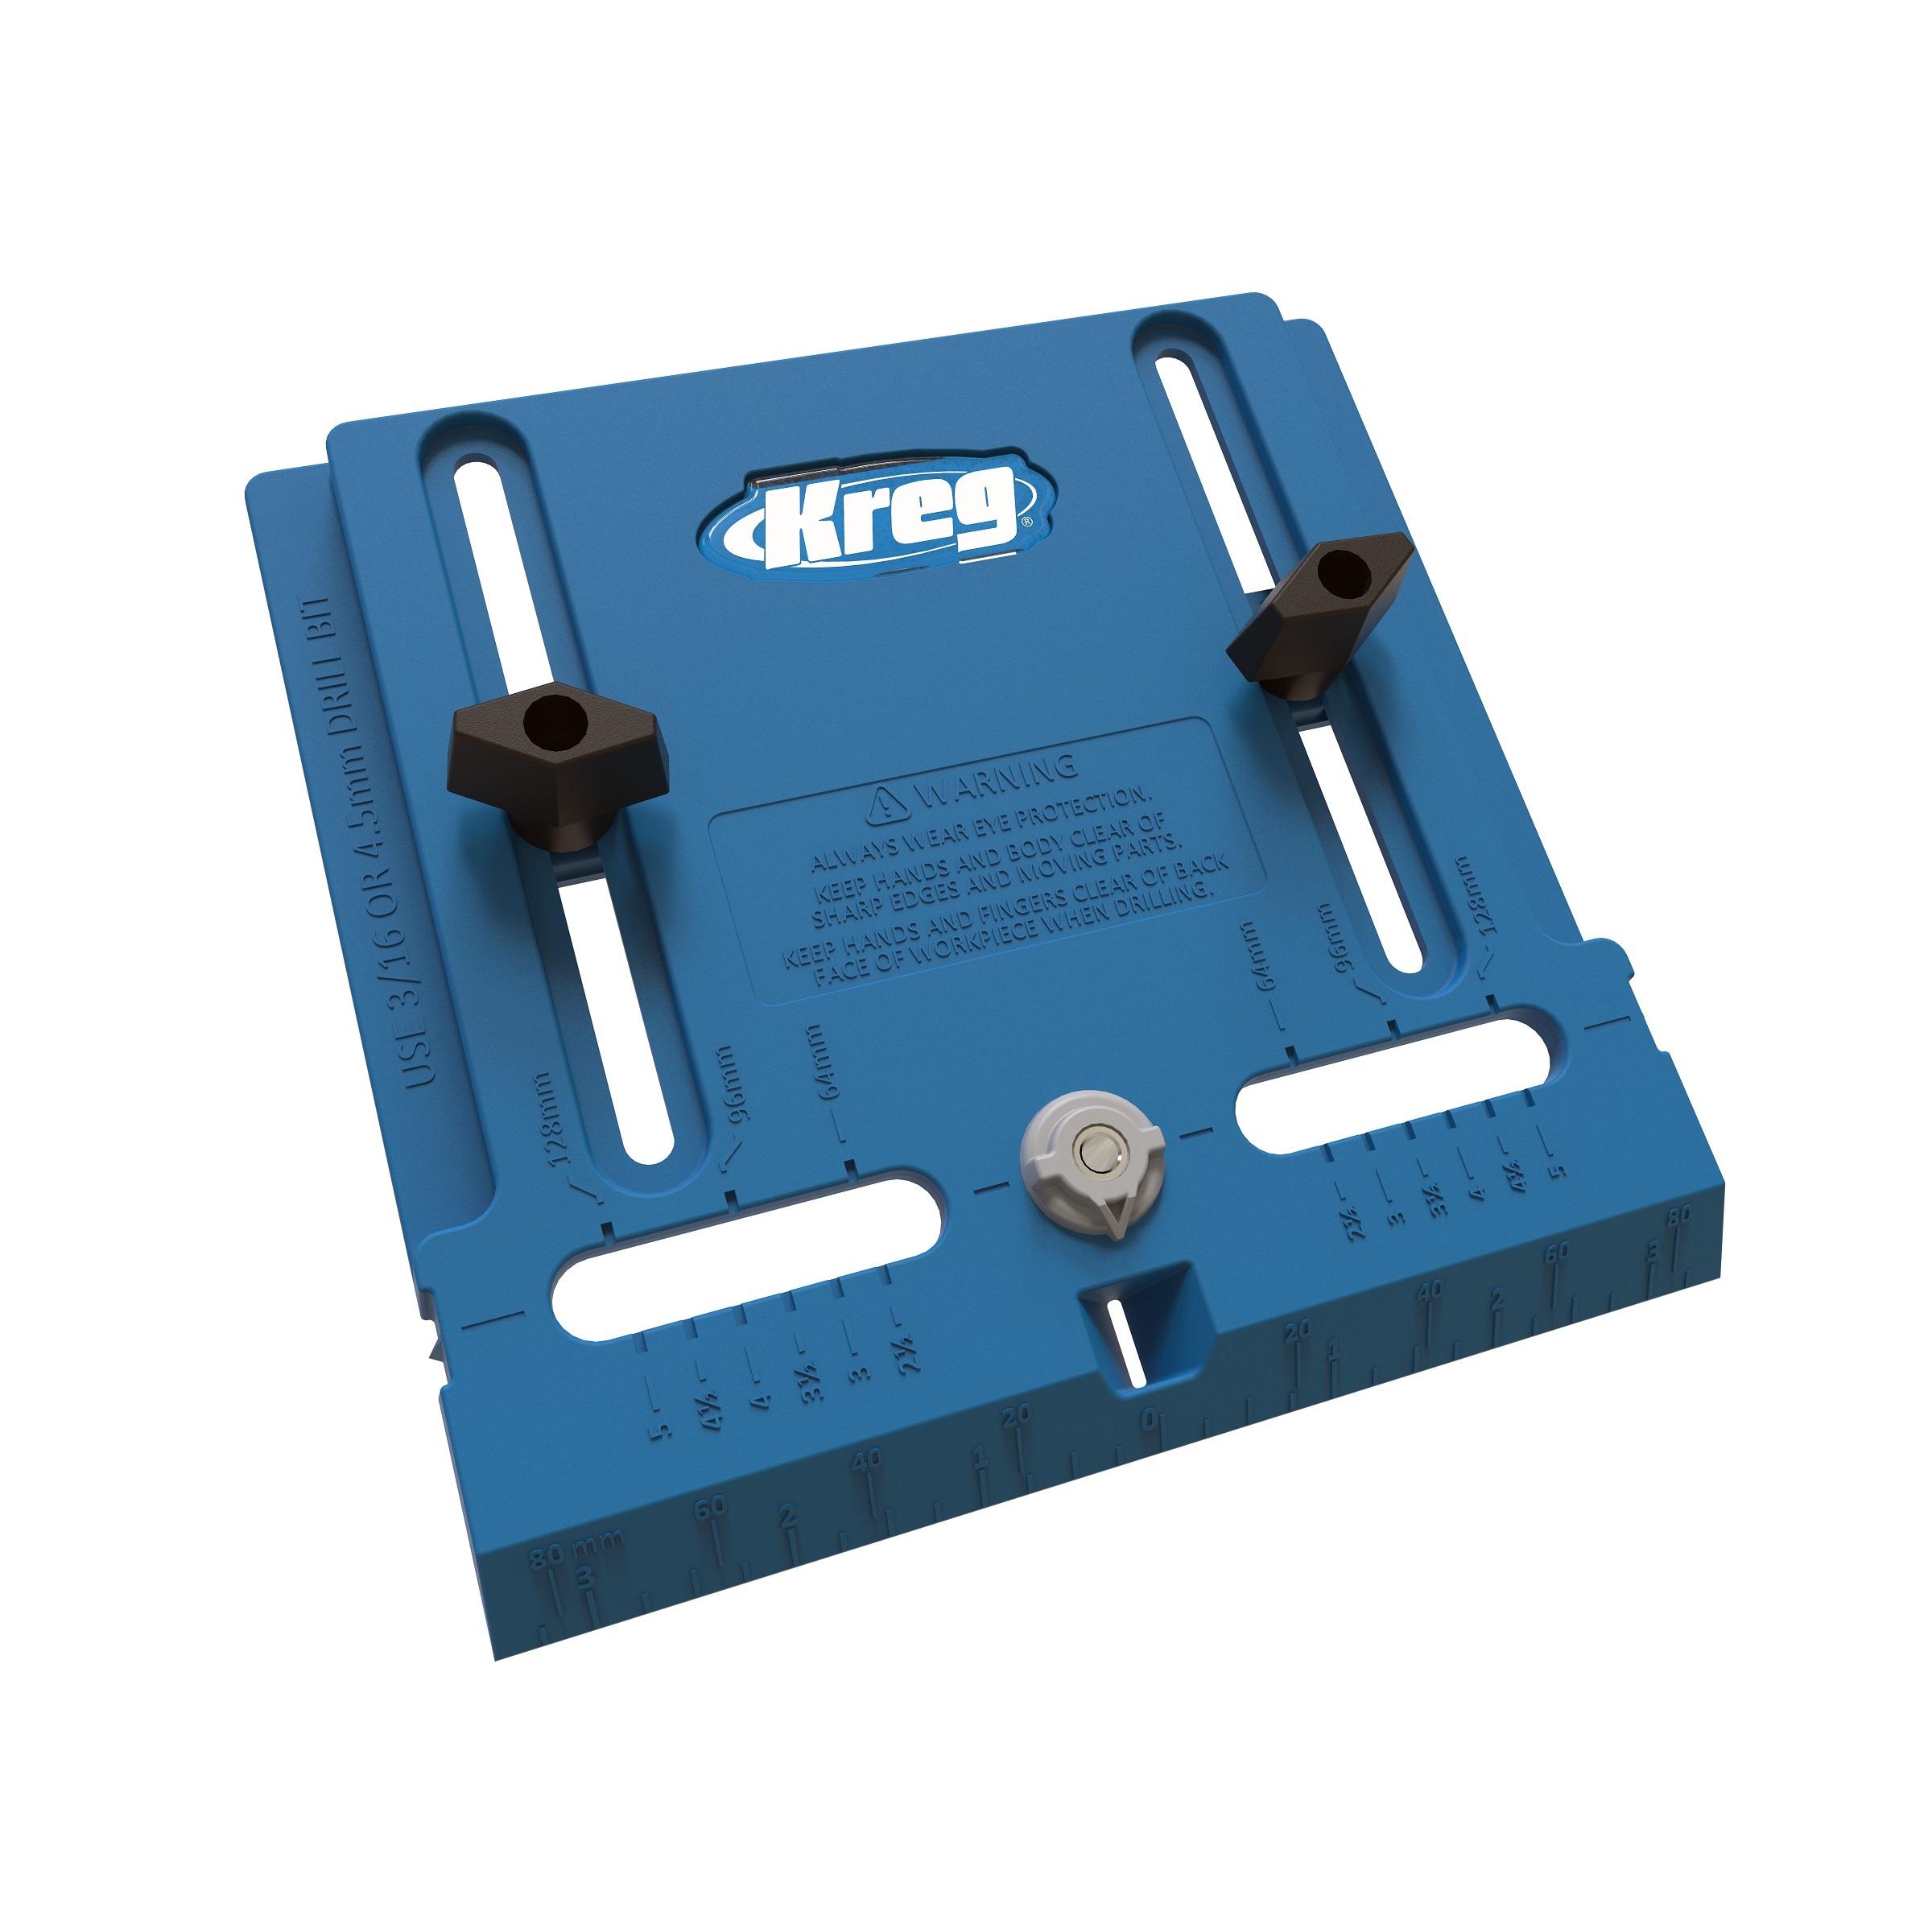
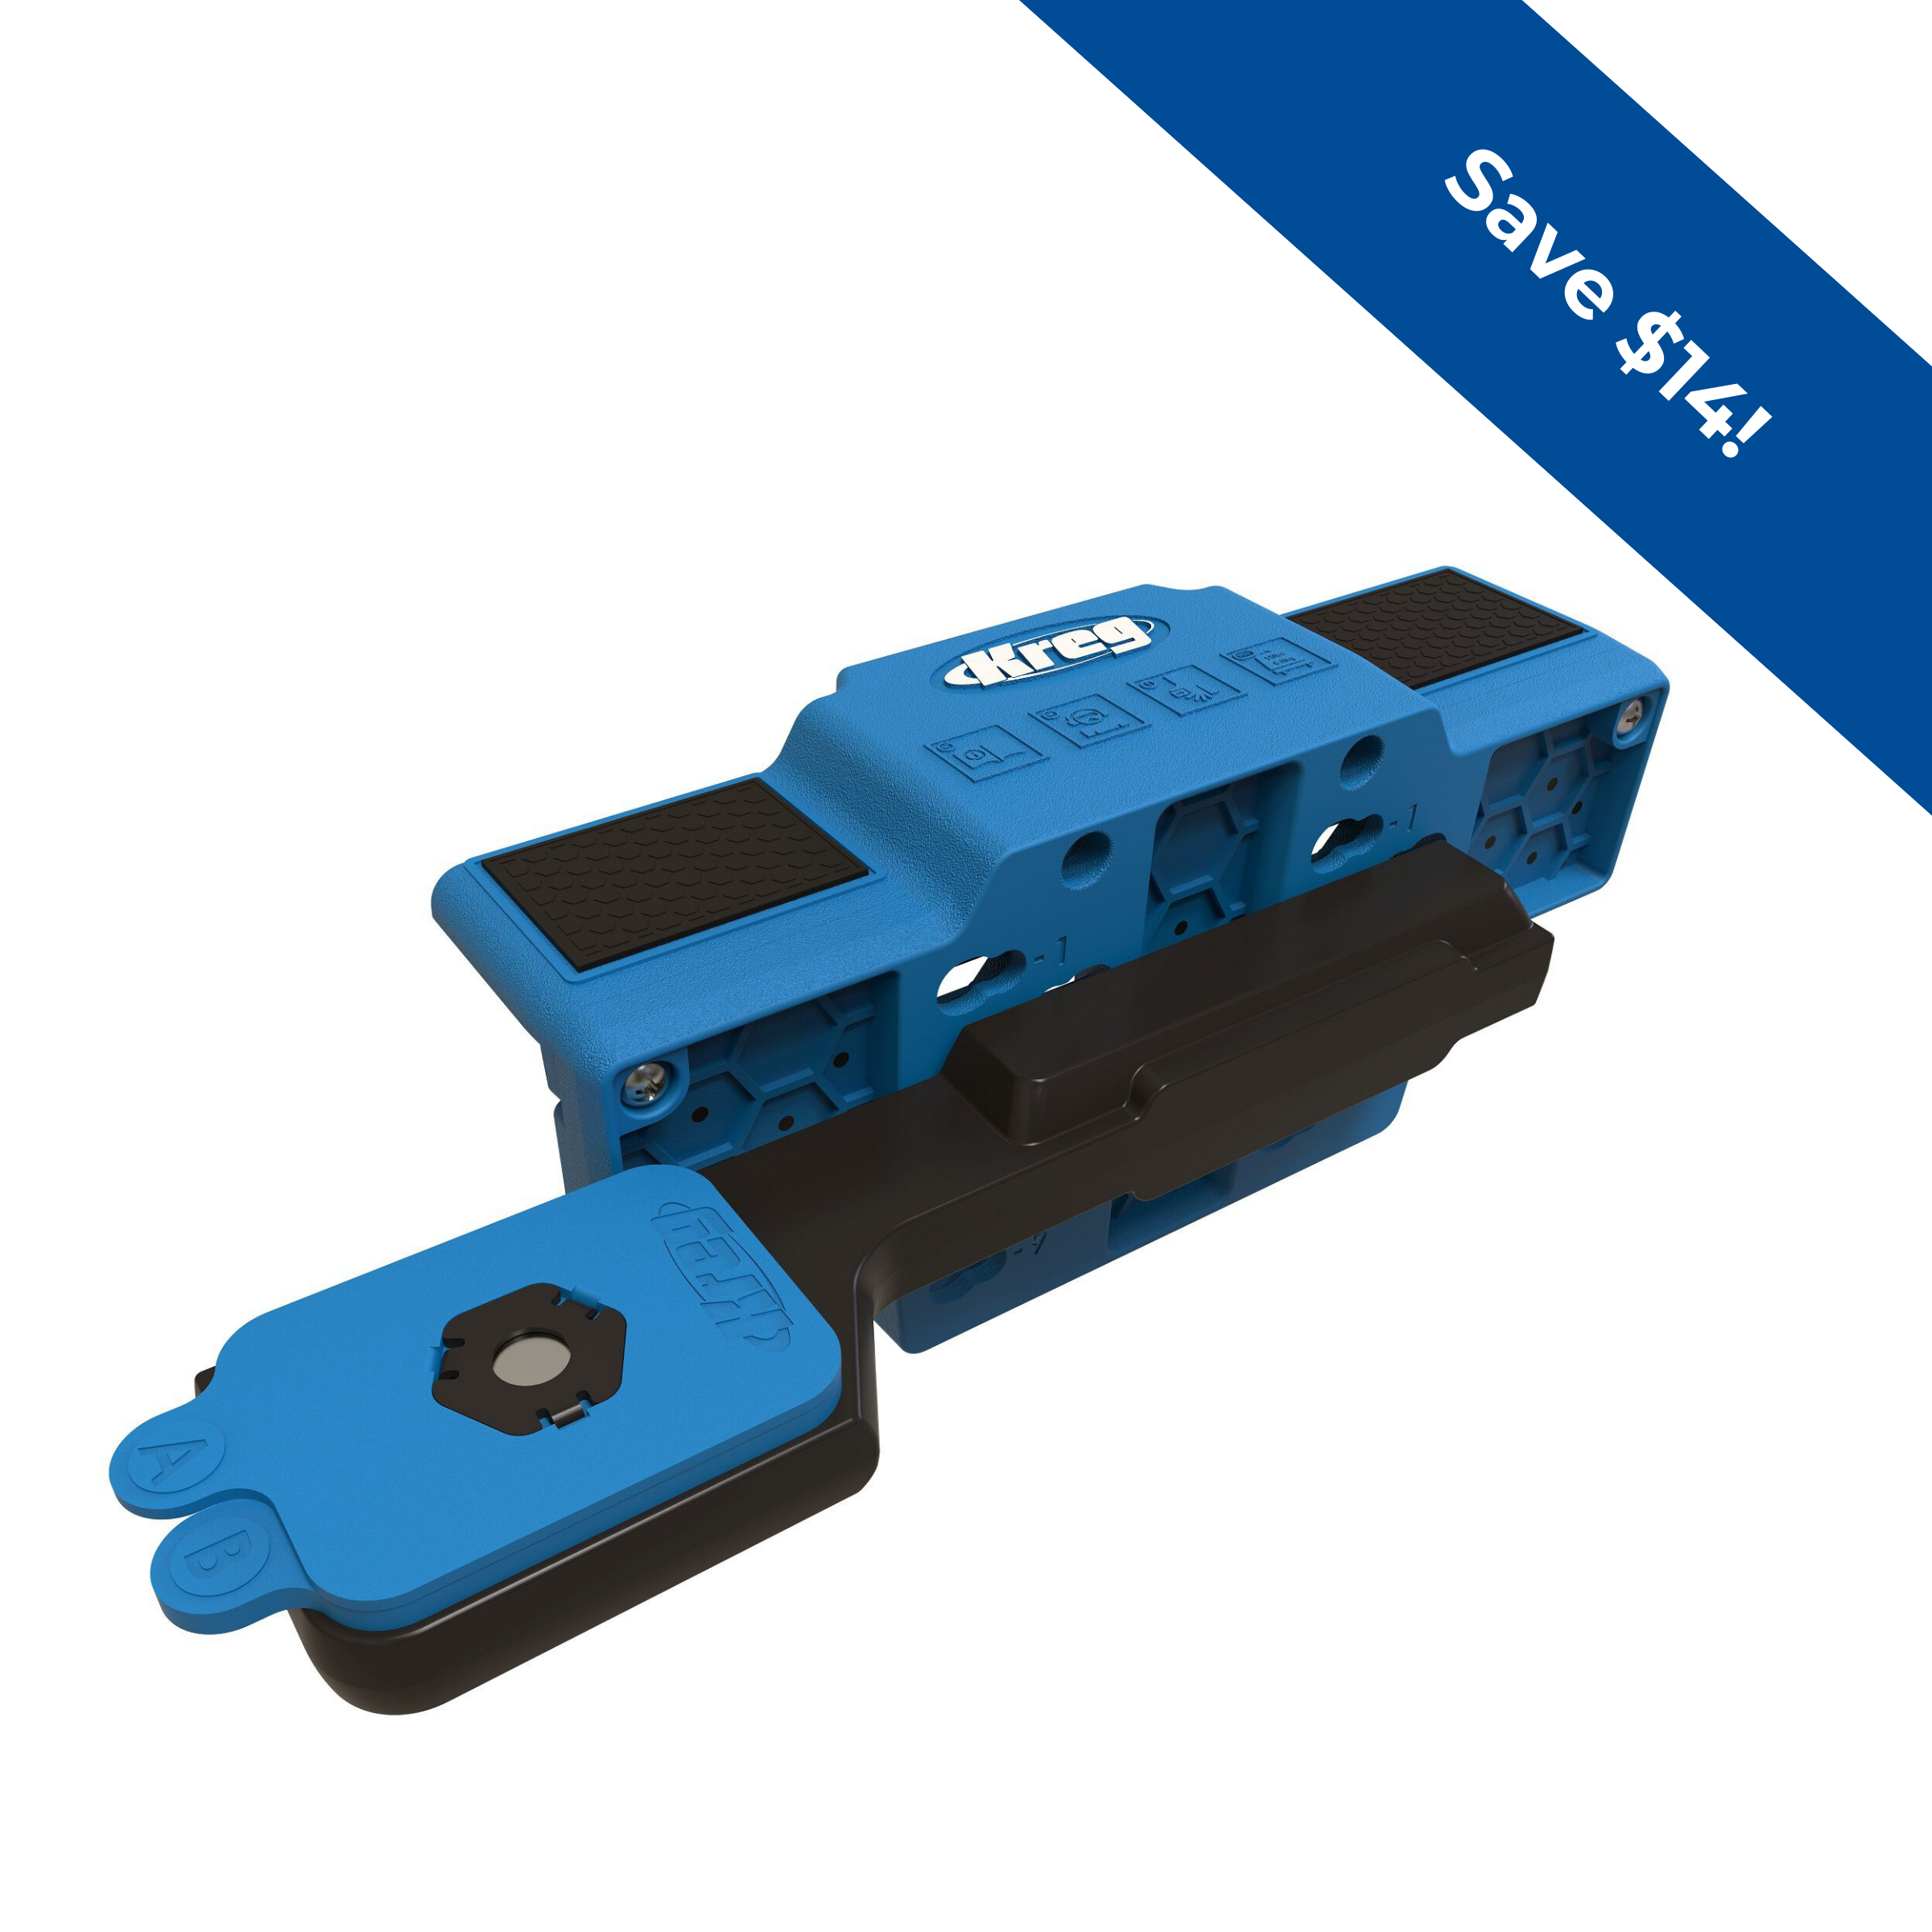
Install the drawer front as well as the doors using the cabinet door mounting jig set to the inset door setting.
-
Attach the cabinet hardware
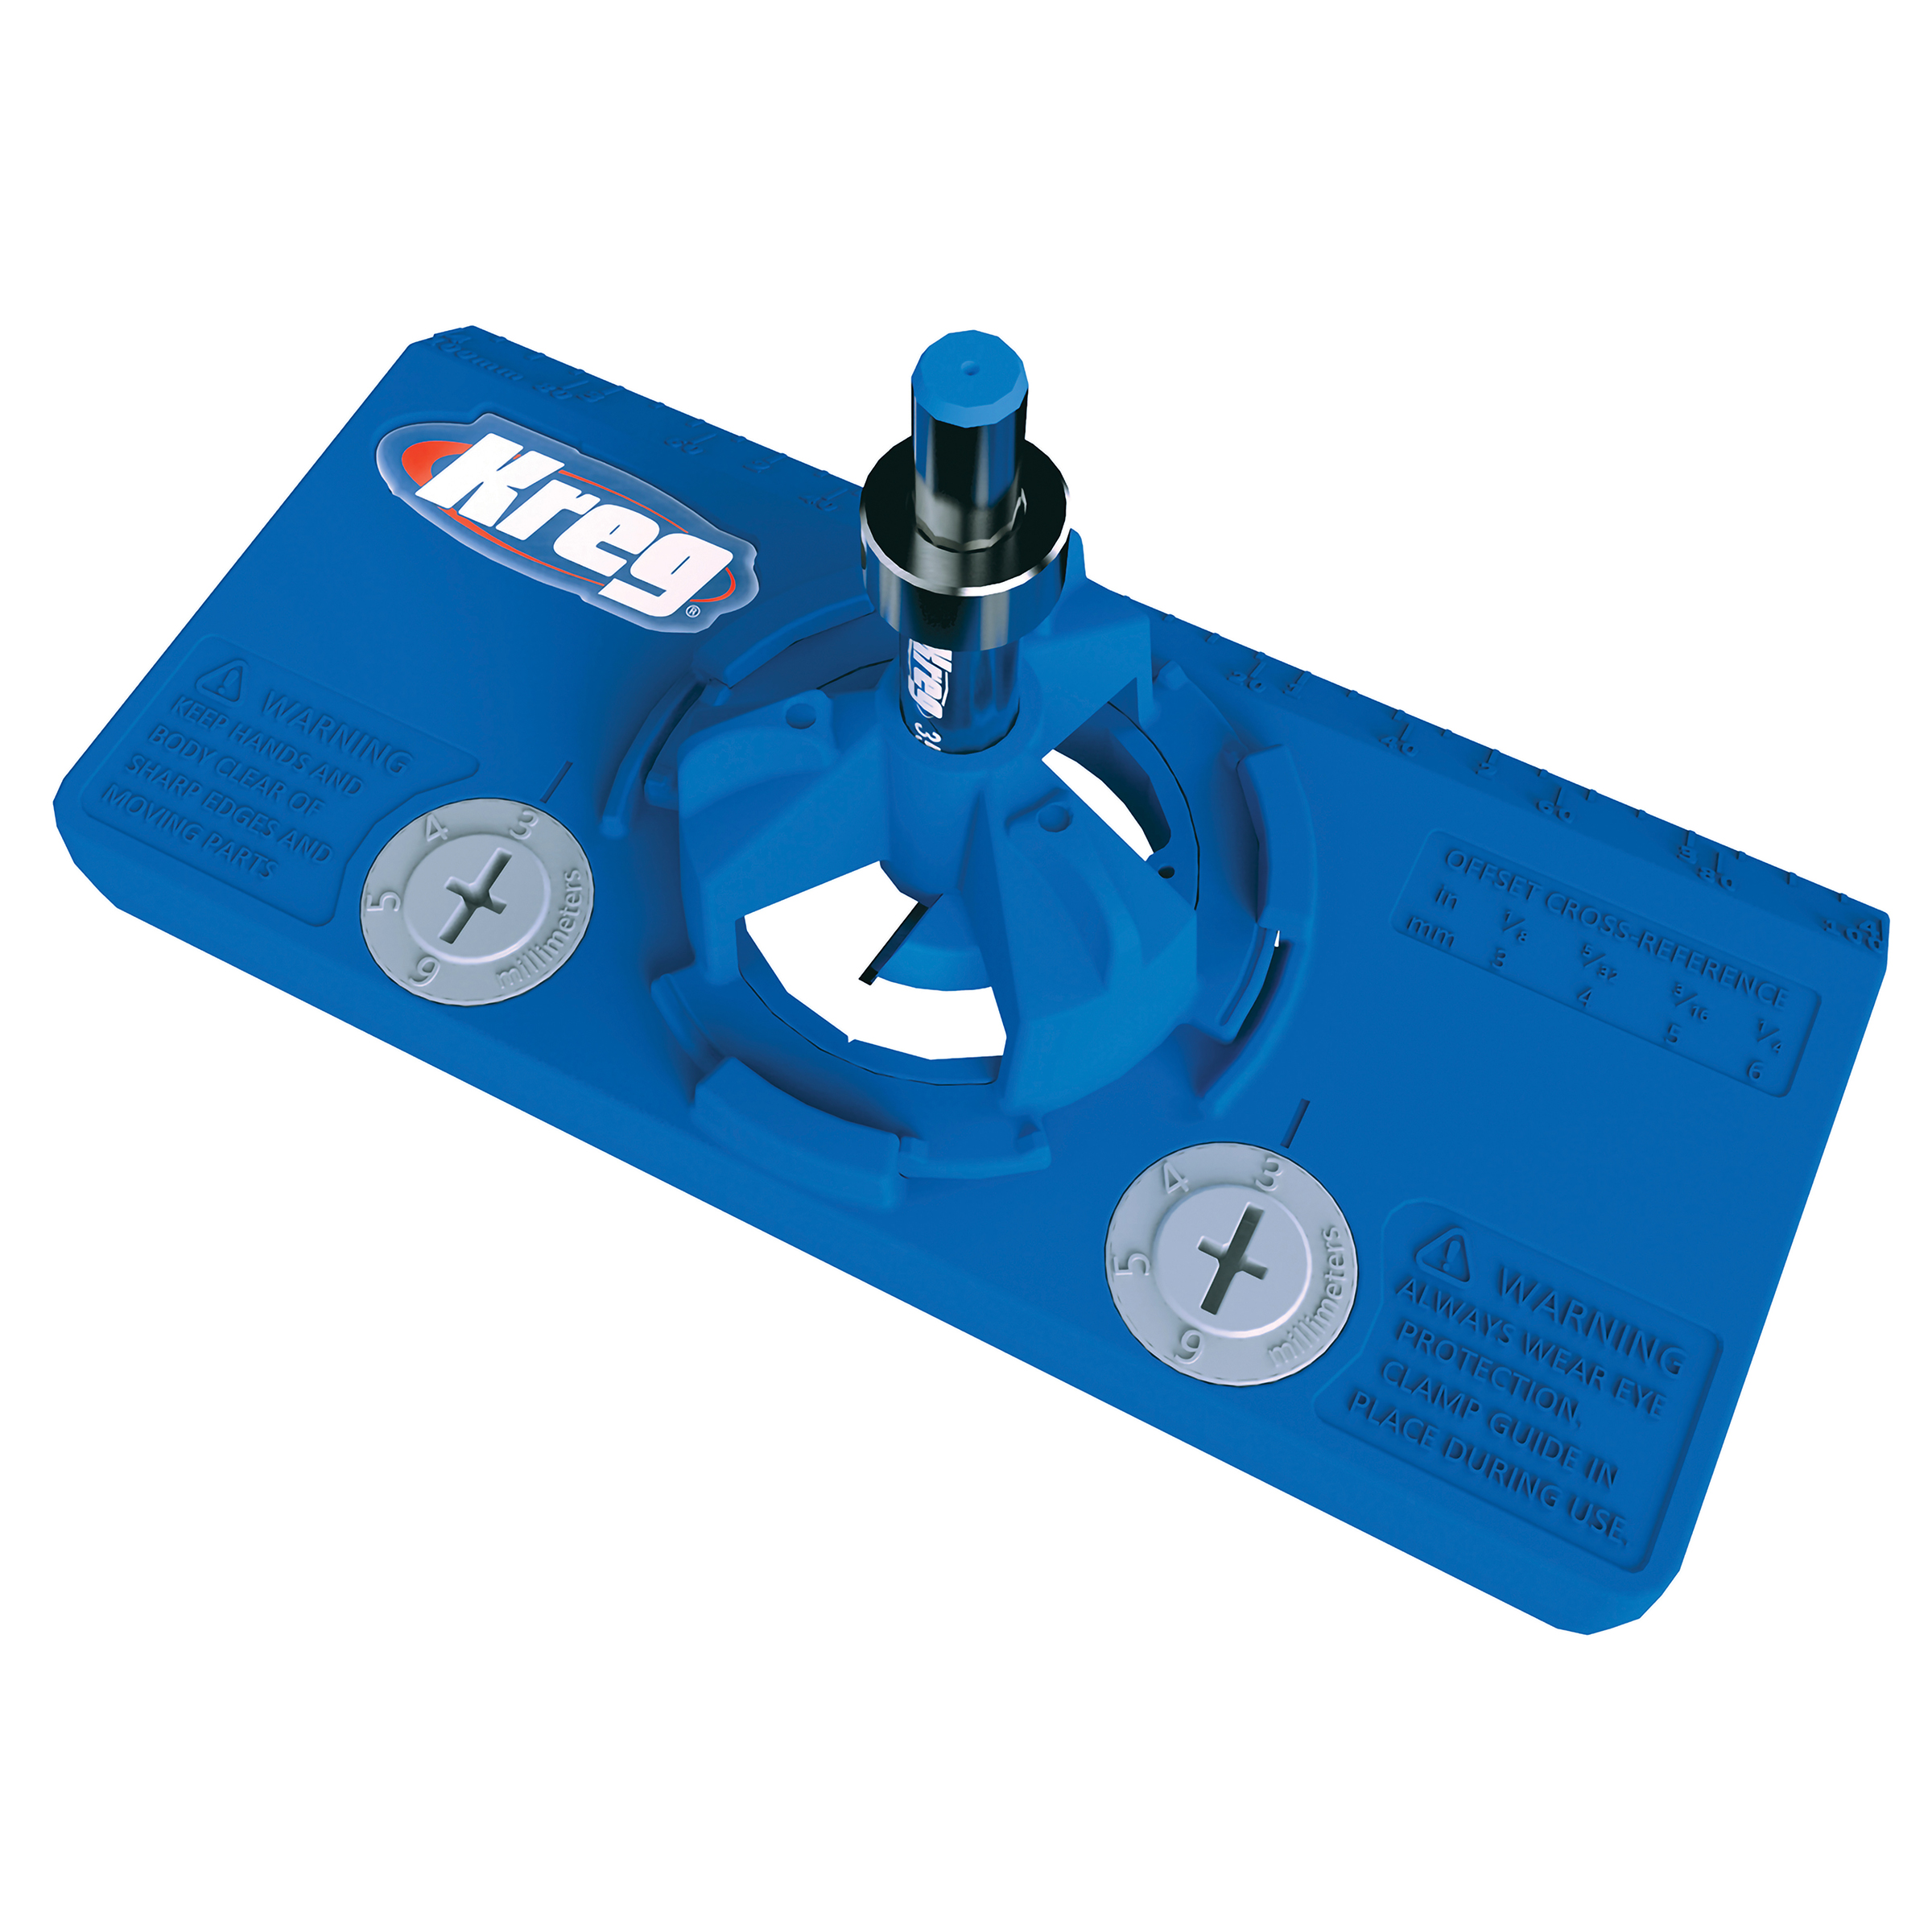
Using the hardware jig attach pulls to the cabinet.
-
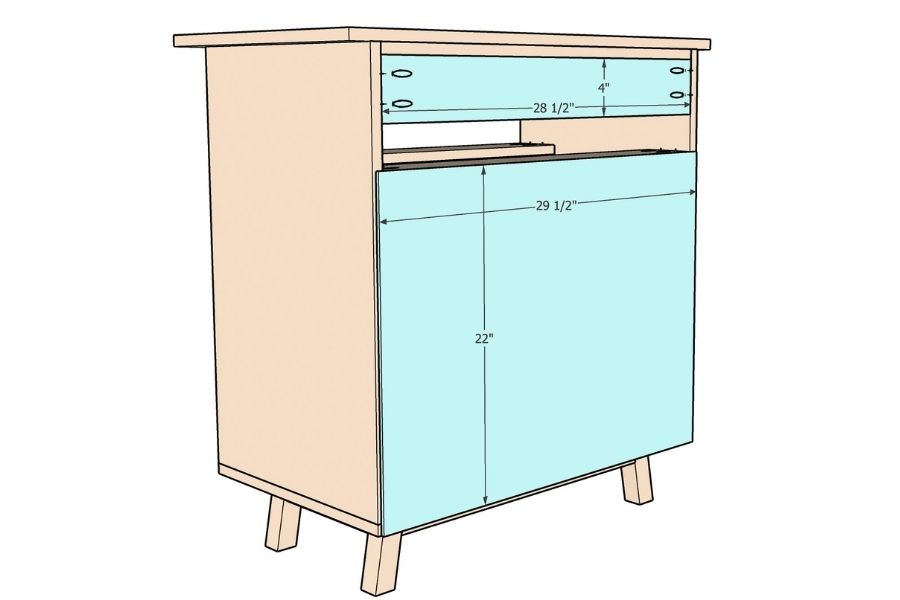
Add the back
In order to anchor the cabinet to the wall, you can add back support.
Also, add a backer board to the bottom part of the cabinets using a staple gun.
Tip:
When cutting the angles for the legs, leave the miter saw at the angle and make all the cuts at once.
Be sure to check for square before attaching the rails.