

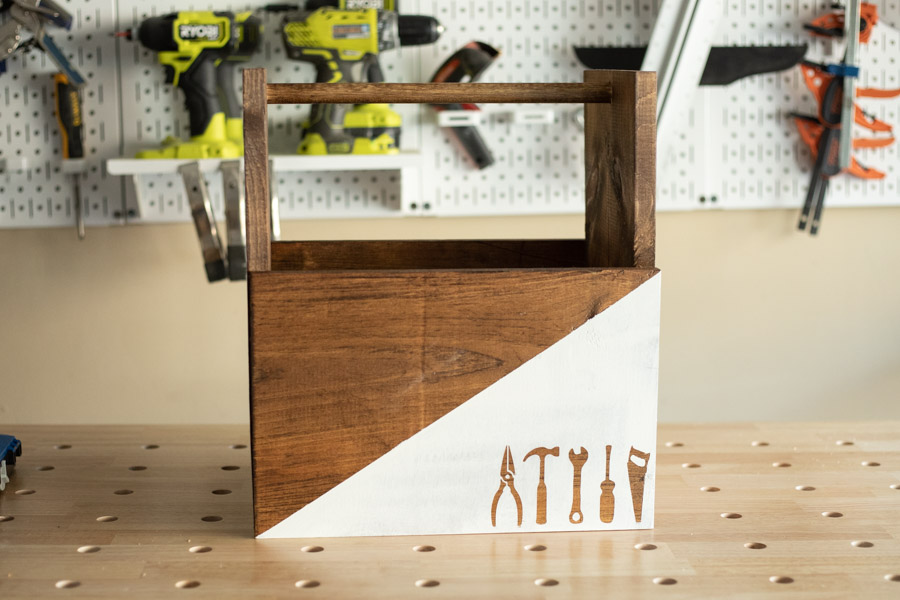
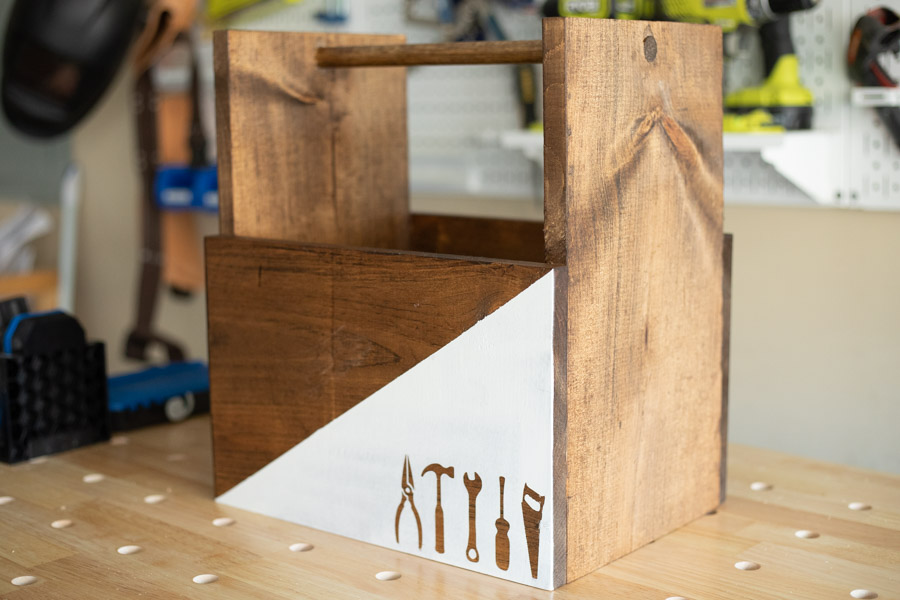


This tool tote is compact but convenient, and easy for beginners. You can have fun customizing the stencil design too!
Tools
Kreg Tools


Other Tools
-
Saw

Materials
Wood Products
- 1 1x10 board , 1x10x8
- 1 3/4" dowel rod , 3/4" x 4'
Hardware & Supplies
- 16 1 1/4" pocket hole screws
- 1 3/4" Forstner drill bit
- 1 Paint and Stain
- 1 Painter's Tape
- 1 Stencil or Vinyl & cutting machine
Directions
-
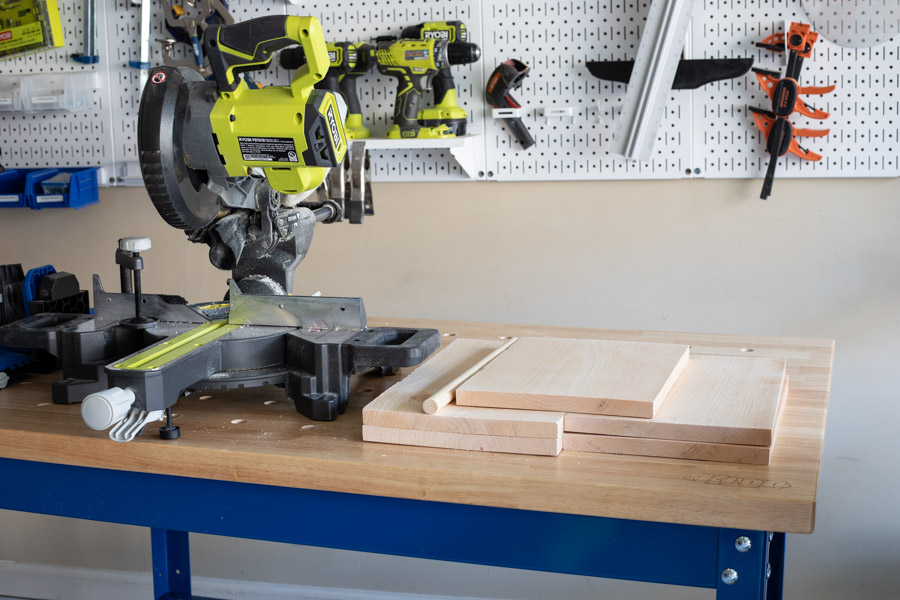
Cut Your Wood
Cut your wood to the specified dimensions.
-
Sand Your Wood
Use a sander or sanding block to smooth edges.
-
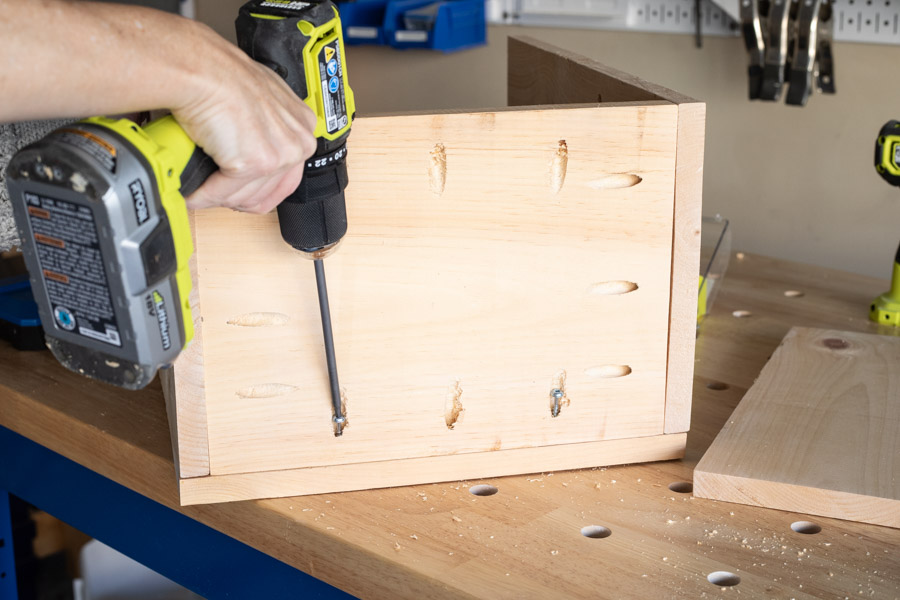
Drill Pocket Holes
Use your Kreg jig to drill pocket holes as follows:
Bottom piece (3 holes on each of the longer sides, and 2 holes on each shorter end)
Side pieces (2 holes along one side of each board, toward bottom 1/3 of the board)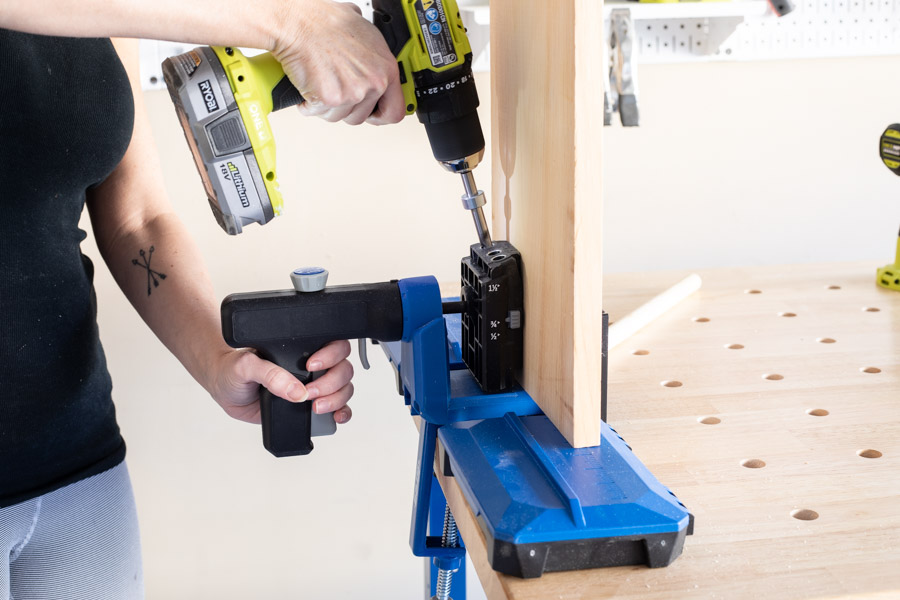
-
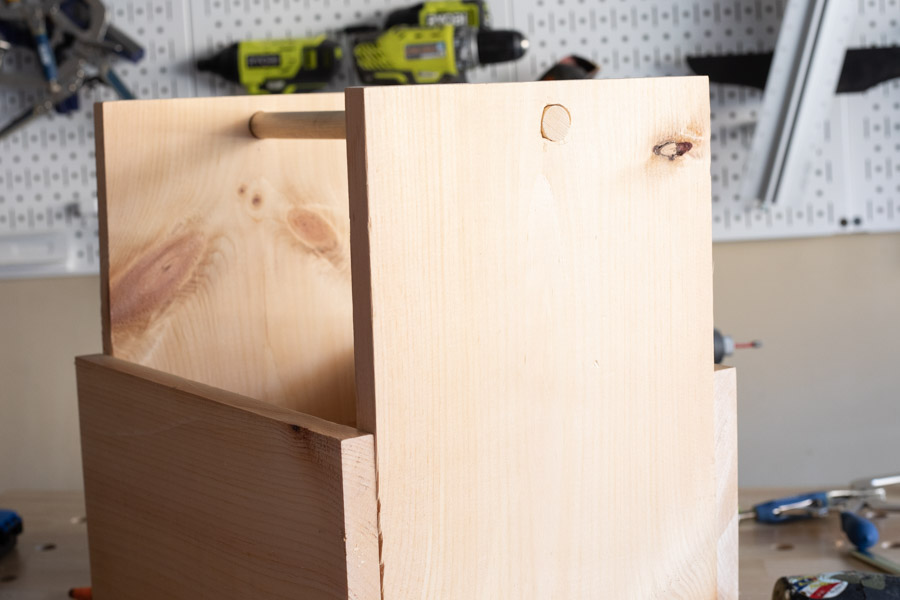
Drill hole for handle
Use a 3/4" Forstner bit to drill a hole at the top of each side piece (opposite end from your pocket holes), centered and about 3/4" from the top.
-
Build Your Box
Using 1 1/4" pocket hole screws, attach your side pieces to the bottom piece. I like the screws to be on the bottom so they aren't visible, but you can attach it whichever way is easiest for you. Attach the front and back panels last.
-
Insert Handle
Slide dowel rod through the holes at the top of your tool tote, using a mallet if needed to position it in place.
-
Stain Tote
Use stain of your choice (I used Provincial).
-
Paint/Stencil
Run a strip of painter's tape diagonally across the front of your tote. Add stencils or vinyl decals (I created these using a vinyl cutting machine). Paint over them and then remove the tape and decals while paint is still damp.
