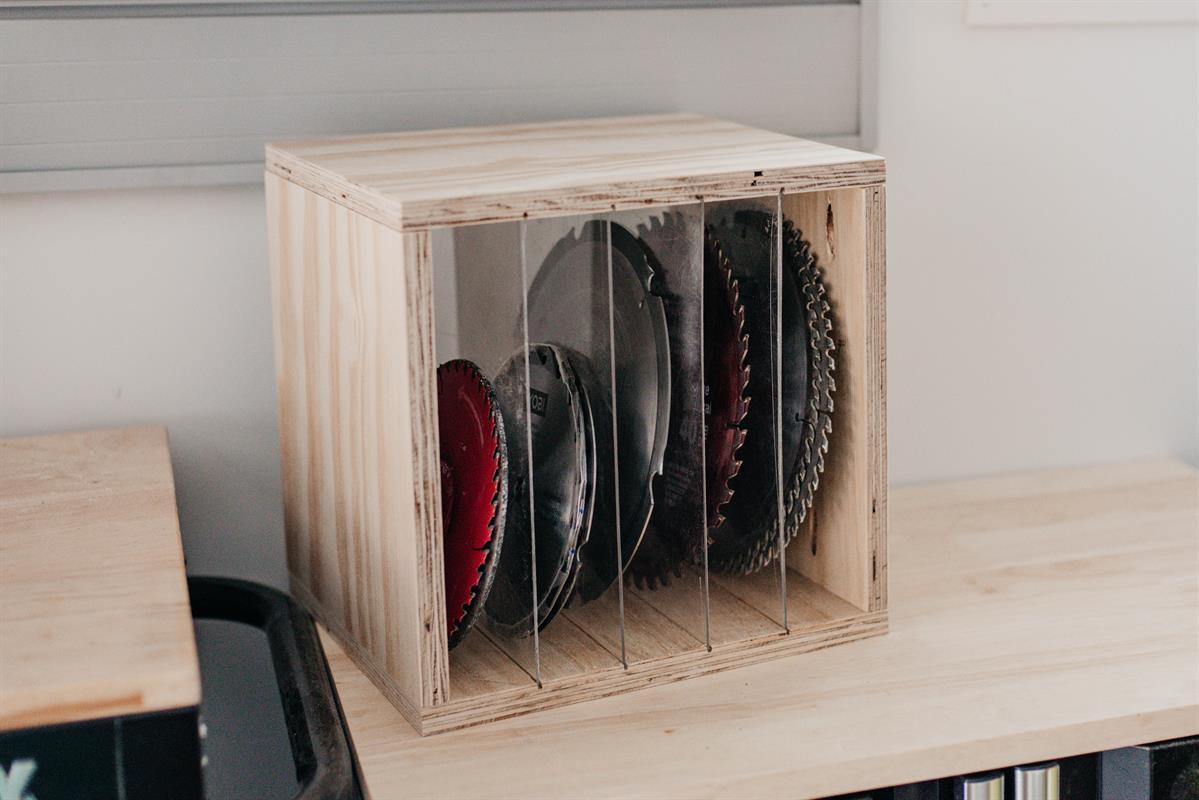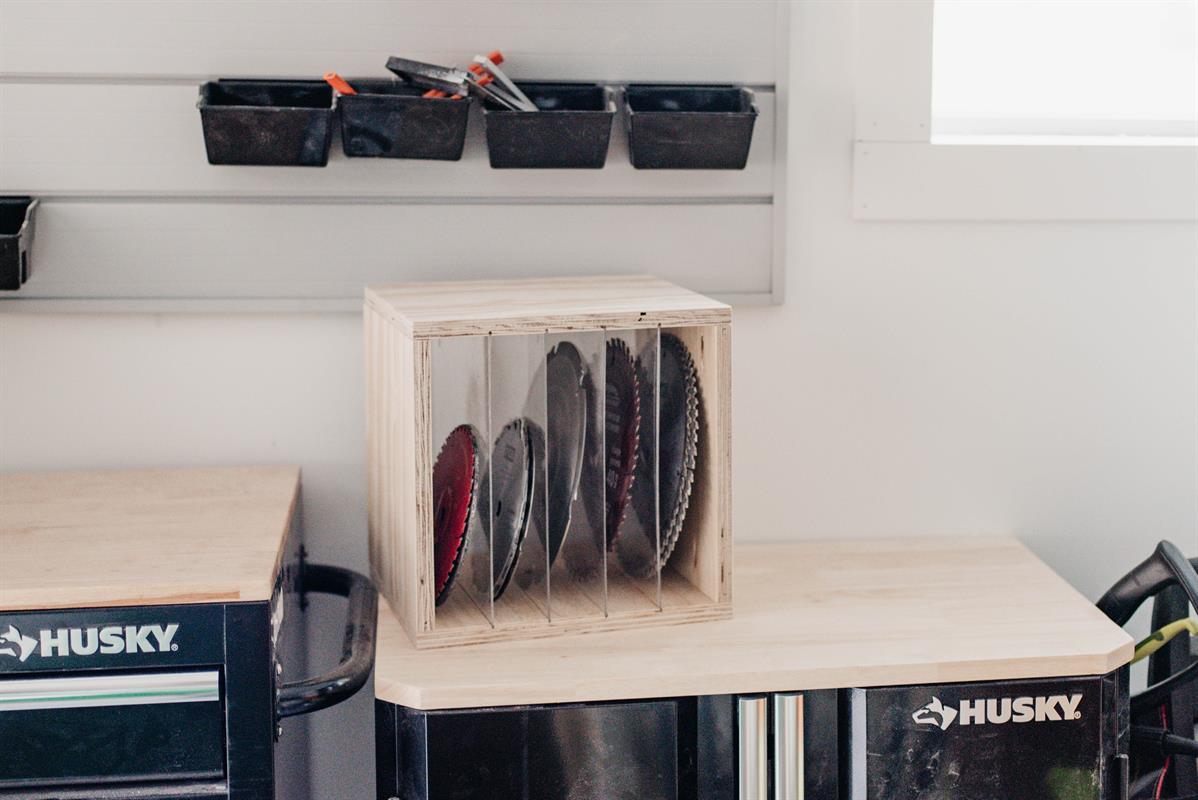


A simple shelf/ box to store saw blades in- perfect for organizing the workshop. Acrylic dividers make it easy to find the blade you’re looking for.
Tools
Kreg Tools


Other Tools
-
Square

-
Tape Measure
-
Tape Measure
-
Utility Knife
Materials
Wood Products
- 1 Plywood , 3/4" Thick , Half Sheet
Hardware & Supplies
- 1 Sheet Acrylic
- 8 Kreg Screws for plywood
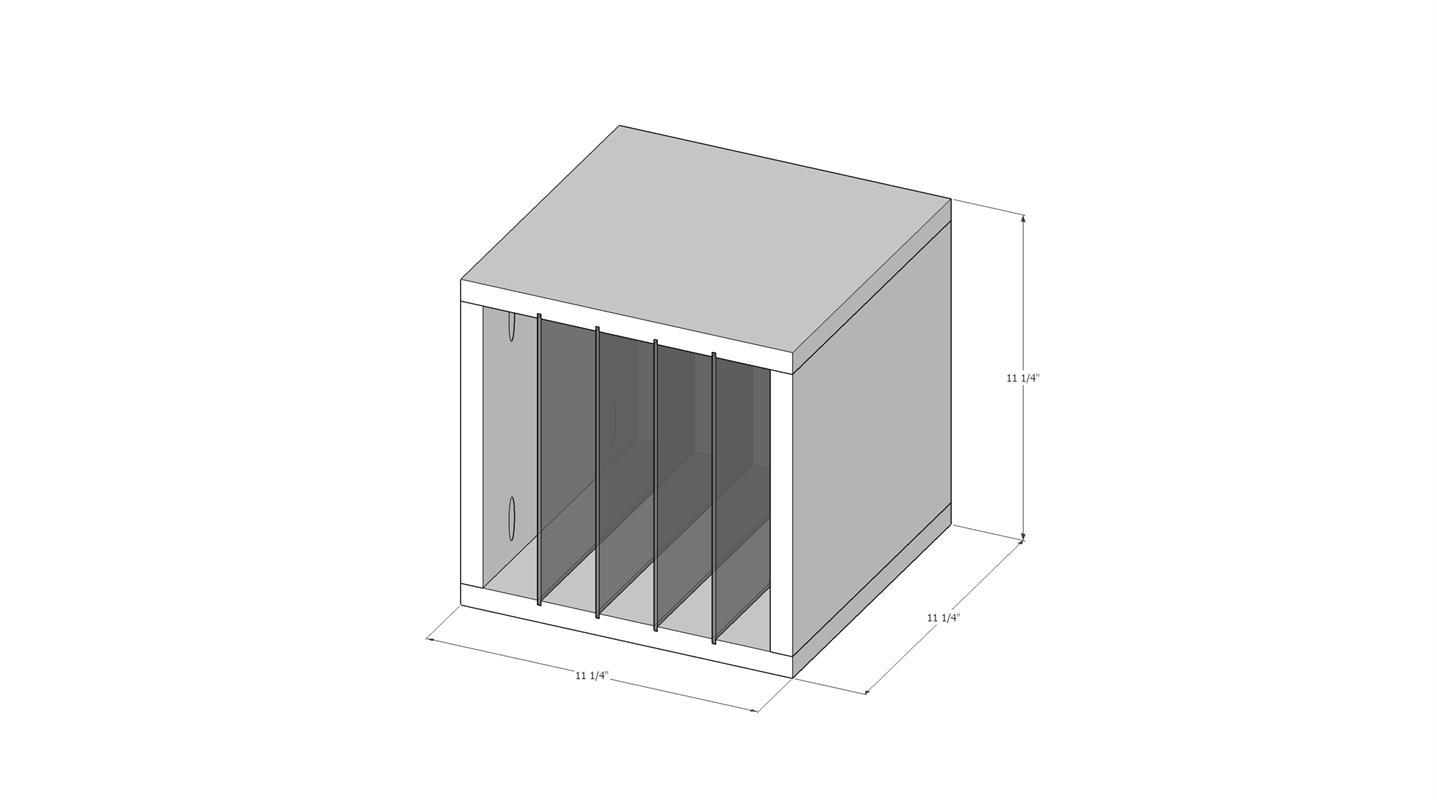
Cut List & Parts
- 2 Top and Bottom , 13" x 11.5"
- 2 Sides , 11.5"x11.5"
Directions
-
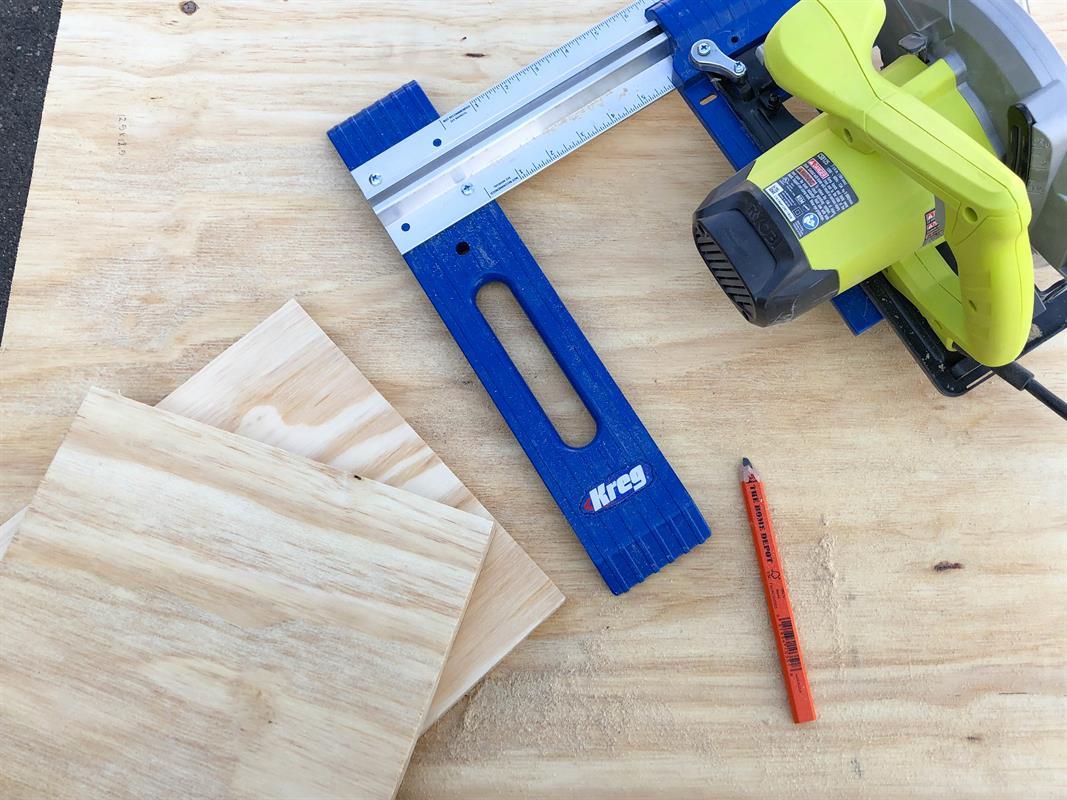
Cut Plywood to Size
I used my Kreg Rip Cut to cut the 3/4" plywood to size. I sized mine for the largest type of saw blade we needed which meant 11 1/2" interior for us. I made it a perfect square, so had the top and bottom cut 1 1/2" longer. Sand if needed.
-
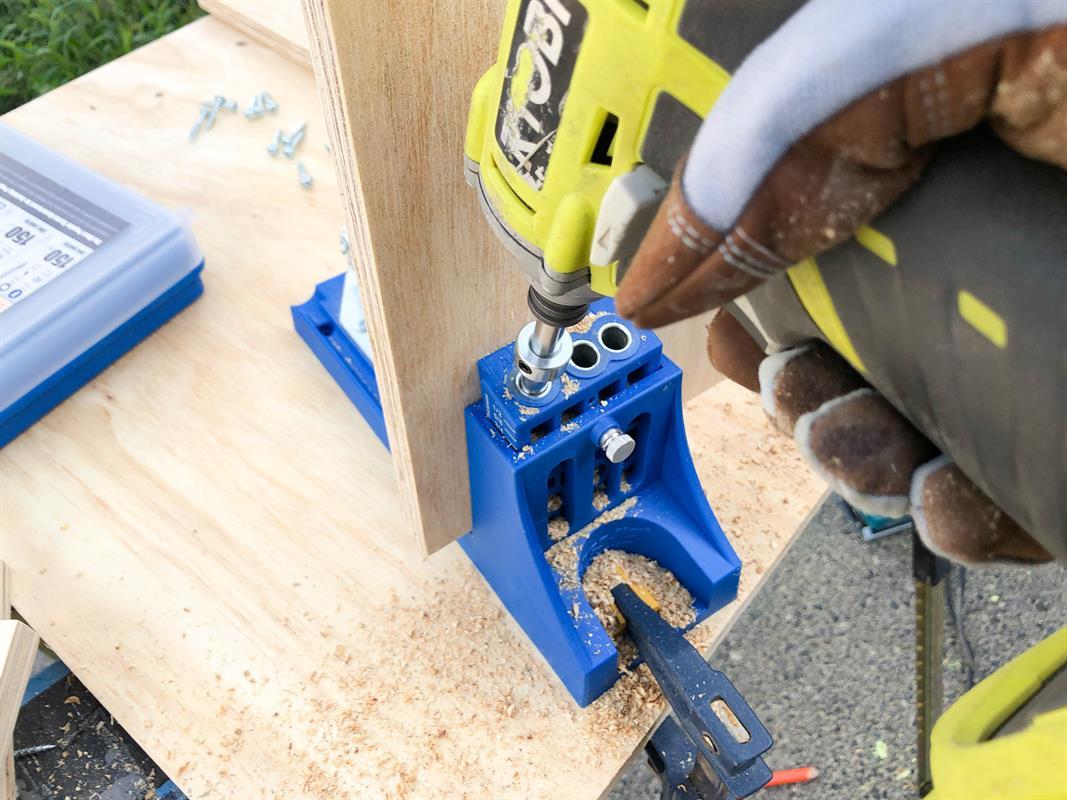
Drill Pocket Holes
I drilled two pocket holes per side to connect the plywood box.
-
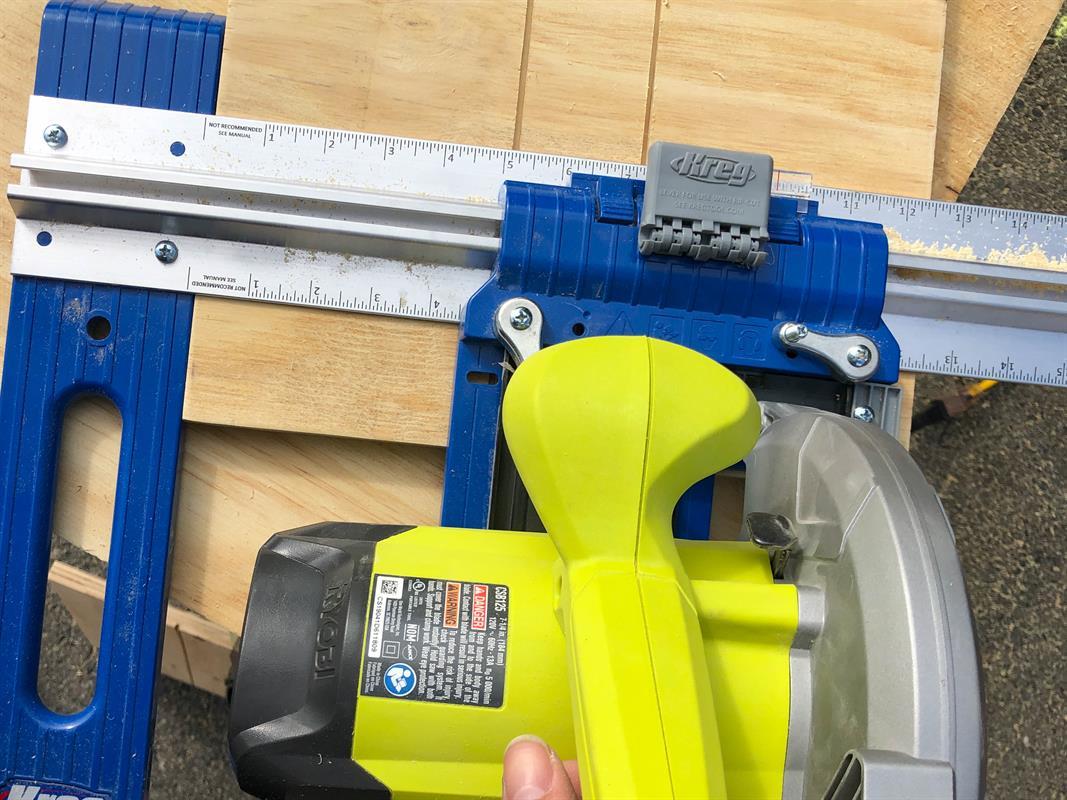
Cut Grooves for Dividers
You could use a plunge router for this. I used my skill saw on a shallow depth and my Kreg Rip Cut for a guide. I cut four grooves for dividers in the top and bottom pieces of plywood.
Optional- cut grooves for backing (I did this but then took it out. I preferred it without.
-
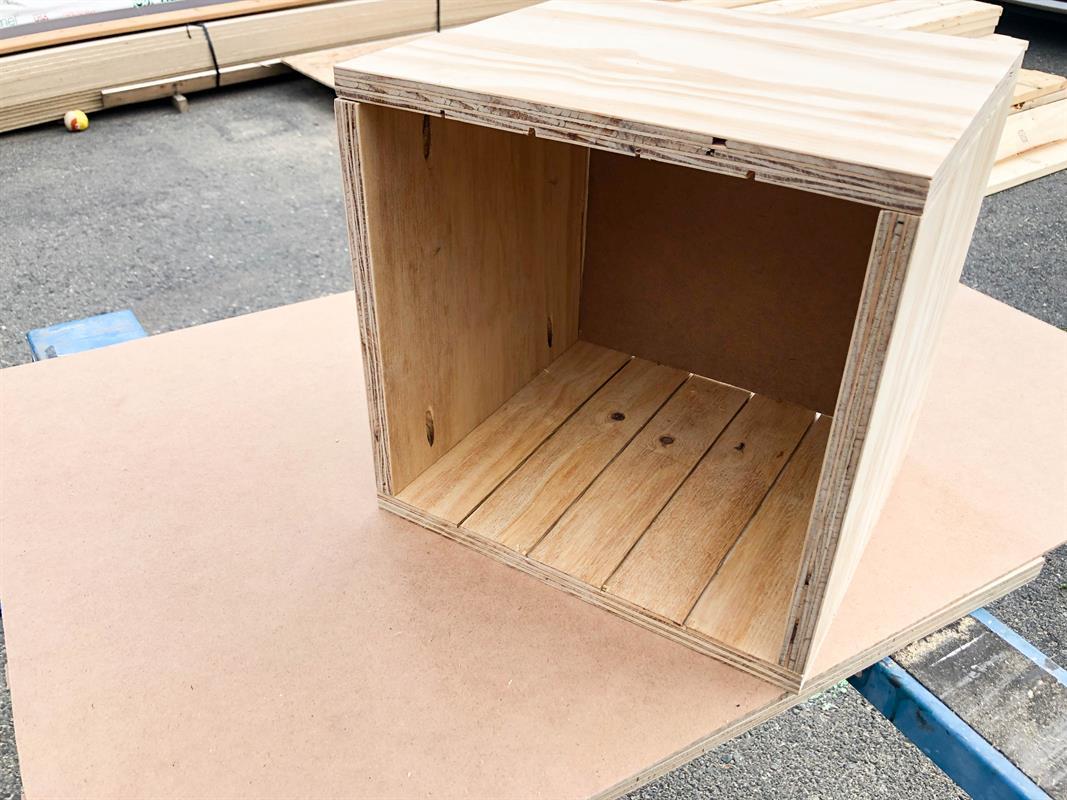
Assemble Box
Assemble the box using pocket holes. Be sure to line up your grooves front to back so you will be able to slide in your dividers.
-
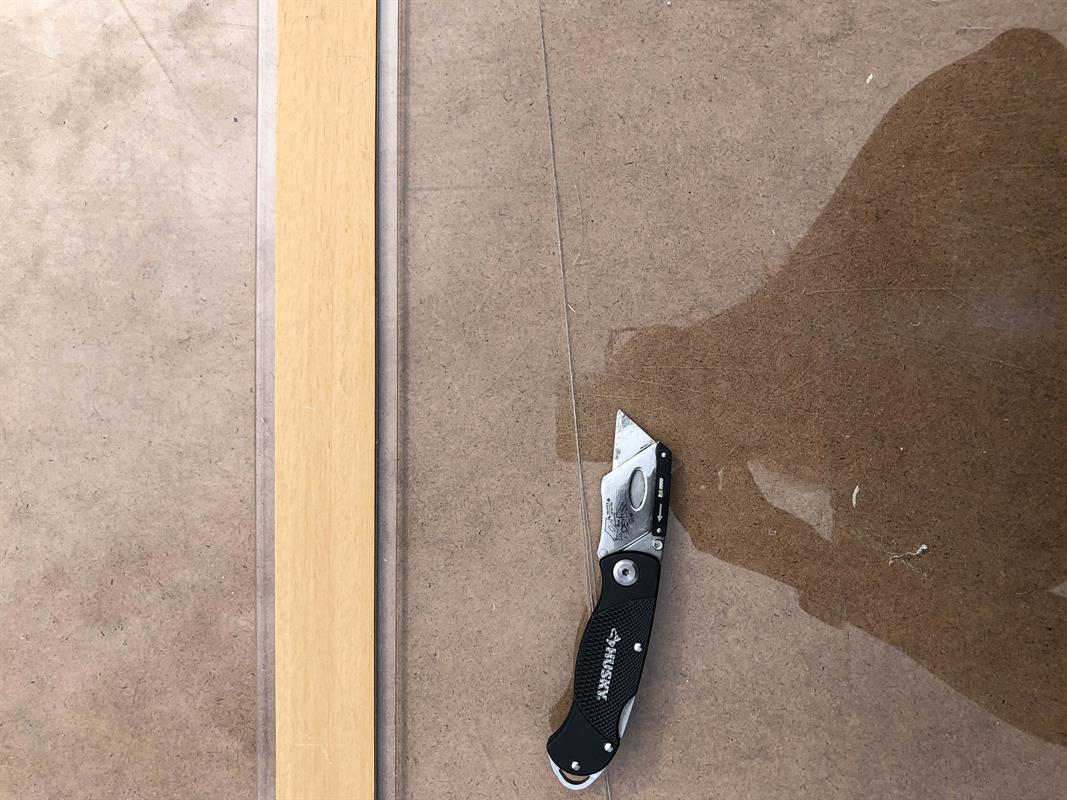
Cut Acrylic Dividers
You could choose to route thicker grooves and use hardboard for your dividers. I used acrylic I had on hand. Cut acrylic by scoring with a utility knife and a straight edge (score a few times), then snapping it over the edge of a table.
-
Slide in the Dividers
Slide them in and it's ready to go! Sand down any rough edges showing using a fine grit sandpaper (I used 100)