

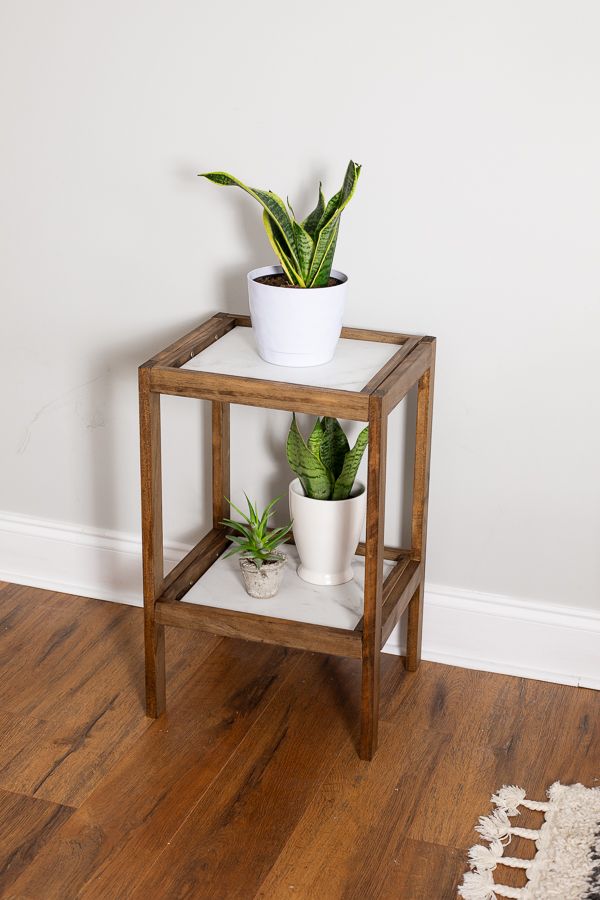
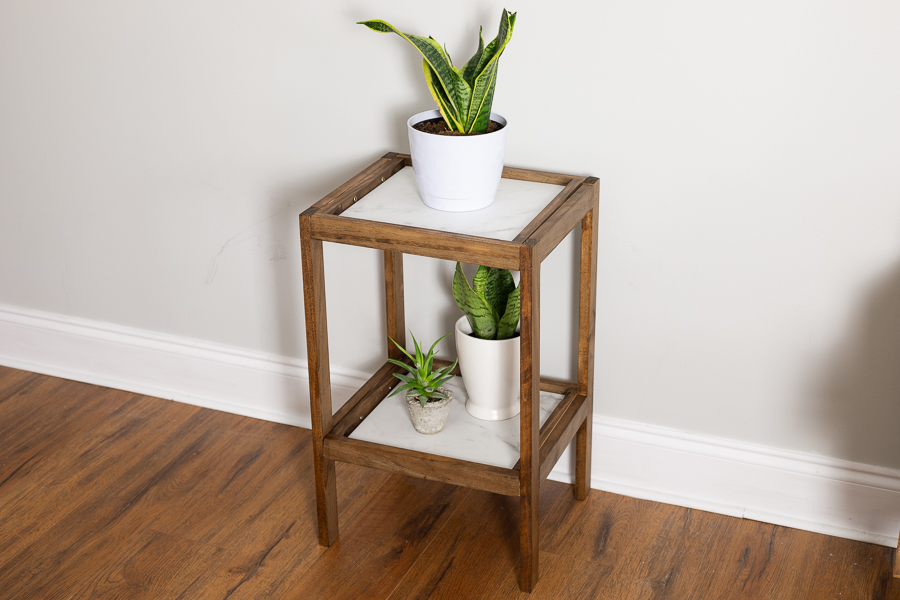


This wood and marble plant stand is a great beginner build that requires just a few simple tools.
Tools
Kreg Tools


Materials
Wood Products
- 1 Project Panel , 15 13/16"x 48"
- 2 1x2 Boards , 1"x2"x8'
Hardware & Supplies
- 2 12" Square Marble Tiles
- 8 1 1/4" Wood Screws
- 32 1 1/4" Pocket Hole Screws
- 1 Speed Square (optional)
Directions
-
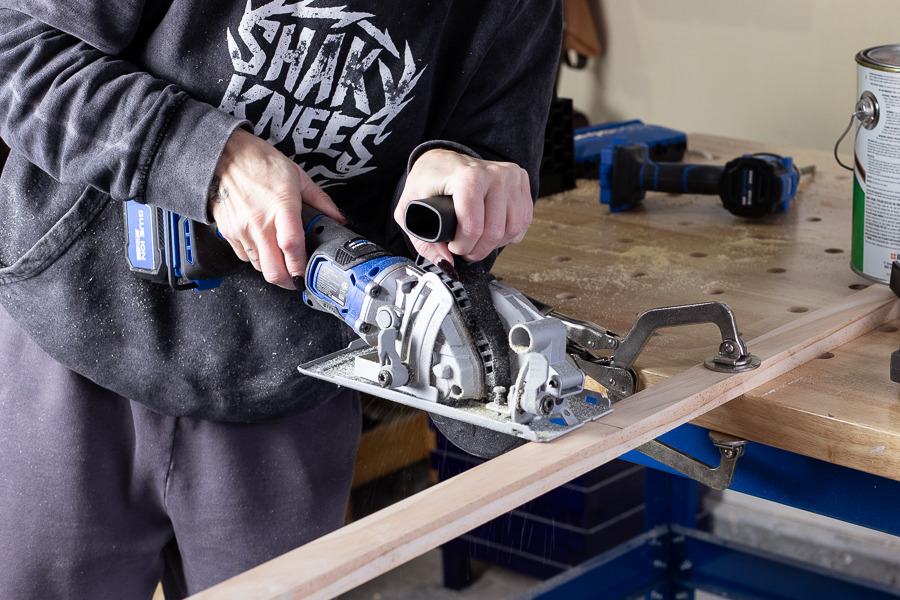
Cut Your Wood
I used the 4 1/2" circular saw to cut my wood to the specified dimensions. If need be, you can clamp a speed square and/or board down to use as a guide to ensure a straight cut.
-
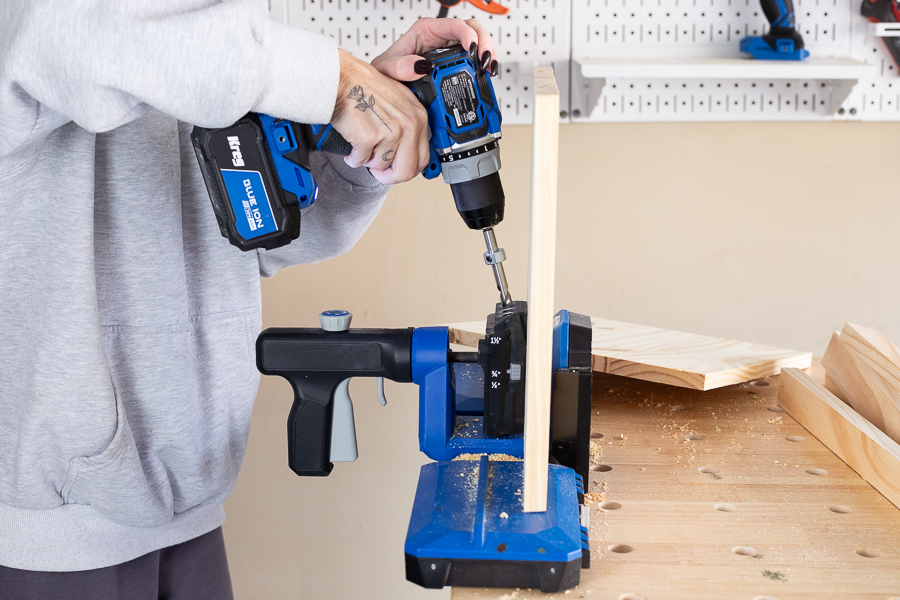
Drill Pocket Holes
I used the Kreg Jig 520PRO to drill pocket holes as follows: 2 on each side of my project panels; 1 at each end of my 10 1/2" long 1x2 boards; 1 at each end of my 12" long 1x2 boards.
-
Sand
I used a random orbit sander to sand everything smooth.

-
Assemble Pieces
Attach the following using 1 1/4" pocket hole screws:
13 1/2" long 1x2 pieces to the front and back of your project panel pieces; 12" long 1x2 pieces to the sides of your project panel pieces (and then to each other for extra reinforcement); each of your 10 1/2" long 1x2 boards to 2 of your 24" long 1x2 boards connecting them and creating pairs of legs. I connected one of the 10 1/2" long boards to the top of the legs creating a "U" shape, then connected the other 10 1/2" long board about 7 inches up from the bottom of the legs to brace them.
-
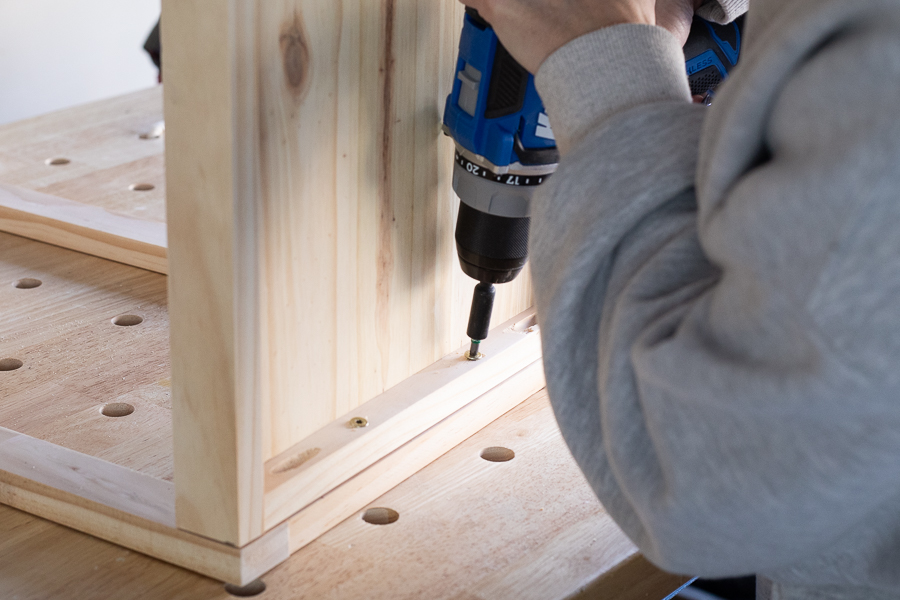
Attach Legs to Shelves
I attached my shelves to the legs using 1 1/4" wood screws, drilling from the inside of the shelves into the brace pieces attaching each pair of legs. The bottom shelf is about 7" from the bottom of the legs. You might have to drill at a slight angle because the sides are so narrow.
-
Paint or Stain
I stained this with a Provincial colored stain, but you could customize this to your style.

-
Add Marble Tiles
I placed 12" marble tiles onto each shelf. Then add your plants and you're all done!