DIY Plans to Build a Norham Coffee Table
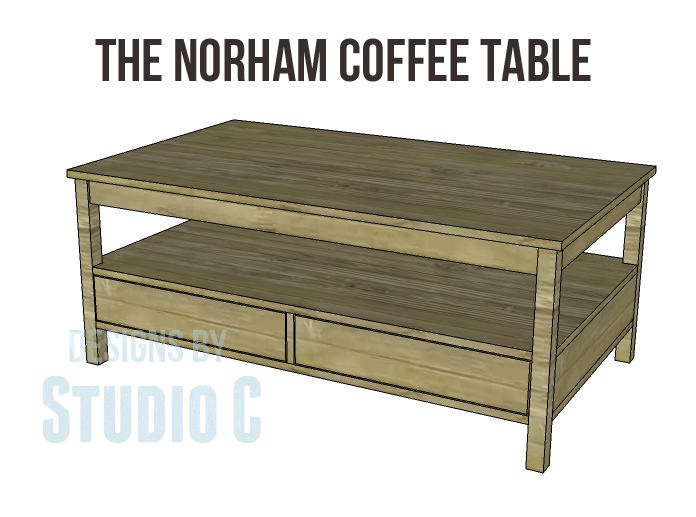
By Designs by Studio CThis table is the ultimate in storage with four drawers (two on each side), a huge shelf, and a large top.
Edge banding will be applied to the exposed edges of the plywood prior to assembly.
Directions
-
Step One
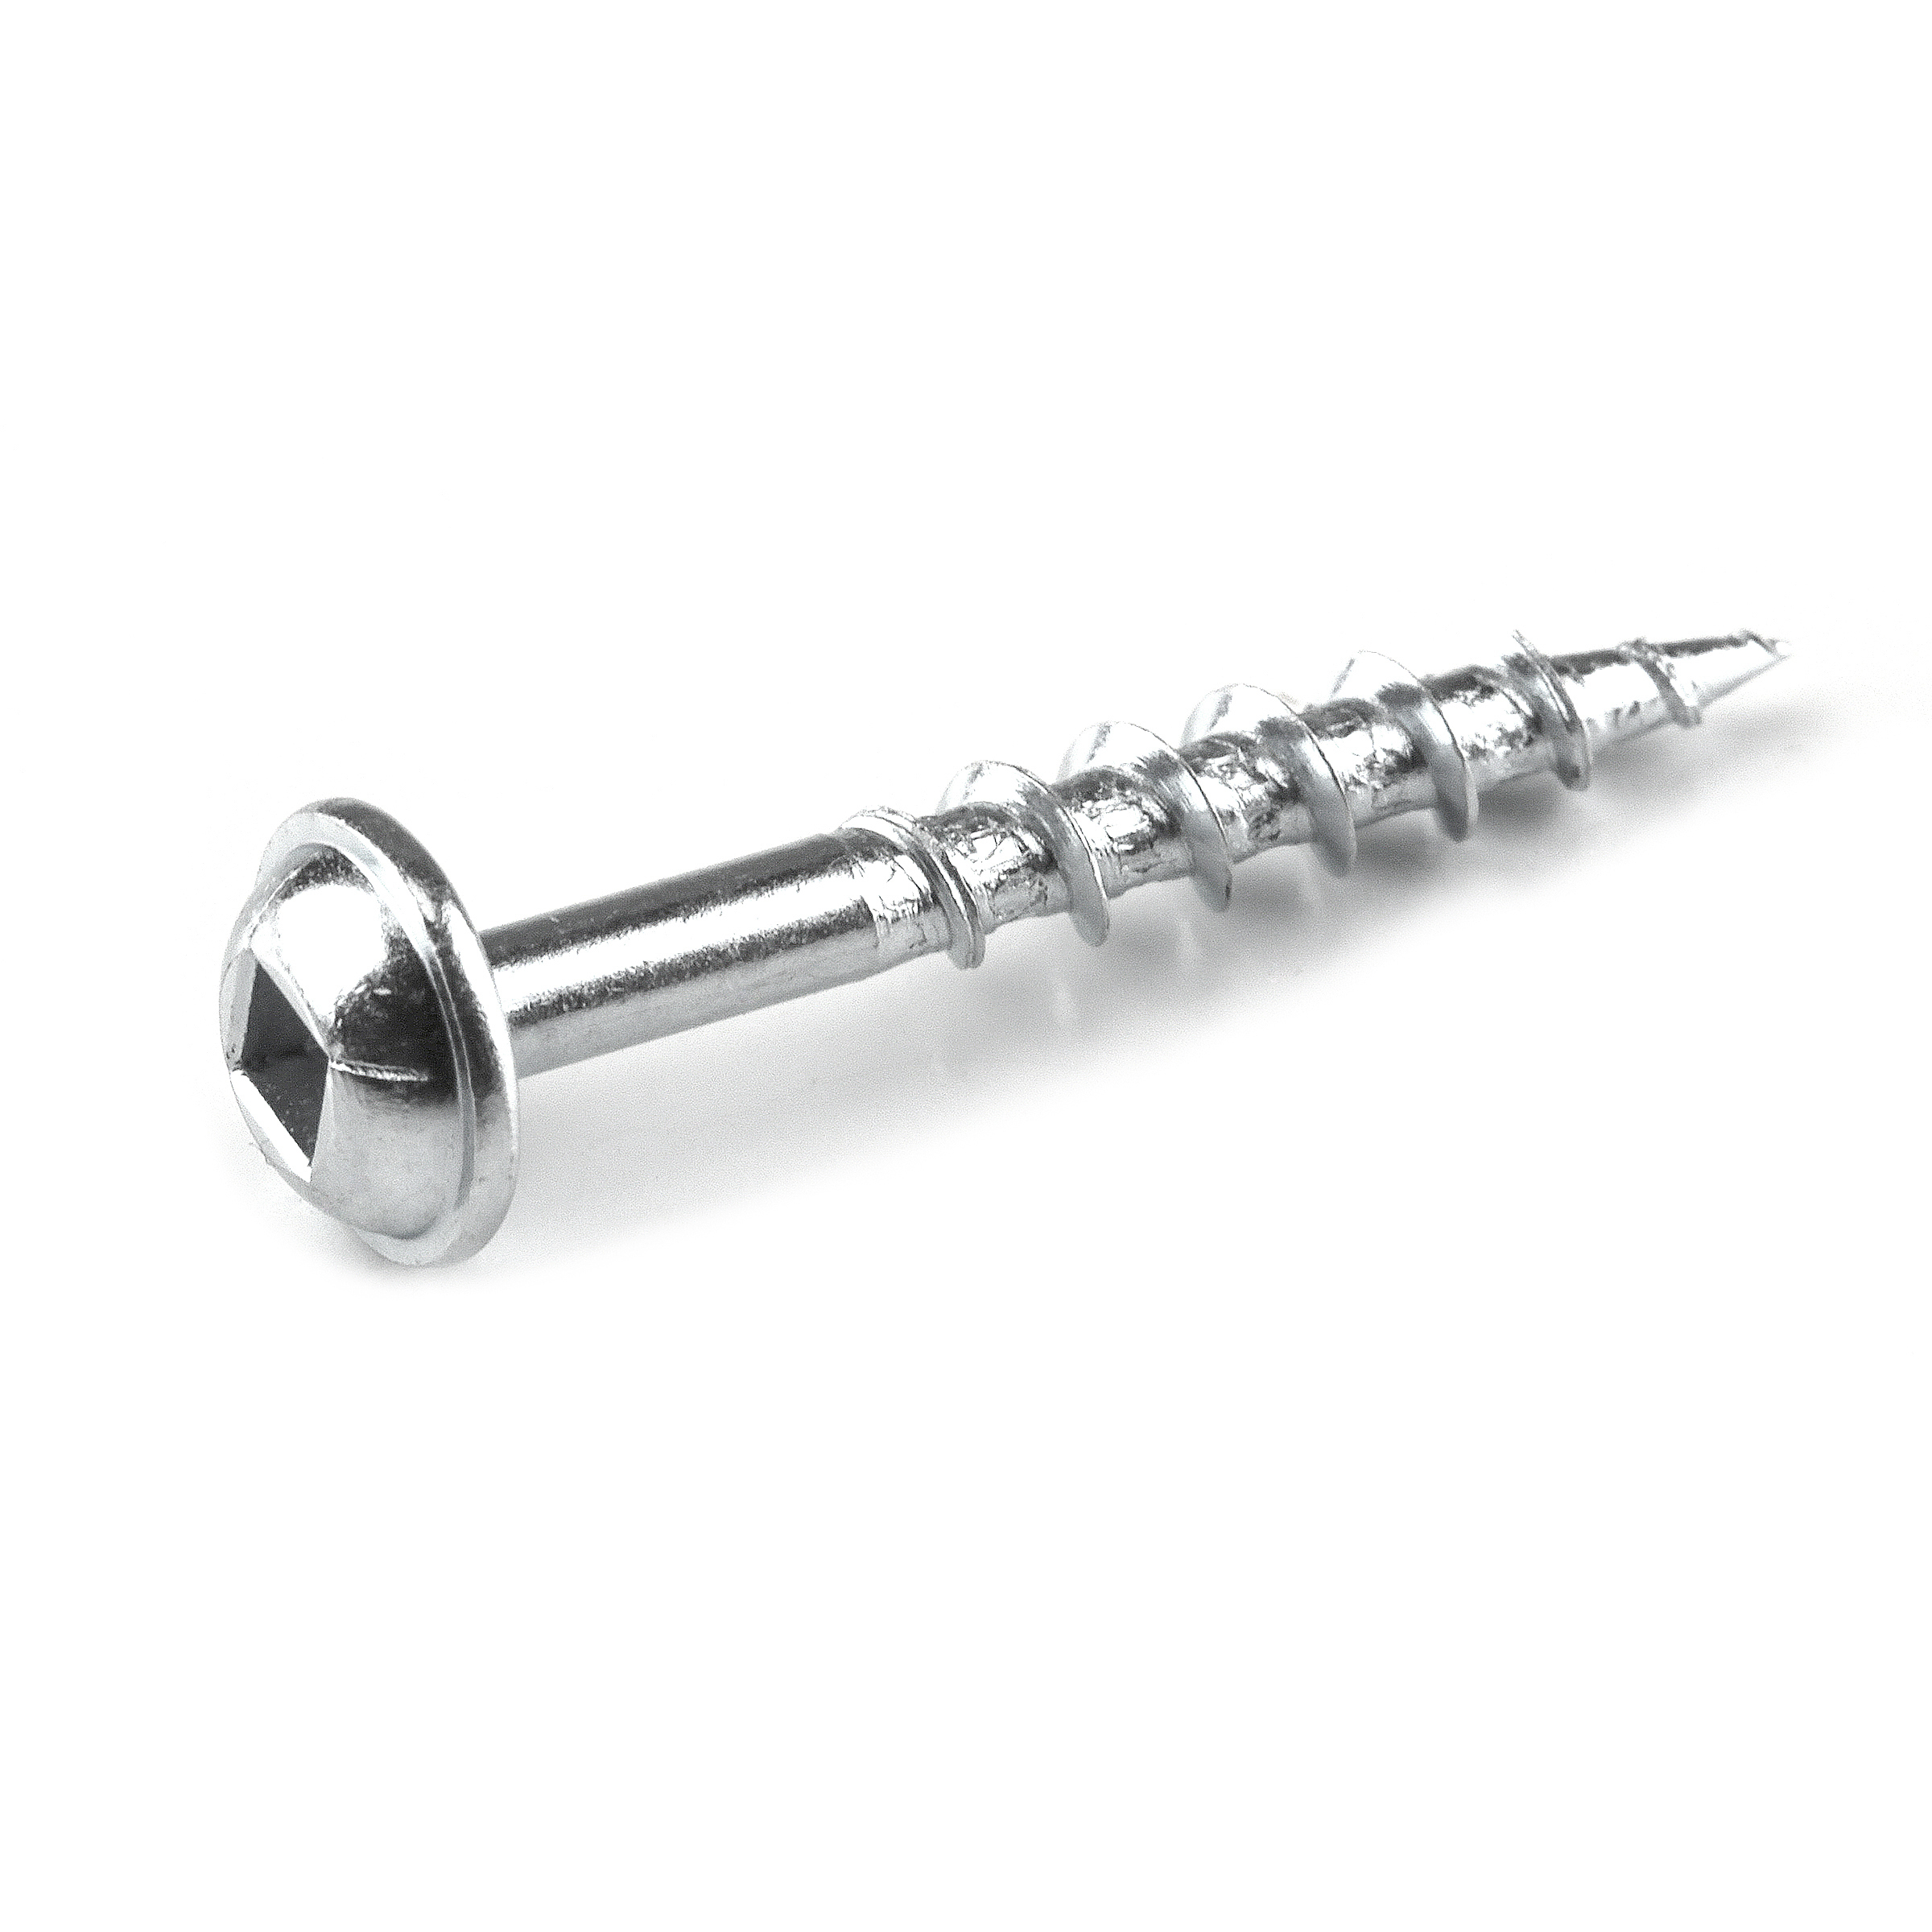
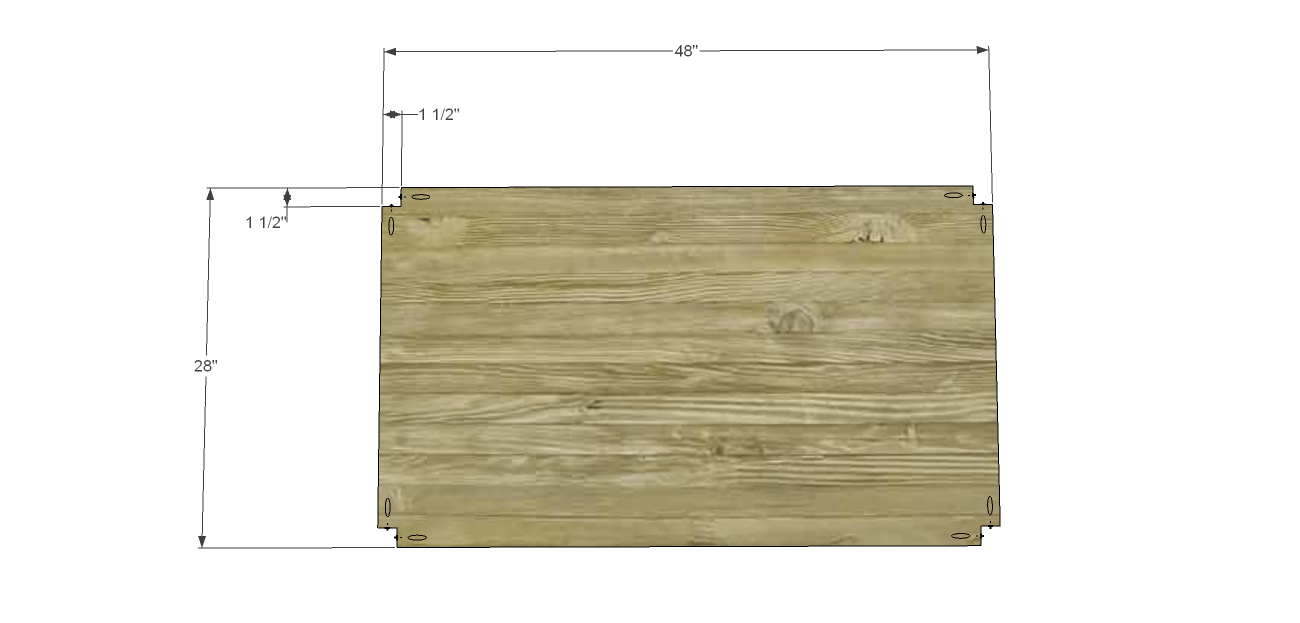
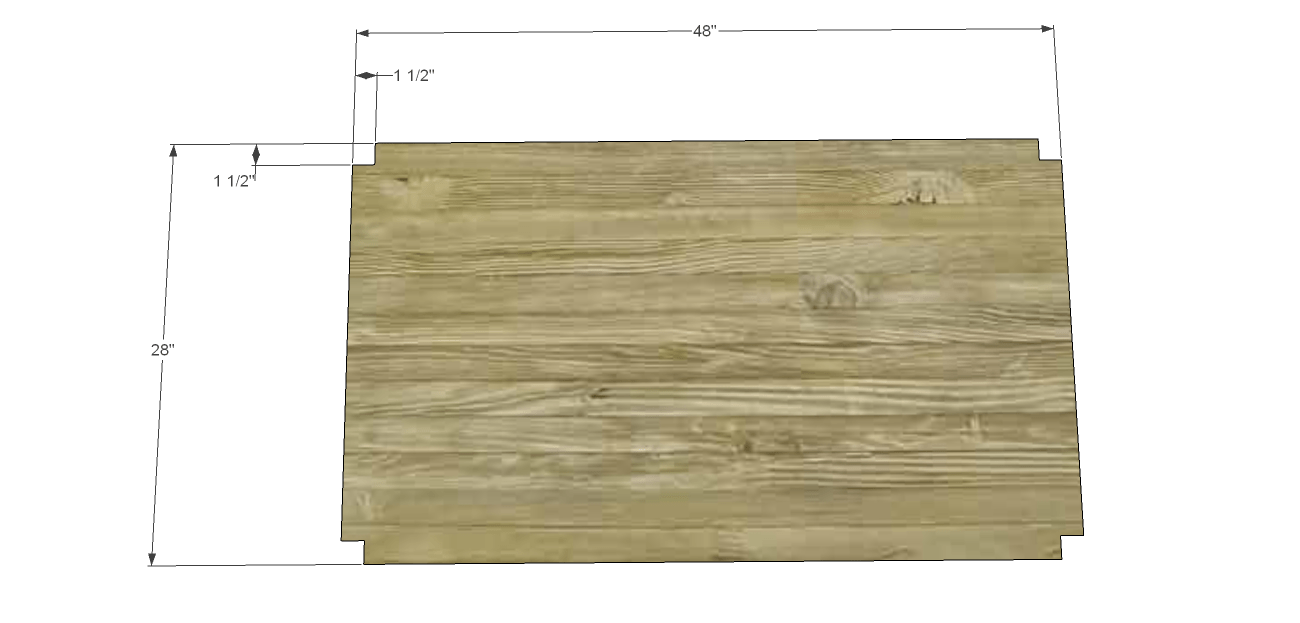
Cut the pieces for the legs and the bottom. Cut the notches in the bottom using a jigsaw. With the pocket hole jig set for ¾” material, drill pocket holes in each notch as shown.
-
Step Two
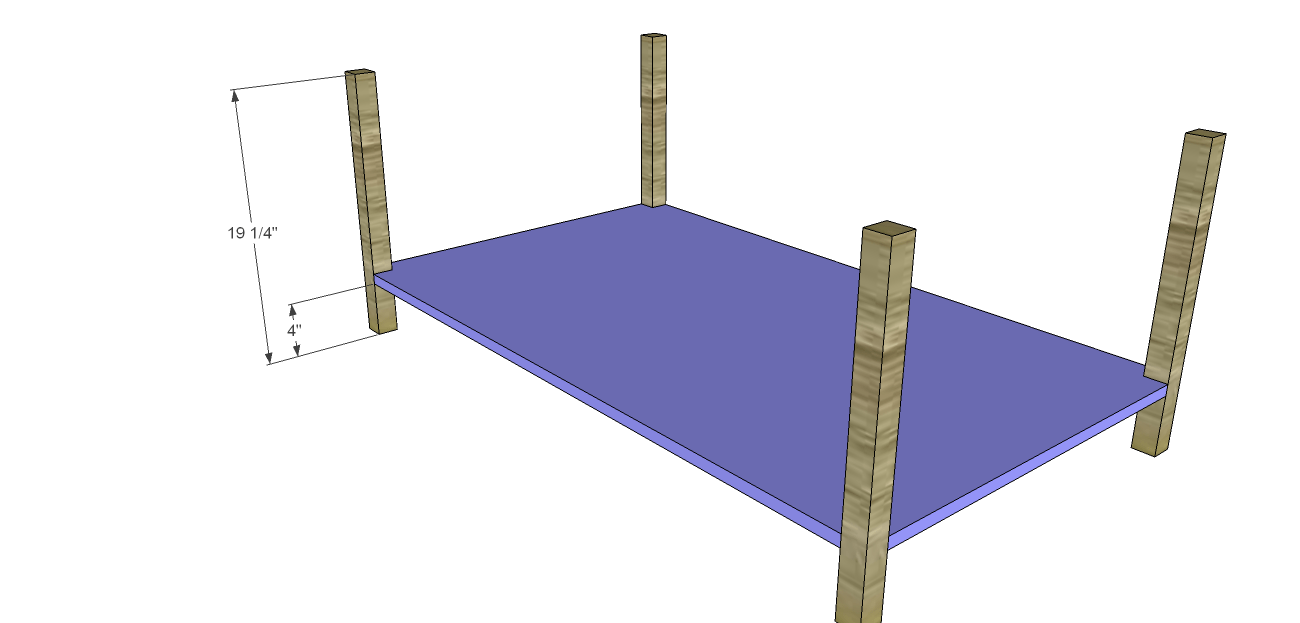
Position the legs in the notches as shown then secure using glue and 1-1/4” pocket hole screws.
-
Step Three
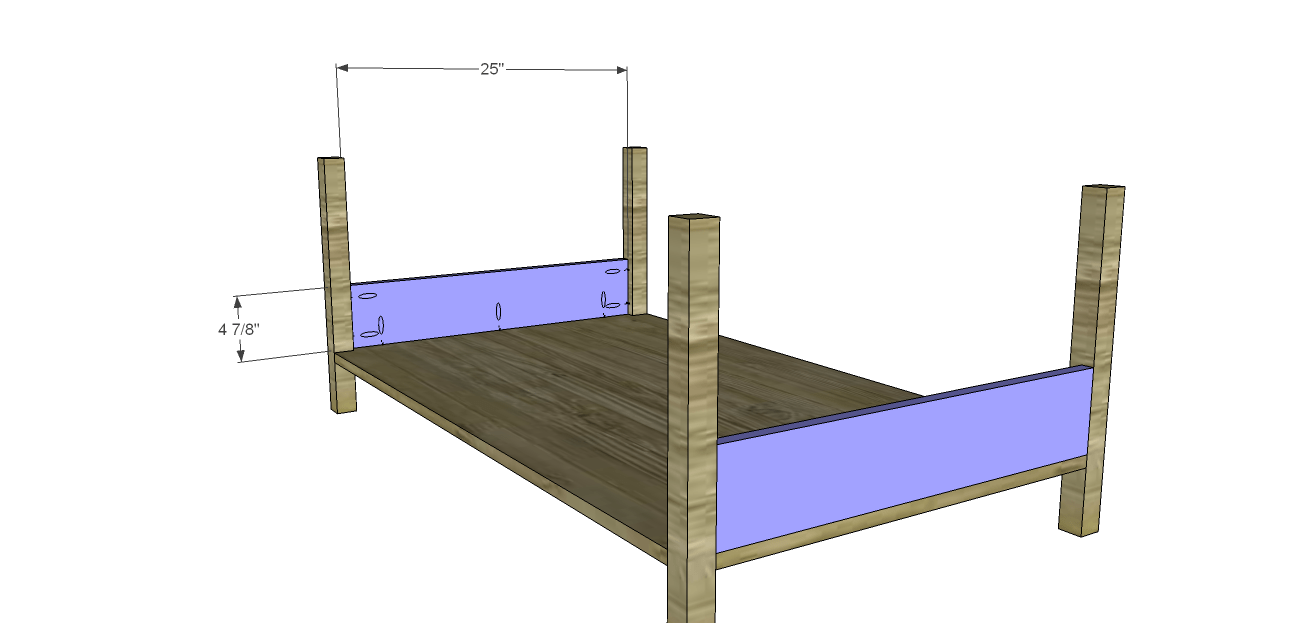
Cut the pieces for the sides and drill pocket holes in one long edge of each piece. Secure the sides to the bottom between the legs using glue and 1-1/4” pocket hole screws. The outside face of the sides will be flush with the outside face of the legs.
-
Step Four
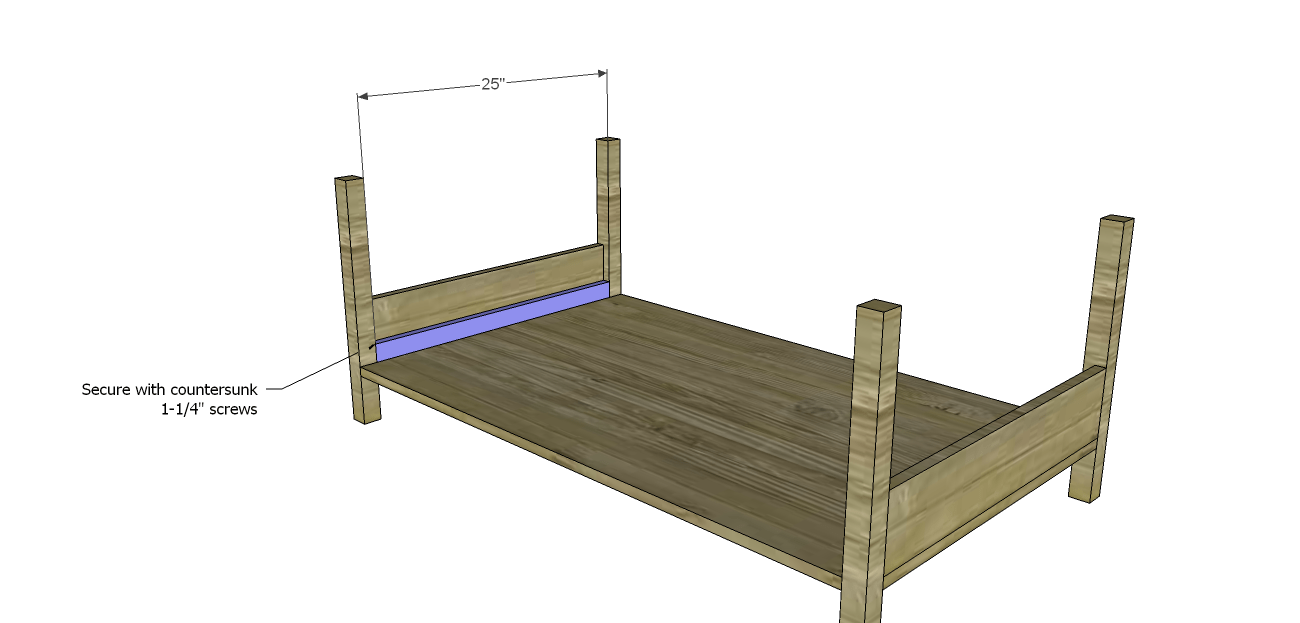
Cut the pieces for the drawer spacers. Position the spacers between the legs so they rest on the bottom and secure in place using glue and countersunk 1-1/4” screws.
-
Step Five
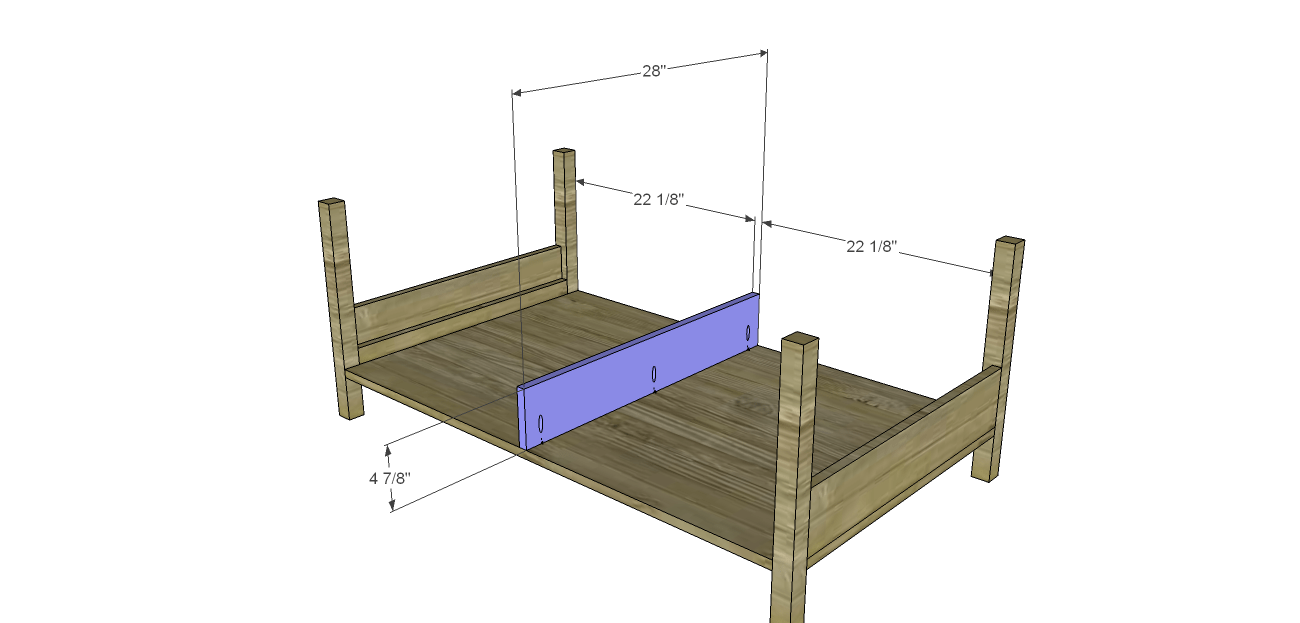
Cut the piece for the drawer divider and drill pocket holes along one long edge. Secure to the bottom as shown using glue and 1-1/4” pocket hole screws.
-
Step Six
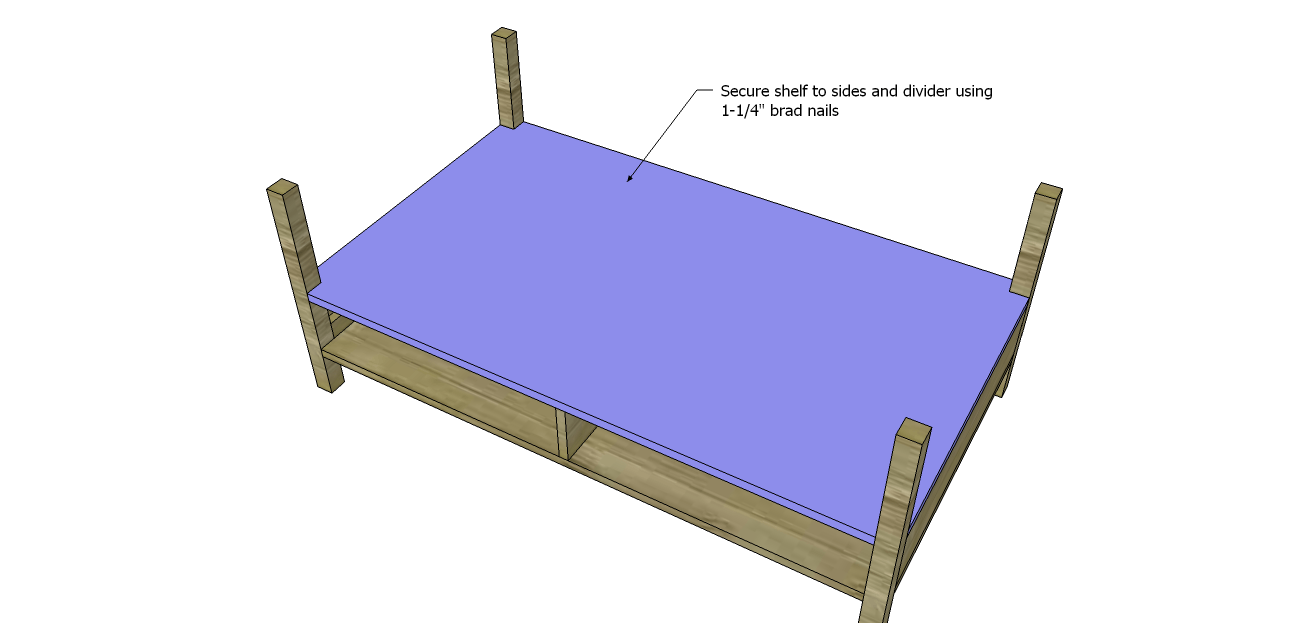
Cut the piece for the shelf and cut the notches using a jigsaw. Spread glue on the top edge of the sides and the divider, then position the shelf on top.
-
Step Seven
Secure the shelf using glue and 1-1/4” brad nails through the shelf into the sides and divider.
-
Step Eight
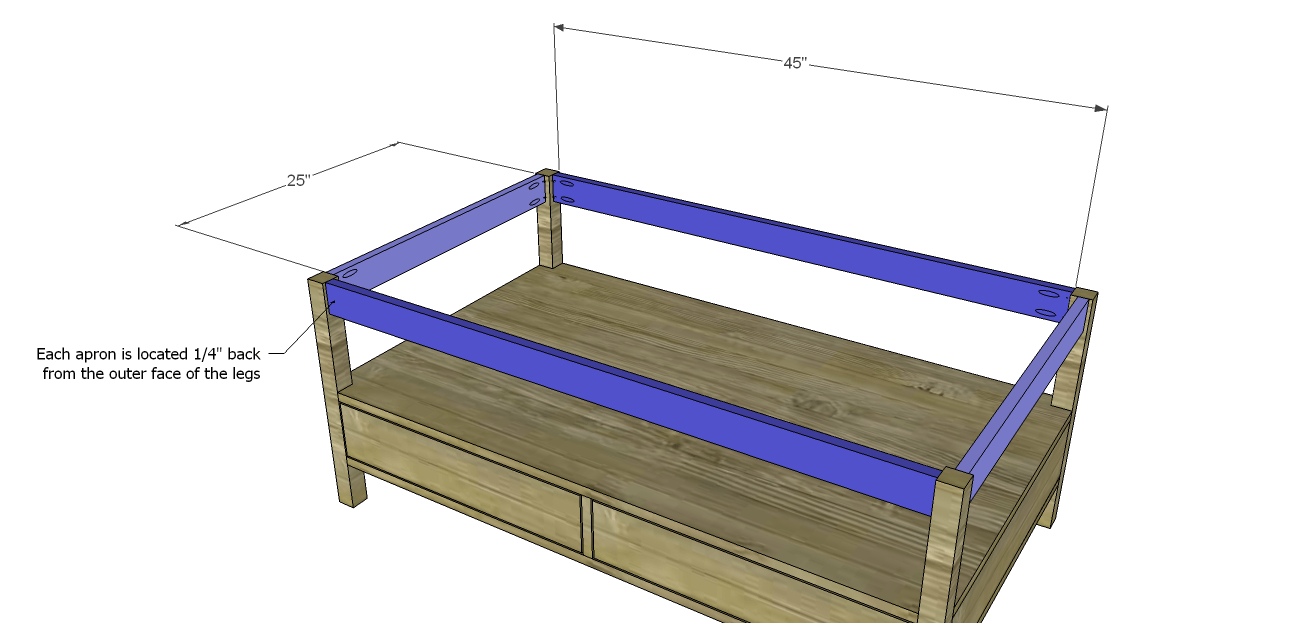
Cut the pieces for the upper aprons and drill pocket holes in each end. Spread glue on the ends of each piece and position the pieces as shown locating them ¼” back from the outside face of each leg. Secure using 1-1/4” pocket hole screws.
-
Step Nine
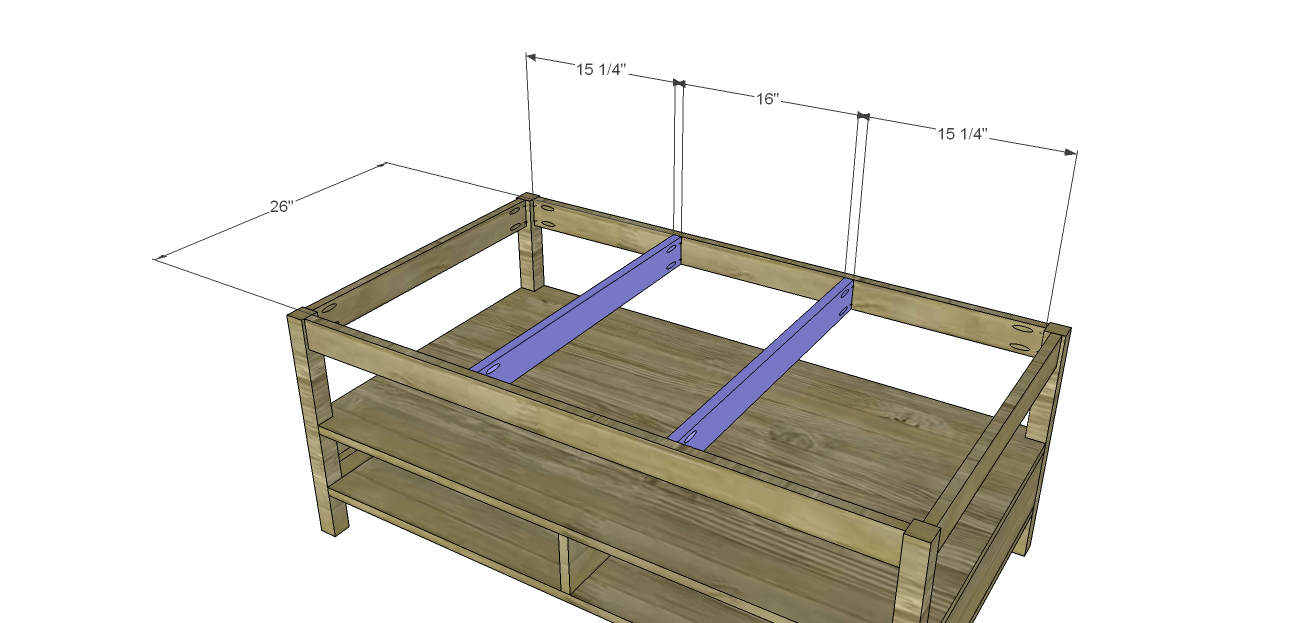
Cut the pieces for the center supports and drill pocket holes in the ends of each piece. Secure to the longer aprons using glue and 1-1/4” pocket hole screws.
-
Step Ten
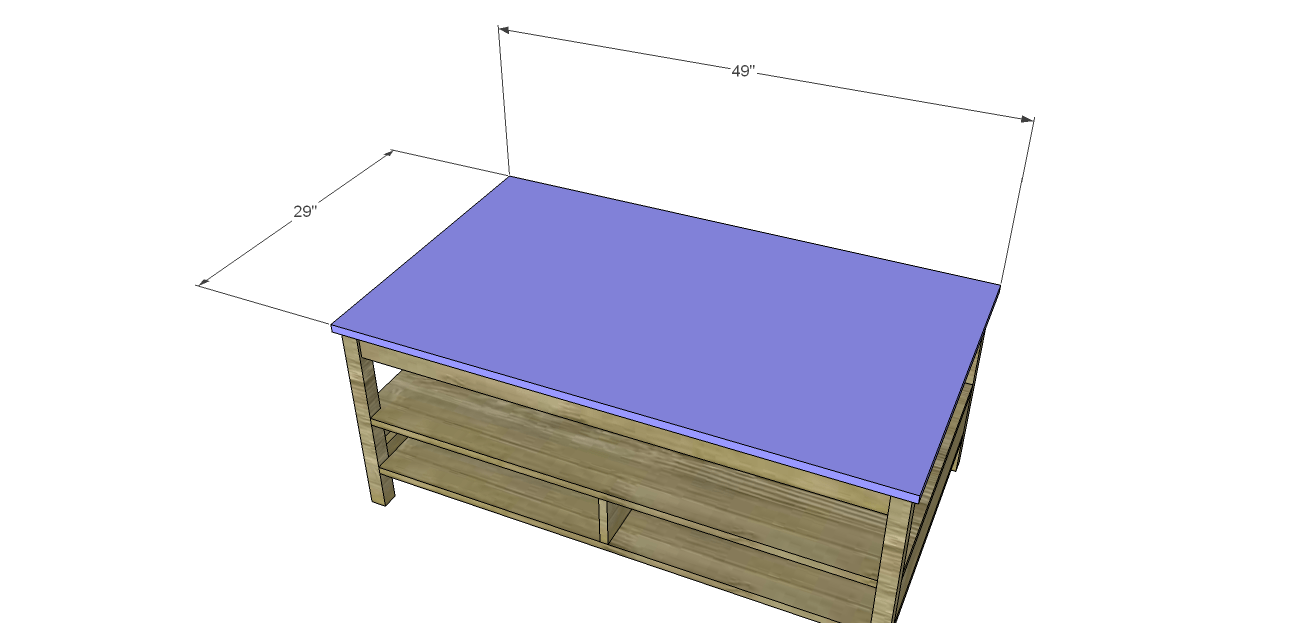
Cut the piece for the top. Spread glue on the top edges of the aprons and the supports. Position the top so that it overhangs by ½” on each side. Secure using glue and 1-1/4” brad nails through the top into the aprons, legs, and supports.
-
Step Eleven
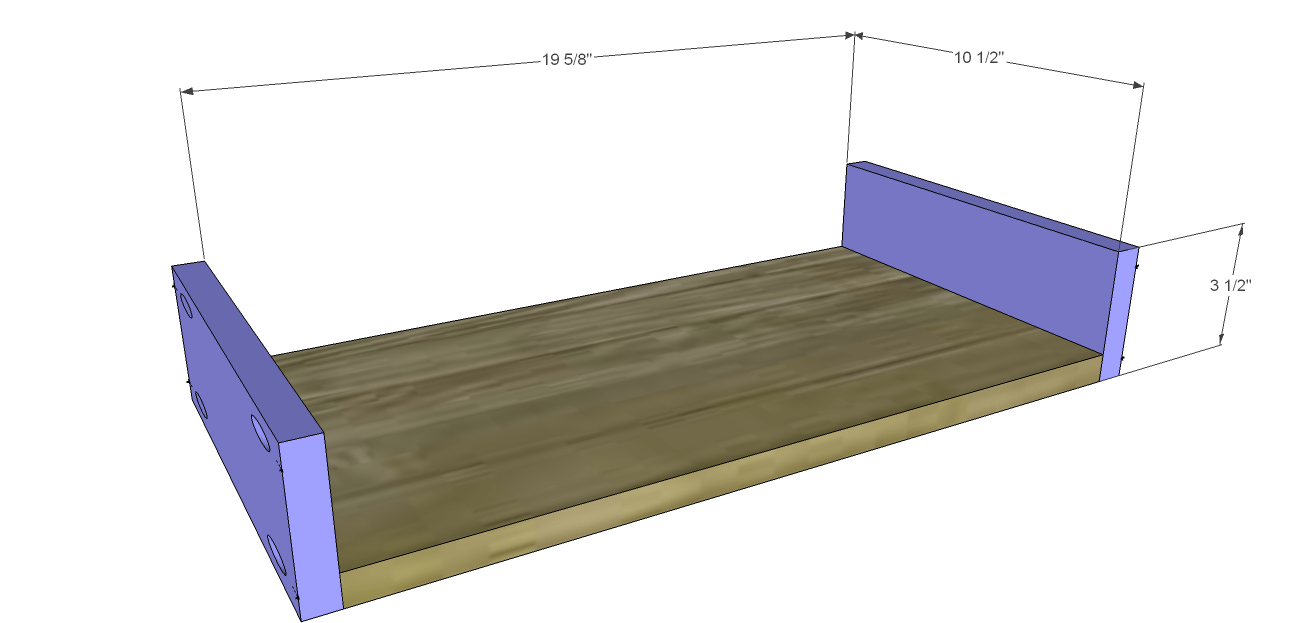
Cut the pieces for the drawer boxes. Drill pocket holes in all four edges of the bottom pieces as well as each end of the side pieces. Secure the sides to the bottom using glue and 1-1/4" pocket hole screws.
-
Step Twelve
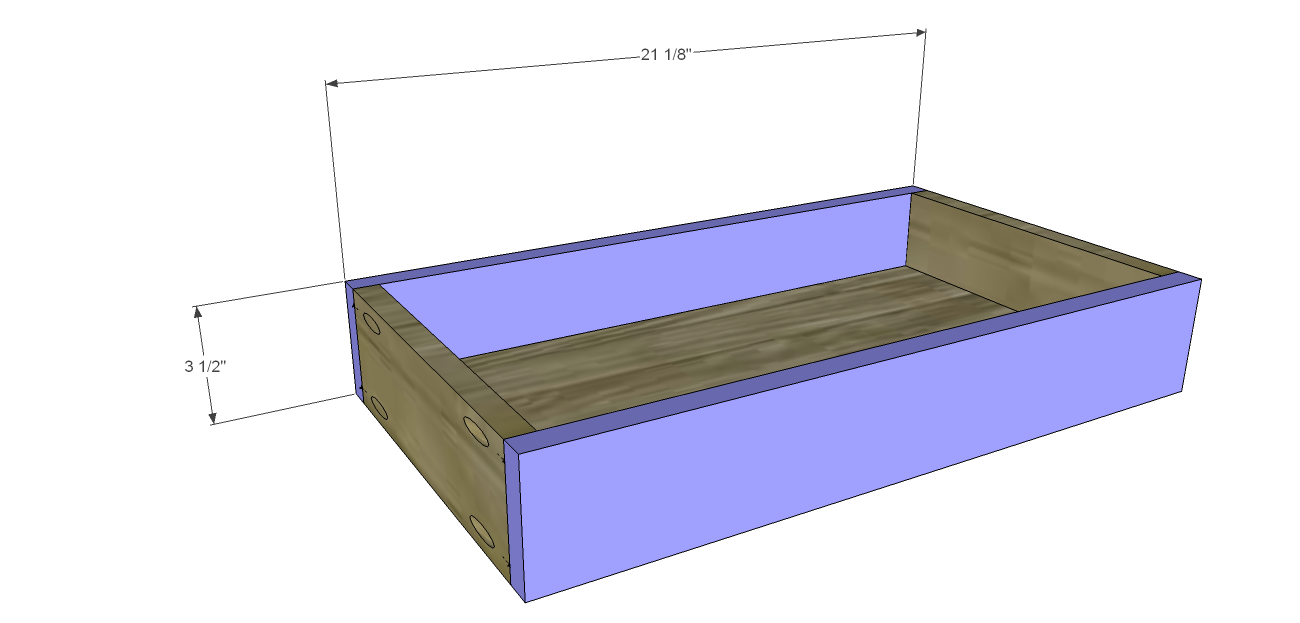
Secure the front and back pieces using glue and 1-1/4" pocket hole screws through the bottom pieces, as well as the side pieces.
Install the drawer slides in the cabinet according to the manufacturer's installation instructions locating them 3/4" back from the outside faces of the legs. Install the other half of the drawer slides on the bottom of the drawer boxes. Make any necessary adjustments. -
Step Thirteen
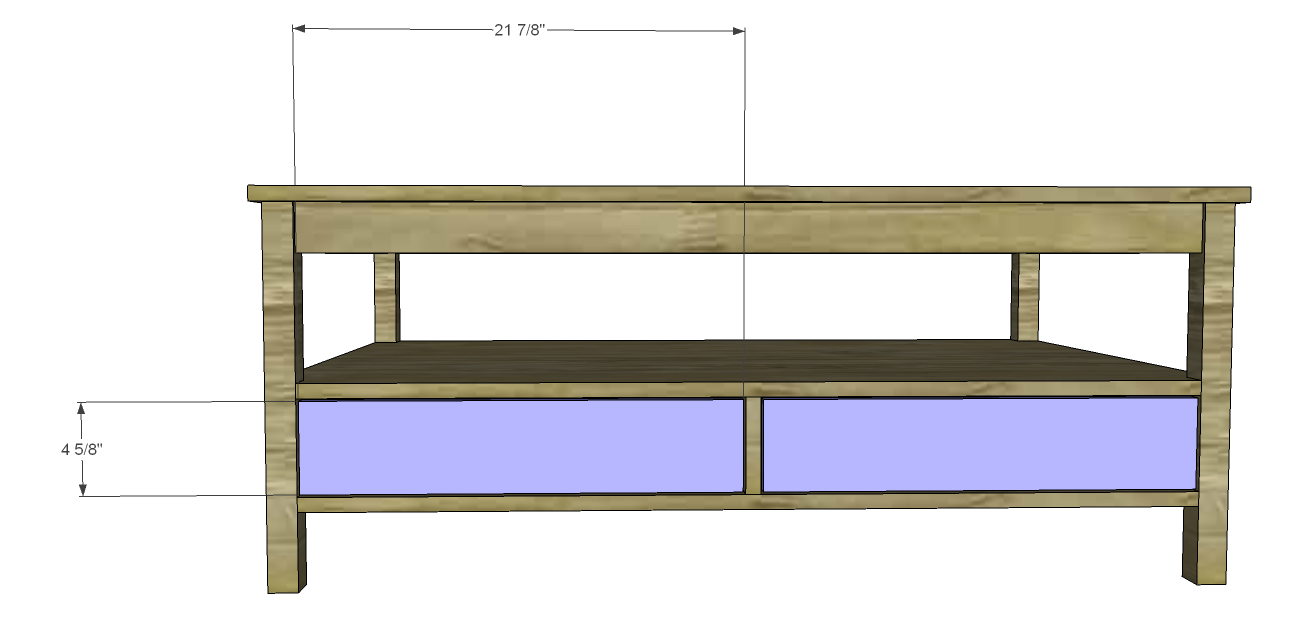
Cut the pieces for the drawer fronts. Mark the position for the drawer pulls and drill the holes. Shim the drawer front in the opening – there will be a 1/8” gap around all sides – then drive screws through the holes for the drawer pulls into the drawer box. Open the drawer, and secure the drawer front using countersunk 1-1/4” screws from the inside. Remove the screws from the holes for the drawer pull then finish drilling the holes. Install the drawer pull.


