


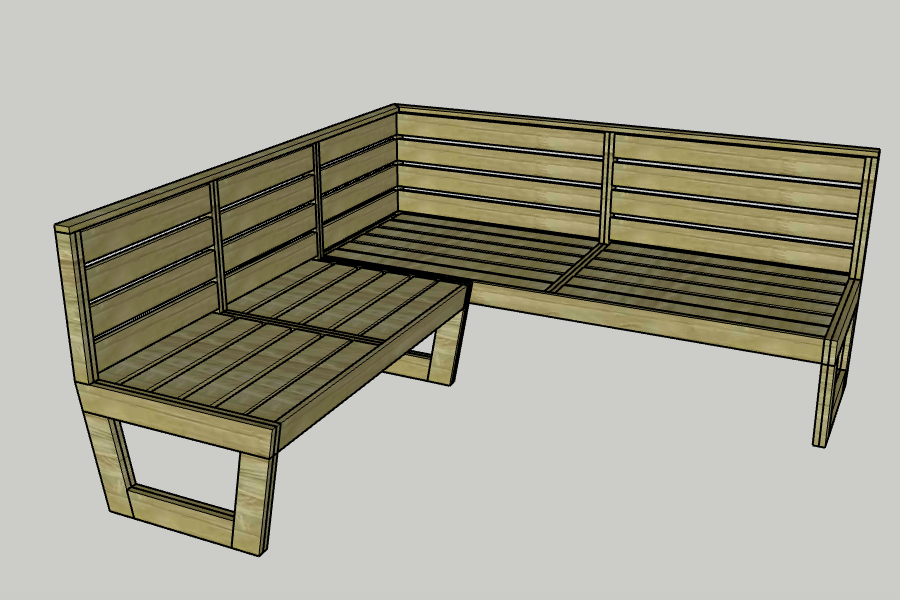


This DIY modern outdoor sectional couch is perfect for summer evenings with friends or winter evenings around the fire. The modern design is simple and functional and saves hundreds of dollars compared to buying one online.
Tools
Kreg Tools


Other Tools
-
Miter saw

-
Table saw
-
Measuring tape
-
Clamps
Materials
Wood Products
- 27 Boards , 3/4" x 3 1/2" x 8'
Hardware & Supplies
- 1 Box of 1 1/4" Kreg pocket hole screws (See tools list)
- 1 Box of 2 1/2" Kreg pocket hole screws (See tools list)
- 1 Protective outdoor sealant
- 1 Wood glue
- 5 Outdoor sofa cushions
Directions
-
Step one- Glue and clamp
Start by pairing up each leg piece with another identical piece (2 Top Legs, 2 Side Legs, 2 Bottom Legs and gluing and clamping them together.
Drill two pocket holes on each short end of each Center Support for the Short Couch and Long Couch. Then glue two Center Supports together (with pocket holes on the outside) and clamp and repeat for the other two.
Glue each Back Post for the Short Couch and Long Couch into pairs.
-
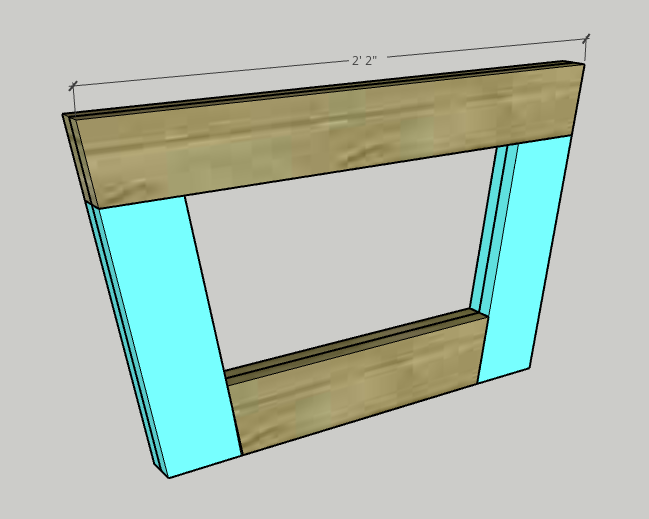
Step two- Assemble legs
To build the first leg, drill two pocket holes on the top edge of the Side Legs and both edges of the Bottom Legs.
Using wood glue and pocket hole screws, attach the Side Legs into the Top Leg so that the 10 degree miter stays in line.
Using wood glue and pocket hole screws, attach the Bottom Leg between the bottom of the Side Legs.
Repeat to make three other legs.
-
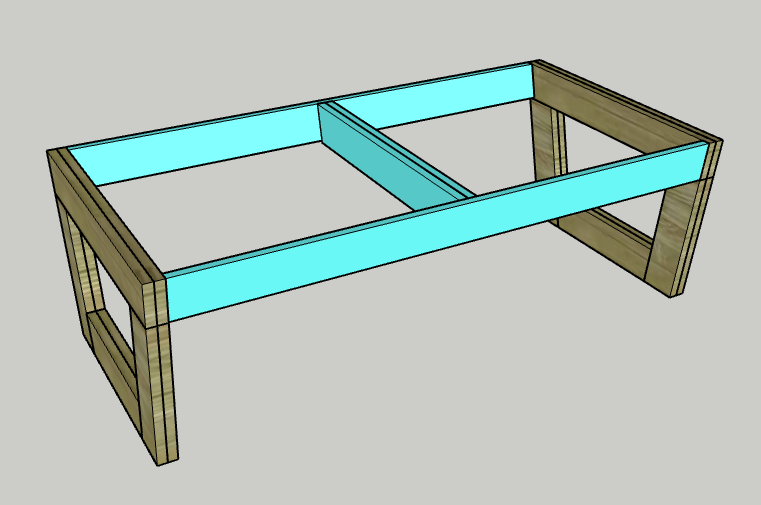
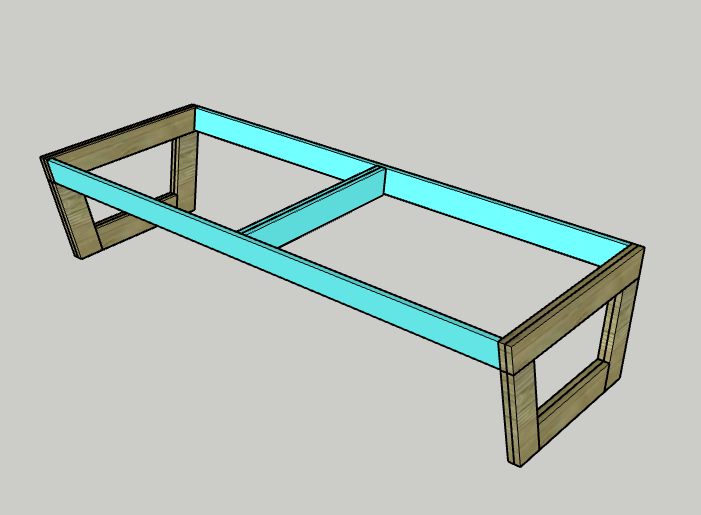
Step three- Short couch frame
Drill two pocket holes on each short end of the Short Couch Front and Back pieces.
Using wood glue and pocket hole screws, attach each to the inside front edges of the Top Legs section of two of the legs you built in step two.
Using wood glue and pocket hole screws, attach a glued together Center Support to the exact center of the Front and Back, which should be about 22 5/8".
-
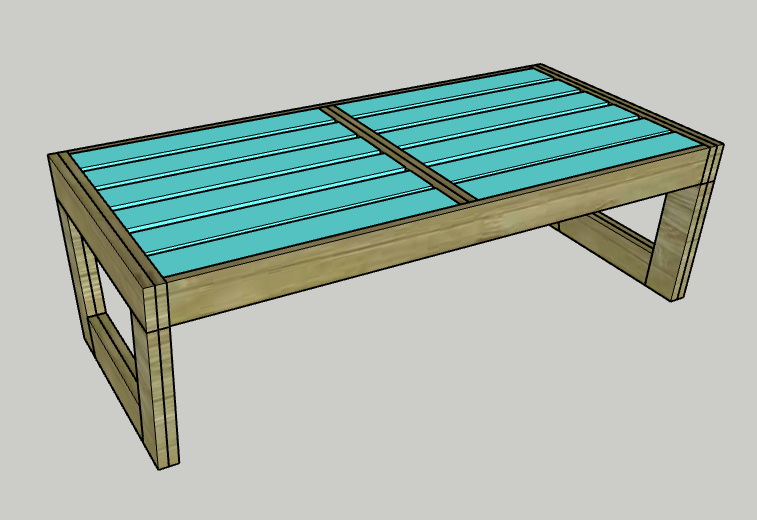
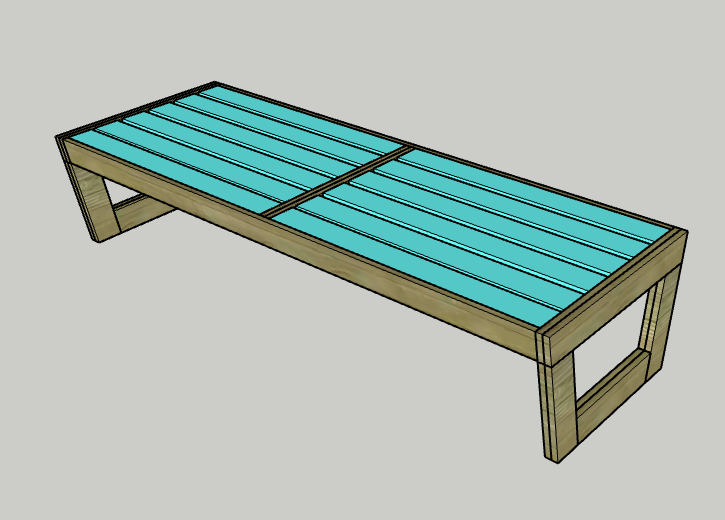
Step four- Short couch slats
Cut a 10 degree bevel on one long edge of four of the Short Couch Slats.
Drill two pocket holes on both short ends of each Short Couch Slat.
Using wood glue and pocket hole screws, attach one of the beveled Slats between one of the Legs and Center Support and flush against the front board.
With a 3/4" gap between, repeat this with four flat edge Slats.
Finish the side with a second beveled slat flush against the back.
Repeat for the other side.
-
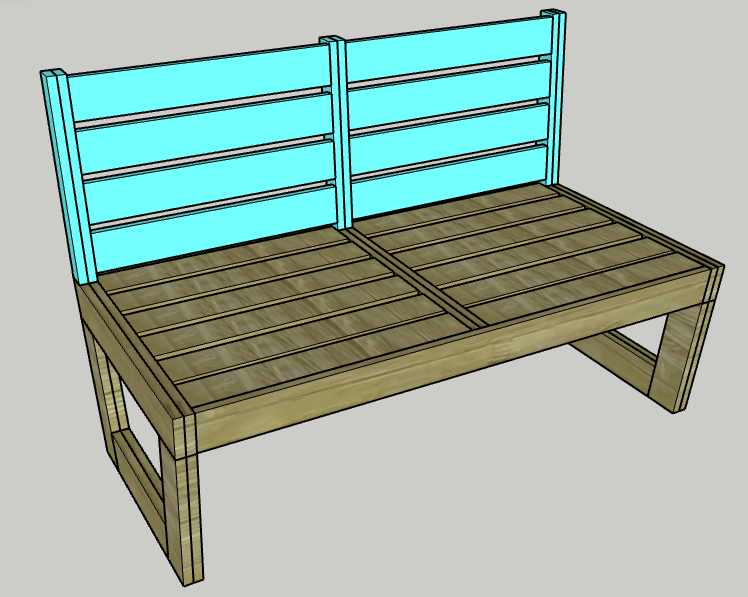
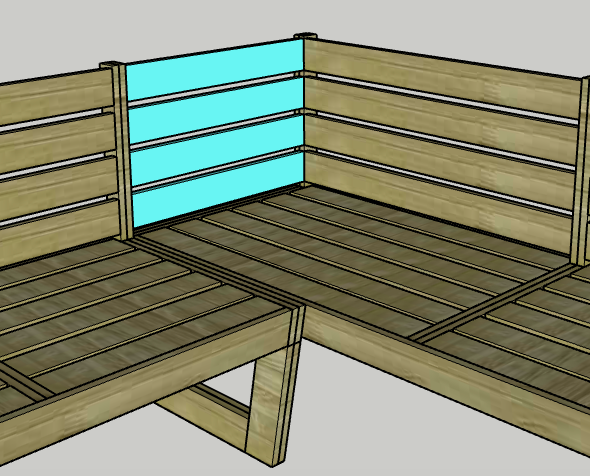
Step five- Short couch back
Drill two pocket holes on each end of each of the Short Couch Back Slats.
Drill two pocket holes on each end of the Back Posts (with one pocket hole on each board).
Starting 3/4" from the bottom of one of the Back Posts, use wood glue and pocket hole screws to attach a Back Slat.
Use a 3/4" spacer and repeat the process for three more Back Slats.
Then, attach each of those Back Slats to a second Back Post.
Repeat the steps to add the remaining four Back Slats and remaining Back Post on the other side.
-
Step six- Long couch frame
Drill two pocket holes on each short end of the Long Couch Front and Back pieces.
Using wood glue and pocket hole screws, attach each to the inside front edges of the Top Legs section of the remaining two legs you built in step two.
Using wood glue and pocket hole screws, attach the remaining glued together Center Support to the exact center of the Front and Back, which should be about 35 1/2".
-
Step seven- Long couch slats
Cut a 10 degree bevel on one long edge of four of the Long Couch Slats.
Drill two pocket holes on both short ends of each Long Couch Slat.
Using wood glue and pocket hole screws, attach one of the beveled Slats between one of the Legs and Center Support and flush against the front board.
With a 3/4" gap between, repeat this with four flat edge Slats.
Finish the side with a second beveled slat flush against the back.
Repeat for the other side.
-
Step eight- Long couch back
Drill two pocket holes on each end of each of the Long Couch Back Slats.
Drill two pocket holes on each end of the Back Posts (with one pocket hole on each board).
Starting 3/4" from the bottom of one of the Back Posts, use wood glue and pocket hole screws to attach a Back Slat.
Use a 3/4" spacer and repeat the process for three more Back Slats.
Then, attach each of those Back Slats to a second Back Post.
Repeat the steps to add the remaining four Back Slats and remaining Back Post on the other side.
-
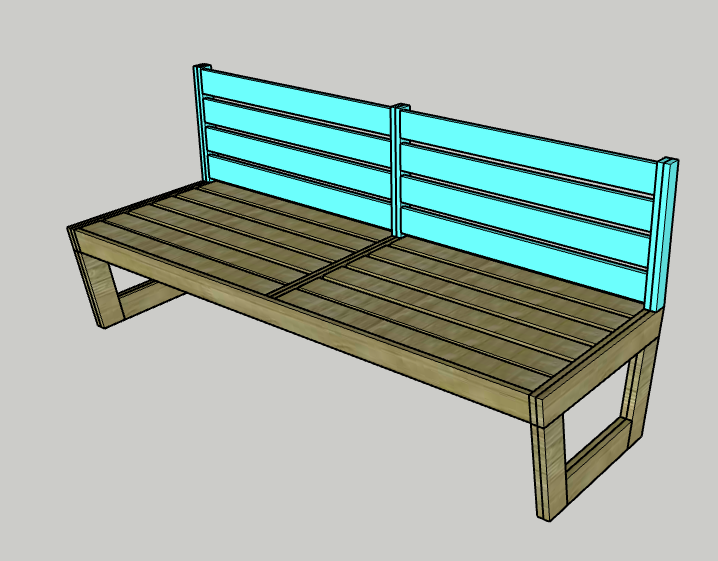
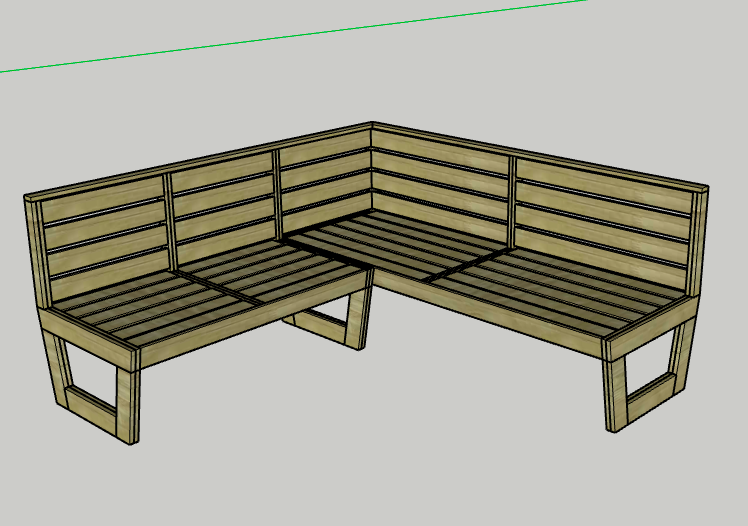
Step nine- Add connector slats
Drill two pocket holes in each short edge of the Connector Slats.
Push the short couch up against the long couch to form a 90 degree angle in the corner and a flush edge along the back.
Using a 3/4" thick spacer, use wood glue and pocket hole screws to attach a Connector Slat from the front corner Back Post of the long couch to the outside edge of the Back Post on the short couch.
Repeat the process for the remaining three Connector Slats.
-
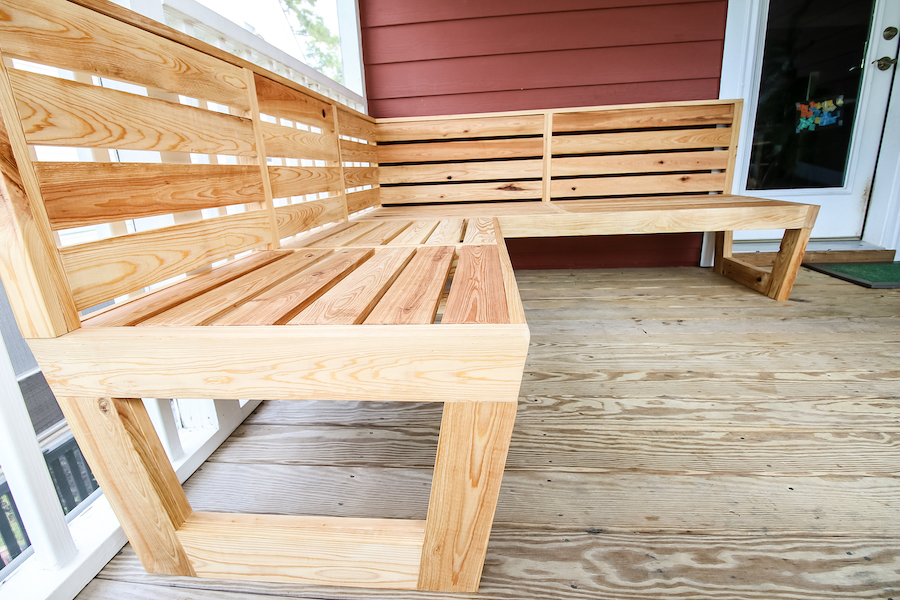
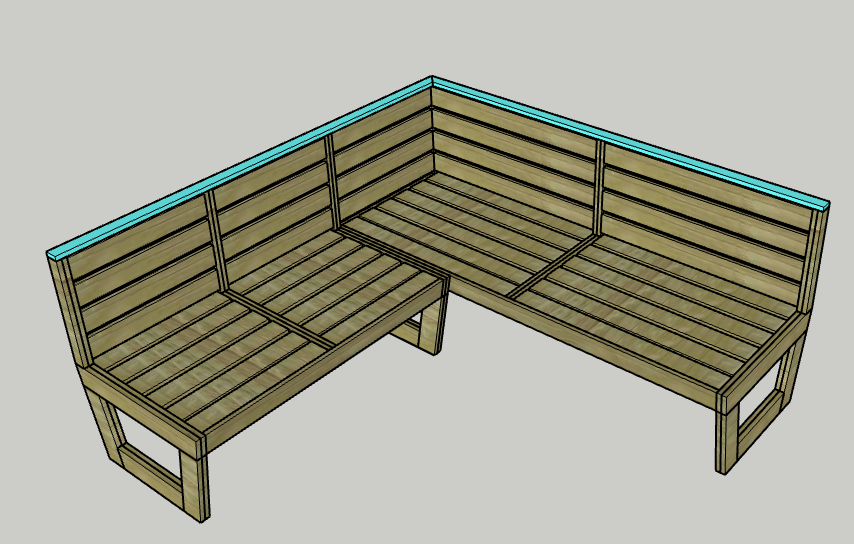
Step 10- Add tops
Lay the Top for the long couch along the top of the Back Posts with the 45 degree end in the corner.
Using wood glue and pocket hole screws, attach the Top to the Back Posts.
Repeat for the Top for the short couch.
-
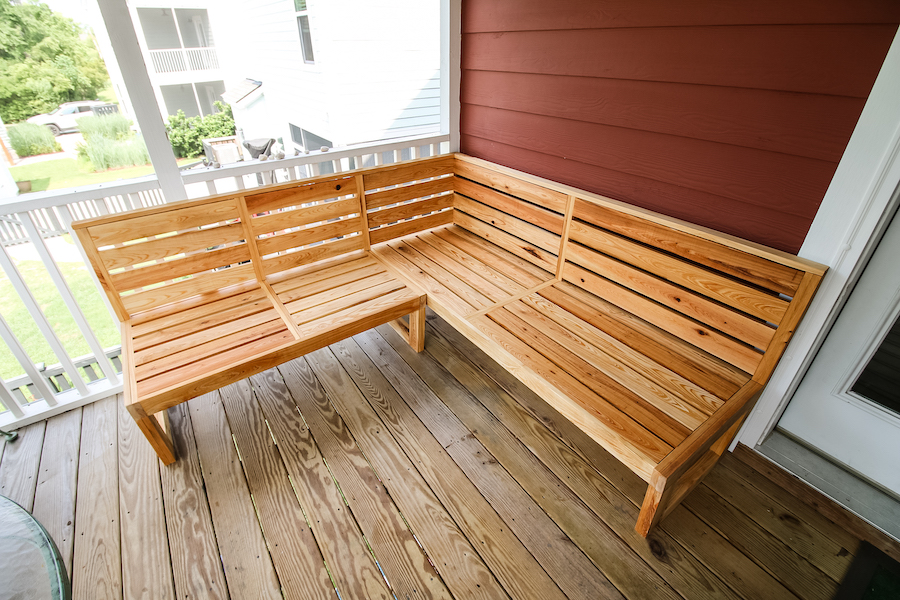
Step 11- Seal for outdoor use
Ensure you use an outdoor sealant on the wood to protect it from weather and water.
Additionally, considering using a sealant spray on the cushions as well to protect them from the elements.
-
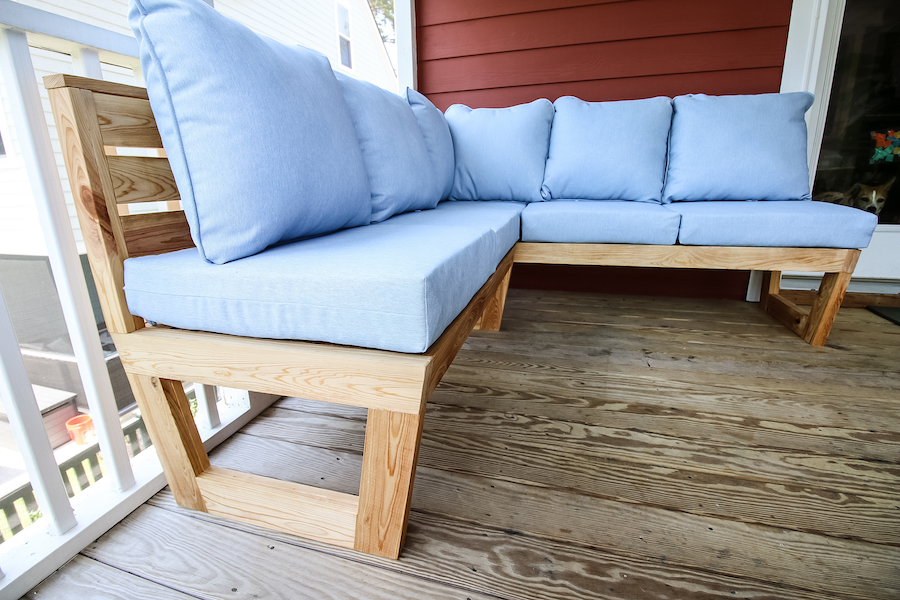
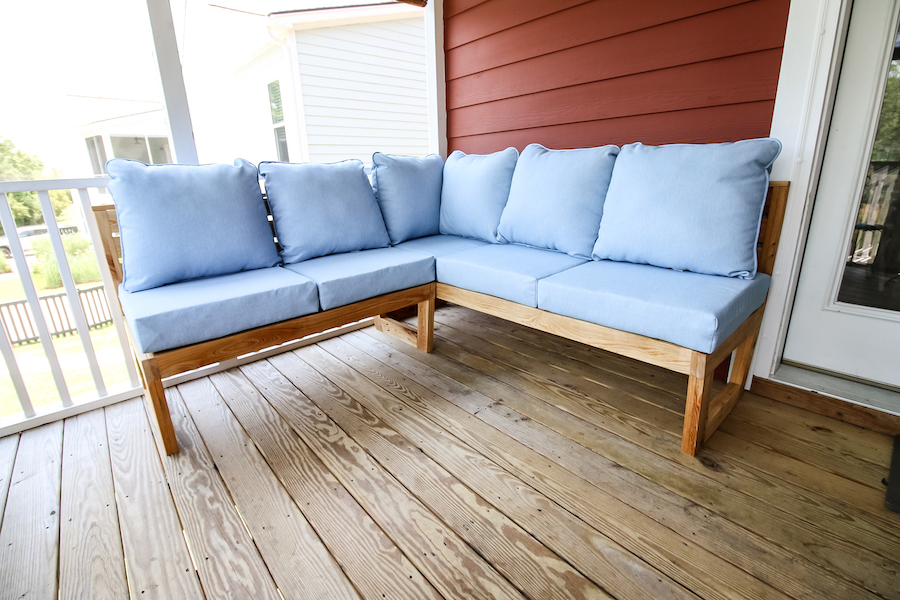
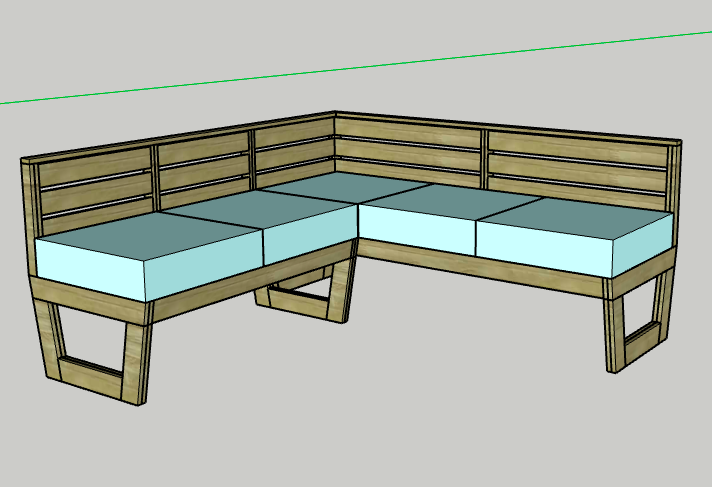
Step 12- Add cushions
Place cushions and throw pillows on top of the couch and enjoy snuggling up all summer long!
-
Step 13- Enjoy!
Enjoy your handiwork and tag @CharlestonCrafted on Instagram with a picture!
Check out their website – https://www.charlestoncrafted.com/how-to-build-a-diy-modern-outdoor-sectional-couch/