DIY Freestanding Outdoor Towel Rack
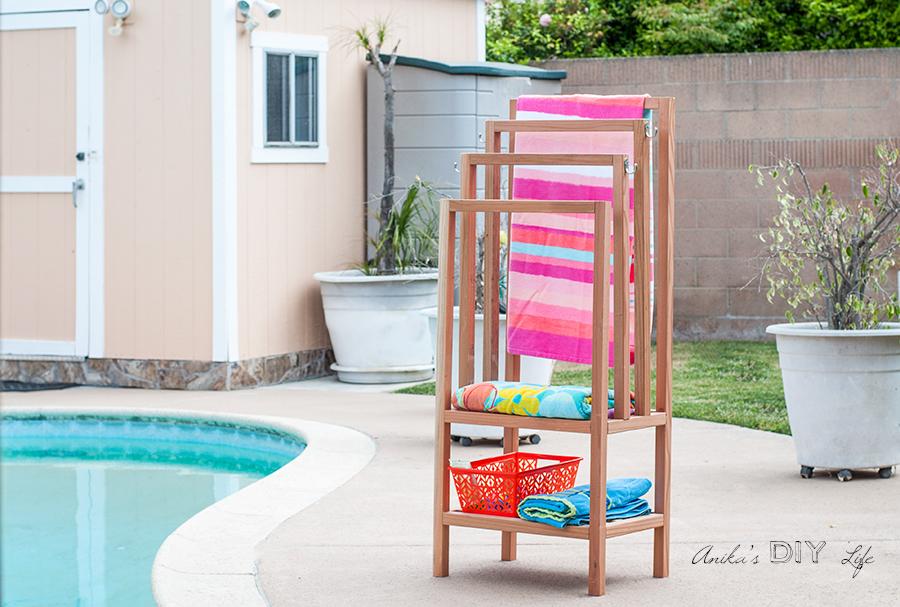
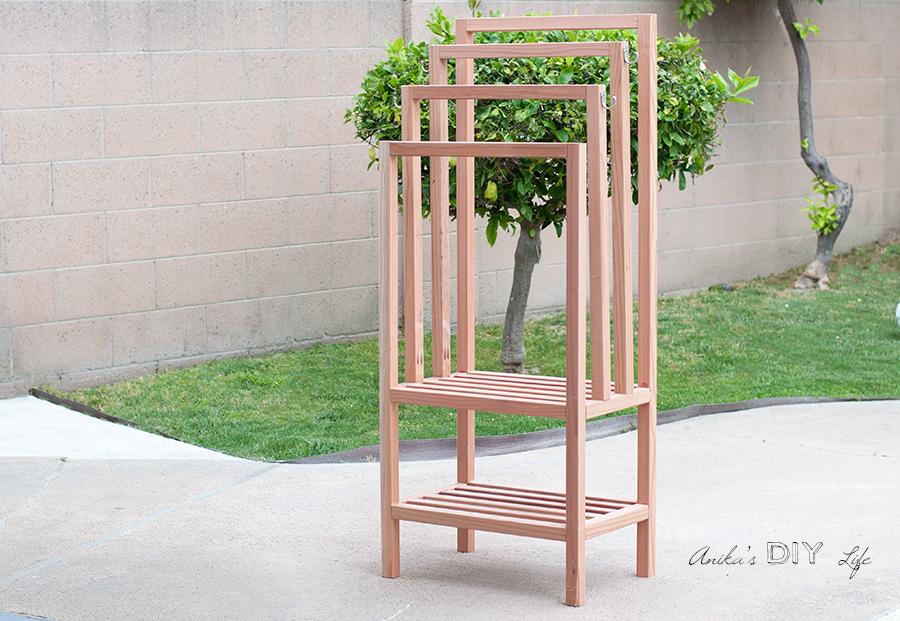
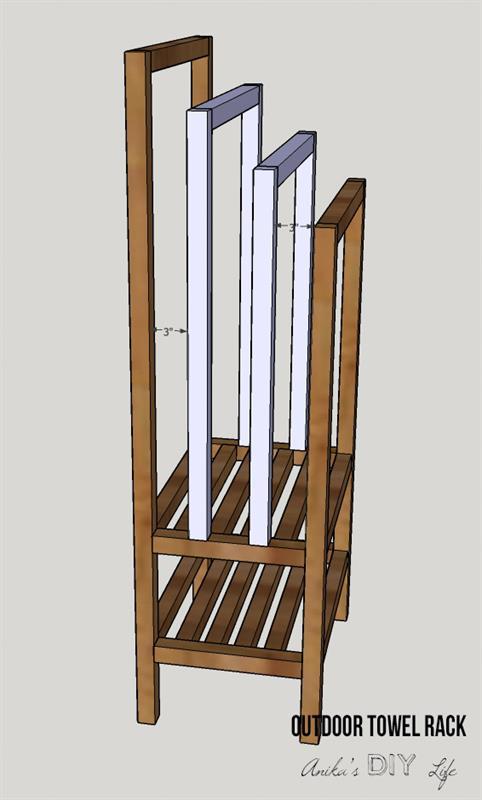
By Anika's DIY LifeBuild this easy freestanding outdoor towel rack this summer. Built using redwood, it makes the perfect addition to any poolside or backyard. It has two shelves for storing supplies and towels too.
Directions
-
Make cuts and pocket holes
Make all the cuts per the cut list and pocket holes. Redwood is typically 1 3/8" x 1 3/8". Be sure to use that setting on the Kreg Jig and the drill bit.
Pocket holes are made on both ends of all the 20" long aprons, 12 3/8" short aprons and on one side of the 29 1/2" and 33 1/2" long sides. 2 Pocket holes per board. -
Make outside frames
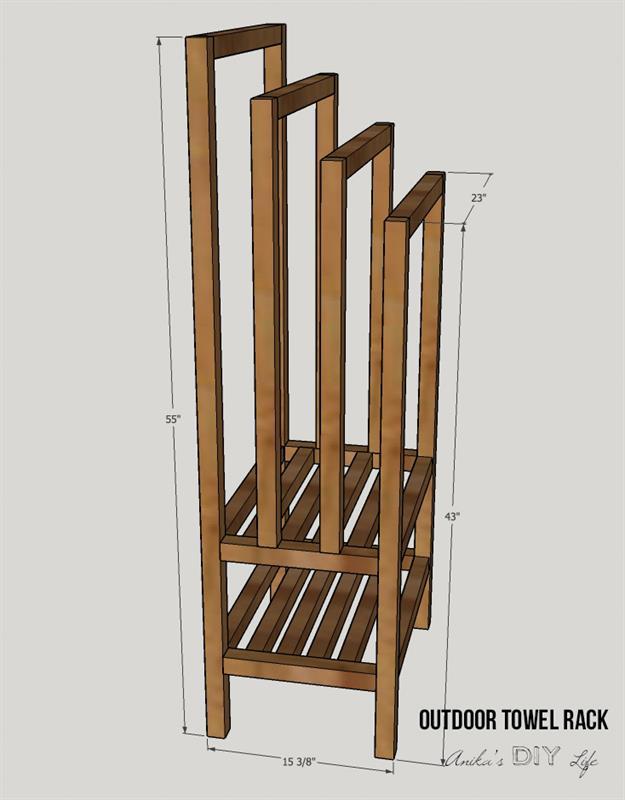
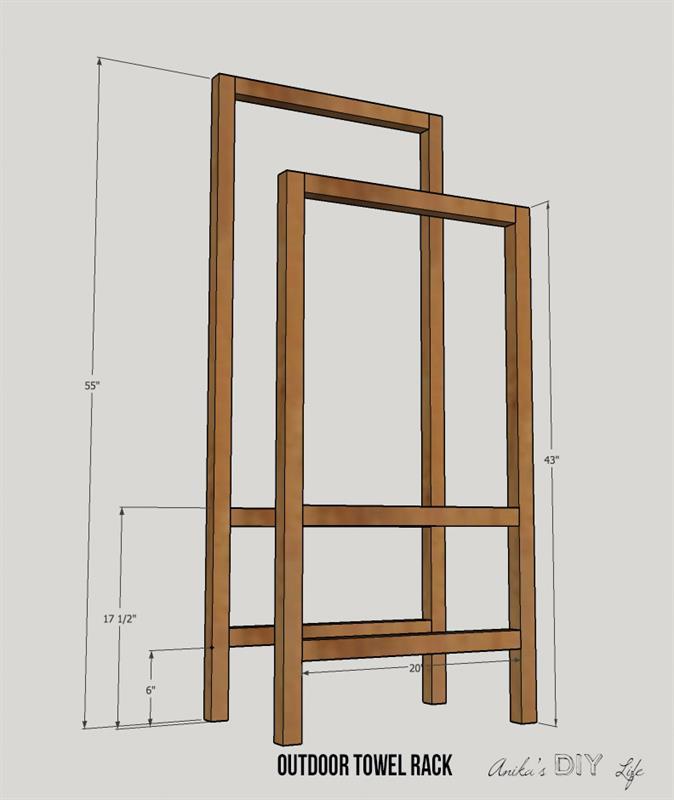
Make frames using the 55" and 43" long sides. The 20" long aprons are placed at 6" and 17 1/2" from the bottom but these can be adjusted based on requirements for the shelf spacing.
Make sure the pocket holes are facing inside (towards to the bottom) -
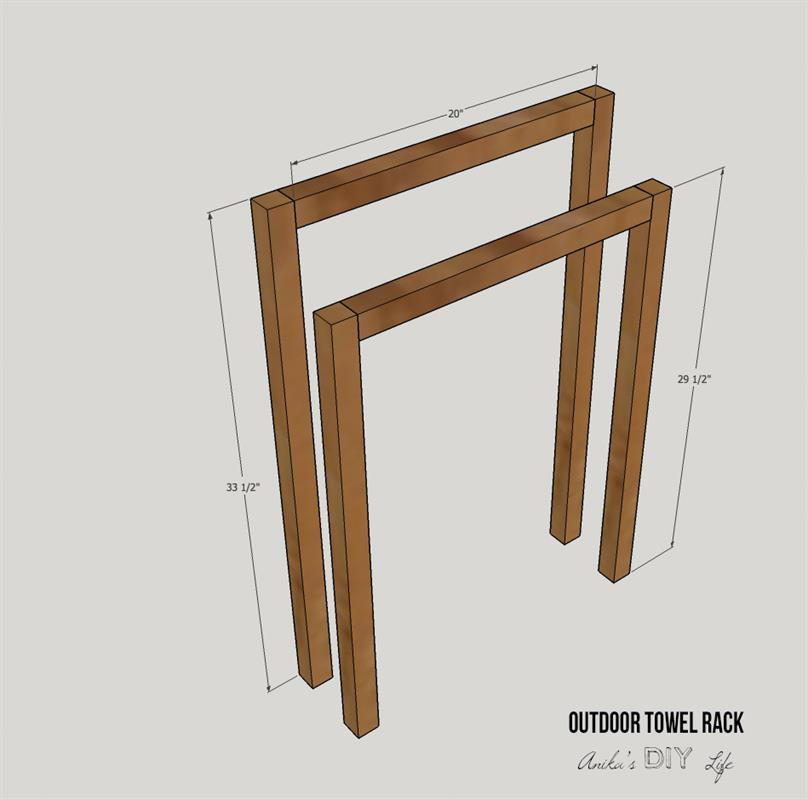
Make inside frames
Make frames using the 33 1/2" and 29 1/2" long sides. Again make sure the pocket holes are facing inside.
-
Build shelves
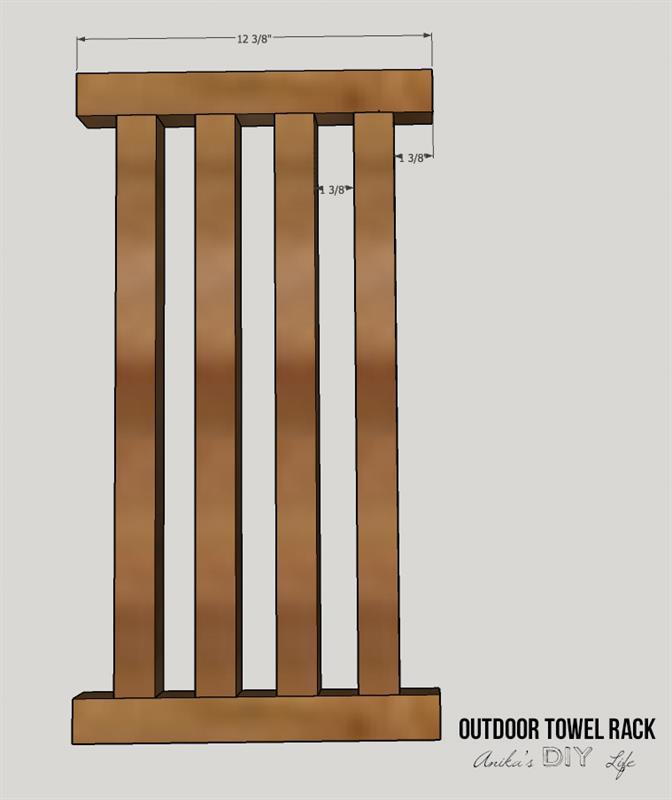
Build shelf using the 12 3/8" short aprons and the 20" shelf slats. The spacing from the ends and in between the slats is 1 3/8". There will be 4 slats per shelf.
Build 2 of these.
Make sure the pocket holes are all on the same side. -
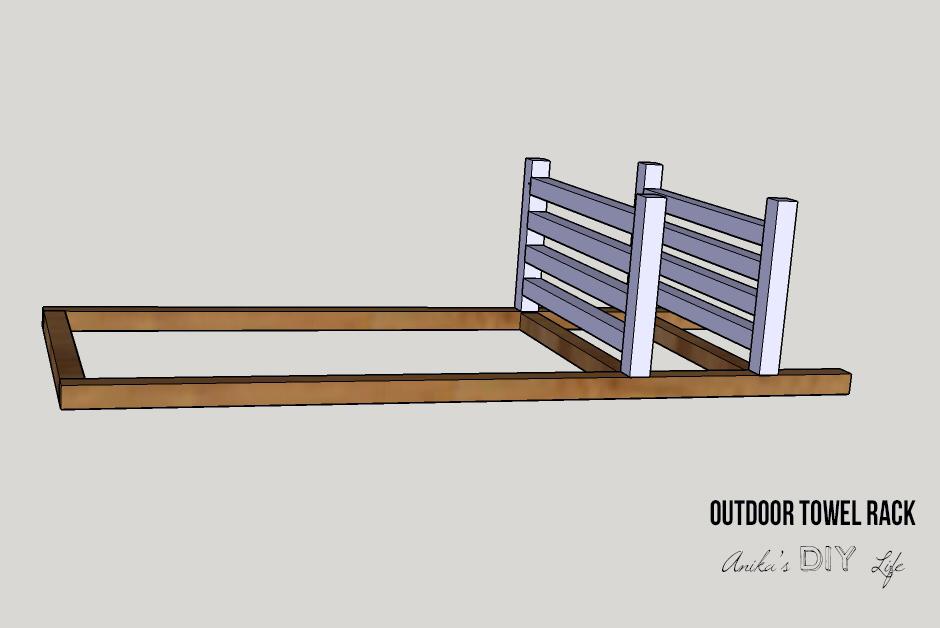
Attach shelves
Attach both shelves to the 55" long frame using pocket hole screws in the short aprons and wood glue. Make sure they are aligned with the 20" long aprons attached in step 2.
-
Attach outer frame
Attach the 43" outer frame to the two shelves using pocket holes in the short aprons.
-
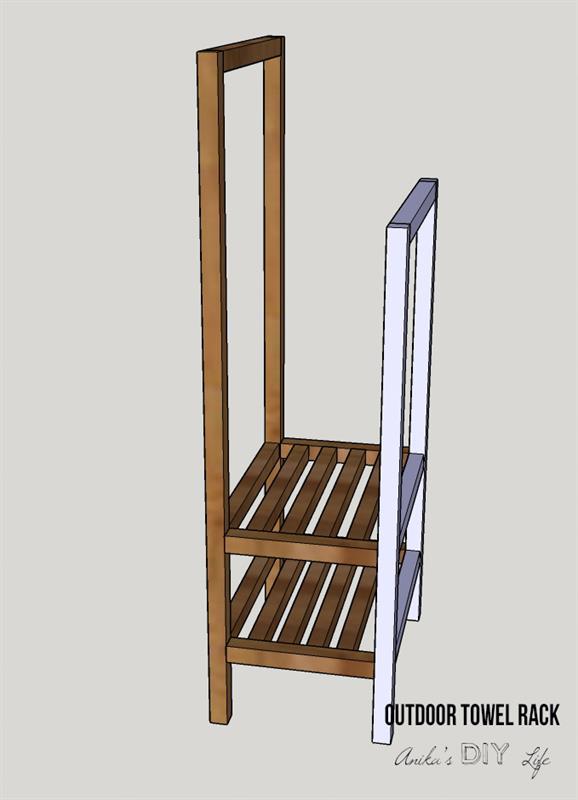
Attach middle frames
Attach the 33 1/2" and 29 1/2" frames to the shelves using pocket hole screws in the sides.
The distance from each outer frame is 3". -
Visit anikasdiylife.com
For pictures of the build, please visit https://www.anikasdiylife.com/diy-outdoor-towel-rack/
For lots more plans and projects visit www.anikasdiylife.com


