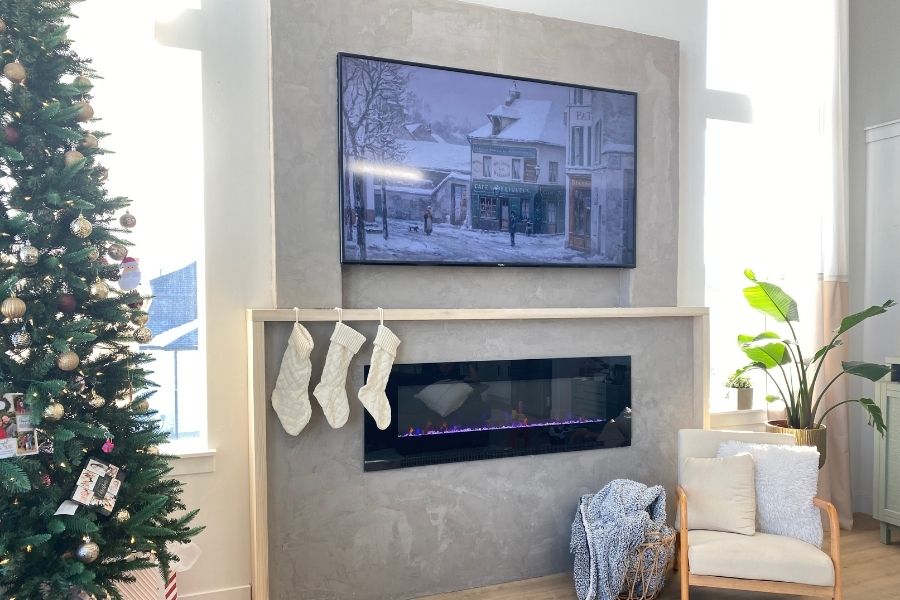
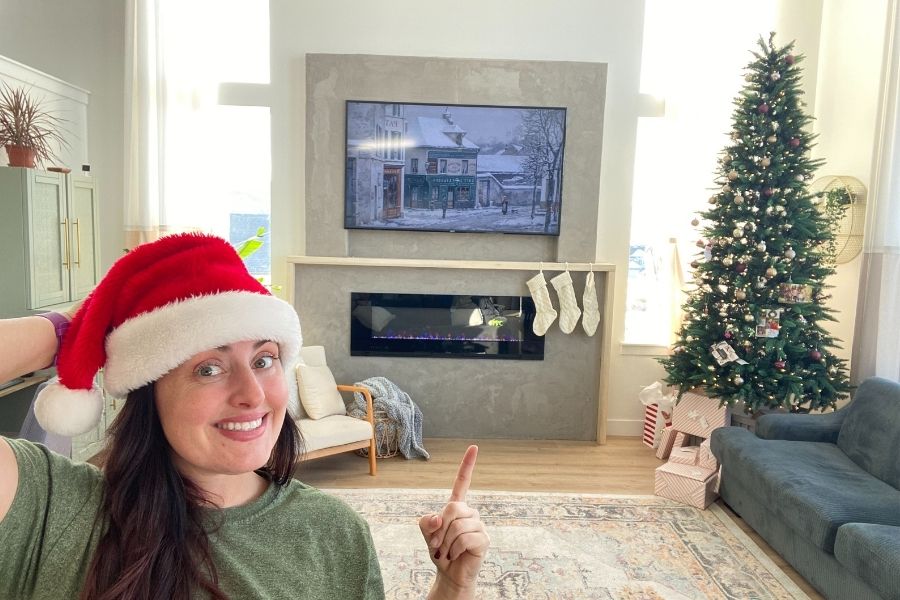


Have you always wanted a fireplace but didn't build your home to accommodate one? This is the ANSWER! This is a built in electric fireplace with a faux cement surround. Using pocket holes to build the entire frame makes this process much easier than it looks!
Tools
Kreg Tools


Other Tools
-
Miter Saw

-
Paint mixer
-
Trowel or 4” wide putty knife
-
Drywall mud pan
-
Ladder
Materials
Wood Products
- 3 Bottom Fire Place , 2" x 6" x 8
- 4 Bottom Fire Place , 2" x 4" x 8"
- 1 Piece of wood trim (Bottom Fire Place) , 1⁄2" x 2" x 4" piece of
- 3 Pieces concrete board (Bottom Fire Place) , 3' x 5'
- 2 Corner bead pieces (Bottom Fire Place) , 1.5' x 10'
- 3 Hardwood pieces 8/4 lumber for mantle (Bottom Fire Place) , 9'
- 2 Concrete boards (For Upper Fireplace) , 3' x 5'
- 2 Drywall corner bead pieces for the sides and top edges (For Upper Fireplace)
Hardware & Supplies
- 1 Box of 2.5” Kreg Jig screws (See tools list)
- 1 Power pro 2.5” interior construction screws
- 1 25lbs bag Planipatch skim coat
- 1 Drywall seam tape
- 1 Box of concrete board screws
- 1 Concrete board scoring knife - or diamond cutting wheel for grinder
- 1 60” Cambridge electric Fireplace
Directions
-
Assemble bottom frame
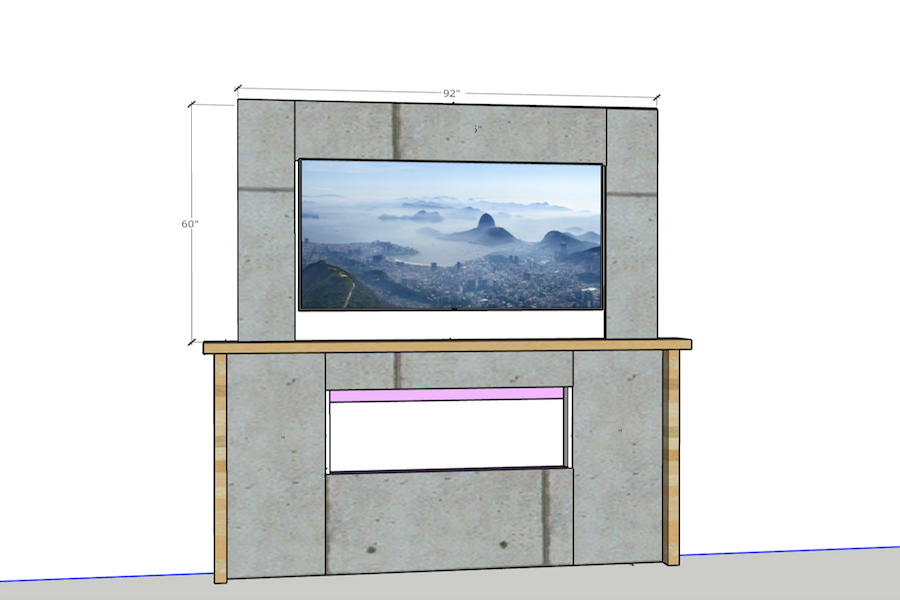
Drill pocket holes in the ends of both the 2x6x54” (Shown in blue) pieces and the ends of 3 2x4x92” pieces (shown in purple).
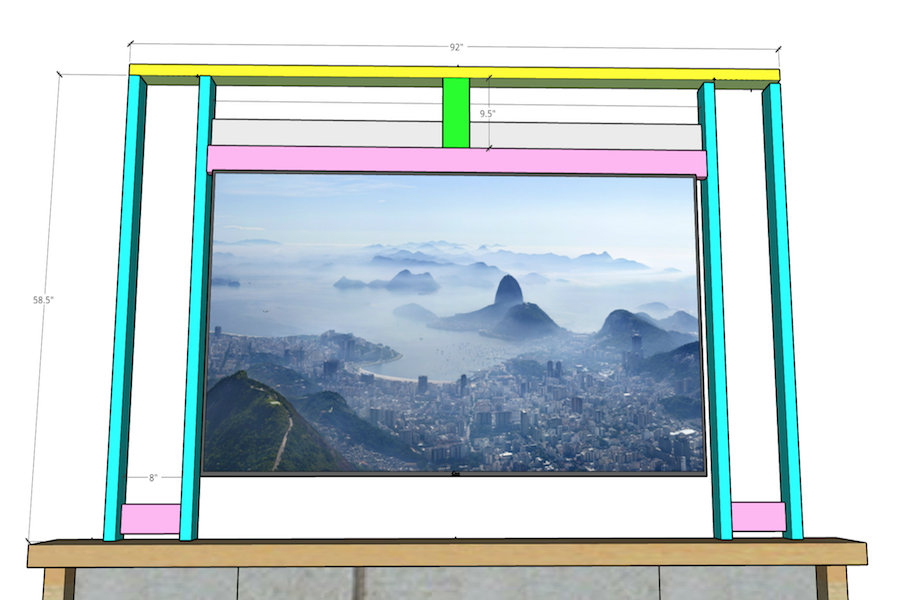
Assemble the 54” pieces into the 95” top plate (shown in yellow) as shown in the diagram with 2 1⁄2” kreg pocket screws. Then assemble 1 2x4x92” piece vertically to the back of the frame (it will attach the frame to studs in the next step).
Then another 2x4x92” piece horizontally up 25” from the bottom (this will be where your fireplace insert sits).
Last attach the last 2x4x92” piece vertically 5” up from the floor to the front of the frame (this will allow the concrete board to attach later).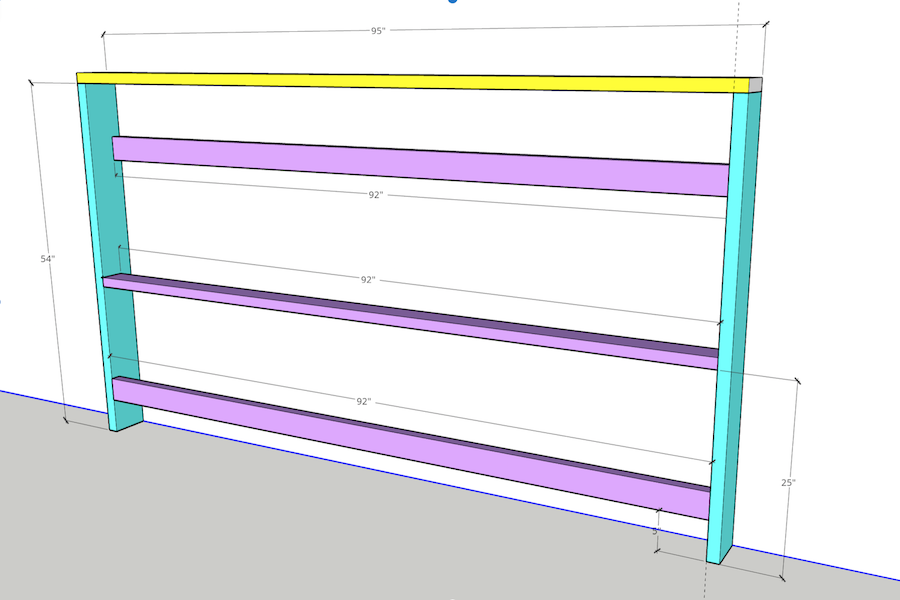
-
Attach the Frame
Attach the frame to studs on your wall using interior 2.5” power pro screws and screwing the vertical 2x4x92” piece on the back of the frame to the wall.
Drill pocket holes in the ends of 2 2x4x29” pieces (shown in white) and add them to the frame as shown in the diagram with 2 1⁄2” pocket screws. Make sure these are installed at the right measurements to fit the width of your electric fireplace without the front glass on.

-
Try out Your Electric Fireplace insert and ensure all the framing is accurate.
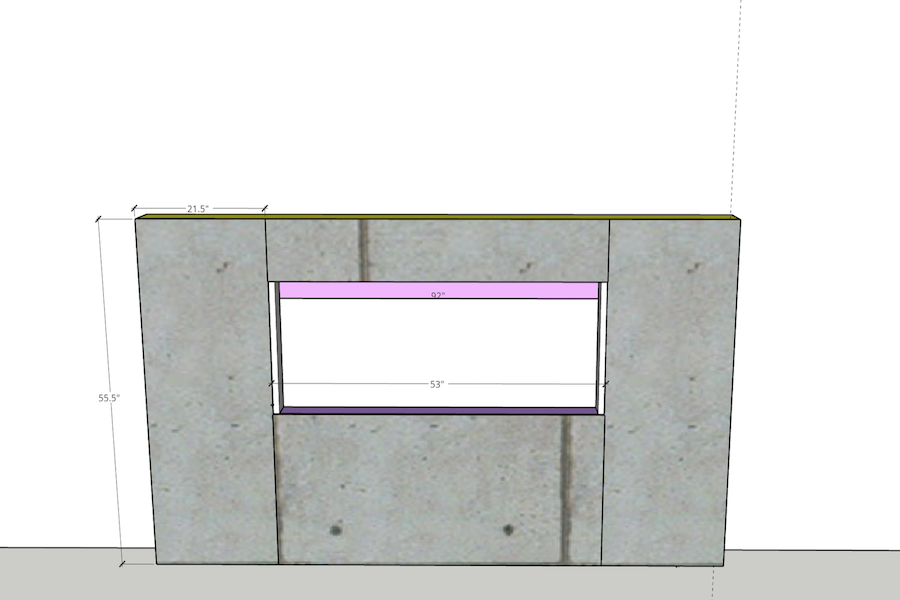
Measure and cut the concrete board panels to fit on the ends using a concrete panel scoring knife or diamond cutting wheel and girder. The concrete panel should fit to the edges of the outside studs and halfway across the face of the inside studs to leave room for the other panels to attach as well.
Use concrete screws to attach these panels to the studs making sure the screw heads are flush with the front of the concrete board. As shown in the diagram Step 3
-
Spread the Skim Coat
Tape all the seams of the concrete board with the drywall tape. Mix your skim coat in a drywall mud pan. Use the trowel or putty knife to spread the skim coat on the tapped seams first.
After the seams dry, spread another batch of the skim coat all over the concrete board. The key is to just cover everywhere in random patterns, just have fun with it. Wait for it to cure.
Then mix a second coat and spread all over the whole face of the fireplace again. The you can apply as many coats as you want to achieve the look you like, just wait for each coat to cure before adding another.All together I did 3 coats.
Tip:
TIP- mix only as much as you can spread in about 10 min, it will start to set after that so work in small patches.
-
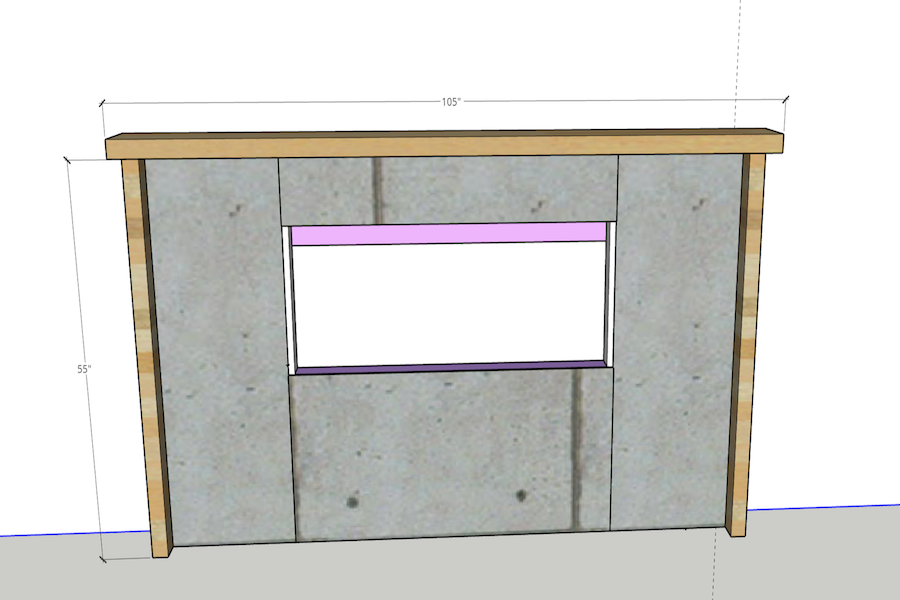
Cut Your Wood
For this step I used 8/4 poplar from a local lumber yard, but you can also use 3x6 from a local hardware store.
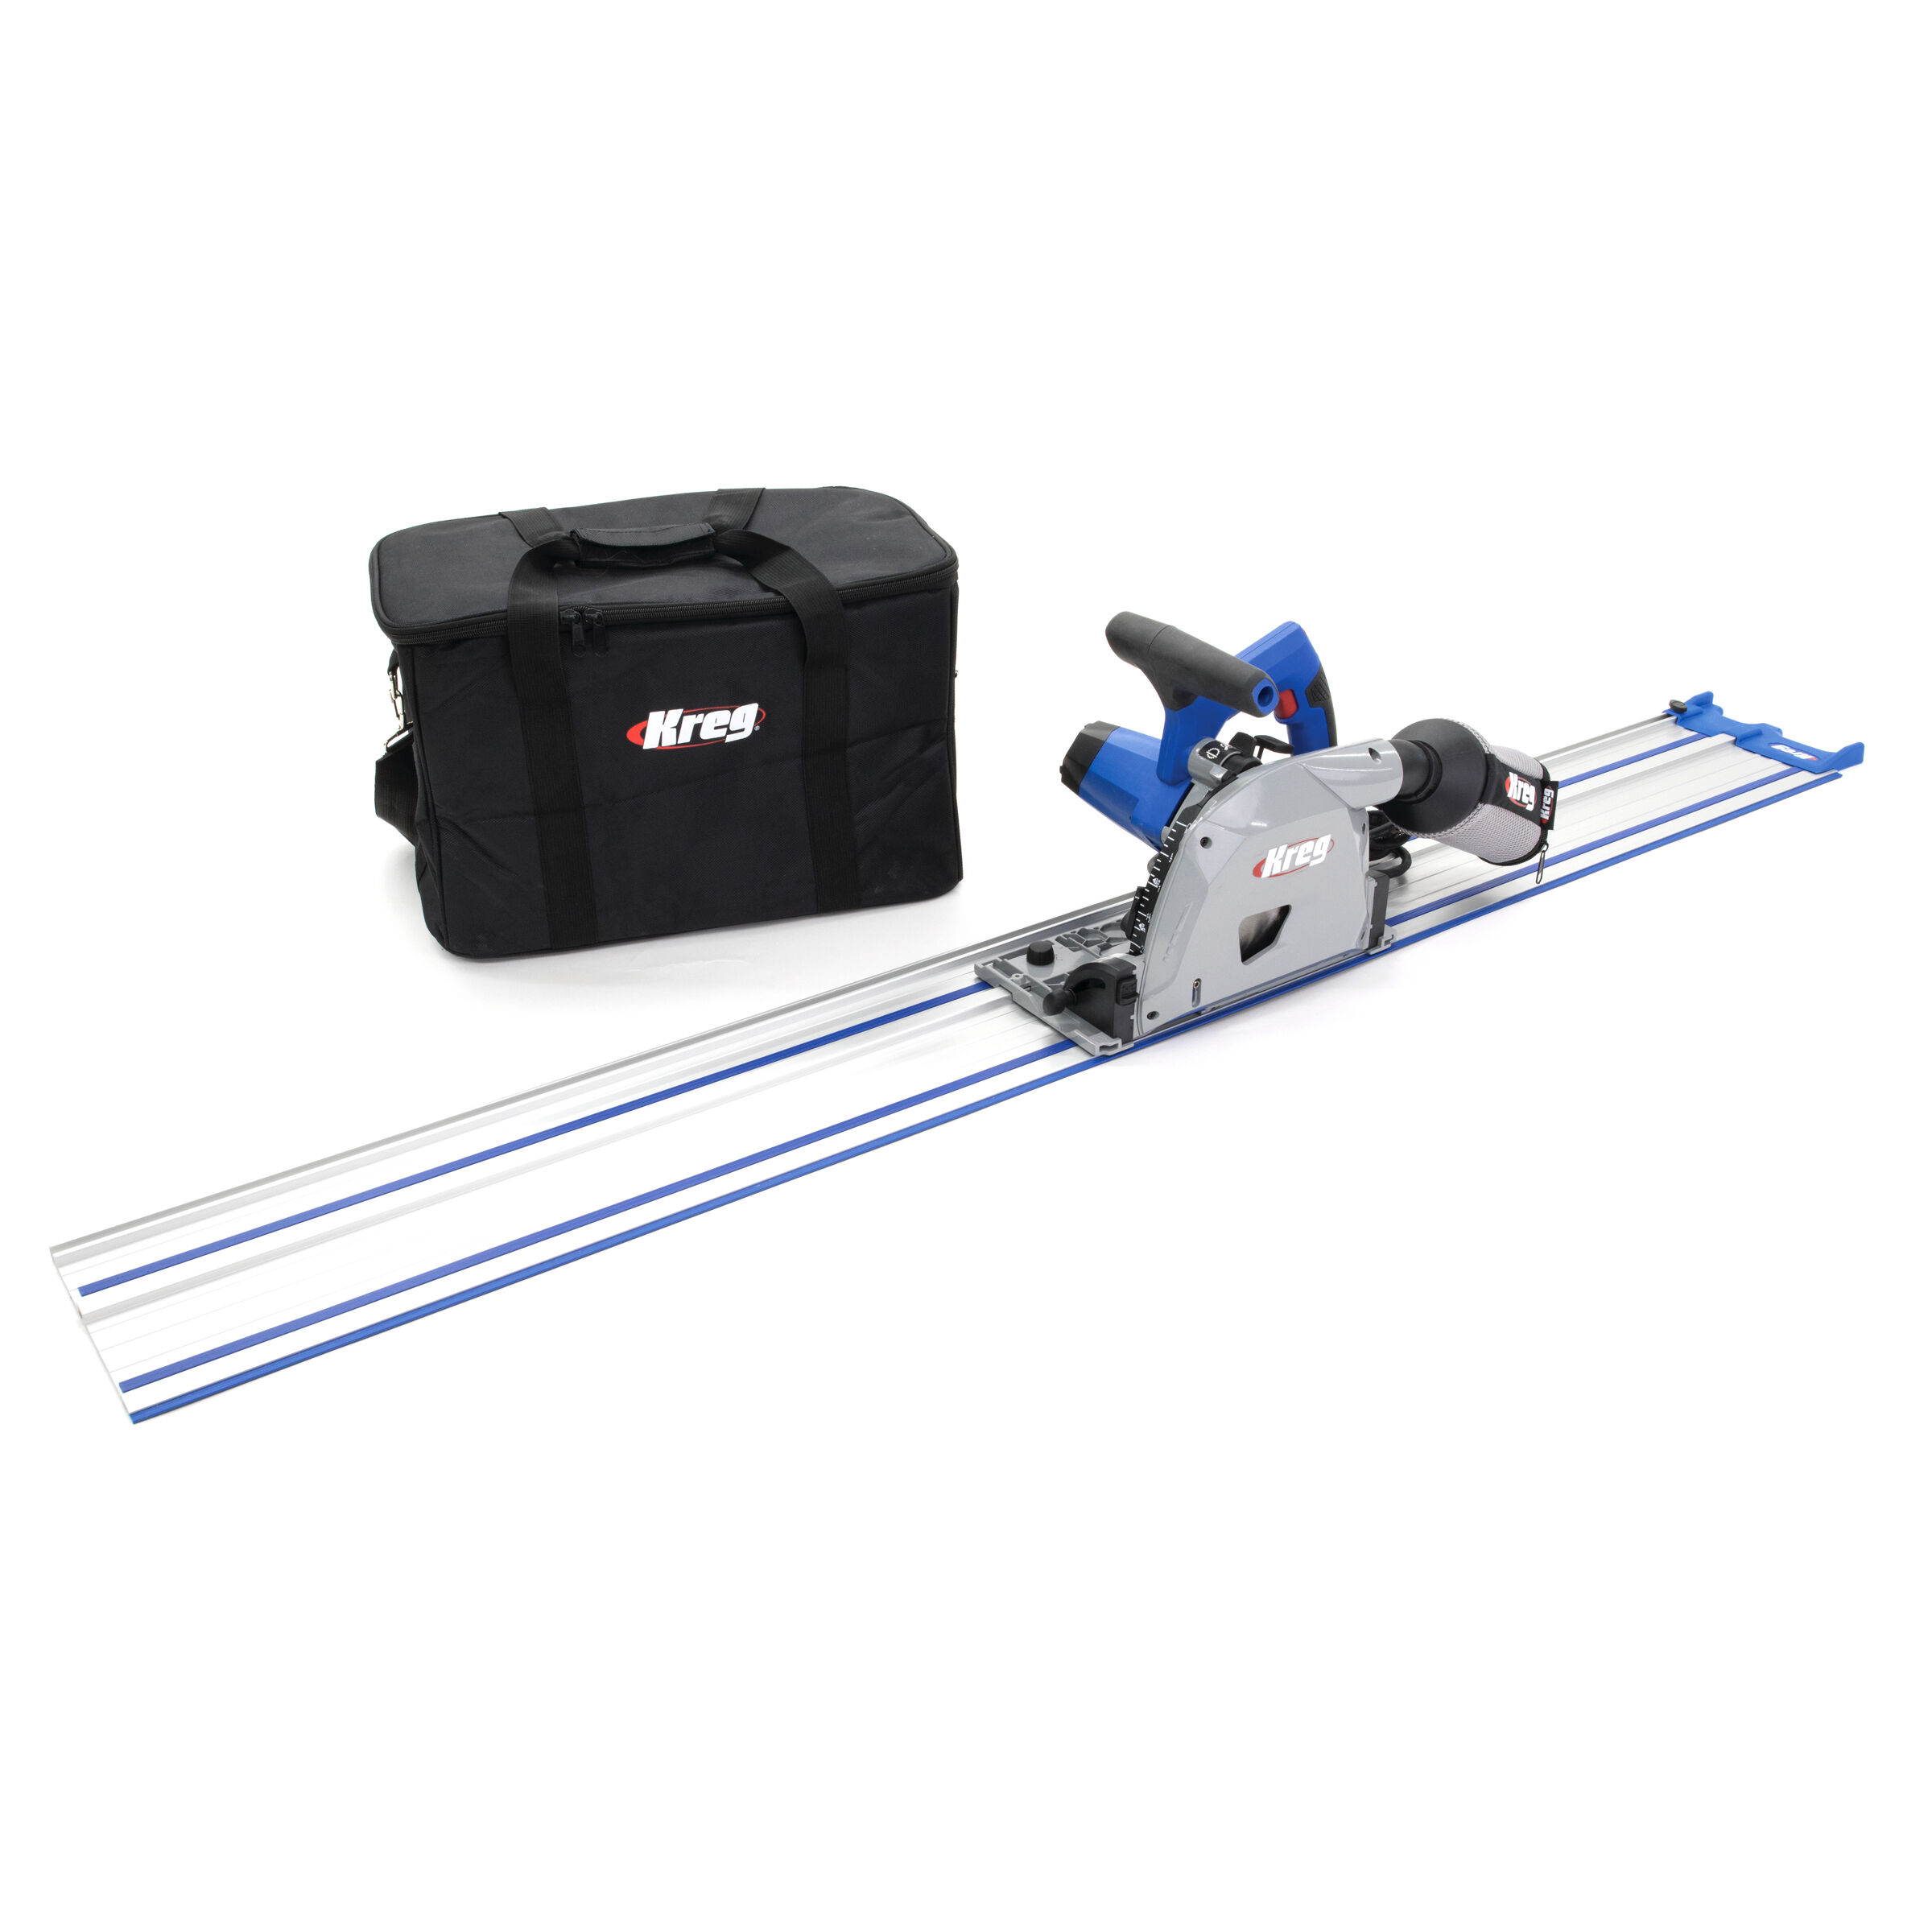
I got rough lumber from the lumber yard and used the Kreg Adaptive Cutting System plunge saw to straighten the edges of these boards and cut them to be 9.5” deep.
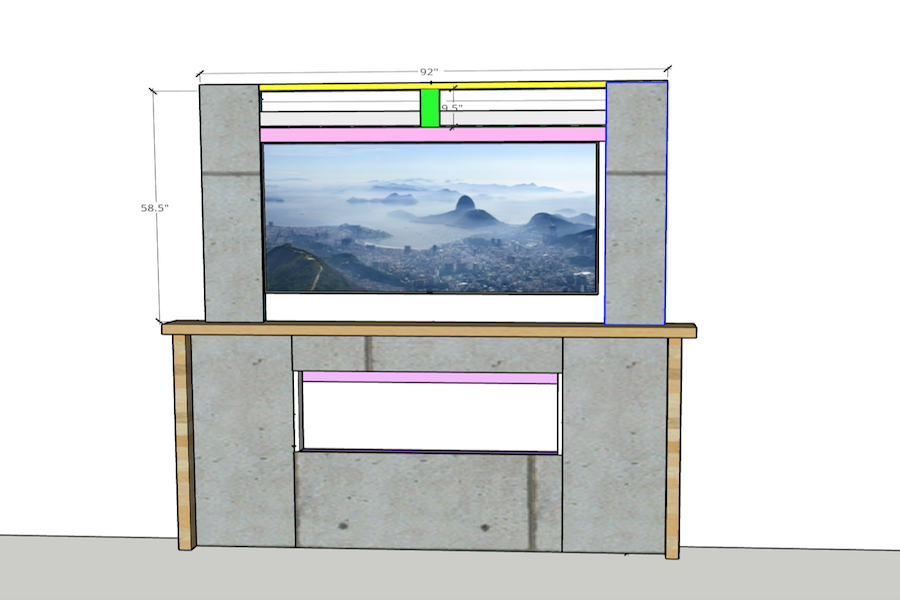
I then cut 2 pieces to 55” for the sides and one to 105” for the top mantle. As shown in the diagram.
-
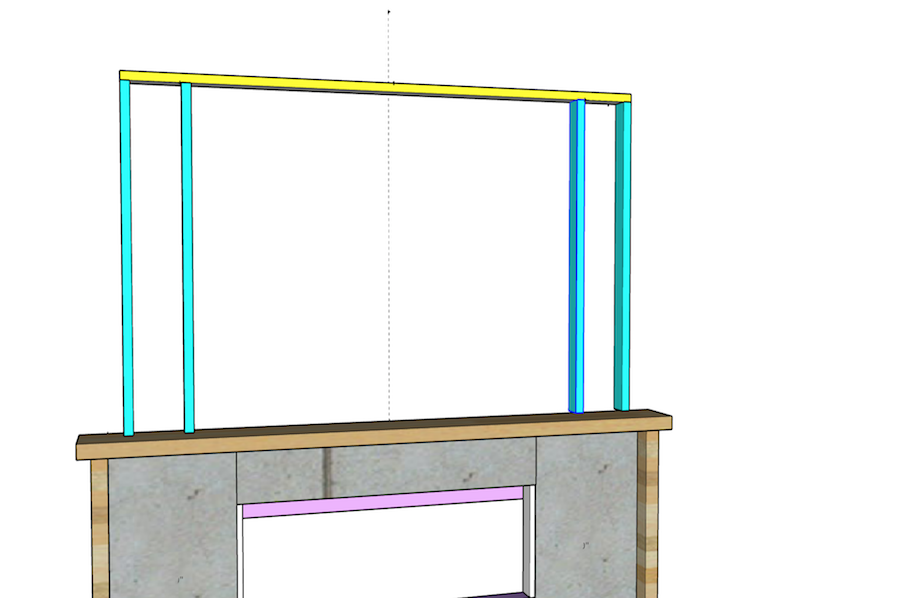
Build Frame for the Top Portion of the Fireplace
Drill pocket holes at one end of 4 2x4x58.5” pieces and screw them to one 2x4x92” stud as shown in the diagram.
-
Drill Pocket Holes
Drill pocket holes into the ends of the 2x4x70” pieces and attach one vertically to the back side of the frame (to attach frame to wall on studs) and the other to the front of the frame 9.5” from the top.
Drill pocket holes into the ends of both 2x4x8” pieces and attach between the 58.5” pieces as shown in the diagram.
-
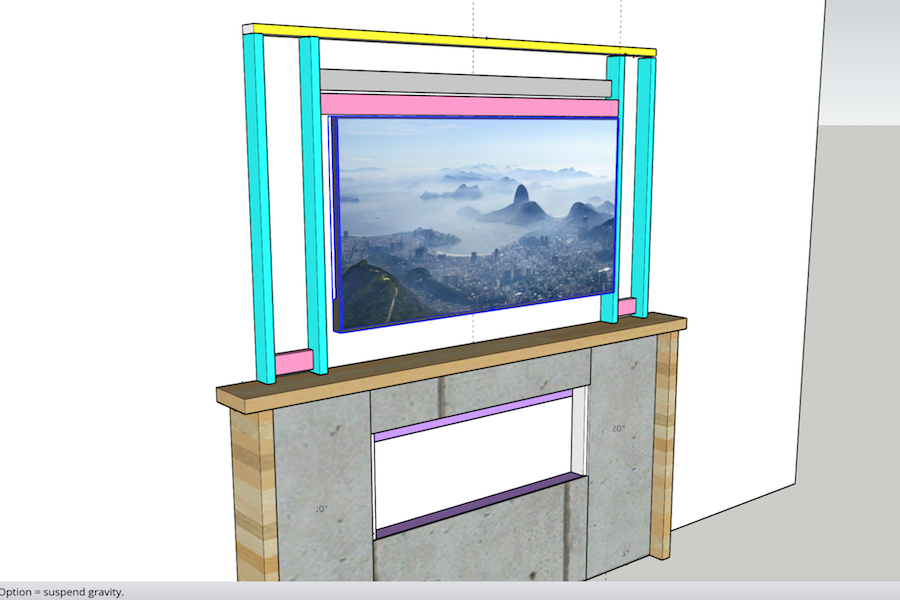
Insert Center Beam
Drill pocket holes in both sides of the 9.5” piece and attach in the center of the top portion of the frame between the top plate and the 92” piece on the front. See diagram
-
Cut Concrete Pieces
Measure and cut concrete pieces for the both sides of the frame using the scoring knife and bending the concrete panels.
Be sure to measure where your TV sits and allow the concrete pieces to go behind the tv slightly.
Attach these pieces using the concrete screws into the frame.
-
Spread the Skim Coat
Repeat step 4 for the face of the top of the frame and do as many skim coats as you like to achieve the concrete look you love.
I did wrap the seam tape around the front edges and top edges for the skim coat to stick to but if I had to do it again, I would attach drywall corner bead along the side and top edges before skim coating to achieve a more streamlined look.
Tip:
*Tip if there are any rough edges you can use a 320 grit sandpaper piece to smooth it down a bit.