DIY Closet System
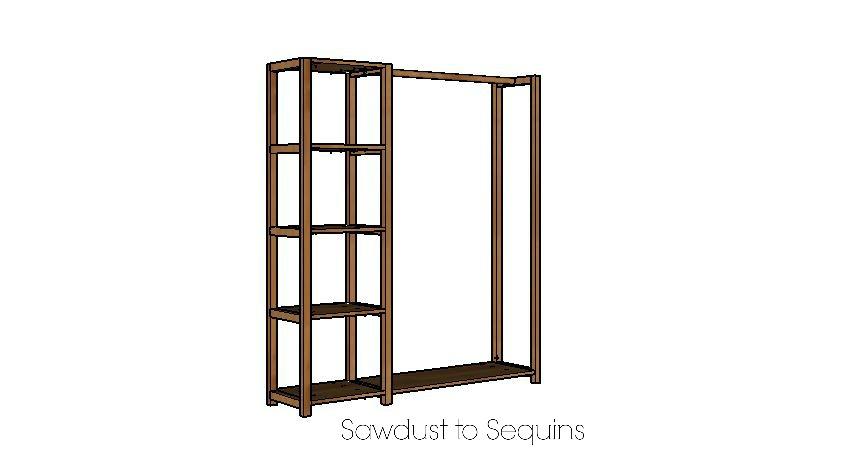
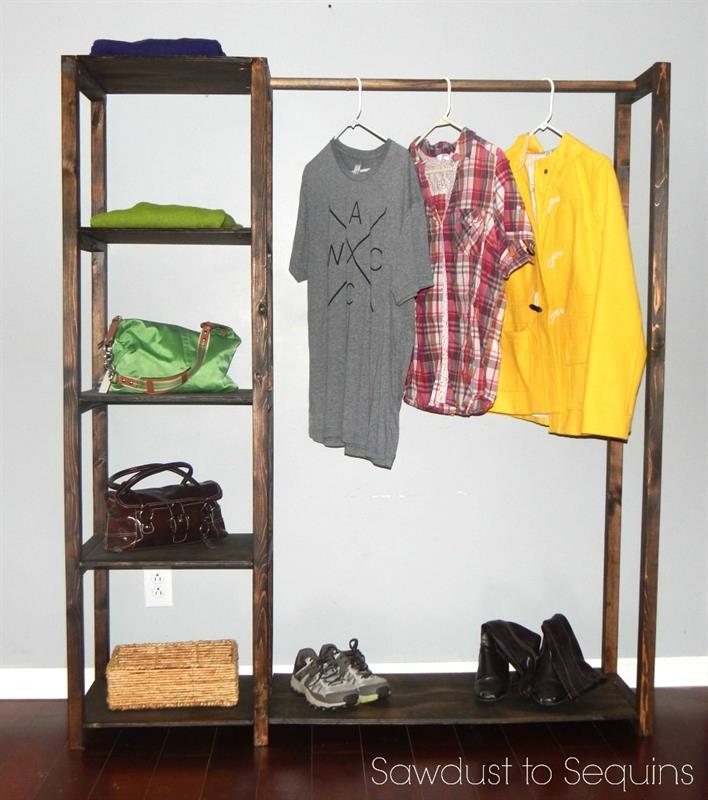
By The Crafted MakerThis closet system was designed for those who don’t have enough closet space, or no closet at all. There are many rooms in the home that this closet system can be an added benefit. Do you need a storage area in your laundry room, or have a spare bedroom with no closet? Quick and easy build!
Directions
-
Step 2
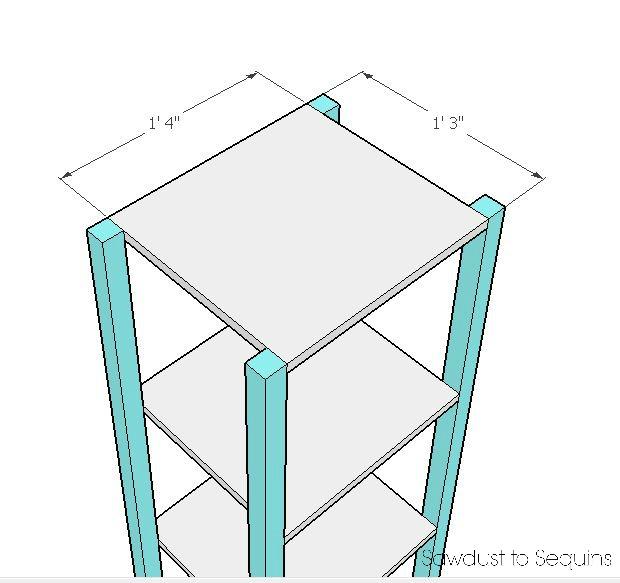
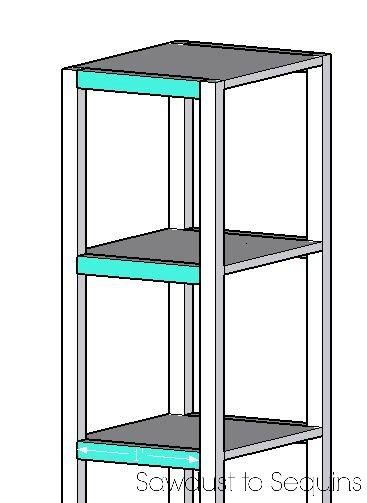
Attach shelves to 2" x 2" legs with 1 1/4" pocket hole screws. Start the first shelf 2" from the bottom and space every 15".
The 16" side of the shelf boards should be flush with the 2" x 2" boards. -
Step 3
Attach the 12" 2" x 2" boards to the 15" side of the shelves with 1 1/4" pocket hole screws. There are 10 total. Use one of the boards drilled for the dowel rod on the top right side of the shelf tower.
-
Step 4
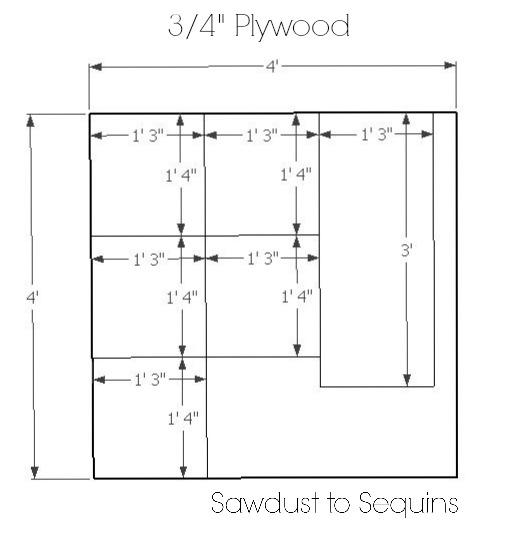
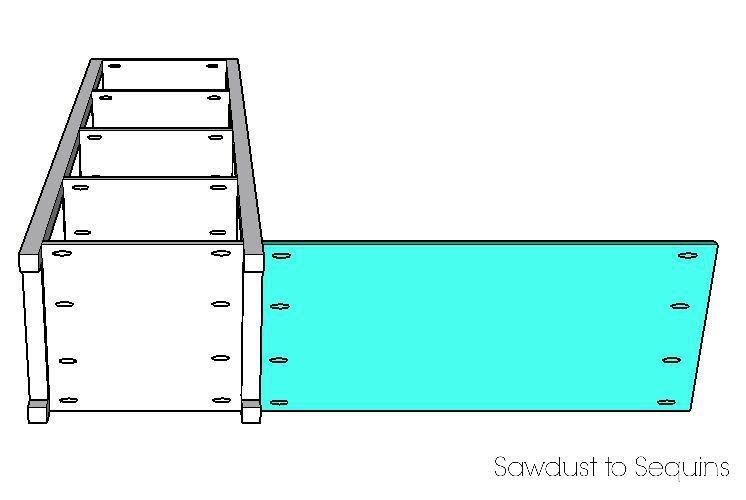
Attach the 15" x 36" bottom shelf board to the shelf tower. The plywood will attach to the 2" x 2" with 1 1/4" pocket hole screws.
-
Step 1
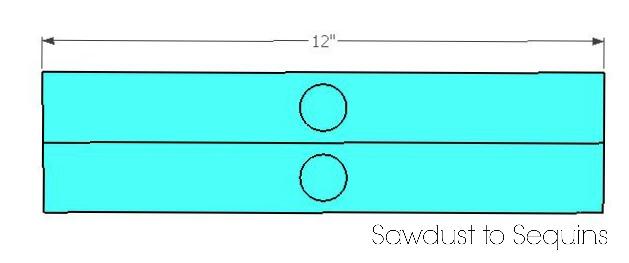
Using a 1" spade bit, drill a hole in the center of two of the 12" 2"x 2" boards.
-
Step 5
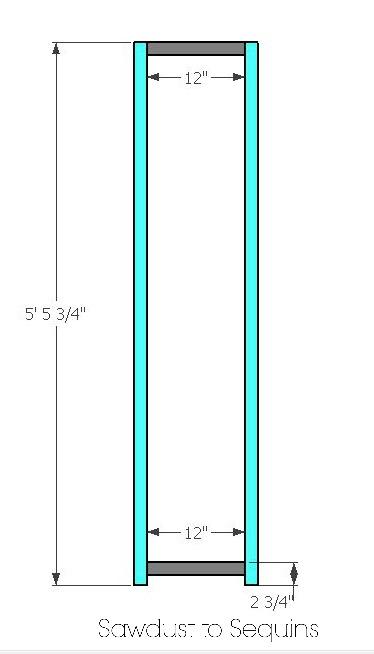
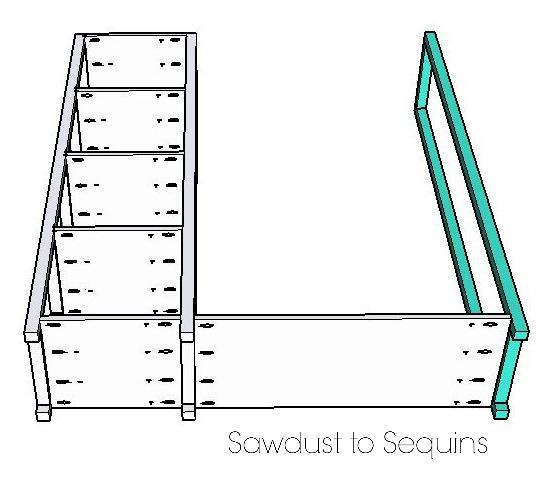
Assemble the closet rod support by joining 2 - 65 3/4" 2" x 2" boards together with 2 - 12" 2" x 2" boards. The bottom board will be 2 3/4" from the end. The top board will be the remaining board drilled with the 1 "spade bit.
-
Step 6
Attach the closet rod support to the bottom shelf of the closet system using 1 1/4" pocket hole screws.
-
Step 7
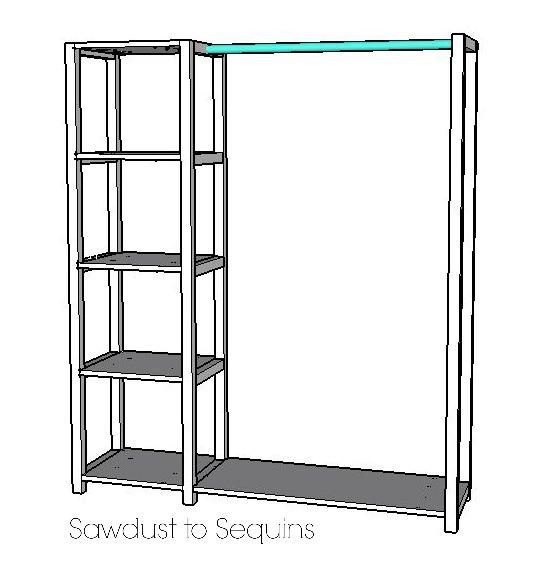
Using wood glue, attach the dowel rod into the 2" x 2" boards previously drilled with the spade bit. You may need to use a hammer to get the end flush.
-
Step 8
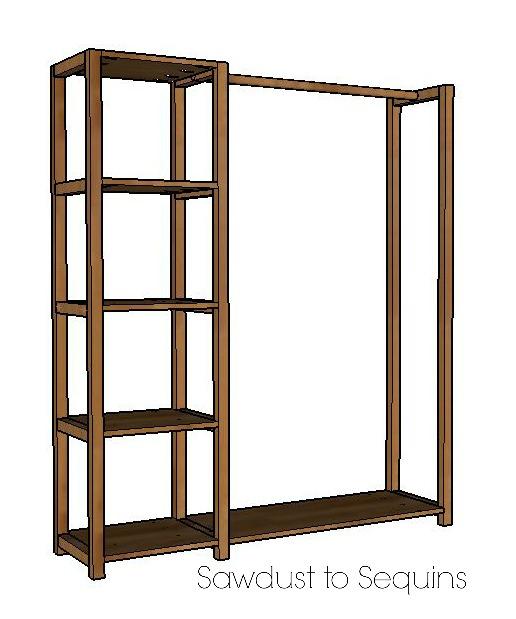
Finish your project by sanding and staining the color of your choice. You could paint the shelves, but I would recommend only stain on the closet rod. The hangers sliding would cause the paint to chip away.


