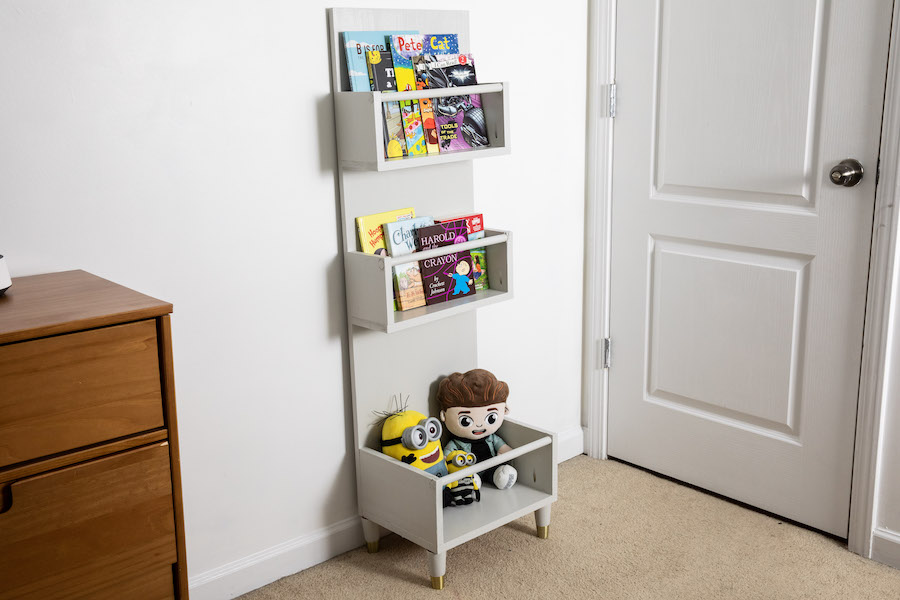


This simple DIY book and toy rack is a great beginner woodworking project and can be free-standing or mounted on the wall. You can also customize the color or finish!
Tools
Kreg Tools


Other Tools
-
Saw

Materials
Wood Products
- 1 Project panel , 4’L x 16” W x ¾”
- 1 Board , 1x6
- 1 Board , 1x12
- 1 Dowel rod , ¾”
Hardware & Supplies
- 1 Box of 1 ¼” pocket hole screws (See tools list)
- 4 Furniture Feet (or wall anchors/mounting hardware, optional)
- 1 Paint or stain of your choice
Directions
-
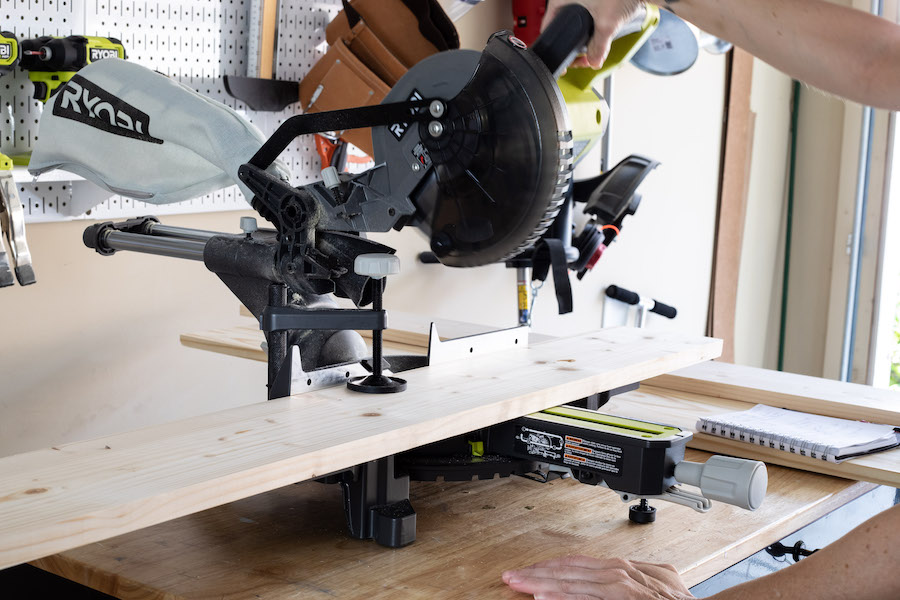
Cut Wood
Cut all wood according to cut list.
-
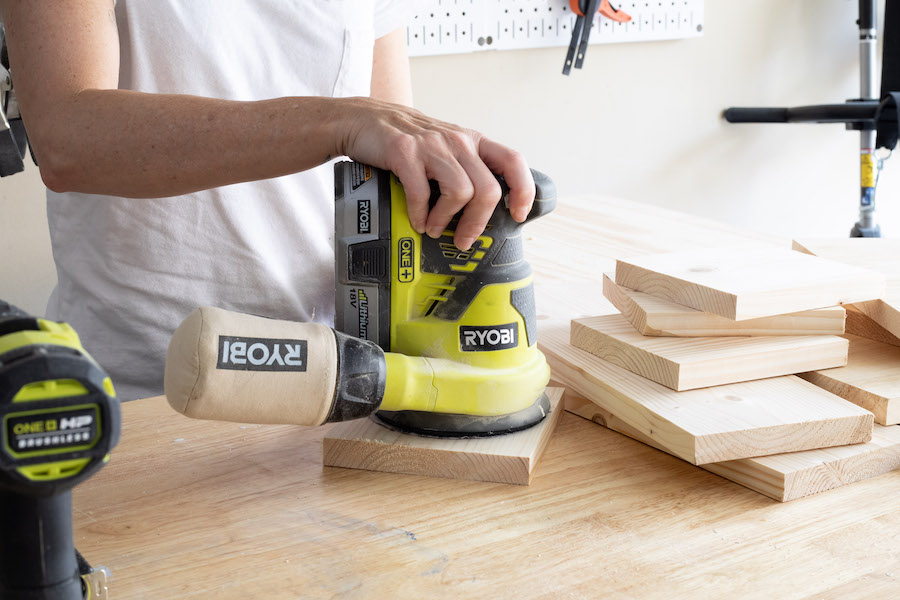
Sand
Sand everything smooth
-
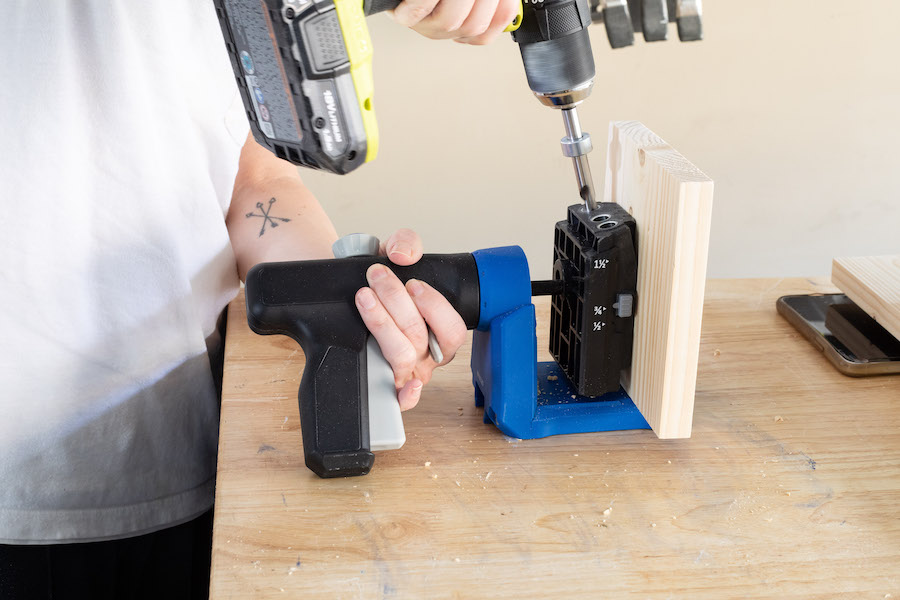
Drill Pocket Holes
Using the Kreg Jig 520PRO, drill pocket holes as follows:
(3) pocket holes along one of the long sides of the 16” long 1x12
(3) pocket holes along one of the long sides of each 16” long 1x6
(3) pocket holes along one end of each 5 ½” long 1x6
(2) pocket holes along one side of each 5 ½” long 1x6, perpendicular to the end you drilled the 3 pocket holes in already
-
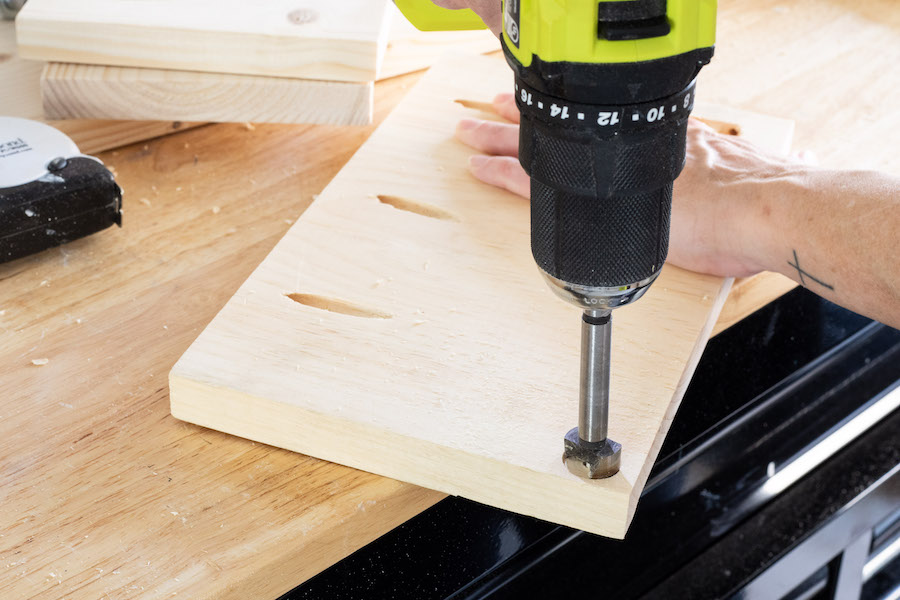
Drill holes for Dowel Rod
Use a ¾” Forstner bit to drill a hole in one corner of each of your 5 ½” long 1x6 pieces (making sure the corners will match up relative to where your pocket holes are, so you’ll be able to slide your dowel rod across later) and one corner of each of your 6” long 1x12 pieces.
-
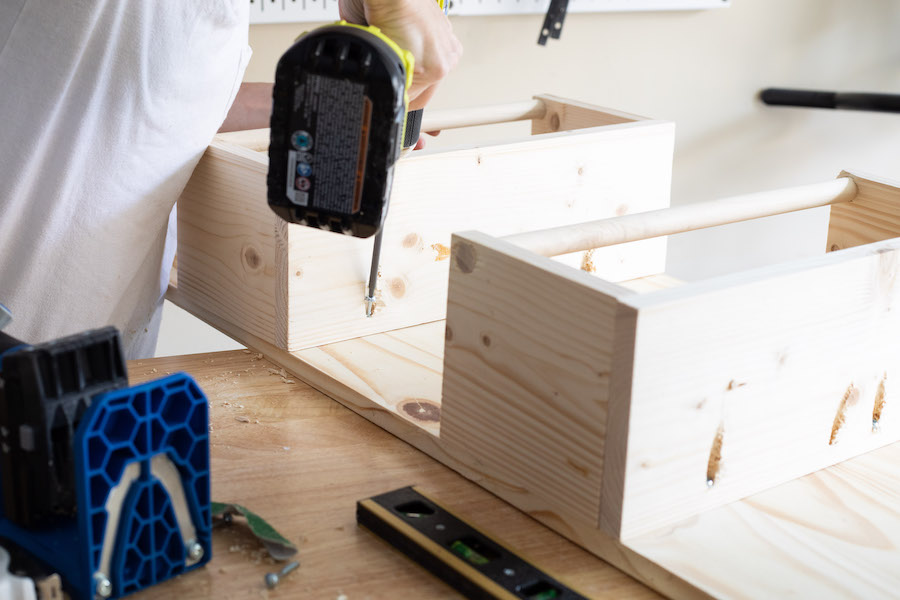
Attach Shelves
Attach your shelves to your 4’ tall project panel (this will serve as the back of the book rack) with 1 ¼” pocket hole screws as follows:
Attach your 1x12 shelf to the very bottom of the panel
Measure 13 ½” inches up and attach one of your 1x6 shelves.
Measure 13 ½” inches up again, and attach your final 1x6 shelf.
-
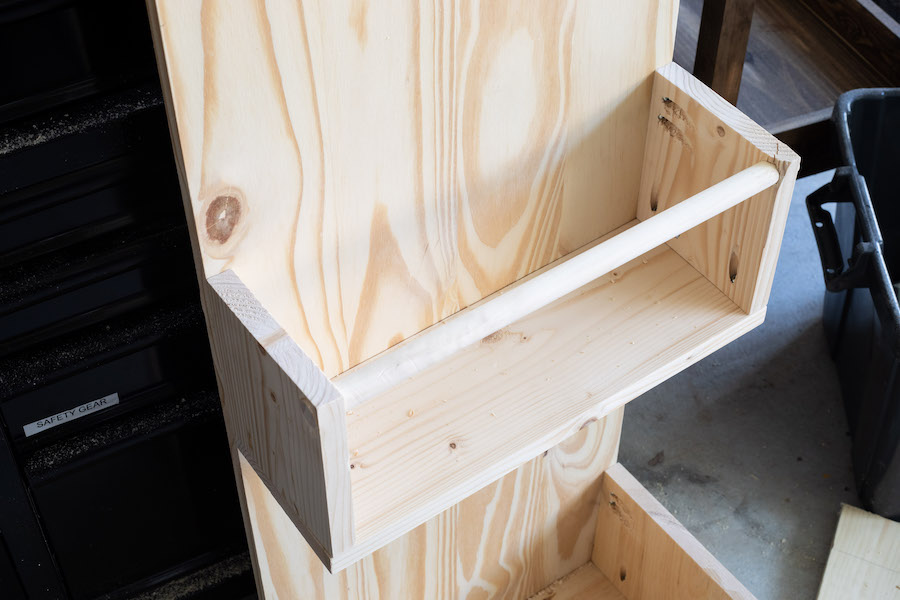
Add Dowel Rods
Slide your dowel rod through your pre-drilled hole, creating the “front” of your shelf which will hold the books in place. You may need a mallet to pound the dowel into place.
-
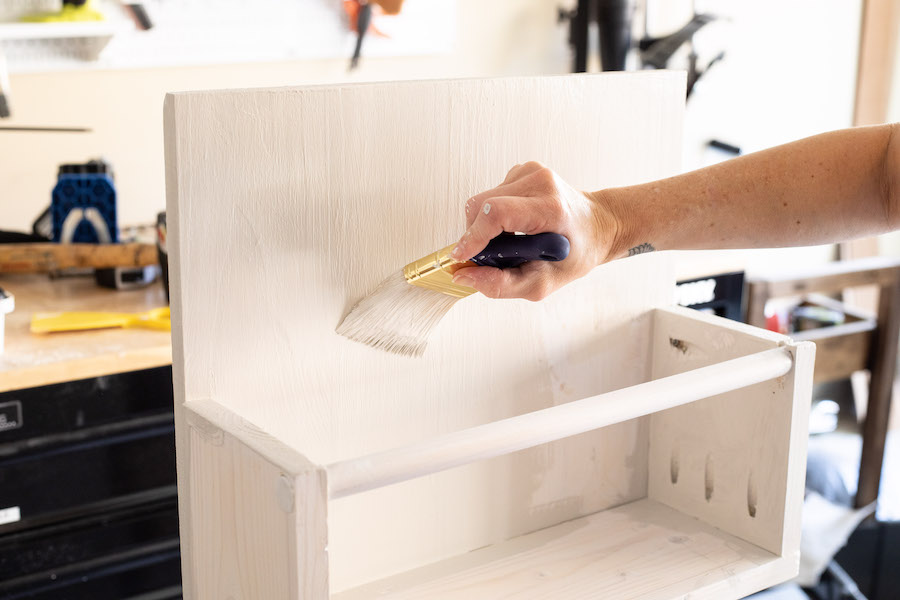
Paint or Stain
Paint or stain any color you choose. If you opt to add furniture feet (I found some on Amazon), paint or stain those to match before attaching.