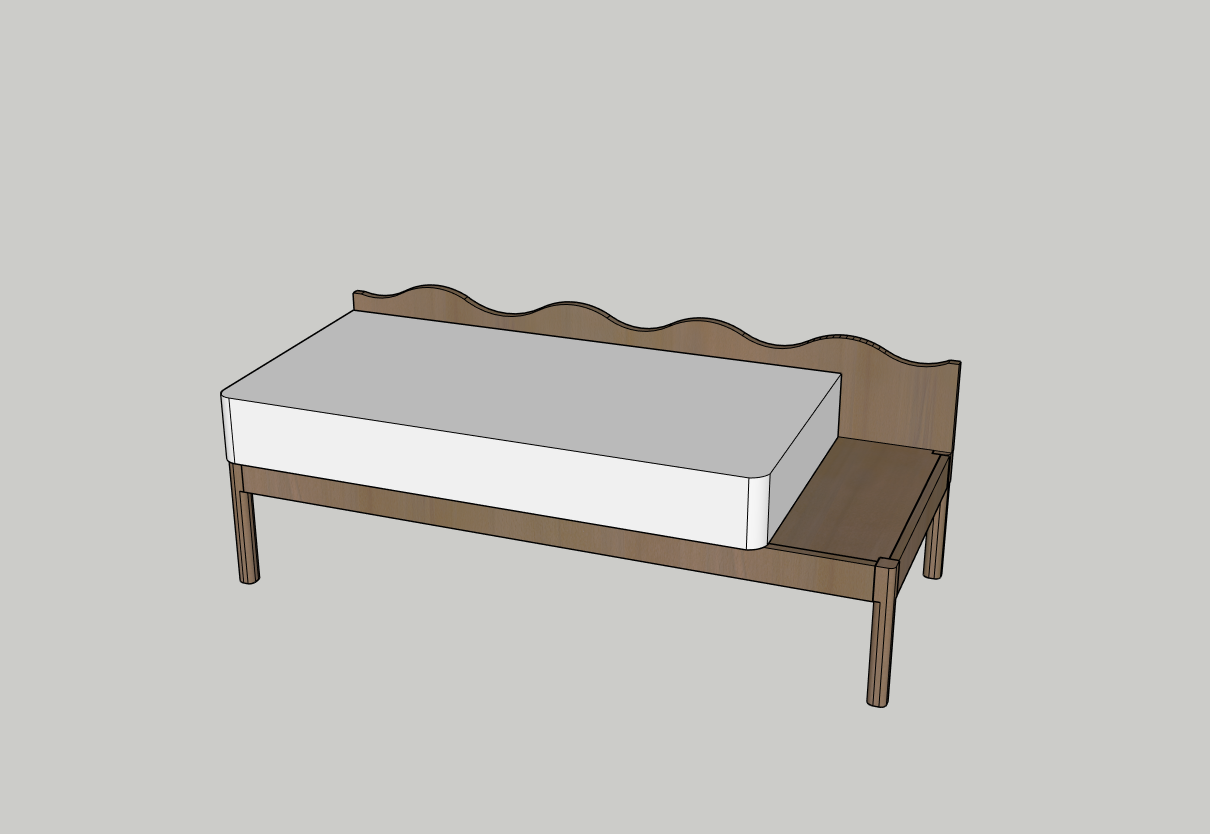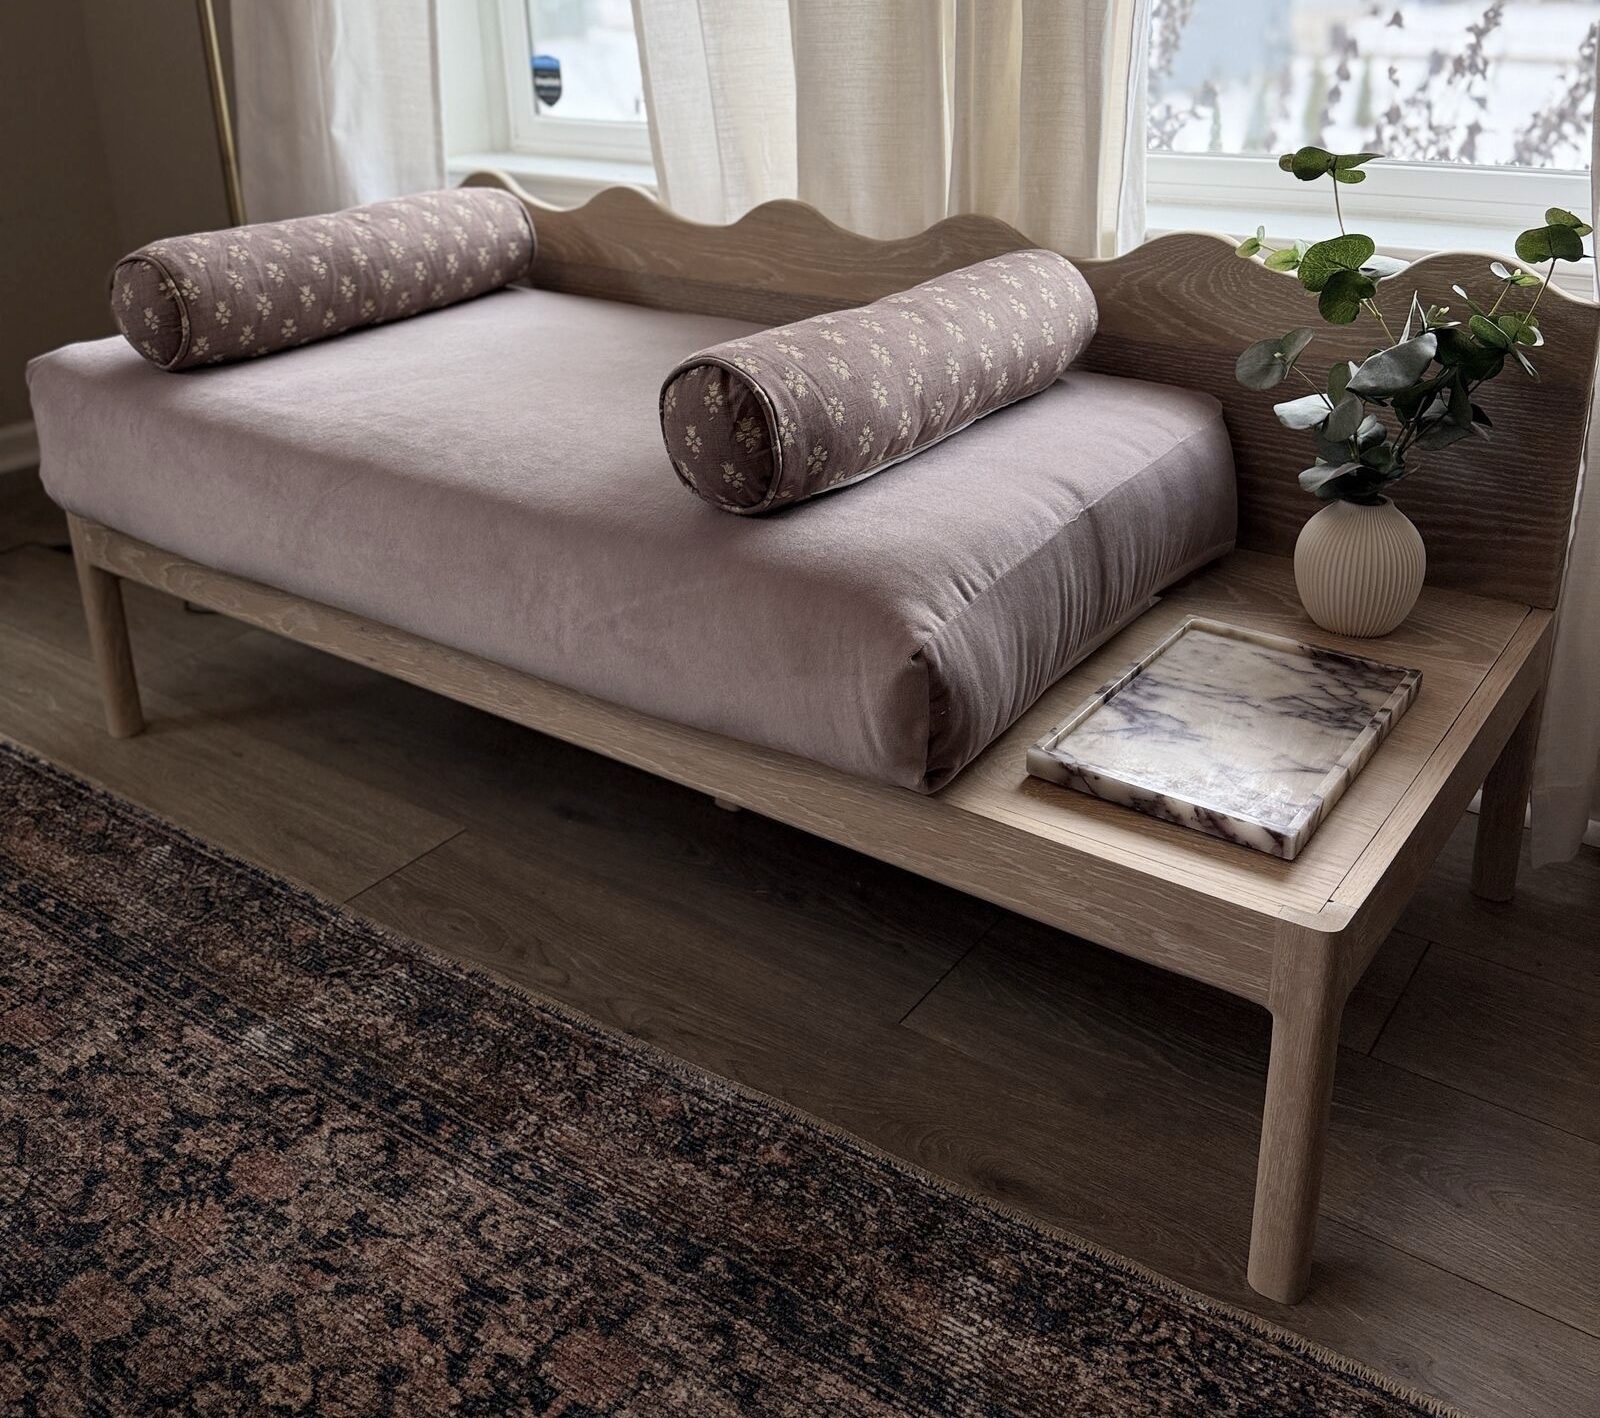
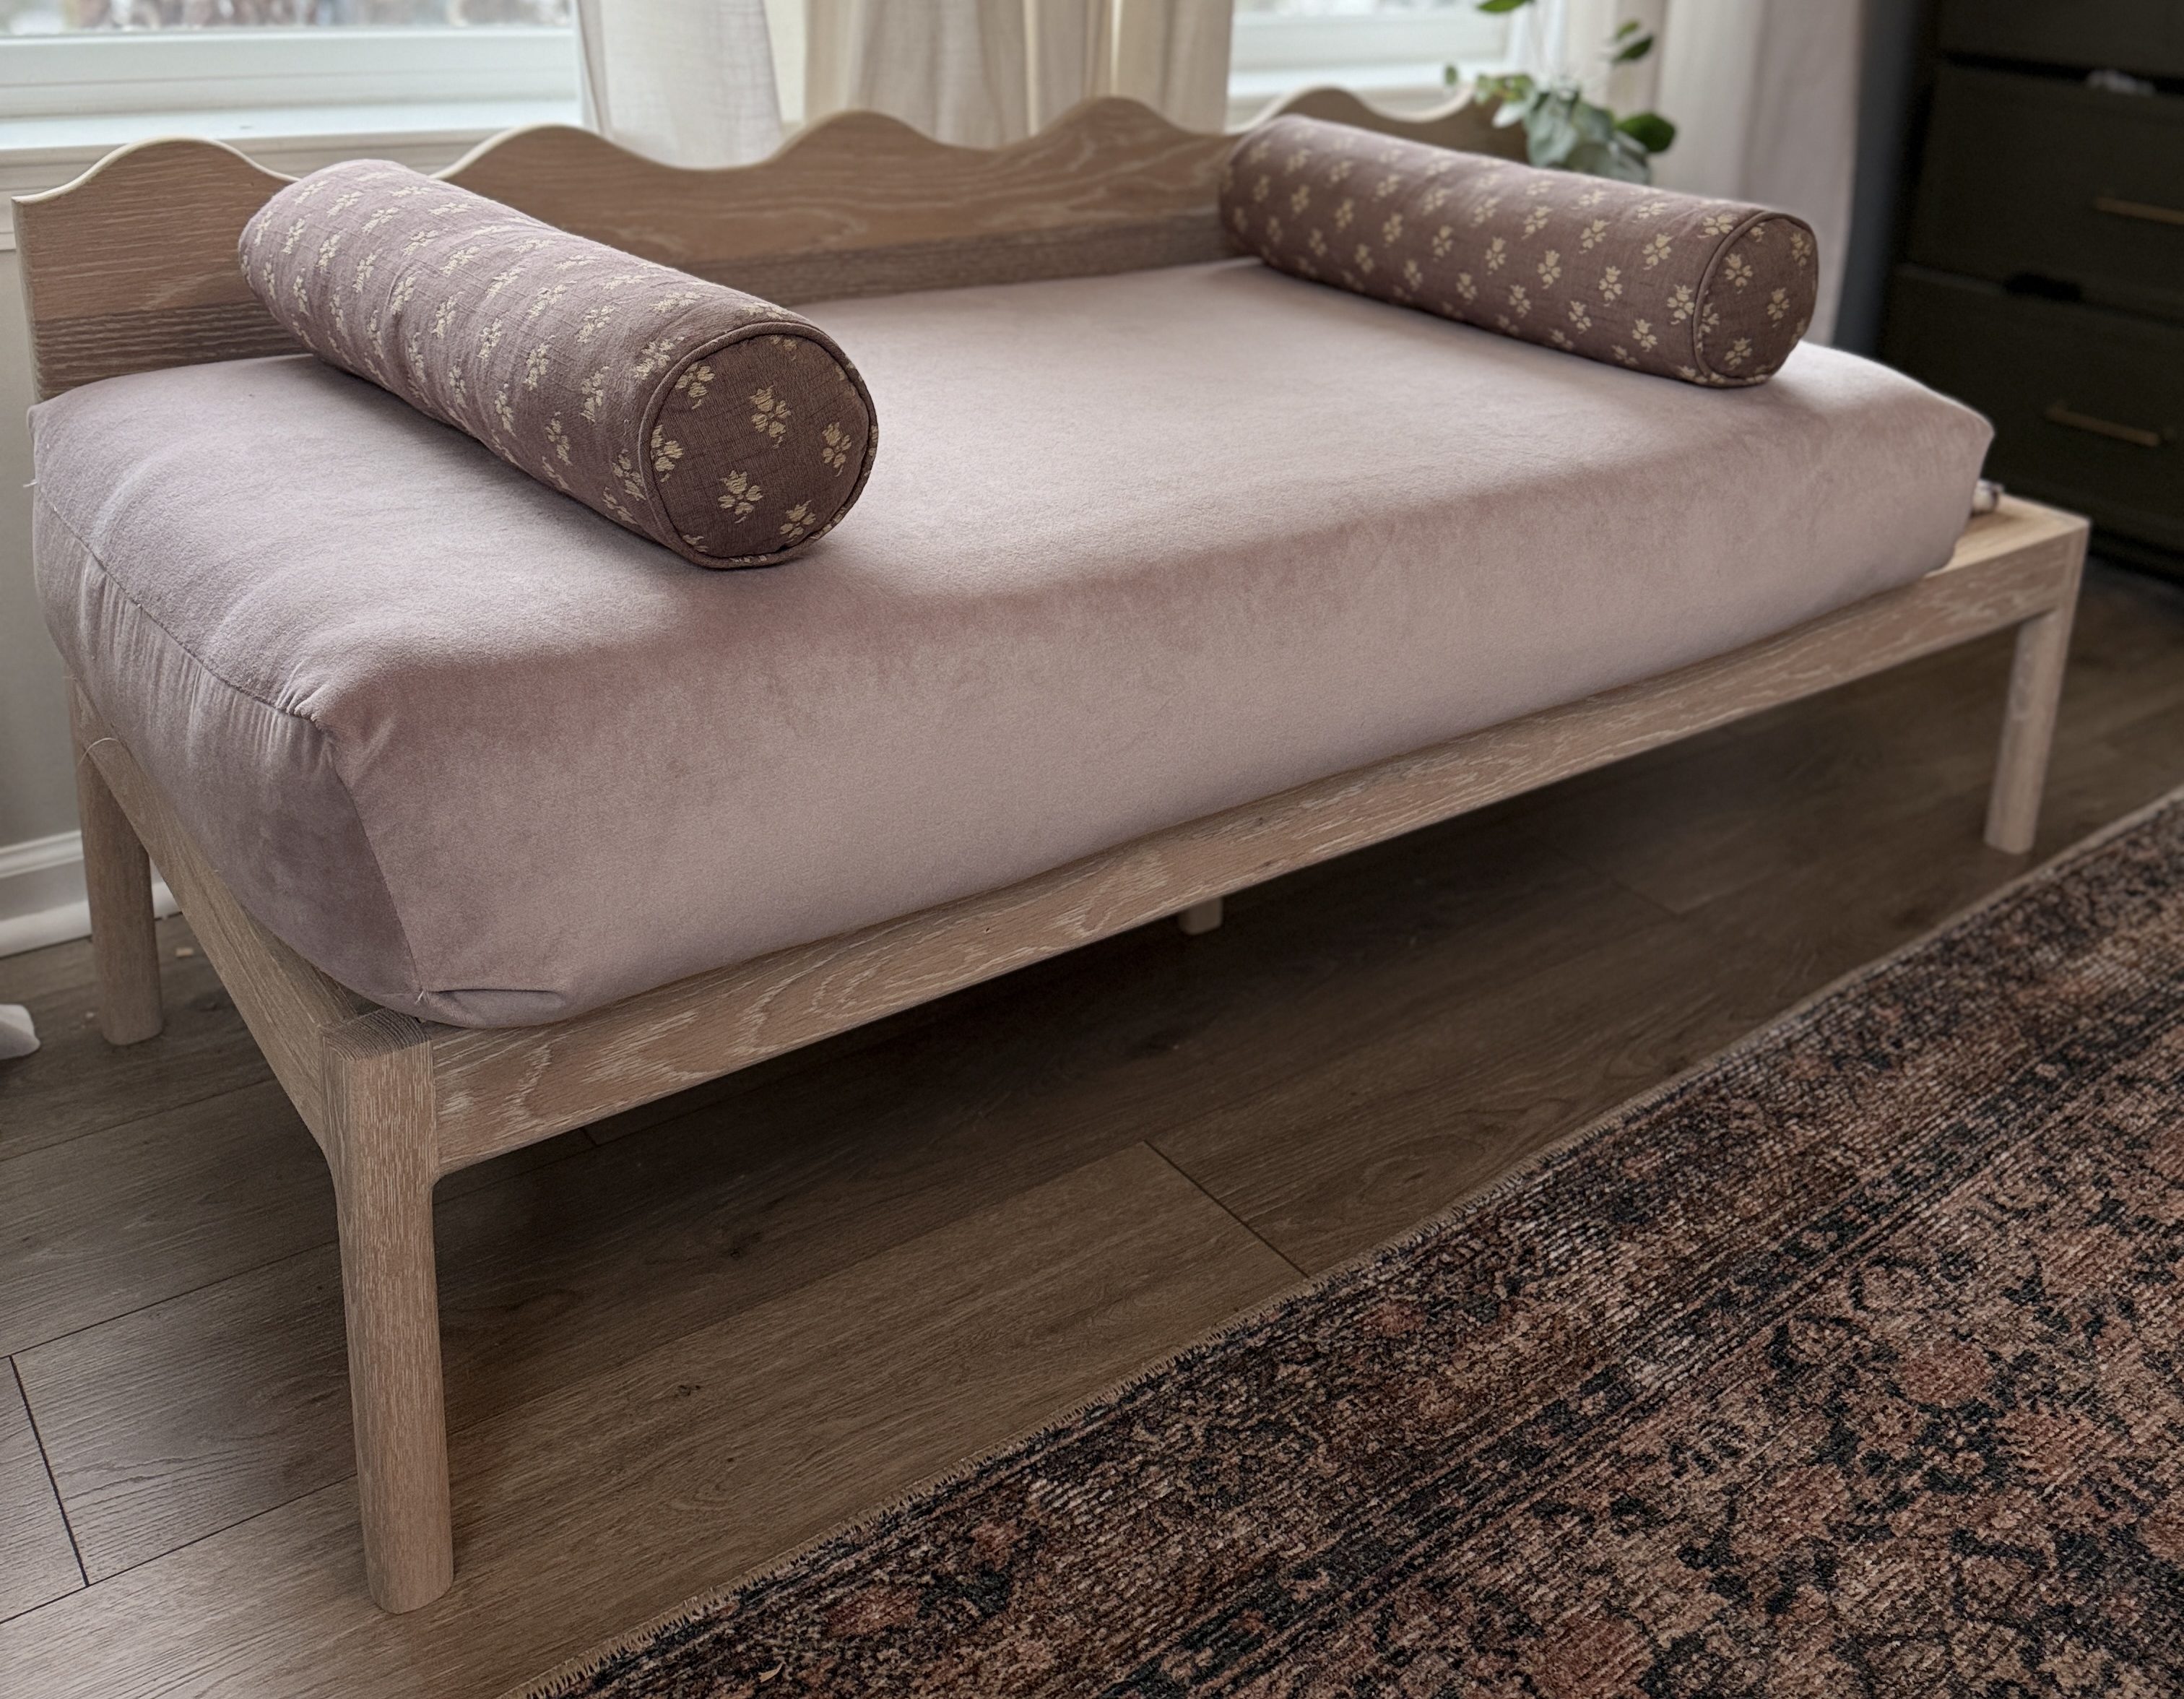


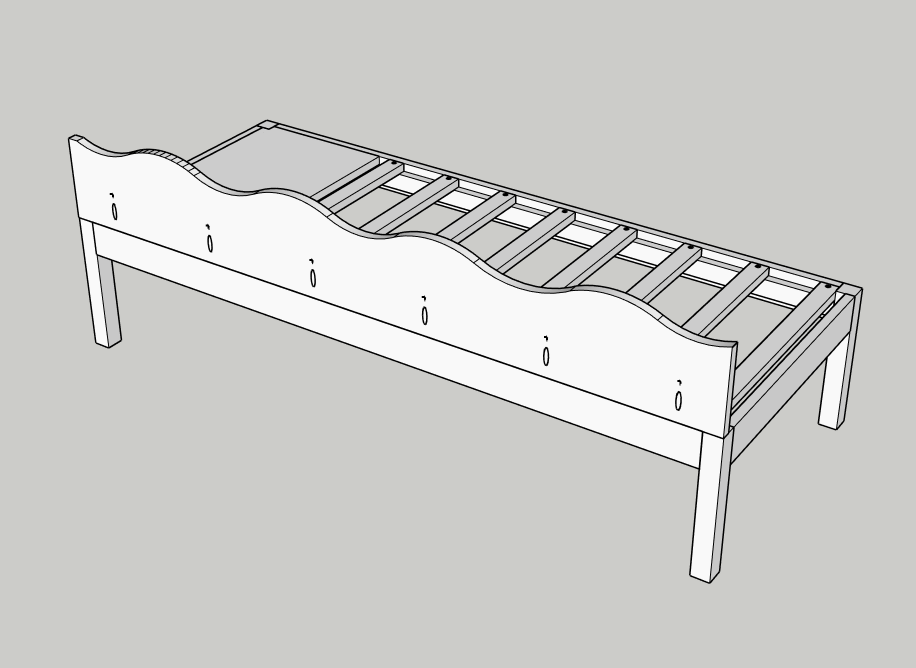
This DIY project combines comfort, function, and a little bit of charm: a custom wooden bench with an attached side table and a wavy cutout backrest that instantly sets it apart from store bought furniture. I designed this piece to be equal parts practical and beautiful. The side table creates the perfect spot for a cup of coffee or a book, while the soft, sculptural back adds a touch of character you just can’t find in mass produced pieces. Built using simple lumber and beginner friendly joinery, this project is ideal for anyone wanting to create a statement bench for an entryway, bedroom window nook, or reading corner.
Tools
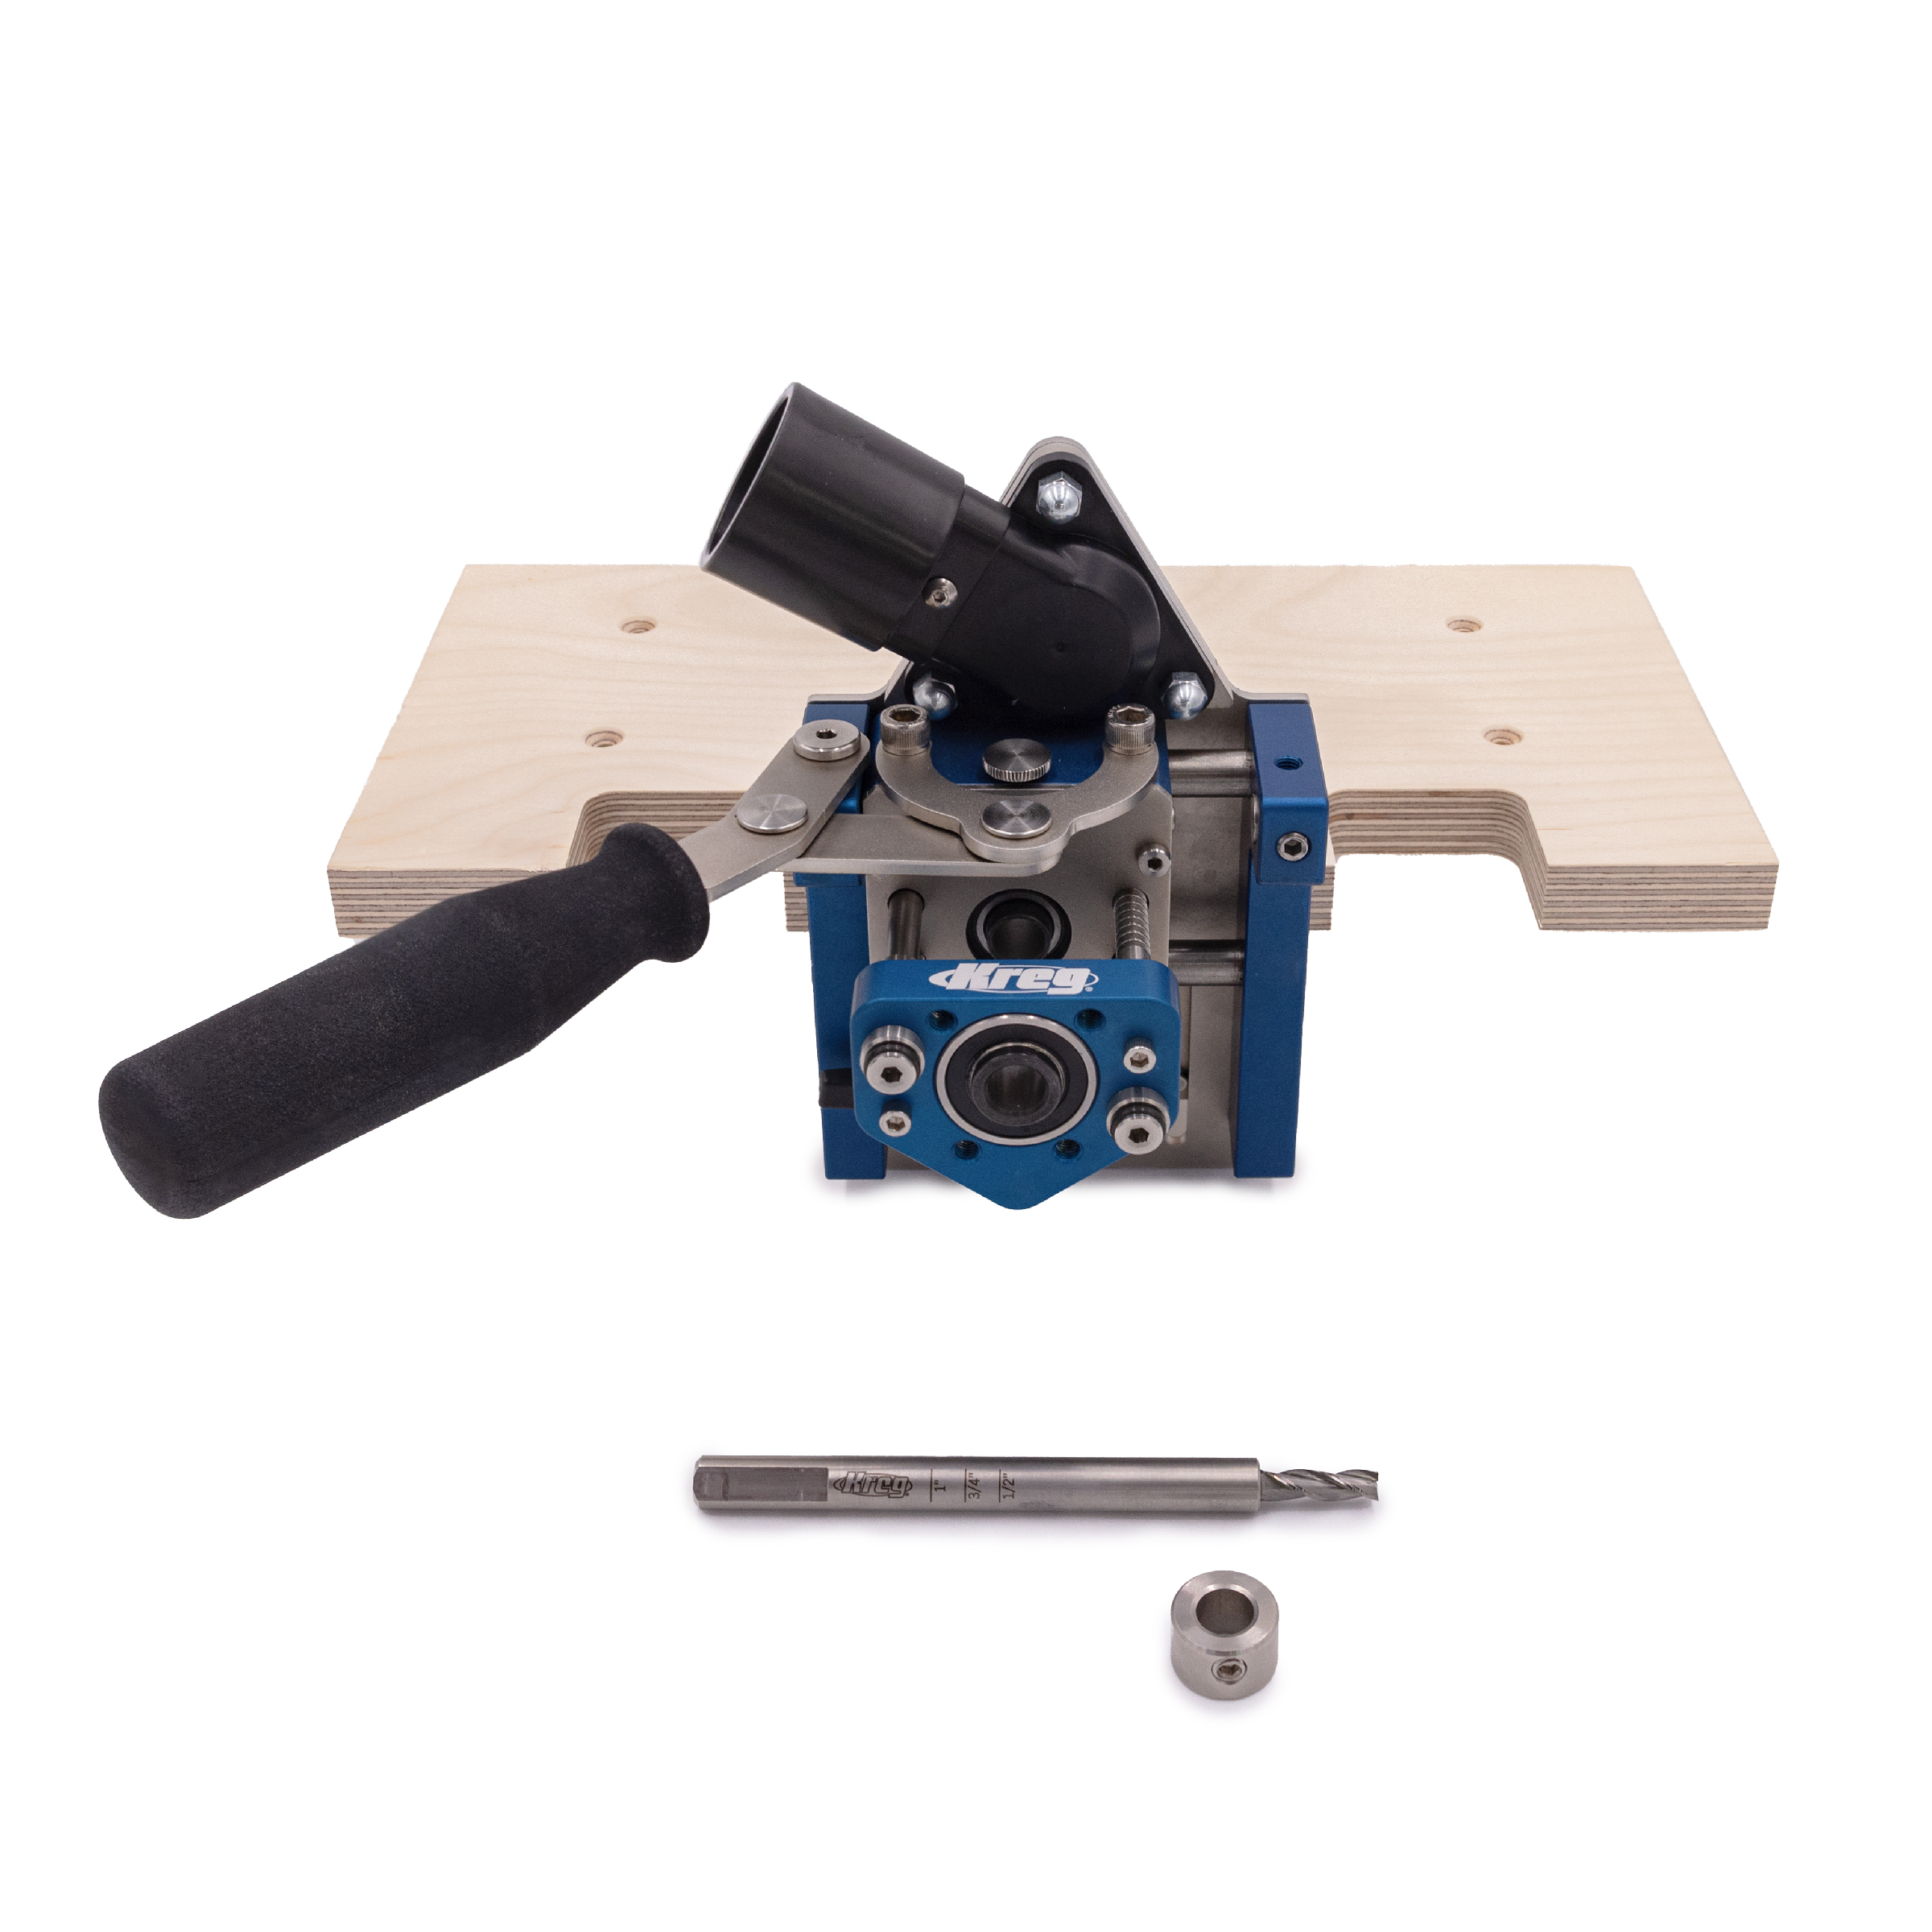
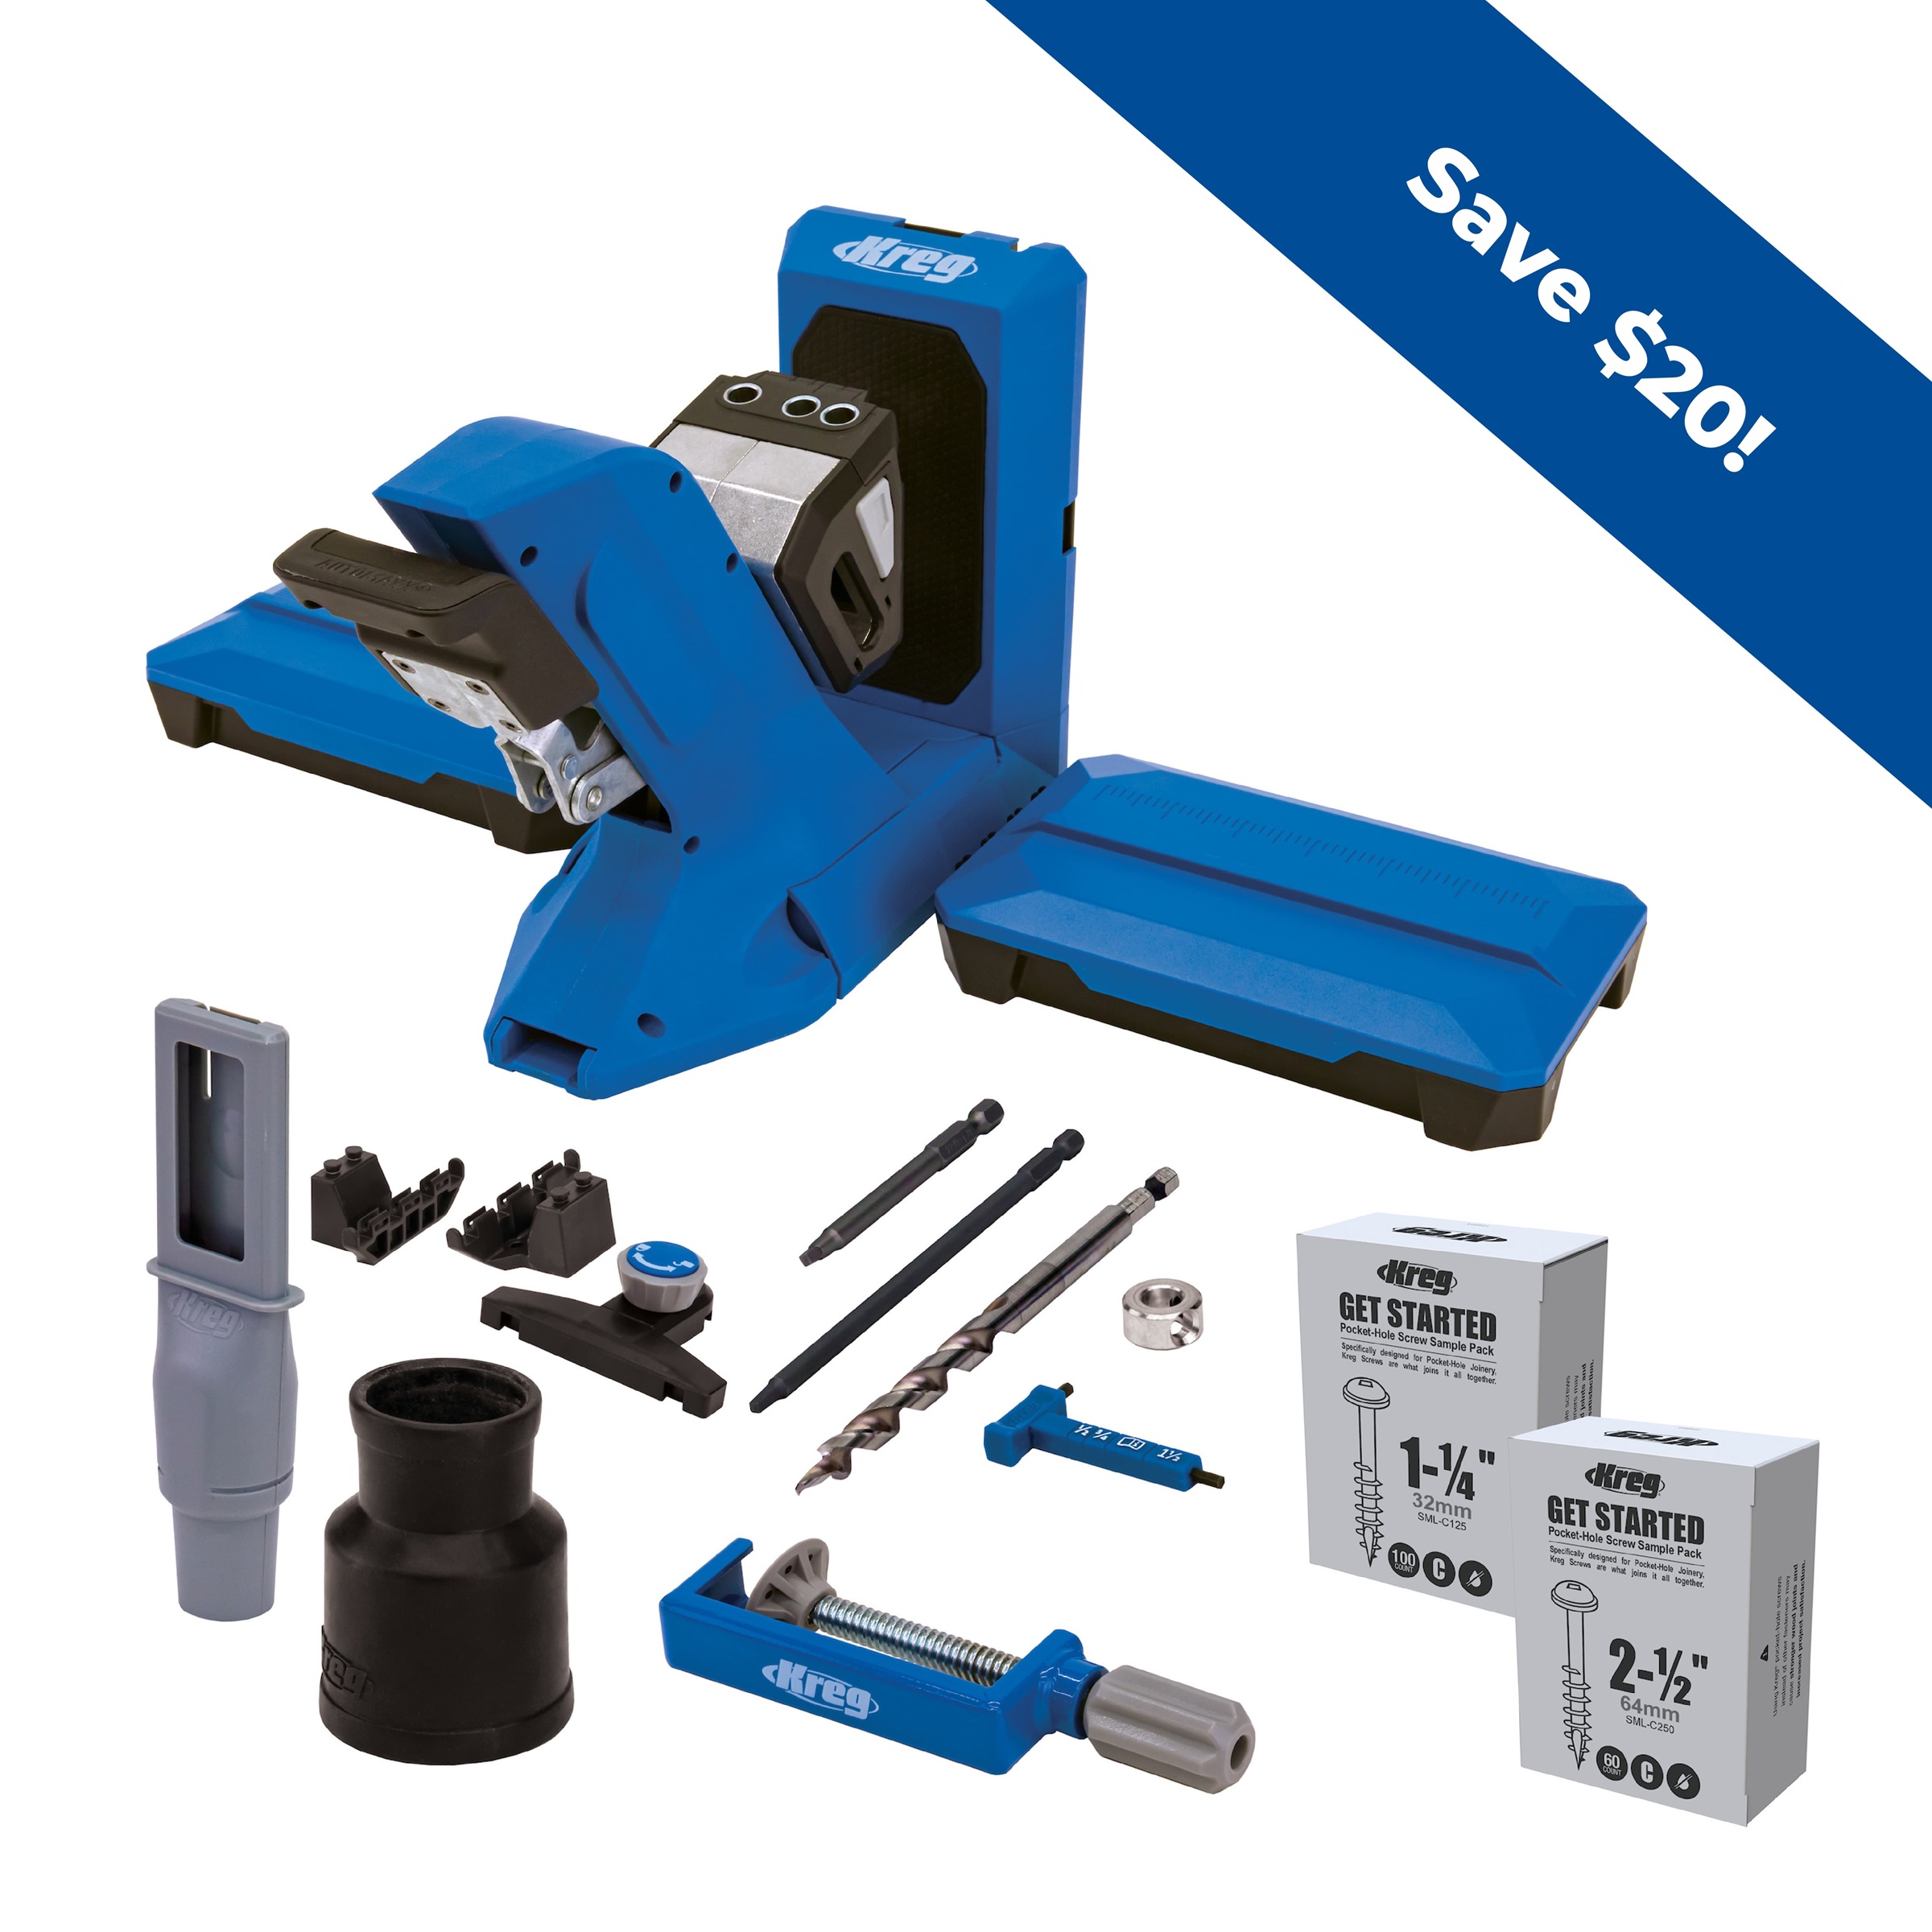
Kreg Tools


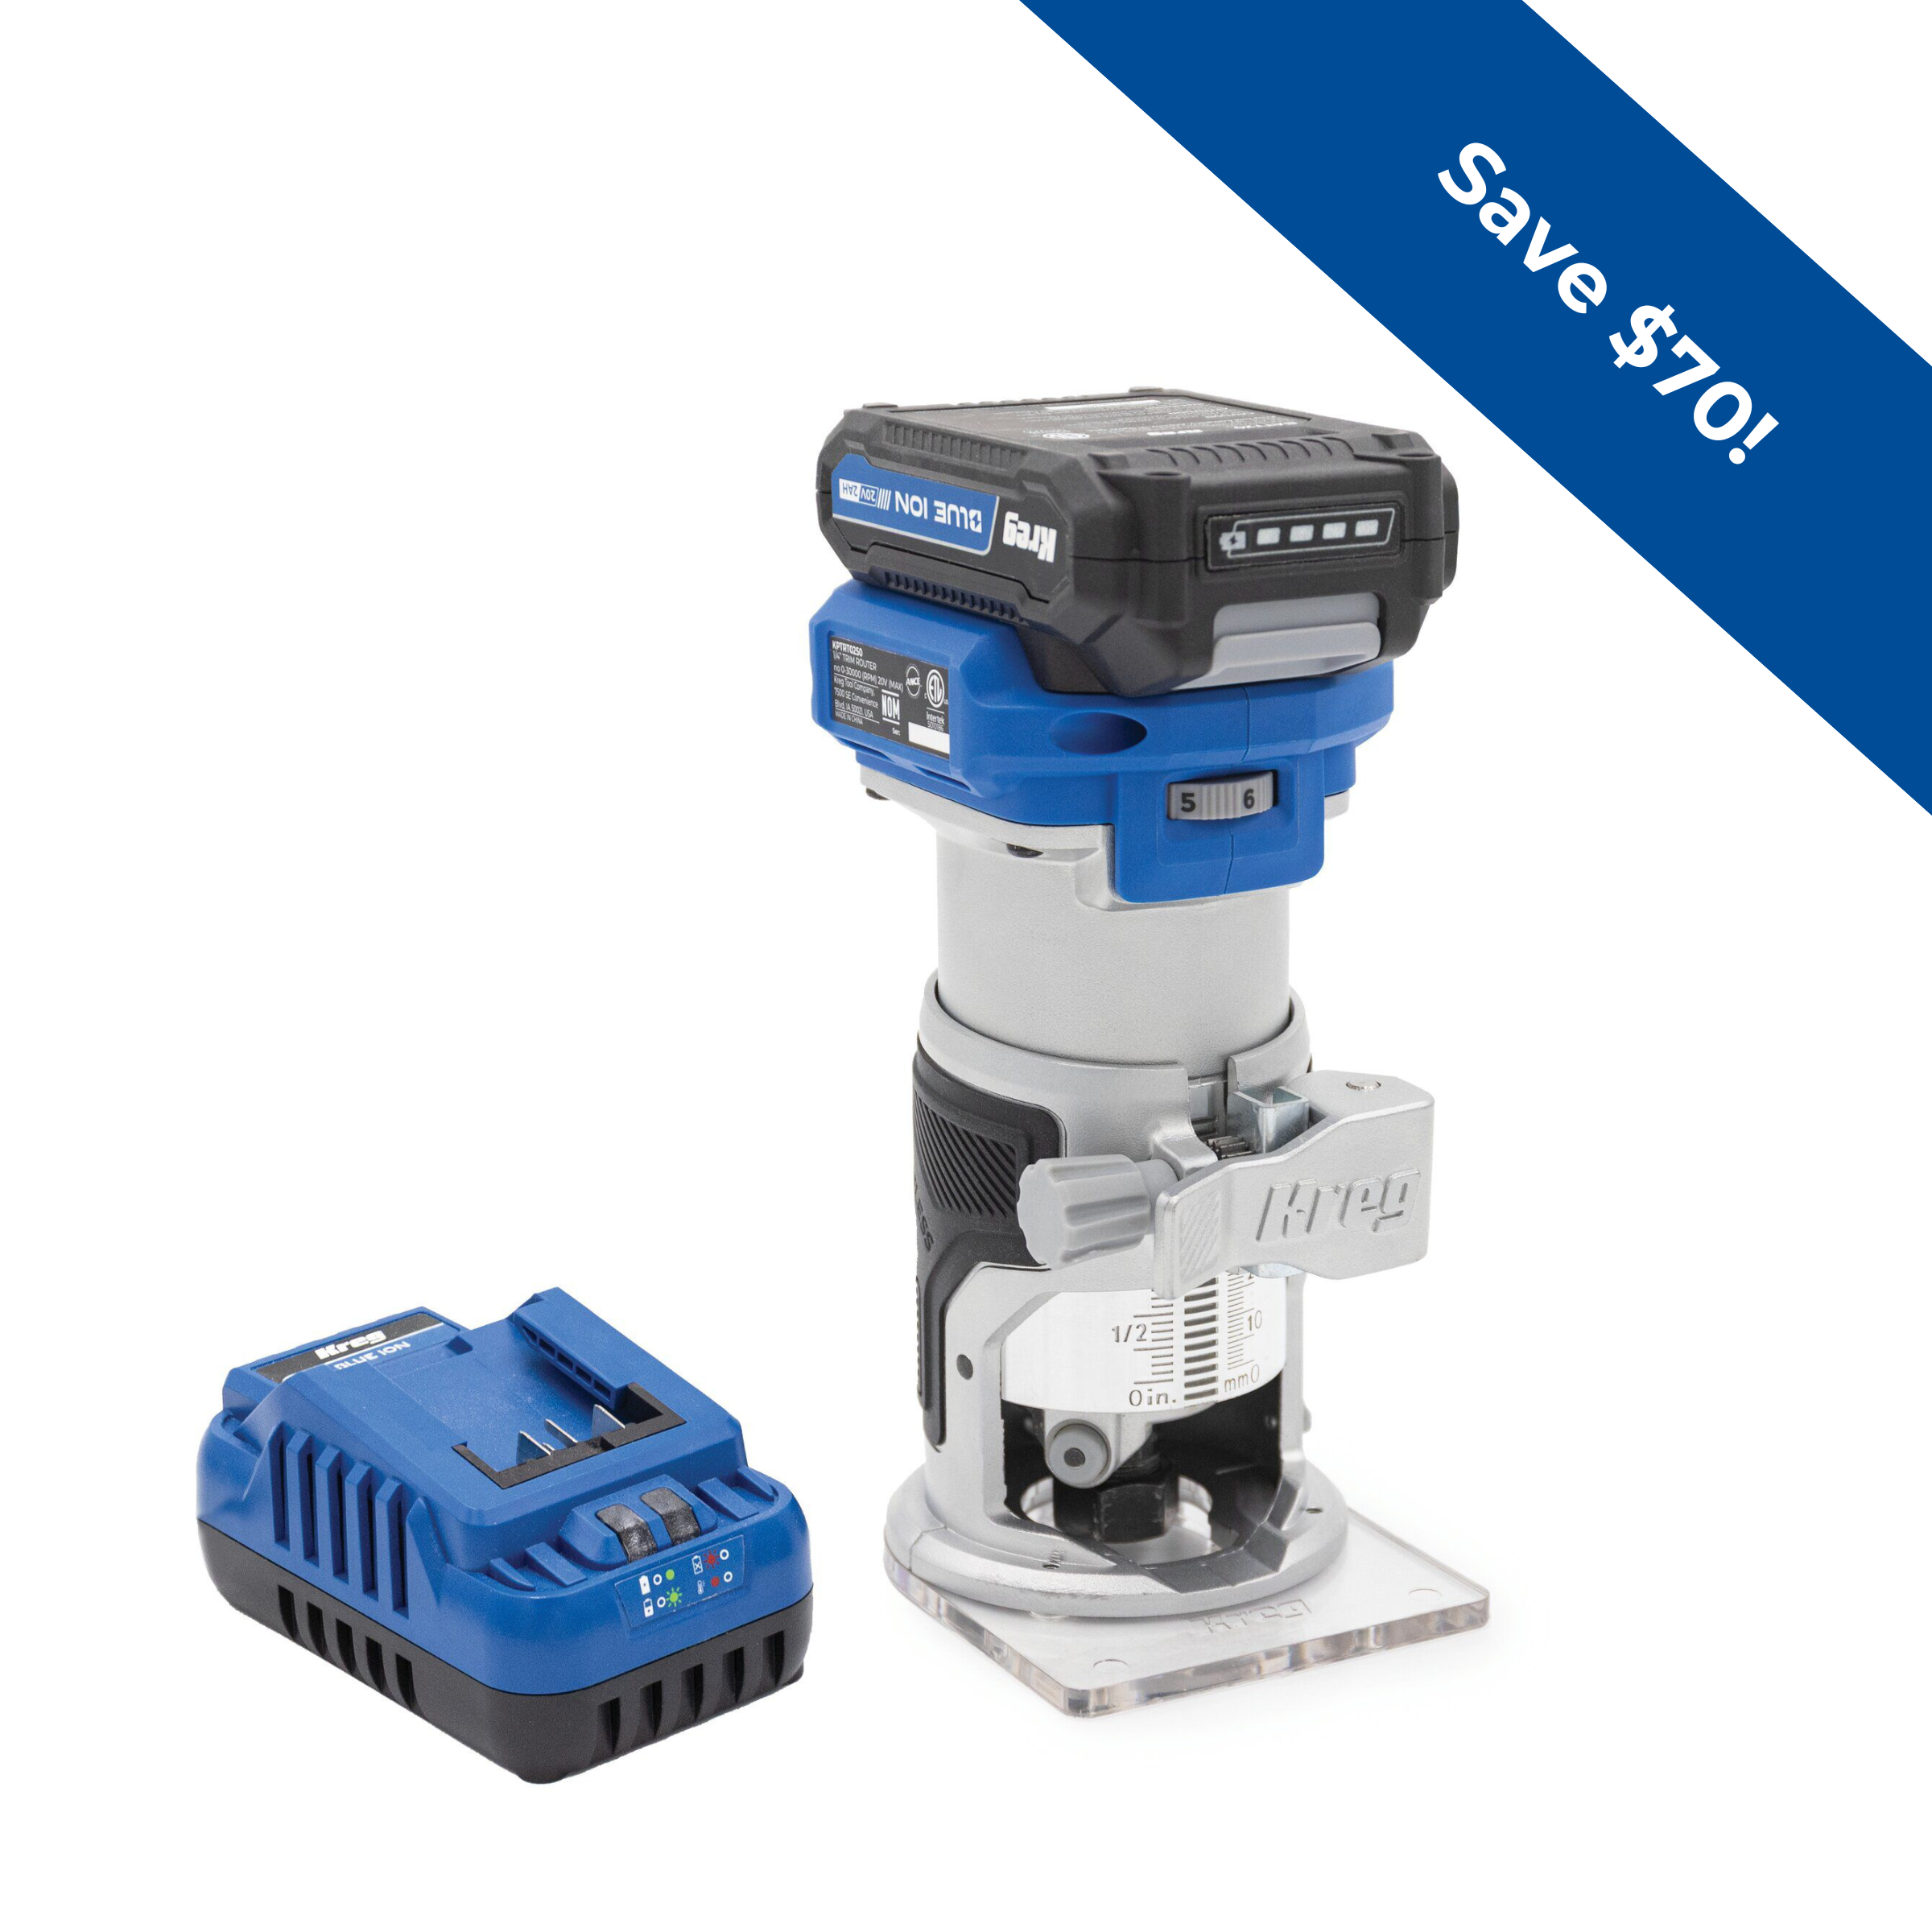
Other Tools
-
Table saw

Materials
Wood Products
- 4 1x2x8’ pine for slats , .75” x 1.5” x 96”
- 1 2x2x8’ any wood for legs , 1.5” x 1.5” x 96”
- 2 1x4x8’ any wood for long + side rails , .75” x 3.5” x 96”
- 3 1x6x8’ any wood for backrest + countertop , .75” x 5.5” x 96”
Hardware & Supplies
- 75 6x20mm loose tenons
- 25 1 1/2” pocket screws
- 10 Figure 8 fasteners (for countertop)
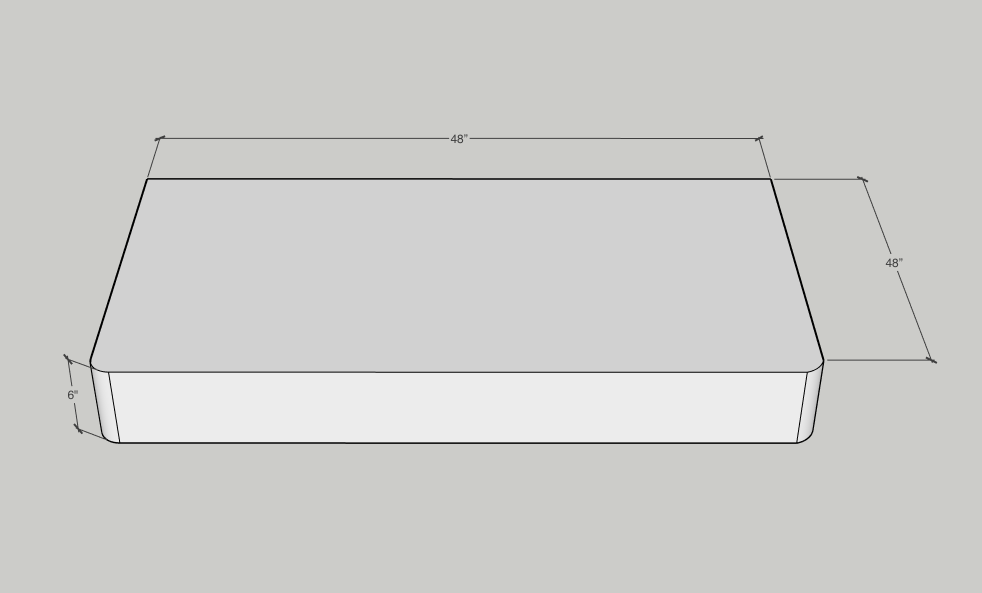
- 1 48”x 24” x 6” foam or prefinished bench cushion
- 3 Yards of fabric (if not using prefinished bench cushion)
- 1 Wood glue
- 1 Stain + finish of choice
- 1 3/8” round over bit (optional)
- 25 1 1/4” wood screws
- 1 1” forstner bit
- 1 Peel + stick Velcro
Directions
-
1
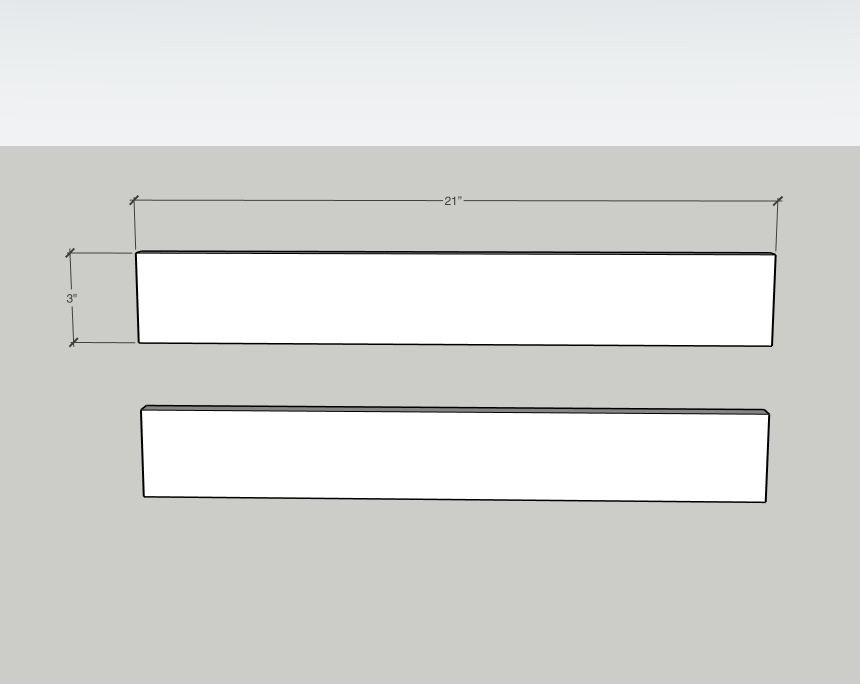
Rip the 1x4 boards to 3 inches on the table saw and cut them to length.
These will be the long rails for the bench.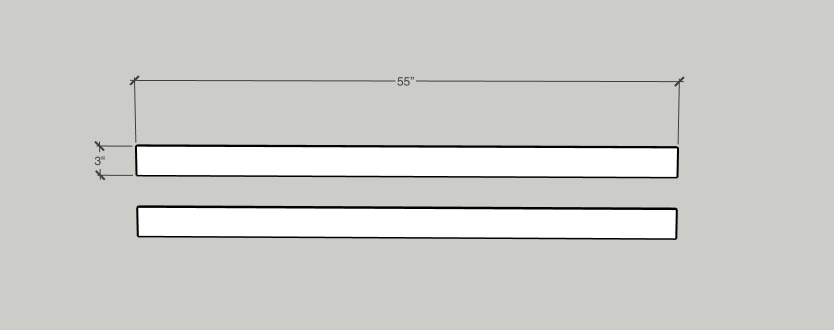
-
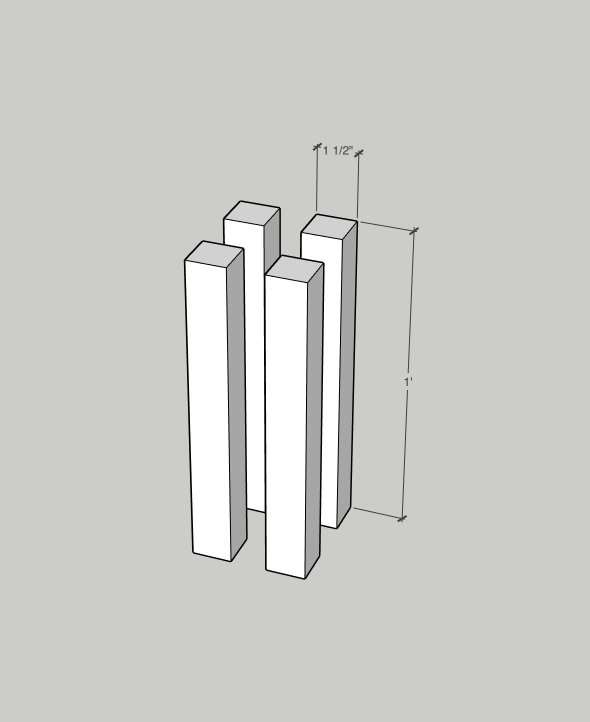
2
Cut the 2x2 to size. These will be the legs for the bench.
-
3
Mark the legs and the side rails so that the side rails are flushed to the outside edge of the legs.
Set the Mortise Mate to 3/4” using the 6 mm drill bit drill a mortise into the legs and the side rails.
Glue and clamp together. You should have two of these.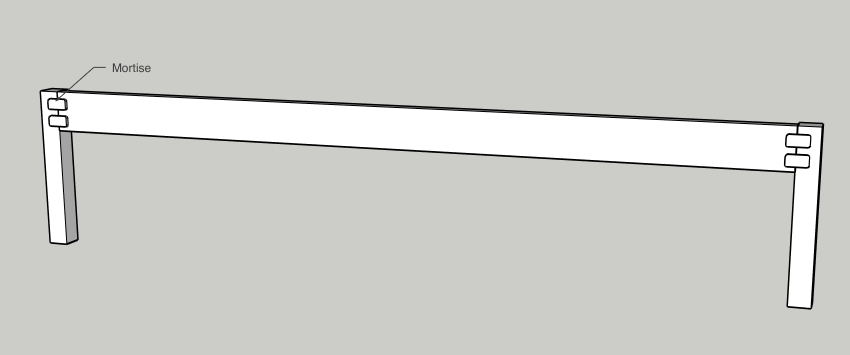
-
4
You can also use 1 1/2” pocket screws and wood glue to attach the long rails to the legs.
Just set your pocket jig and bit to 3/4”.
-
5
Rip the side rails to 3 inches with a table saw and then cut to size.
-
6
Use either loose tenons with the Mortise Mate to attach the side rails to the legs as shown in the picture or use pocket screws.
Make sure the rails are flush with the outside edge of the legs.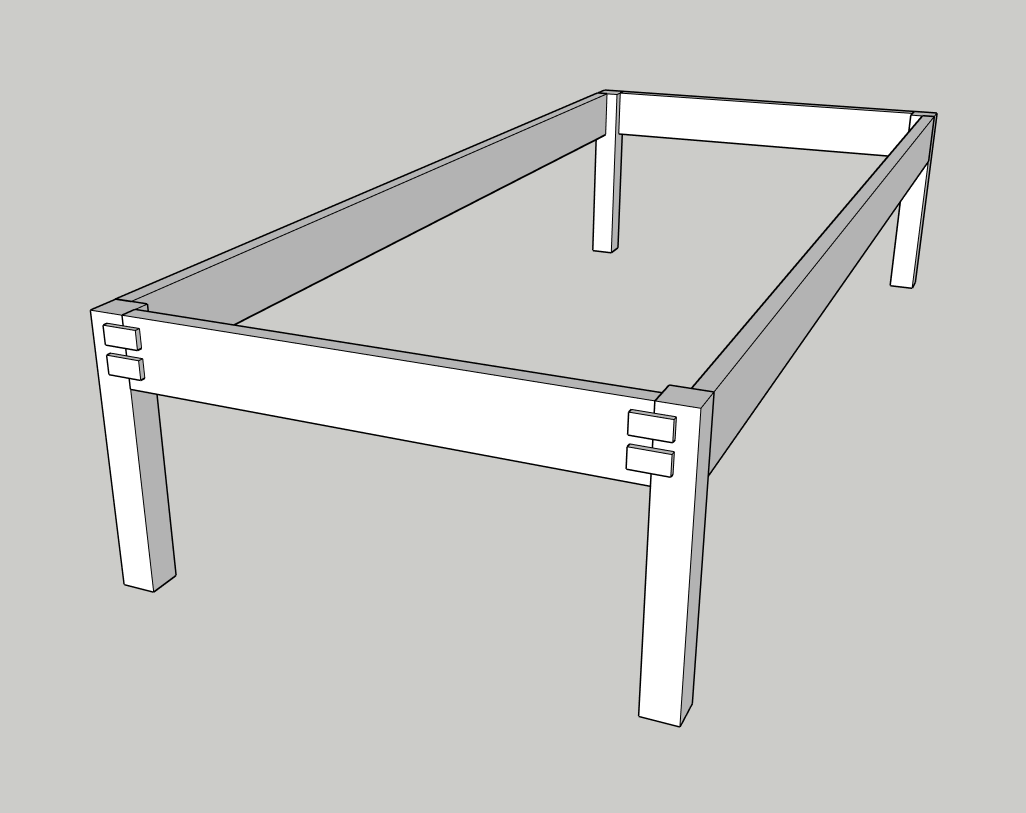
-
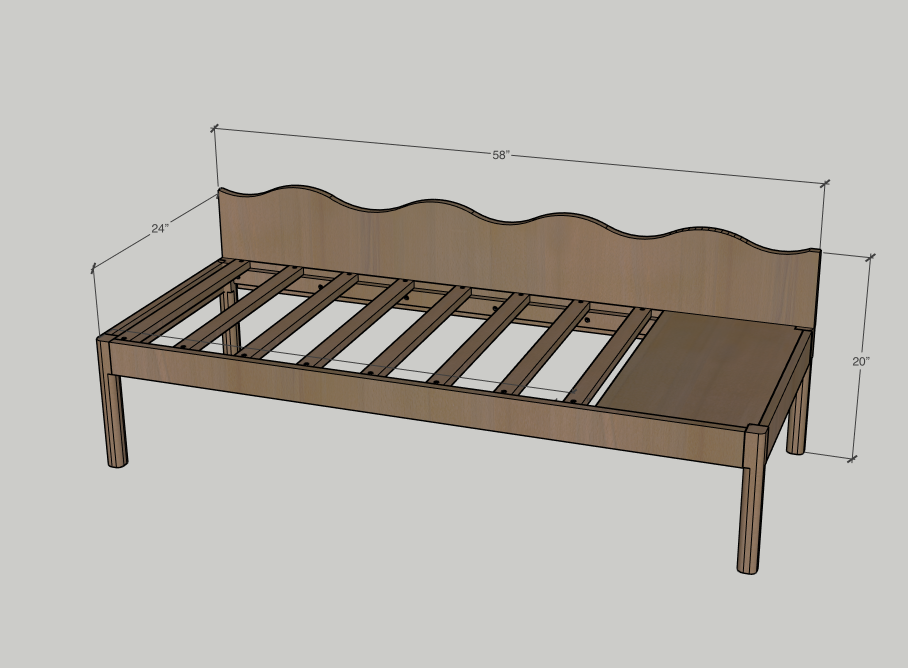
7
Screw the bench slat supports 3/4” down from the top of the long bench rails as shown in the picture.
Use wood glue and 1 1/4” wood screws.
Do this on both sides of the long rails.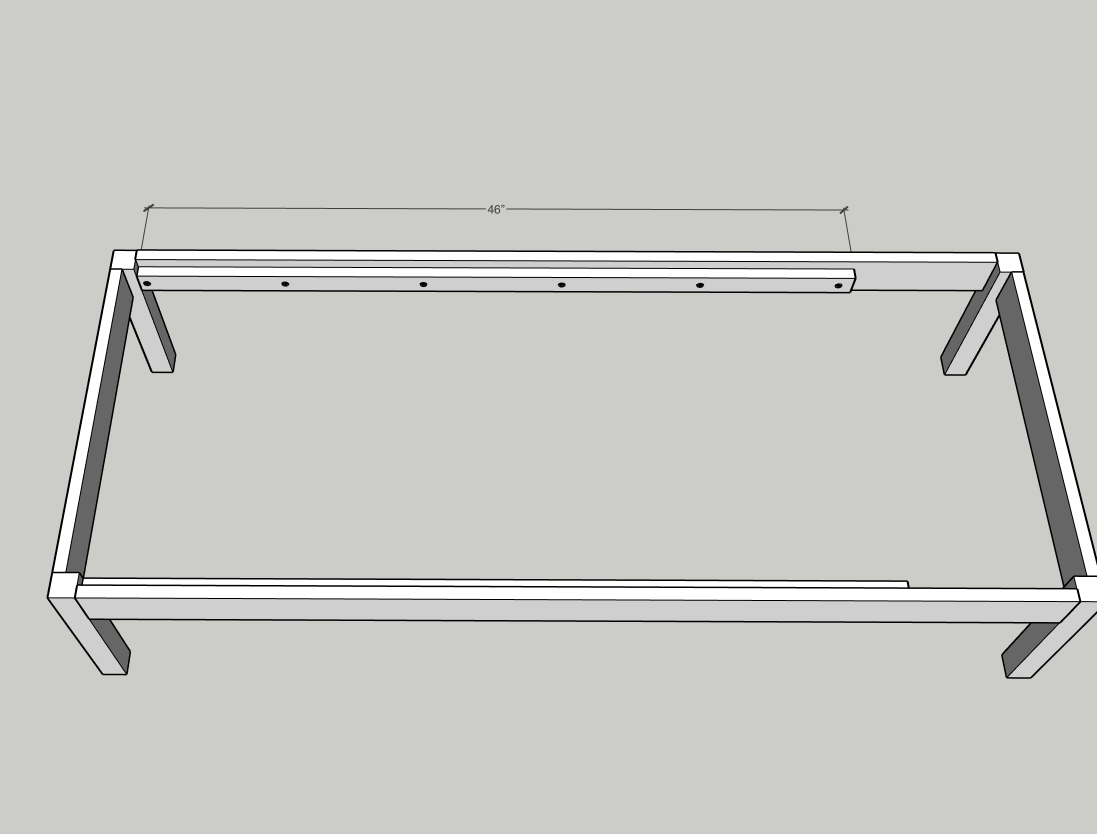
-
8
Screw the bench slats to the bench slat supports using 1 1/4” wood screws.
Tip: pre drill before screwing to prevent the wood splitting.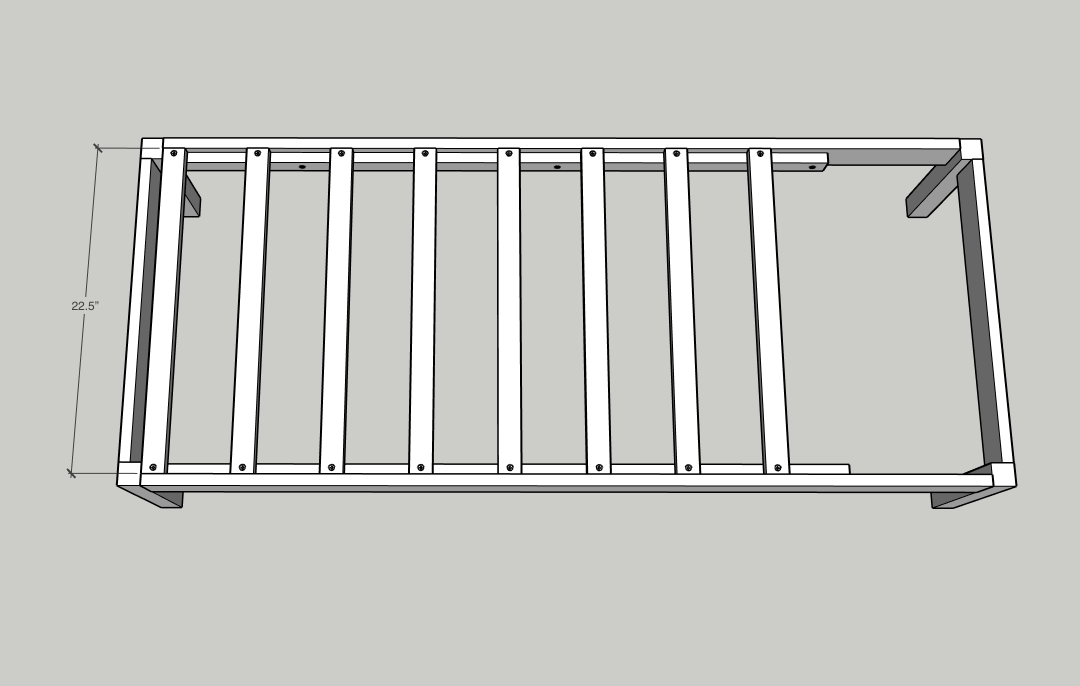
-
9
After gluing and cutting the countertop to size, use a jigsaw to cut out notches on the right side.
The notches should be 3/4” x 3/4”. To keep the jigsaw cutting straight it helps to use a square.
-
10
Attach the countertop support 3/4” down on the right side of the bench.
Use 1 1/4” wood screws.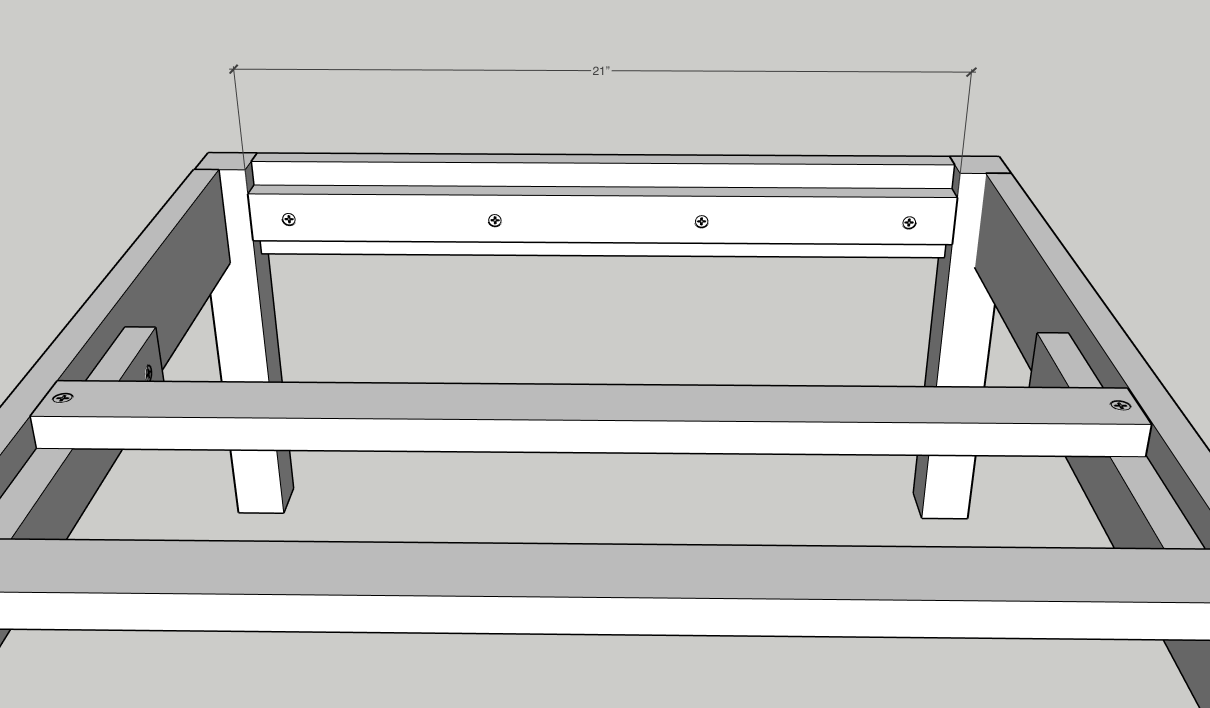
-
11
Using the 1” forstner bit, drill holes in the edge of the supports (as shown in the picture) for the figure 8 fasteners.
The fasteners should sit flush or slightly under the top of the wood.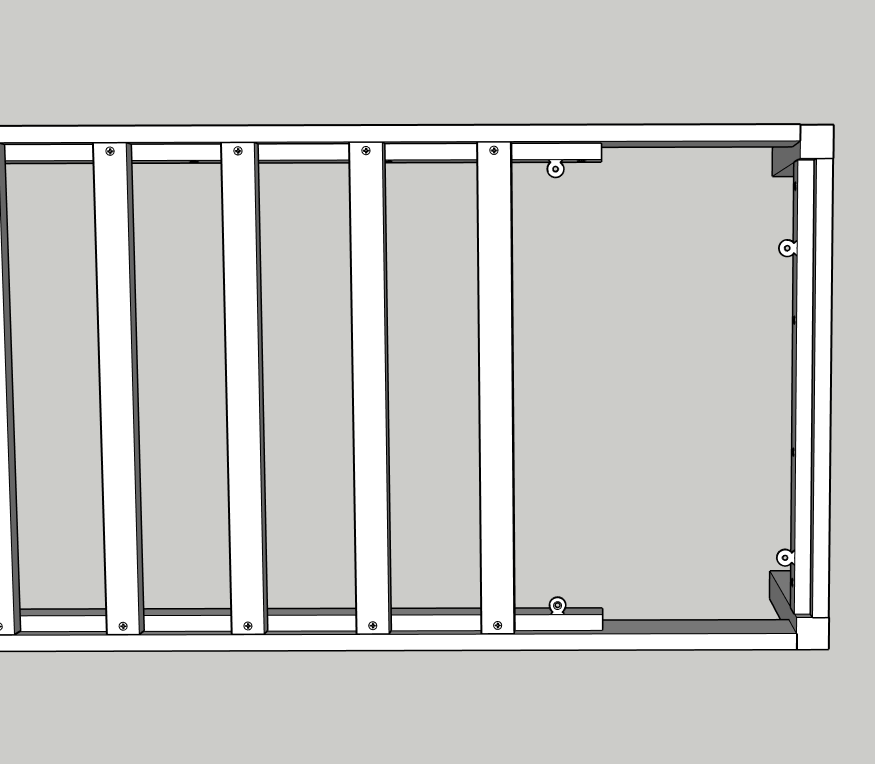
-
12
Attach the countertop to the figure 8 fasteners using the provided screws.
This will allow the wood to move with the seasons.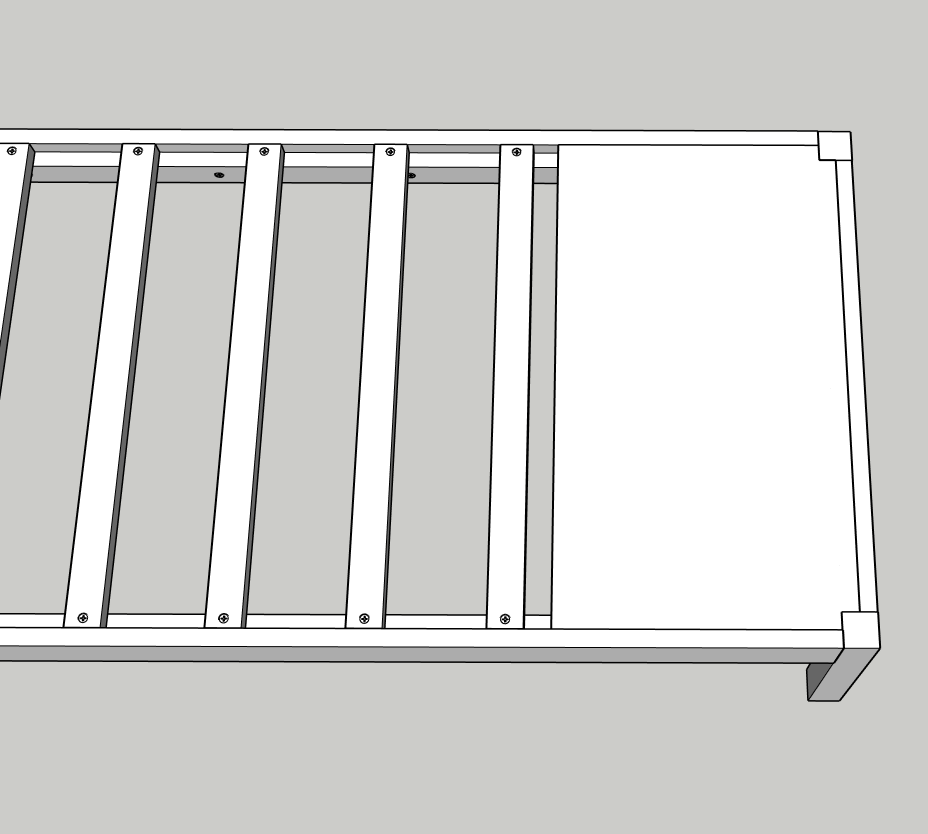
-
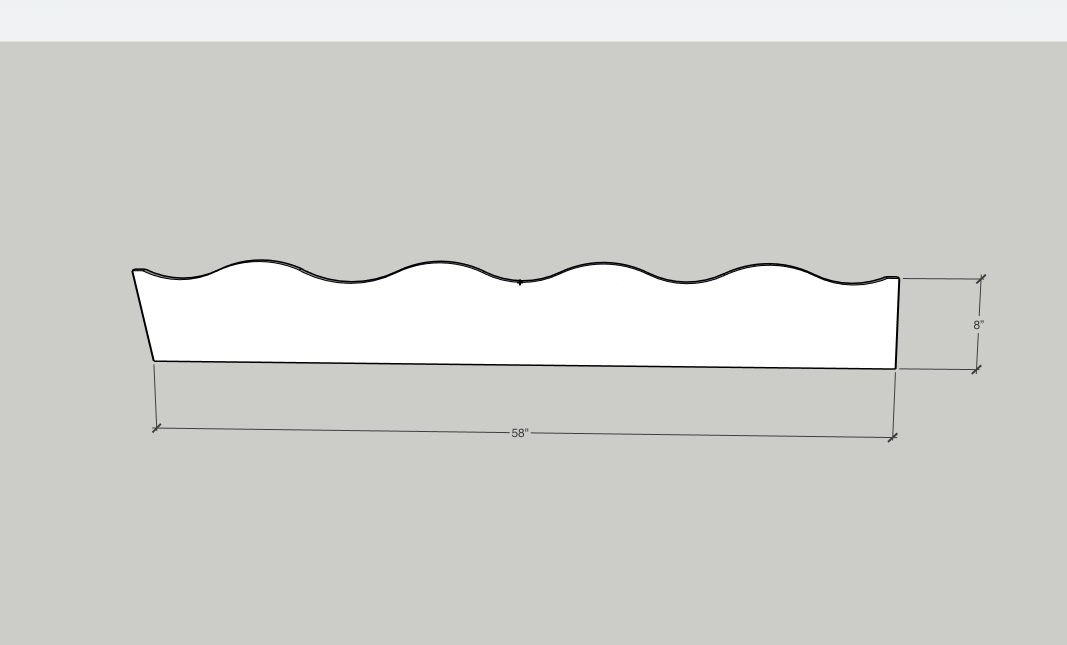
13
After gluing up the backrest + cutting it to size, use a jigsaw to cut out whatever shape you want.
This is completely optional. You can just leave the backrest square!If you do want a wavy pattern, I suggest using bowls to layout what you like before cutting.
-
14
Using 1 1/2” pocket screws, attach the backrest to the back of the bench.
-
15
Stain + finish!
Tip: sand each piece of wood before putting them together.
Optional: round over the legs and rails using a 3/8” round over bit.
-
16
Use either a prefinished bench cushion or if you have sewing skills, then sew a cushion cover for the foam.
-
17
Use sticky tape Velcro to keep the bench cushion in place.