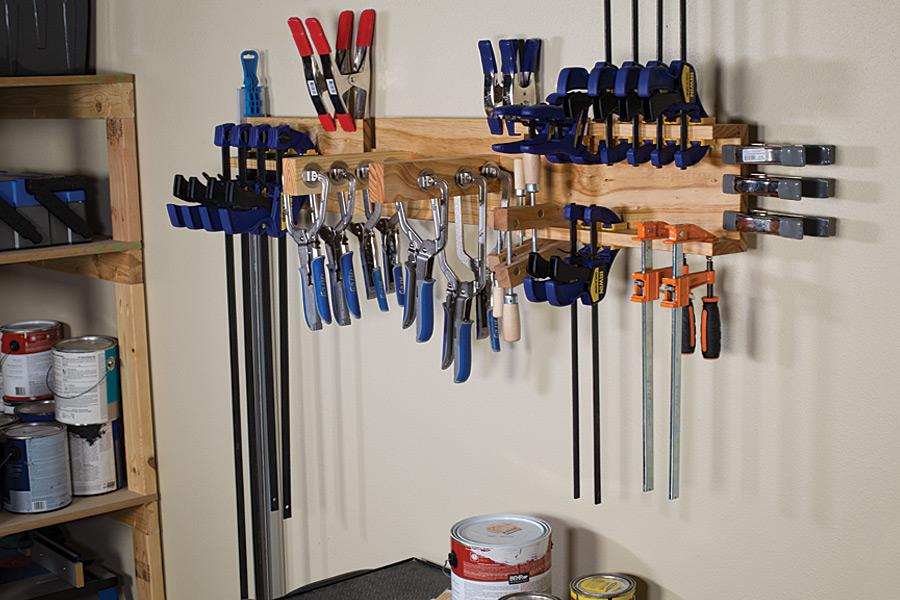
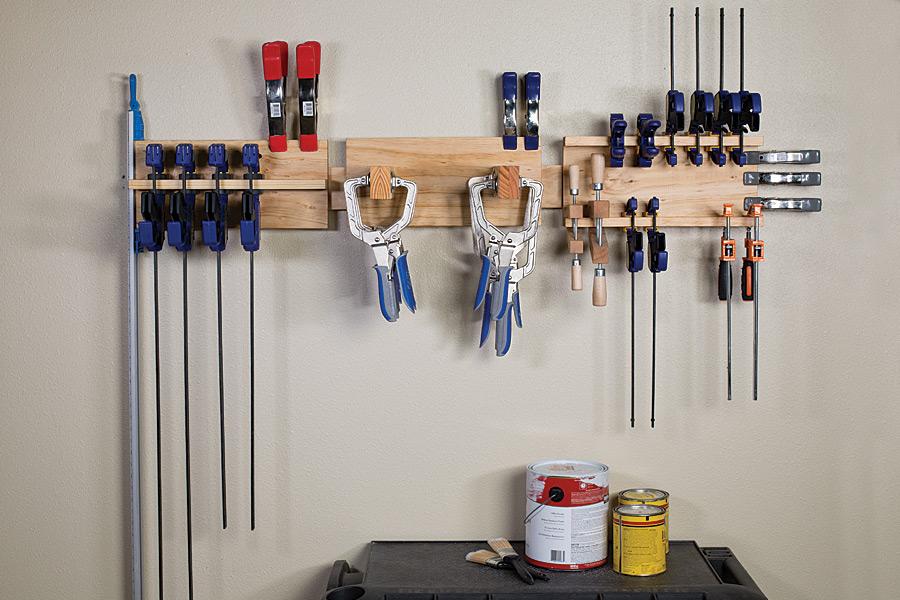


There’s an old—and very true—adage that says you can never have too many clamps. As you build projects, you’ll amass a collection of clamps many different type, sizes, and shapes. This clever storage system makes it easy to store them all, with individual racks that slip onto a wall-mounted rail.
Tools
Kreg Tools


Other Tools
-
miter saw

Materials
Wood Products
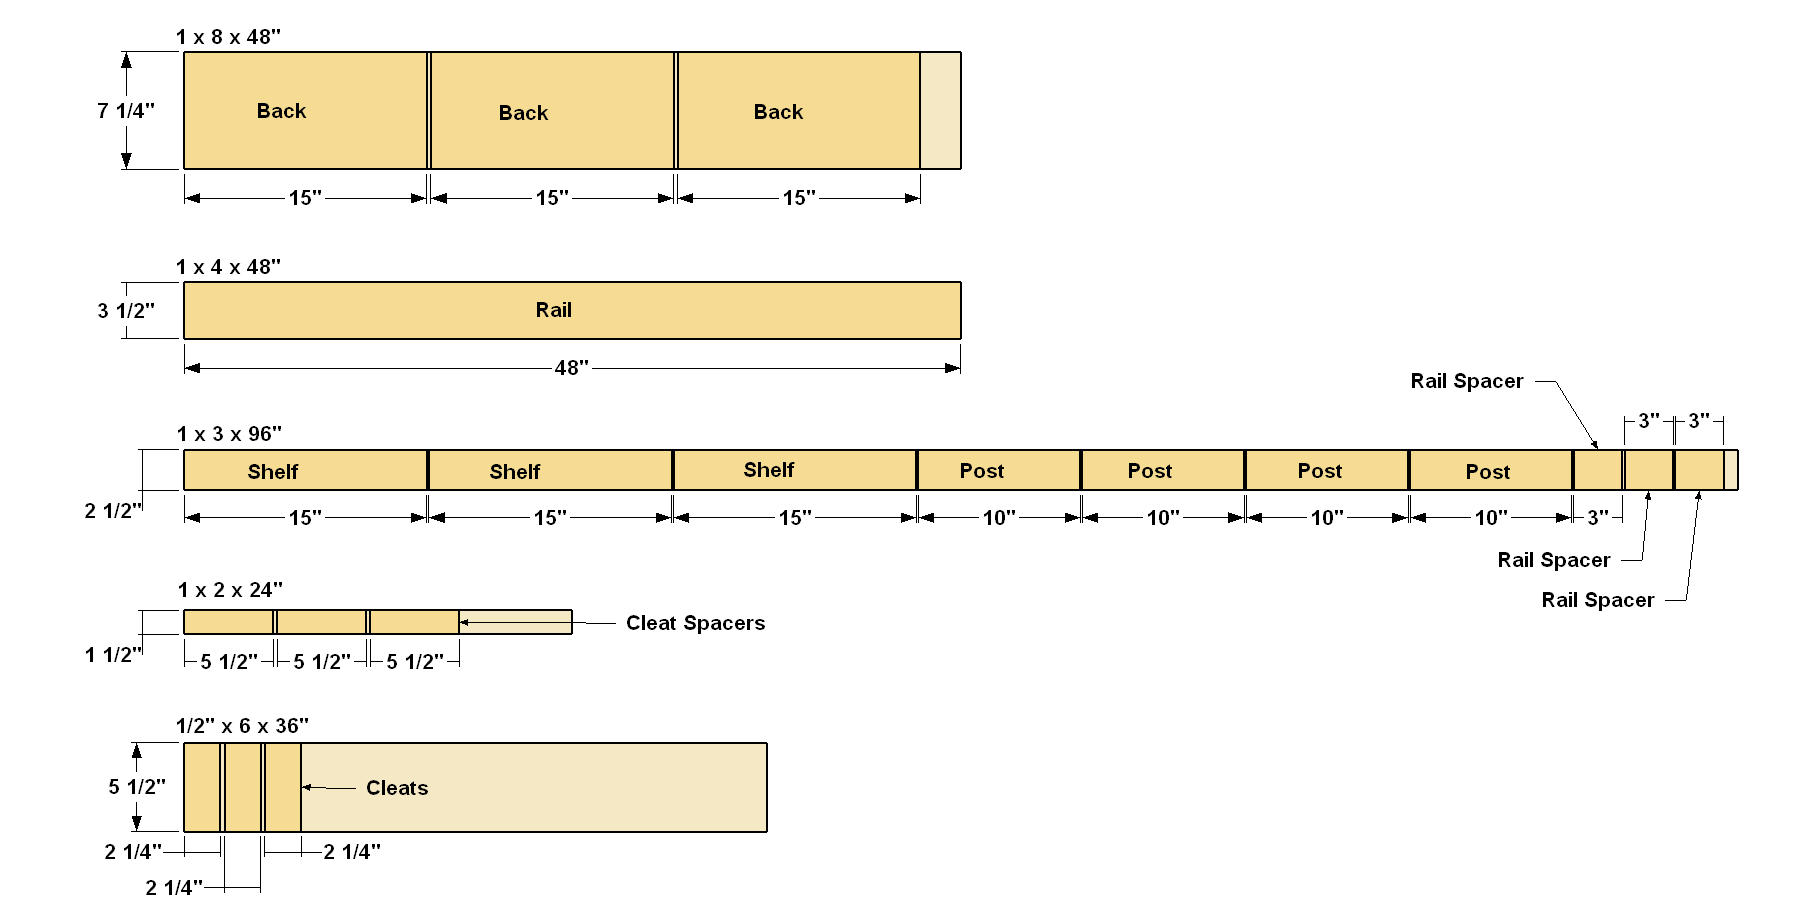
- 1 Pine board , 1x8 x 48"
- 1 Pine board , 1x4 x 48"
- 1 Pine board , 1x3 x 96"
- 1 Pine board , 1x2 x 24"
- 1 Pine board , 1/2"x6 x 36"
Hardware & Supplies
- 23 1 1/4" coarse-thread Kreg Pocket-Hole Screws (for all three clamp versions)
- 9 #8 x 1 1/2" flat-head wood screws
- 6 #10 x 3" flat-head wood screws
Cut List & Parts
- 3 Back , 3/4" x 7 1/4 " x 15"
- 3 Shelf , 3/4" x 2 1/2 " x 15"
- 4 Post , 3/4" x 2 1/2" x 10"
- 3 Cleat , 1/2" x 5 1/2" x 2 1/4"
- 3 Cleat Spacer , 3/4" x 1 1/2" x 5 1/2"
- 1 Rail , 3/4" 3 1/2" x 48"
- 3 Rail Spacer , 3/4" x 2 1/2 " x 3"
Directions
-
Cut the Backs
Cut three Backs to length from a 1x8 board, as shown in the cutting diagram. Sand he faces and edges smooth, then set these pieces aside.
-
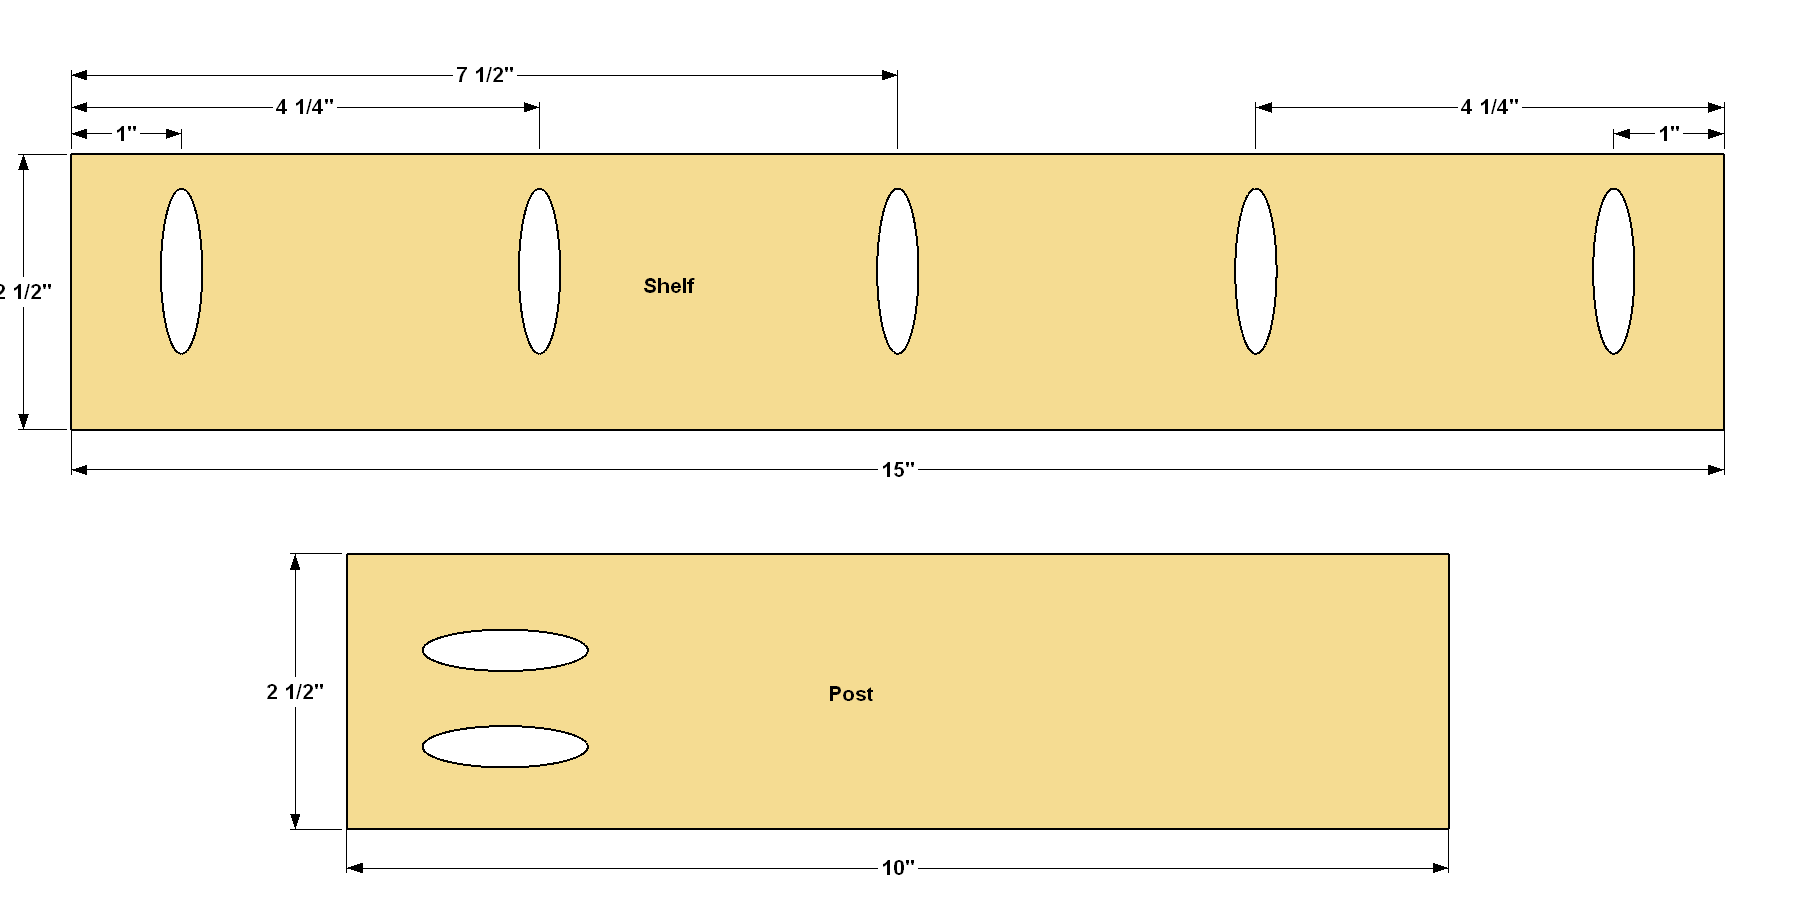
Make the Shelves and Posts
Cut three Shelves and four Posts to length from a 1x3 board, as shown in the cutting diagram. Set up your Kreg® Pocket-Hole Jig for 3/4" material, and then drill pocket holes in each Post and Shelf, as shown.
-
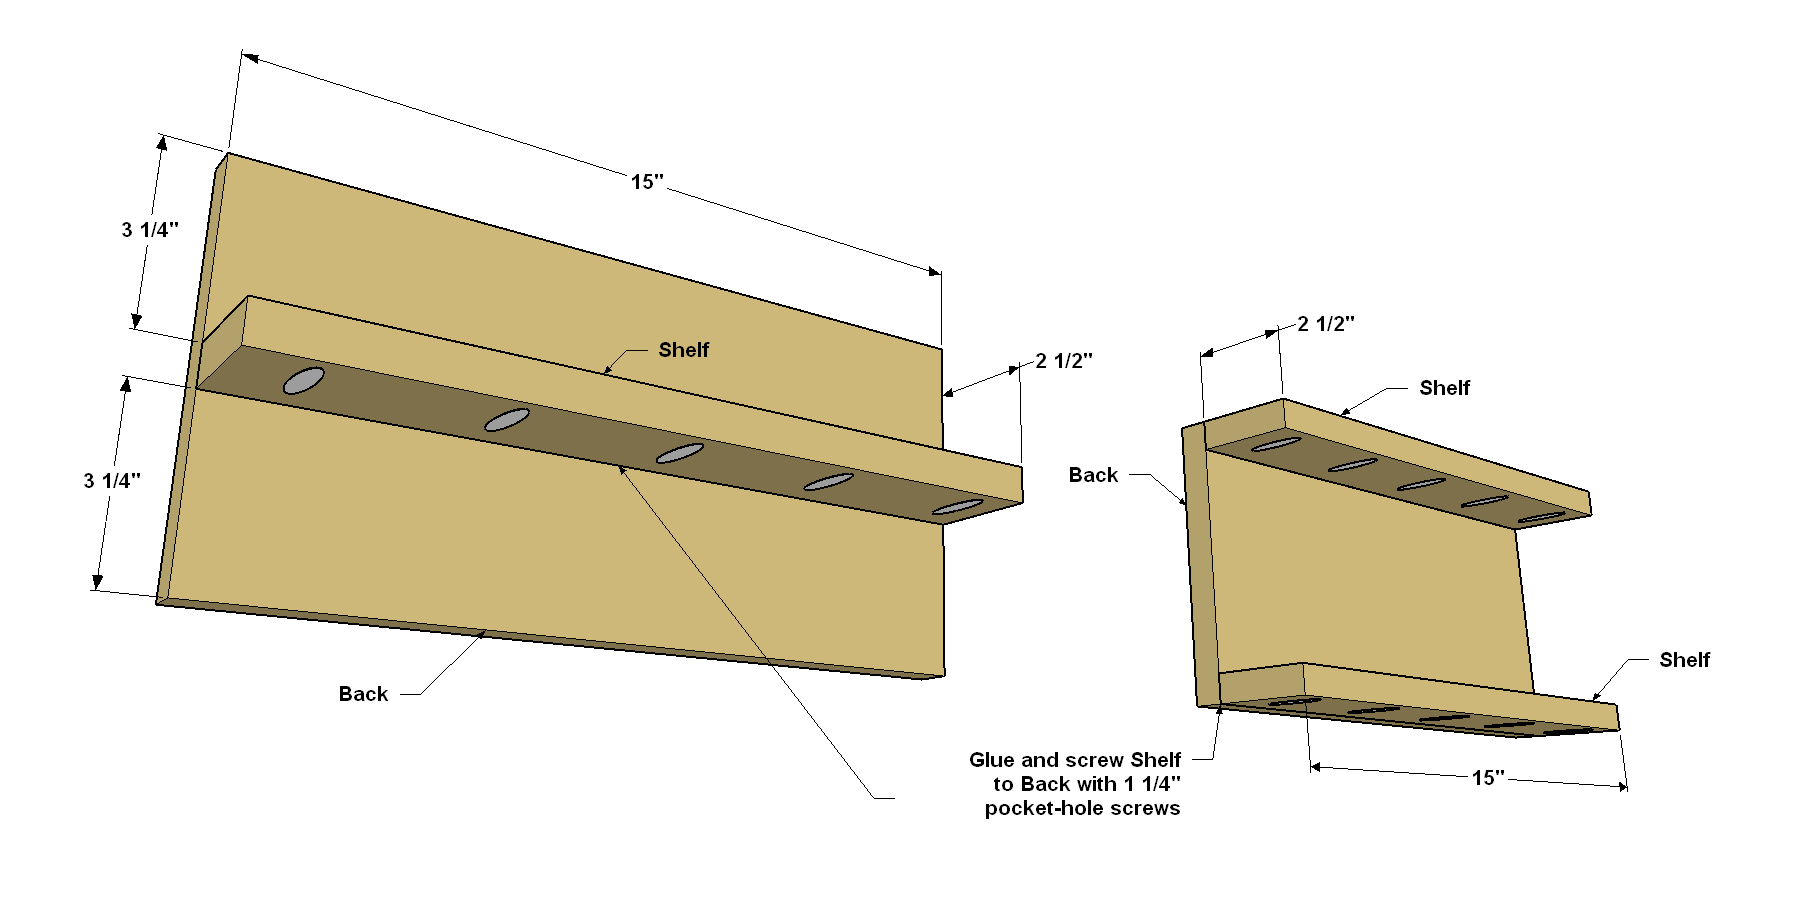
Attach the Shelves to the Backs
Glue and screw the Shelves to two of the Backs in the configurations shown using 1 1/4" coarse-thread Kreg Pocket-Hole Screws.
-
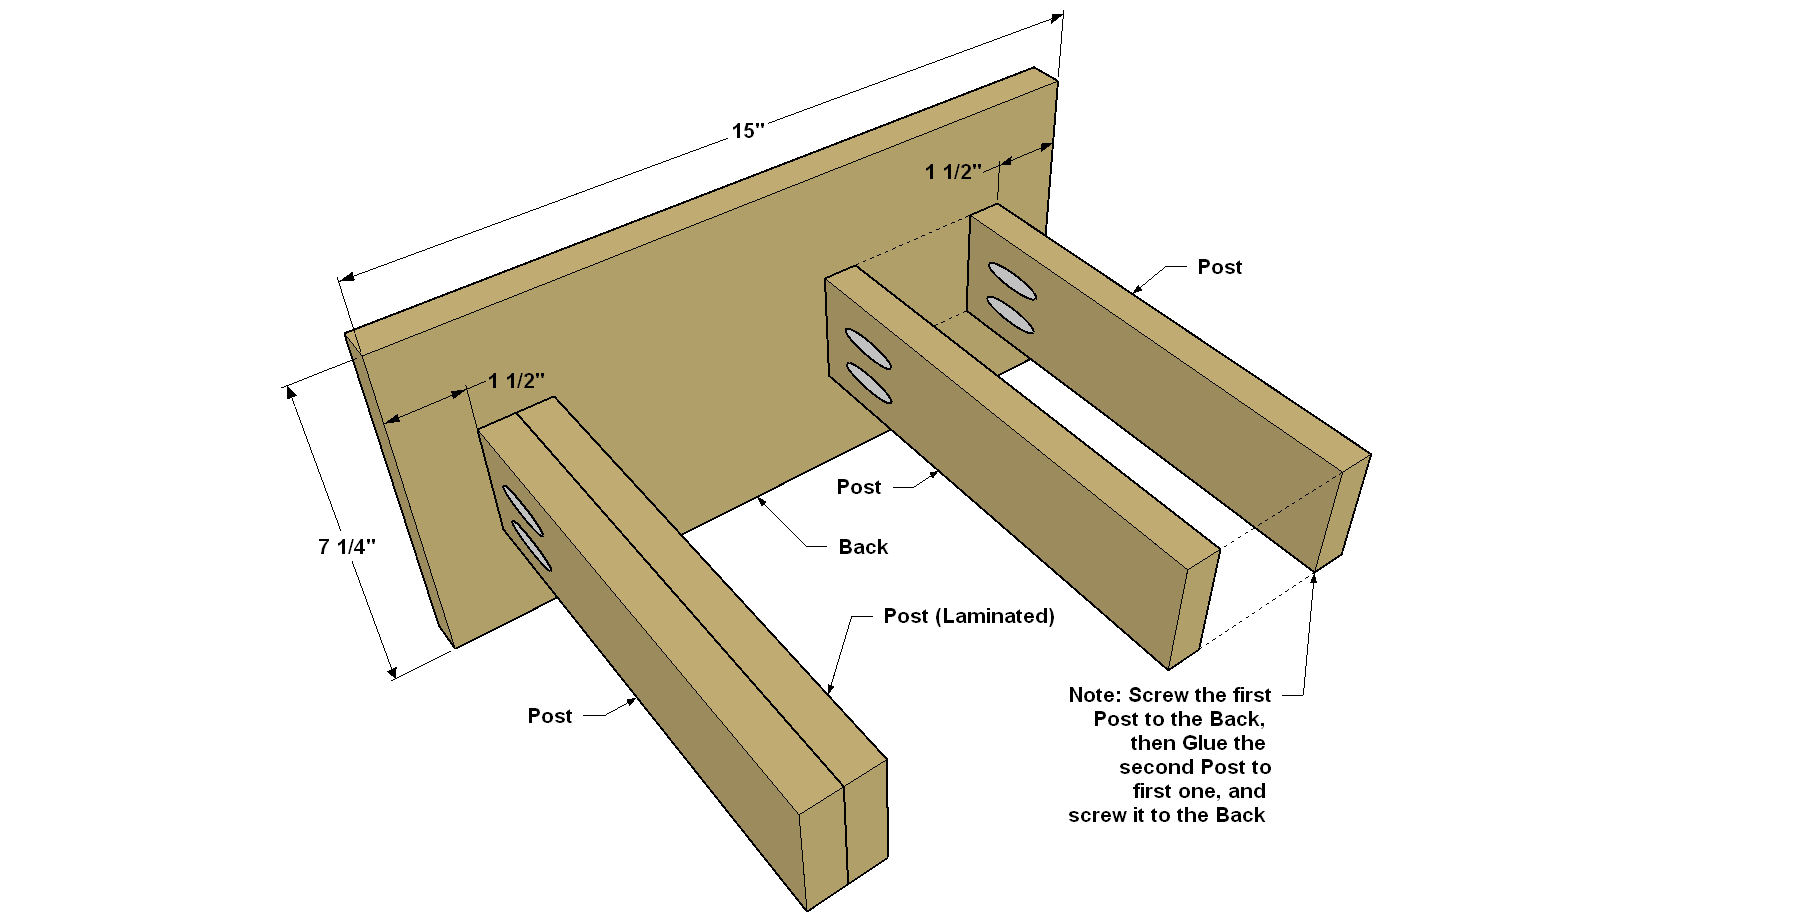
Attach the Posts to the Backs
Glue and screw the first Post to a Back where shown using 1 1/4" coarse-thread Kreg Pocket-Hole Screws. Then glue the second Post to the first, clamp it in place, and secure it to the Back, as well. Do this for both Post assemblies.
-
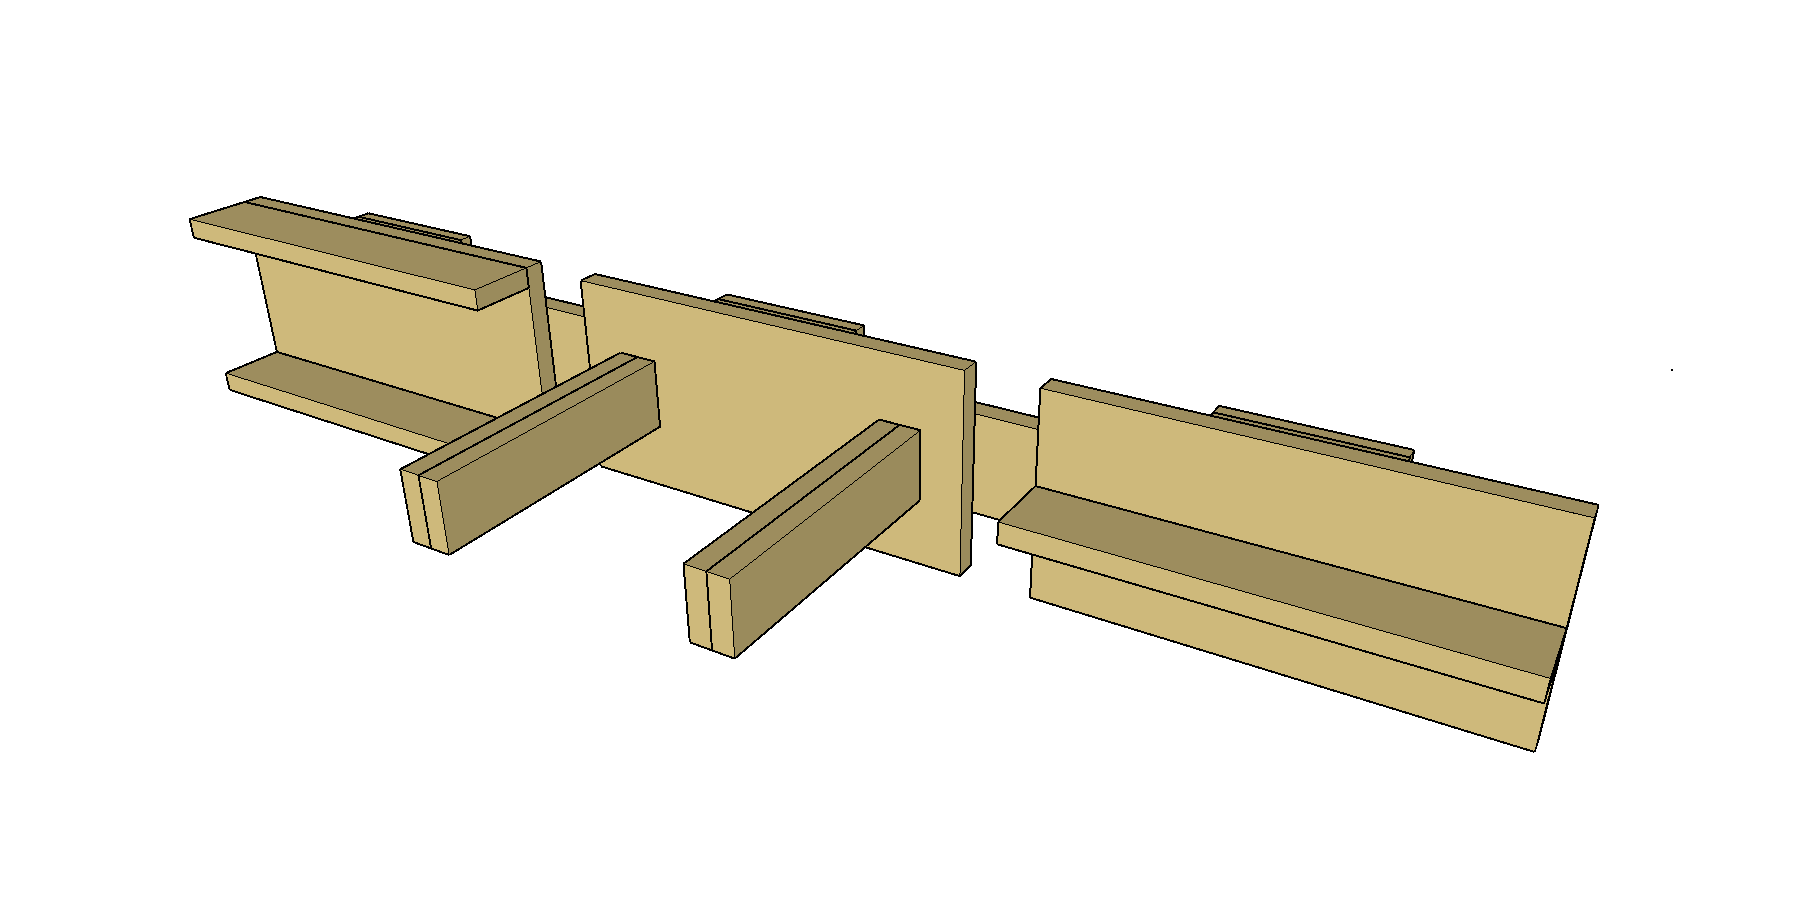
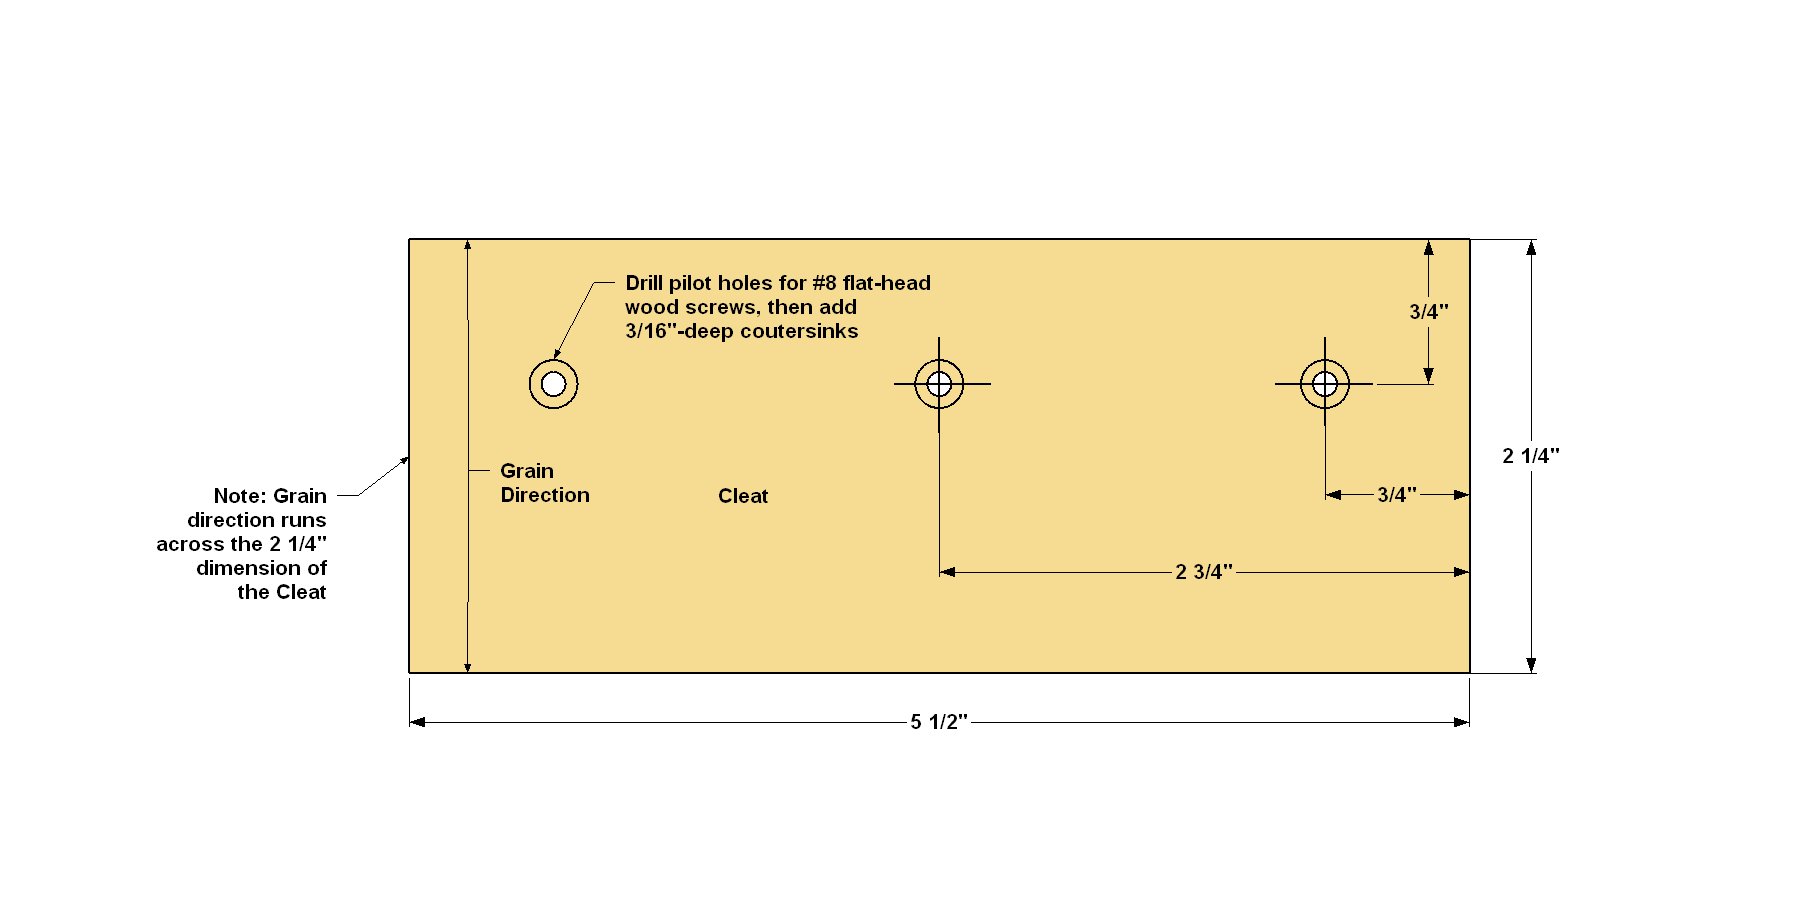
Make the Cleats
From a 1/2" x 6 board (5 1/2" actual width), cut three Cleats to length as shown in the cutting diagram. Drill countersunk holes about 3/16" deep at each location, as shown.
-
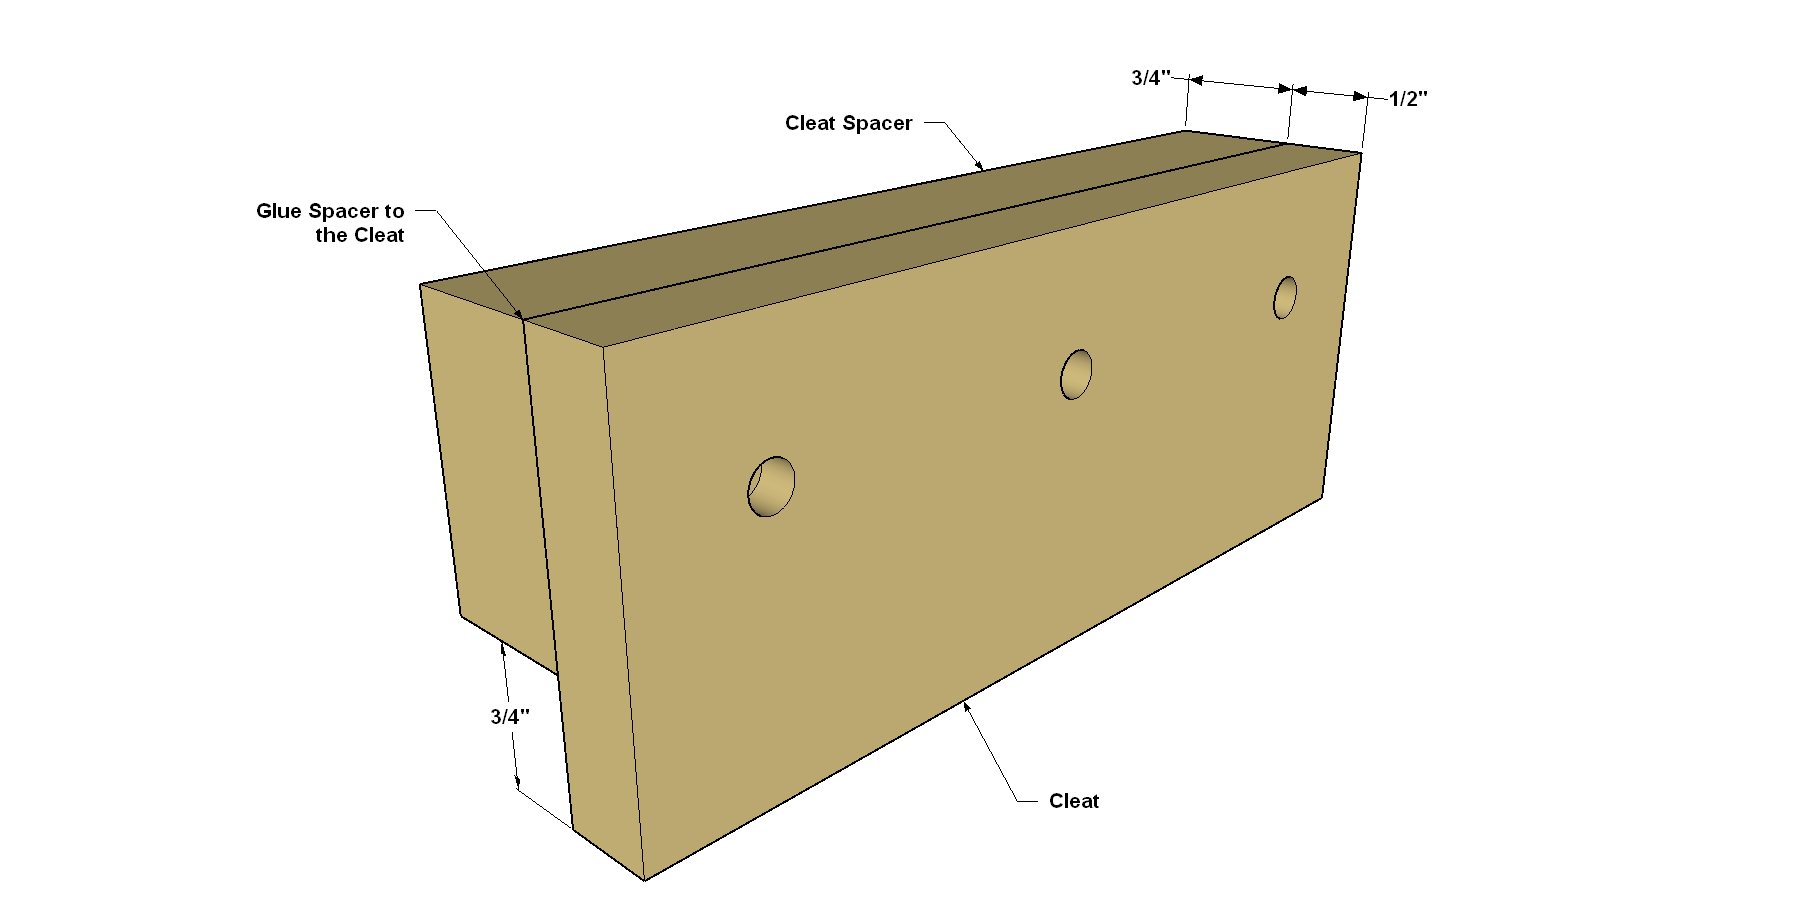
Add Spacers, Assemble the Cleats
Cut three Cleat Spacers to length from a 1x2 board, as shown in the cutting diagram. Then glue and clamp each Spacer to the back of each Cleat, as shown.
-
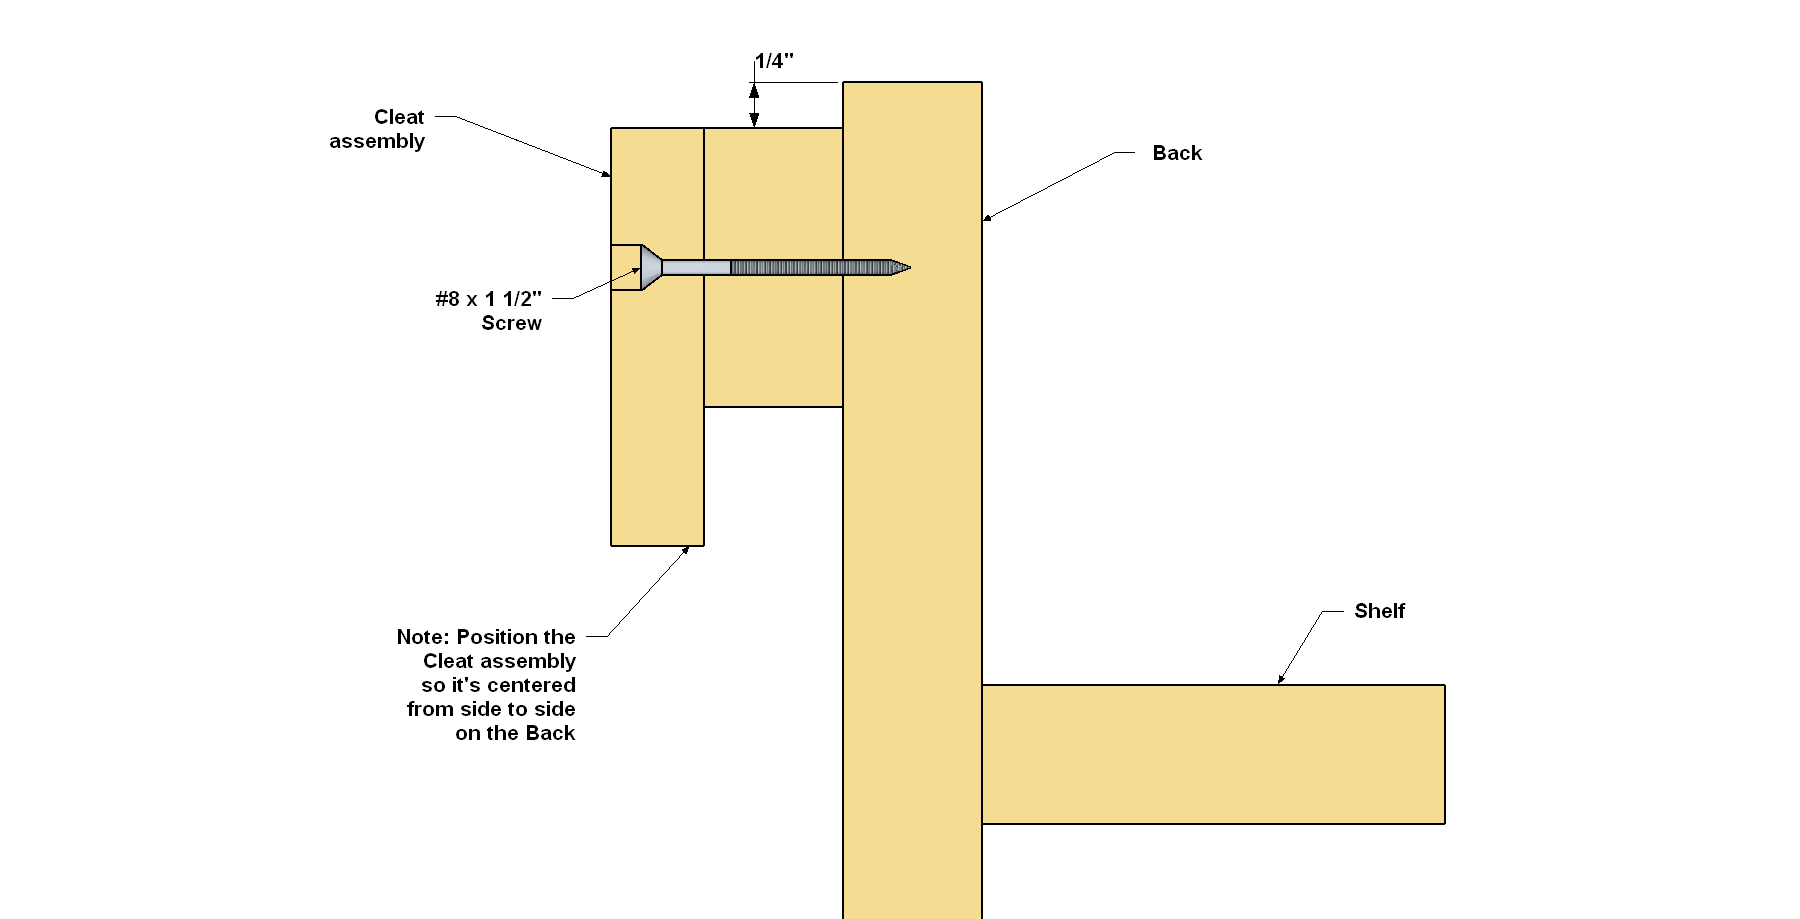
Attach the Cleat to the Back
Glue and clamp the Cleat assembly to the Back at the location shown. Secure the Cleat with three #8 x 1 1/2" flat-head wood screws.
-
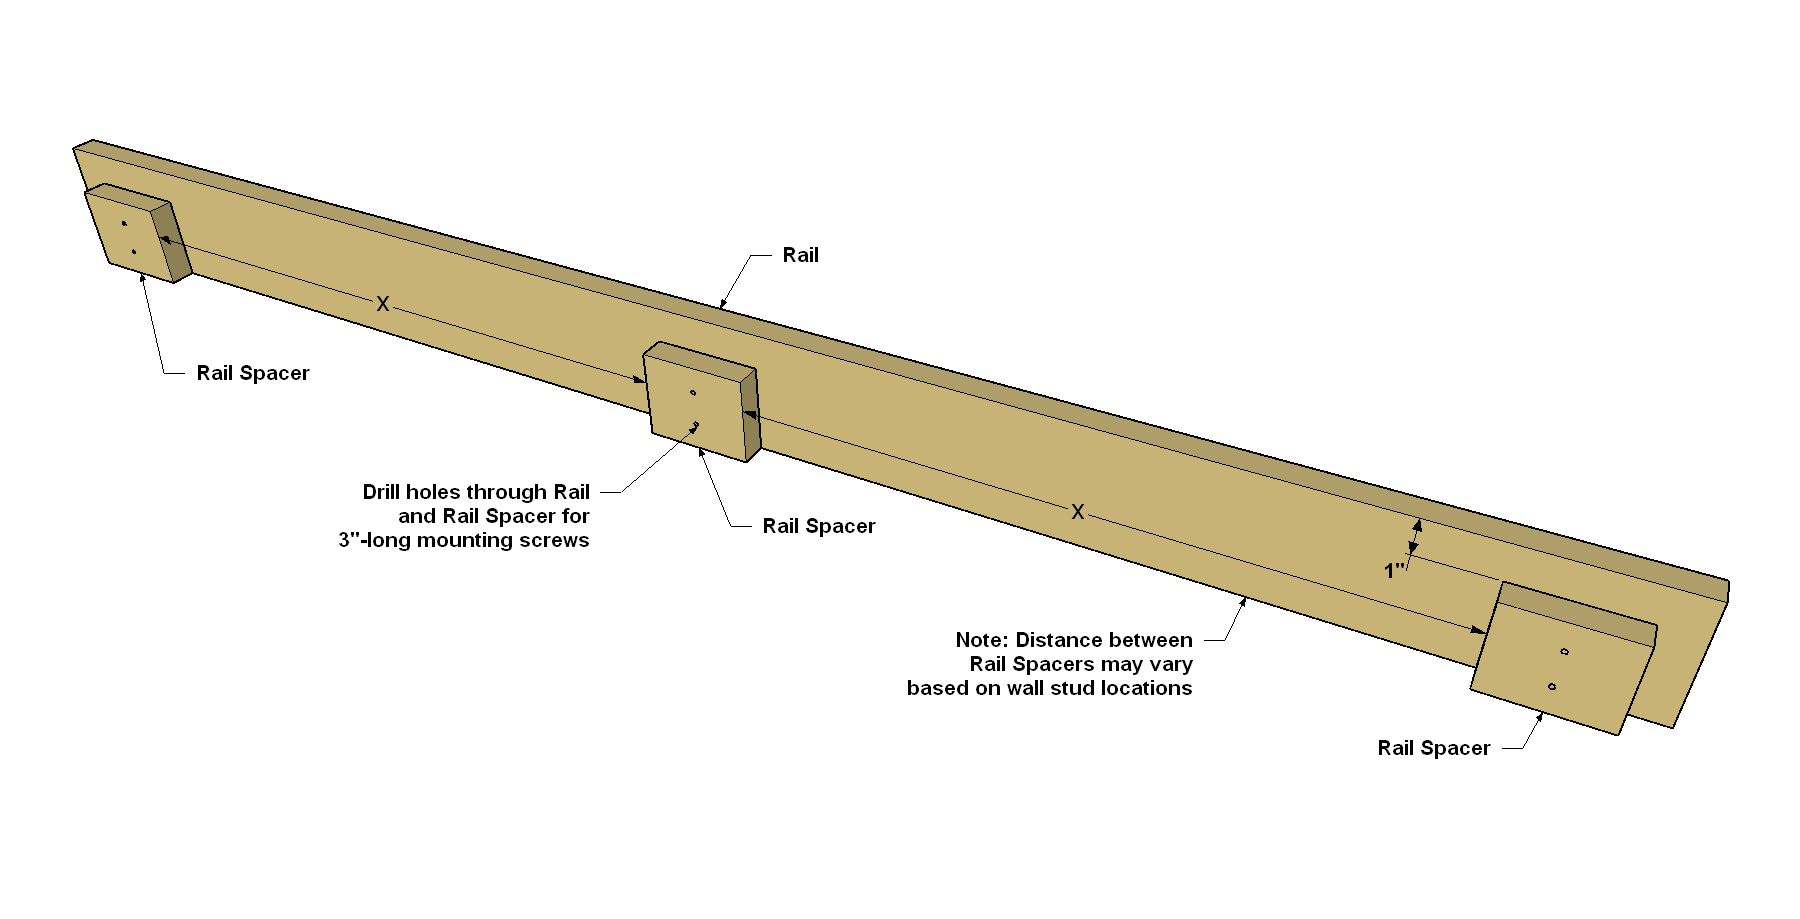
Make the Rail and Spacers
Cut three Rail Spacers to length as shown in the cutting diagram. You’ll also need one Rail, which is simply a 48"-long 1x4 Verify the location of the wall studs where you’ll mount your clamp rack. They’re usually located every 16" on-center. Then spread glue on the Rail Spacers and clamp them in position on the back of the Rail at these locations. Drill pilot holes through the Rail and Rail Spacer. Then secure the Rail assembly to the wall by driving two 3 1/2" flat-head wood screws into each stud. Make sure the screw heads are flush with the front face of the Rail, or driven slightly below the surface, so the clamp racks will fit over the Rail without interference.
-
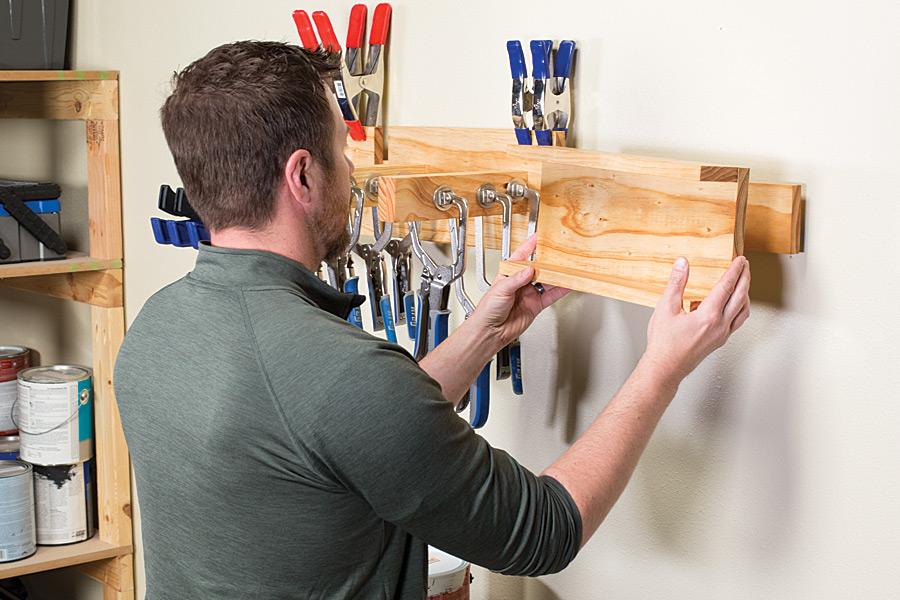
Add the Racks to the Rail
Once the Rail is secured to the wall, slip the Clamp Racks over the top edge of the Rail, and then load them up your collection of clamps.