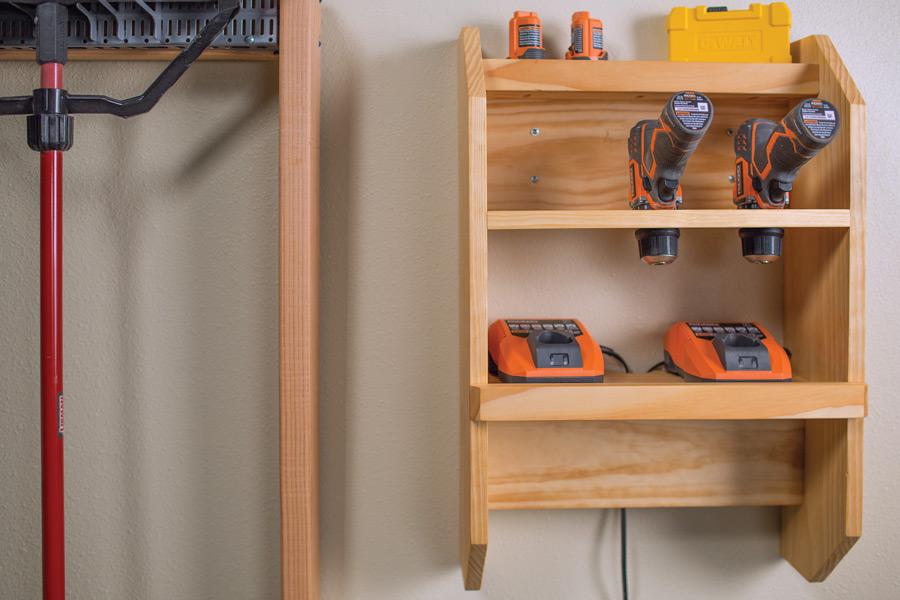
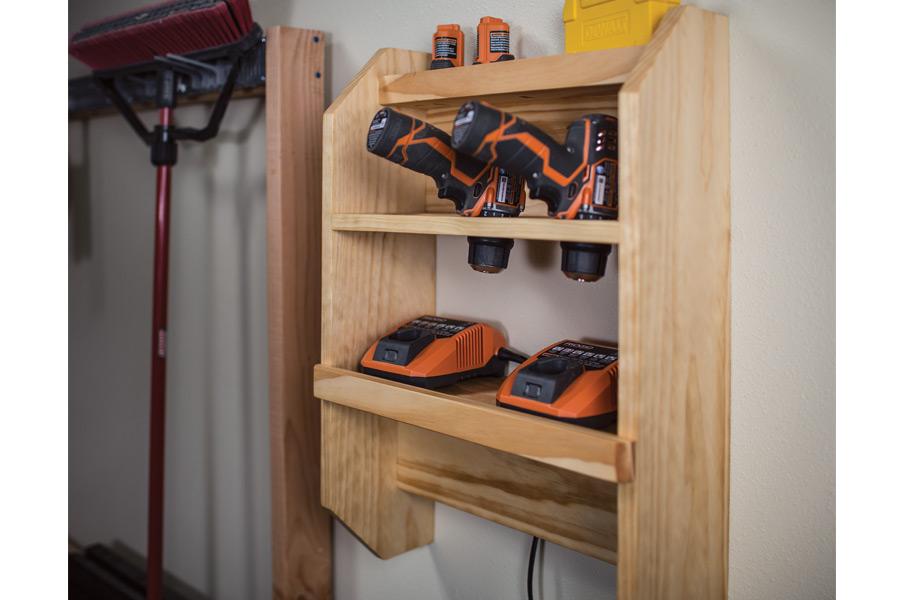
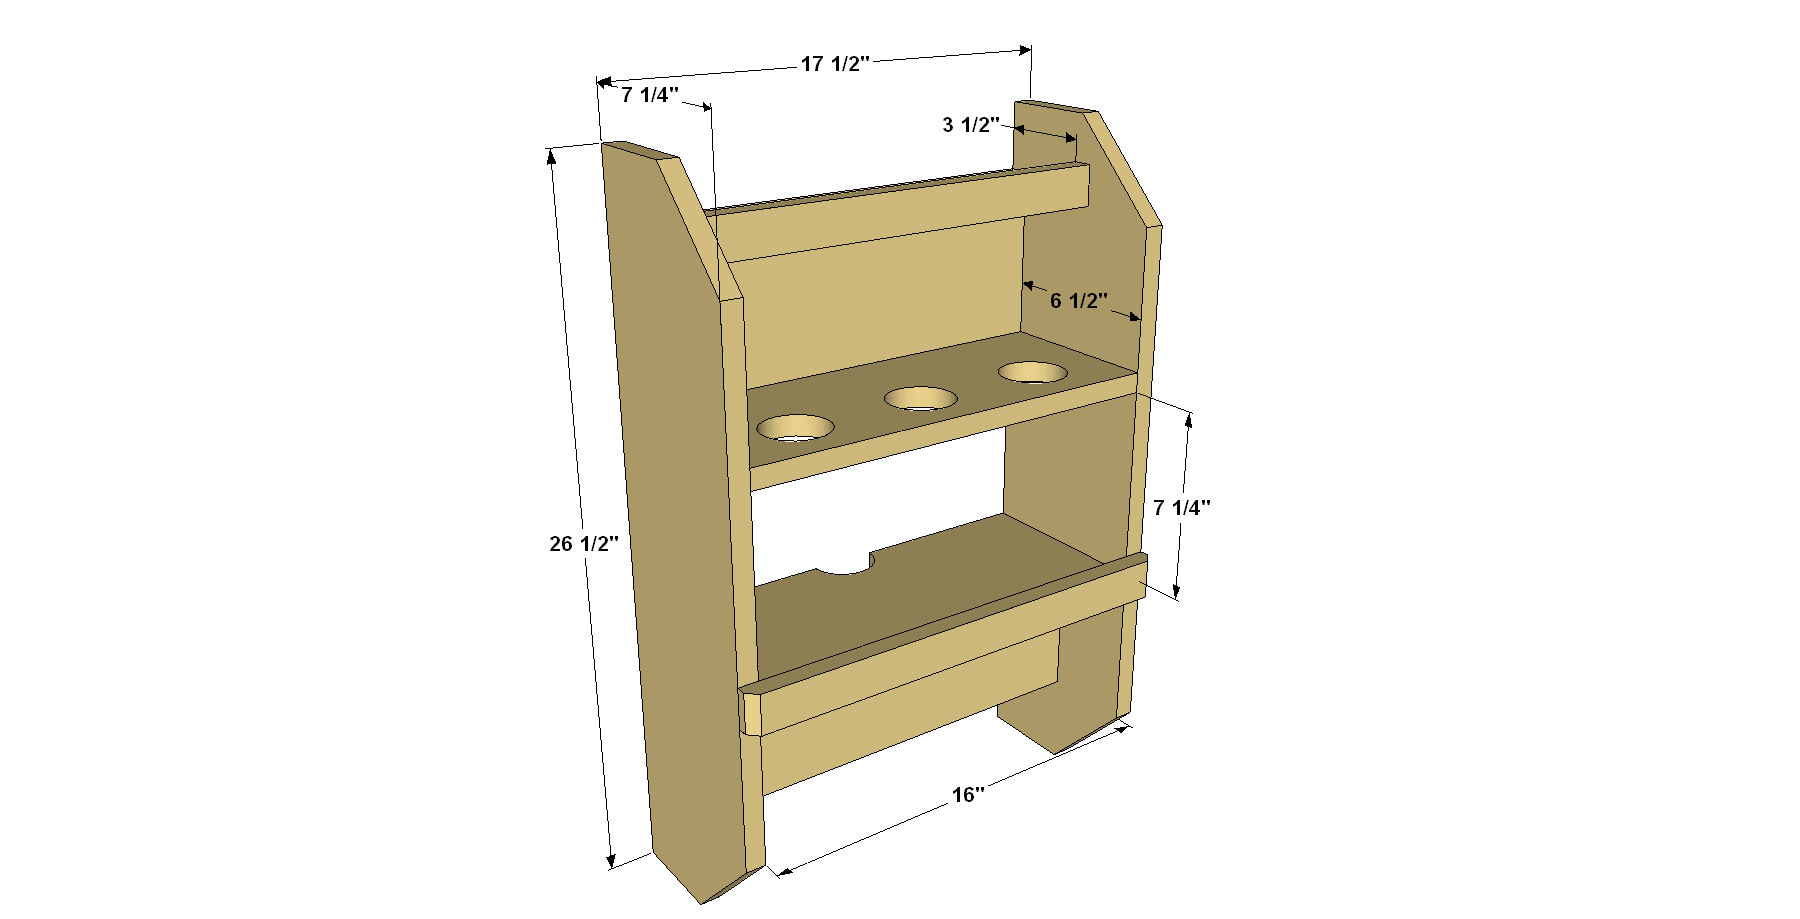


Cordless tools are great, but finding a place to keep their chargers and batteries can be a challenge. This wall-mounted station offers space for several chargers, plus storage for three drills. It’s a great way to keep your cordless tools organized and ready to go.
Tools
Kreg Tools


Other Tools
-
miter saw

-
tape measure
-
2 1/2" hole saw
Materials
Wood Products
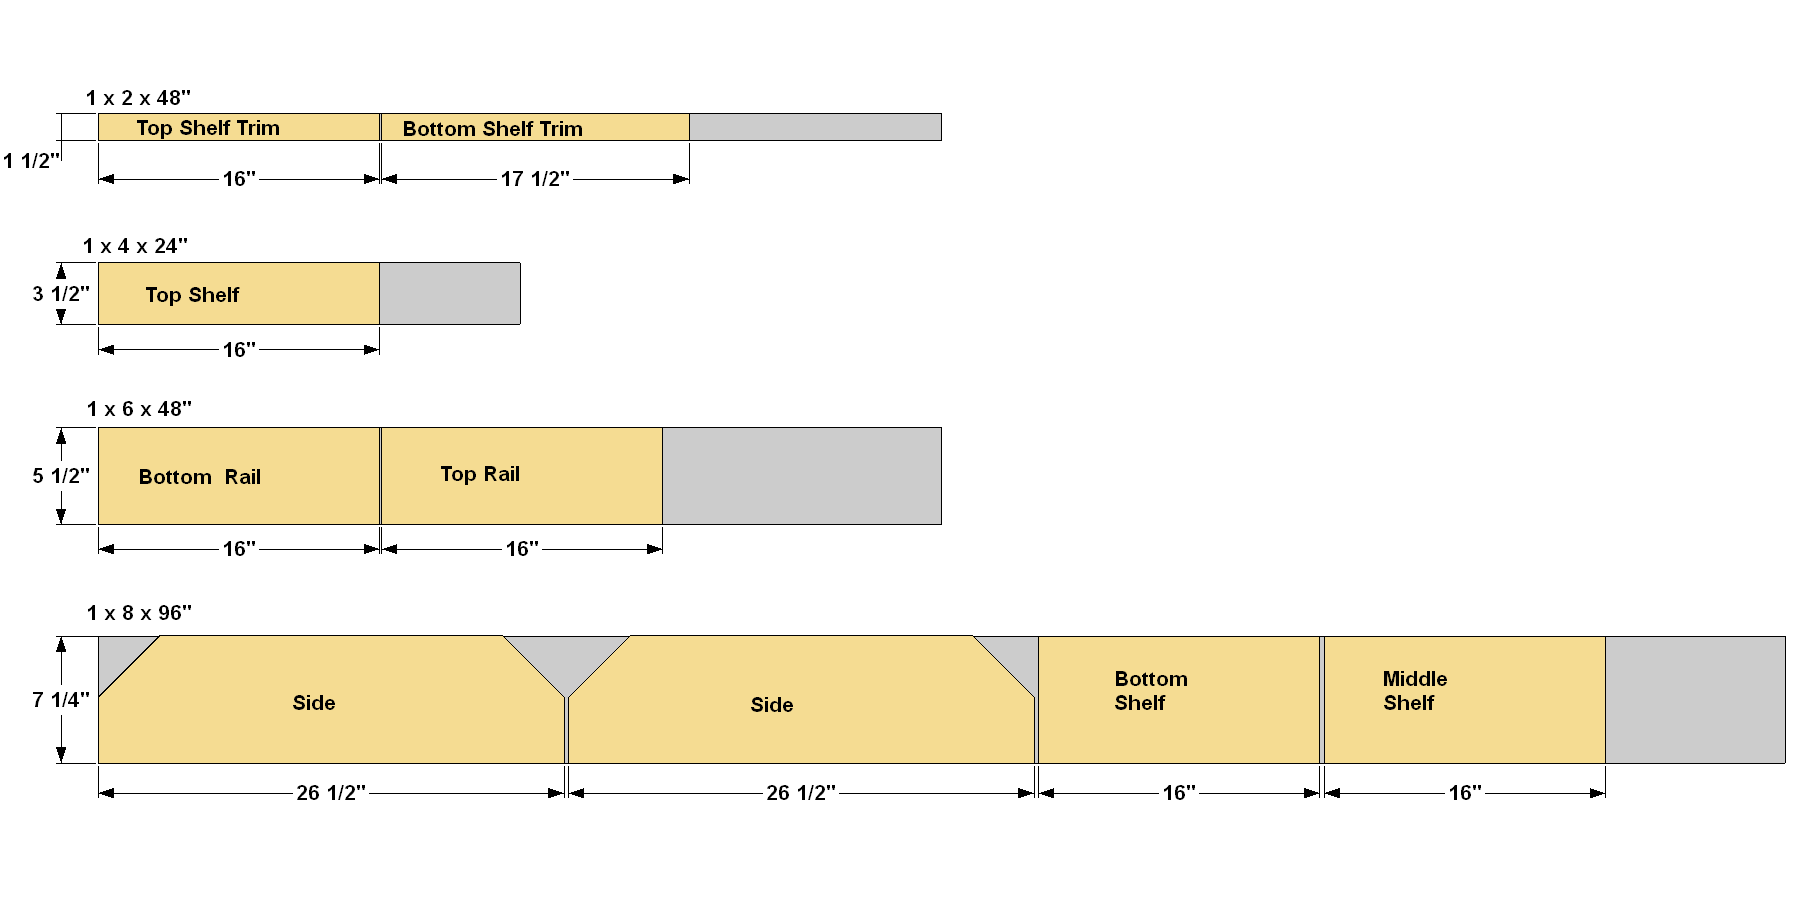
- 1 Pine board , 1x2 x 48"
- 1 Pine board , 1x3 x 48"
- 1 Pine board , 1x4 x 24"
- 1 Pine board , 1x6 x 48"
- 1 Pine board , 1x8 x 96"
Hardware & Supplies
- 35 1 1/4" coarse-thread Kreg Pocket-Hole Screws
- 2 3" wood screws
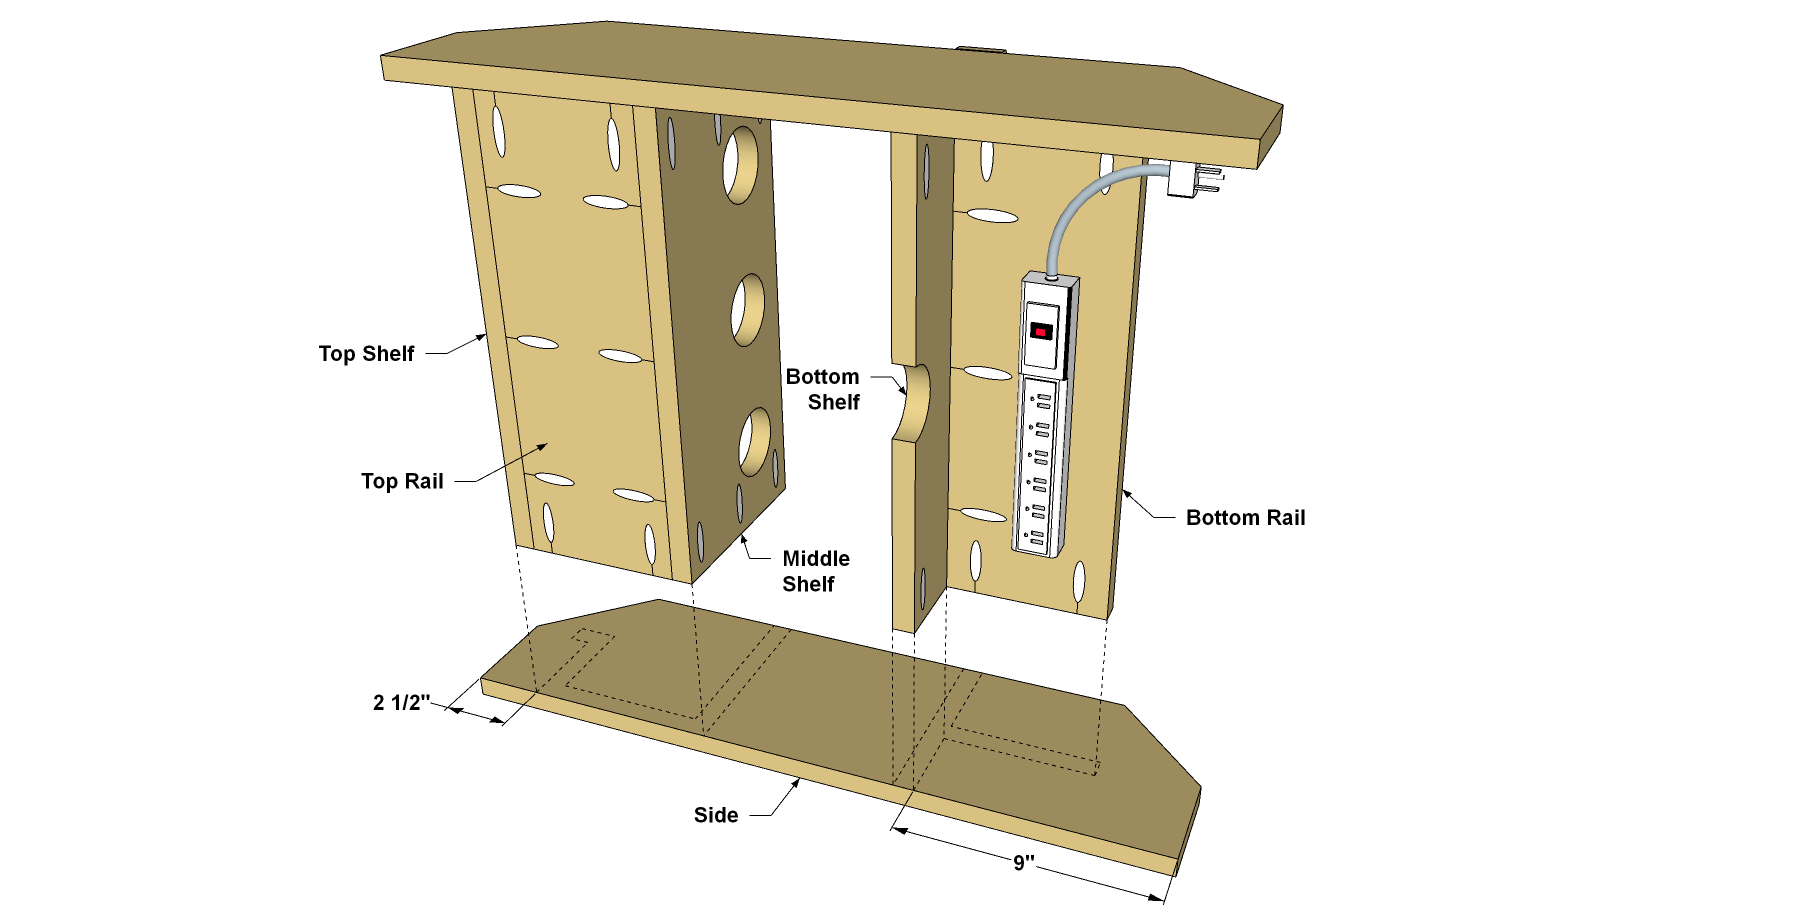
Cut List & Parts
- 1 Top Shelf , 3/4" x 3 1/2" x 16"
- 1 Top Shelf Trim , 3/4" x 1 1/2" x 16"
- 1 Top Rail , 3/4" x 5 1/2" x 16"
- 1 Middle Shelf , 3/4" x 7 1/4" x 16"
- 2 Side , 3/4" x 7 1/4" x 26 1/2"
- 1 Bottom Shelf , 3/4" x 7 1/4" x 16"
- 1 Bottom Shelf Trim , 3/4" x 1 1/2" x 17 1/2"
- 1 Bottom Rail , 3/4" x 5 1/2" x 16"
Directions
-
Make a Top Shelf
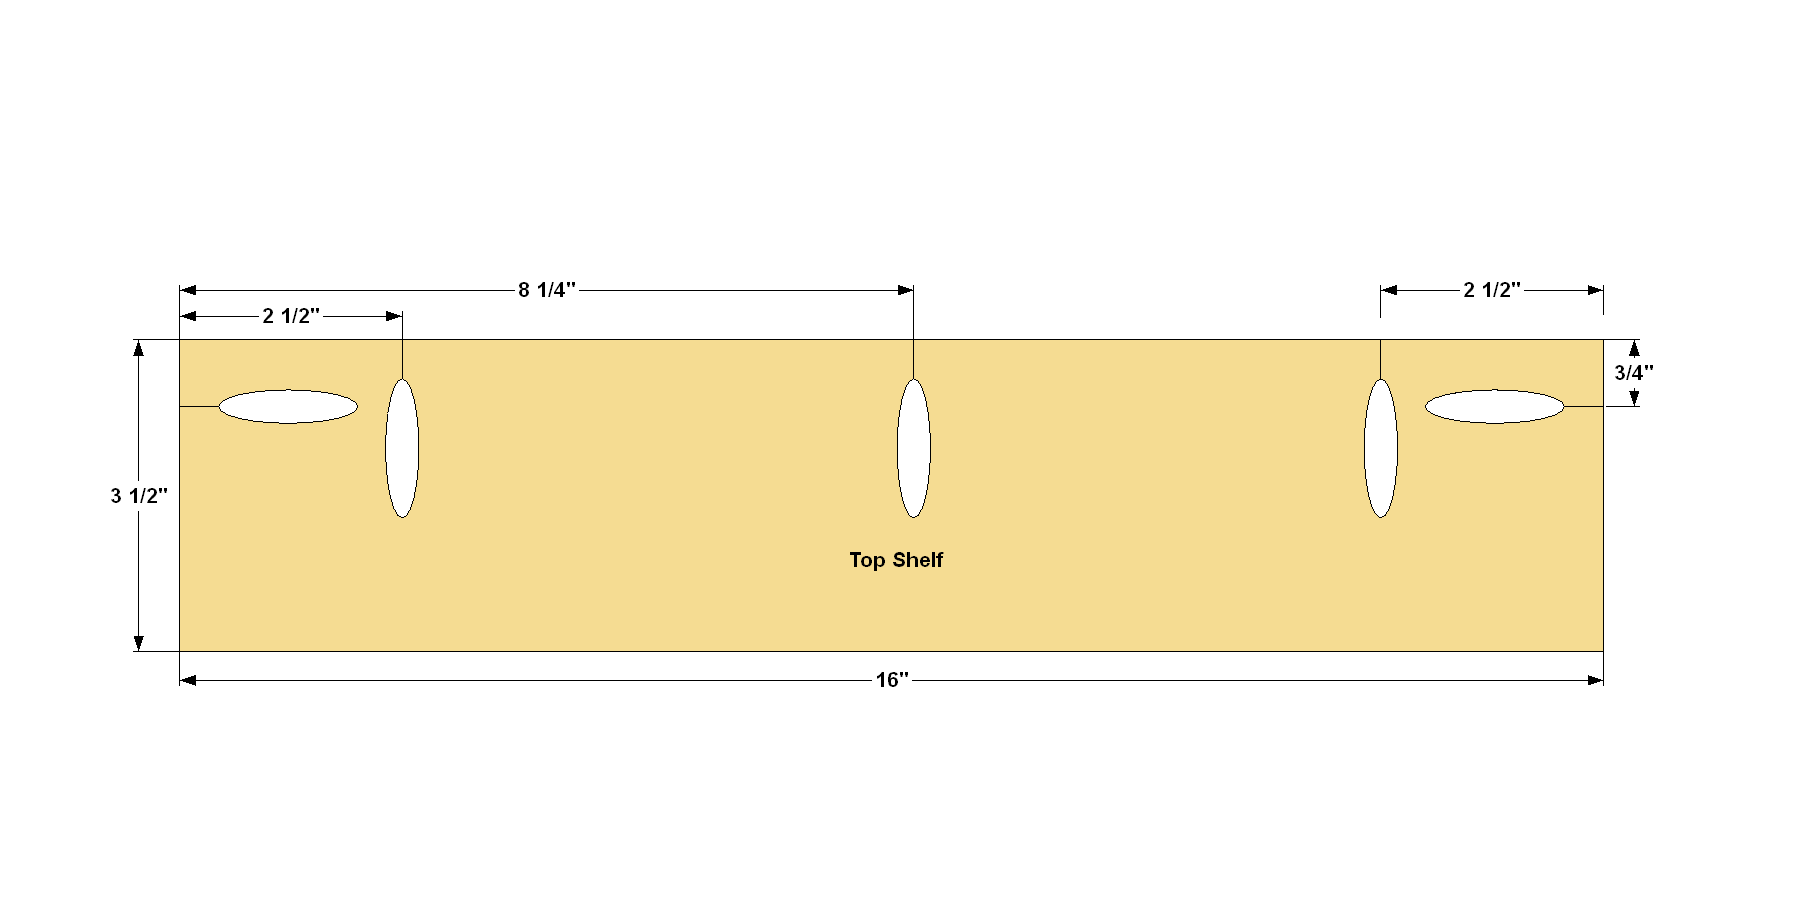
Cut a Top Shelf to length from a 1x4 board, as shown in the cutting diagram. Set your Kreg® Pocket-Hole Jig for 3/4"-thick material, and then drill pocket holes in the Top Shelf, as shown. Sand the faces smooth.
-
Add Top Shelf Trim
Now cut a piece of Top Shelf Trim from a 1x2 board, as shown in the cutting diagram, and sand the faces smooth. Then attach the Trim to the Top Shelf using 1 1/4" coarse-thread Kreg Pocket-Hole Screws, as shown.

-
Make a Top Rail
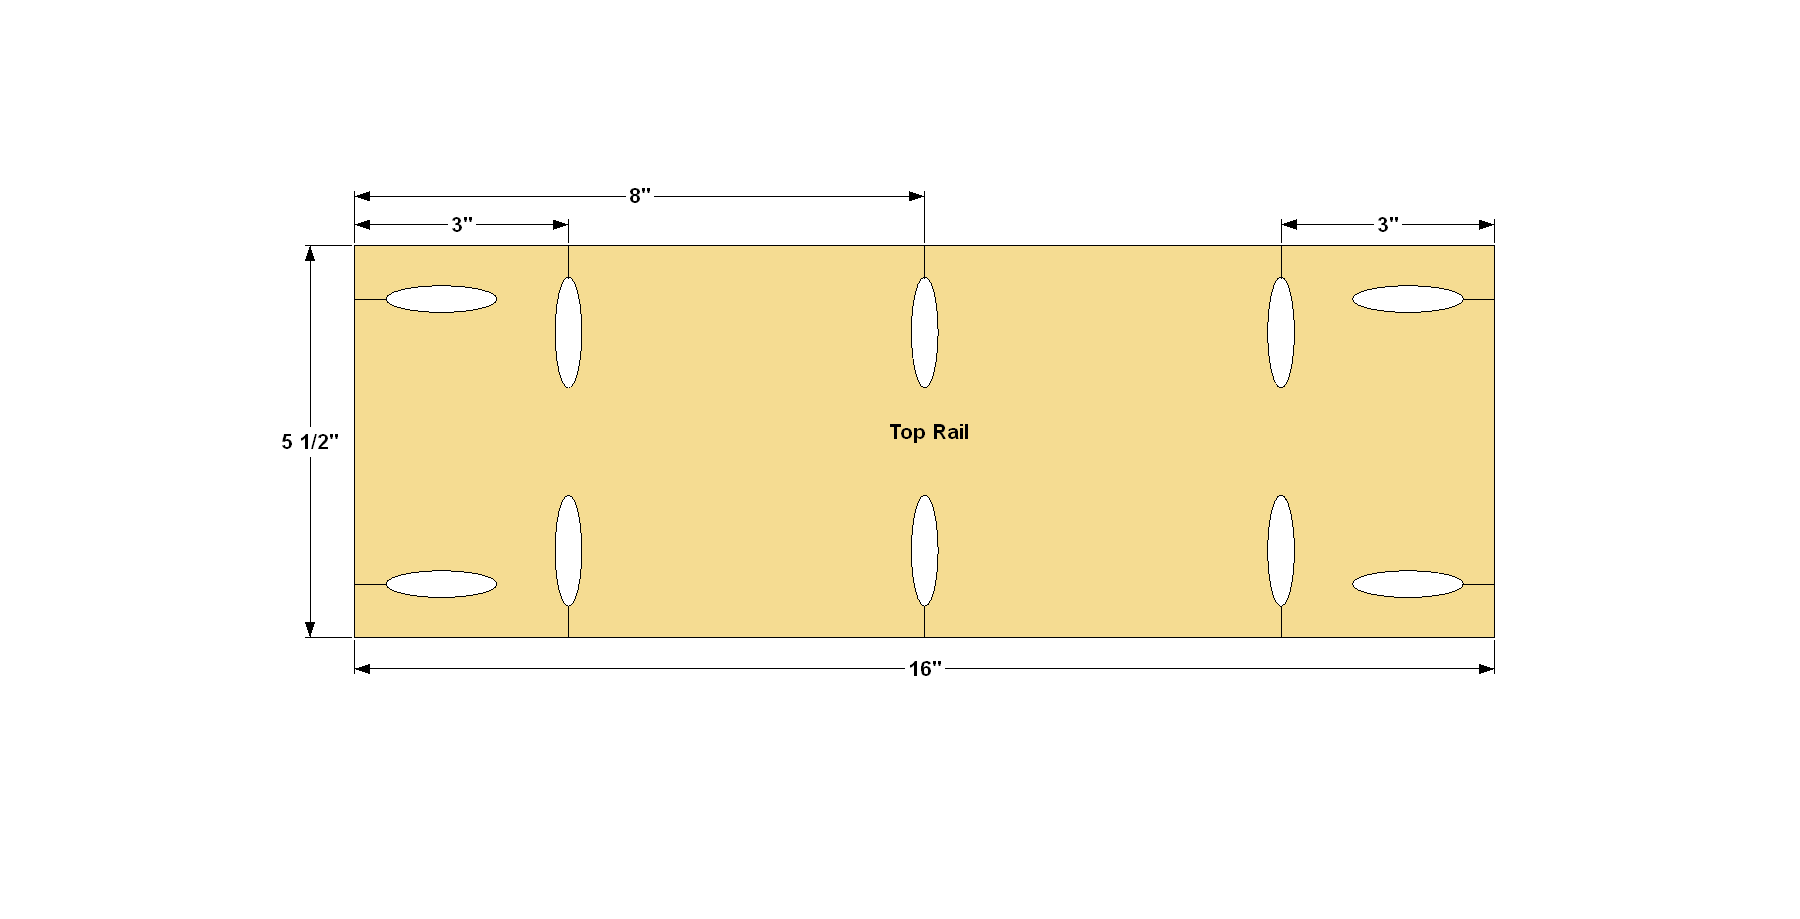
Cut a Top Rail to length from a 1x6 board, as shown in the cutting diagram. Drill pocket holes in the Top Rail, as shown, and then sand the faces smooth.
-
Attach the Top Rail
Now you can attach the Top Shelf assembly to the Top Rail using 1 1/4" coarse-thread Kreg Pocket-Hole Screws.

-
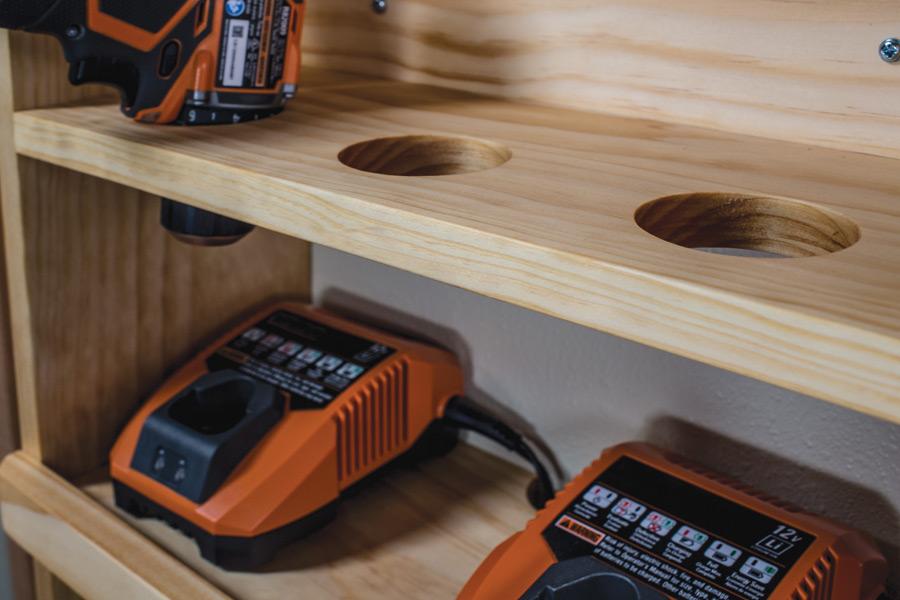
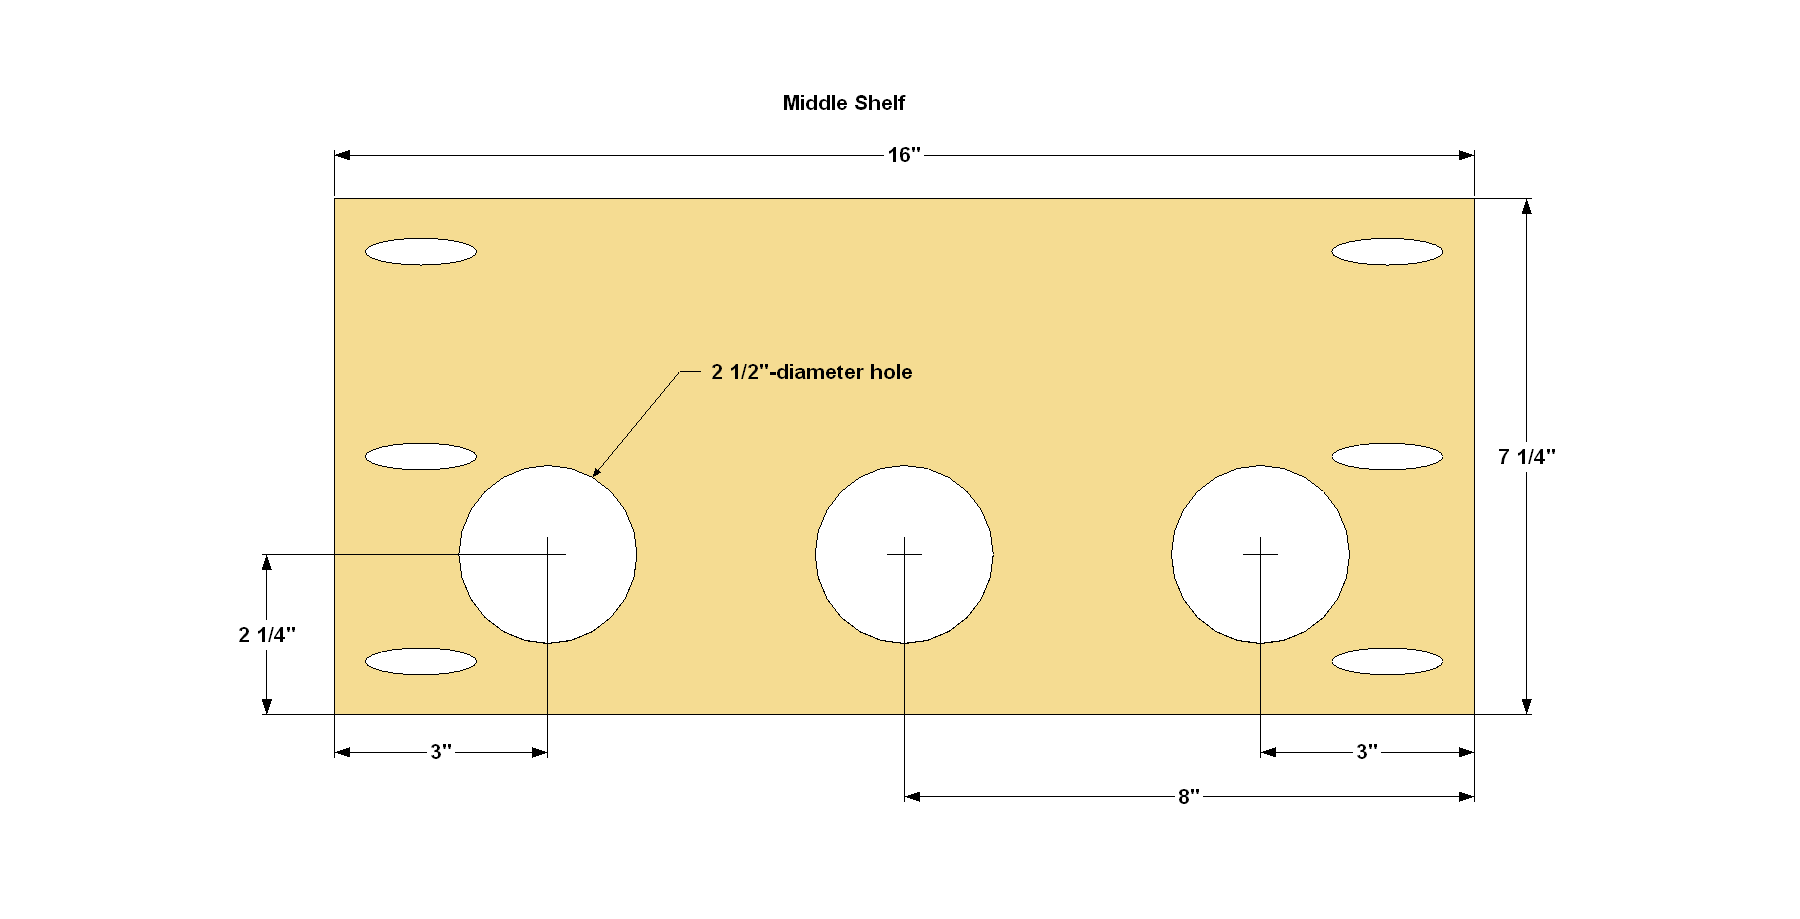
Make the Middle Shelf
Cut a Middle Shelf to length from a 1x8 board, as shown in the cutting diagram. Drill pocket holes at the ends, as shown. Then lay out and drill three 2 1/2"-diameter holes where shown. You’ll be able to slip your drill chucks into these holes for storage. Sand the faces smooth.
-
Attach the Middle Shelf
Next, attach the Middle Shelf to the Top Shelf/Rail assembly using 1 1/4" coarse-thread Kreg Pocket-Hole Screws. Make sure that the ends of the all the pieces are flush, and sand them if needed.
-
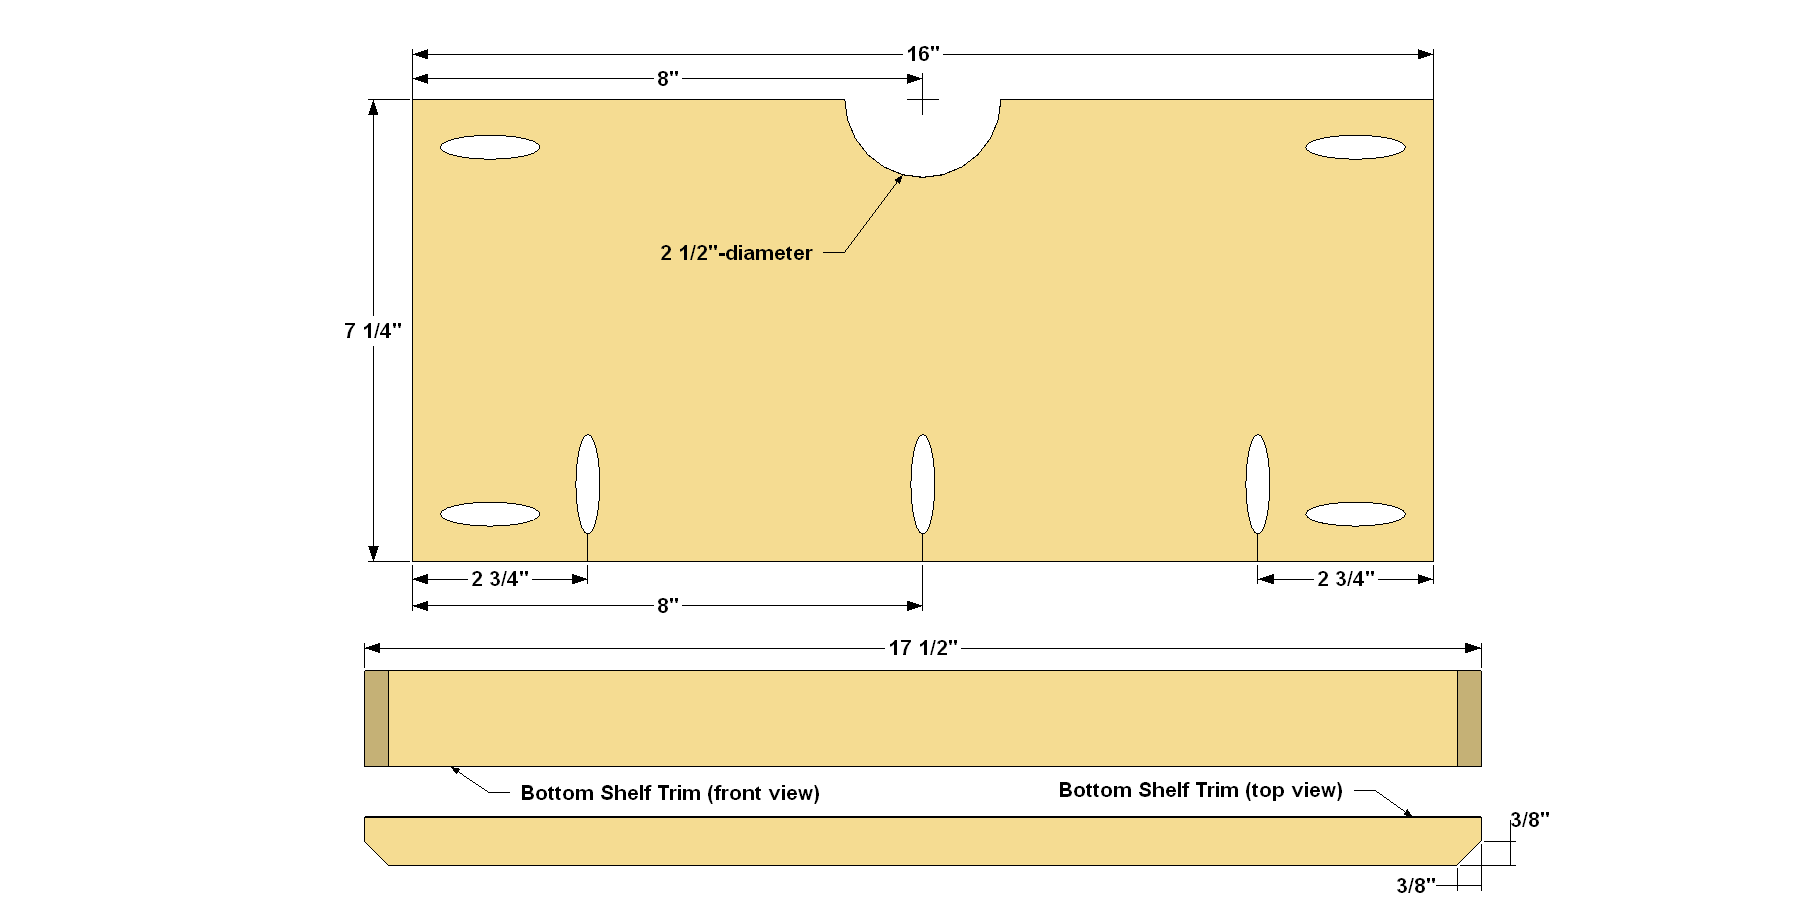
Make the Bottom Shelf Parts
Cut a Bottom Shelf to length from a 1x8 board, as shown in the cutting diagram. Drill pocket holes at the locations shown. Then drill a half-circle cutout along the back edge of the Middle Shelf using a 2 1/2" hole saw, as shown. The easiest way to do this is to clamp a scrap piece along the edge of the shelf, then drill where the board meet. You can also cut the Bottom Shelf Trim from a 1x2 board. Then cut the profile at each end, as shown. Just stand the piece on edge on your miter saw, set the saw for a 45° miter, and trim off the corners.
-
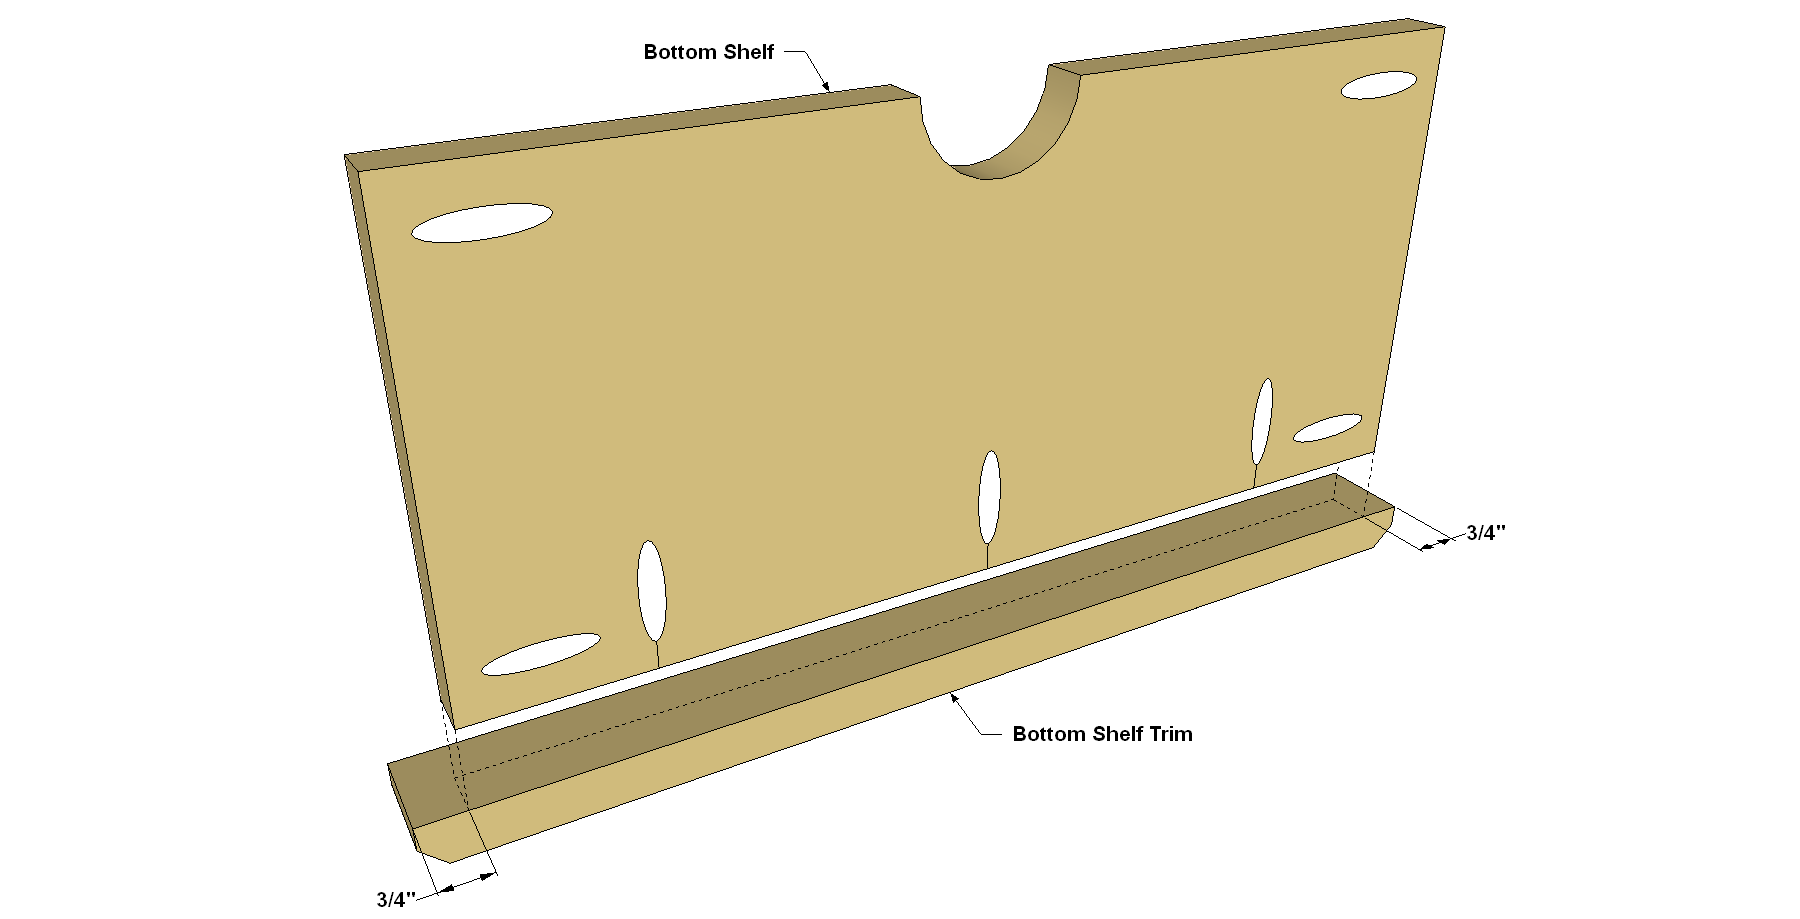
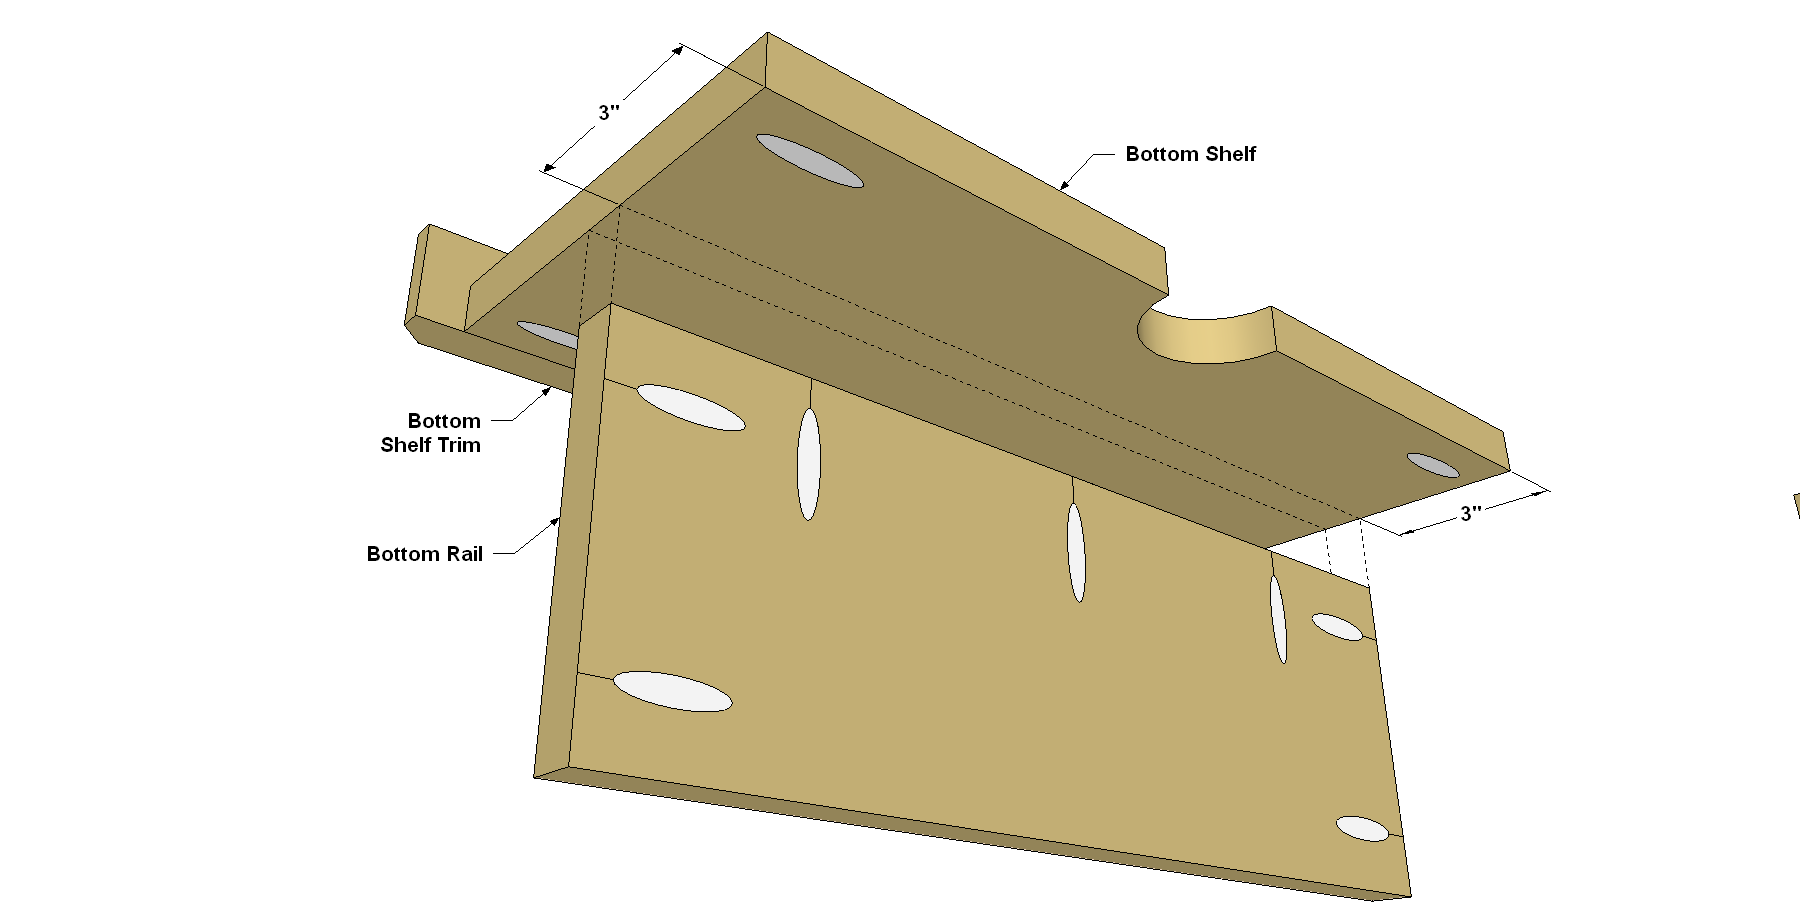
Assemble the Bottom Shelf
Position the Bottom Shelf Trim, as shown, so that it overhangs the Bottom Shelf by 3/4" on each end, and so that the lower edge of the Trim is flush with the underside of the Shelf. Attach the Trim to the Bottom Shelf using 1 1/4" coarse-thread Kreg Pocket-Hole Screws.
-
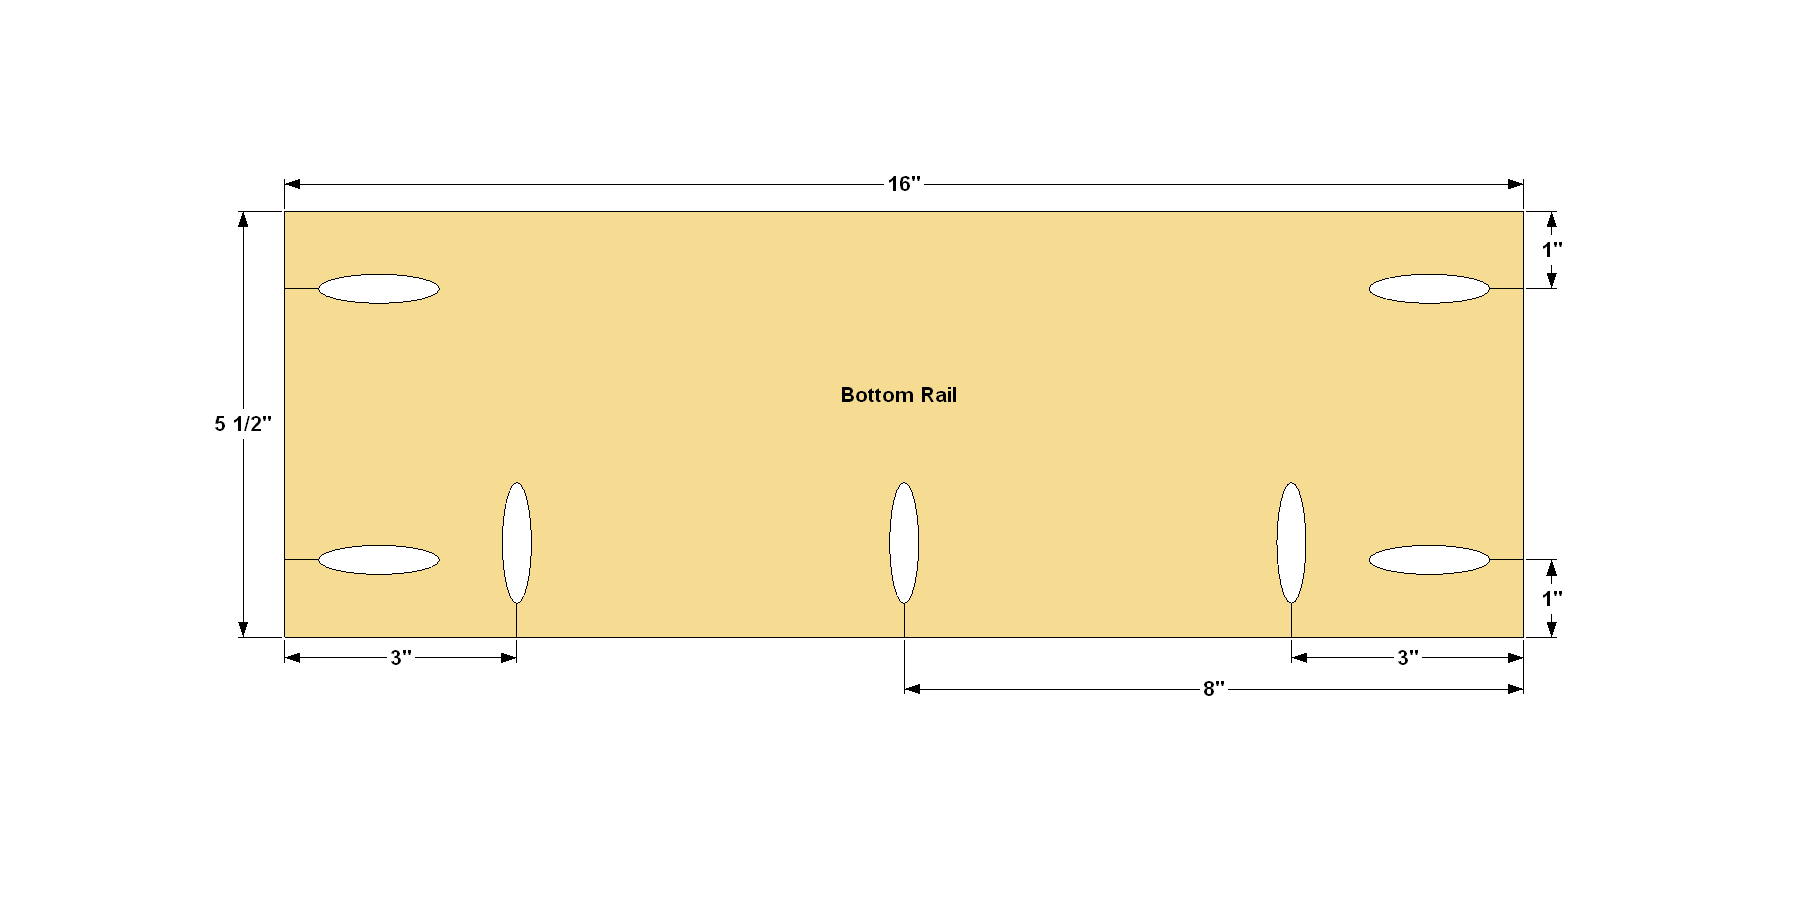
Create a Bottom Rail
Cut a Bottom Rail to length from a 1x6 board, as shown in the cutting diagram. Drill pocket holes in the Bottom Rail, as shown, and then sand the faces smooth.
-
Attach the Bottom Rail
Now you can attach the Bottom Rail to the Bottom Shelf assembly using 1 1/4" coarse-thread Kreg Pocket-Hole Screws, as shown. Make sure that the ends of the Bottom Rail and the Bottom Shelf are flush, and sand them if needed.
-
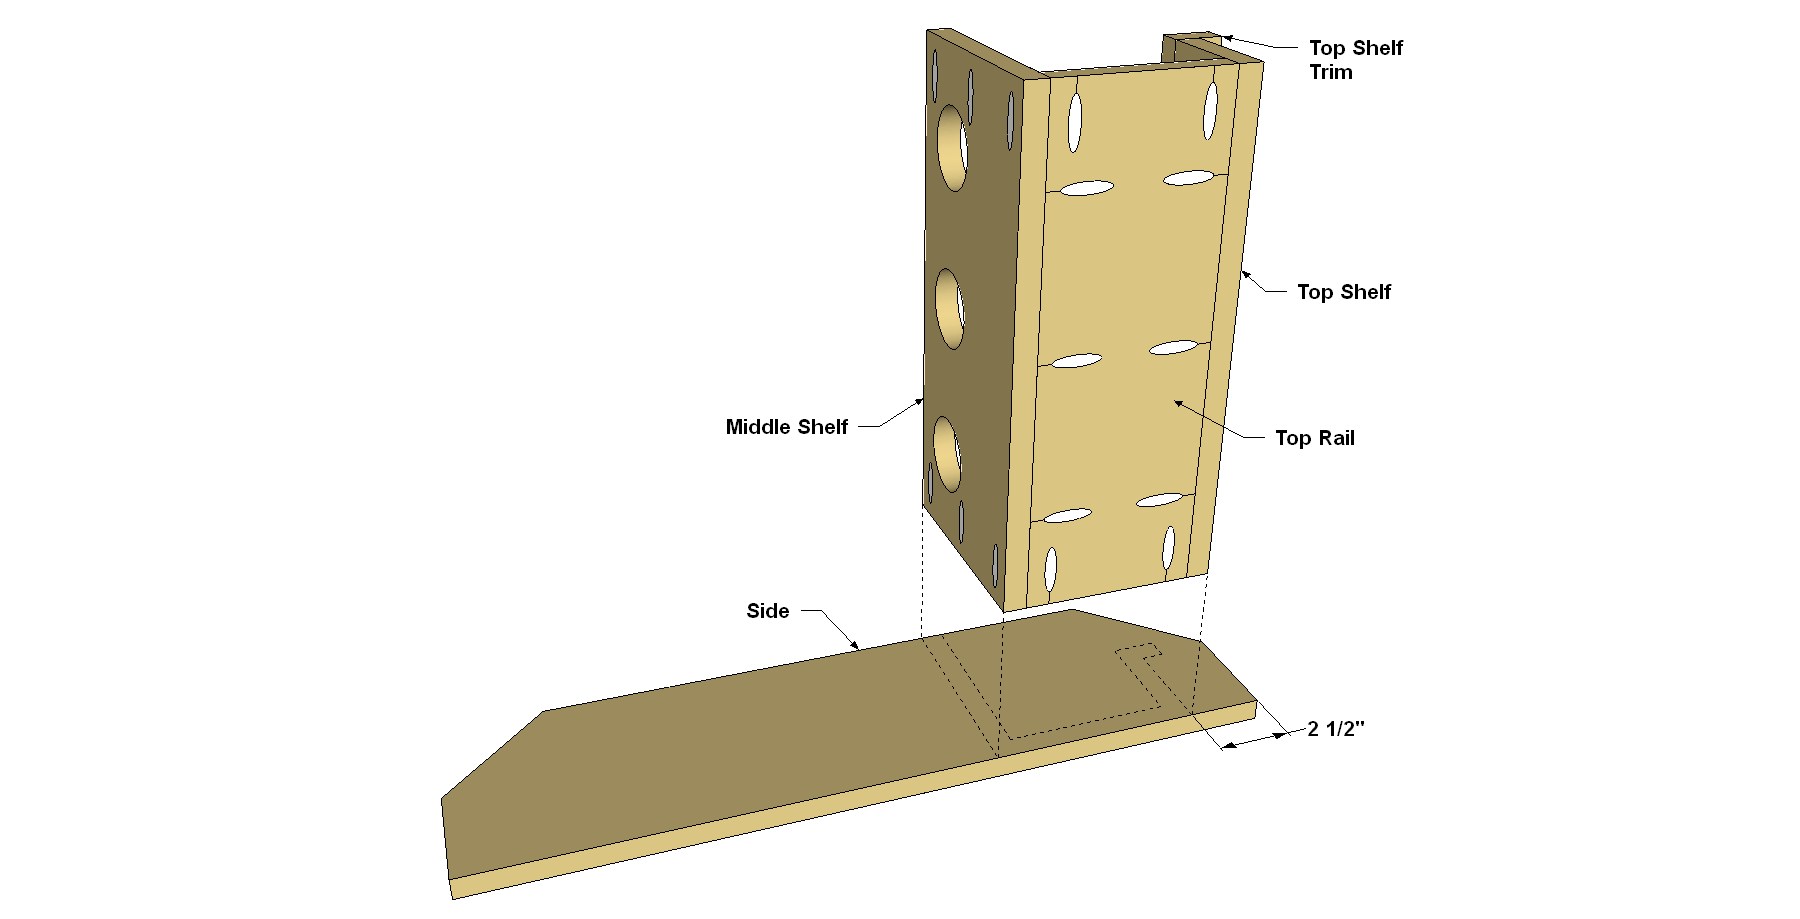
Make the Sides
Cut two Sides to length from a 1x8 board, as shown in the cutting diagram. Then cut the angles on the ends, as shown. You can do this easily with a miter saw by setting the saw for a 45° cut. Sand the faces, edges, and ends smooth.

-
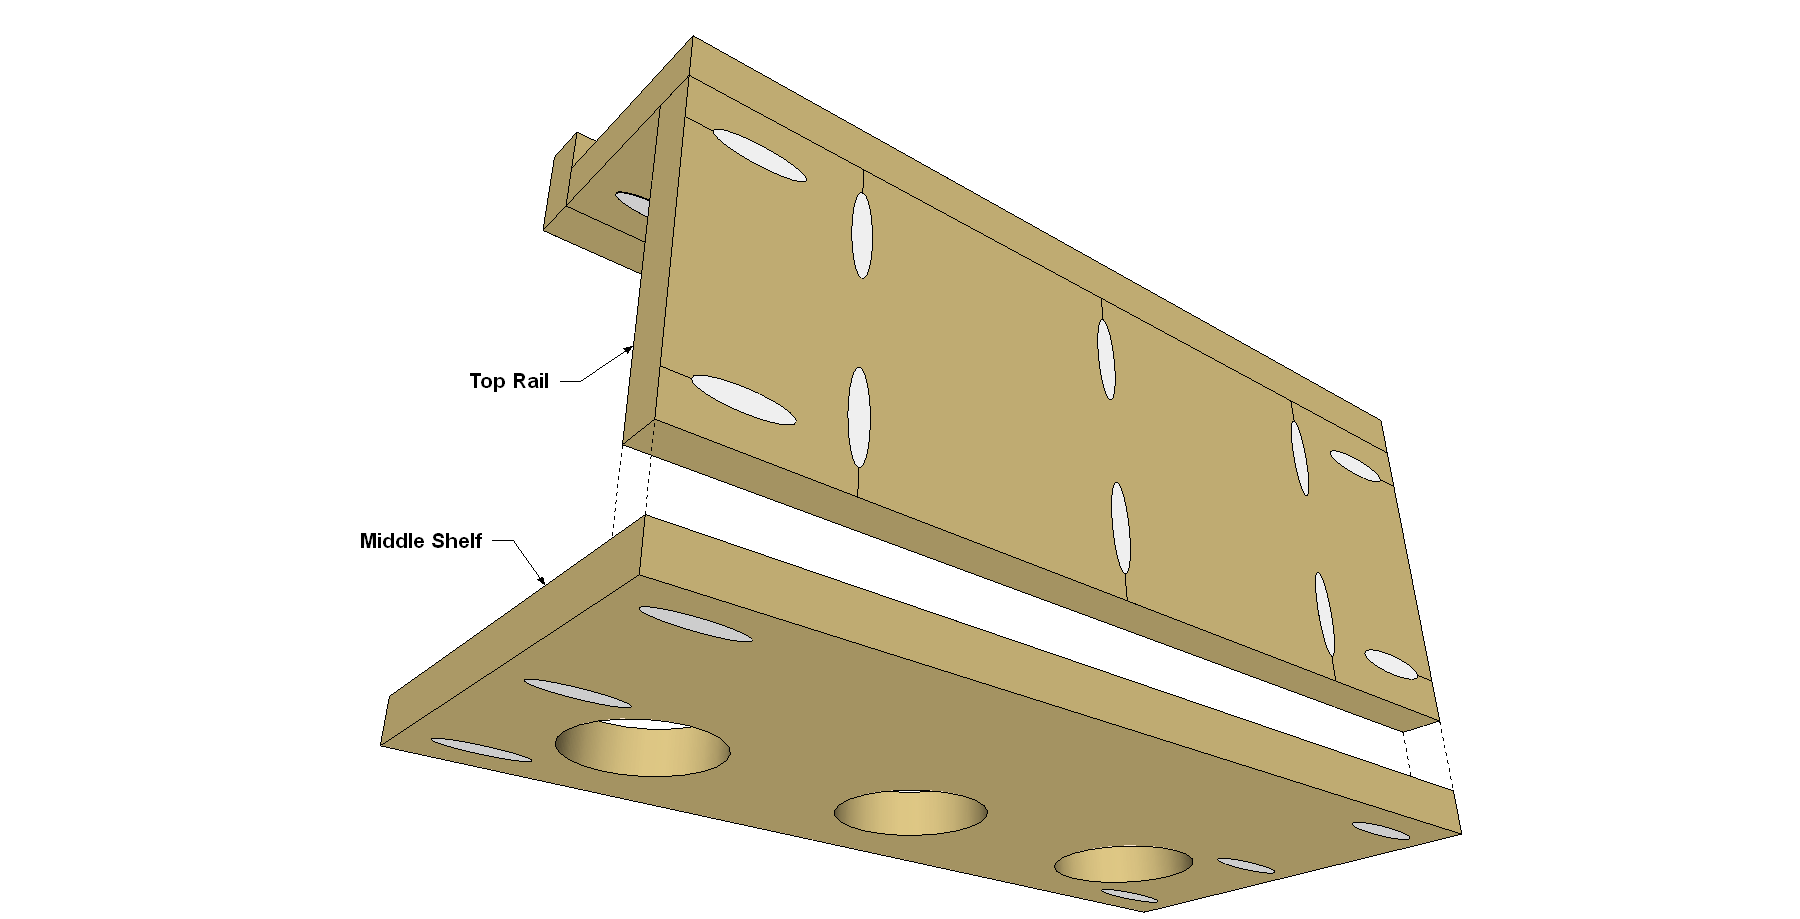
Attach the Middle Shelf Assembly
With the parts all made and the subassemblies together, you can begin final assembly. Position the Middle Shelf/Rail/Top Shelf assembly as shown, and then attach these pieces using 1 1/4" coarse-thread Kreg Pocket-Hole Screws.
-
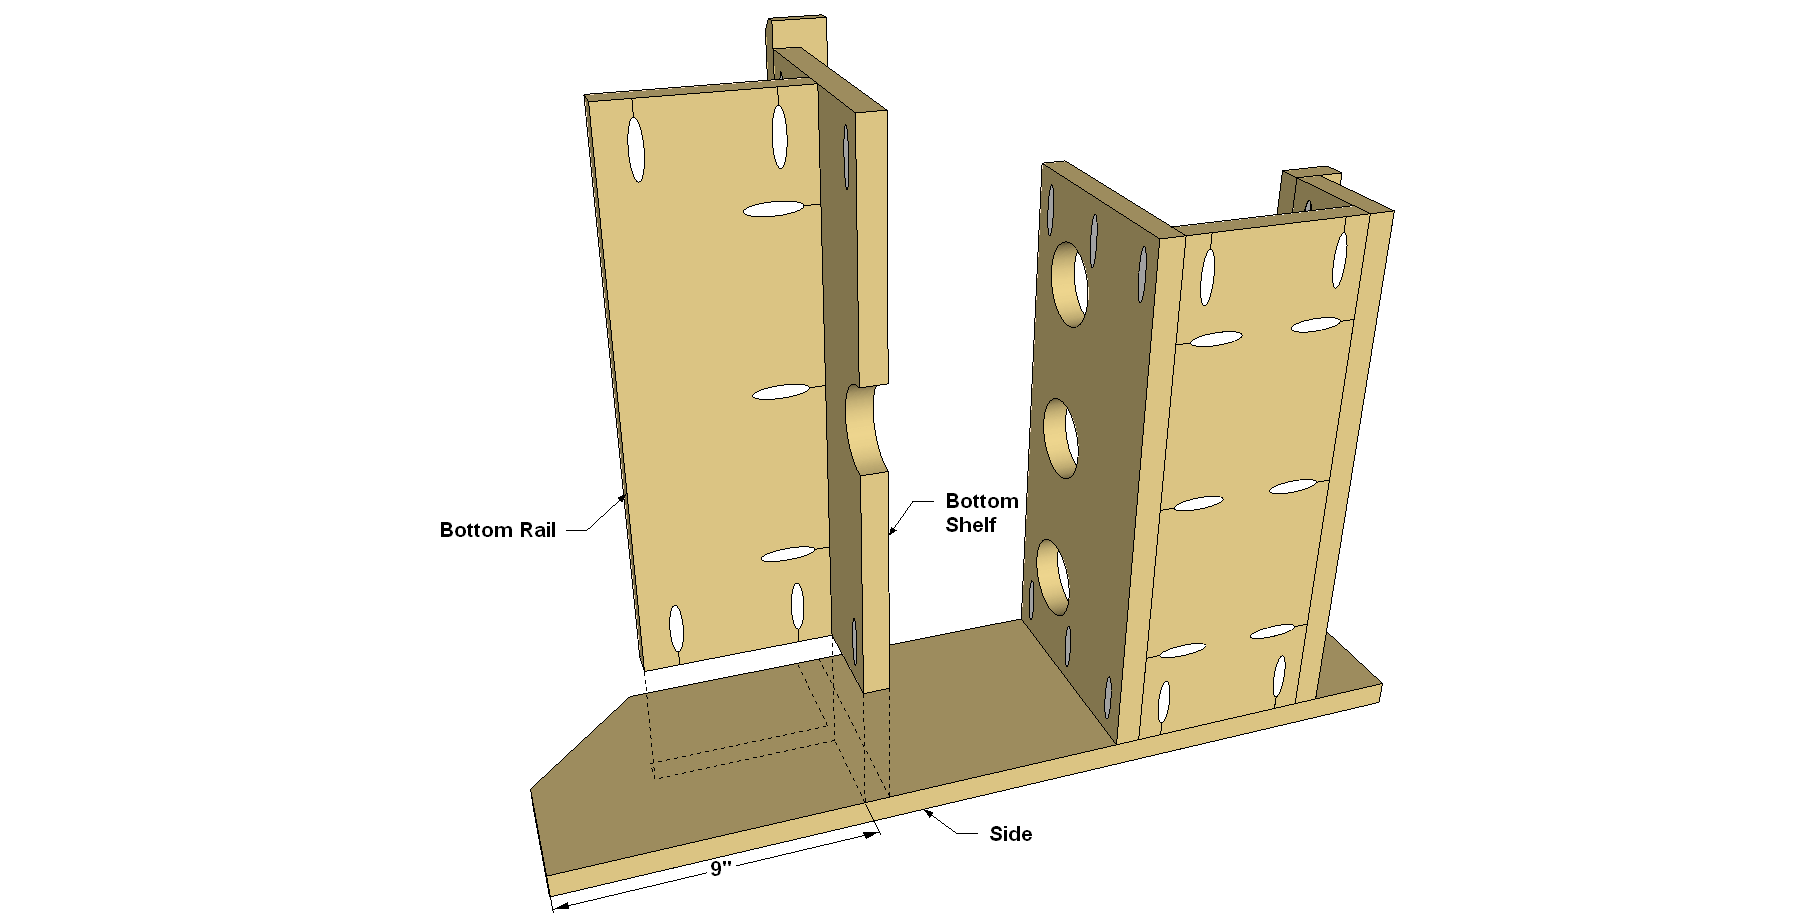
Add the Bottom Shelf Assembly
Position the Bottom Shelf/Rail assembly, as shown, and attach it to the Side using 1 1/4" coarse-thread Kreg Pocket-Hole Screws.
-
Add the Other Side
To complete your charging station, attach the other Side, as shown. You can use the station as is, or you can add a coat of paint or finish. We wiped on a couple coats of oil finish. Then you can mount a power strip to the backside of the Bottom Rail. That way, you can plug your chargers into the power strip, rather than needing a separate wall outlet for each one. Finally, hang your charging station on the wall. If possible, locate it over a wall stud, and drive two 3" screws through the Top Rail and into the stud. If you can’t locate the station over a stud, use medium- or heavy-duty wall anchors.