Cool Kids’ Picnic Table
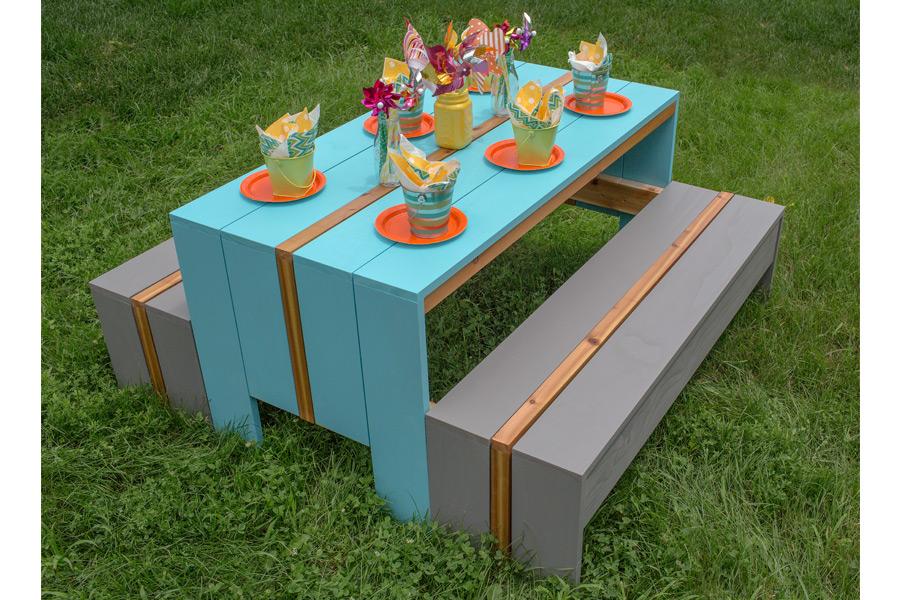
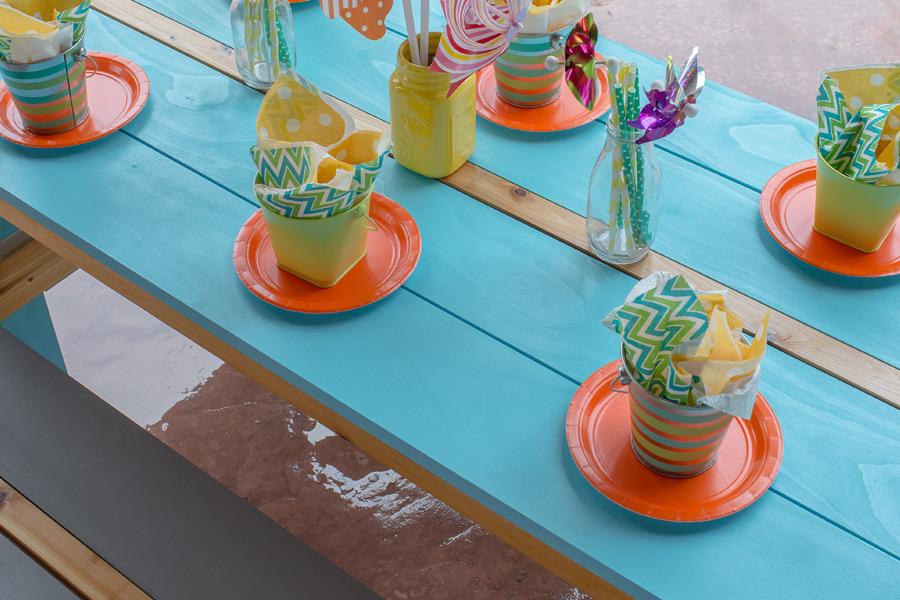
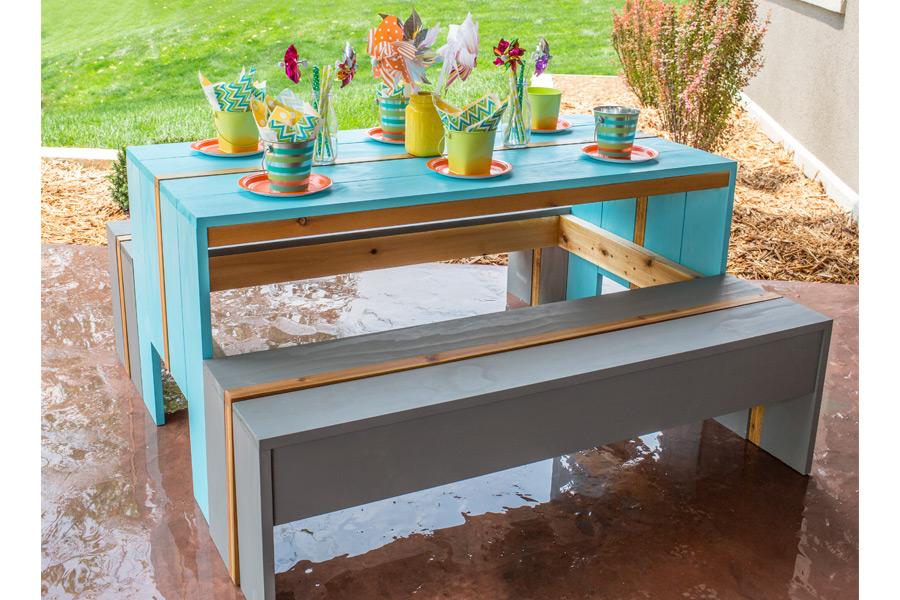
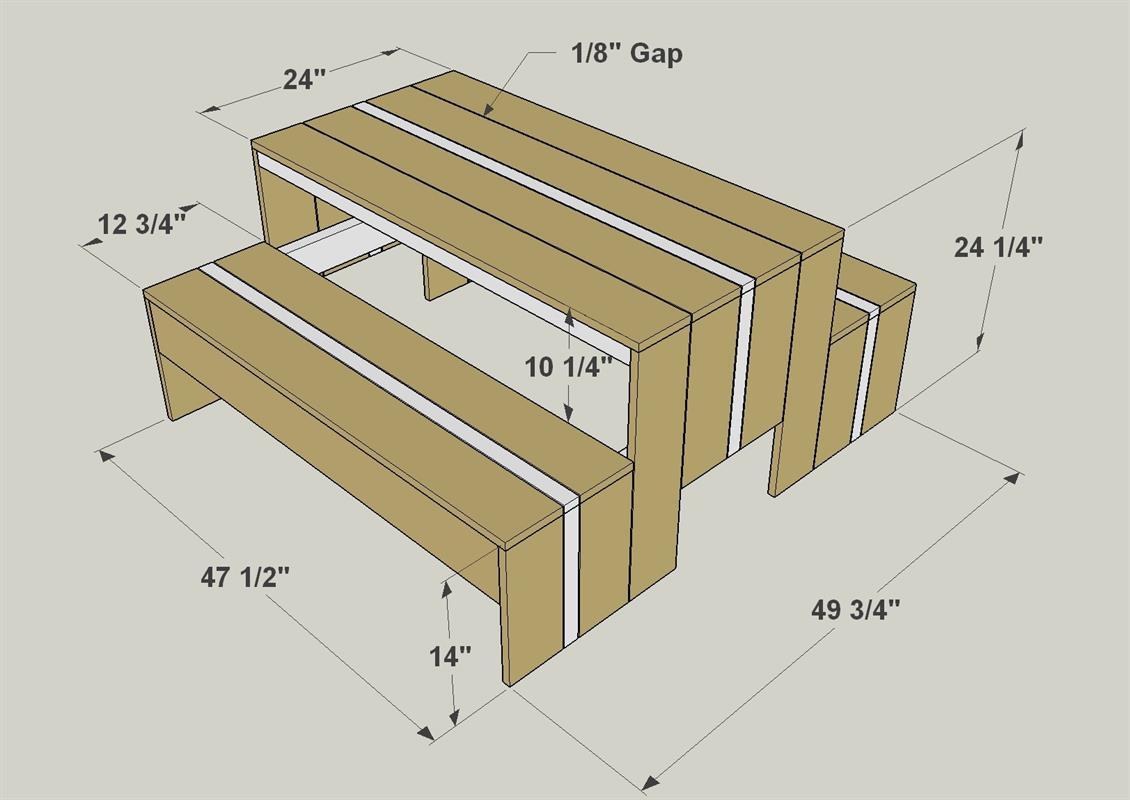
By Kreg ToolWho says the “kids’ table” has to be a second-class seating arrangement when you gather for meals? This cool table will have kids clamoring for a seat, and adults wishing they could fit. Whether you use it outdoors or inside, it’s sure to be one of the best seats in the house.
Directions
-
Create the Upper Frame Parts
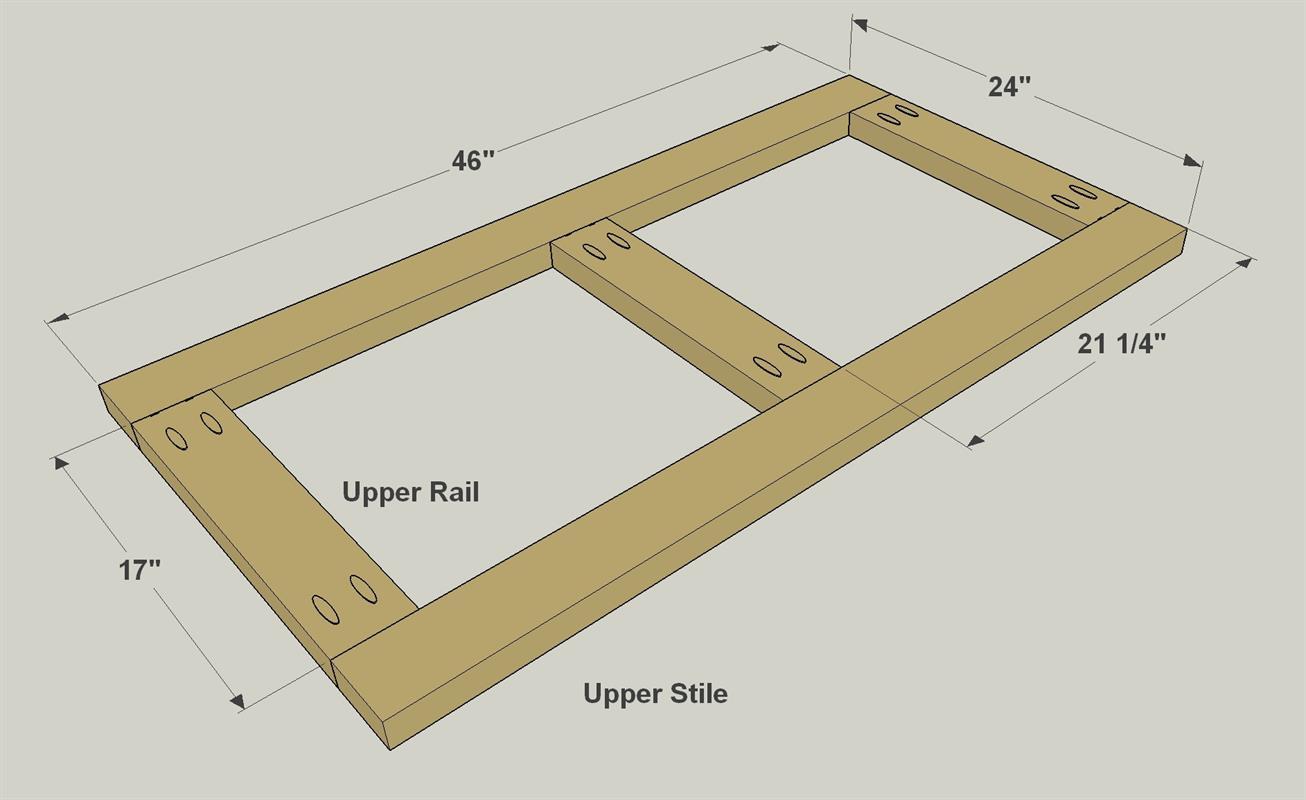
Cut three Upper Rails and two Upper Stiles to length from 2x4 boards (we used cedar), as shown in the cutting diagram. Then, with your pocket hole jig set up for 1 1/2" material, drill pocket holes in the Upper Rails where shown.
-
Assemble the Upper Frame
Now you can attach the Upper Rails to the Upper Stiles using 2 1/2" exterior-rated pocket hole screws, as shown.
-
Create the Lower Frame Parts
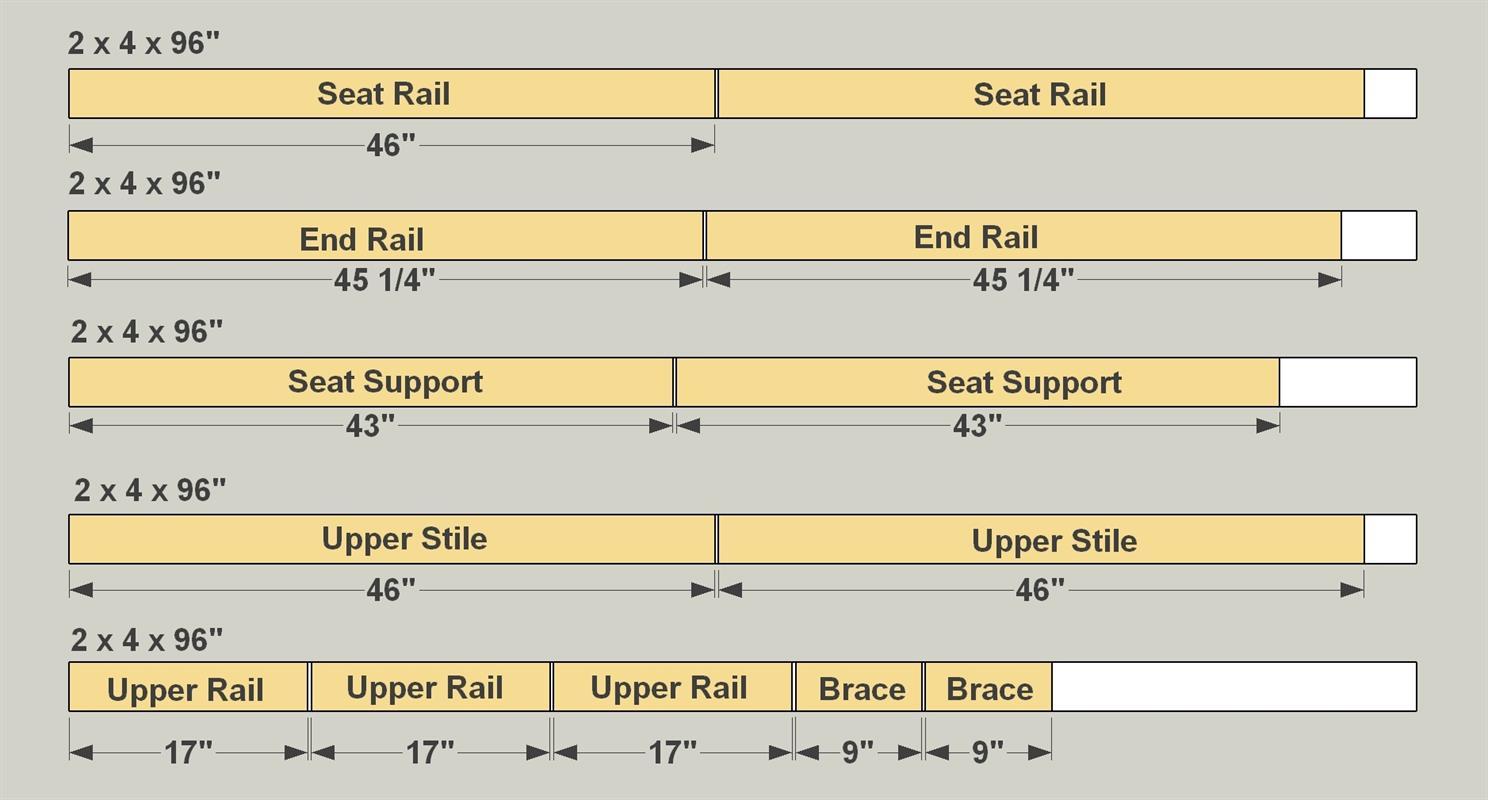
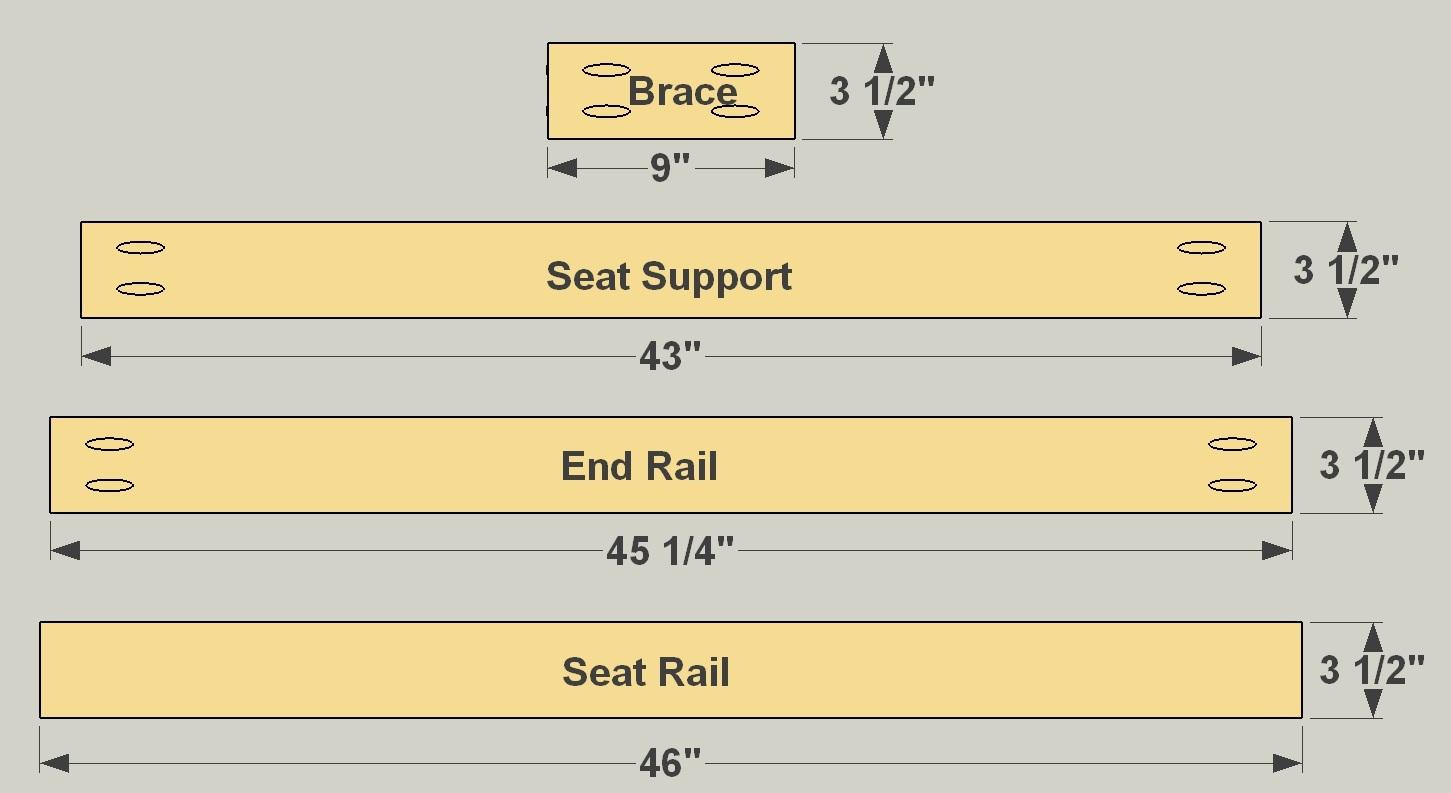
Cut two Seat Rails, two End Rails, two Seat Supports, and two Seat Braces to length from 2x4 boards, as shown in the cutting diagram. Then, with your pocket hole jig set up for 1 1/2" material, drill pocket holes in all the pieces, as shown, except for the Seat Rails.
-
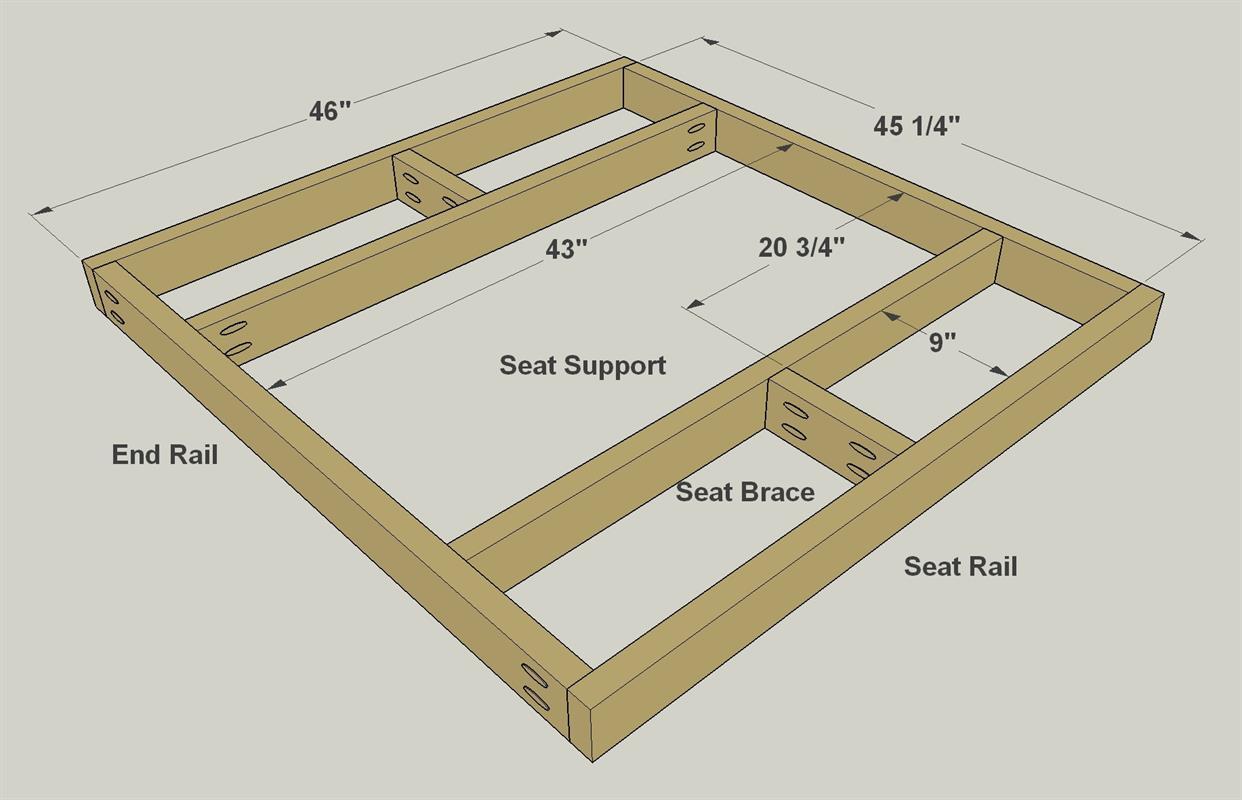
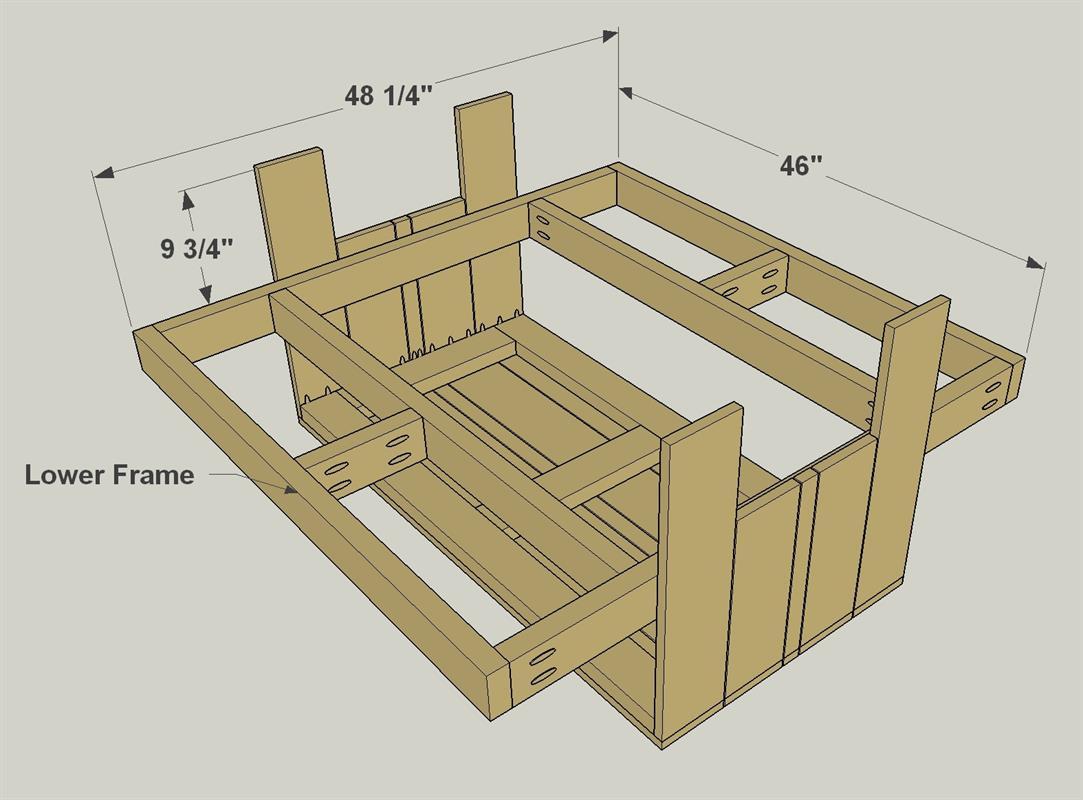
Assemble the Lower Frame
Now you can attach the lower frame parts, as shown, using 2 1/2" exterior-rated pocket hole screws. You’ll have limited space when attaching the Seat Braces, so pick up a right-angle drill attachment and a short #2 square-drive bit. You can get both at any home center.
-
Create Top Parts
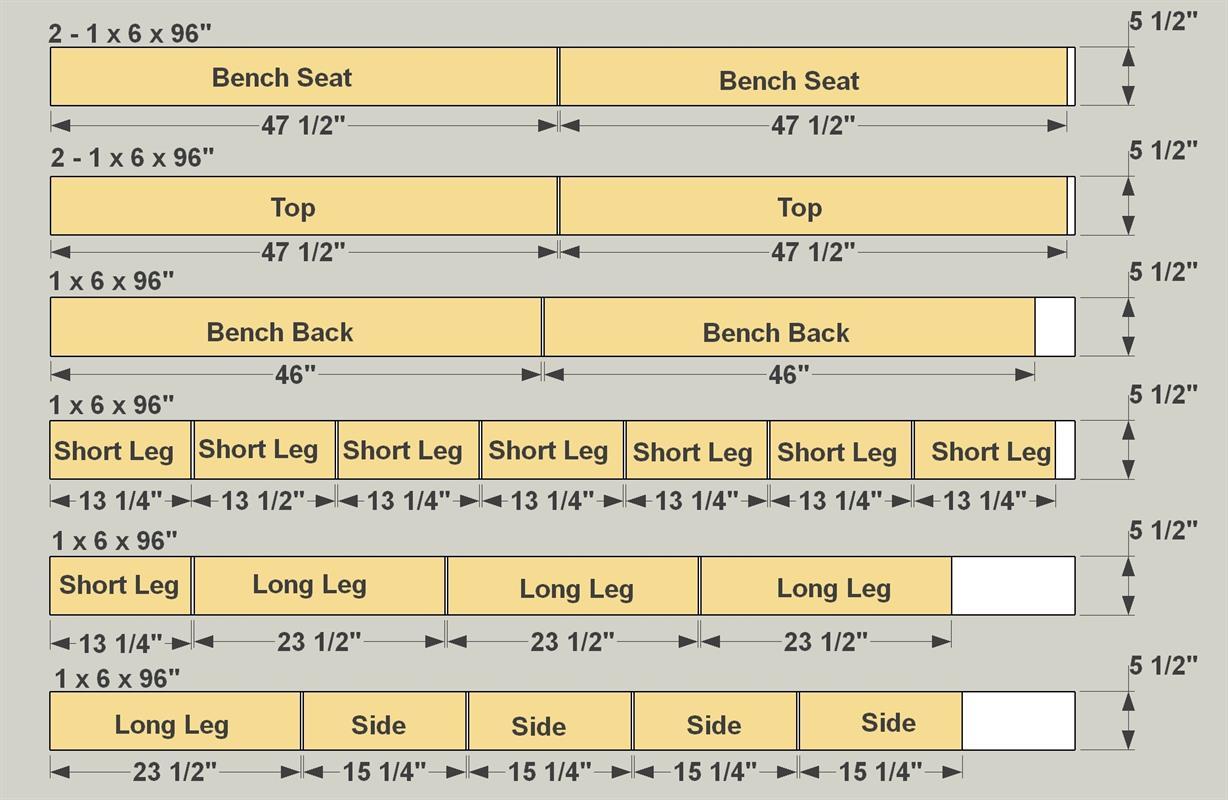
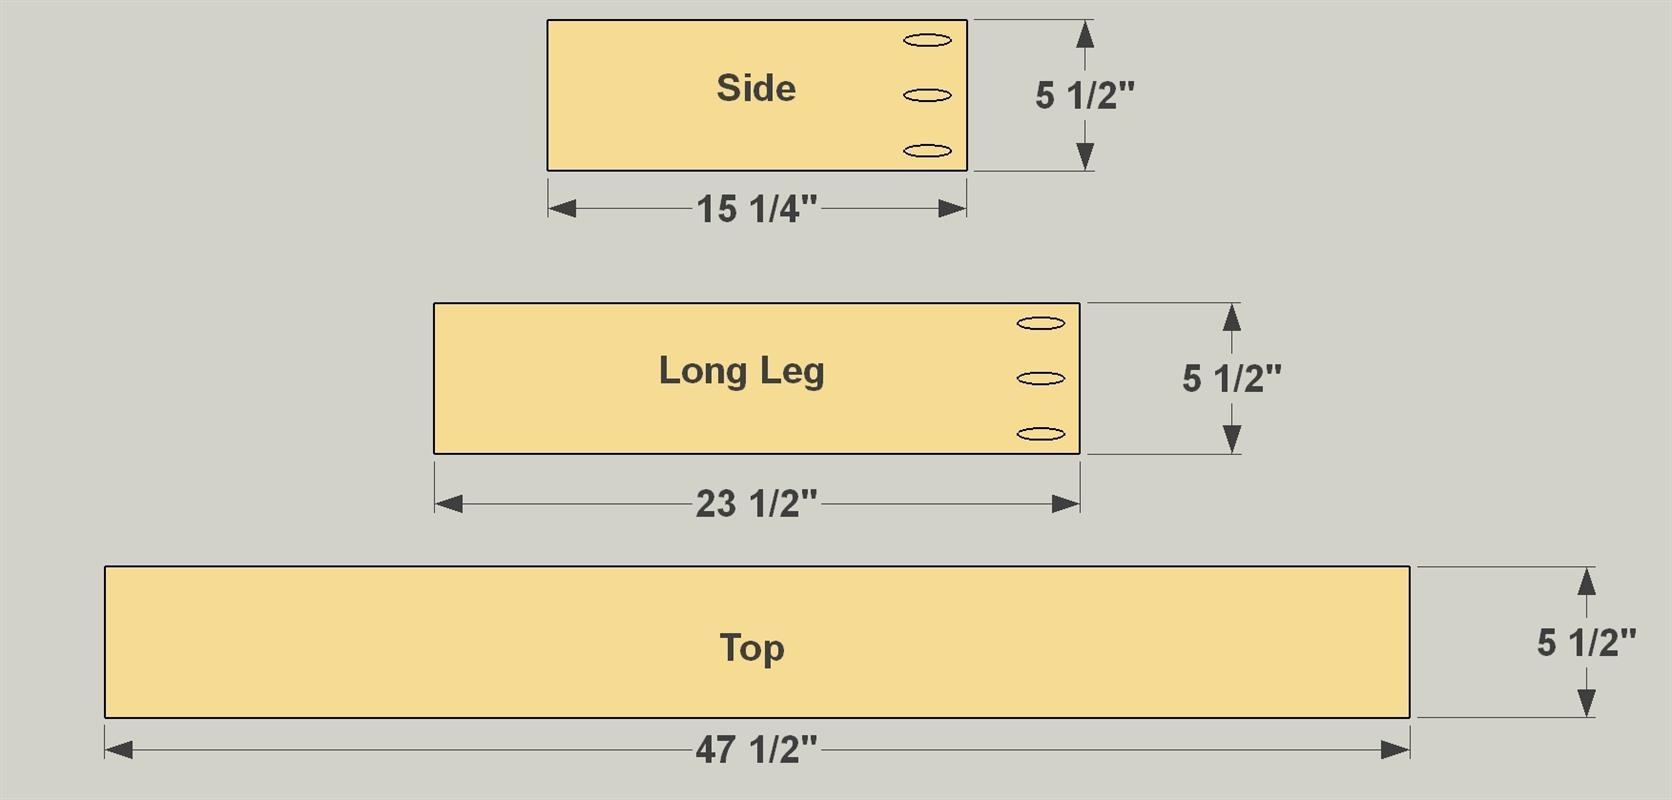
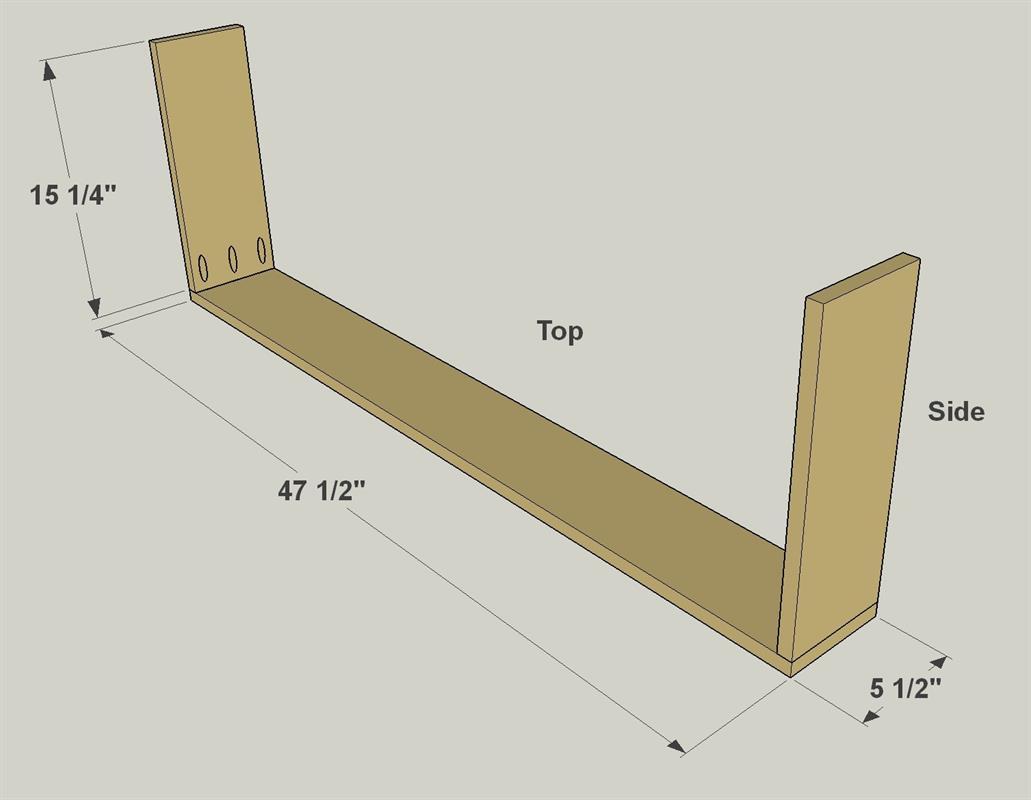
Cut four Top Boards, four Long Legs, and four Sides to length from 1x6 boards (we used pine 1x6s), as shown in the cutting diagram. With your pocket hole jig set up for 3/4" material, drill pocket holes in the Long Legs and Sides where shown.
-
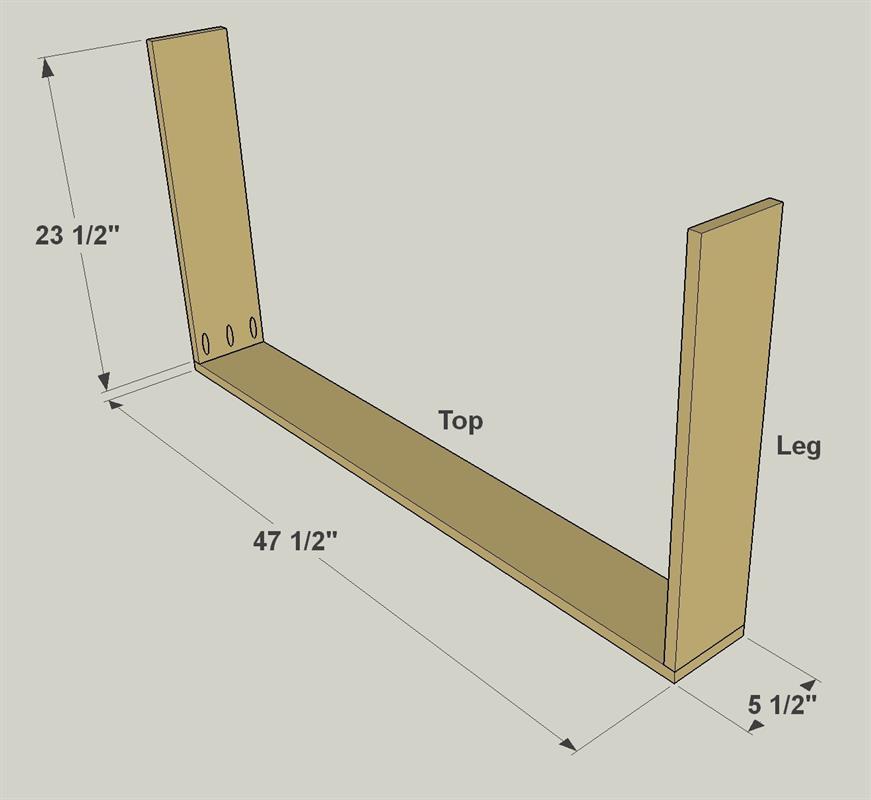
Connect the Long Legs
Attach the Long Legs to two of the Top Boards using 1 1/4" exterior-rated pocket hole screws, as shown.
-
Connect the Sides
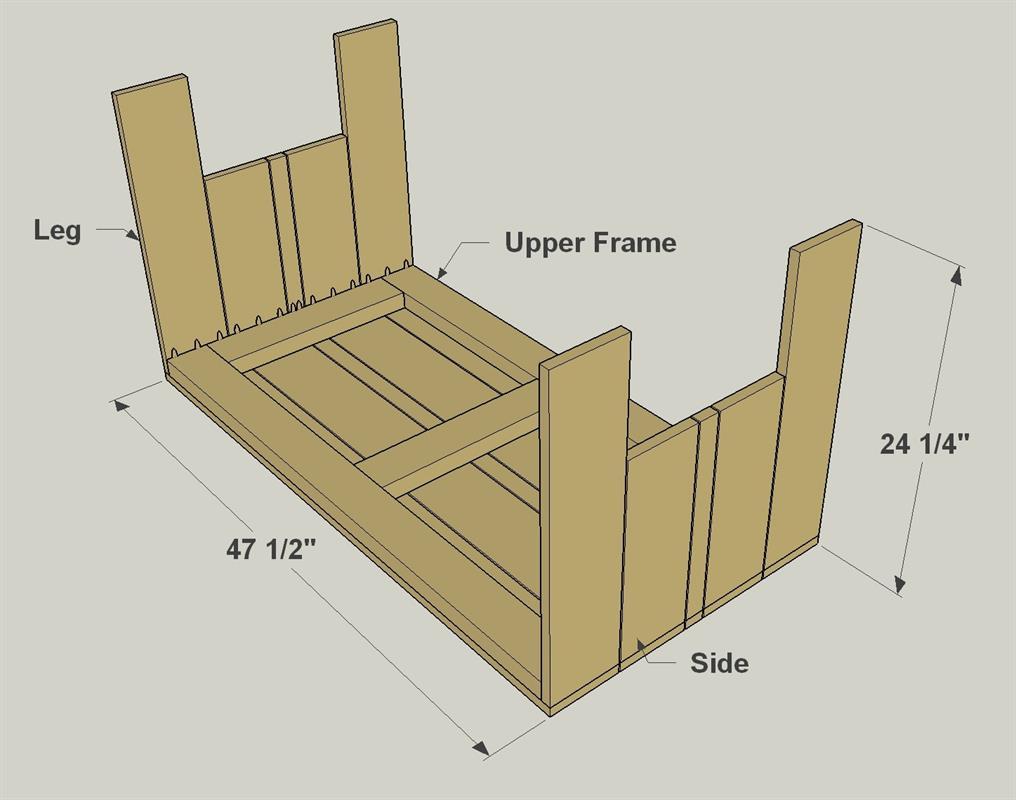
Now attach the Sides to the other two Top Boards using 1 1/4" exterior-rated pocket hole screws, as shown.
-
Create Detail Strips
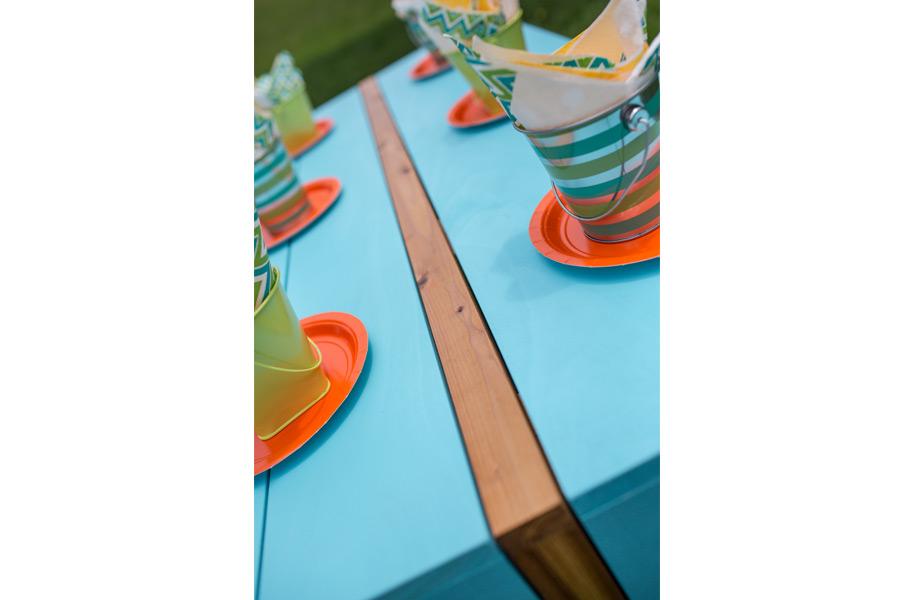
Cut one Top Detail and two Side Details to length from 1x2 boards (we used cedar), as shown in the cutting diagram. With your pocket hole jig set up for 3/4" material, drill pocket holes in the Side Details where shown. Then Assemble the Detail parts using 1 1/4" exterior-rated pocket hole screws.
-
Assemble the Top and Frame
Now you can join all these pieces together to start seeing your table take shape. Start by laying the Top Detail assembly face down on a flat surface. Put the Top/Side assemblies on either side, and then flank those with the Top/Long Leg assemblies. Lay the upper frame assembly in place, and make sure everything is sitting properly. Then attach the frame to the top parts by driving 2" deck screws through the frame pieces and into the underside of the Top and Detail boards. Use four screws per Rail in the Top Boards, and two Screws in the Top Detail. Along the Frame Stiles, drive a screw every 6" or so.
-
Add the Lower Frame
Next, position the lower frame assembly as shown, and hold it in place with clamps. Then attach the frame to the Long Legs and Sides driving 2" deck screws through the frame pieces and into the back side of the Legs and Sides.
-
Create the Bench Parts
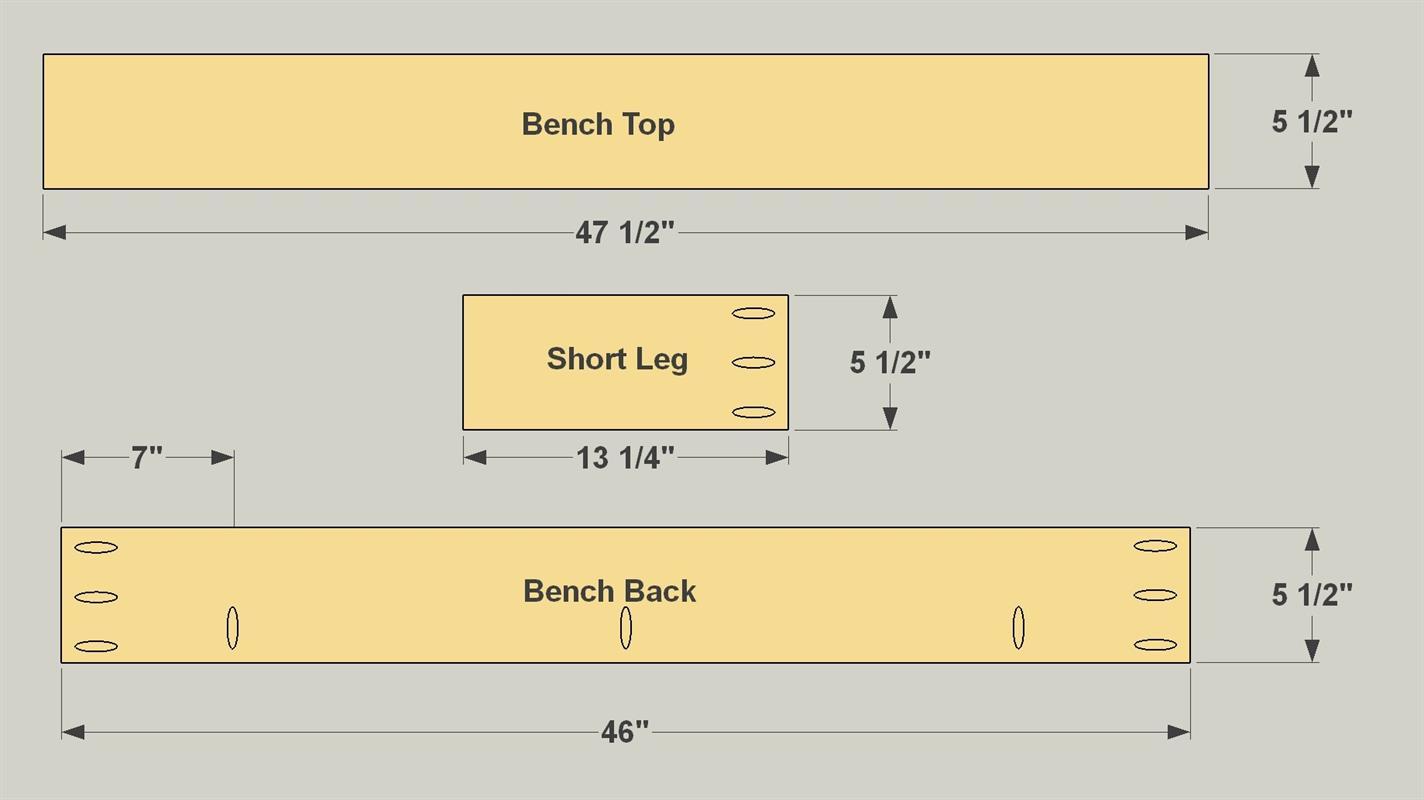
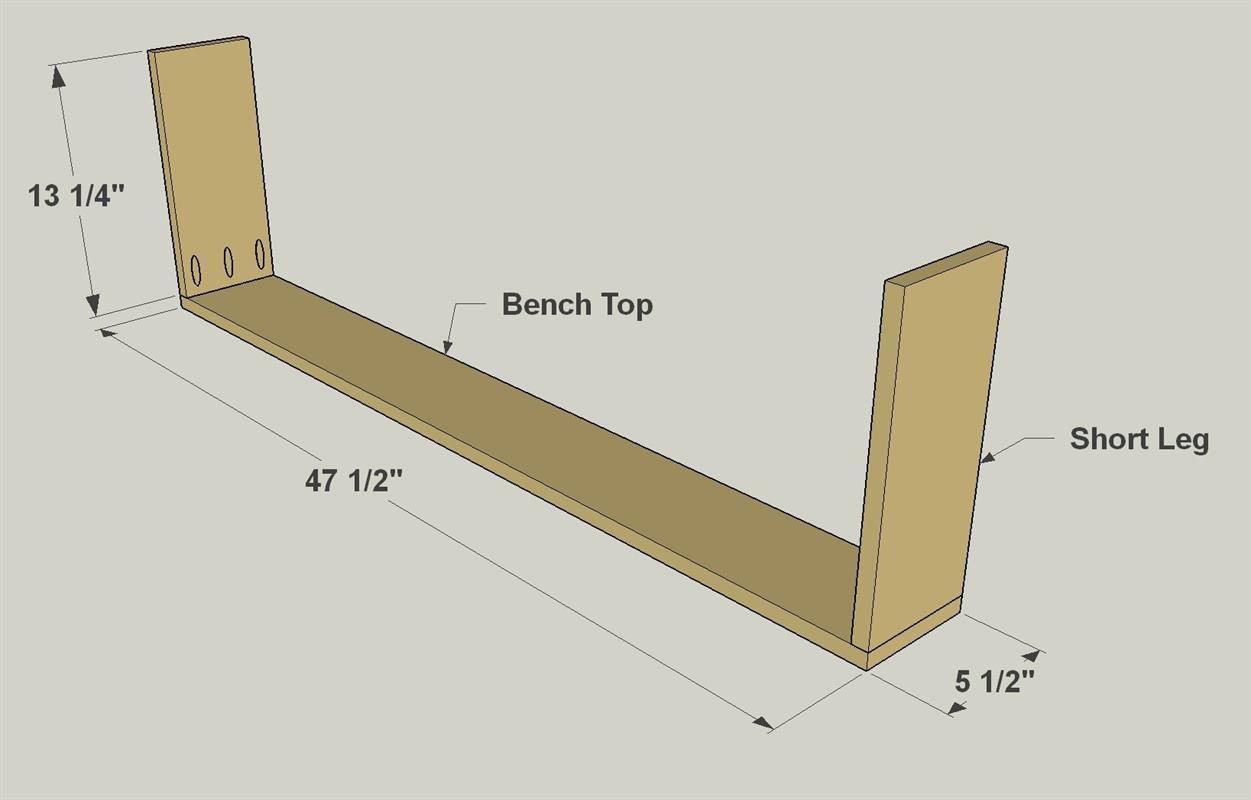
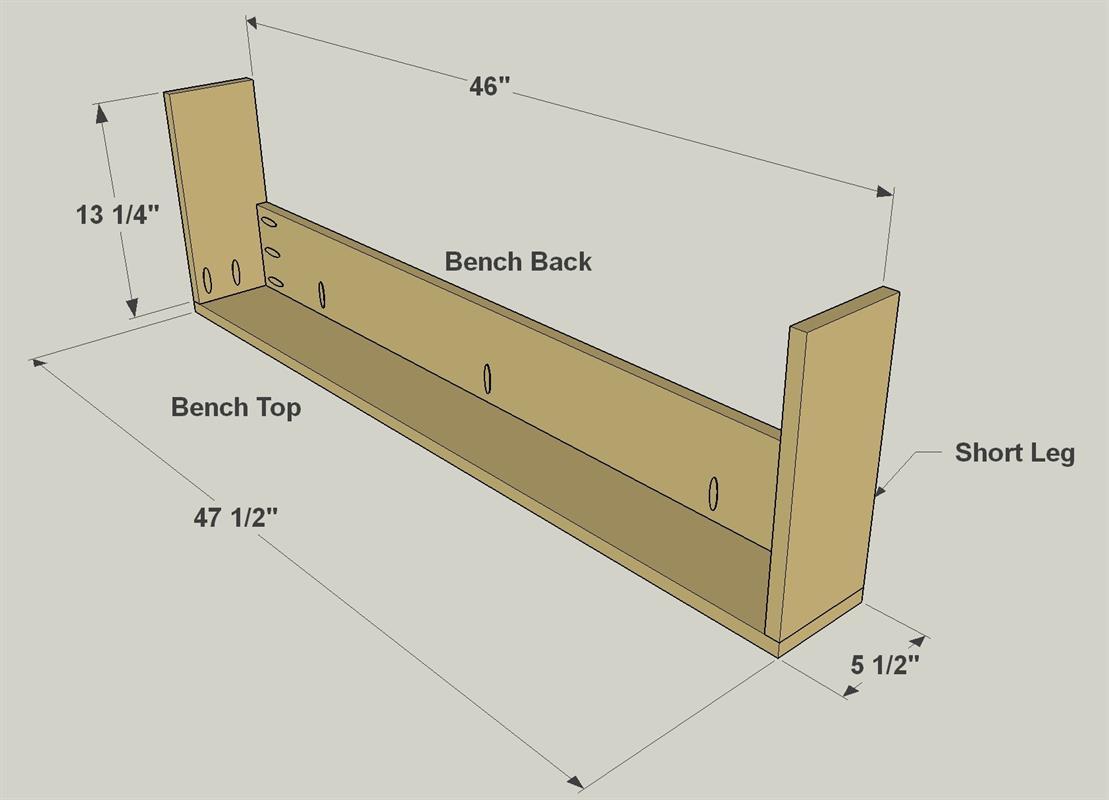
Cut four Bench Tops, two Bench Backs, and eight Short Legs to length from 1x6 boards (we used pine 1x6s), as shown in the cutting diagram. With your pocket hole jig set up for 3/4" material, drill pocket holes in the Bench Backs and Short Legs where shown.
-
Connect the Short Legs
Attach the Short Legs to the Bench Tops using 1 1/4" exterior-rated pocket hole screws, as shown.
-
Attach the Bench Backs
Now attach the Bench Backs to two of the Bench assemblies using 1 1/4" exterior-rated pocket hole screws, as shown.
-
Create Bench Detail Strips
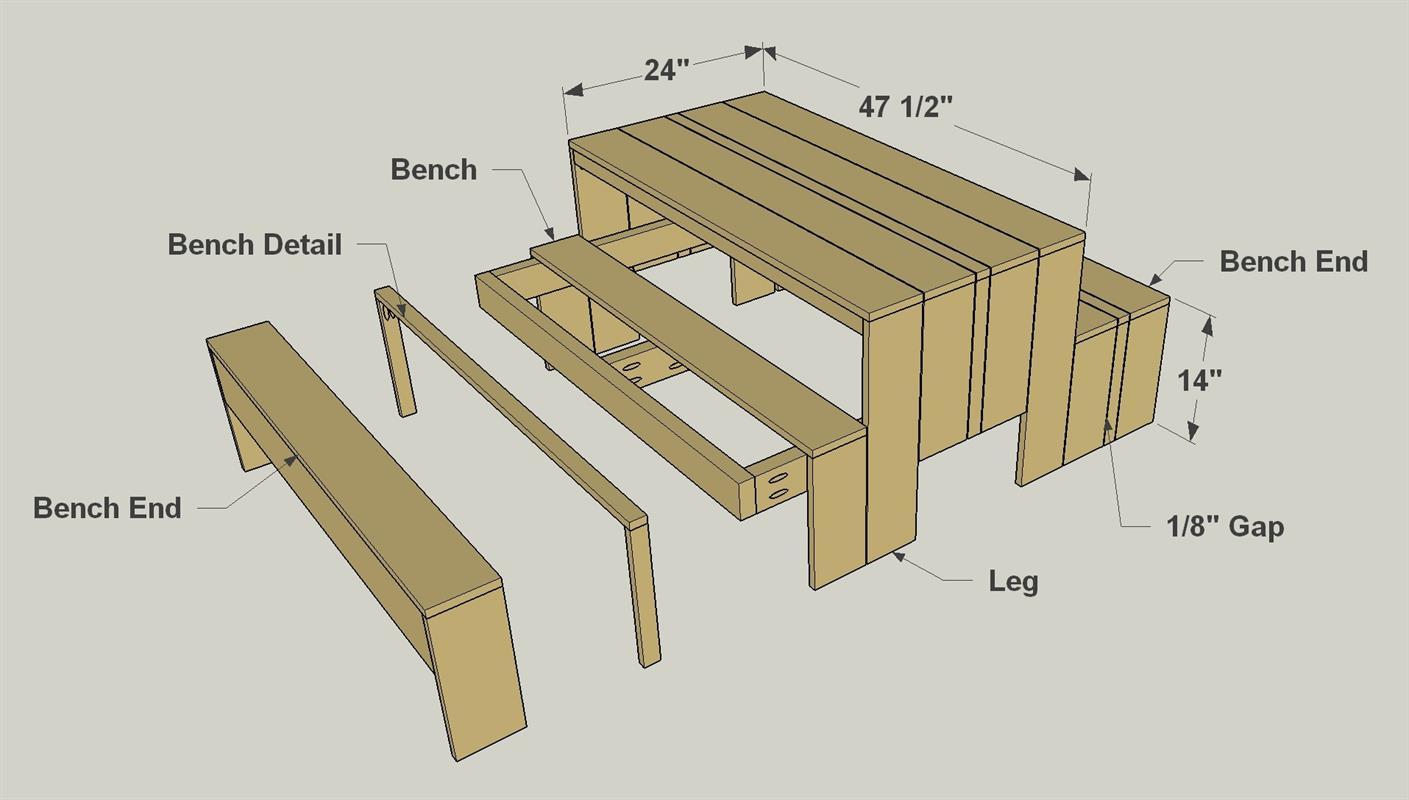
Cut one Bench Detail and four Leg Details to length from 1x2 boards, as shown in the cutting diagram. With your pocket hole jig set up for 3/4" material, drill pocket holes in the Leg Details where shown. Then Assemble the Detail parts using 1 1/4" exterior-rated pocket hole screws.
-
Attach the Bench Parts
To finish up assembly, join the Bench parts to the Lower Frame. Again, you’ll drive 2" deck screws through the frame pieces and into the back/underside of the benches. Start nearest the Long Legs, and work your way outward on each side.
-
Prep, Paint, and Finish
With the parts all assembled, give the entire piece a good sanding, and then brush off the dust. If you plan to use a combination of paint and stain as we did, remove the detail pieces. Then paint and stain as appropriate, and reinstall the Details.


