Console Table with Faux Drawer Fronts
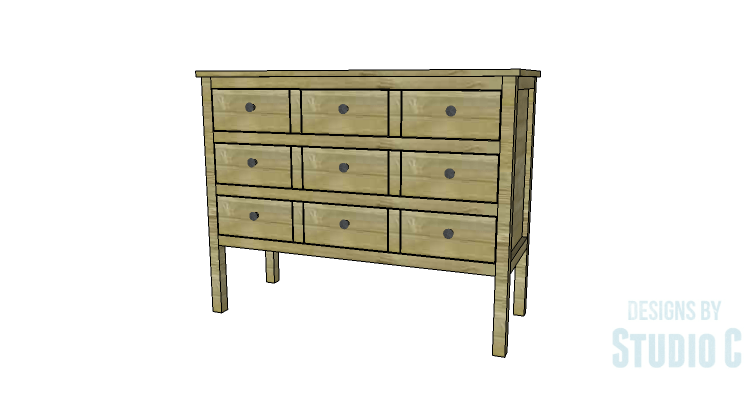
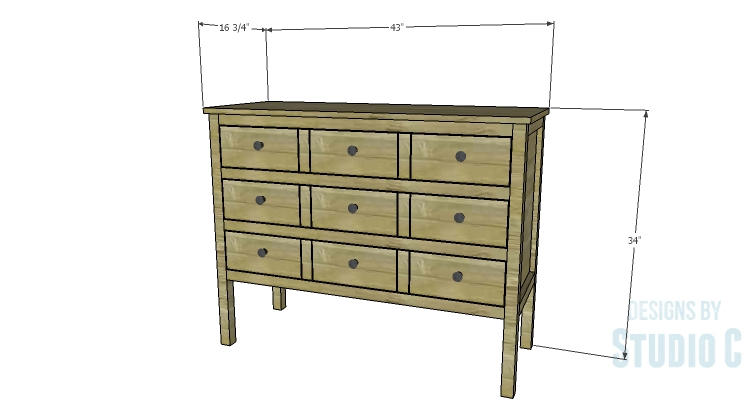
By Designs by Studio CThis console table has multiple faux drawer fronts resembling nine drawers when it actually has three! This is a great table to use in a dining room for linen storage, in an entryway as “general” storage (we all have that!), or as a small dresser.
Directions
-
Step One
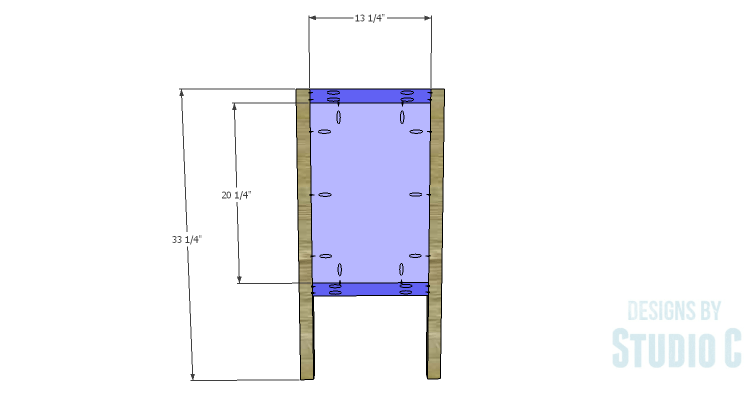
Cut the pieces for the legs, the side framing and the side panels. With the pocket hole jig set for 1-1/2" material, drill pocket holes in each end of the framing pieces. Secure the framing to the legs using glue and 2-1/2" pocket hole screws.
Set the pocket hole jig for 3/4" material and drill pocket holes in all four edges of the side panels. Secure the panels to the legs and framing using glue and 1-1/4" pocket hole screws. The inside faces of the panels will be flush with the inside faces of the legs and framing. -
Step Two
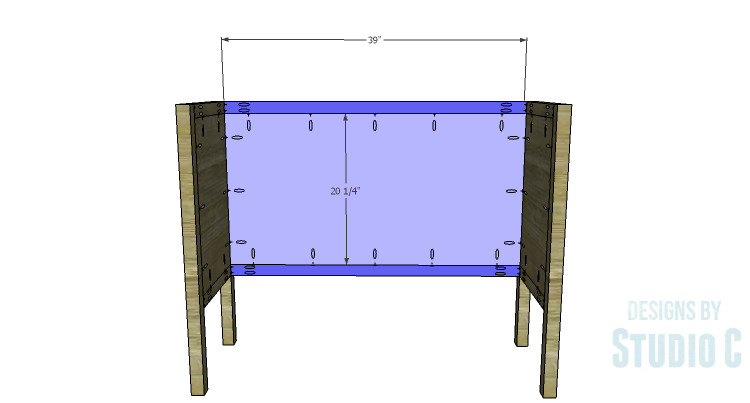
Cut the pieces for the back framing and the back panel. Set the pocket hole jig for 1-1/2" material and drill pocket holes in each end of the framing pieces. Secure the framing to the legs using glue and 2-1/2" pocket hole screws.
Set the pocket hole jig for 3/4" material and drill pocket holes in all four edges of the back panel. Secure the panel to the legs and framing using glue and 1-1/4" pocket hole screws. The inside face of the panel will be flush with the inside faces of the legs and framing. -
Step Three
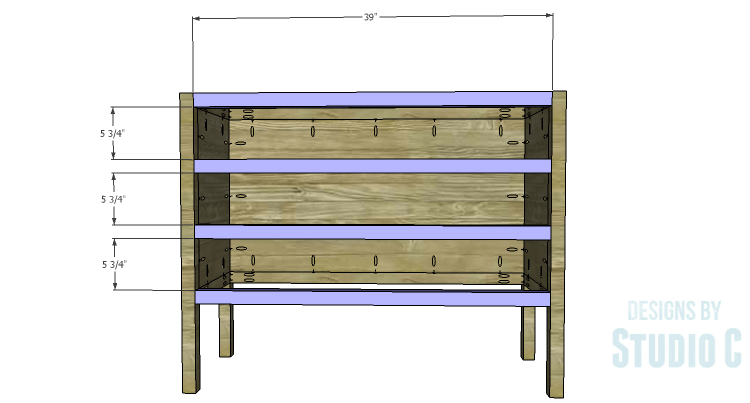
Cut the pieces for the front stretchers. Set the pocket hole jig set for 1-1/2" material and drill pocket holes in each end of the stretchers. Secure the stretchers to the legs using glue and 2-1/2" pocket hole screws.
-
Step Four
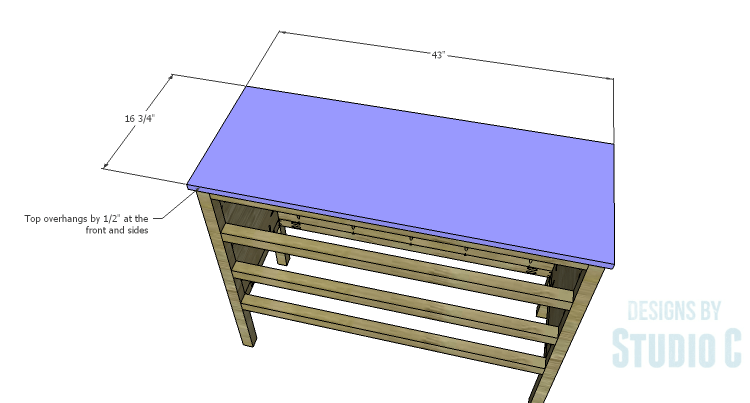
Cut the piece for the top. Apply the edge banding to the exposed edges of the plywood. The top will overhang the front and sides by 1/2". Secure the top in place using glue and 1-1/4" brad nails.
-
Step Five
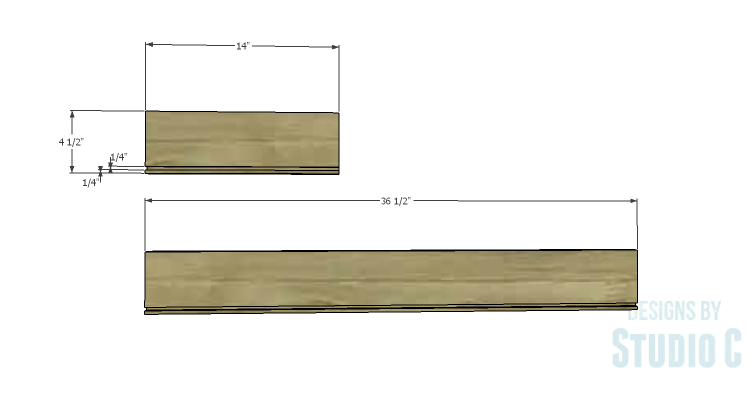
Cut the pieces for the drawer boxes. Cut a 1/4" deep by 1/4" wide groove in the bottom of each piece to allow for the drawer bottom. Set the pocket hole jig for 3/4" material and drill pocket holes in each end of the front and back pieces.
-
Step Six
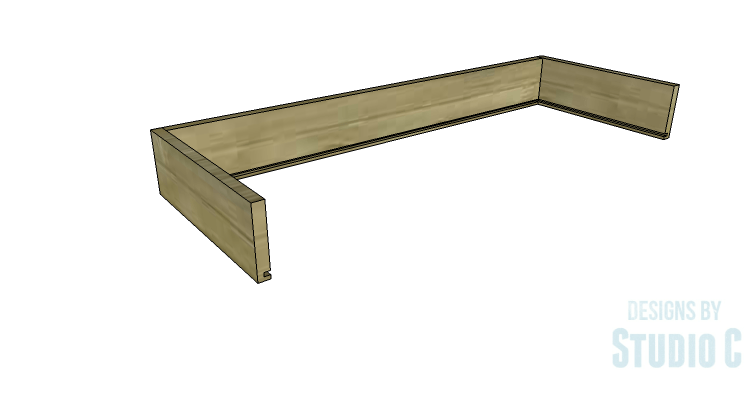
Secure the drawer back piece to the sides using glue and 1-1/4" pocket hole screws.
-
Step Seven
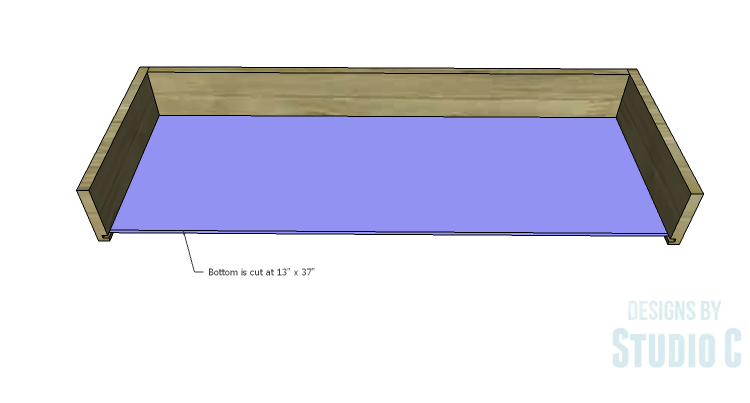
Cut the pieces for the drawer bottoms. Slide the drawer bottom in the groove on the sides and back of the drawer box.
-
Step Eight
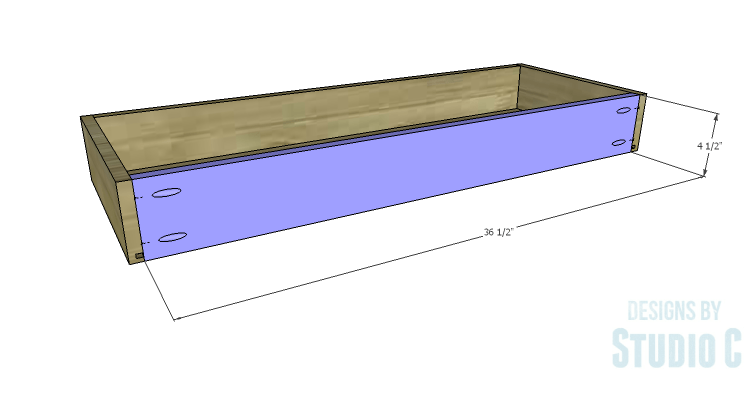
Secure the drawer box front using glue and 1-1/4" pocket hole screws. Install the drawer slides according to the manufacturer's installation instructions locating them 3/4" back from the front face of the stretchers and legs. Make any necessary adjustments.
-
Step Nine
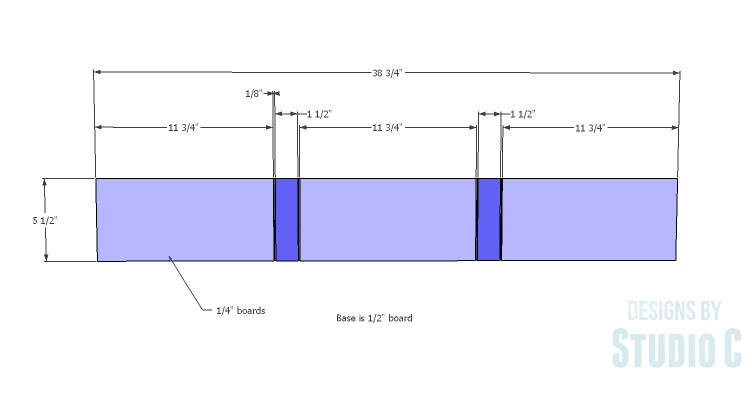
Cut the pieces for the drawer front base, the faux drawer fronts, and the faux dividers. There will be a 1/8" gap between the faux drawer fronts and faux dividers. Secure the faux pieces to the bases using glue and clamp in place until dry.
-
Step Ten
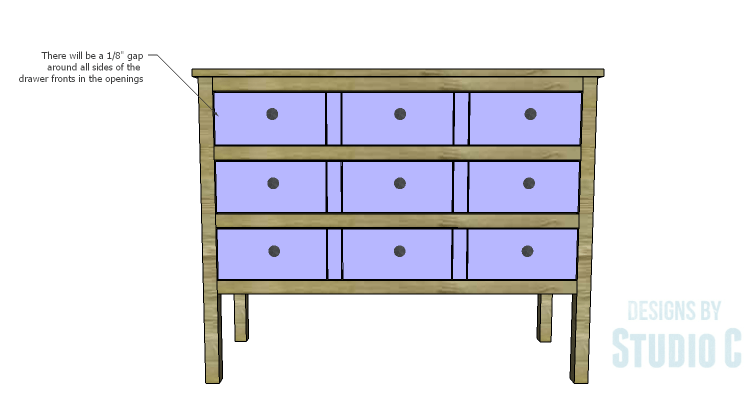
Drill the holes in the drawer fronts for the cabinet pulls. Shim the drawer fronts in place in the openings - there will be a 1/8" gap around all sides in the openings. Drive screws through the holes in the drawer front to temporarily secure the fronts to the drawer boxes. Open the drawer, and secure the fronts to the boxes using 1-1/4" screws. Remove the temporary screws in the front and finish drilling the holes for the cabinet pulls. Install the cabinet pulls.


