


I'm a person that likes to have a place for everything, so the fact that our Legos are always strewn about our main living area is very cringy.
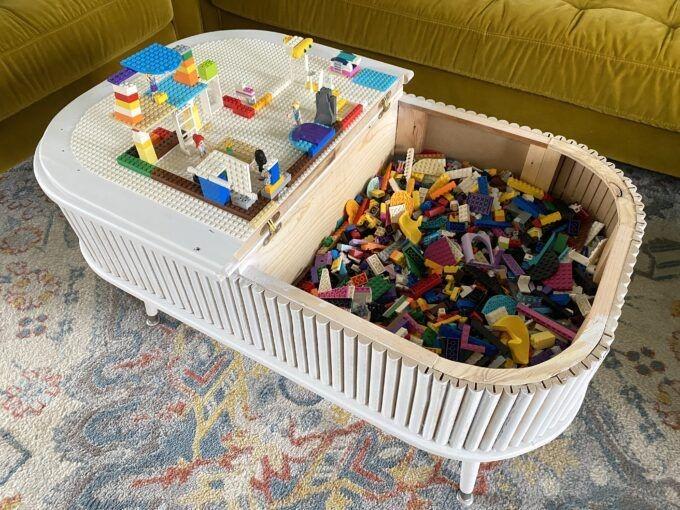
Since I haven't been altogether happy with the style of our coffee table anyway, I've been plotting to design/build a new coffee table for our family, complete with hidden Lego storage!
Are you ready to build this baby with us?!
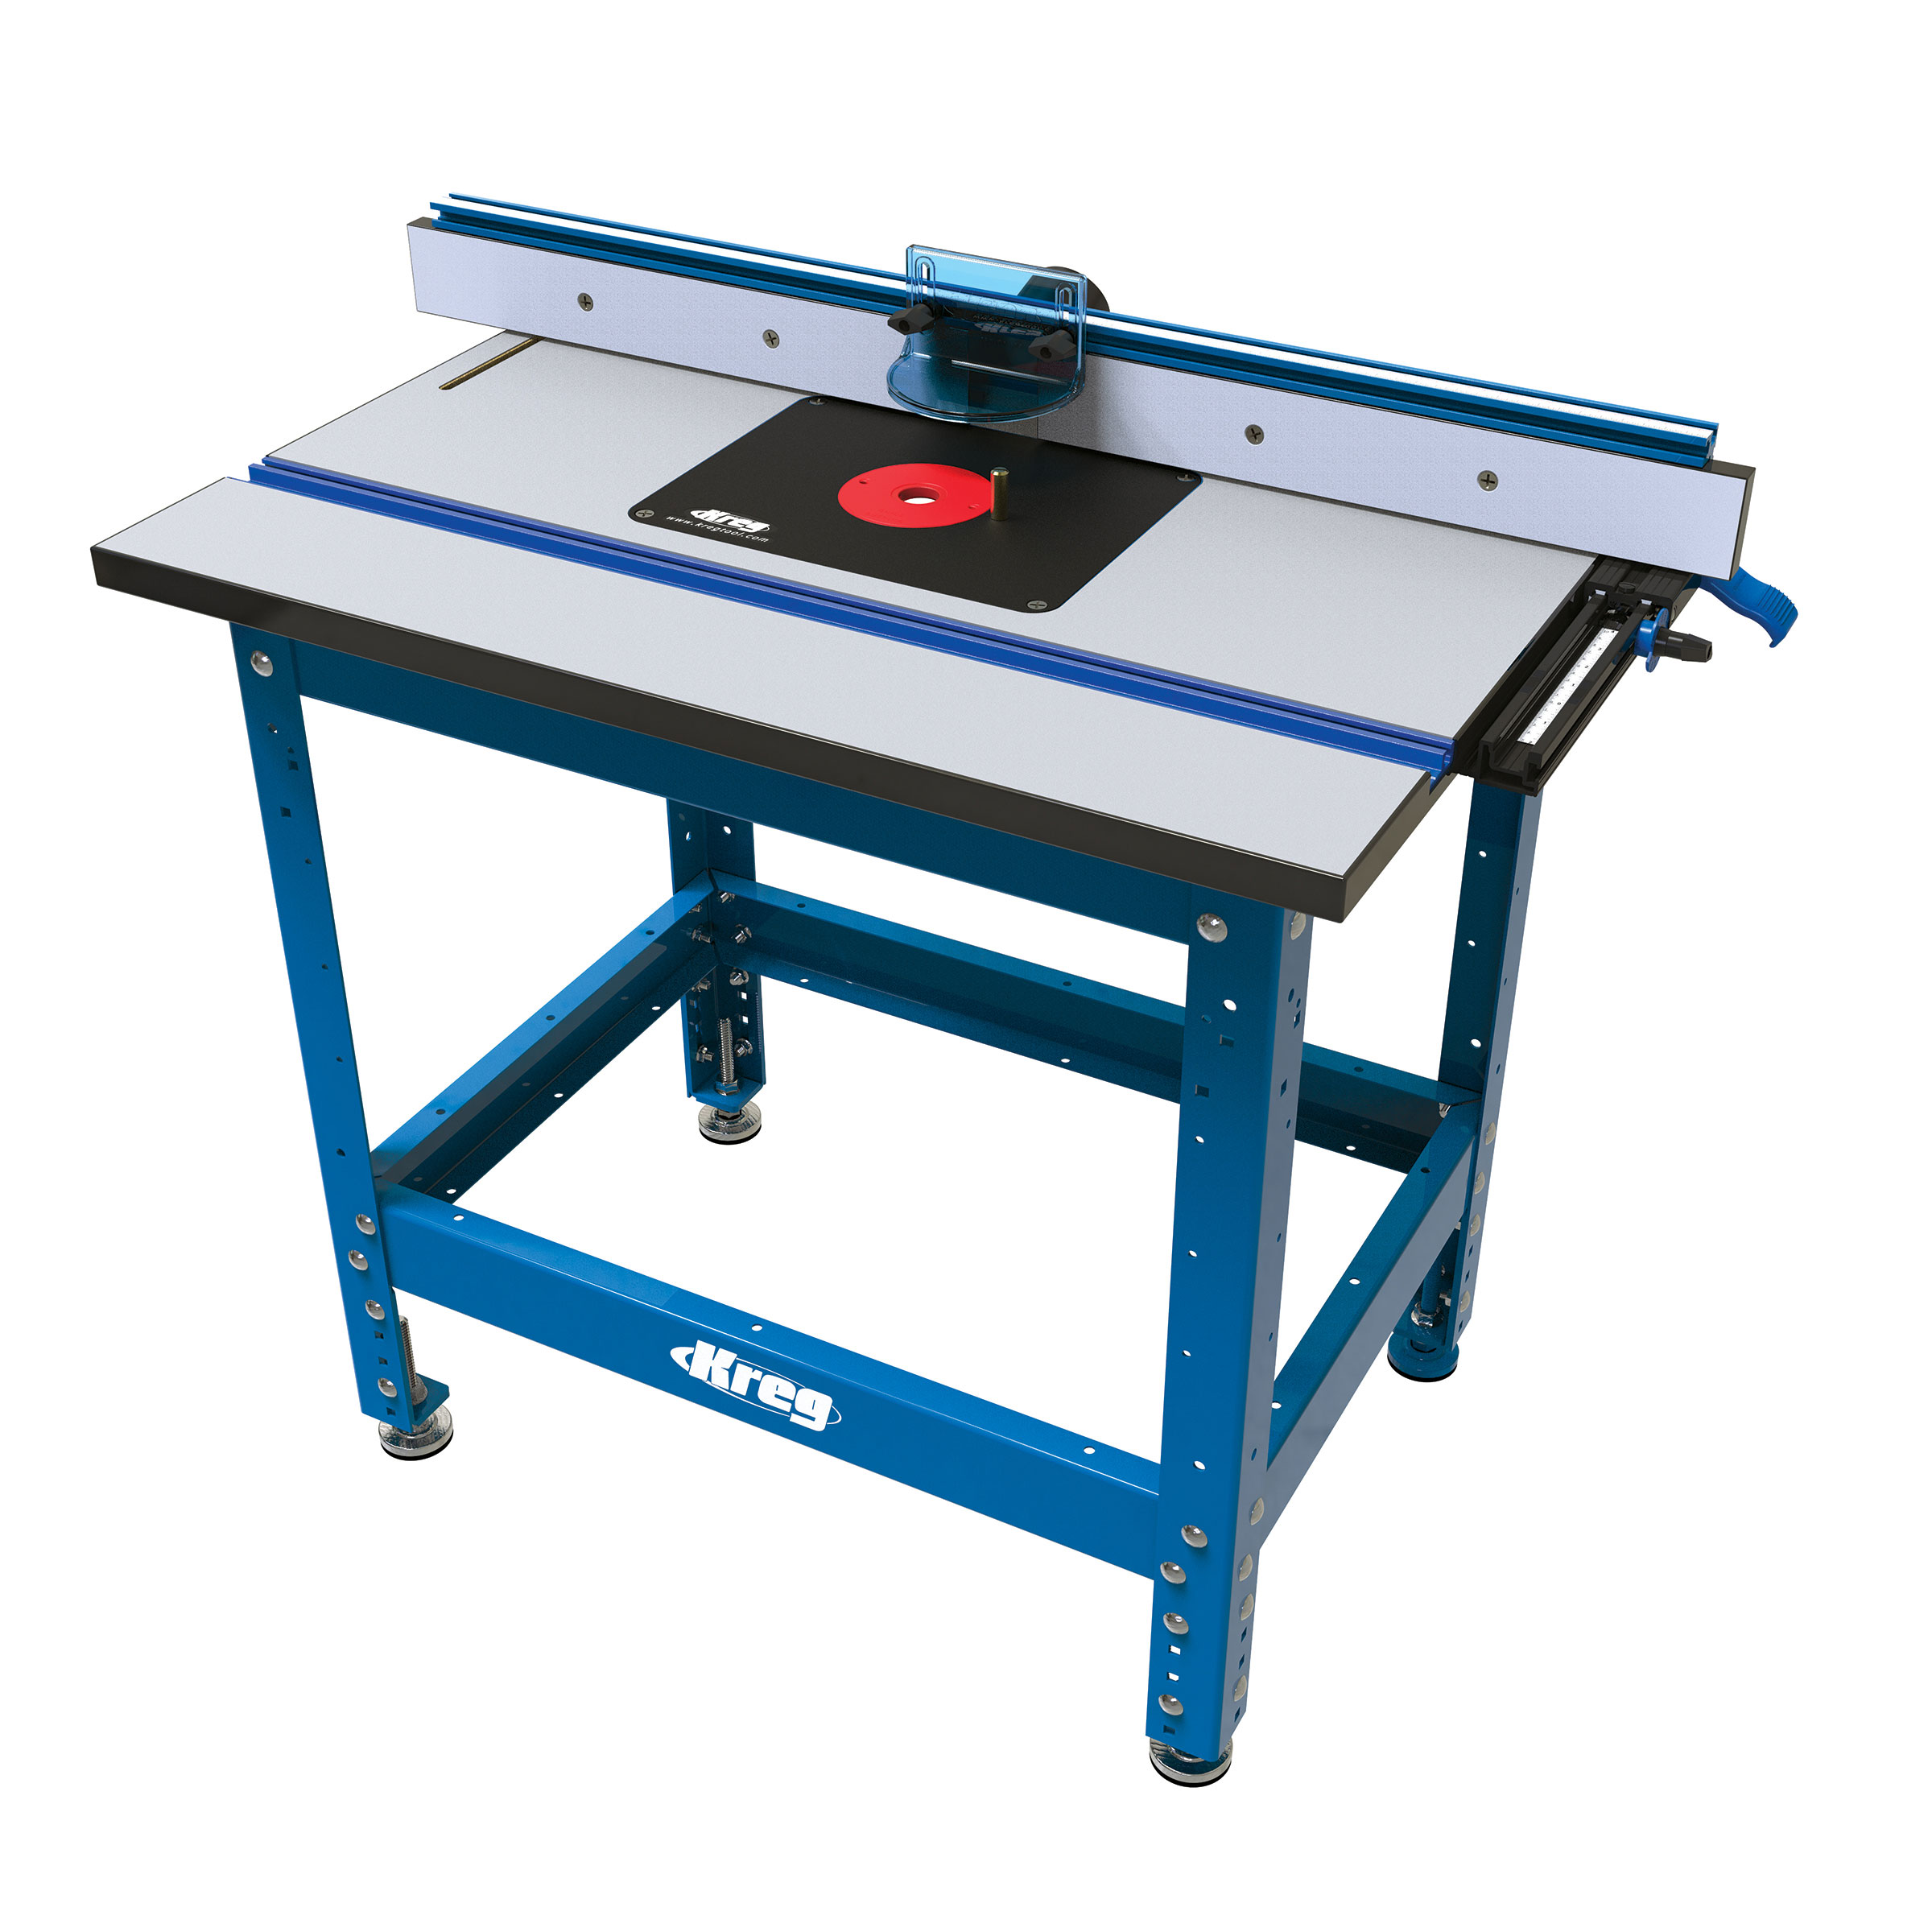
Tools
Kreg Tools


Other Tools
-
Track Saw and/or Miter Saw

-
Radial Arm Saw and/or Miter Saw
-
Pin Nailer
Materials
Wood Products
- 5 Boards , 1 X 6 X 72"
- 1 MDF sheet , 1/2 x 24 x 48"
- 1 Plywood sheet , 1/2 x 24 x 24"
Hardware & Supplies
- 4 12" tapered legs
- 1 Wood glue
- 1 Wood filler
- 4 Lego plates
- 4 SOSS hinges
- 1 Box 1" pin nails
Directions
-
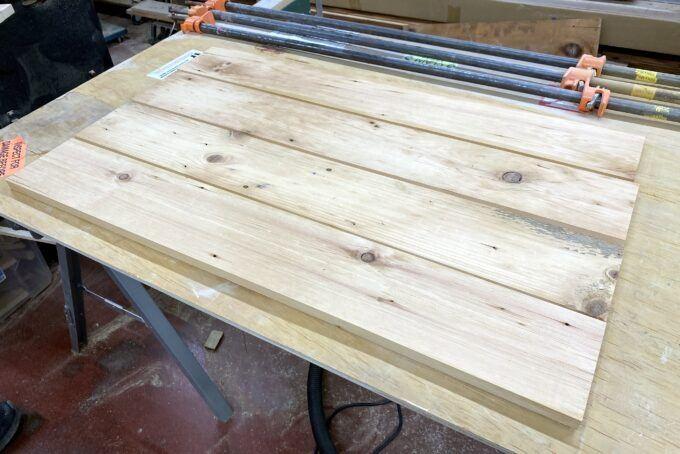
Join your boards
We laid out our boards for the top and bottom of our coffee table. This pic is just the bottom.
-
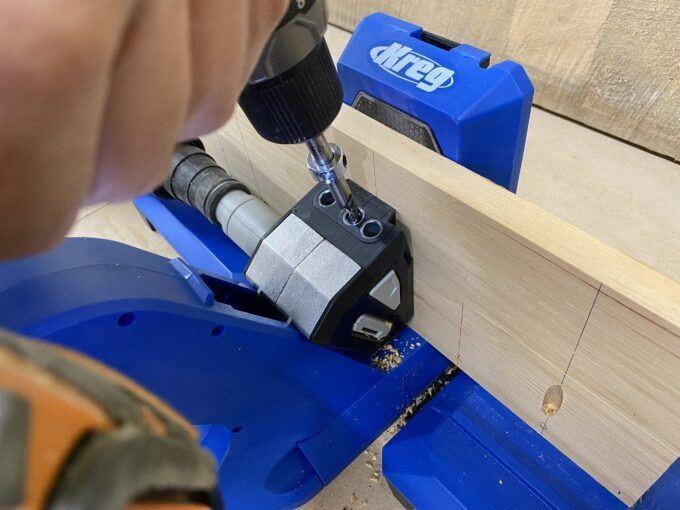
Mark out pocket holes
We marked out increments to decide where the pocket holes should go, and got busy with our Kreg Pocket Hole Jig 720 PRO. It's amazing how fast and convenient it is to add pocket holes now!
-
Glue and assemble
We put a layer of wood glue along the sides, and joined these boards together! Repeat this process so that you have two, one for the top and one for the bottom.
-
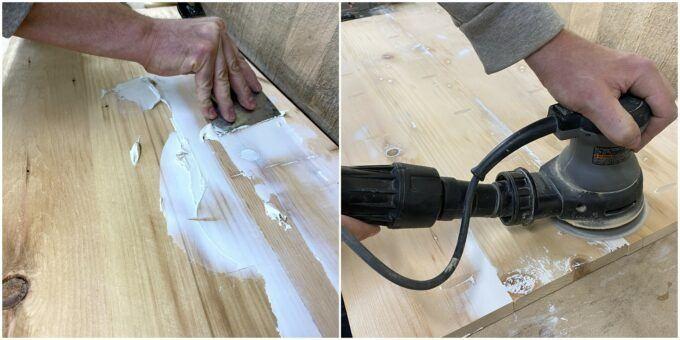
Fill holes
Since our lumber was used as floor boards, there were lots of nail holes, knots, and other imperfections that we wanted to fill so we could have a flawless finish when we paint.
-
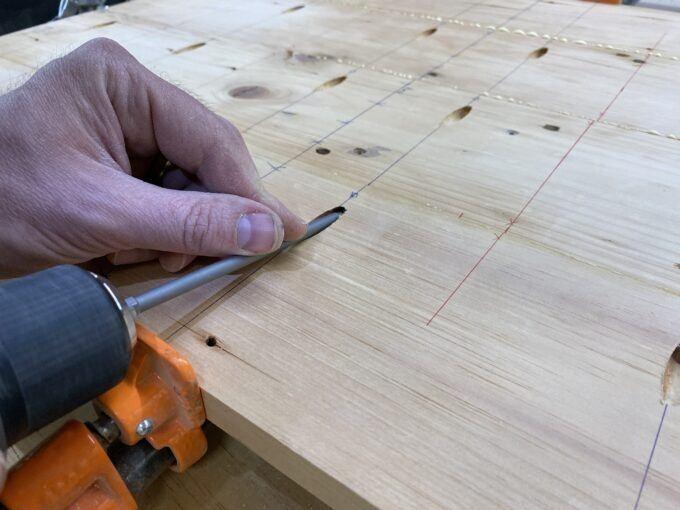
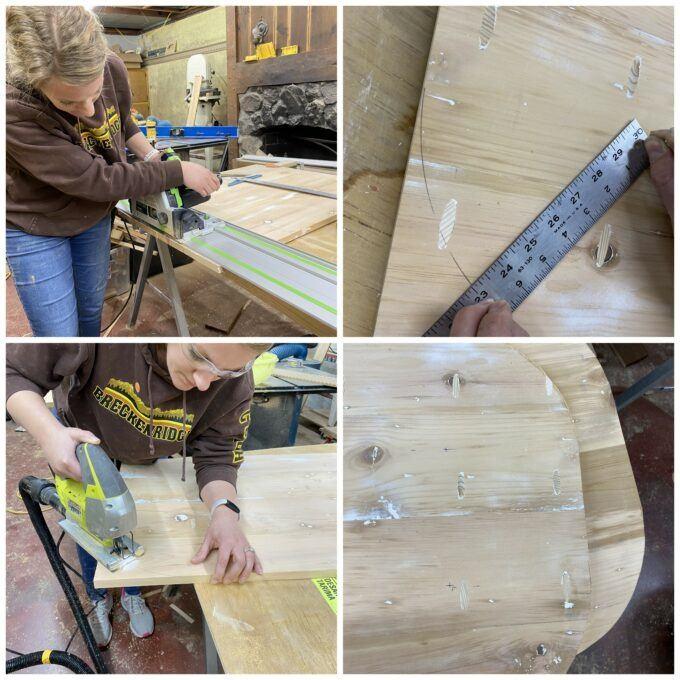
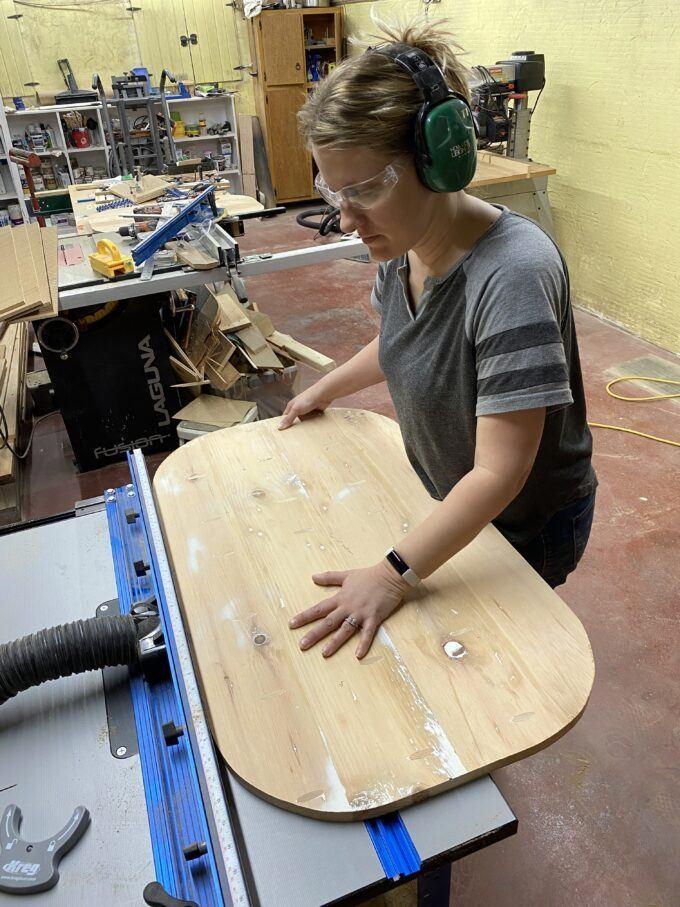
Round the corners (optional)
Slice off the edges to make them true with a track saw. We love the look of rounded edges, so we made our own large compass with by drilling into a ruler and drew out our circles on the edge. Then cut with a jigsaw or band saw.
-
Route the edges
We chose to use a roundover bit and route the edges a bit to soften them up. Then sand everything down.
-
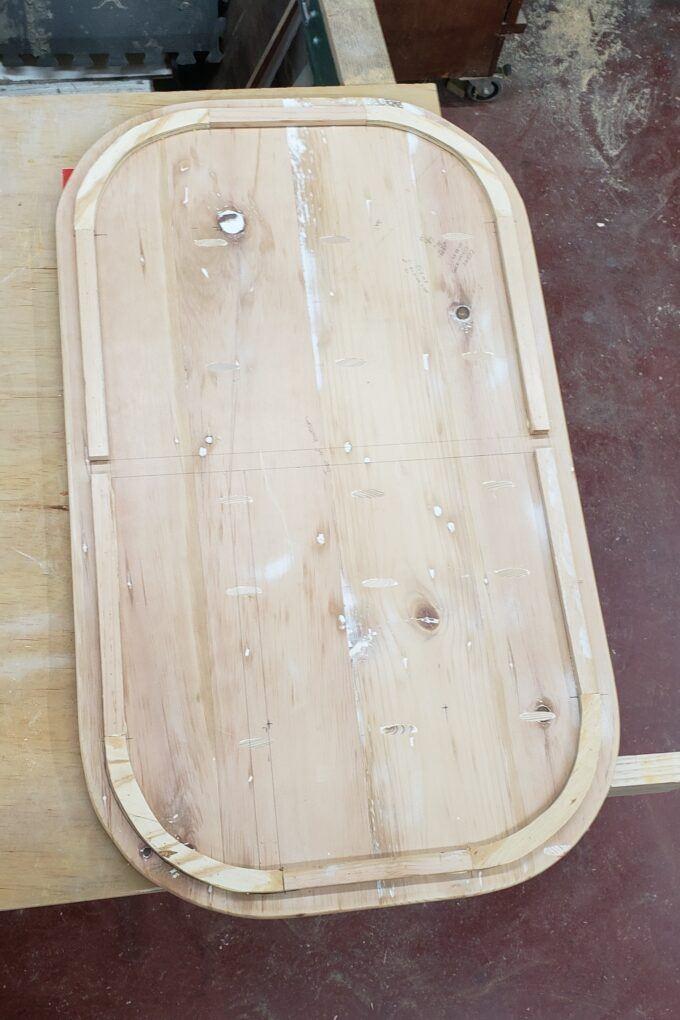
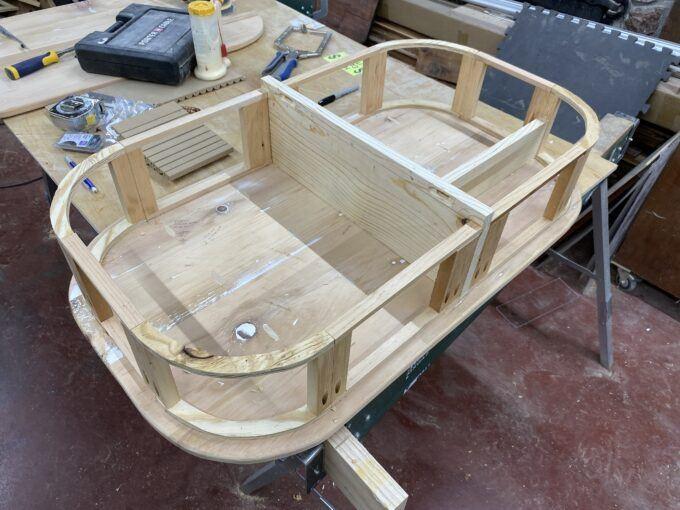
Build the carcass
Nick here... this part was all me. I like our furniture to last a lifetime, so I built this interior framing that would make it more structurally sound. It will also give us something to affix the fluting to (more details about that to come!)
This table was designed to have a 1/2" overhang past the fluted sideboards. We laid out where we wanted the carcass to go by measuring in from the edges. 1/2" overhang 1/2 inch MDF Fluting and 3/4 inch for the supporting carcass.
Once the supporting carcass was laid out we go busy building it, using some scrap 1x6 pieces we cut the supporting tracks 1/2" X 3/4". For the corners we traced the curve onto a piece of 1/2" plywood on the scroll saw.
-
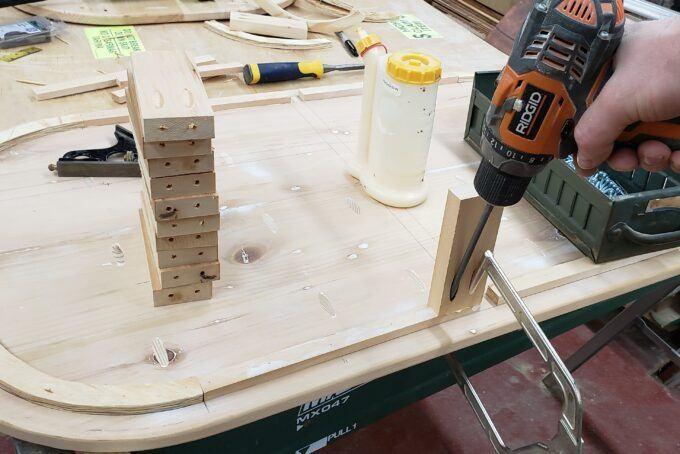
Add support blocking
We also added blocking (2" x 4 1/4") to help support the table and the MDF fluting that goes along the outside edges.
-
Add dividers
While everything was accessible we added the center divider and the divider perpendicular to the center. Note: If using SOSS hinges you will want to route them before installing divider.
-
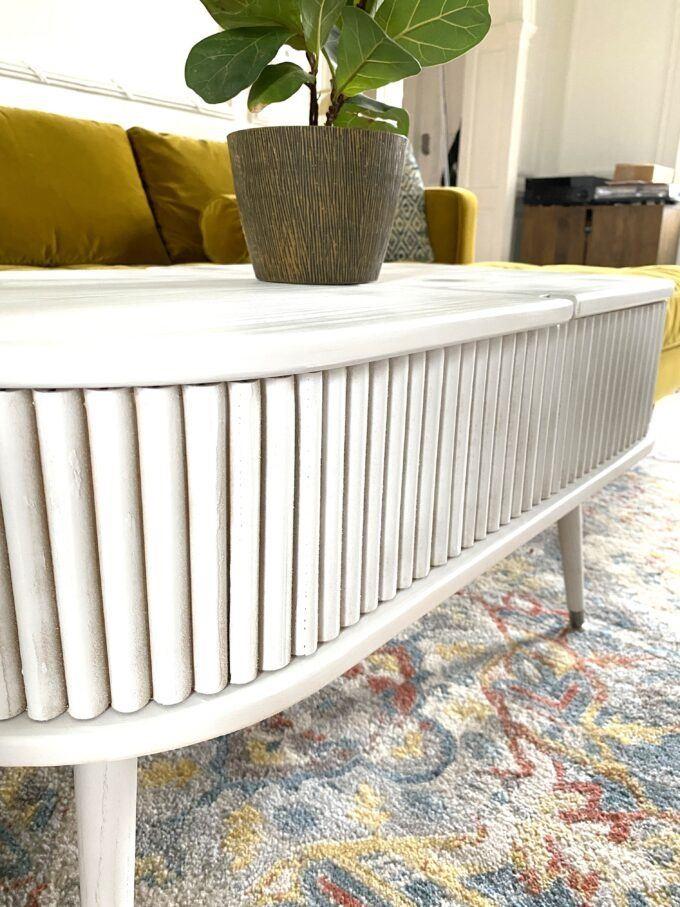
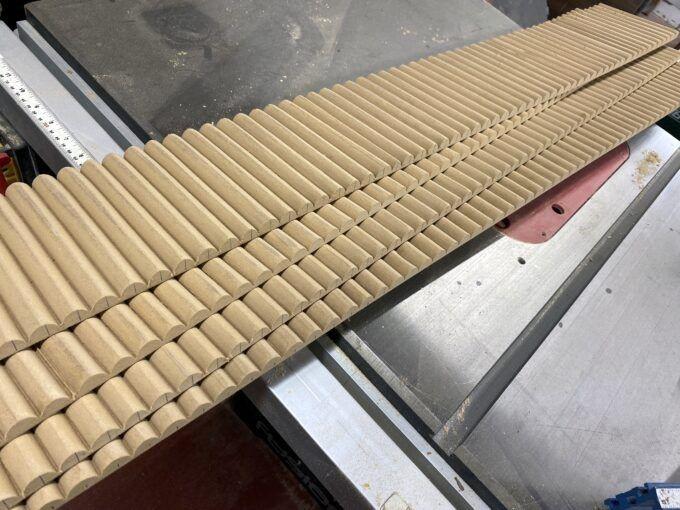
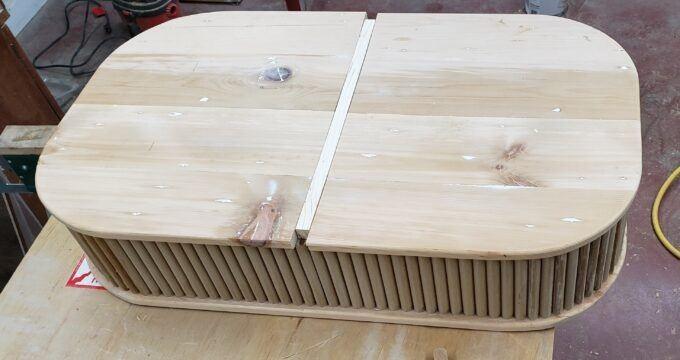
Add fluting
There's a trend going around where you place dowels side-by-side on furniture to create a fun texture, or 'fluting'. Instead of cutting a million dowels to size, we decided to try using a sheet of MDF and routing to make the fluting or beading, then attempt to bend it around the corners and affix it to the vertical edges of the coffee table.

-
Admire your work
Routing the beads was fun, but very time consuming. In hindsight, we would have just used dowels, but it's totally your choice. You have options!
-
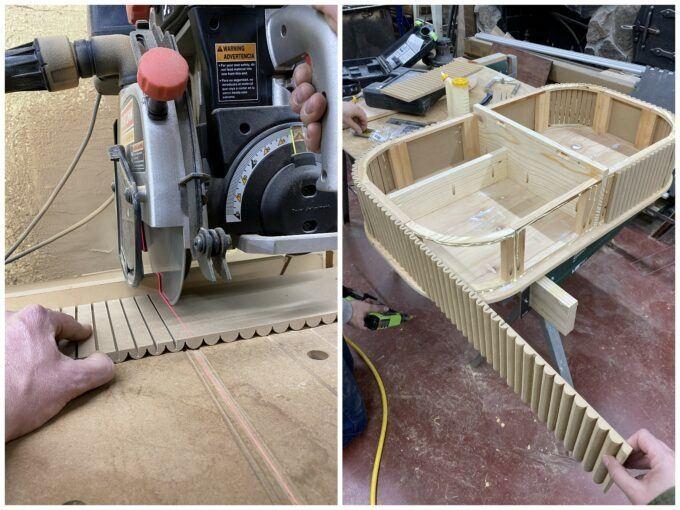
Bend the MDF
We were hopeful that the MDF would be more flexible after routing, but it was clear we would need to do some kerfing to help with the bending around those corners of the coffee table.
For a 90* angle, you need 12 kerfs, so we used our radial arm saw and got to work! You could also use your table saw for this. After kerfing, these sheets were VERY delicate, so take care!
-
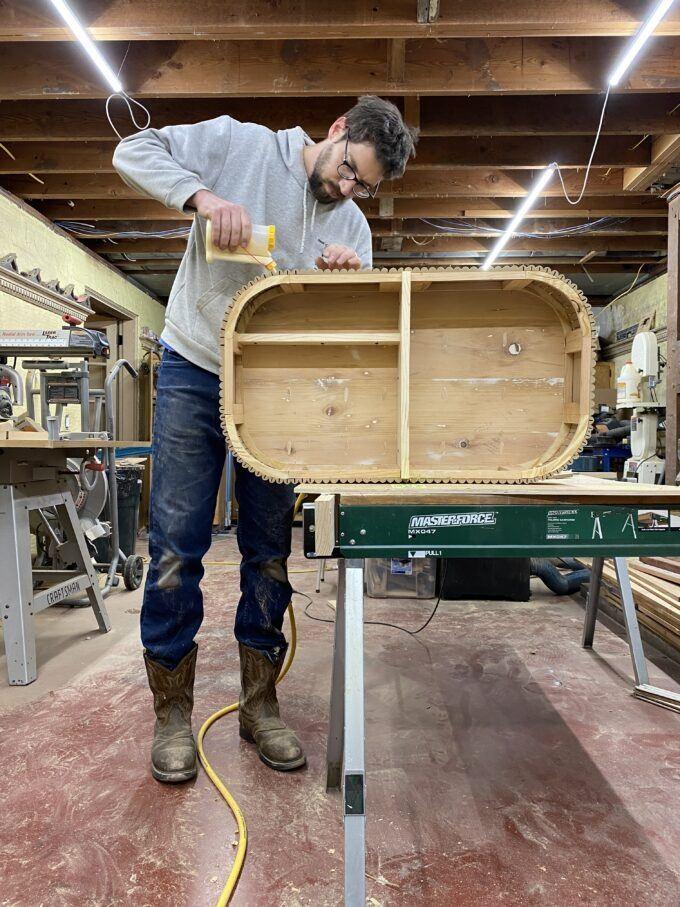
Glue any cracks
ISN'T THAT SATISFYING?
I'll admit that a few of the beads cracked a little as we made these curves and nailed them in with a pin nailer. We panicked for a second, but it really didn't look too bad. We filled the fractures with wood glue and sanded them smooth, and you'd never know they're there!!
-
Install lids
Now it's time to slice that board in half to be your two 'lids'. Keep in mind that you want to subtract the thickness of that center divider.
-
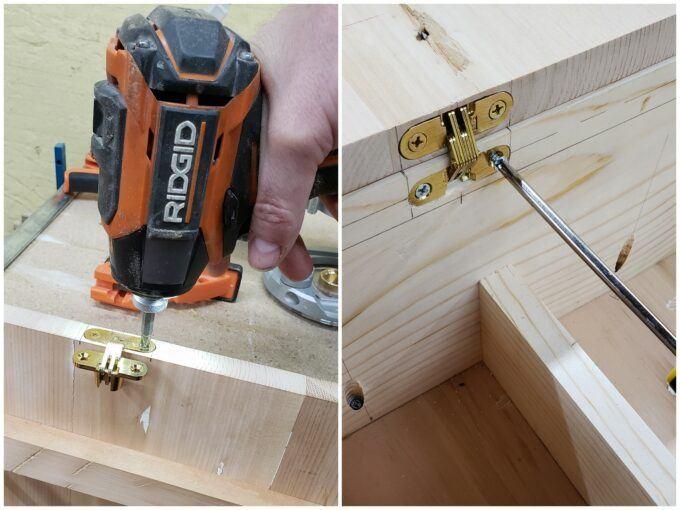
Install hinges
Install your hinges, according to the instructions. You could also just use piano hinges for this coffee table, but you'll have a little visible bump where both of the hinges are on the top surface.
-
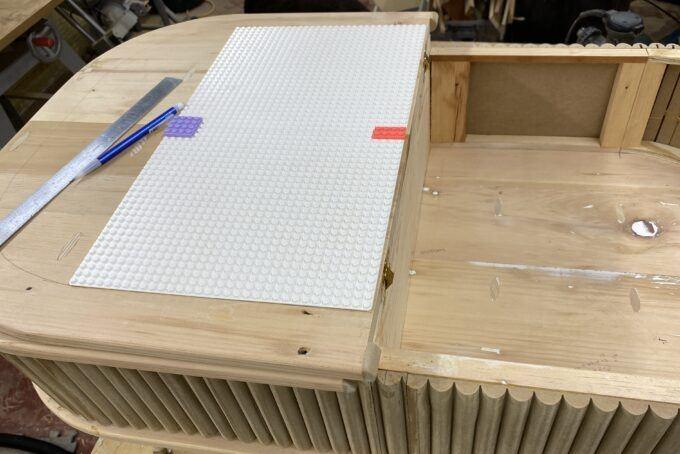
Add Lego plates
We ordered four 10' square Lego plates for this project. Since we wanted the Lego plates to follow the same curve as the tabletop, we marked the sizing we needed to cut the straight sides first.
(Tip: make sure you connect the Lego plates together to confirm they have the right spacing between each other.)
-
Cut Lego plates
We used the table saw to cut the straight lines.

-
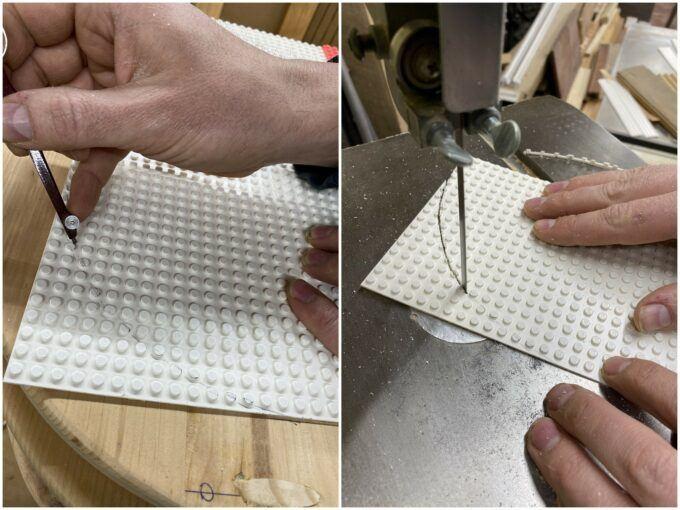
Cut Lego plates (curves) & glue down
Then, using a compass, we marked on the Lego plates where the curves should be, and cut with a band saw.
I painted the inside of the coffee table lids and let it dry completely before gluing down the Lego plates. We used Gorilla Glue for this.
-
Install Legs
We used 12" tapered furniture legs, and installed them using the angled brackets.
-
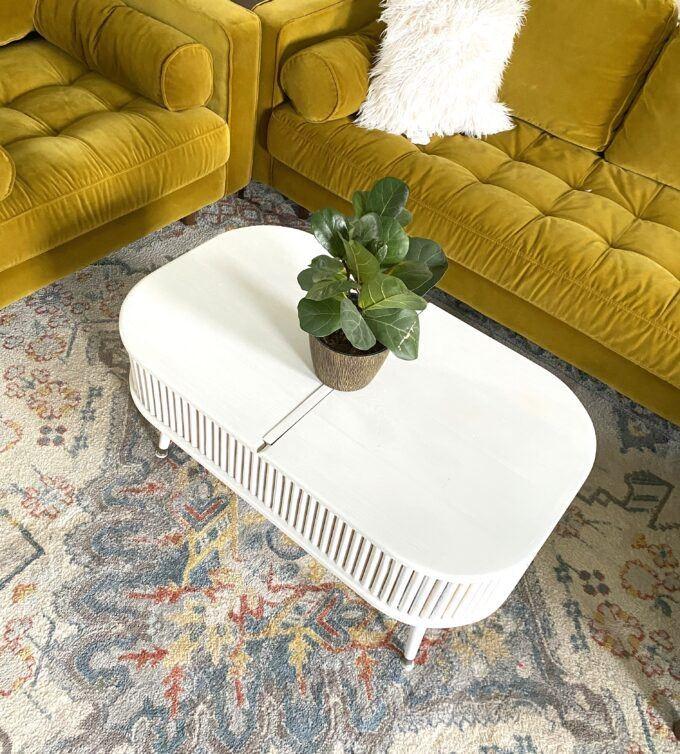
Paint!
The whole table got a couple coats of matte white spray paint. It's important to use an oil-based paint... even if you're not using spray paint. The reason for this is because MDF will become fuzzy due to the water in the paint.
We did a couple light coats until it had great coverage, and we're ready to load 'er up with Legos and remotes! ;)
Check out more from Reality Daydream here:
RealityDaydream.com
Instagram
Facebook
YouTube