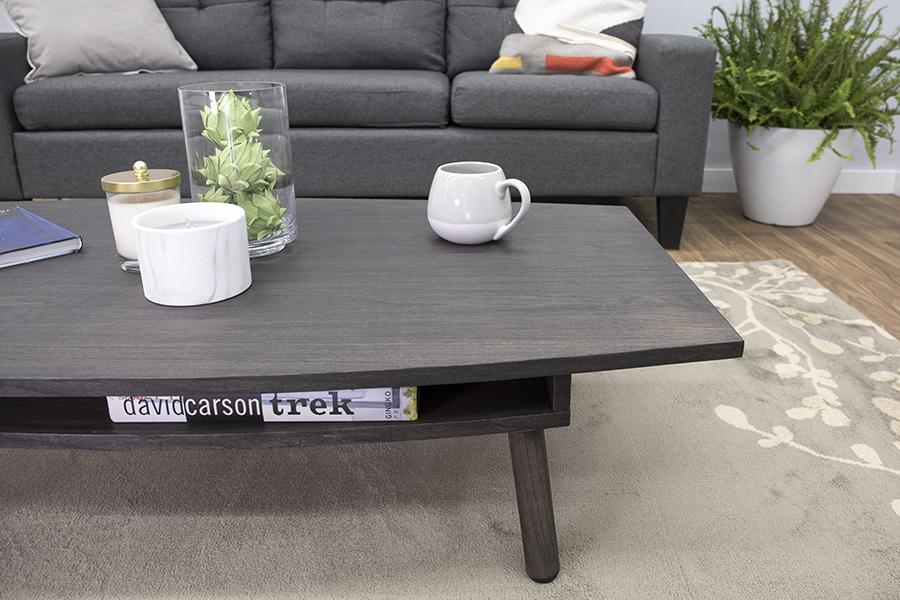


This coffee table offers the perfect mix for any DIY project: basic materials, simple construction, and great-looking results. Add some built-in storage, and you have a table that will end up on a lot of must-build lists. You can make one from a half sheet of plywood plus a set of store-bought legs.
Tools
Kreg Tools


Other Tools
-
Miter Saw

-
Combination Square
-
Old Iron
-
Tape Measure
Materials
Wood Products
- 1 Plywood , 19mm x 1220mm x 1220mm oak plywood , Full Sheet
- 1 Trim , 19mm x 1220mm screen molding , 6mm
Hardware & Supplies
- 6 32mm coarse-thread Kreg Screws
- 1 4-pack table leg angled brackets
- 4 203mm-long cylindrical table legs
- 10 32mm flat-head wood screws
- 1 25’ roll, oak iron-on veneer edge banding
- 1 Edge banding trimmer
Cut List & Parts
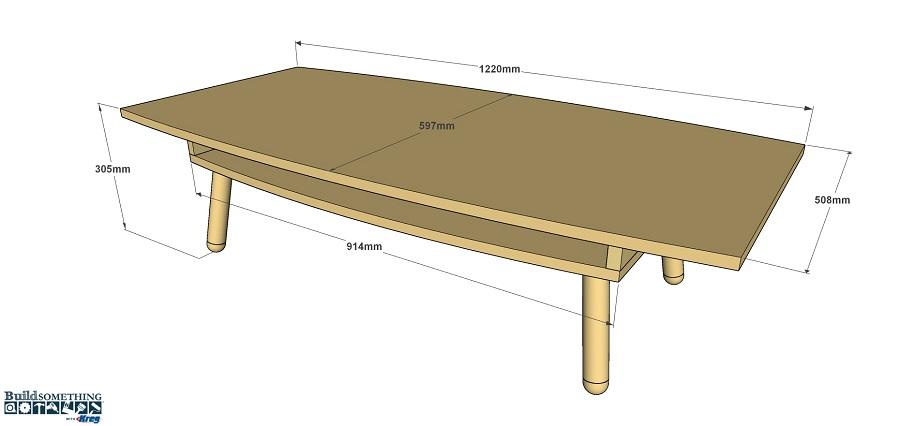
- 1 Top , 19mm x 597mm x 1220 oak plywood
- 1 Shelf , 19mm x 508mm x 914 oak plywood
- 2 Shelf Ends , 19mm x 64mm x 432mm oak plywood
Directions
-
Make the Table Top
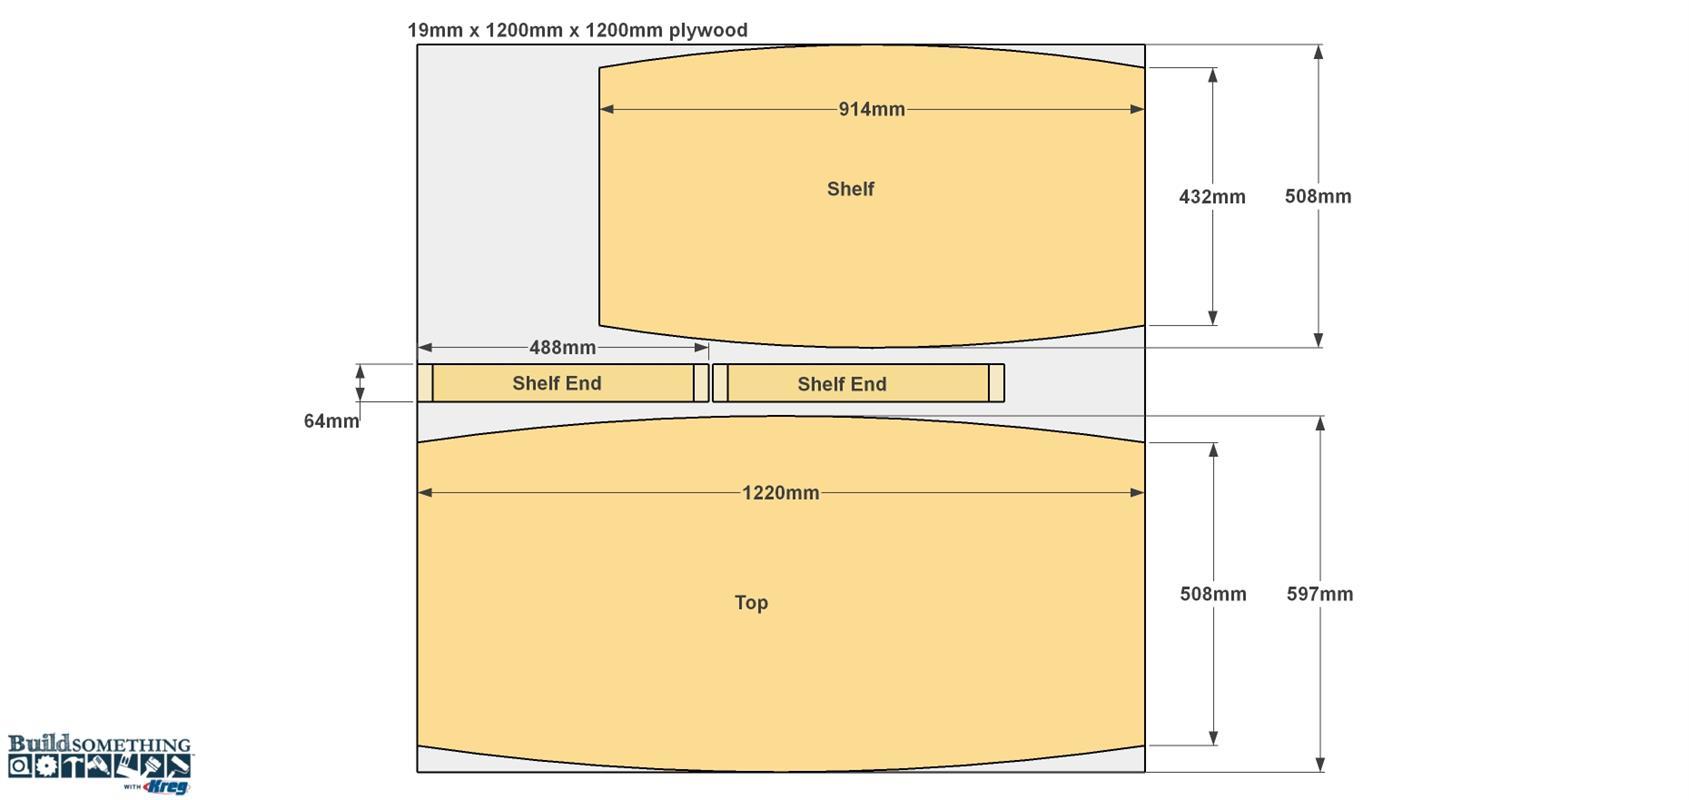
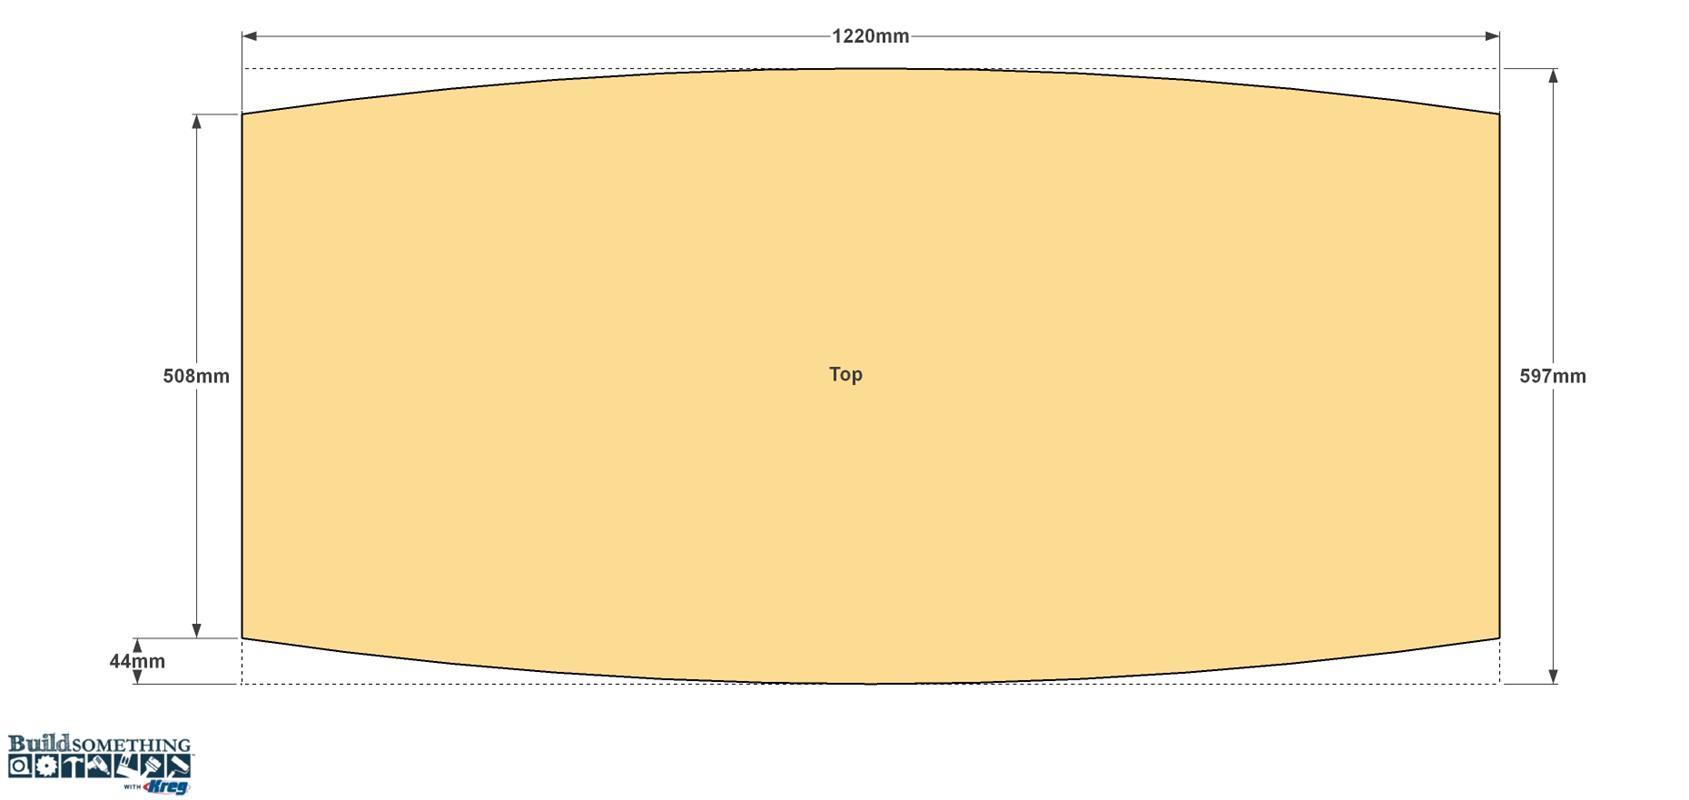
Cut the table Top to rough size from 19mm oak plywood, as shown in the cut diagram. Start by making a straight cut to produce a piece that’s 597mm wide by 1220mm long—with the grain running lengthwise. Then lay out the cut the arched shape on each side. The Tip below works great. After you have done this, cut the arched sides using a jigsaw. For best results cut just outside your layout line, and then sand up to the edge to create a smooth, consistent shape.
LAY OUT A SMOOTH CURVE EASILY
Here’s an easy way to lay out a smooth, consistent curve, as is needed for the table Top edges, by using a piece of screen molding. This inexpensive molding is available in any home center, and it’s flexible enough to bend, but stiff enough to do so consistently. First, Mark the centerline of the plywood, as well as the locations of the ends of the curves as shown. Set the screen molding on one end mark, and then position a clamp, as shown, to hold it in place. Then do the same at the other end. Now flex the screen molding at the center line until it reaches the edge of the plywood. Then trace the molding to mark the curve onto the table top. Do this along one edge, and then the other.
-
Make the Shelf
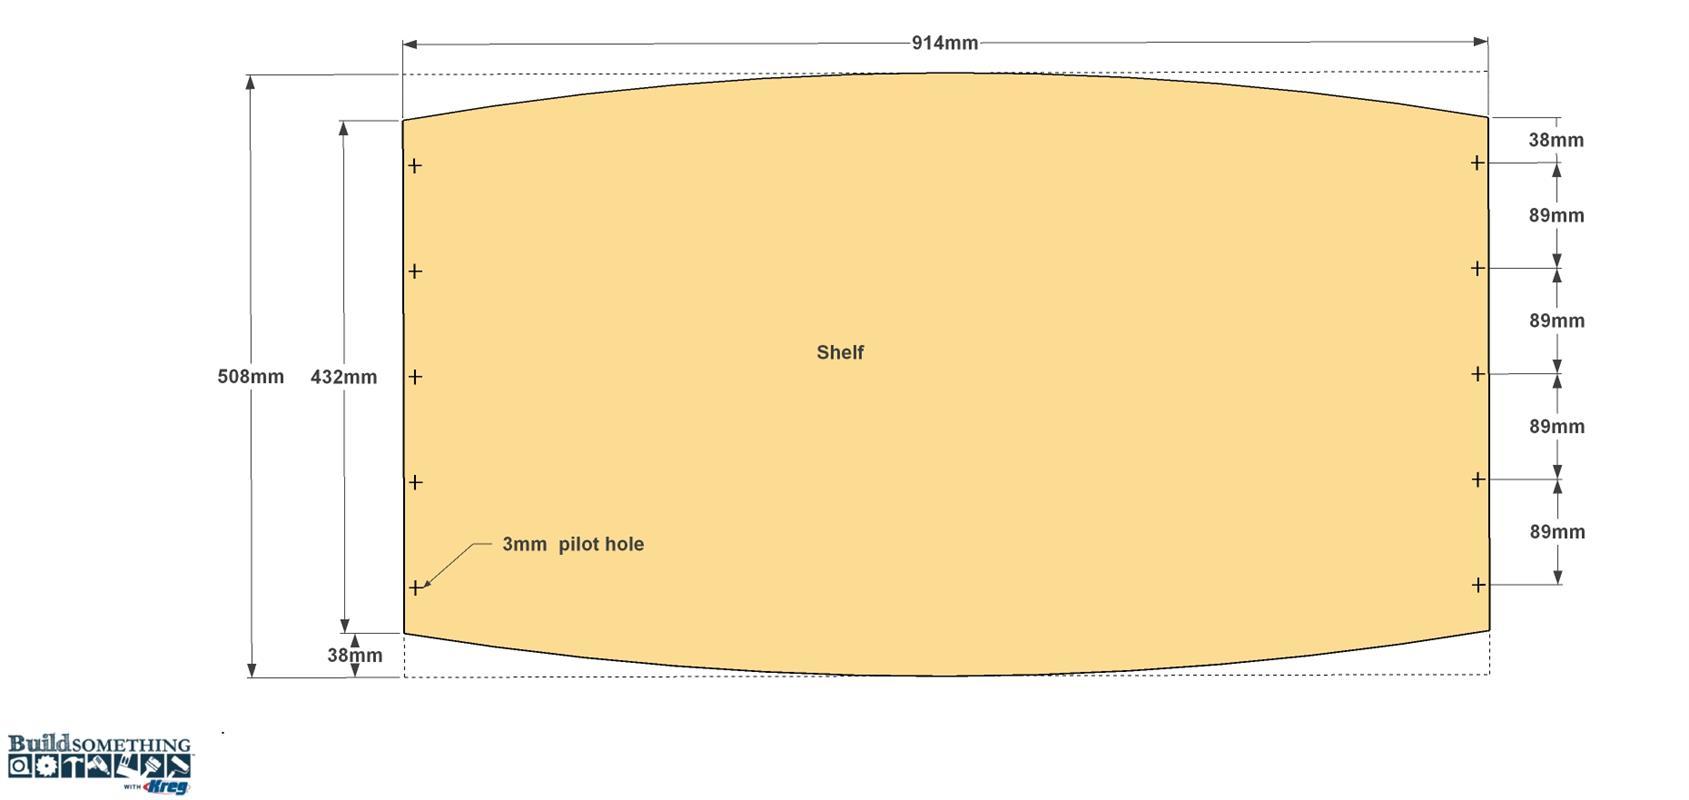
Cut the shelf to rough size from 19mm oak plywood, as shown in the cutting diagram. Then lay out and cut the arched edges, just as you did on the Top. Then, drill five pilot holes in each end, as shown. These are for screws that will attach the Shelf later.
-
Make the Shelf Ends
Cut two Shelf Ends to finished width and to rough length from 19mm oak plywood, as shown in the cutting diagram.
Set one of the Ends on the Shelf so the outside face of the Shelf End is flush with the end of the Shelf, and the ends overhang slightly. With a pencil, trace the curved profile of the Shelf onto the edge of the Shelf End. Set your miter saw to that angle (approximately 9°, in our case), and then cut the Shelf Ends to final length at that angle. Now set your Kreg Jig for 19mm thick material, and then drill pocket holes on the inside face (the longer face) of each Shelf End, where shown.
-
Cover Edges with Iron-On Veneer
Before you move on to assembly, it’s time to cover the exposed plywood edges to give you r table a solid-wood look. The easiest way to do that is with iron-on veneer. The Tip below tells you more about this easy-to-use product. You’ll need to cover all of the edges of the Top and Shelf. On the Shelf Ends, the long upper and lower edge won’t show, so you only need to apply edging to the ends. On the Top and Shelf, apply the veneer banding to the straight ends of the first. Then trim the veneer to length, trim it to width using a veneer edge bander, if needed, or by sanding. Next, apply veneer to each of the arched sides of the Top and Shelf. Finally, veneer the ends of the Shelf Ends.
-
Attach the Shelf Ends to the Top
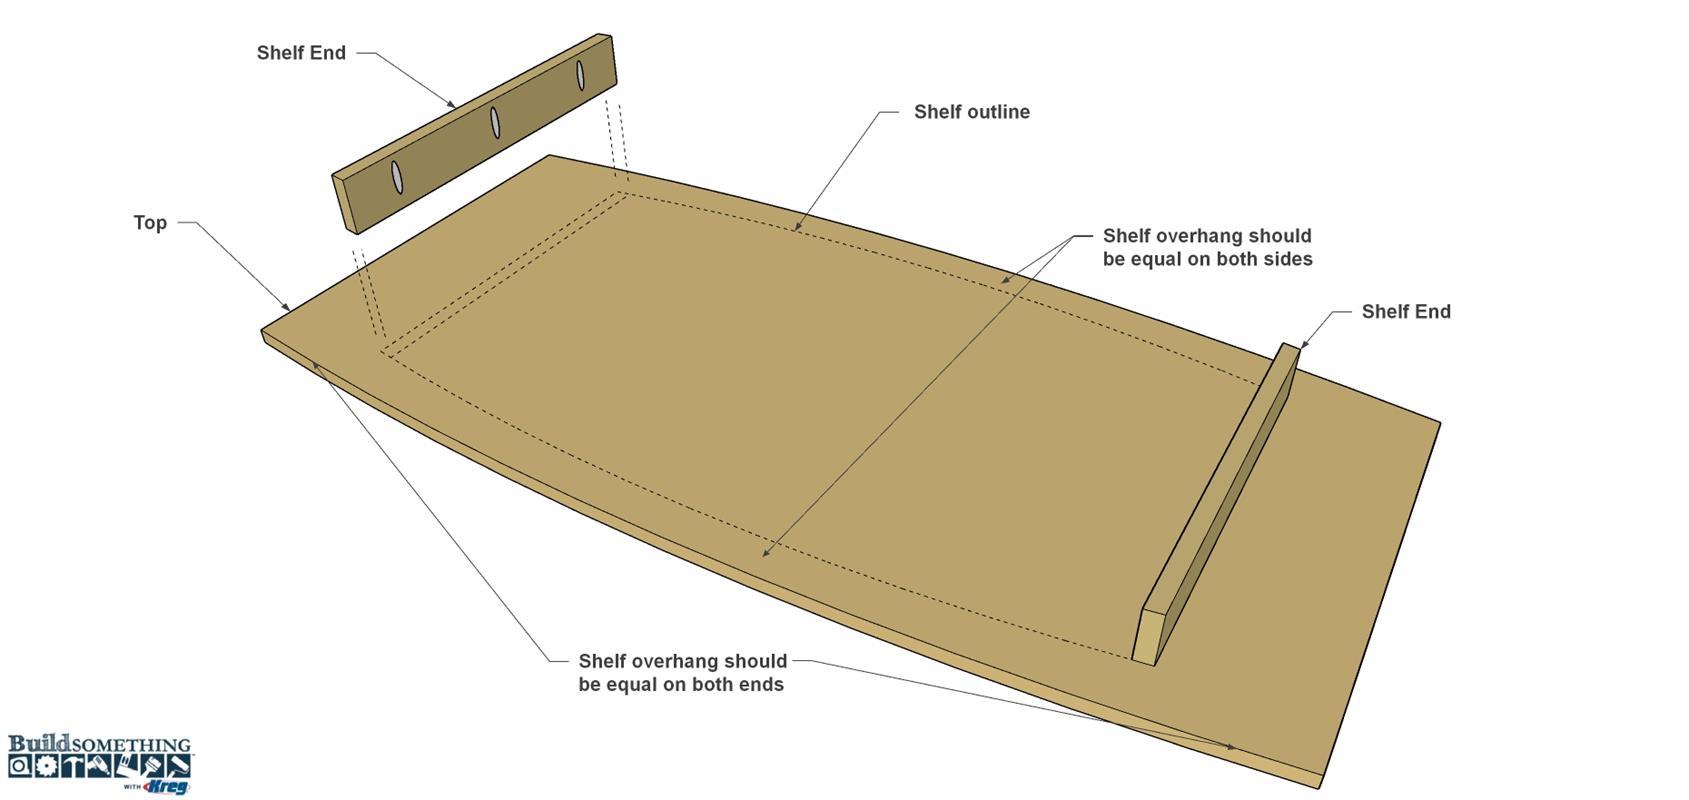
First, place the Top on a flat work surface with the lower face pointing up. Position the Shelf on the Top, also with the lower face up, and position it so that the Top overhangs equally on all sides, as shown. Lightly trace around the Shelf with a pencil to mark its position. Remove the Shelf, and then place the first Shelf End in position on the traced line make sure that the pocket holes face inward. Secure the Shelf End to the Top using 32mm coarse-thread Kreg Screws. Repeat this to attach the other Shelf End.
-
Apply Stain or Finish Now
Before you attach the Shelf, this is a good time to apply stain or finish to your table. Doing it now is much easier than having to try to reach in between the Shelf and the Top. We applied a dark Java gel stain to our table, and then, once the finish was dry, applied a coat of wipe-on polyurethane.
-
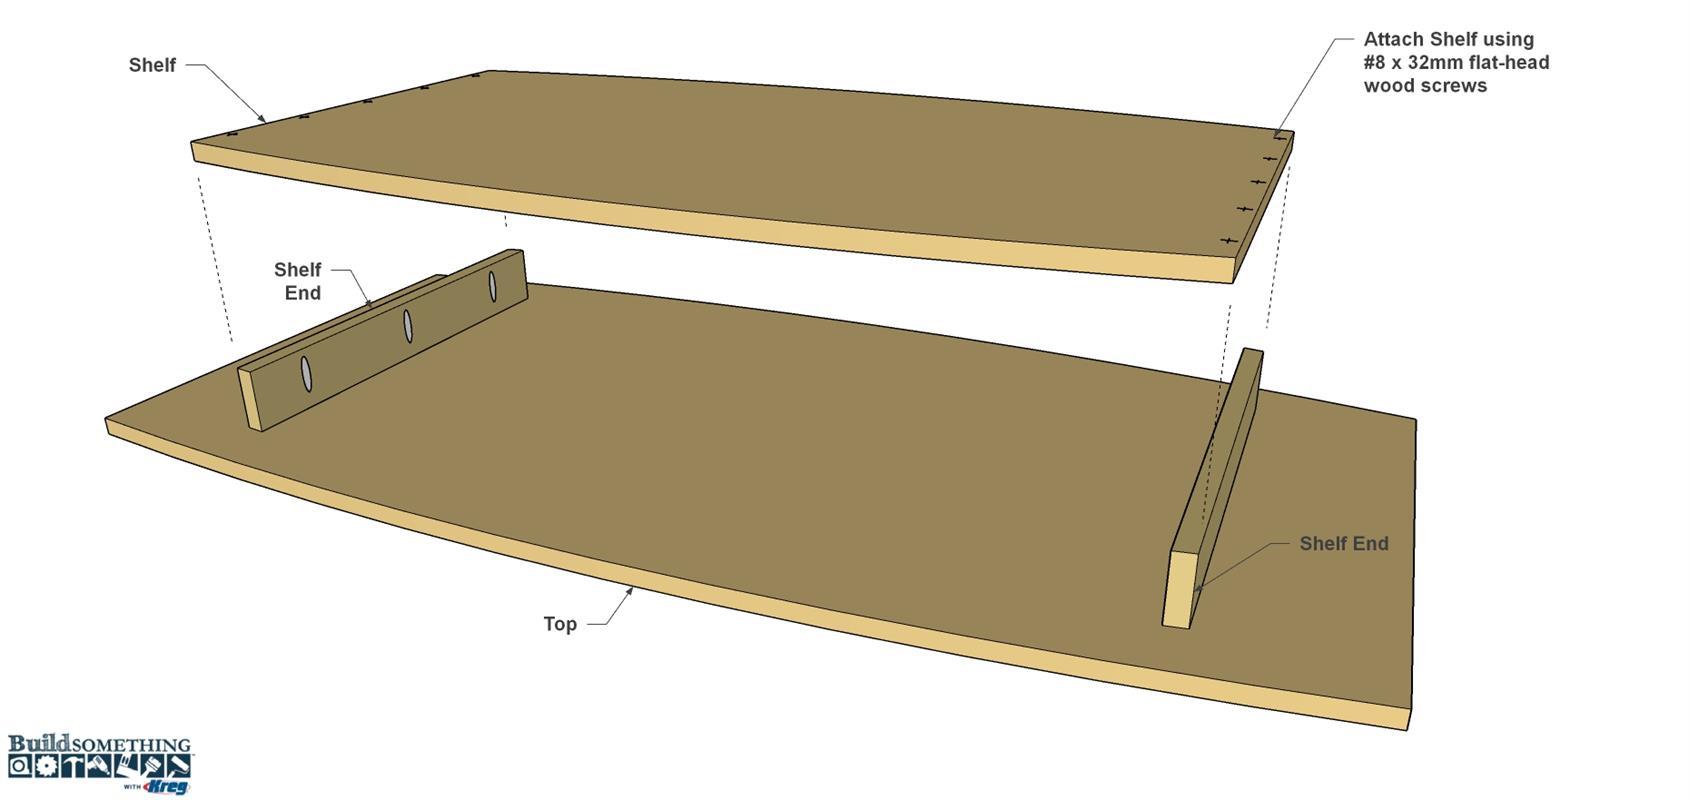
Attach the Shelf to the Ends
Place the Shelf on the Shelf Ends and position it so that everything lines up. Then, using the pilot holes in the Shelf as guides, drill 1.56mm holes into the Shelf Ends. This will prevent the screws from splitting the Ends with you attach the Shelf. Drive in 32mm flat-head wood screws to secure the Shelf.
-
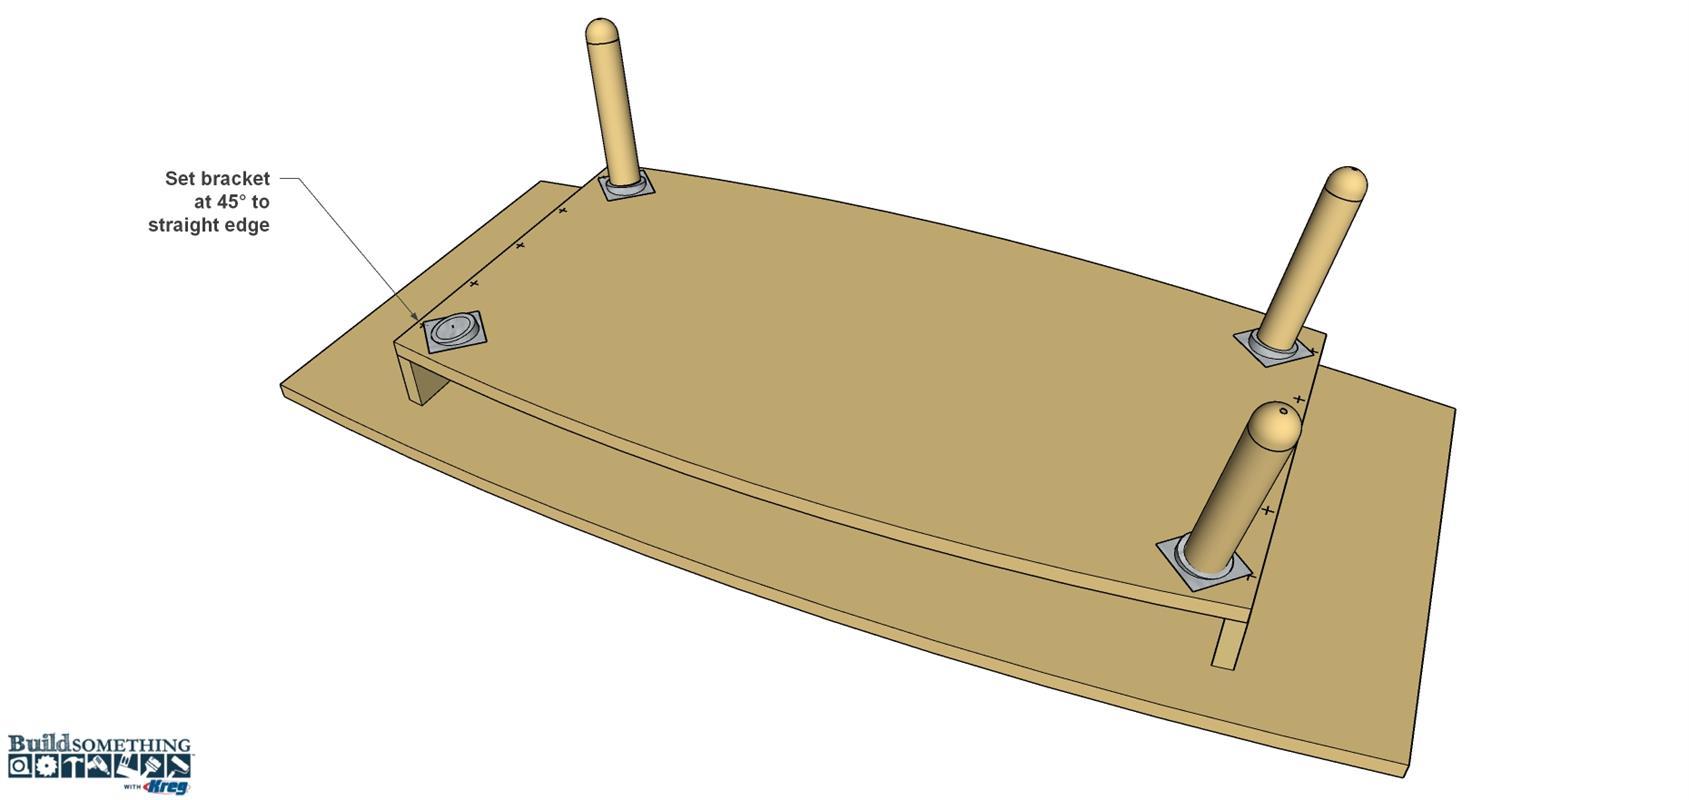
Attach the Legs
The legs we used are pre-made and already have a threaded bolt installed. All there is to do is to attach the metal leg brackets to the underside of the shelf, as shown, so they’ll splay each leg out at a 45° angle. Then you can stain or finish the legs, and simply screw them in place to complete your coffee table.