


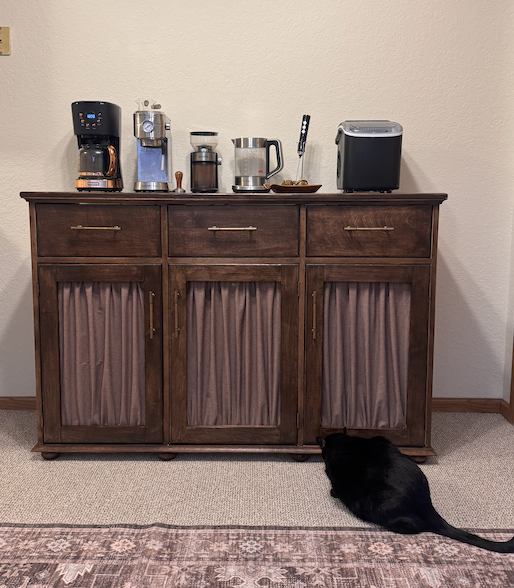
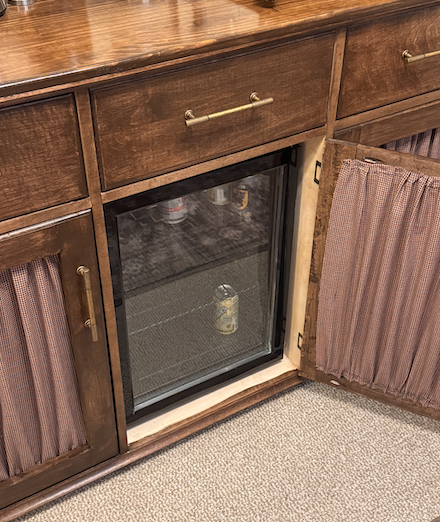


Create a stylish coffee and drink bar cabinet with smart, hidden functionality. This build includes a concealed mini fridge space, an optional garbage pull-out drawer, and plenty of storage—keeping everything you need tucked away but easily accessible.
Tools
Kreg Tools


Other Tools
-
Carpenter Square

-
T-Square Ruler
-
Measuring Tape
-
2' Clamps
-
2" Foam
-
Brad Nailer
-
Staple Gun
-
Miter Box & Pull Saw
Materials
Wood Products
- 3 Plywood , 3/4" , 4' x 8'
- 4 Dimensional Lumber , 1"x3"x8"
- 1 Dimensional Lumber , 1"x8"x6"
- 1 Project Board , 1"x2'x6'
- 2 Trim , 3/4" x 8'
- 1 Edge Banding , 1 Roll
Hardware & Supplies
- -- Wood Screws 1 3/4"
- -- Wood Glue
- -- 1 3/4 Pocket Hole Screws
- -- Hardware
- -- Fabric
- -- 2" Legs
- -- Hinges
- 10 Drawer Slides
- 3 Magnet Door Clasps
- -- Iron
- -- Needle & Thread
- -- Staples
- -- Mini Fridge 2.6 Cu ft
- -- 13 Gallon Garbage
Directions
-
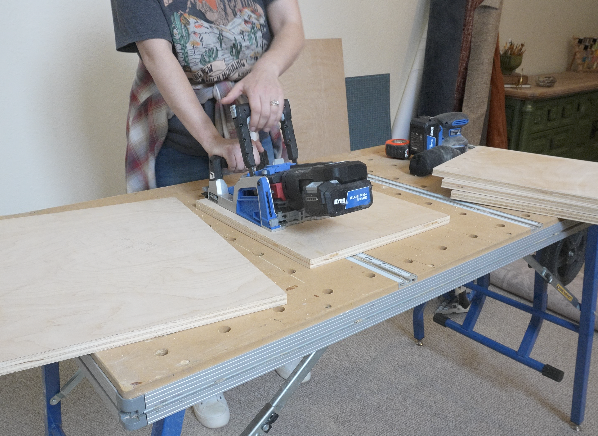
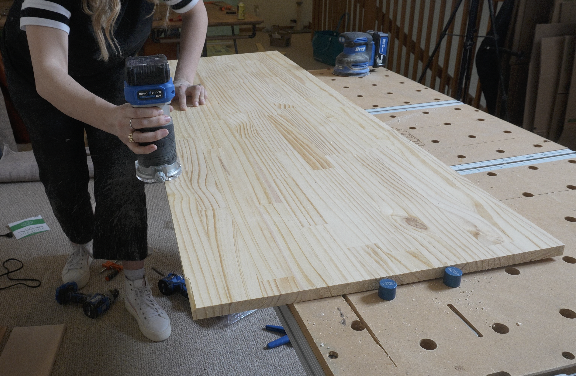
Cut Pieces for Cabinet Carcass
Start by cutting all your plywood pieces.
Main Cabinet Pieces:
-(4) pieces — 35 1/4" x 20" (vertical sides + dividers)
-(1) piece — 56" x 20" (bottom)Support / Bracing Pieces:
-(4) pieces — 17 1/4" long (top braces)
-(2) pieces — 18 1/2" long (middle top supports)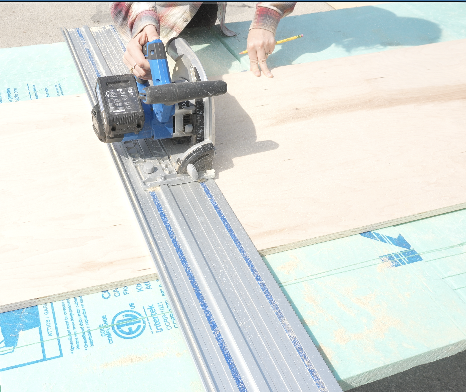
-
Prep for Assembly
Drill all your pocket holes before assembling.
-On the 35 1/4" x 20" boards Drill 4 pocket holes along one 20" side
-On the 17 1/4" & 18 1/2" pieces drill 2 pocket holes on each end-Lightly sand all pieces (this makes assembly cleaner + faster)
-
Putting Together Cabinet Carcass
Mark divider placement
-Take your 56" bottom board and measure 17 1/4“ in from each end
-Draw straight lines using a square
-This creates your center opening (~18 1/2" wide for the fridge)Install vertical dividers
-Attach (2) of the 35 1/4“ boards along those lines, using wood glue + pocket hole screws
-Make sure they are square before securingAttach outer sides
-Take the remaining (2) 35.25" boards and attach them to each end of the base
-At this point you should have 3 sections: Left cabinet, middle fridge opening and right cabinetAdd top supports
-Attach the (2) 18 1/2“ pieces across the top of the middle section (these connect the two center dividers)
-Then install the (4) 17 1/4“ pieces across the tops of the outer sections (2 on each side)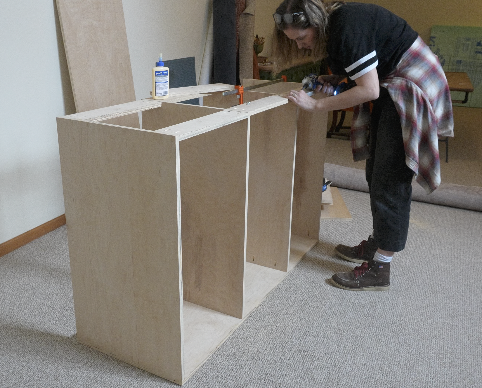
-
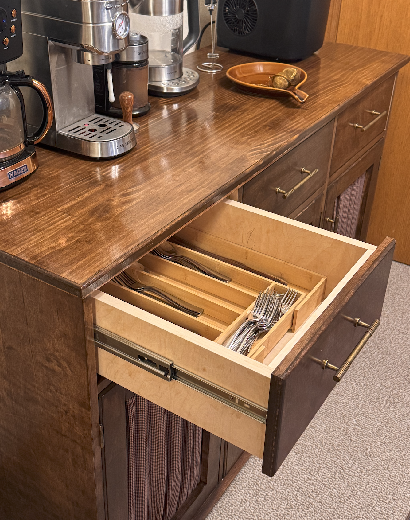
Cutting Pieces for Drawer Boxes
Drawer Sides (used for all drawers):
-(6) pieces — 18" x 6"
Front & Back Pieces:
-(4) pieces — 14 3/4" x 6" (for left + right drawers)
-(2) pieces — 16" x 6" (for middle drawer)
Drawer Bottoms:
-(2) pieces — 14 3/4" x 16 1/2" (left + right drawers)
-(1) piece — 16" x 16 1/2" (middle drawer)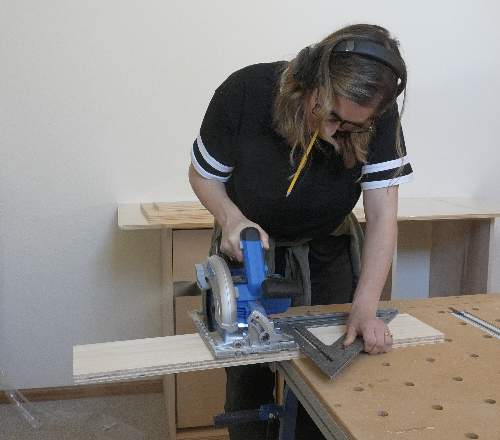
-
Prep for Assembly
Front and Back Pieces:
-Drill 2 pocket holes on each end of 14 3/4" x 6" and 16" x 6"
Drawer Bottoms:
-Drill 2 pocket holes on ALL four sides-Lightly sand all pieces
-
Building Drawer Boxes
Take:
-(2) — 18" x 6" (sides)
-(2) — 14.75" x 6" (front + back)
-Attach into a rectangle using wood glue and screwsAttach bottom:
-(1) — 14.75" x 16.5" using wood glue + pocket hole screws
-Repeat for second outside drawerMiddle Drawer (make 1)
Take:
-(2) — 18" x 6" (sides)
-(2) — 16" x 6" (front + back)
-Assemble rectangle using wood glue and screwsAttach bottom:
-(1) — 16" x 16.5" Using wood glue and ScrewsEdge Band
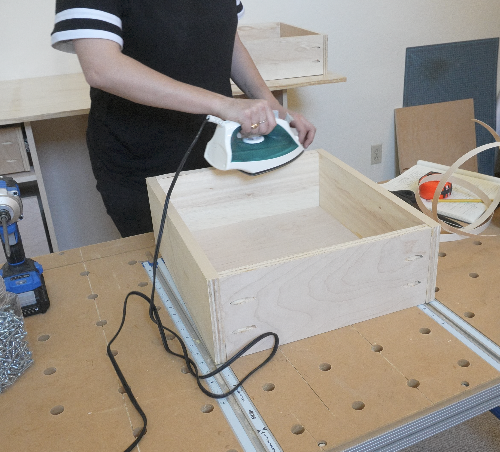
After building your three drawers iron on 3/4" edge banding to clean up drawer boxes.
-
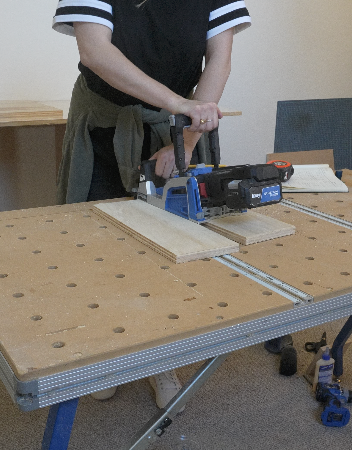
Attaching Drawer Slides
Attach slides to drawer boxes
-Measure 3" up from the bottom of each drawer side
-Draw a straight line using a carpenter square
-Attach drawer slide just under that line
-Repeat for all 3 drawersAttach slides inside cabinet
-Measure 2 1/2" down from the underside of the top brace
-Draw a straight line using carpenter square
-Mark 3/4" back from the cabinet front (this creates proper inset spacing)
-Attach slides under that line
-Repeat for each drawer opening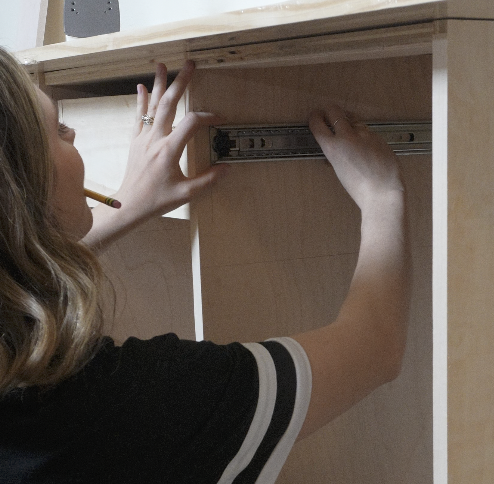
-
Spacer Pieces
Cut: Using scrap plywood
-(2) pieces — 17 1/4" long (outer cabinets)
-(1) piece — 18 1/2" long (middle cabinet)Prep:
-Drill 2 pocket holes on each end
-Lightly sandInstall:
-Measure 7 1/2" down inside each cabinet section
-Draw a straight lineAttach:
-17 1/4" pieces → left + right sections
-18 1/2" piece → middle sectionUse:
-Wood glue and pocket hole screws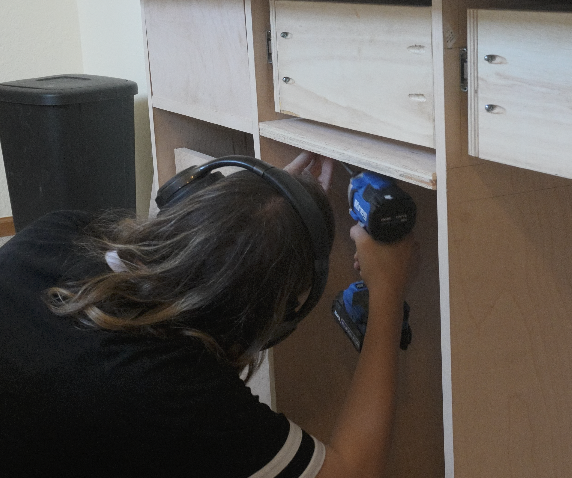
-
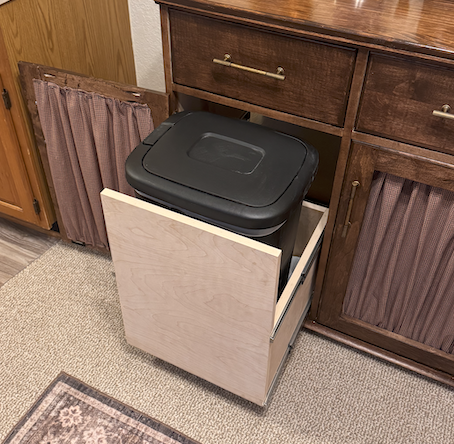
Garbage Drawer (optional)
Drawer Sides:
-(2) pieces — 17 1/4" x 12"
Drawer Back:
-(1) piece — 14" x 12"
Drawer Front (tall front panel):
-(1) piece — 15 1/2" x 22"
Drawer Bottom:
-(1) piece — 14" x 16 1/2"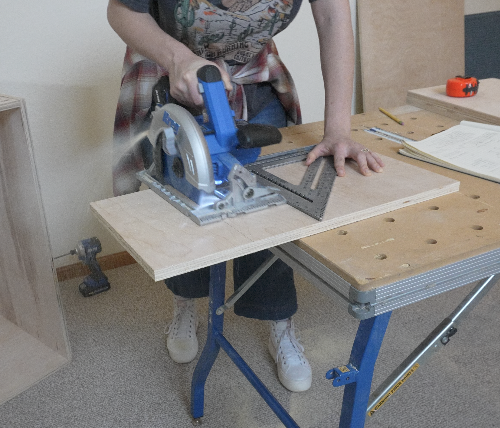
-
Prep for Assembly
Drill pocket holes before assembling.
-17 1/4" x 12" drill 3 pocket holes along one 12"edge
-14" x 12" drill 3 pocket holes on each end
-14" x 16 1/2" drill 2 pocket holes on all four sides-Lightly sand all pieces
-
Build Garbage Drawer
Attach sides to drawer front
Take:
-(2) — 17. 1/4" x 12" (sides)
-(1) — 15 1/2" x 22" (front)
-Attach sides to the back of the front panel using wood glue and screws
-This creates the full depth of the drawer (~18" total)Attach the back
-(1) — 14" x 12" (back piece)
-Secure using wood glue and screwsAttach the bottom
-(1) — 14" x 16 1/2" (bottom)
-Attach using wood glue and screws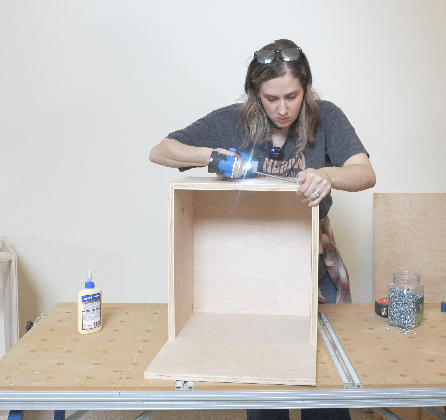
-
Installing Garbage Drawer
This drawer is taller and heavier, so it uses double drawer slides for extra support.
Attach slides to drawer
-Install 2 drawer slides per side:
-One at the top and one at the bottomMark slide placement inside cabinet
Measure:
-2 1/2" up from bottom
-13 1/5" up from bottom
-Draw straight lines using a square
-Measure 1 1/2" back from the cabinet front. This allows space for a cabinet door or drawer front
-Repeat on other sideAdd spacer (left side only)
-Attach scrap wood to the left interior wall of the cabinet
-This creates clearance so drawer slide and door hinges don't interfere with each other.Install cabinet-side slides
Attach slides just under each line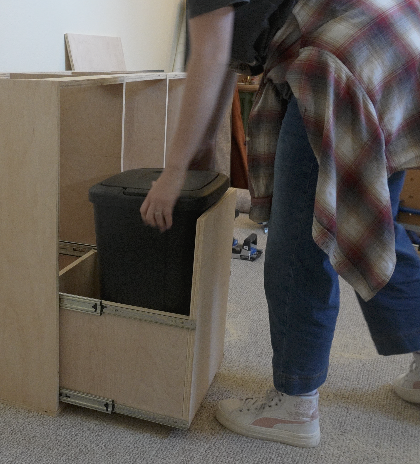
-
Doors & Drawer Fronts
Cut 1x3 boards:
-(6) pieces — 26" (vertical stiles)
-(4) pieces — 12" (left + right doors)
-(2) pieces — 13 1/2" (middle door)Prep:
-Drill 2 pocket holes on each end of all 12" and 13 1/2" piecesLeft + Right Doors
Attach:
-(2) 26" pieces & (2) 12" pieces using wood glue and screws.
-Repeat for second doorMiddle Door
Attach:
-(2) 26" pieces & (2) 13 1/2" pieces using wood glue and screwsDrawer Fronts
Cut 1x8 board:
-(2) pieces — 17"
-(1) piece — 18 1/4"Trim Router
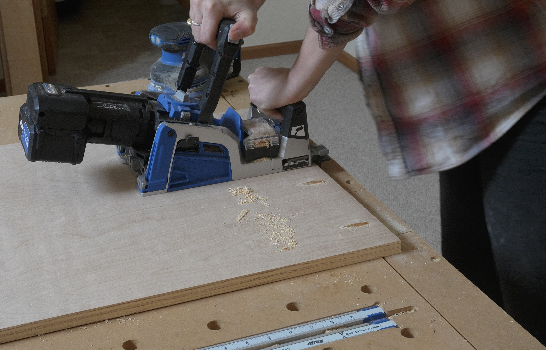
Use a 1/4" round-over bit + trim router to give the doors and drawer fronts a softened edges. This makes everything look high-end!

-
Edge Banding and Trim
Edge Banding
Apply iron-on edge banding to:
-Front of (4) vertical plywood piece
-Front (3) spacer pieces between drawers and doorsDecorative Trim
Cut List (3/4" trim):
-(2) pieces — 56" (45° cuts on both ends)
-(4) pieces — 20" 45° on one end & straight cut on the other
-Make sure you mirror cuts for left + right sidesInstall:
-Attach trim to top and bottom of cabinet using brad nailer OR wood glue + clamps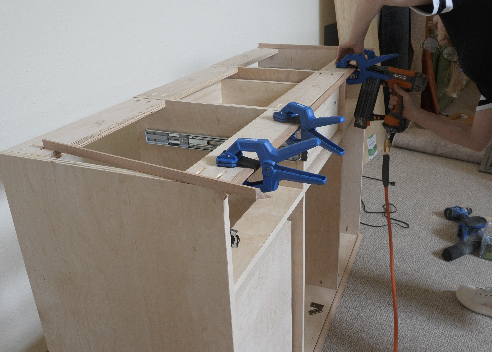
-
Cabinet Top
Take:
-(1) 2' x 6' project board and cut to 57 1/2" x 20 3/4"Trim Router
Use a 1/4" round-over bit on top edges to match doors & drawer fronts for a cohesive look
-
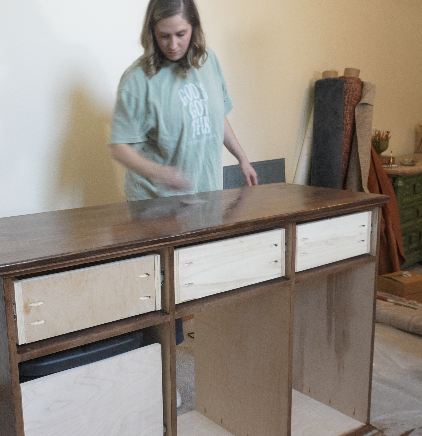
Stain and Top Coat
Apply your choice of:
-Stain or paint
-Seal with top coatWater Resistant
I did 3 coats on the body of the cabinet and 7 coats on the cabinet top to make is water proof.
-
Fabric Door Center
Cut (3) piece of fabric:
-Height: covers inside door opening
-Width: 6" wider than door openingPrep Fabric:
-Fold + iron top and bottom edges
-Sew a simple gather stitch along top & bottomInstall:
-Staple fabric to inside of door frame
-Attach at top & bottom
-
Attaching Drawer Fronts & Doors
Drawer Fronts:
-Use playing cards as spacers for perfect even gaps
-Attach with 1 1/4" wood screws (from inside drawer box)Doors:
-Install hinges of your choice. (I used barrel hinges + magnetic clasps)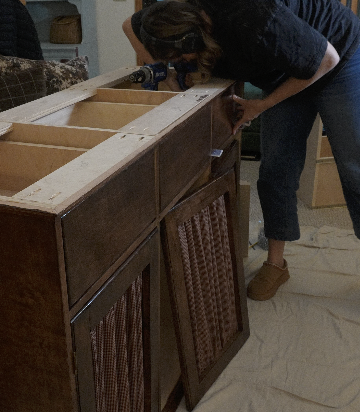
-
Hardware, Top, & Legs
Install:
-Drawer pulls & door hardware of your choosingAttach cabinet top:
-Use 1 1/4" wood screws from underneathLegs (Optional):
-Add (8) 2" legs to bottom of cabinet
-
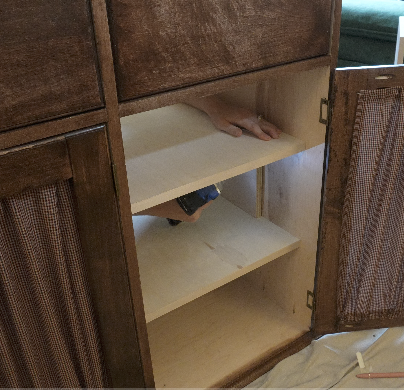
Interior Cabinet Shelves
Cut:
-(2) pieces — 17.25" x 18" (shelves)Prep:
-Drill 3 pocket holes along each 18" side of both shelves
-Lightly sand edges
- Apply Edge Banding to front the front of shelvesInstall Shelves:
-Determine shelf height
-Create temporary supports & cut scrap pieces to the height of your desired shelf placementAttach shelves:
-Set shelf on top of the scrap supports and secure using wood glue and screws.-Repeat process on left side if you skipped the garbage drawer
-
All Done!
You now have a fully functional drink station complete with:
-Drawer storage
-Cabinet storage
-Mini fridge space
- Hidden Garbage StorageENJOY!