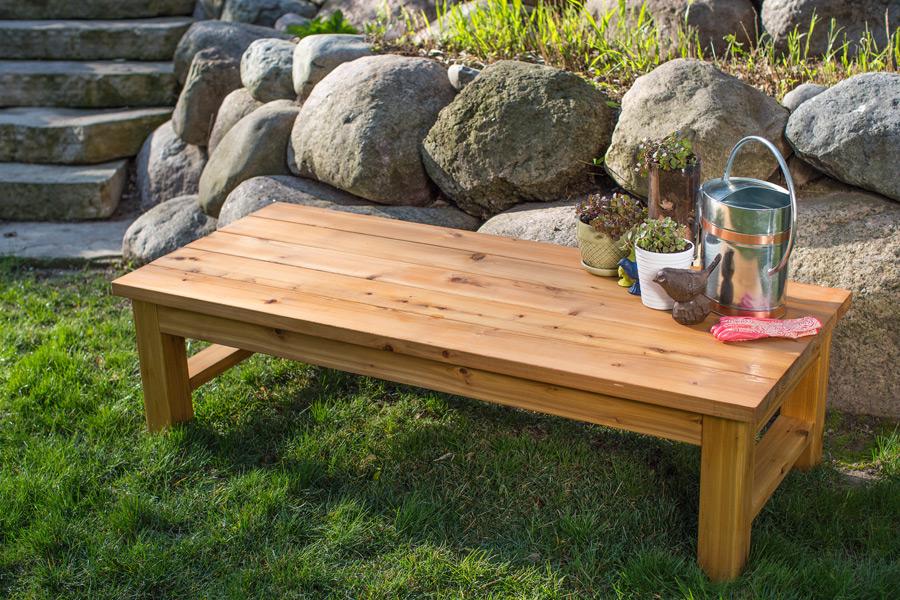
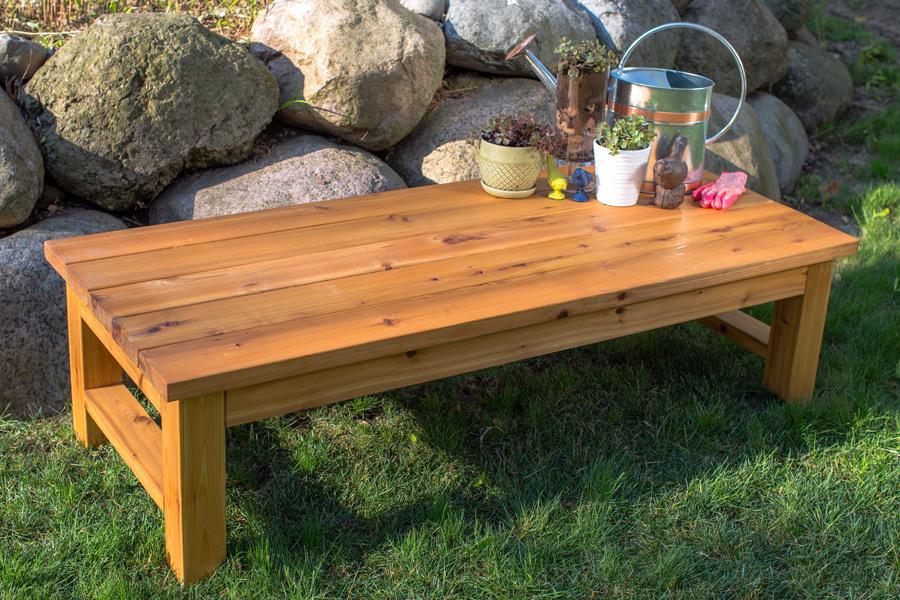
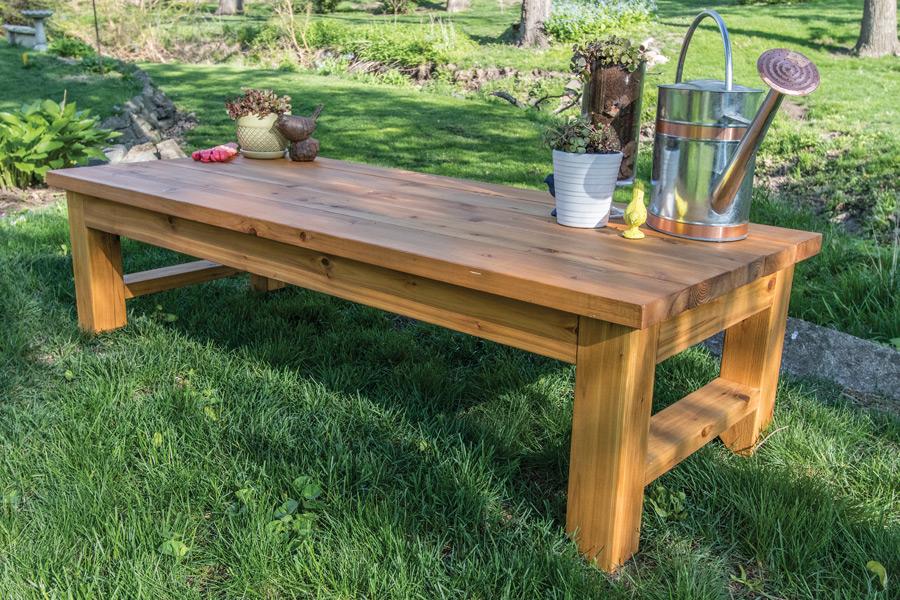
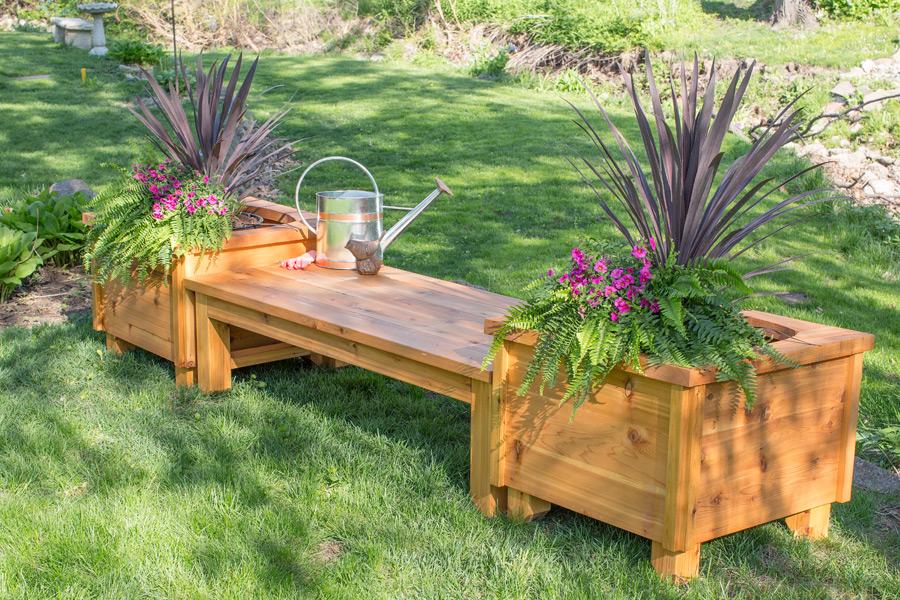


Here’s the perfect pace to kick back and relax in your backyard. This bench is built from cedar for great looks that will last. Straightforward construction means it’s easy to build, too.
Tools
Kreg Tools


Other Tools
-
miter saw

-
tape measure
Materials
Wood Products
- 1 Cedar board , 4x4 x 96"
- 2 Cedar board , 2x4 x 96"
- 5 Cedar board , 2x6 x 96"
Hardware & Supplies
- 66 2 1/2" Kreg Blue-Kote™ or Stainless Pocket-Hole Screws
- 1 Waterproof wood glue
Cut List & Parts
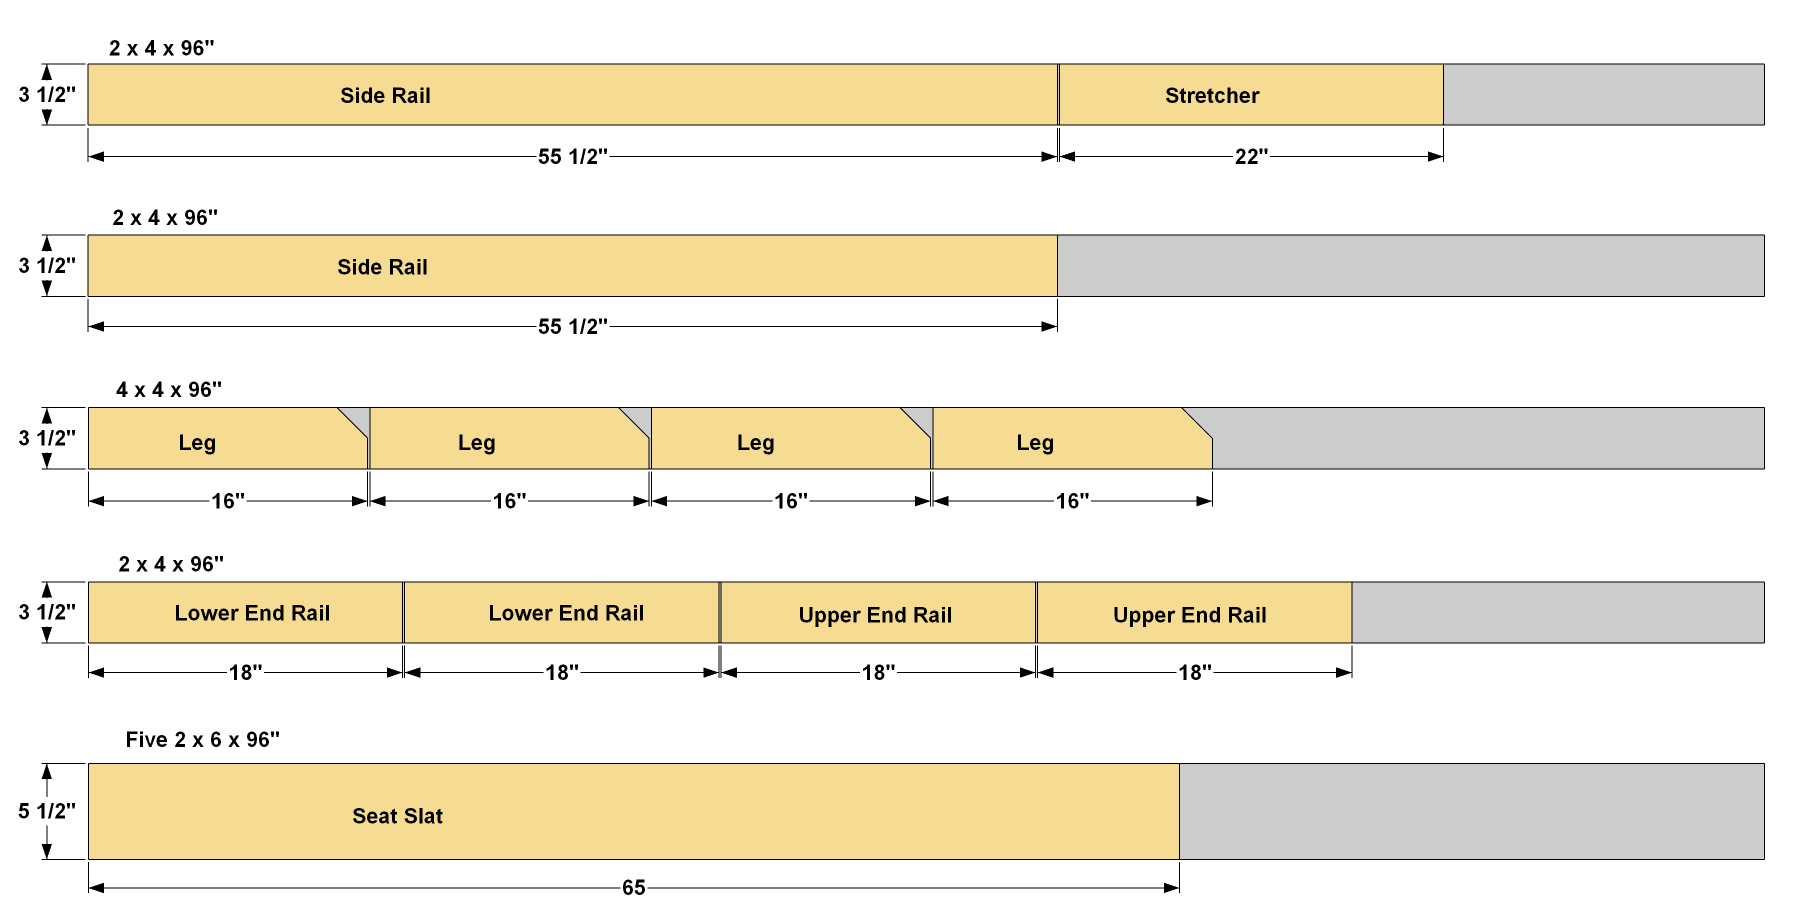
- 4 Leg , 3 1/2" x 3 1/2" x 16"
- 2 Upper End Rail , 1 1/2" x 3 1/2" x 18"
- 2 Lower End Rail , 1 1/2" x 3 1/2" x 18"
- 1 Stretcher , 1 1/2" x 3 1/2" x 22"
- 2 Side Rail , 1 1/2" x 3 1/2" x 55 1/2"
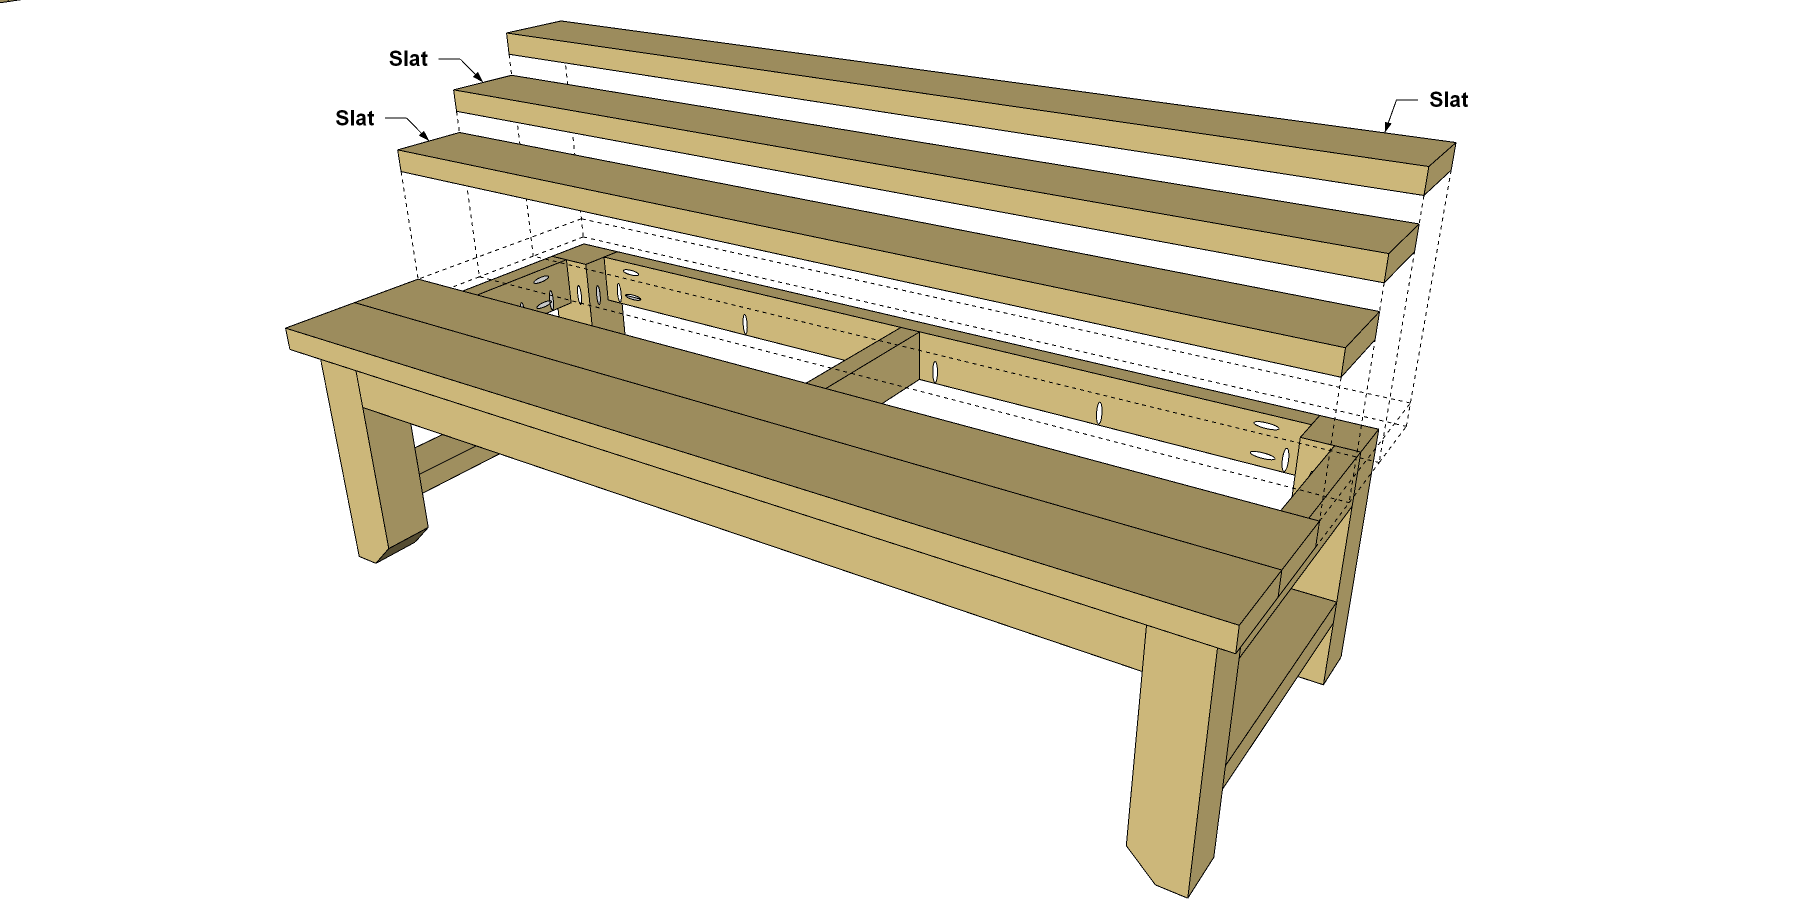
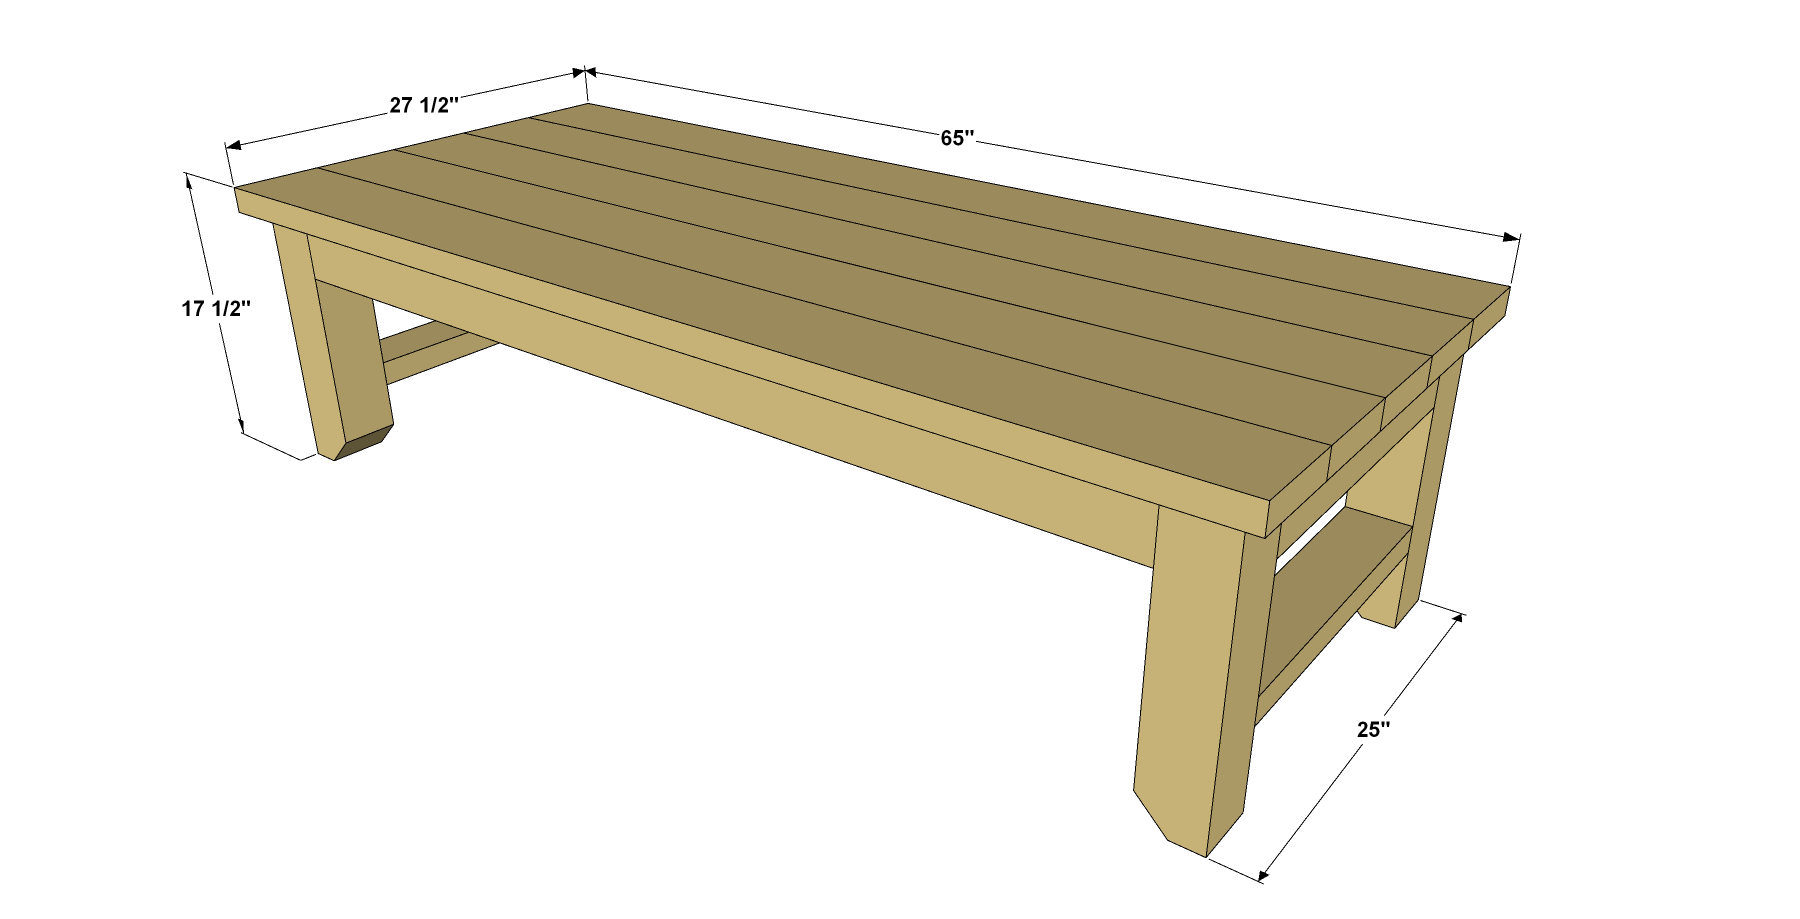
- 5 Seat Slat , 1 1/2" x 5 1/2" x 65"
Directions
-
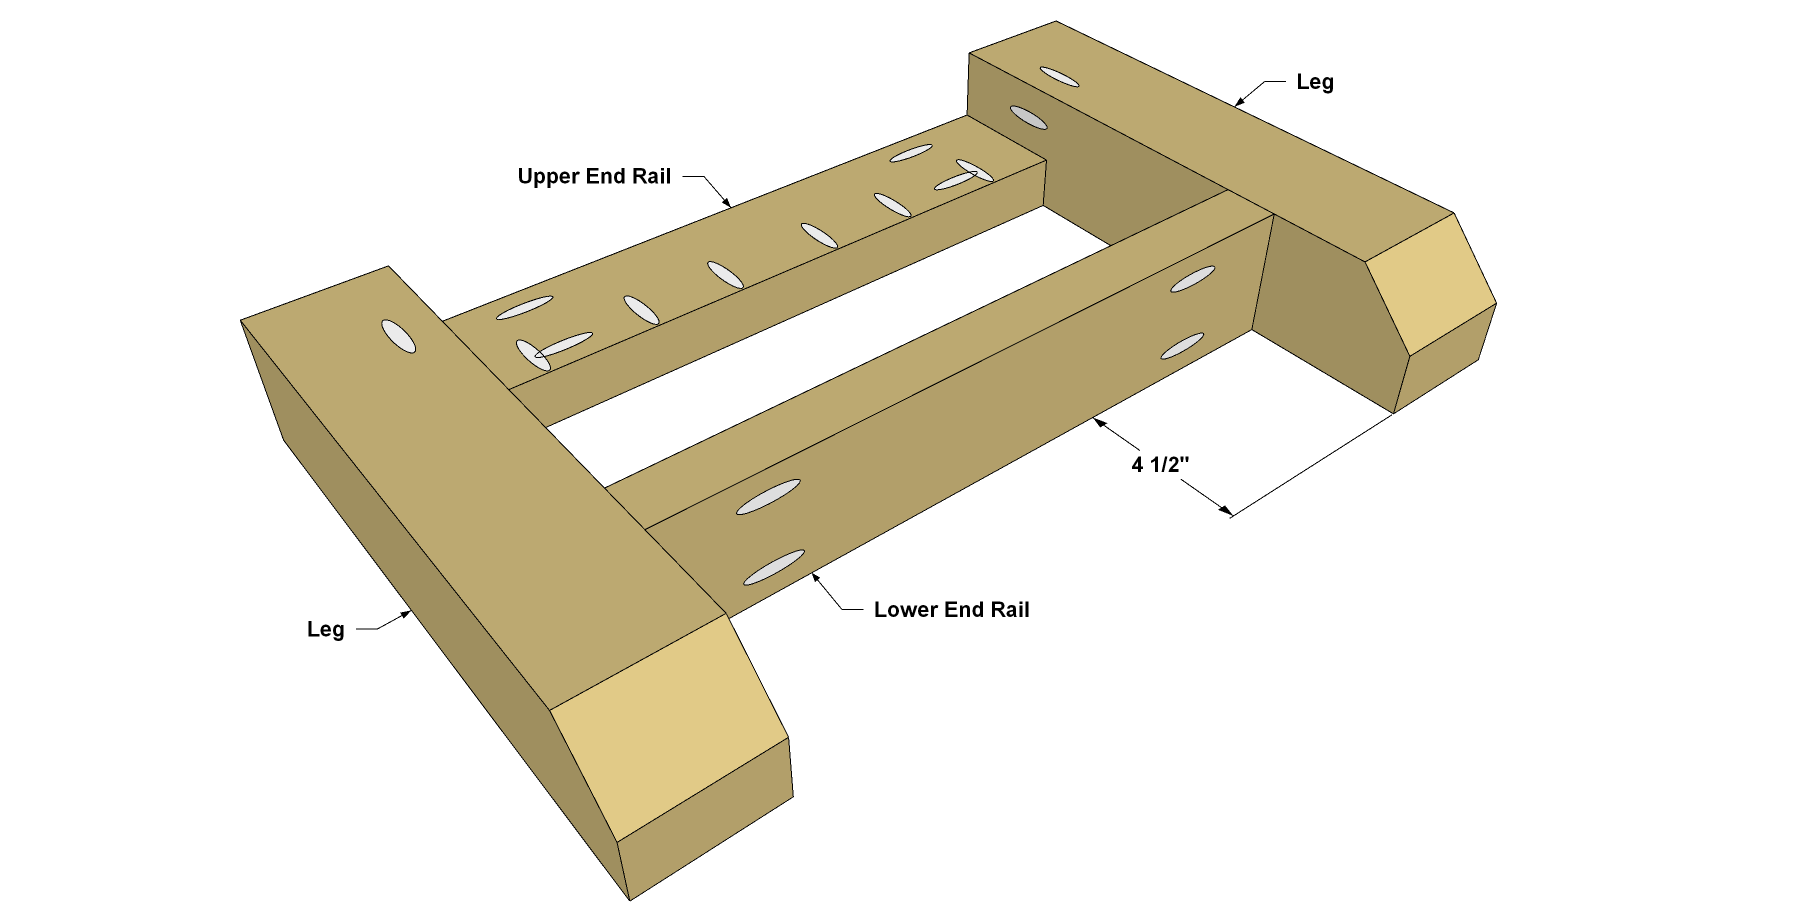
Create the Legs
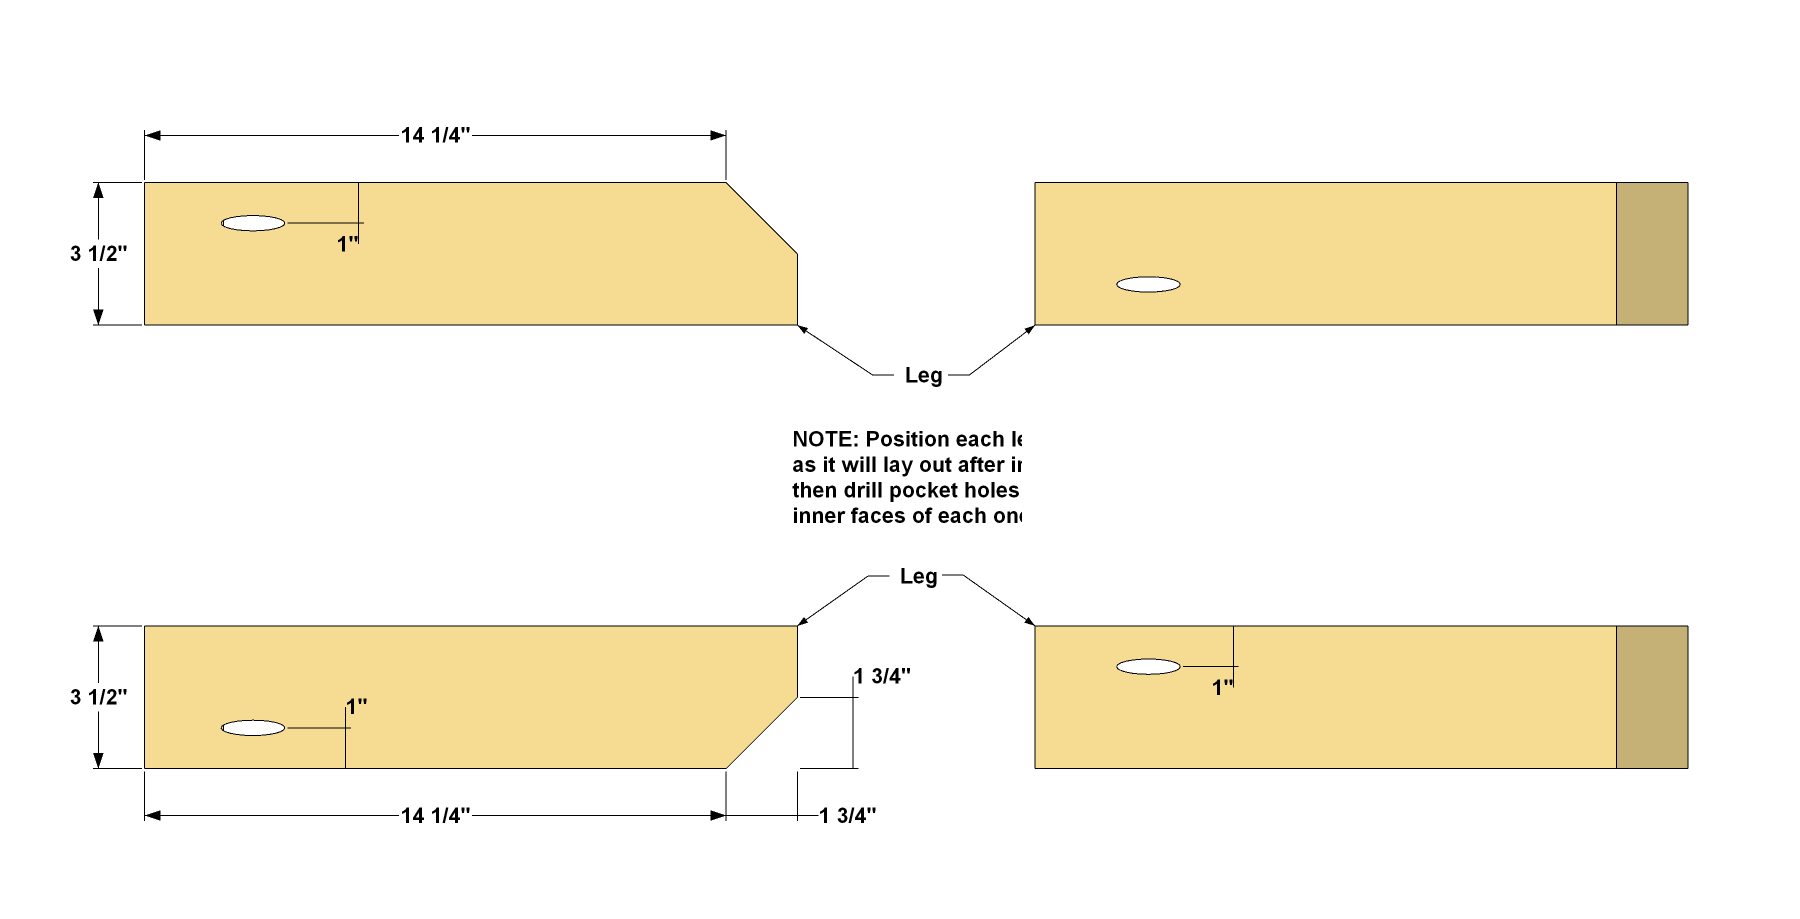
Cut four Legs to length from a 4x4 board. After cutting the legs, cut a 45° bevel on the bottom end of each one, as shown. Then, with your Kreg® Pocket-Hole Jig set up for 1-1/2" stock, drill pocket holes in the Legs, as shown. When drilling the pocket holes, make sure to locate the holes in the inner faces only. An easy way to ensure this is to stand all four legs in their final position before drilling, and mark the faces that need to be drilled.
-
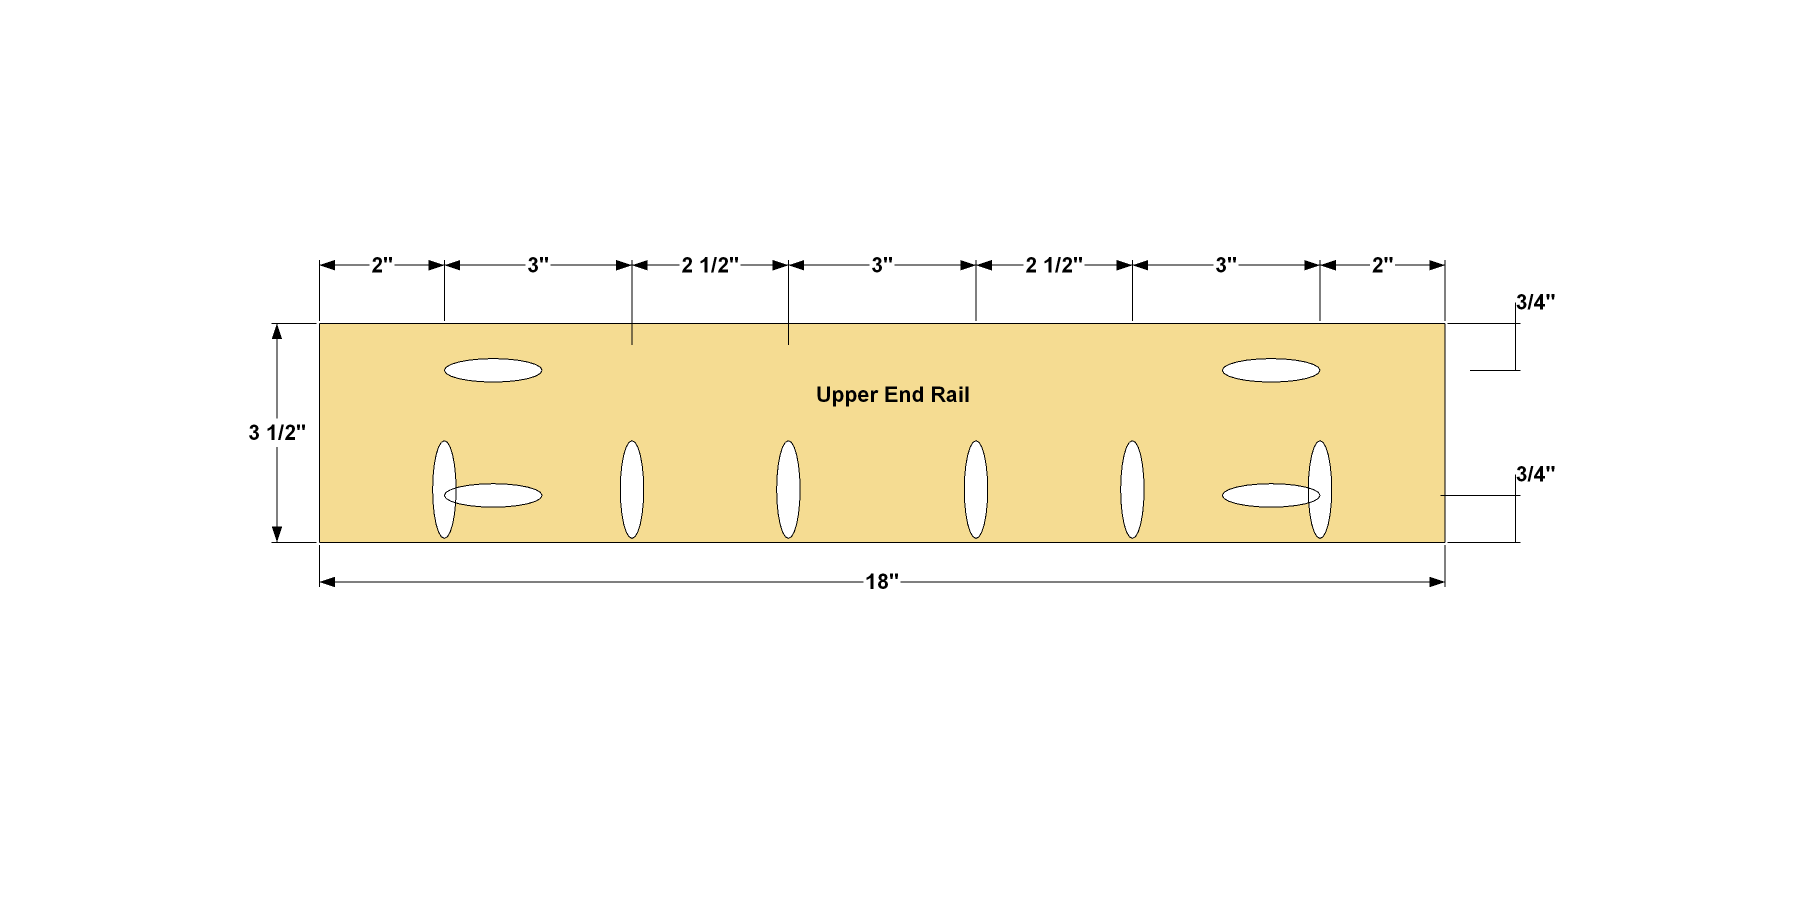
Make the Upper End Rails
Cut two Upper End Rails to length from a 2x4 board, as shown in the cutting diagram. Then drill pocket holes in the Upper End Rails, as shown. You’ll drill holes at the ends for attaching to the Legs, and holes along one edge for attaching the Seat Slats later.
-
Make the Lower End Rails
Cut two Lower Rails to length from a 2x4 board, as shown in the cutting diagram. With your jig set up for 1-1/2" stock, drill pocket holes in the Bottom Rails, as shown. These only need holes at the ends.

-
Assemble the Ends
After sanding the Legs and the Rails smooth, position them as shown, making sure that the pocket holes in the Legs are oriented properly, and that the pocket holes along the edge of the Upper End Rails are pointing upward for attaching the slats later. Then attach the Rails to the Legs using waterproof exterior wood glue and 2-1/2" Kreg Blue-Kote™ Pocket-Hole Screws to create two end assemblies.
-
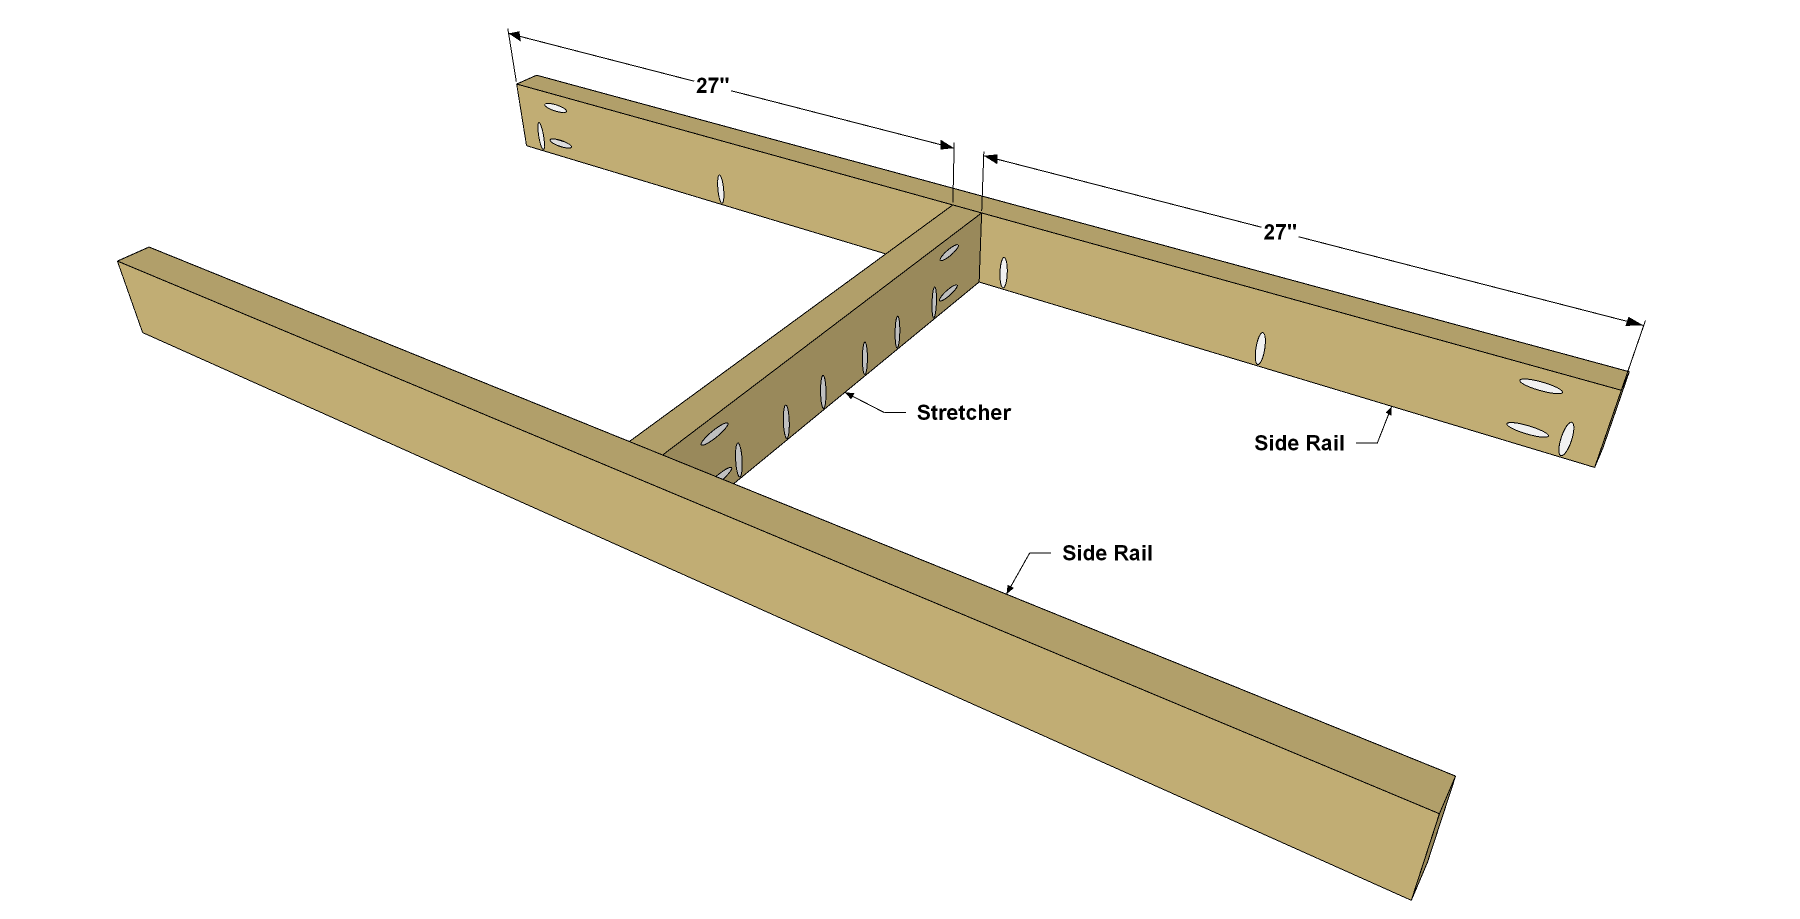
Make the Side Rails
Cut two Side Rails to length from a 2x4 board, as shown in the cutting diagram. Drill pocket holes in the Side Rails, as shown.

-
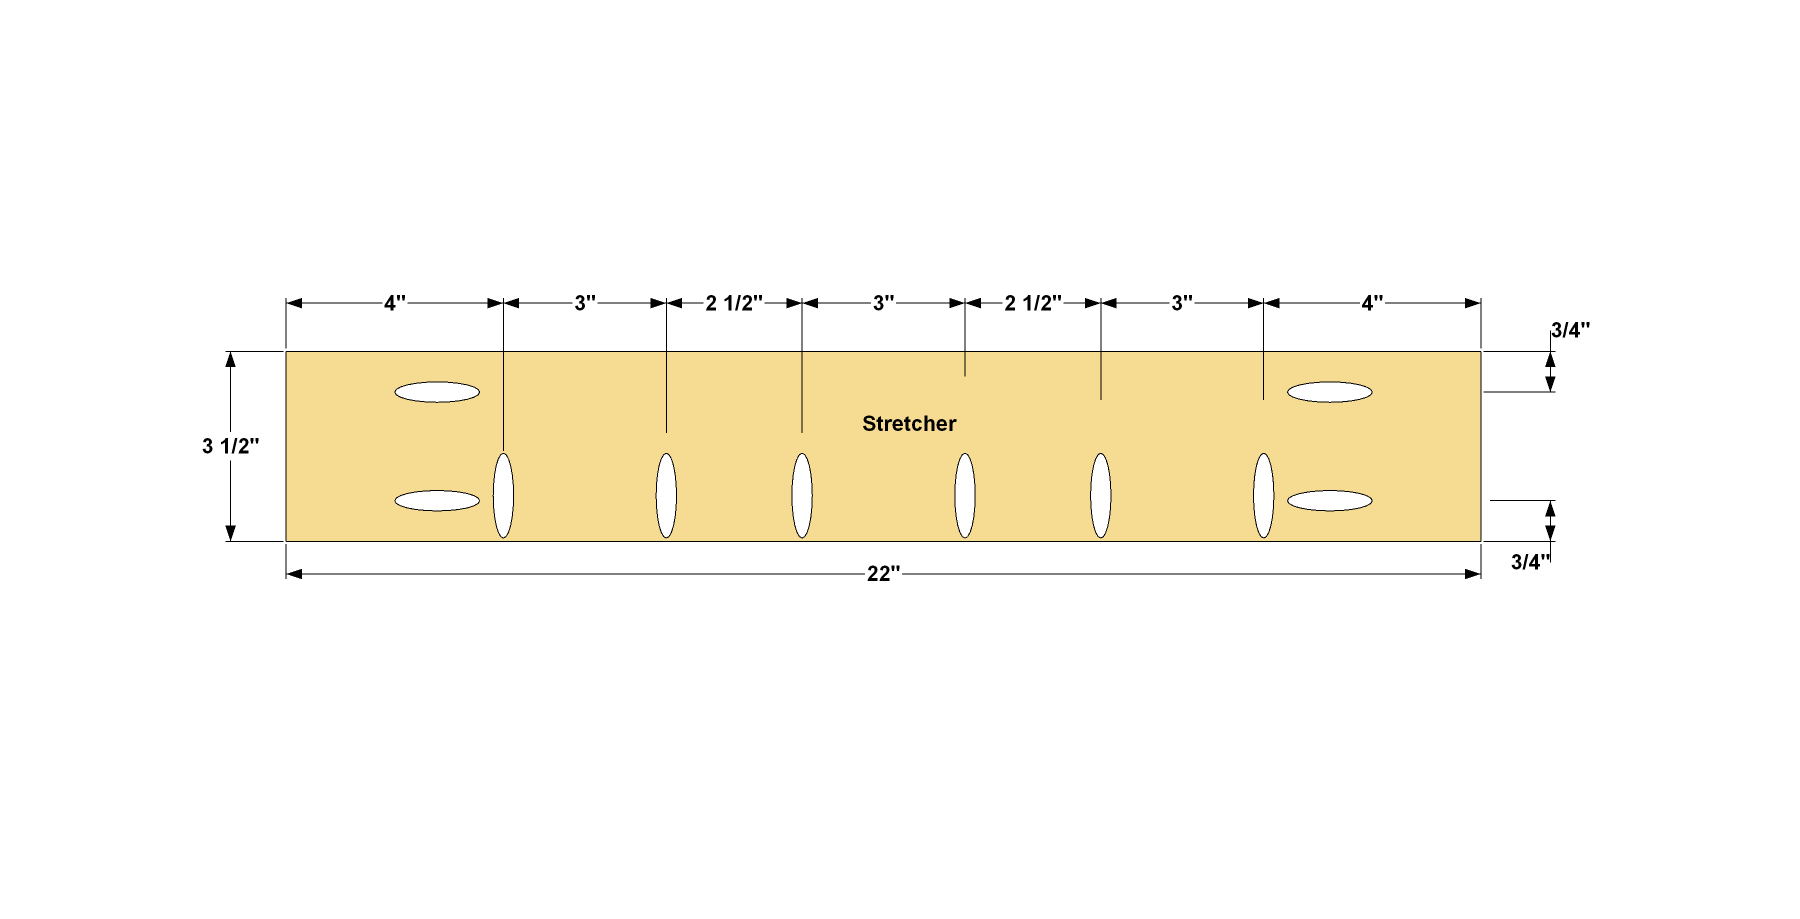
Make the Stretcher
Cut one Stretcher to length from a 2x4 board, as shown in the cutting diagram. Drill pocket holes in the Stretcher, as shown
-
Assemble the Rails and Stretchers
After sanding the Side Rails and Stretcher smooth, position them as shown, making sure the pocket holes along the edges are all pointing in the same direction. Attach the Stretcher to the Side Rails using waterproof exterior wood glue and 2-1/2" Kreg Blue-Kote™ Pocket-Hole Screws.
-
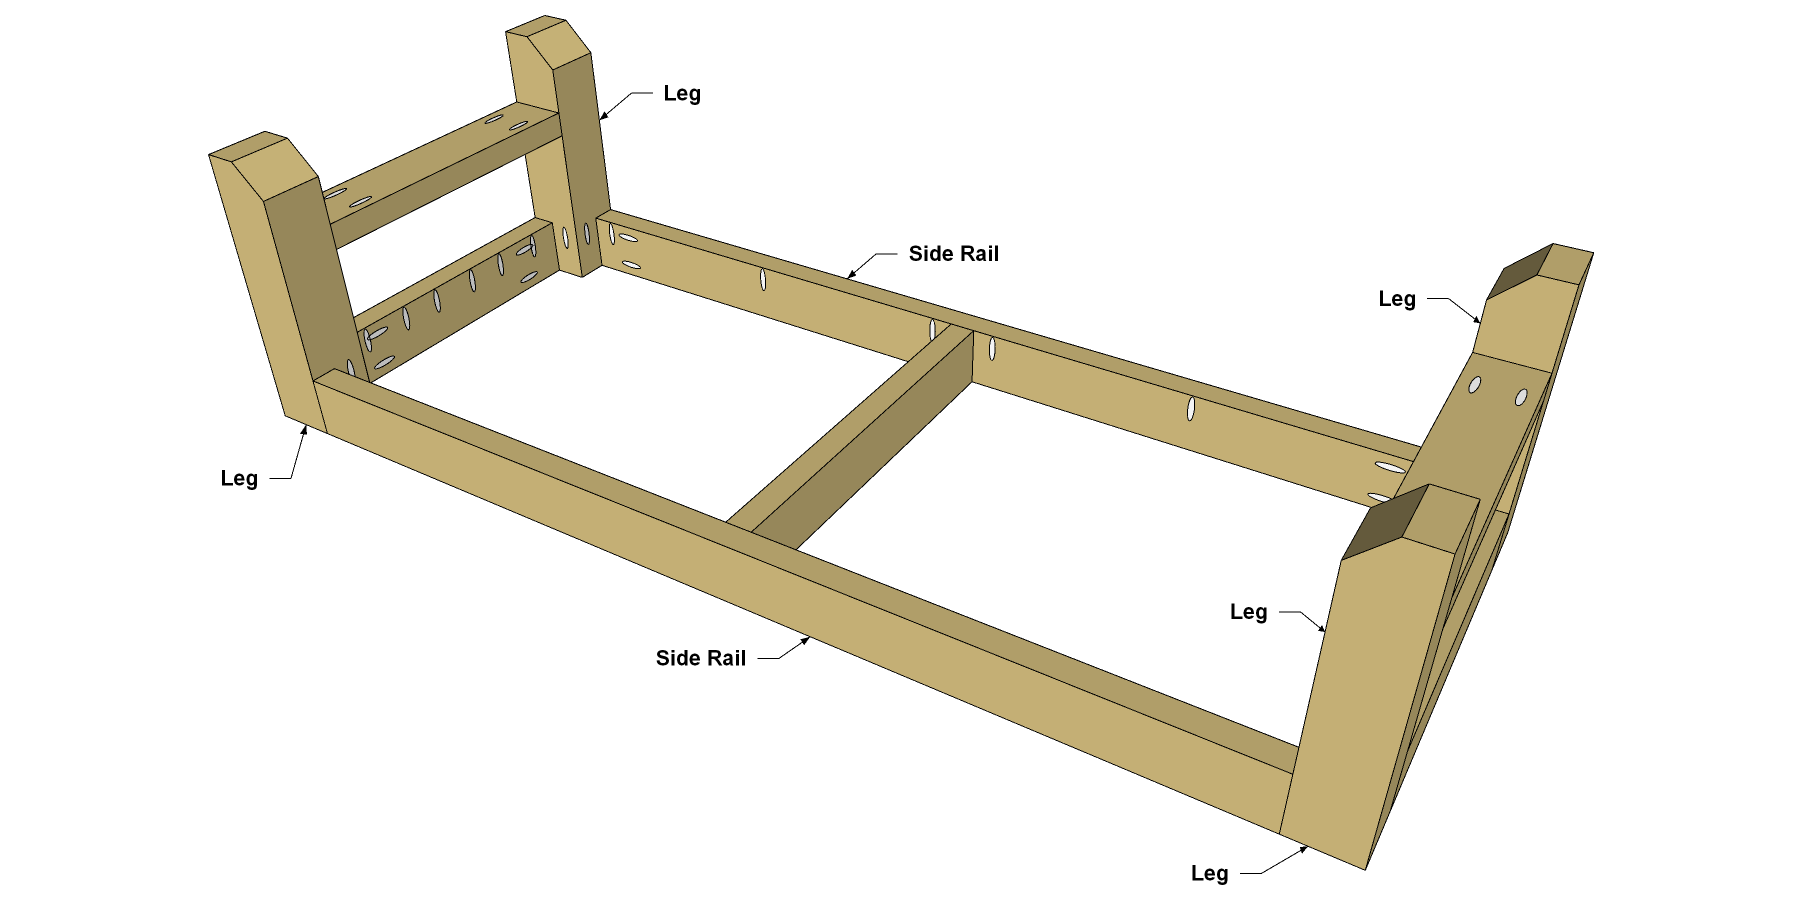
Complete the Bench Base
Now you can complete the bench base by attaching the end assemblies to the rail/stretcher assembly using waterproof exterior wood glue and 2-1/2" Kreg Blue-Kote™ Pocket-Hole Screws. Make sure as you do this that the pocket holes in the Rails and Stretcher are all oriented in the proper direction for attaching the Seat Slats later.
-
Add the Seat Slats and Finish
Cut five Seat Slats to length from 2x6 boards, as shown in the cutting diagram. Then sand the Slats smooth before installation. Lay out the Seat Slats face down on a flat surface with all of the ends aligned, and then position the bench base on the Slats. Make sure that the Slats overhang equally on each end, and equally on the sides, as well. Then attach the bench base to the slats using 2-1/2" exterior-rated pocket hole screws—no glue is needed here. When done, protect your bench with a couple of coats of exterior stain or finish.