

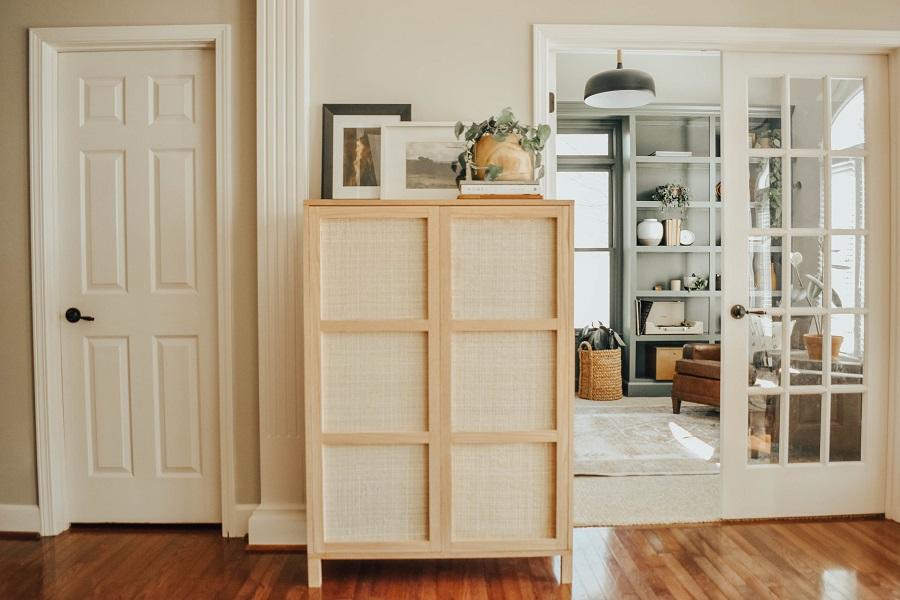
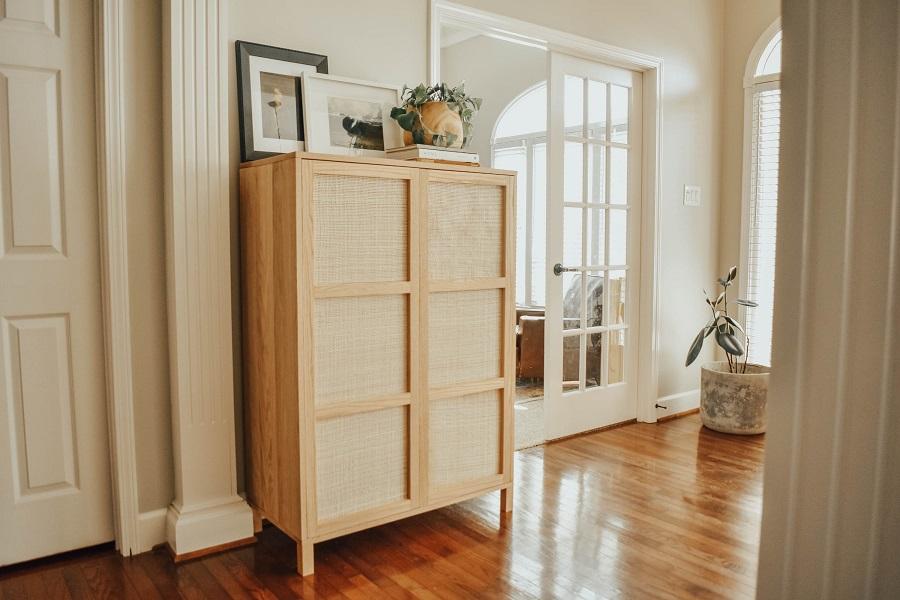
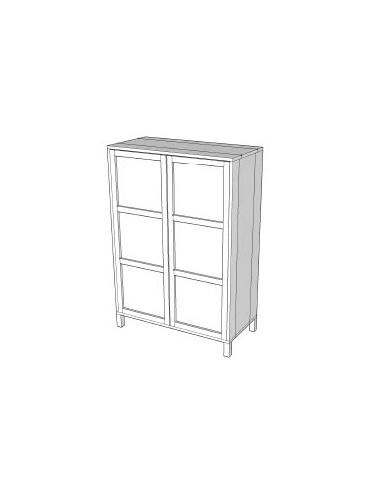


A three-pane cane cabinet with modern straight lines and 3-shelf interior storage. This cane cabinet is the perfect touch of modern mixed with trendy cane webbing, great for use as a wardrobe, pantry, linen cabinet and more!
Tools
Kreg Tools


Other Tools
-
Square

-
Parallel Clamps
-
Miter Saw
-
Tape Measure
-
Staple Gun
Materials
Wood Products
- 2 Oak boards , 1x10 @ 37"
- 2 Oak boards , 1x6 @ 37"
- 2 Oak boards , 1x4 @ 37"
- 6 Oak boards , 1x6 @ 48"
- 2 Oak boards , 1x2 @ 48"
- 5 Oak boards , 1x2x8
- 1 3/4" oak plywood full sheet , 4'x8'
- 1 Oak board , 2x2x3
Hardware & Supplies
- 102 1 1/4" pocket-hole screws
- 4 1 1/2" wood screws
- 1 Wood glue
- 2 Pair inset cabinet hinges
- 2 Cabinet pulls *optional
- 7 Open box weave cane webbing - 24" or 18" wide
- 1 1/4" crown staples
- 1 Oak edgebanding
Directions
-
Attach boards to create top & bottom
Glue and screw together boards to create the top and bottom: ¾” x 9 ½” x 36 ⅝”, ¾” x 4
¾” x 36 ⅝”, and ¾” x 3 ½” x 36 ⅝”.
Make 2.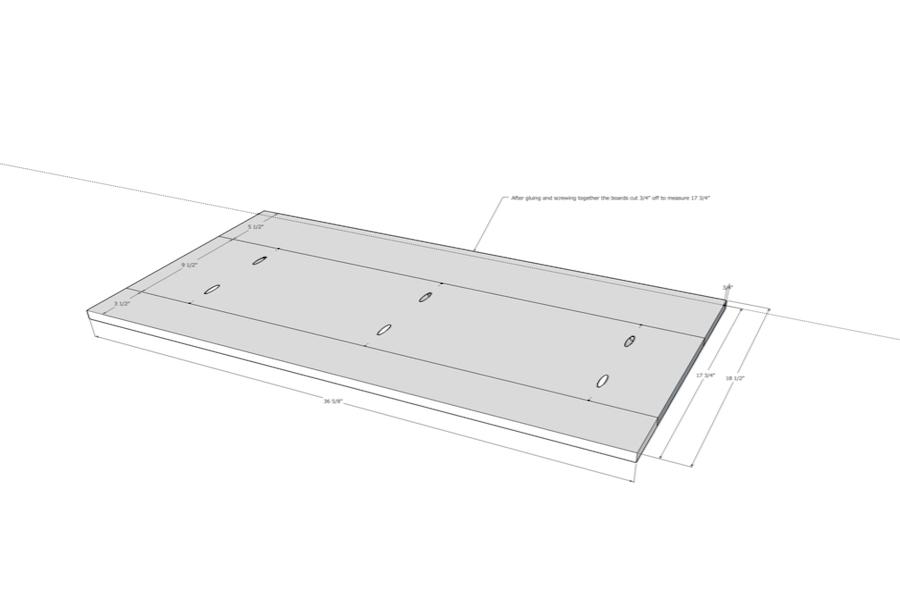
-
Attach boards to create side panels
Glue and screw together boards to create side panels: ¾” x 5 ½” x 47 ½” and ¾” x 1 ½”
x 47 ½”.
Make 2.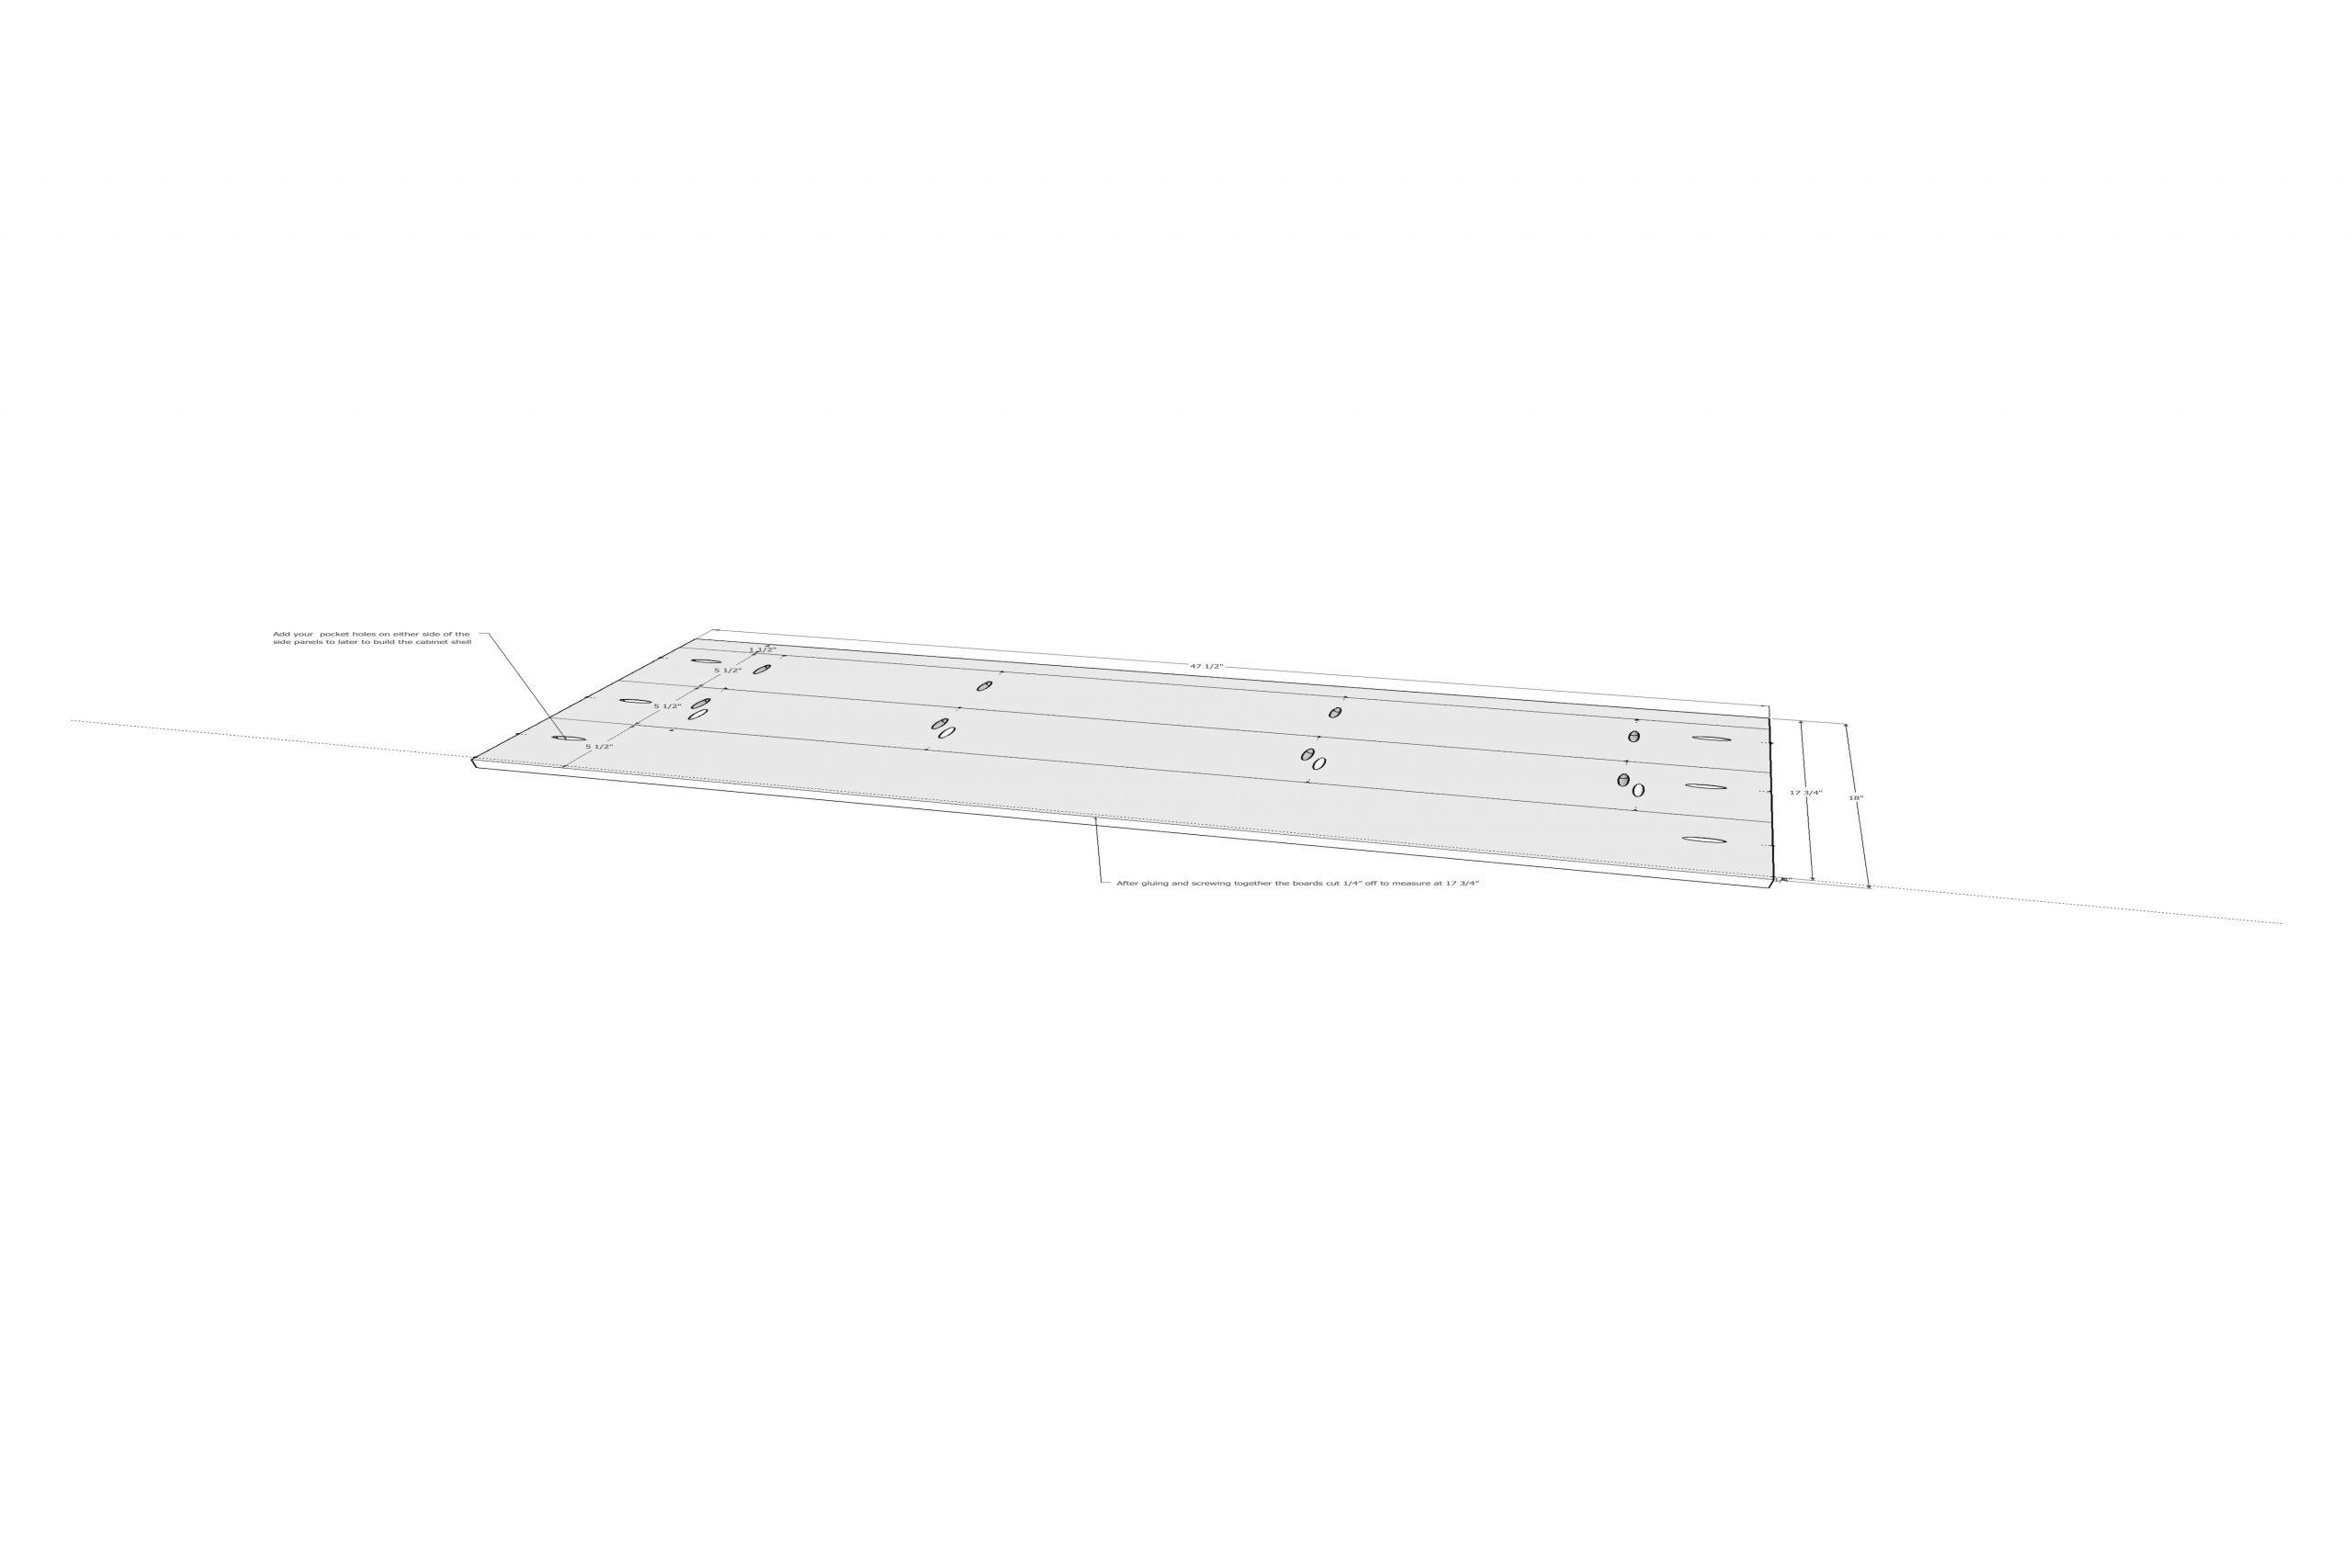
-
Attach side panels to backing
Attach the side panels to the outermost side of backing using wood glue and 1 ¼”
pocket hole screws.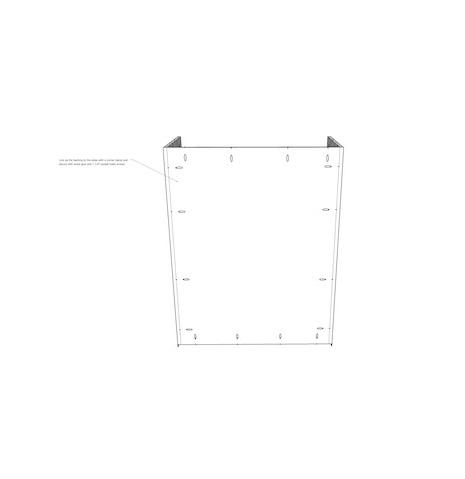
-
Attach the bottom
Attach the bottom with the pocket holes facing up. Both the top and bottom pocket holes
should be facing the same direction.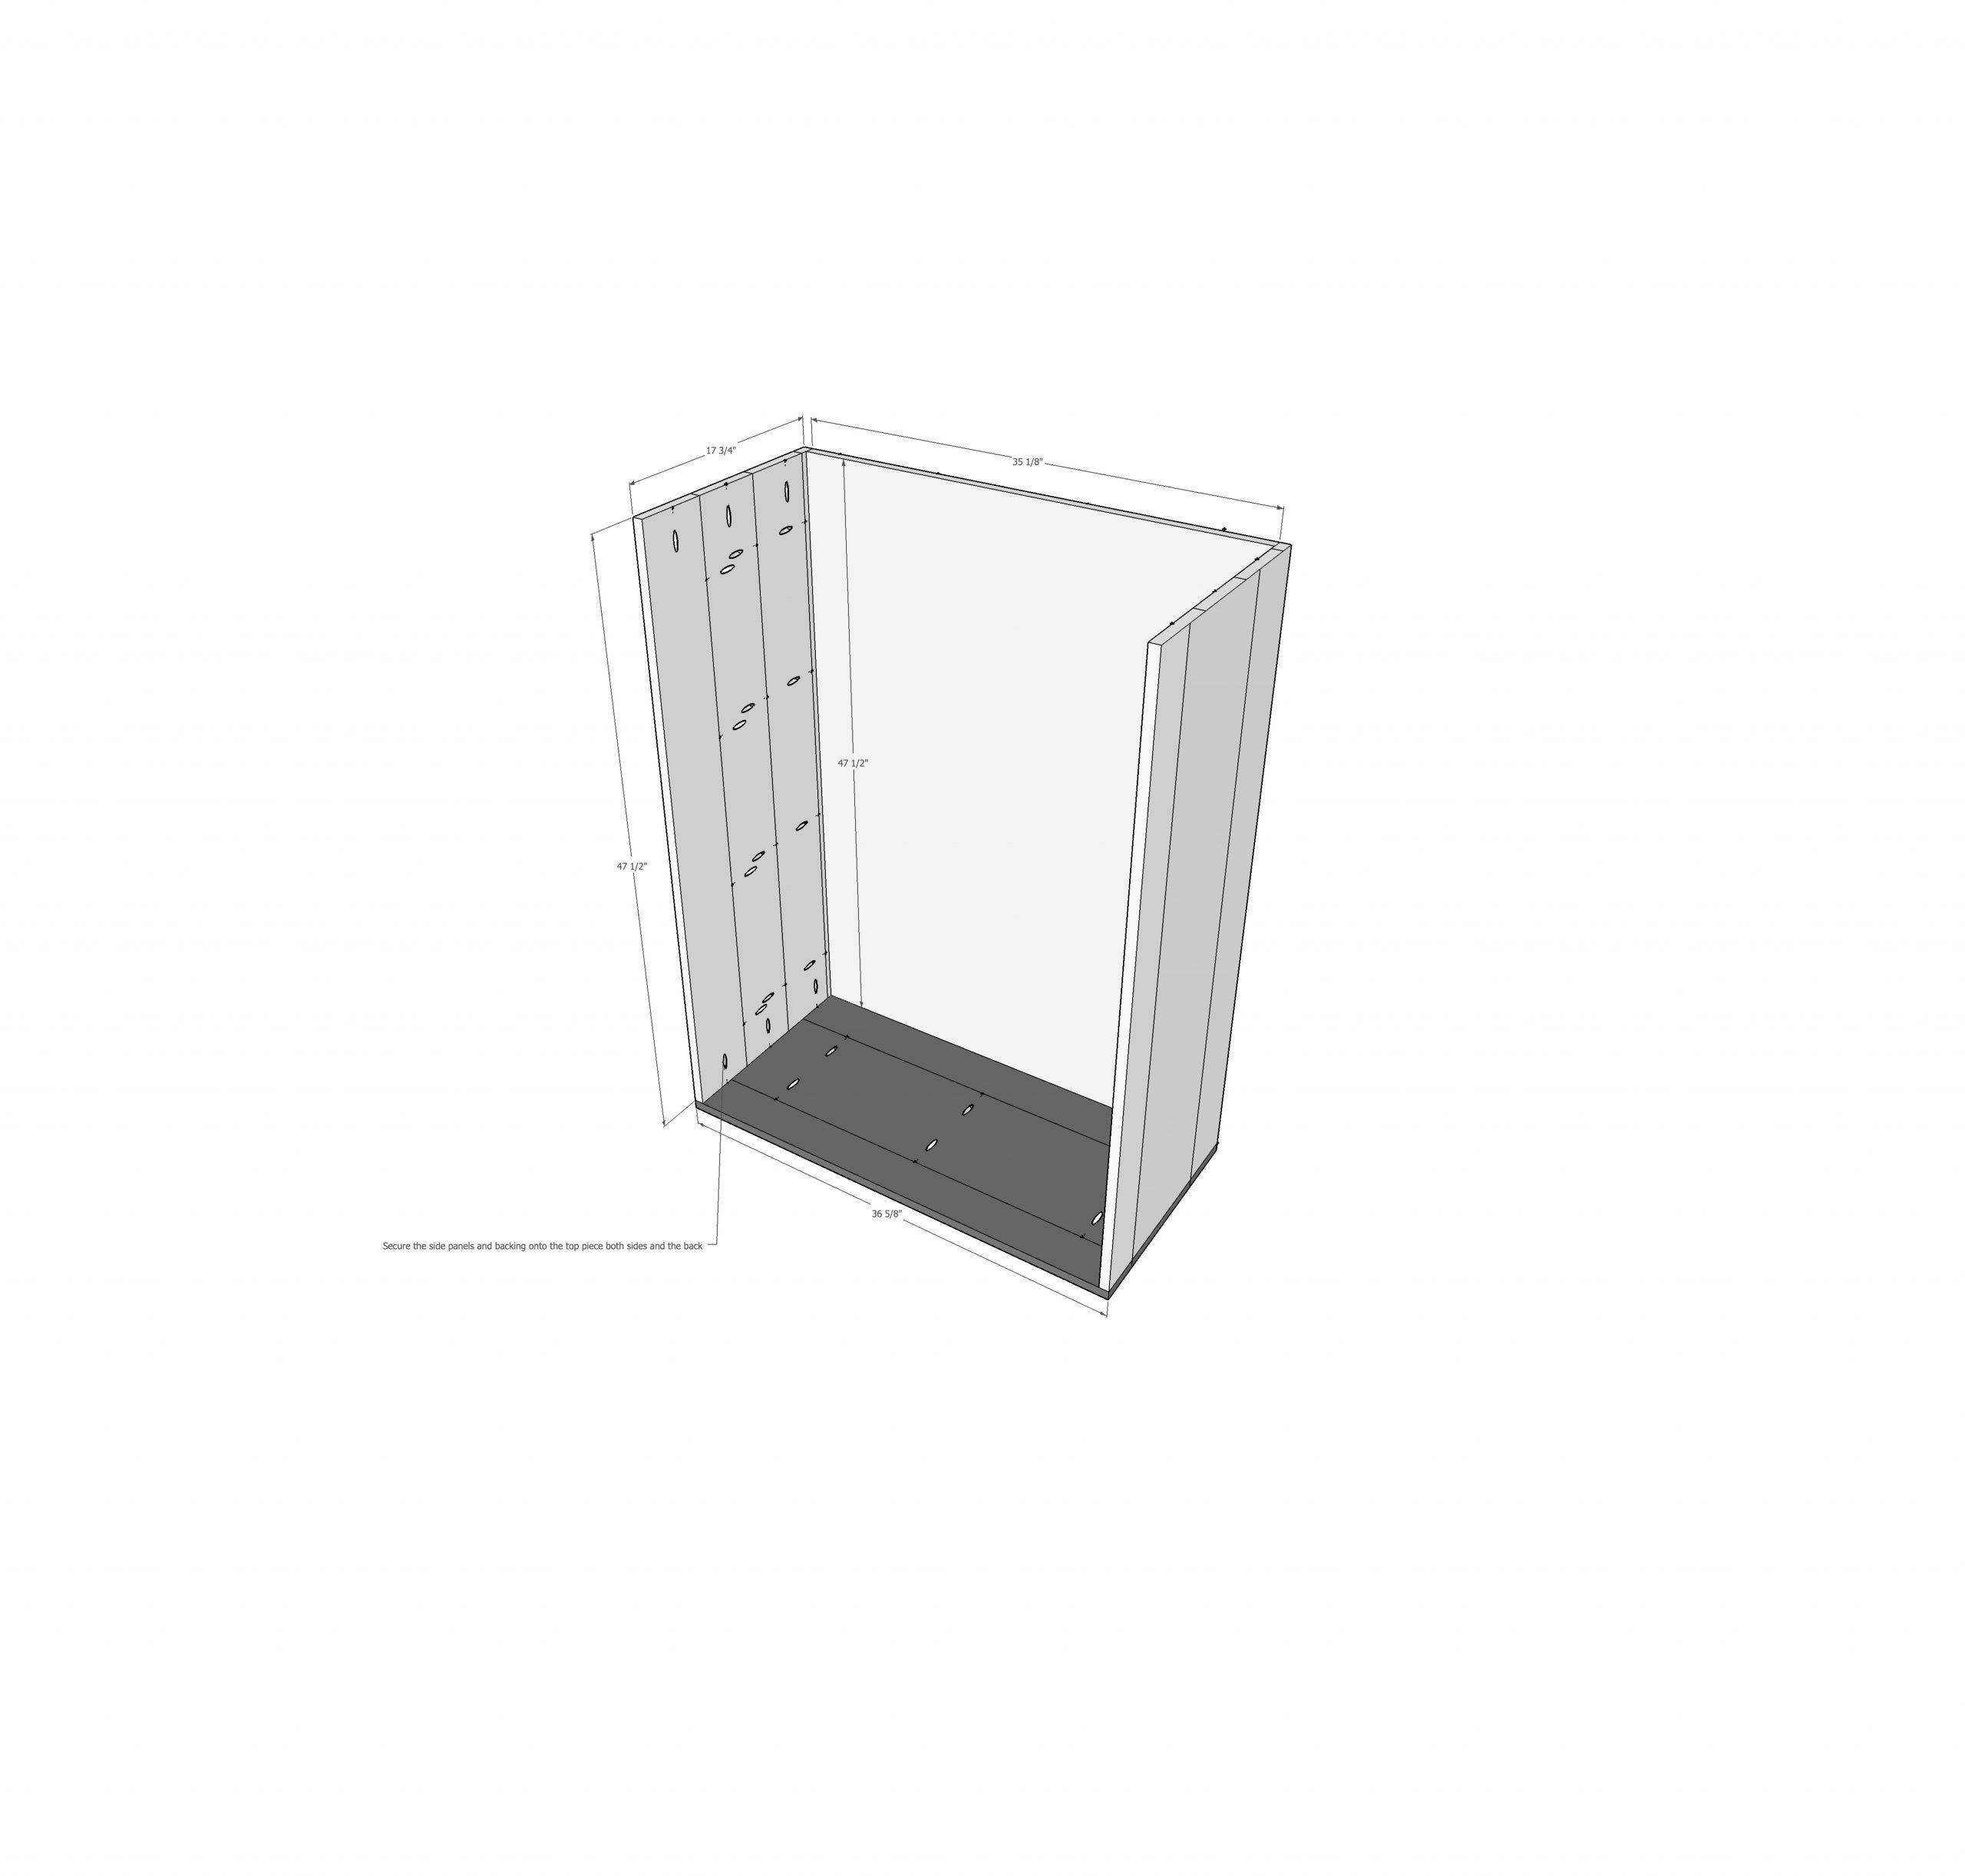
-
Attach the top
Attach the top with the pocket holes facing down. Both the top and bottom pocket holes
should be facing the same direction.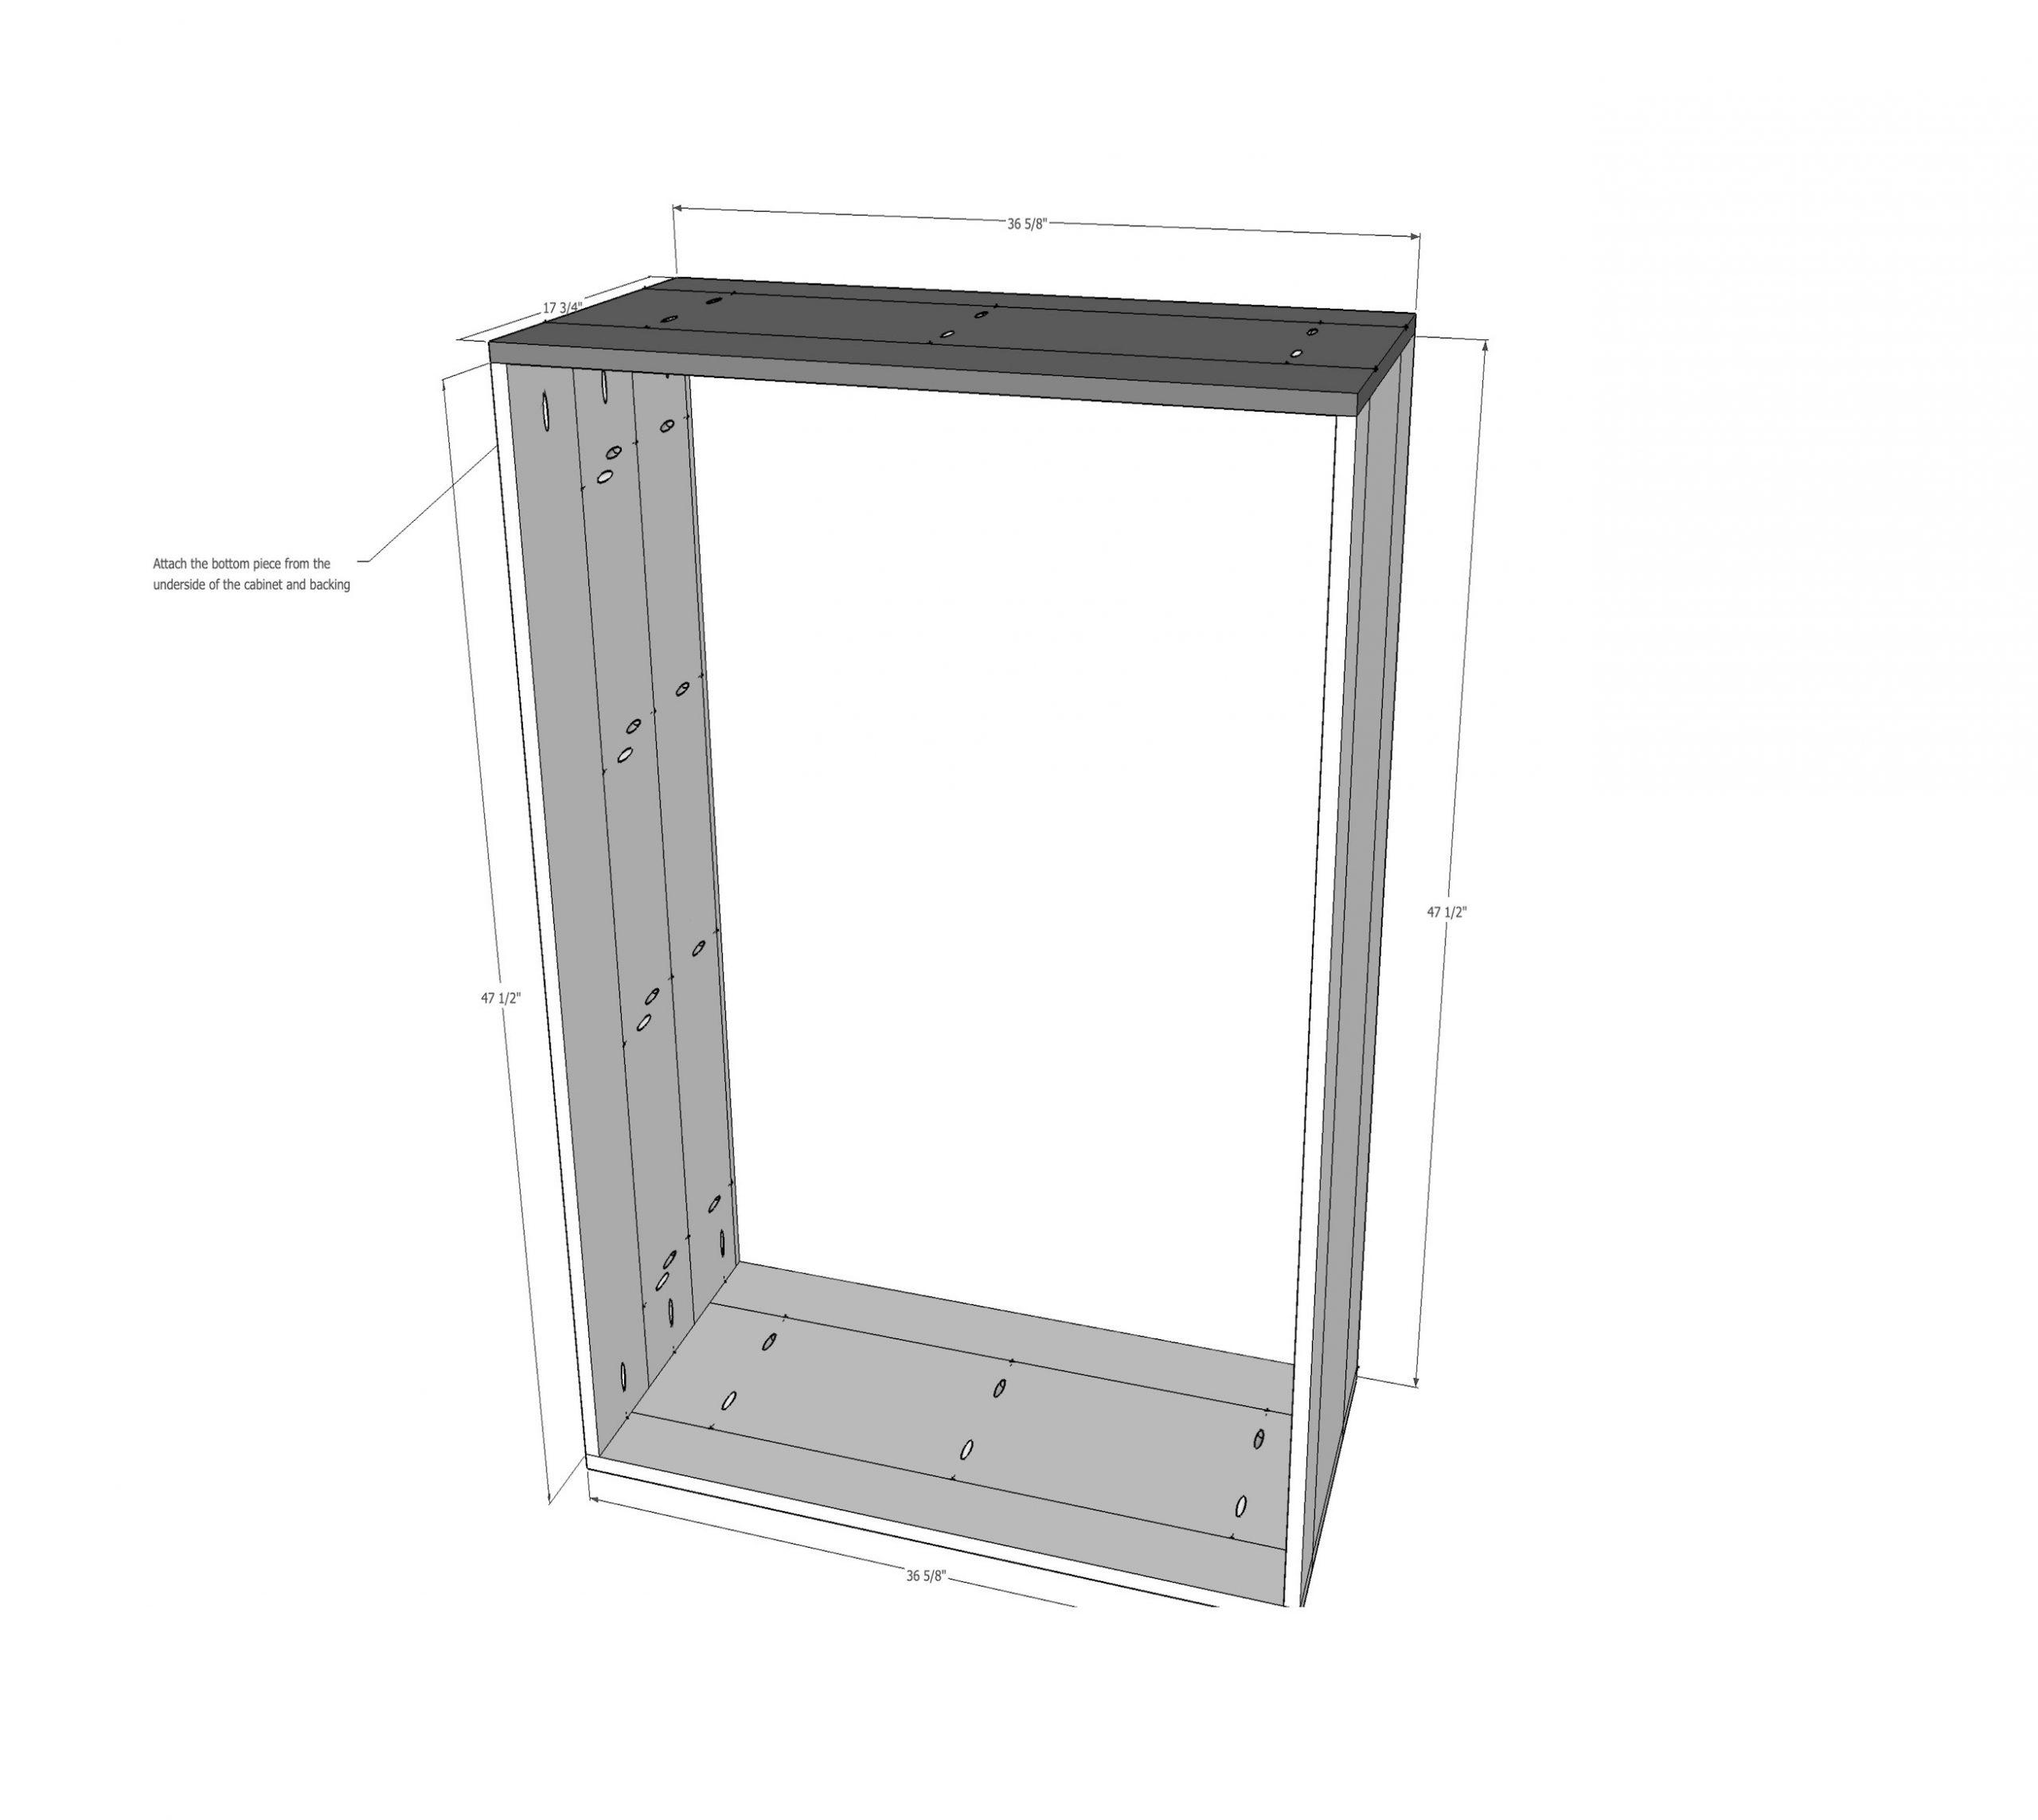
-
Assemble doors
Put together doors using a 3” wood clamp at the joint and (2) 1 ¼” pocket-hole screws
on either side of the 1 ½” x ¾” x 14 ⅜”. Your doors will be smaller than your opening at 3/32”
gap around the door for an inset cabinet door.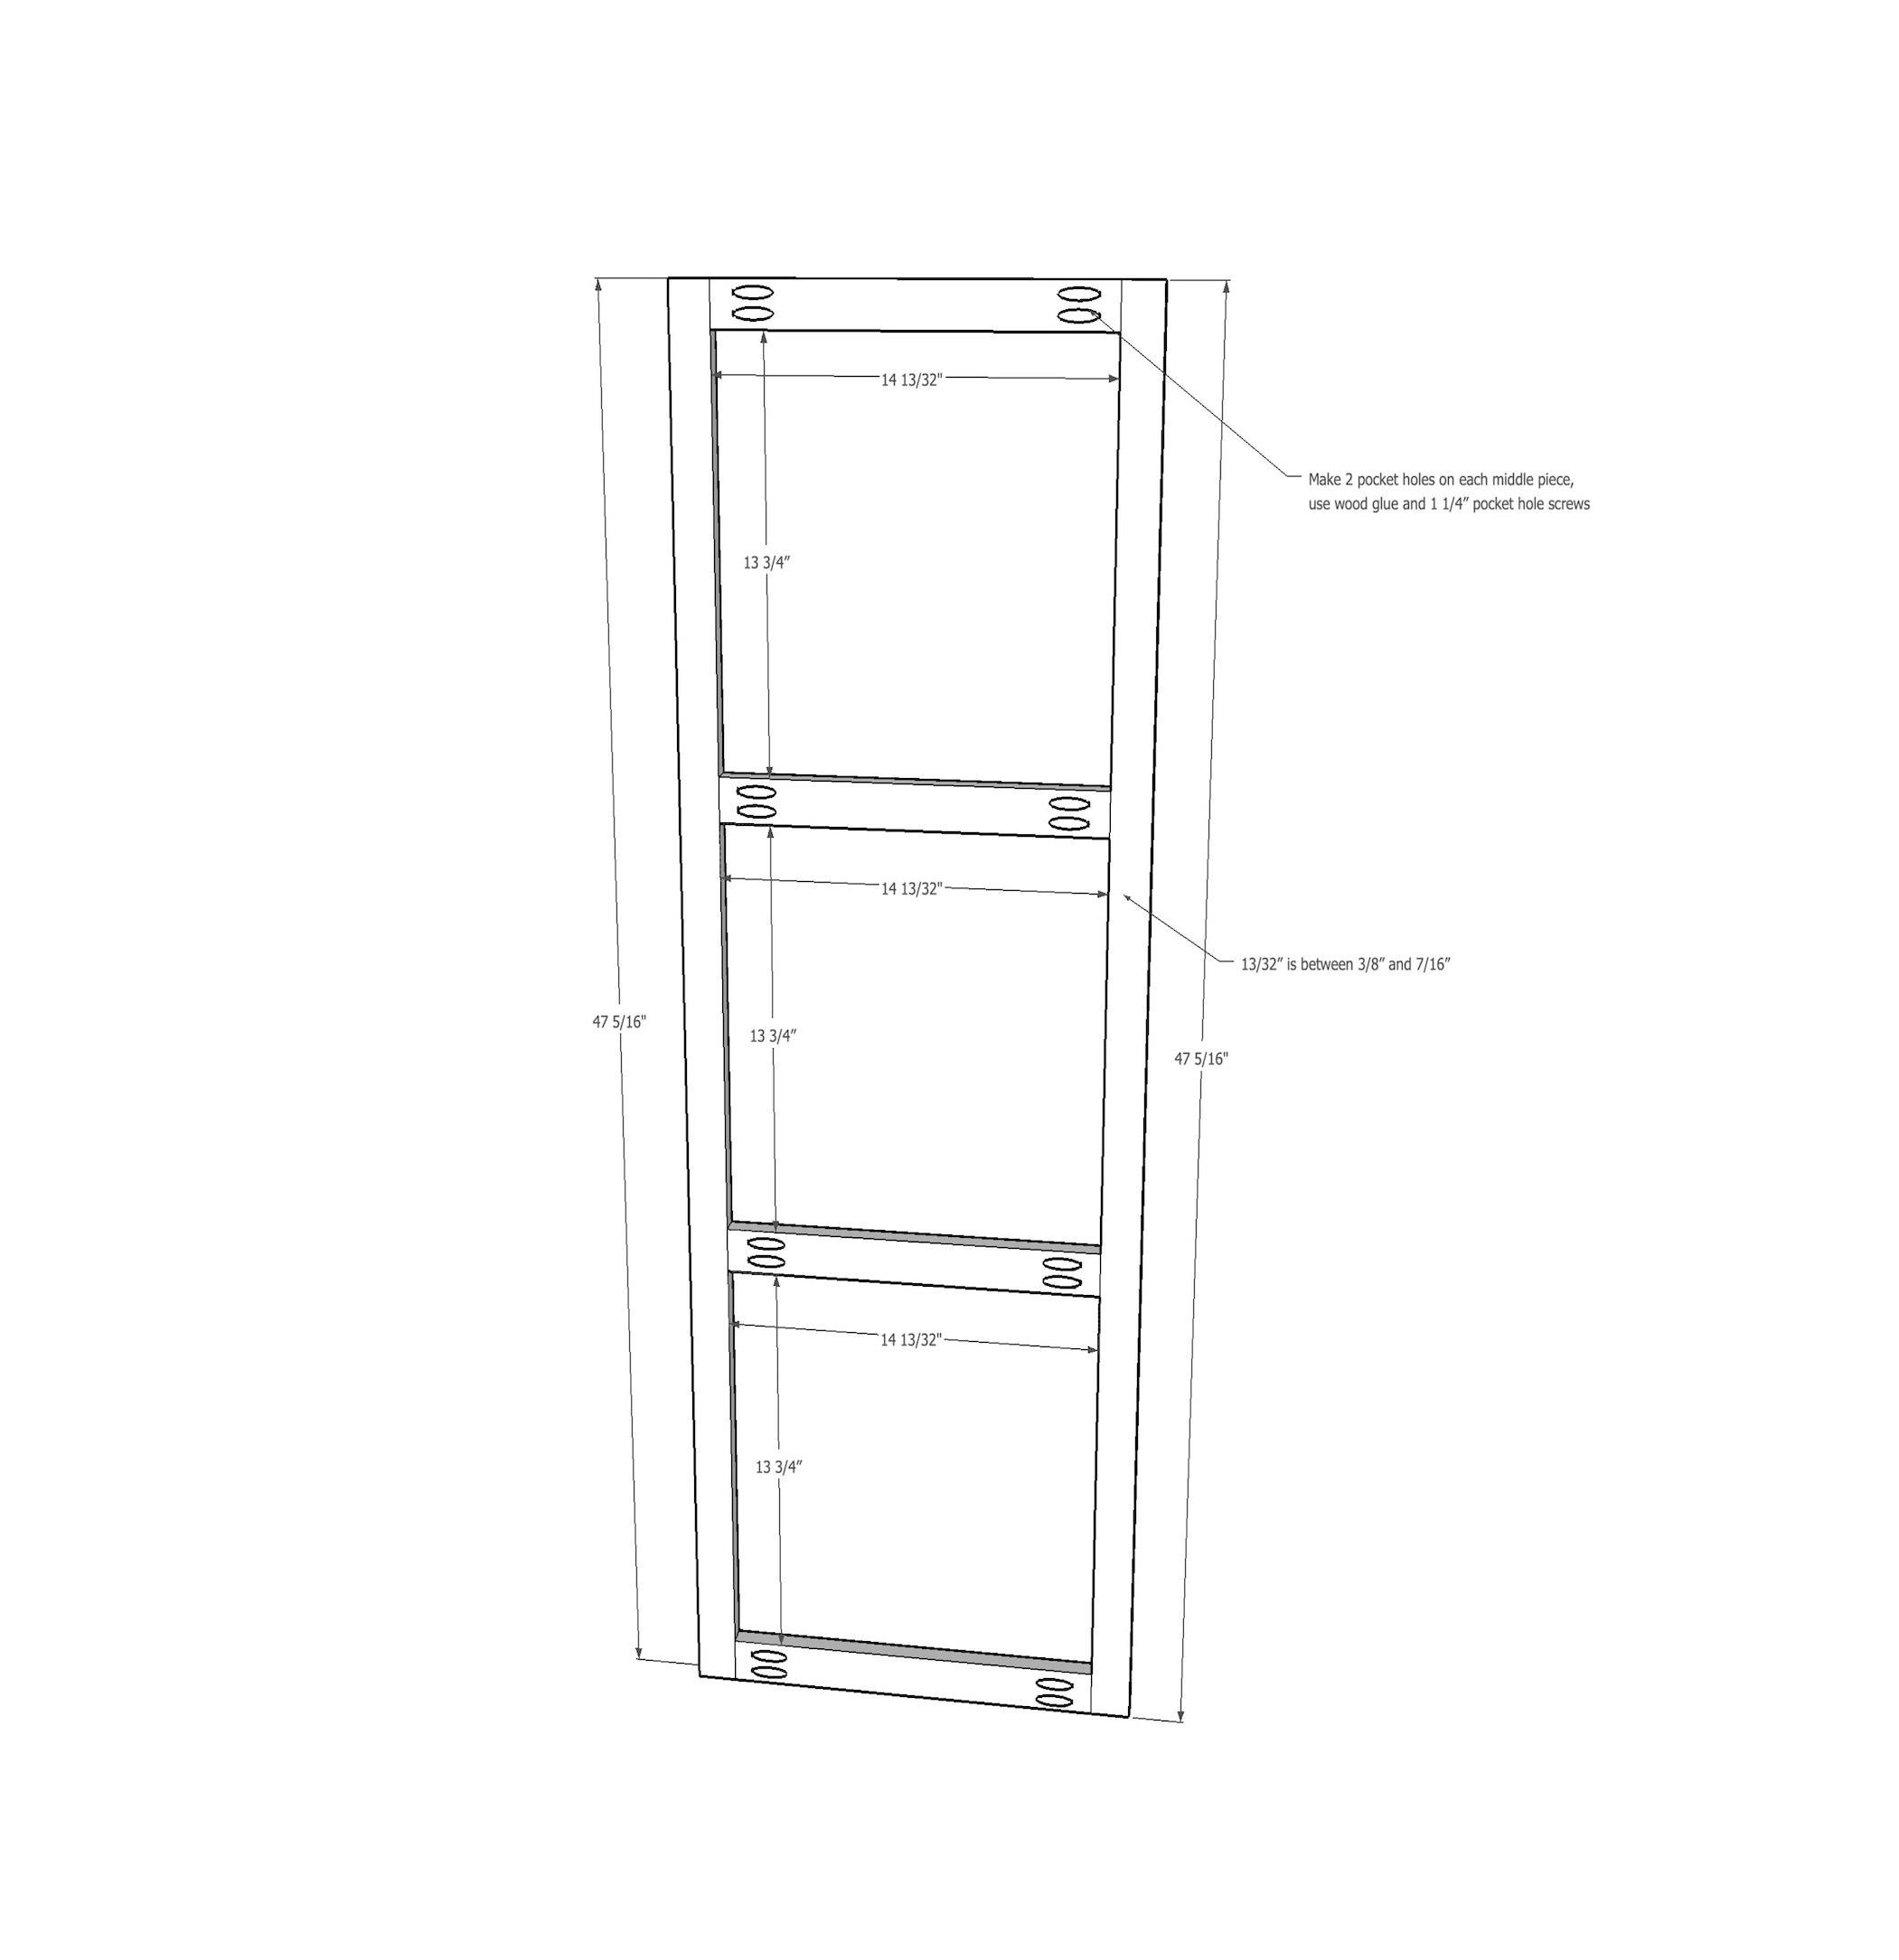
-
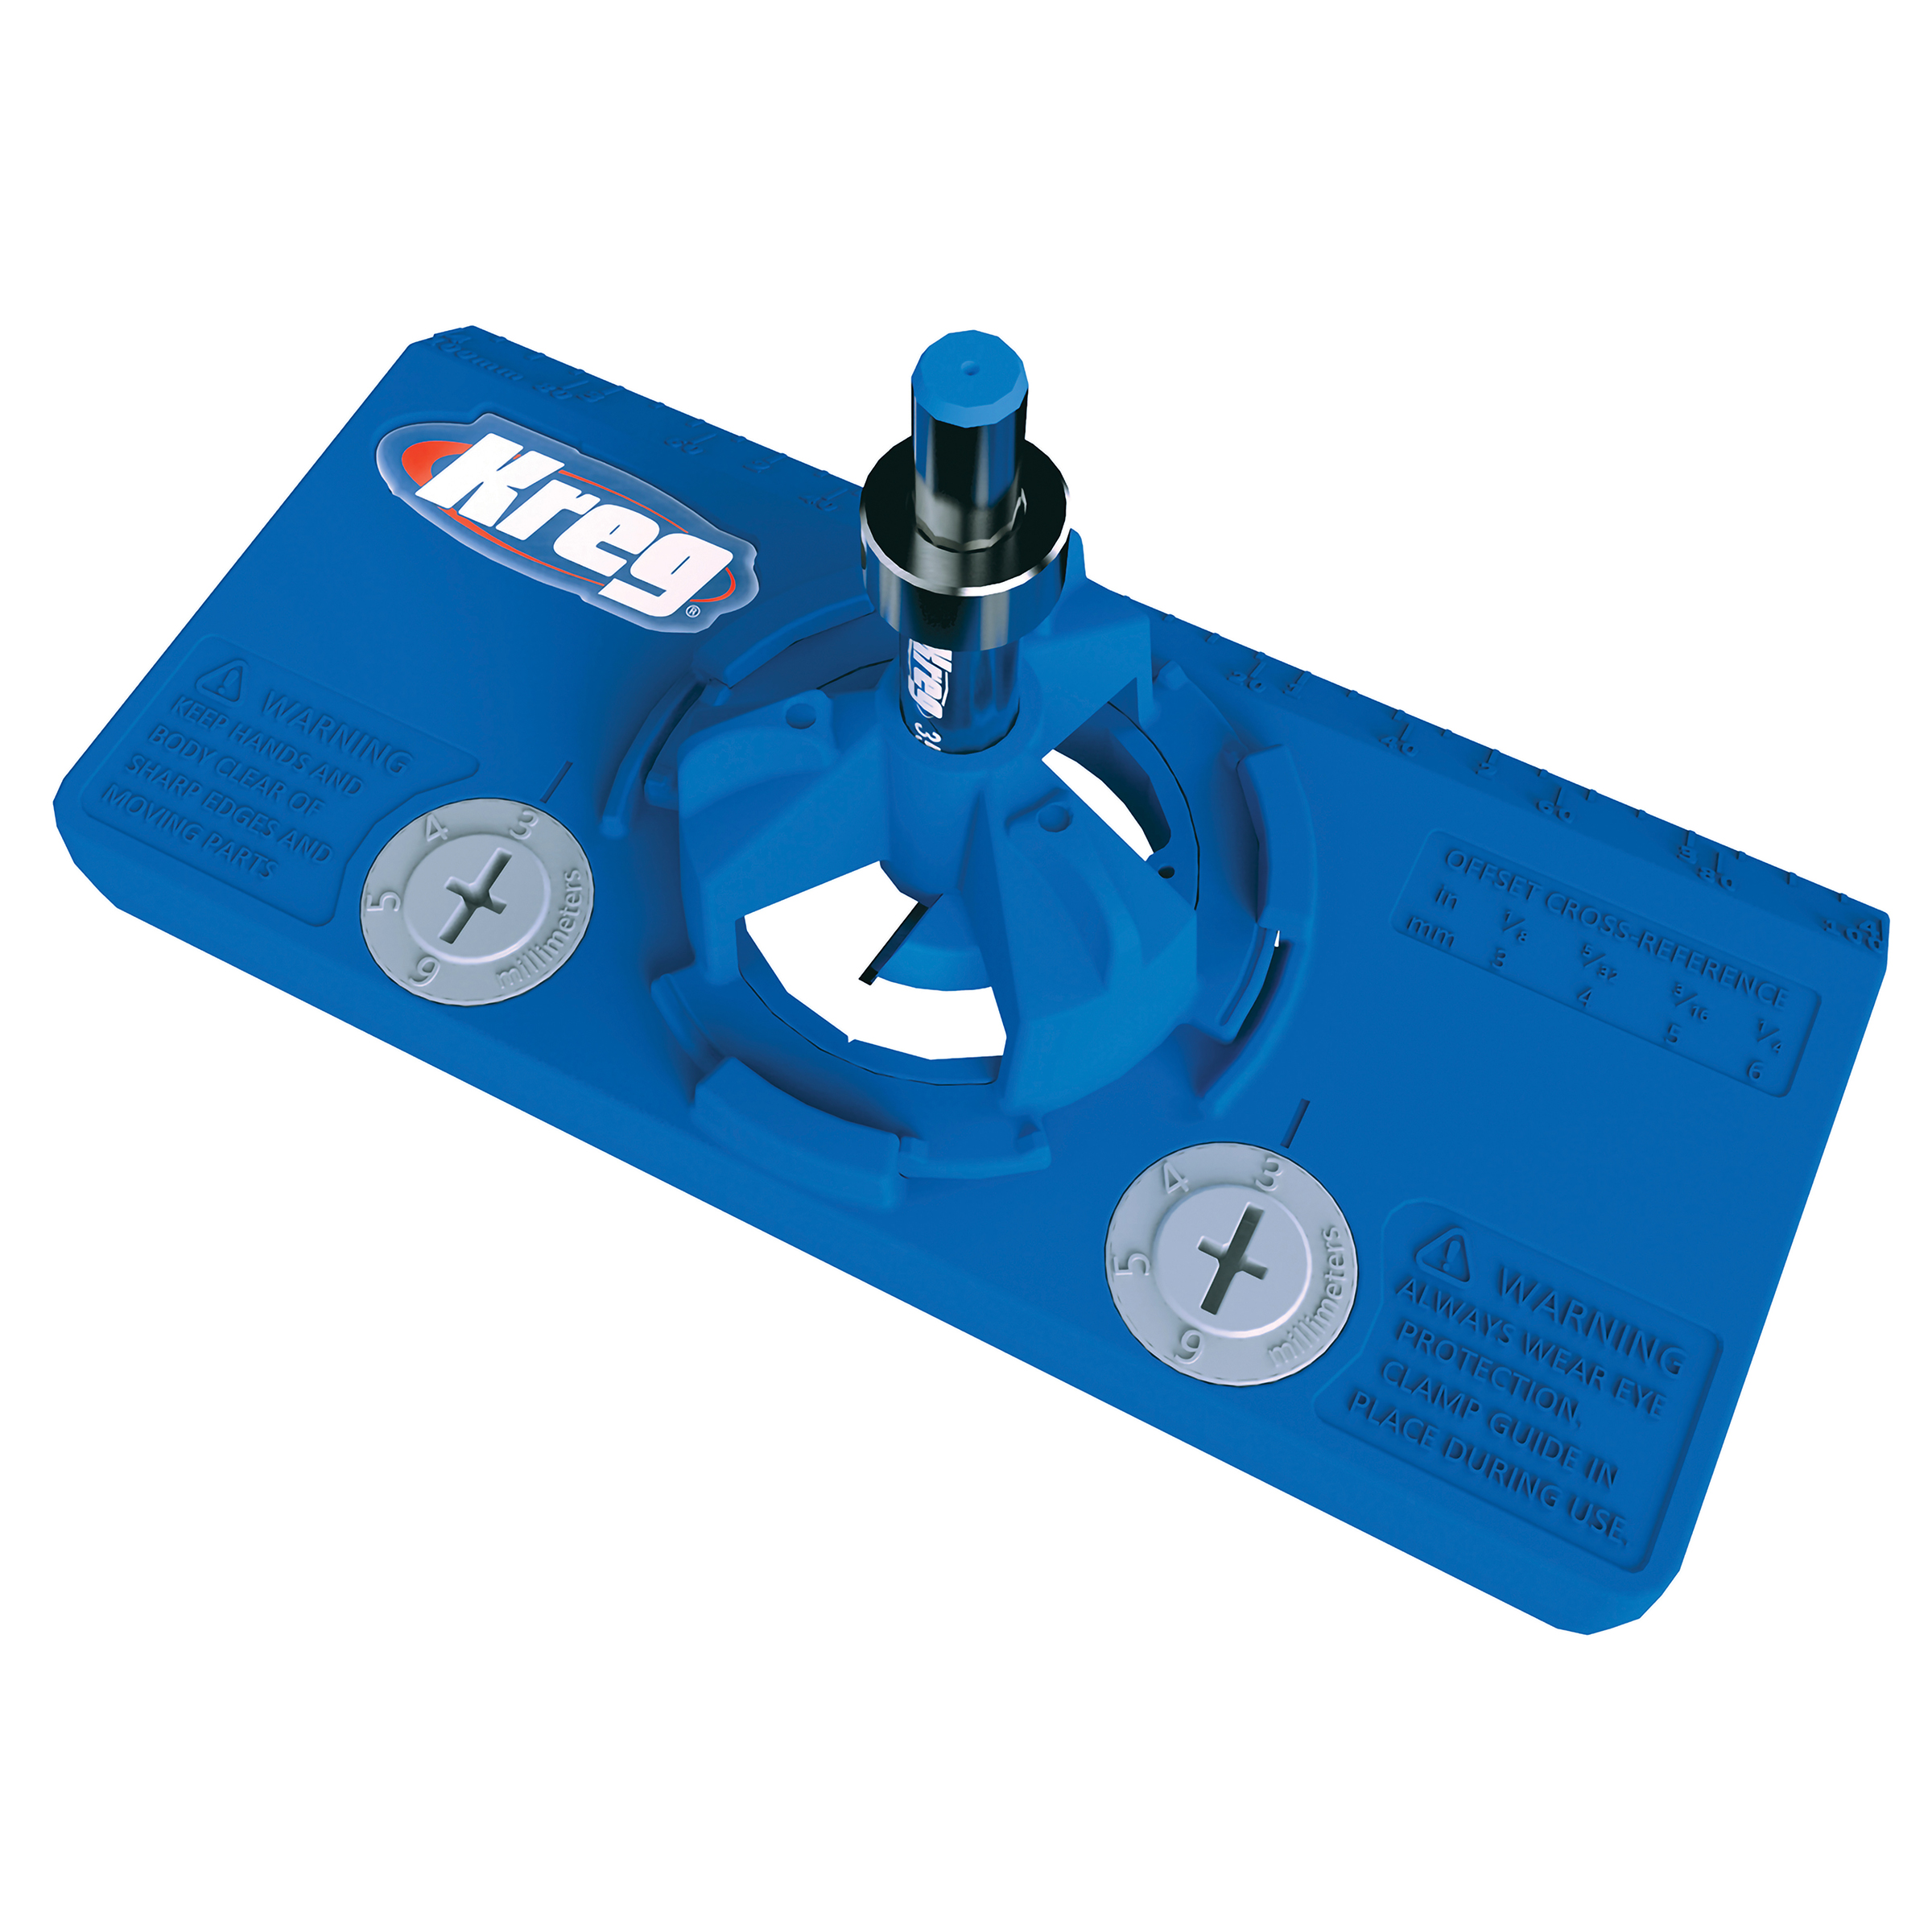
Drill concealed hinge holes
Use your concealed hinge jig to make 2 hinge holes on either end of the cabinet door.
The number of hinges is based on how heavy your door is (9-13lbs only needs 2 hinges). -
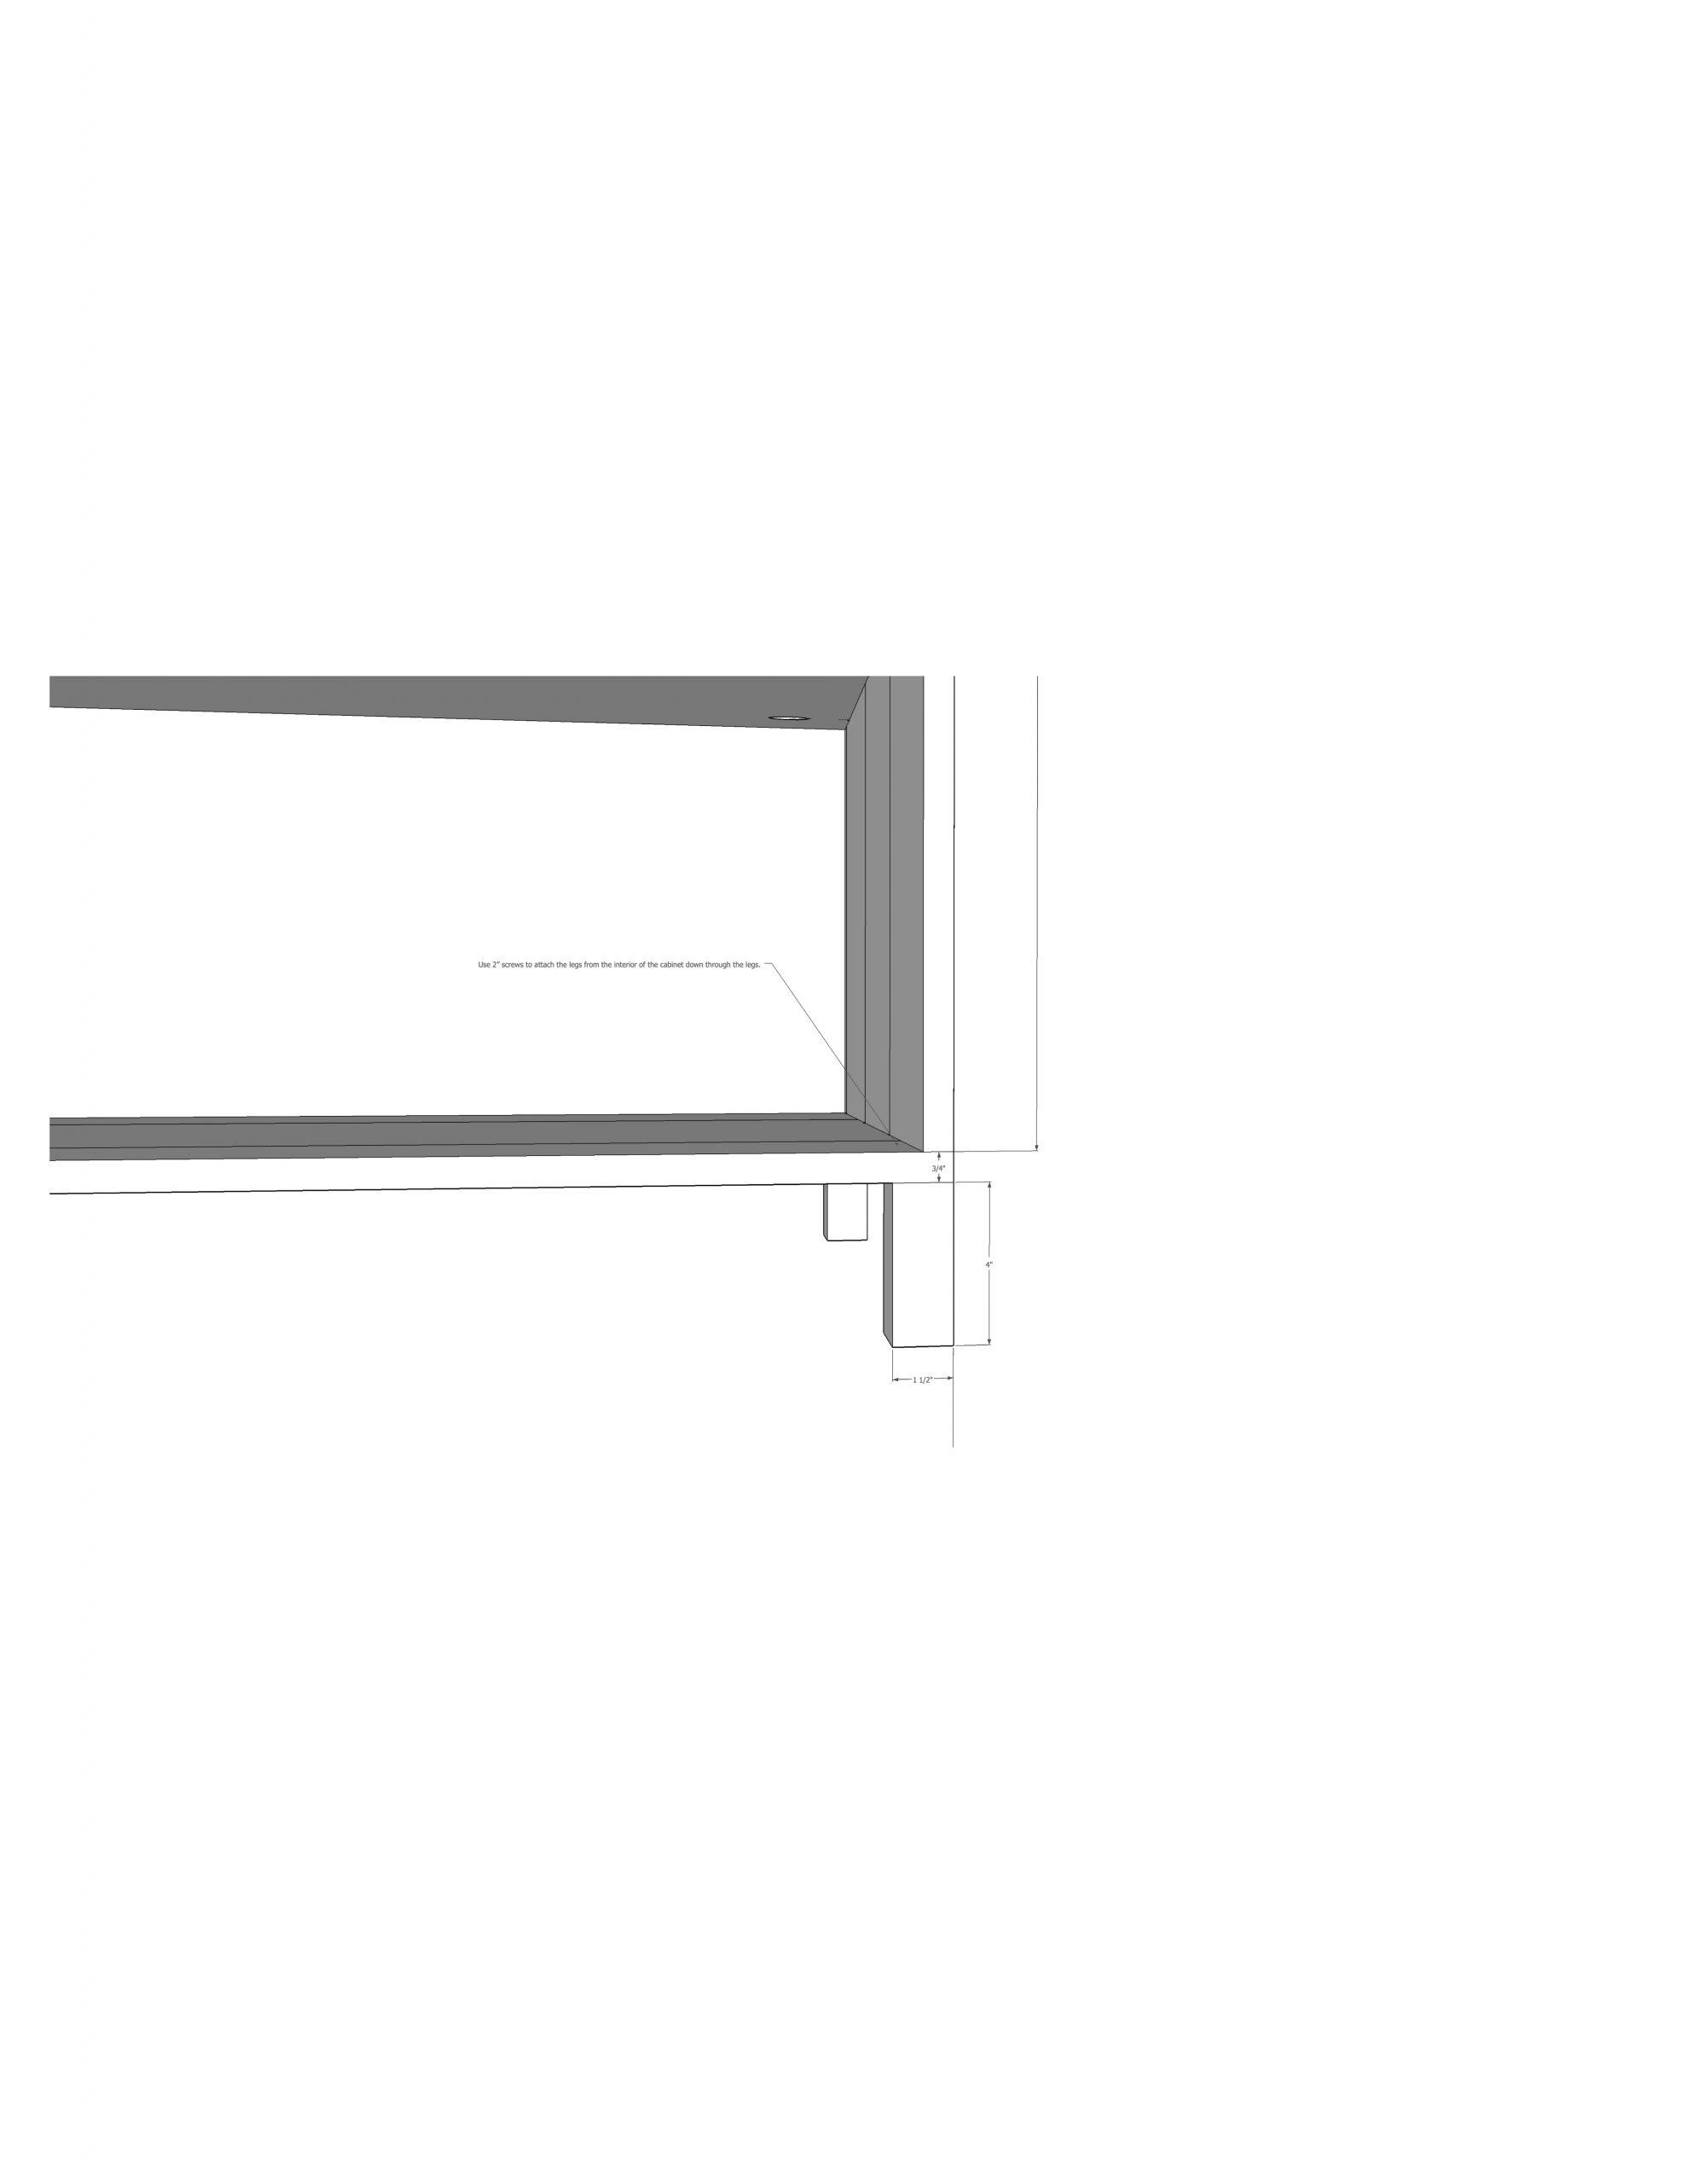
Attach legs
Attach legs by screwing from the interior bottom of the cabinet down through the legs.
-
Attach hinges
Attach the hinge plate to the interior cabinet shell 2 3/16” from the front edge, directions
will say 1 7/16”. You need to add the width of your door (¾”) to the 1 7/16”. Follow hinge
installation guide instructions. -
Apply edgebanding
Add oak edgebanding to one long edge of your 35 ⅛” x 15” x ¾” shelves. Attach shelves
15 ¾” from the top interior part of the cabinet to the top of the ¾” plywood shelf, using 1 ¼”
pocket-hole screws.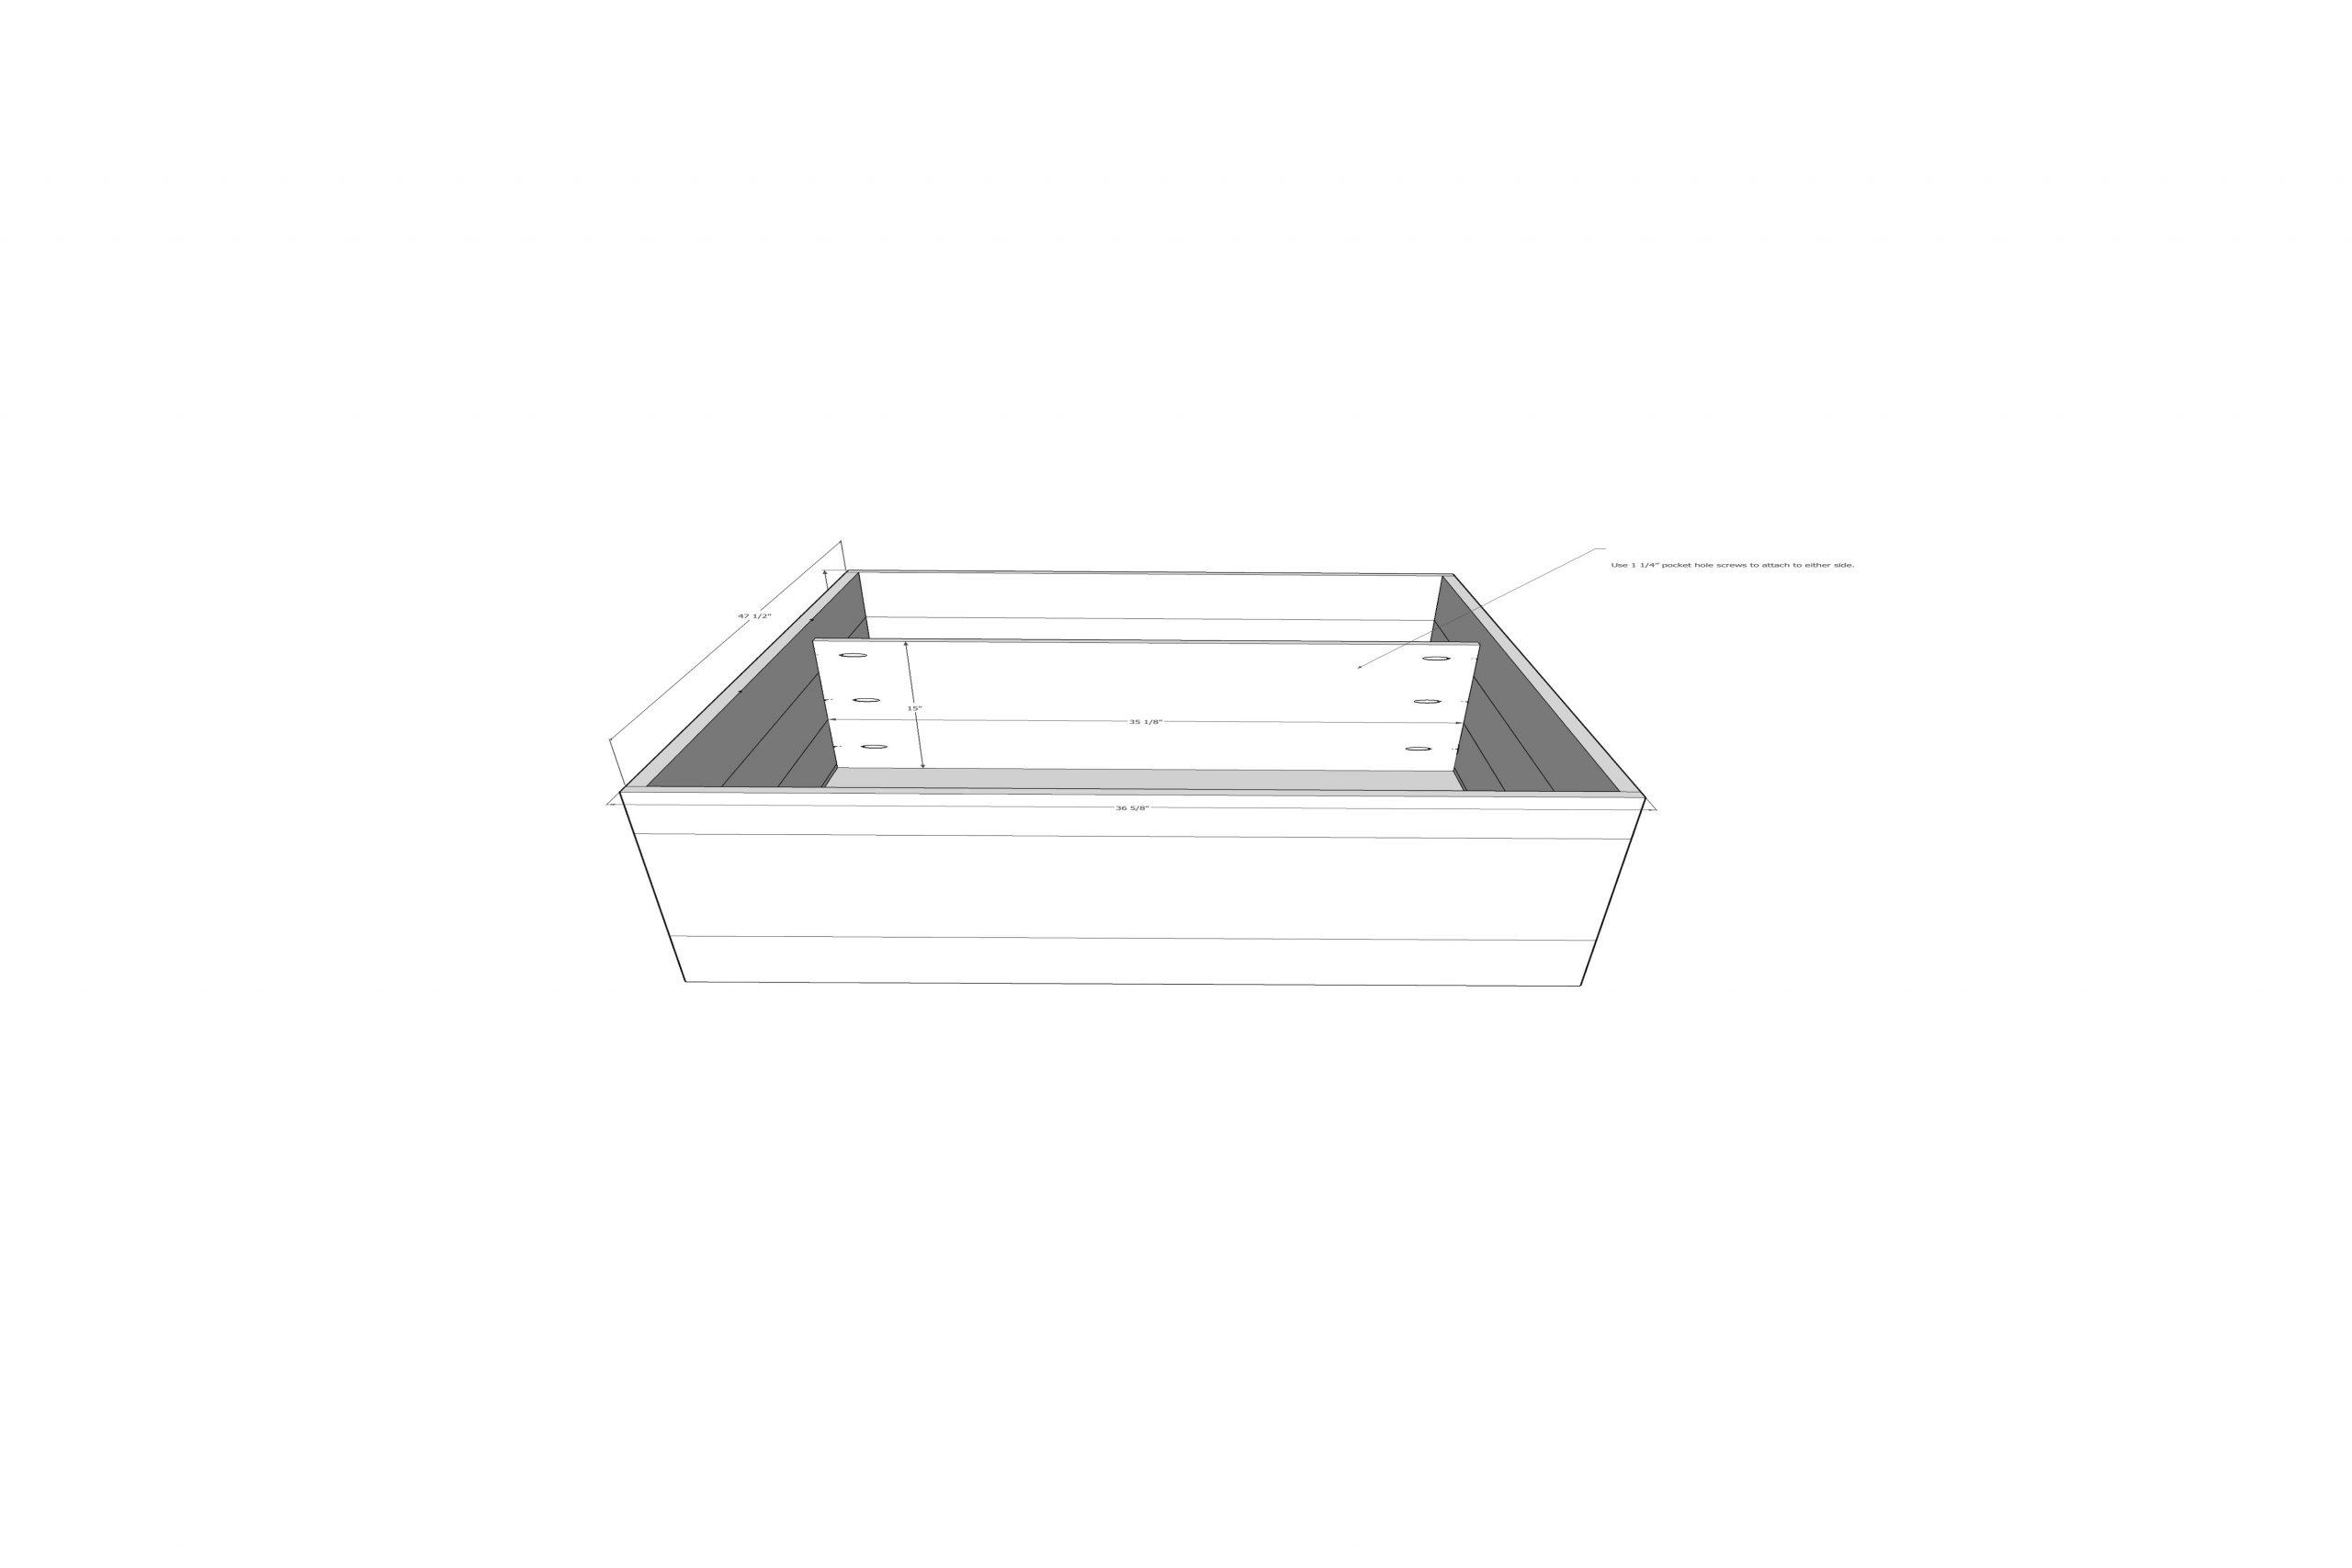
-
Attach cane webbing
Use ¼” crown staples to attach your cane webbing at least a ½” overlay from the edge
of the wood. Cut around the hole for your concealed hinges.
Soak cane for 30 minutes in warm water before attaching for optimal usage.
*Optional - Apply wood glue over staples and add a small trim piece if you wish to cover up the raw edge. -
Attach doors
Clip in your hinges and attach doors to concealed hinges separately. With the
110-degree angle of the inset hinges, getting the hinges to clip into the hinge plate was difficult when already attached to the doors. Adjust hinges as necessary, there should be a 3/32” gap
around the inset cabinet doors.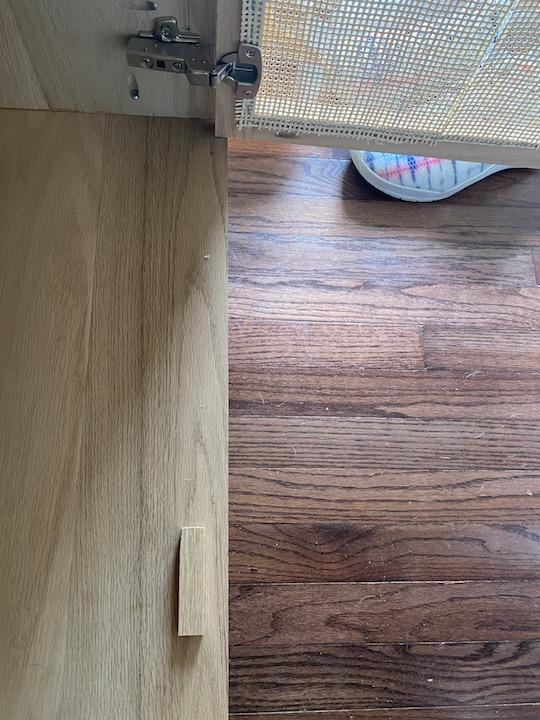
-
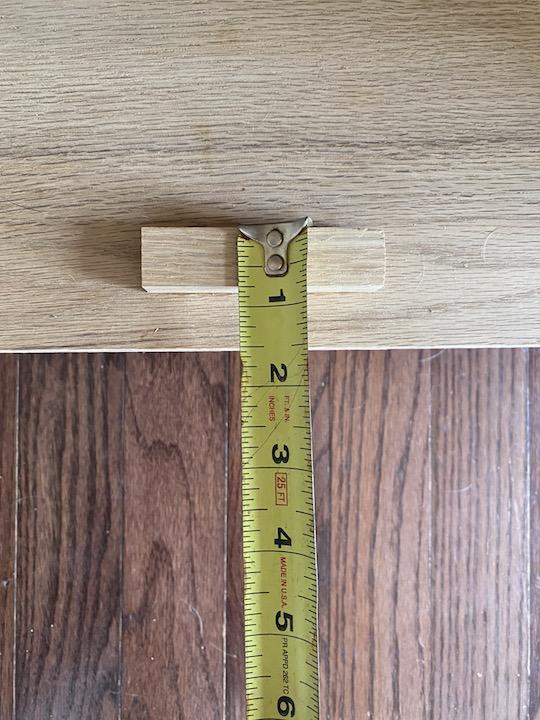
Add interior door stopper
Attach interior door stopper by using scrap wood, cut (2) 1 ½” x 3” pieces and glue 1 ½” inset from the edge. Add this to the top and bottom to stop the doors from over extending into the cabinet.
-
Add safety braces
For safety, please brace the cabinet to the wall using anti-tip hardware for use around
children.
Check out more from Kourtni here:
HouseOnLongwoodLane.com
Instagram
Facebook