

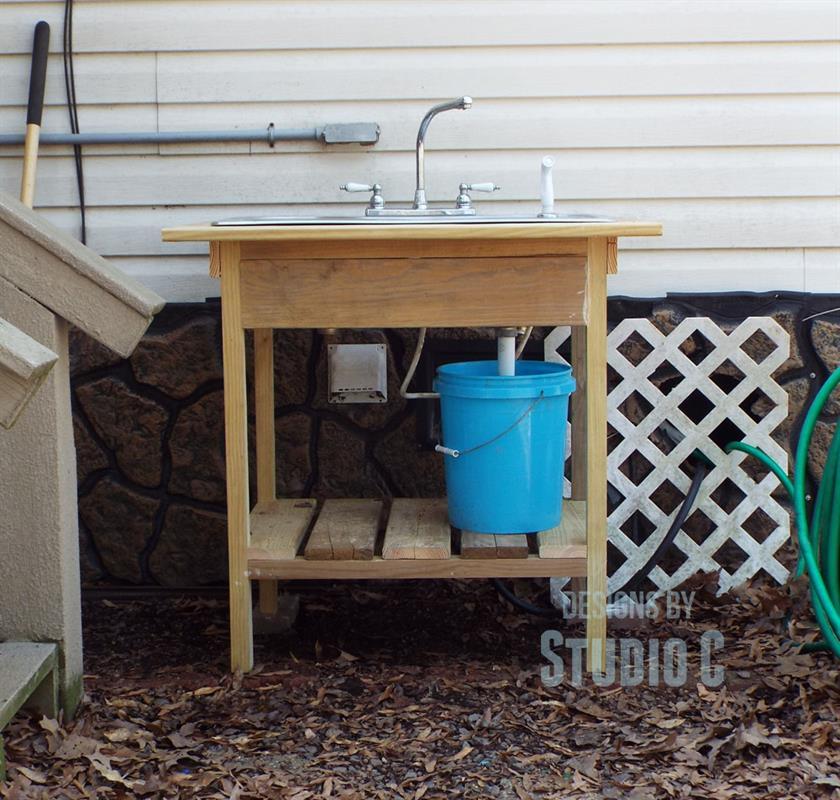


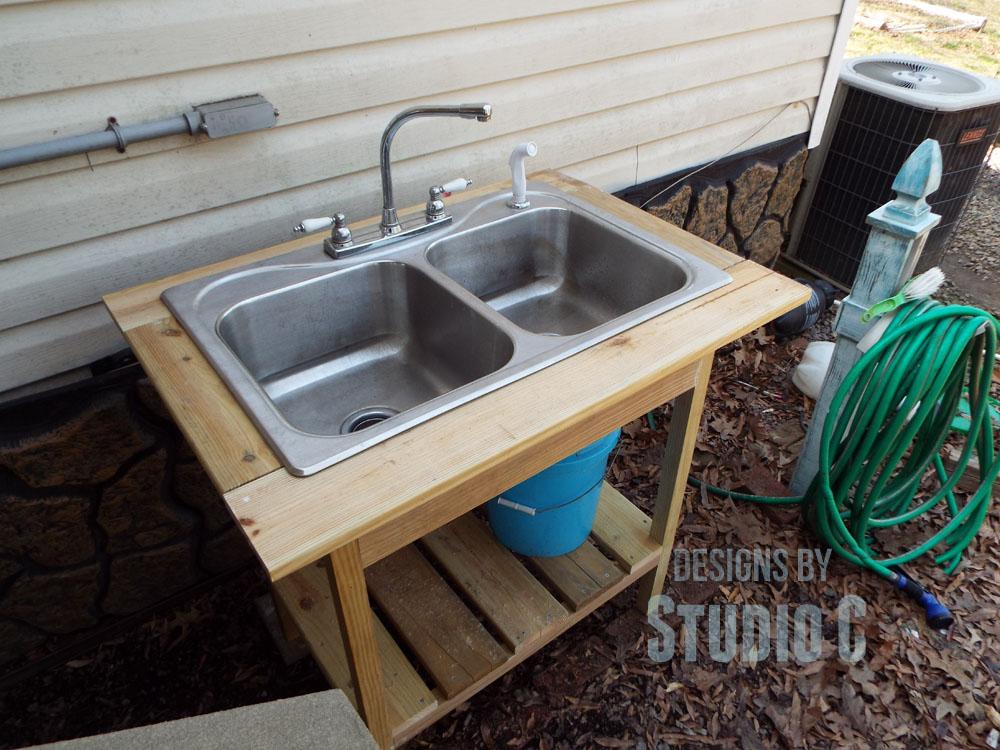
An easy to build outdoor sink that connects to a water spigot. The base is constructed out of treated lumber (or cedar), and the size is based on the size of the sink. Visit http://designsbystudioc.com/install-outdoor-sink-faucet/ for instructions and a parts list to connect the sink to the spigot!
Tools
Kreg Tools


Other Tools
-
Tape Measure

-
Tape Measure
Materials
Wood Products
- 1 Board , 2x2 , 96"
- 2 Board , 5/4 Decking Boards , 96"
- 2 Board , 1x6 , 96"
Hardware & Supplies
- 1 Box of 2-1/2" pocket hole screws
- 1 Box of 2" screws
- 1 Wood Glue
- 1 Silicone Caulk
- 1 Assorted sandpaper, if desired
Directions
-
Step One
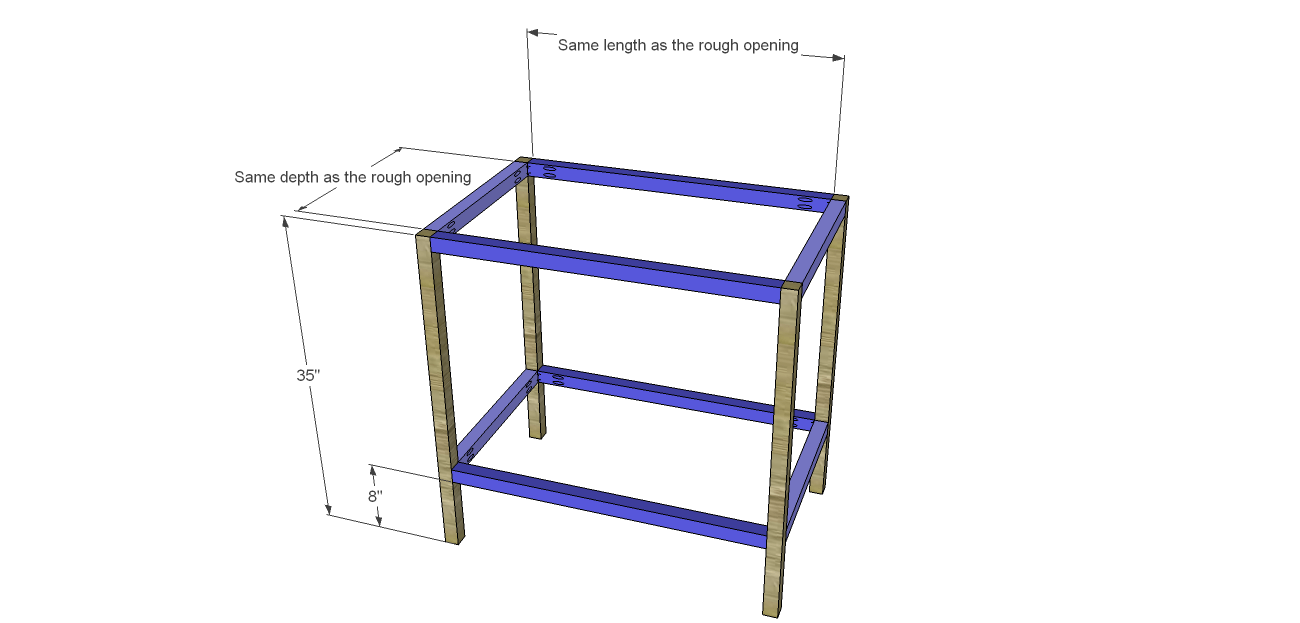
Cut the pieces for the legs and the stretchers. The legs will be cut at 35" long. The length of the stretchers will be the same length and width of the rough opening. In other words, my rough opening was 20" x 32", so the stretchers were cut at 20" and 32". With the pocket hole jig set for 1-1/2" material, drill pocket holes in each end of the stretcher pieces. Secure to the legs using glue rated for outdoor use and 2-1/2" weather resistant pocket hole screws. Check the fit of the sink and make any necessary adjustments.
-
Step Two
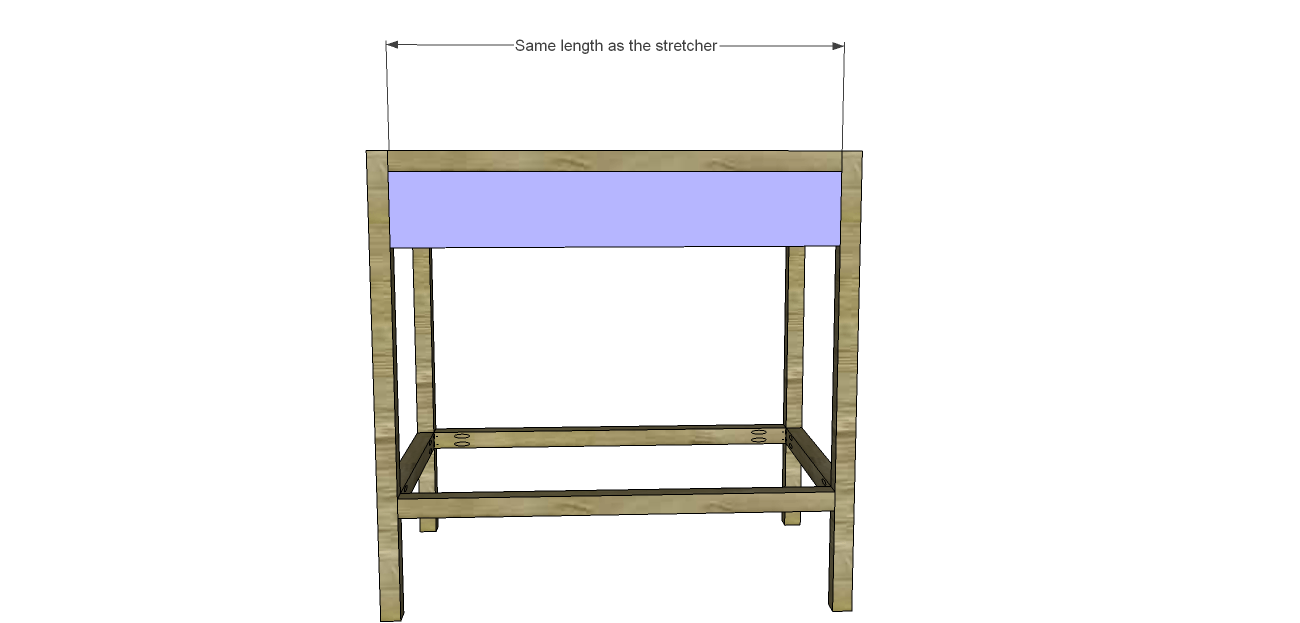
Cut a piece of the decking board at the same length as the longer stretcher. Set the pocket hole jig for 3/4" material and drill pocket holes in each end. Secure to the front legs (under the front stretcher) making it flush with the front face of the legs using glue and 1-1/2" pocket hole screws rated for outdoor use. This piece hides the basin of the sink and makes it look nice!
-
StepThree
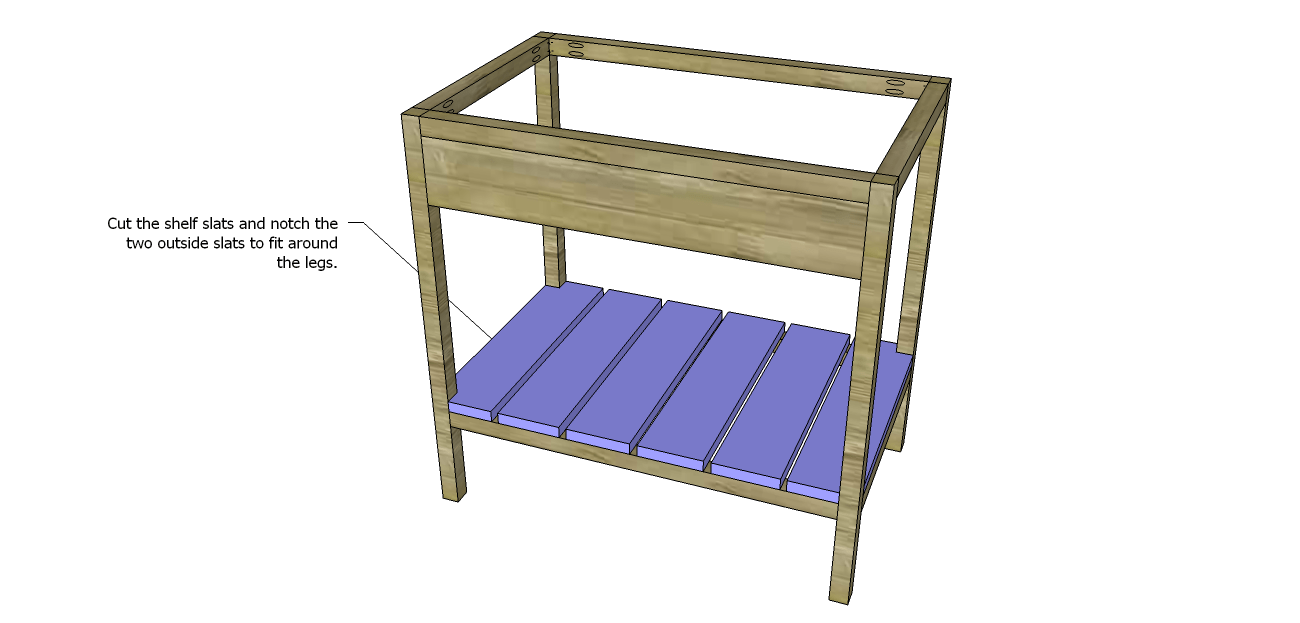
Cut the pieces for the shelf. Measure the distance from the outside of the longer lower stretcher to the outside of the opposite longer lower stretcher. The shelf slats at each end will have to be notched out with a jigsaw in order to fit around the legs. Secure the shelves in place using glue and 2" screws rated for outdoor use. The slats will be evenly spaced to allow for debris to fall through the shelf.
-
Step Four
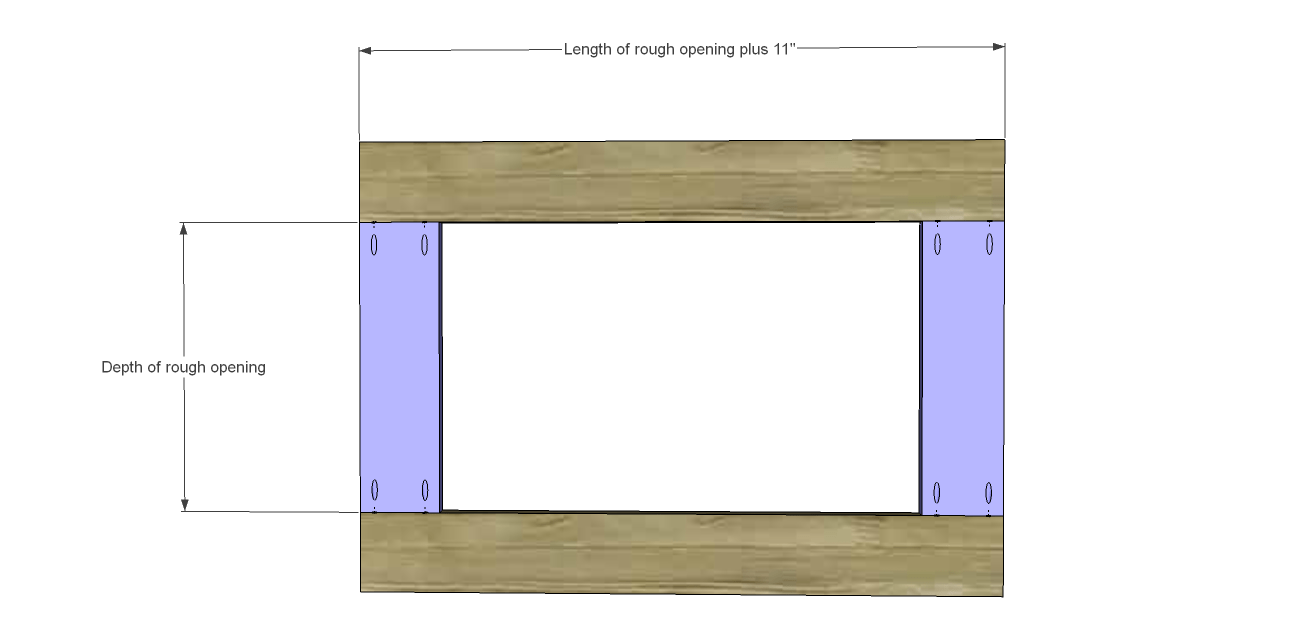
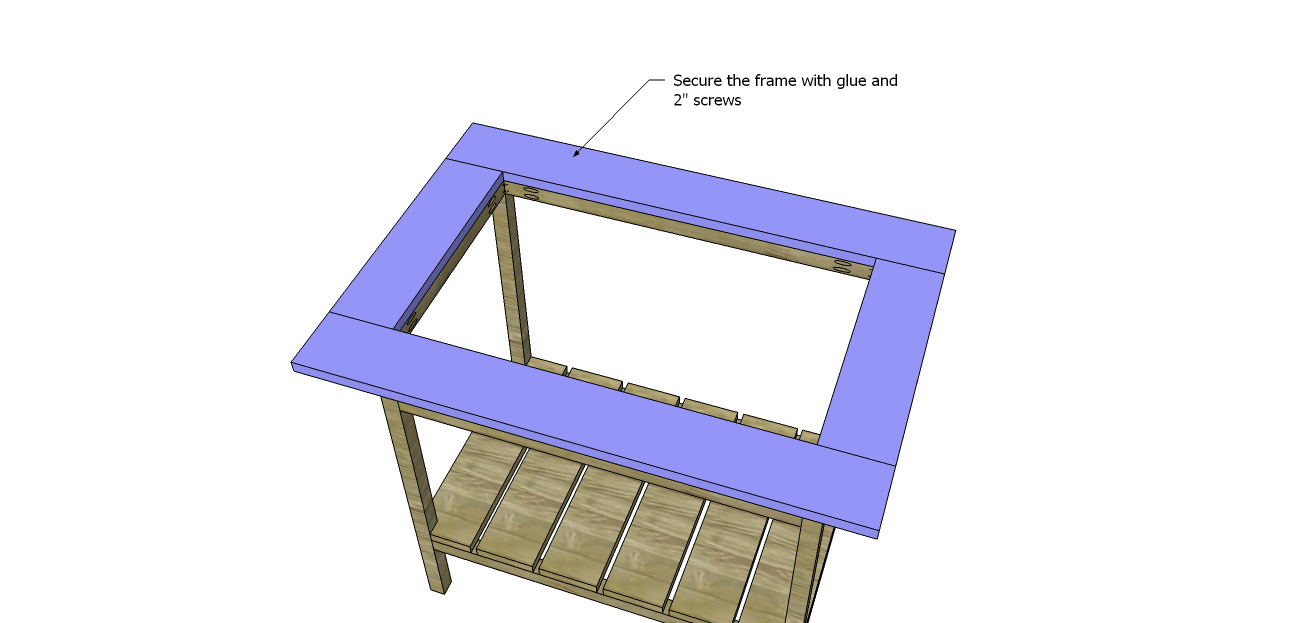
Cut the pieces for the top frame. The shorter sides of the frame will be the same measurement at the shorter stretchers while the longer frame pieces will be the measurement of the longer stretchers plus 11" (5-1/2" times two) for the width of the side frame pieces. Set the pocket hole jig for 3/4" material and drill pocket holes in each end of the shorter pieces. Assemble the frame using glue and 1-1/2" pocket hole screws rated for outdoor use. Position the top frame on the base frame and line up the openings. Secure the top frame to the base frame using glue and 2" screws rated for outdoor use.
-
Step Five
Position the top frame on the base frame and line up the openings. Secure the top frame to the base frame using glue and 2" screws rated for outdoor use.
-
Step Six
Flip the sink upside down and run a bead of the silicone around the edge of the sink (on the underside). Place the sink in the opening and let the silicone cure. Install the faucet according to the manufacturer's installation instructions.
-
Notes
There is no cut list - the length of the boards (except for the legs) will depend on the size of the rough opening for the sink. The sink basin will have to measured for the rough opening. In other words, the overall length and width of the sink will be measured, then the measurement for the distance from the outside lip to the basin (on both sides of the underside) will be subtracted. This will be the measurement for the rough opening. It also helps if the rough opening is slightly larger than the measurements of the sink. I learned this the hard way and had to do some fancy "adjustments" to make my sink fit! It is also helpful if the holes on the sink for the faucet and sprayer fall inside the rough opening.