Board Gamers Coffee Table
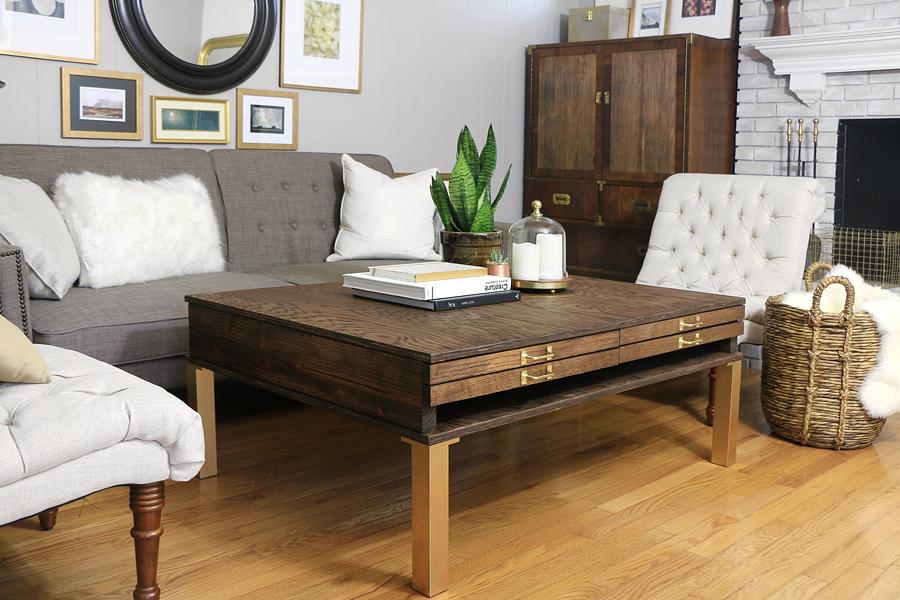
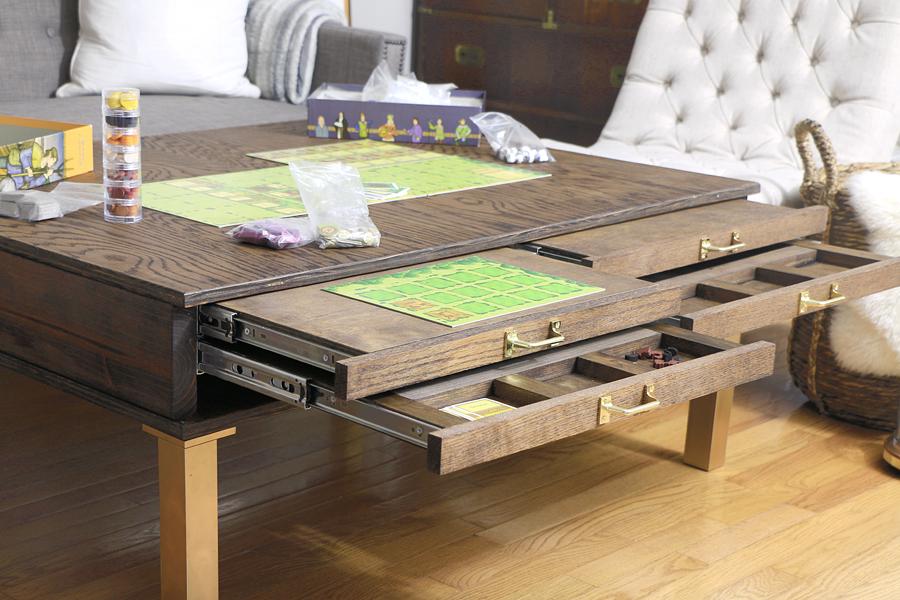
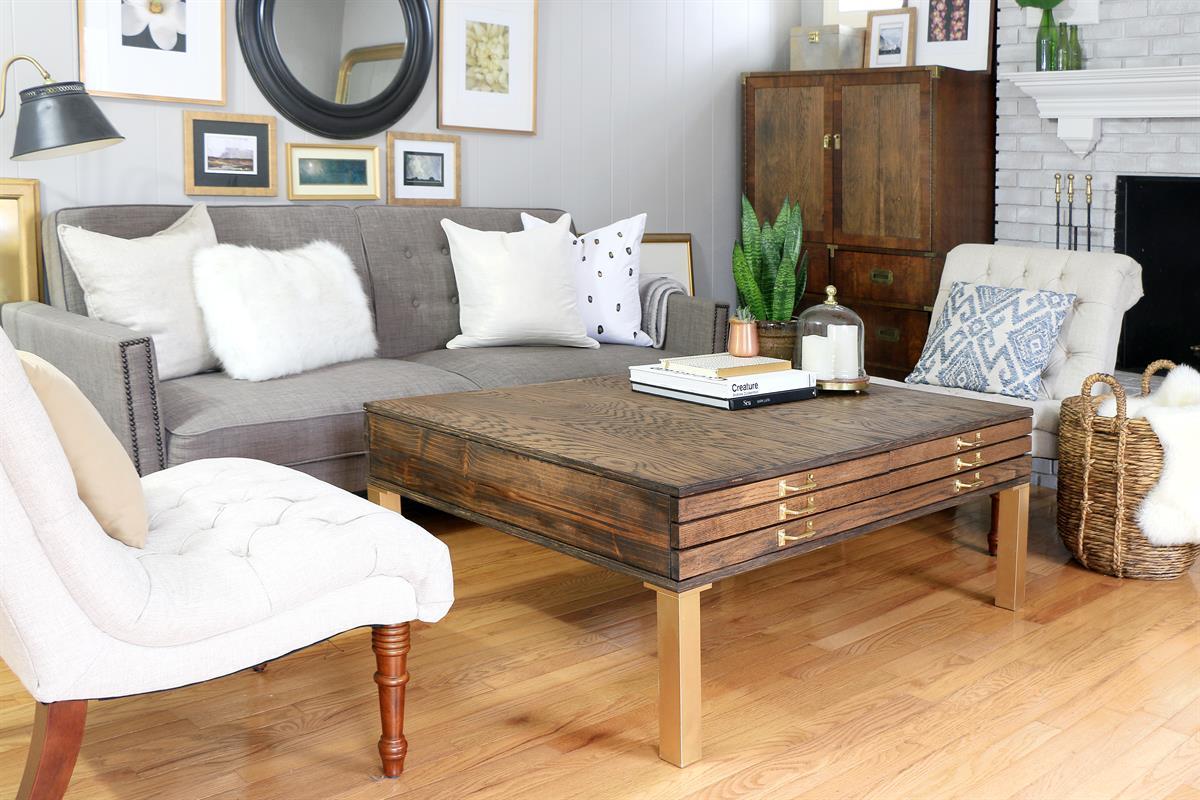
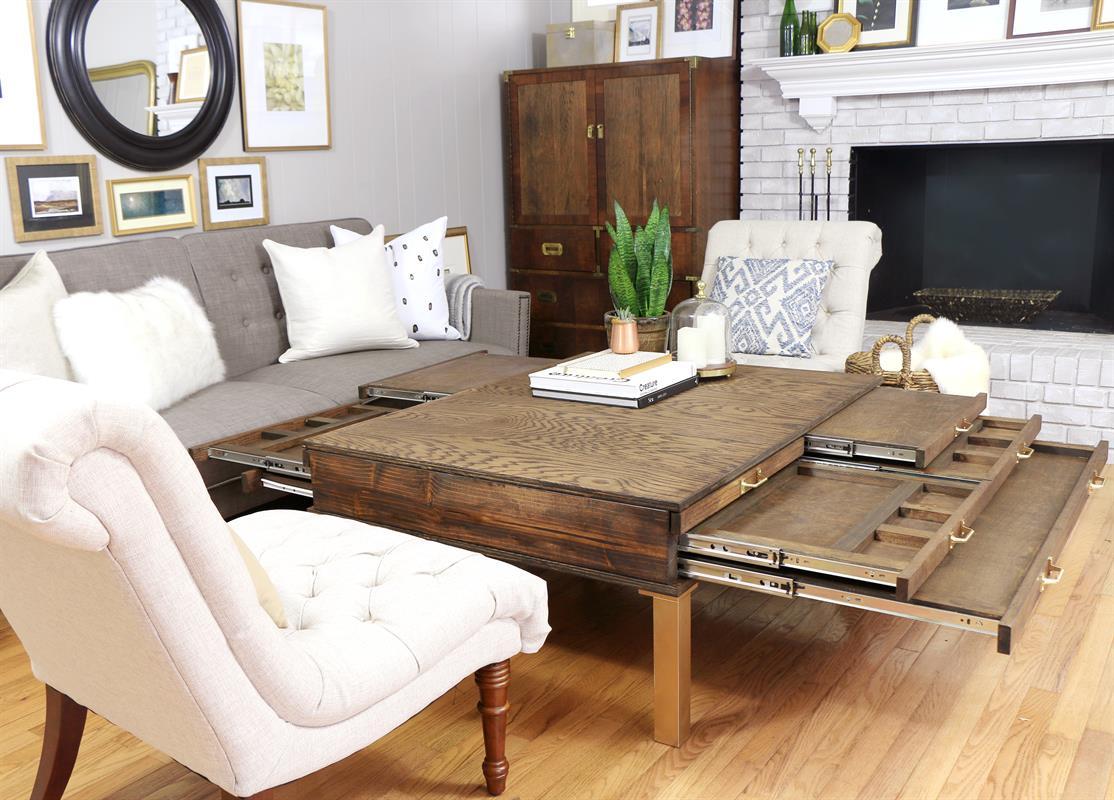
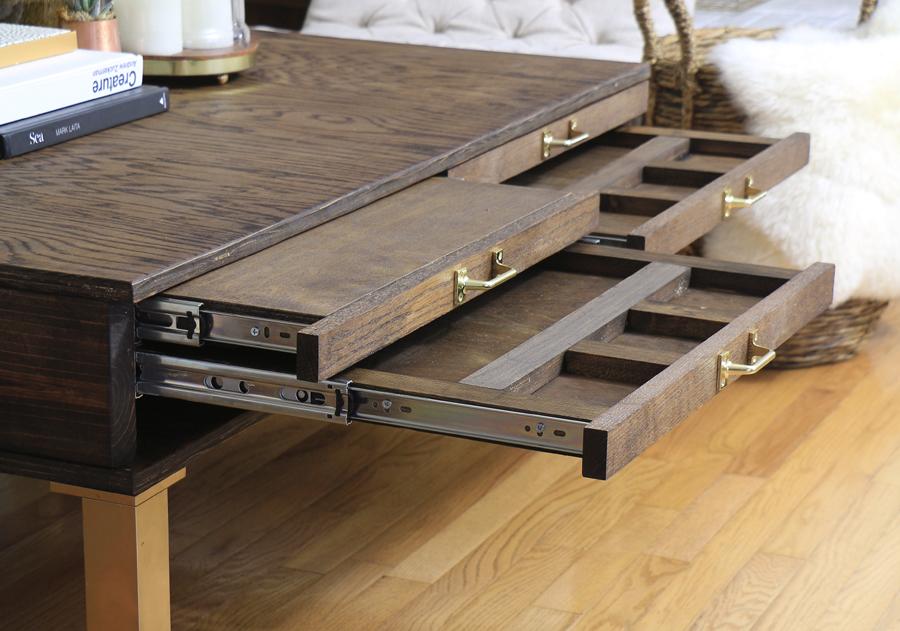
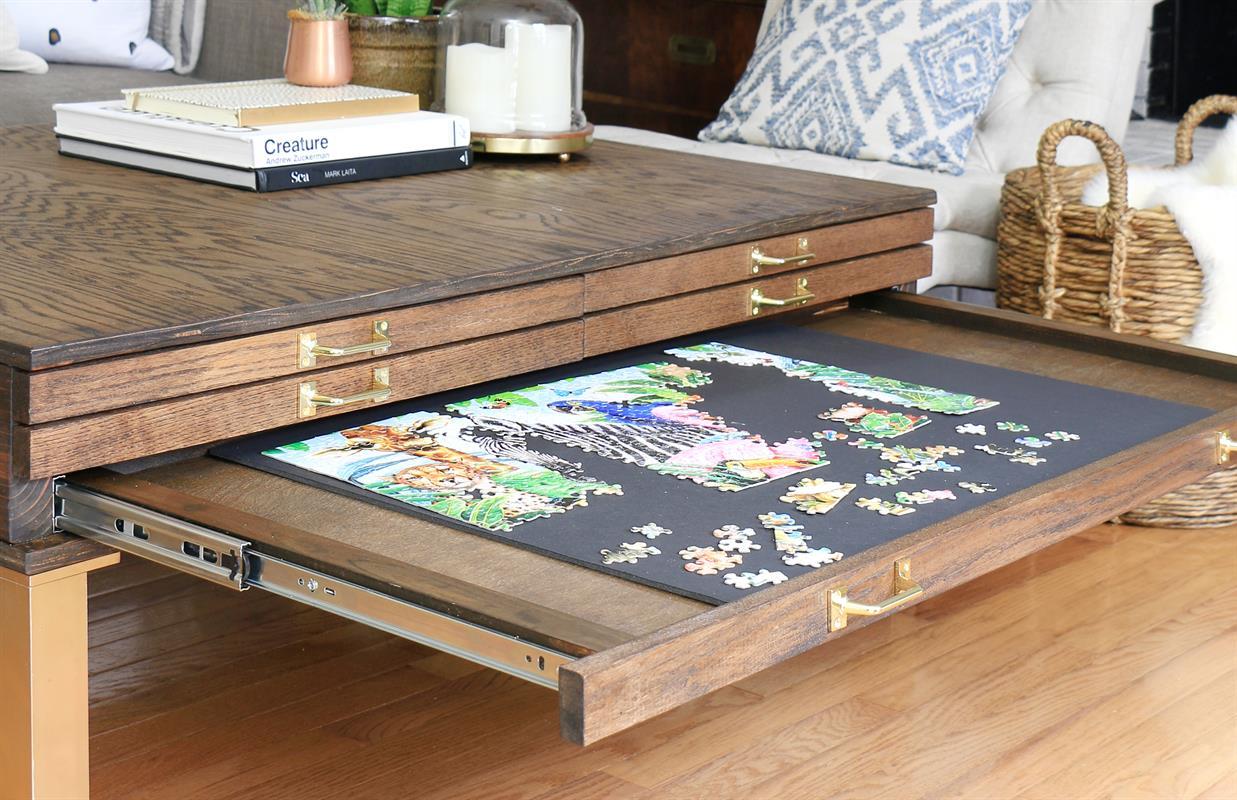
By Home Made by CarmonaEvery board gamer's household needs this dream coffee table! Stylish but also has pullouts and compartments ideal for tabletop gaming. It can also be used as TV trays for entertaining, storage, plus two more optional compartments for puzzles, etc. See it in action on the Home Made by Carmona blog.
Directions
-
Drill Pocket Holes In Table Sides
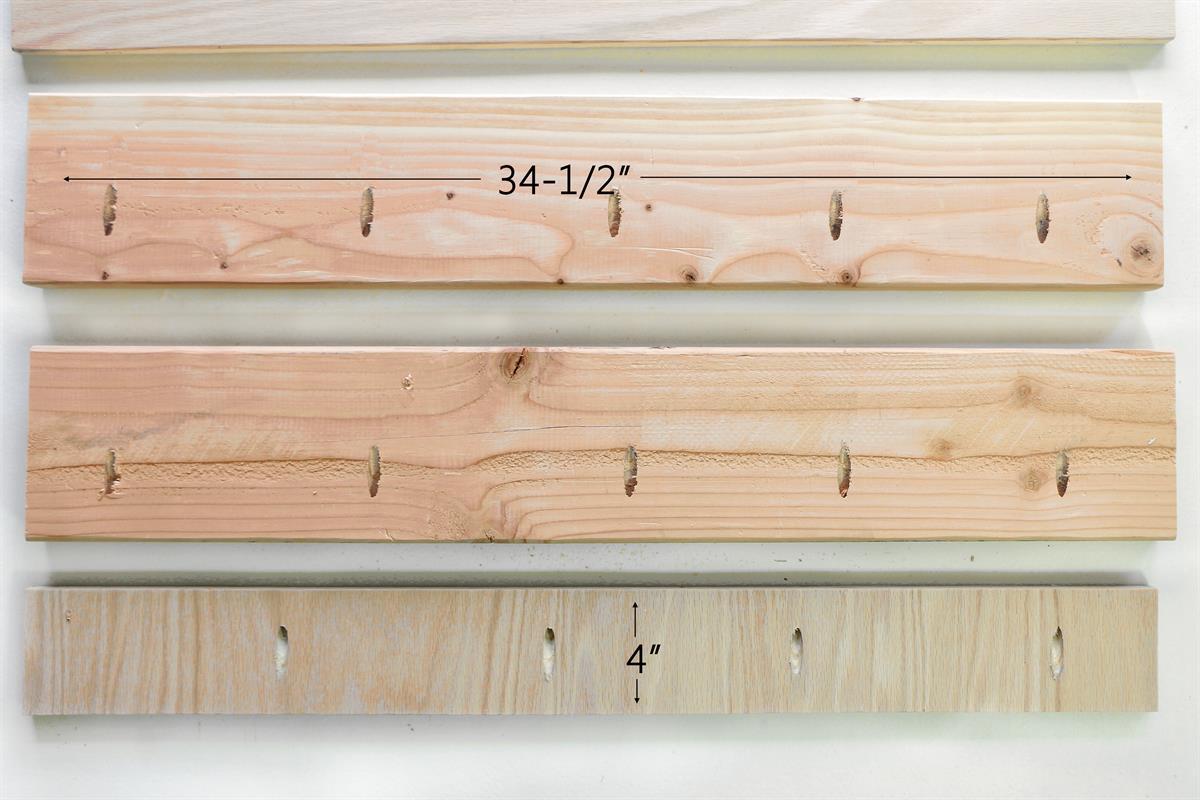
Start by drilling pocket holes in the two 2"x6"x34.5" coffee table side boards. Drill a minimum of 5 evenly spaced holes. Also drill pocket holes in the 3/4"x4"x34.5" middle divider...drill pocket holes on both sides of this middle divider, and stagger the holes.
-
Attach Sides & Middle Support
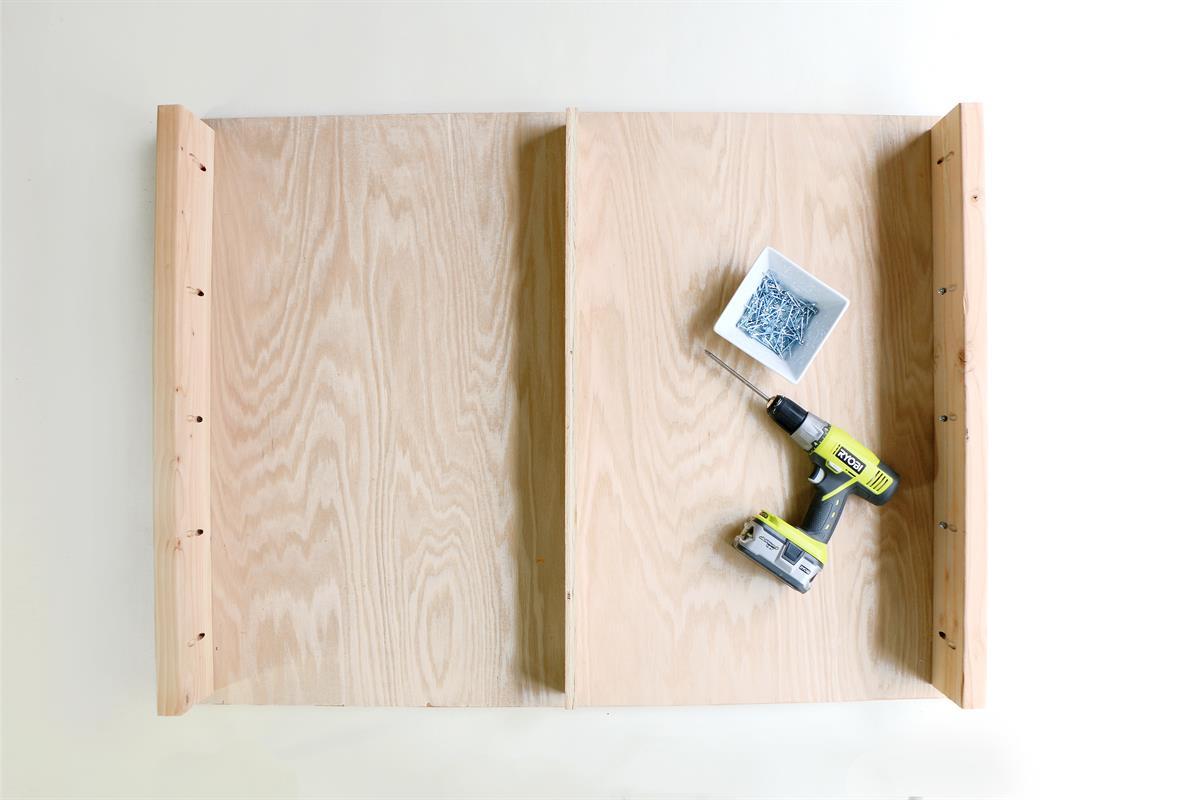
Attach the two 34.5" side boards to the coffee table top. The sideboards should be centered to allow a 3/4" gap on the front and back. Also attach the 4" middle support in the center with the same 3/4" overhang.
-
Attach the Base
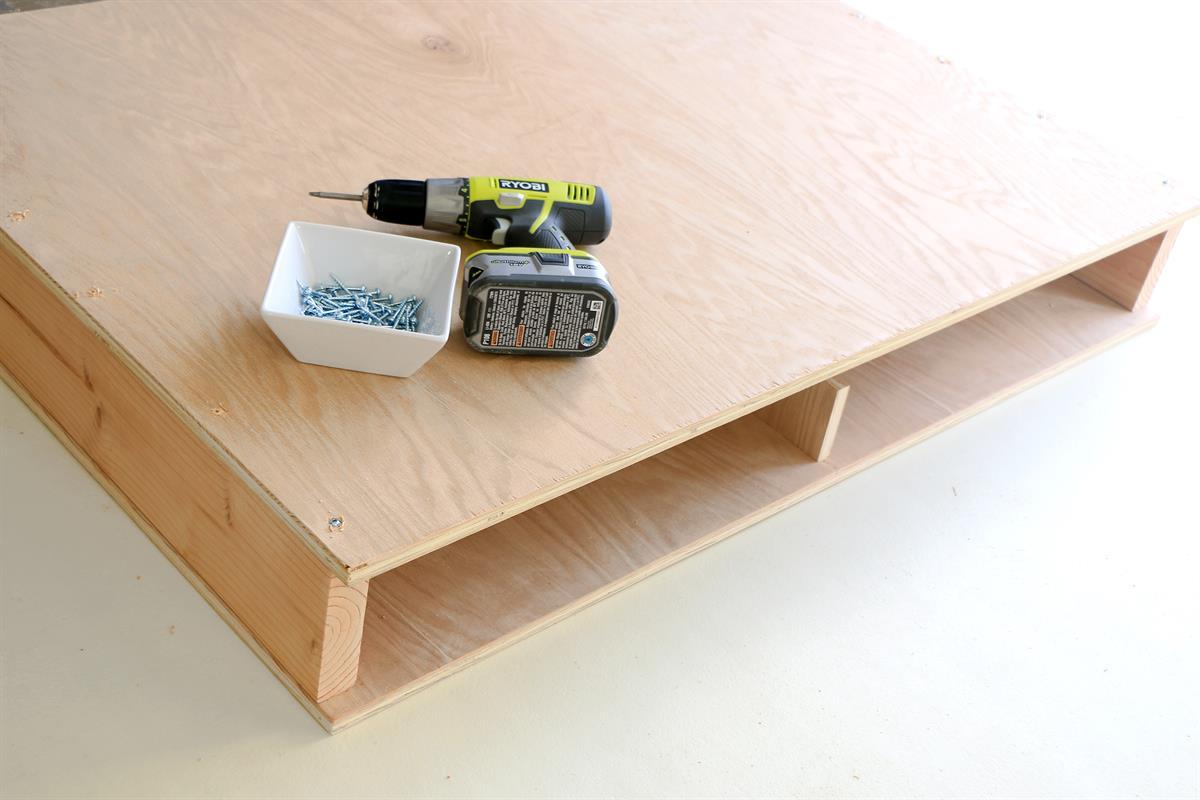
Now place the second 3/4"x3'x4' oak sheet centered to the piece you just built, and secure it by screwing straight through the 3'x4' base into the 2"x6"x34.5" sides. Sand, stain, then add legs to this piece. This is your coffee table...now you need to work on the pullouts.
-
Create Pullout Drawers
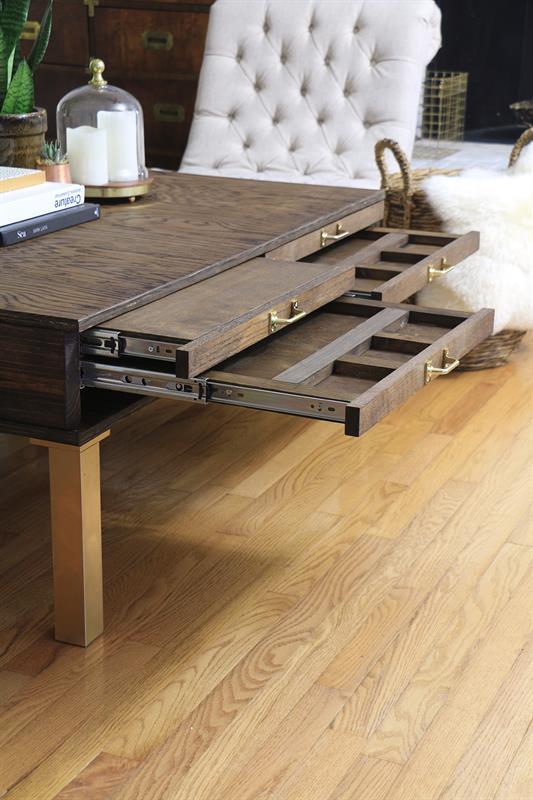
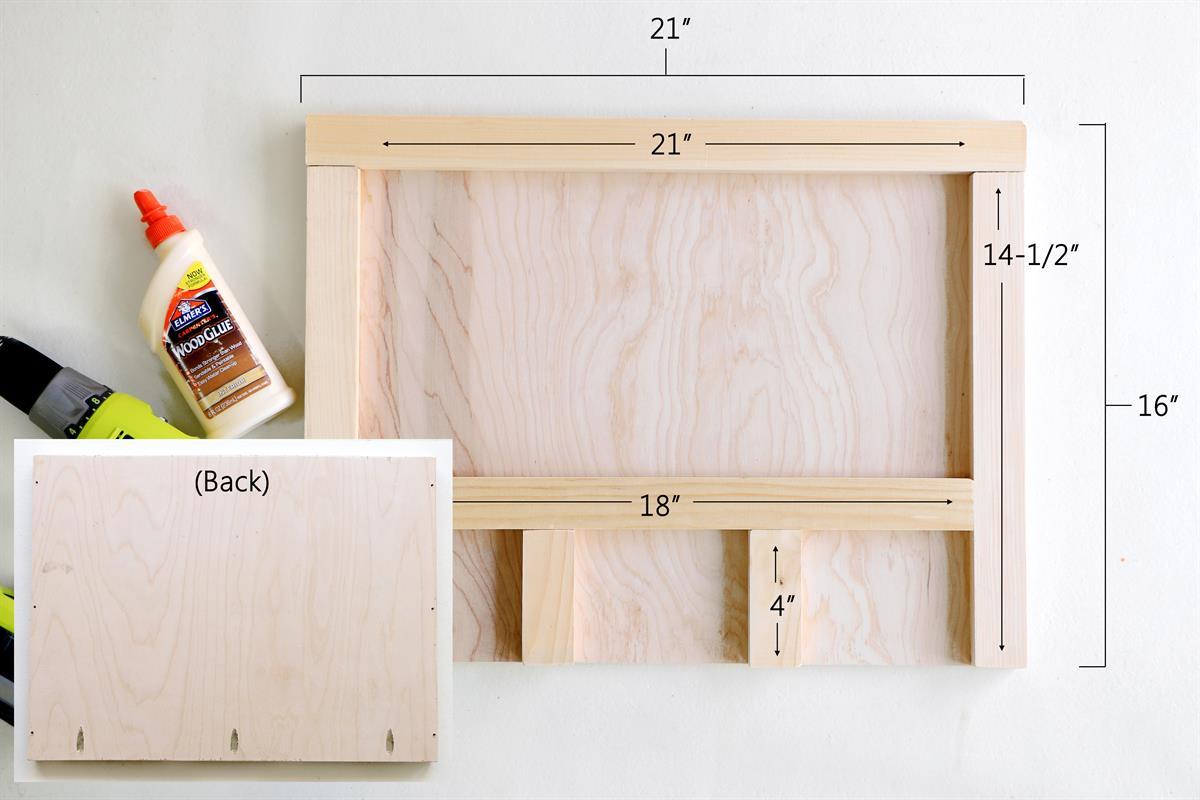
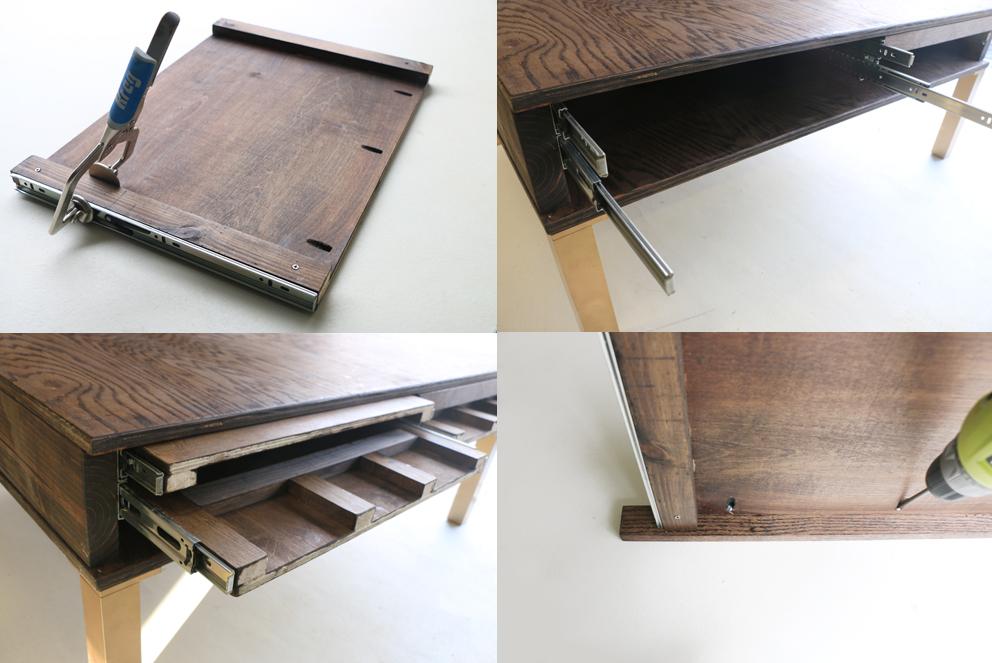
Create 4 pullout drawers by gluing 1"x2" pieces atop your 16"x21" sheet. You can create any compartment arrangement you desire, and I included the dimensions for the compartment style I used here in this image (not included in the cut list). You will also need to drill three pocket holes in the back of this compartment drawer, the holes should be in the end that will face the front of the coffee table (this is how you will attach the drawer's front later).
-
Top Pullout
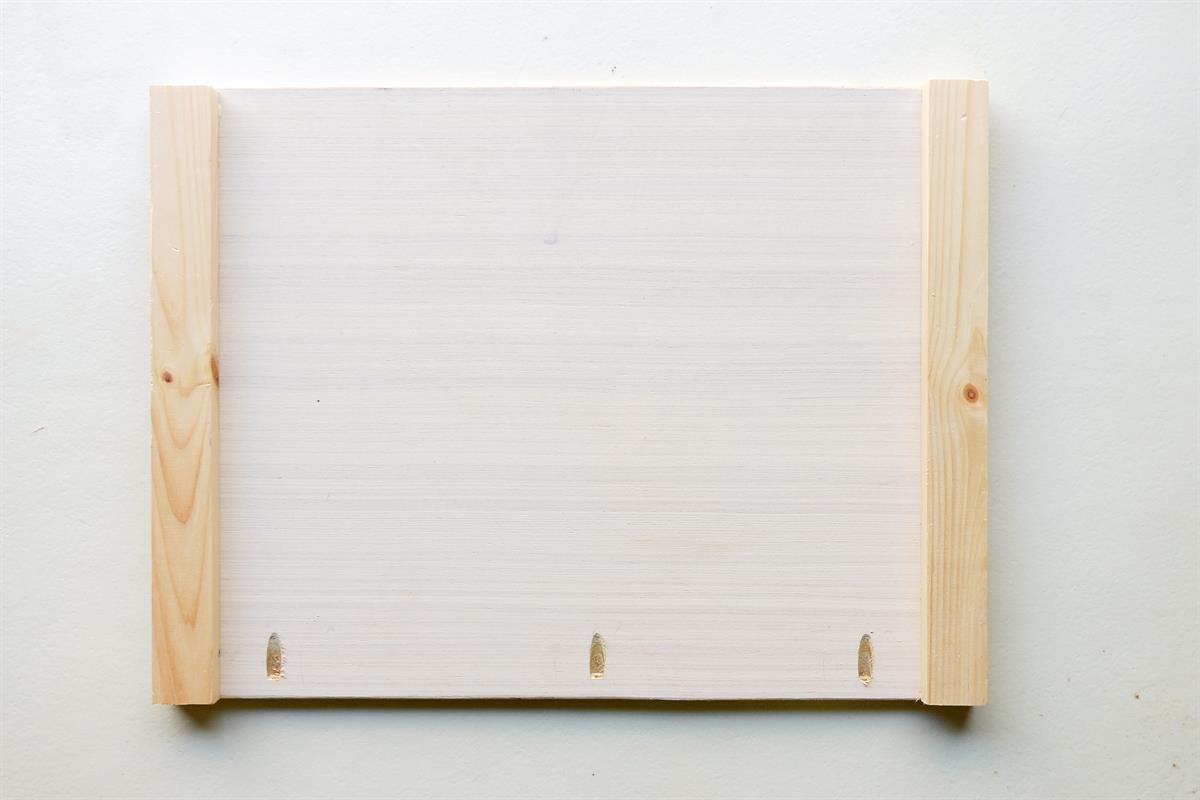
Create 4 top pullouts that are not drawers. These are flush pullouts are perfect for games that have individual game boards. Drill three pocket holes in the back of your 16"x21" top pullout. Add two 1"x2"x16" strips along either side of your pullout (glue or screw down). The pocket holes will face down and toward the front of the coffee table when they are put in.
-
Stain
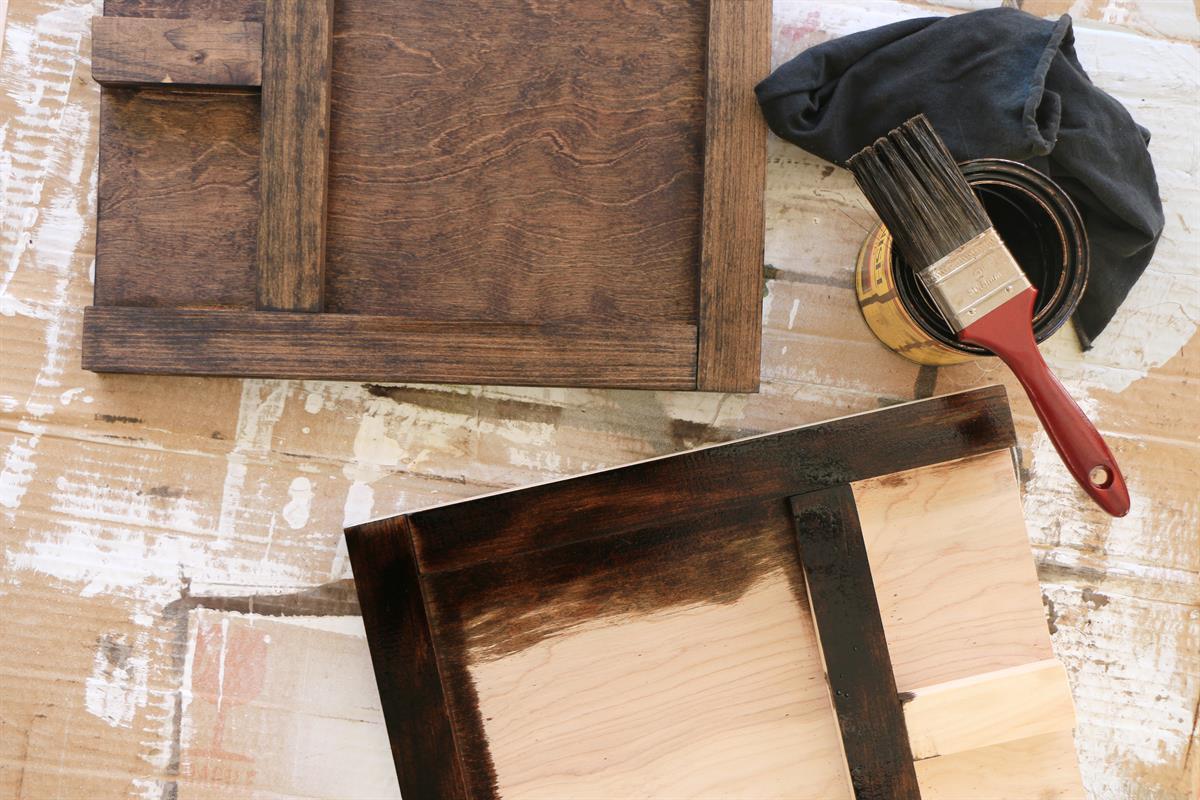
Stain your coffee table base (if you haven't already), and the drawers and top pullouts you just created.
-
Attach Drawers & Pullouts
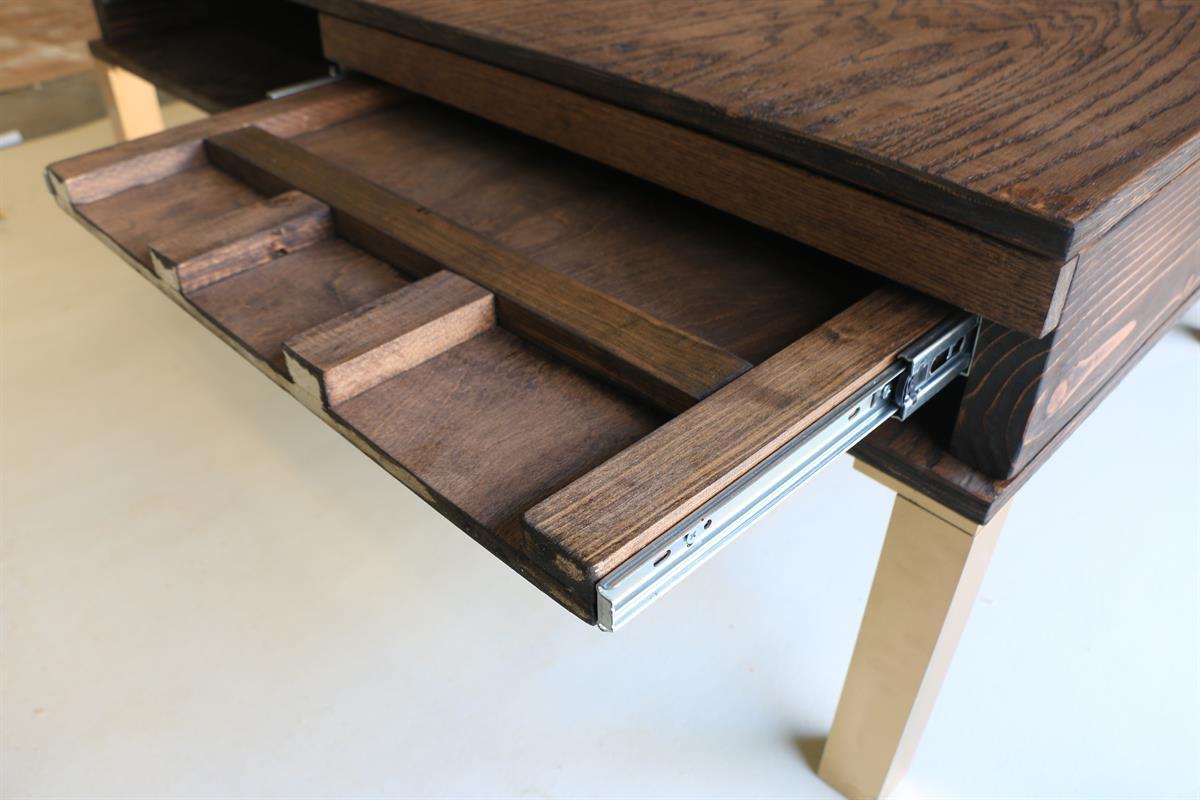
Once the stain has dried completely, add your drawer slides (they will be placed one directly on top of the other). Next insert your pullouts and drawers. Place your 1"x2"x24" front drawer panels over top of the drawers/pullouts and attach with screws via the pocket holes found on the underside. Remember that both the front and back of your coffee table will have pullouts and drawers for a total of 8!
-
Add Hardware
Add pulls to your drawer fronts, and you are done! The open space beneath can be used as open storage, a spot to stash games, or you can even add one extra large pullout for puzzles!
-
(Drawer Attachment Tips)
To help get your measurements just right, here are some tips for each pullout/drawer: The top pullouts: slider should be flush with the bottom strips. When attaching the drawer front, it should be flush with the top of the pullout, with a 2" overhang on the side (where it overhangs the 2x6 coffee table side). The drawer compartments below: Slider should be positioned 1/8" from the bottom. When attaching the drawer front it should be 1/4" from the bottom, with a 2" overhang on the outside edge.
Optional bottom pullouts: Sliders should be attached touching the bottom of the coffee table, use the same tips for the middle drawer pullouts. -
(Optional) Two Extra Drawers
You can leave the bottom open for that open storage look, or you can add full length drawers to the back and front. If you choose to add extra drawer pullouts, you will need a 20" slider, and a 12" slider. You'll build a 20"x44" drawer pullout, and a 12"x44" drawer pullout for the opposite end. Follow the same instructions for making the drawers, just in larger size.


