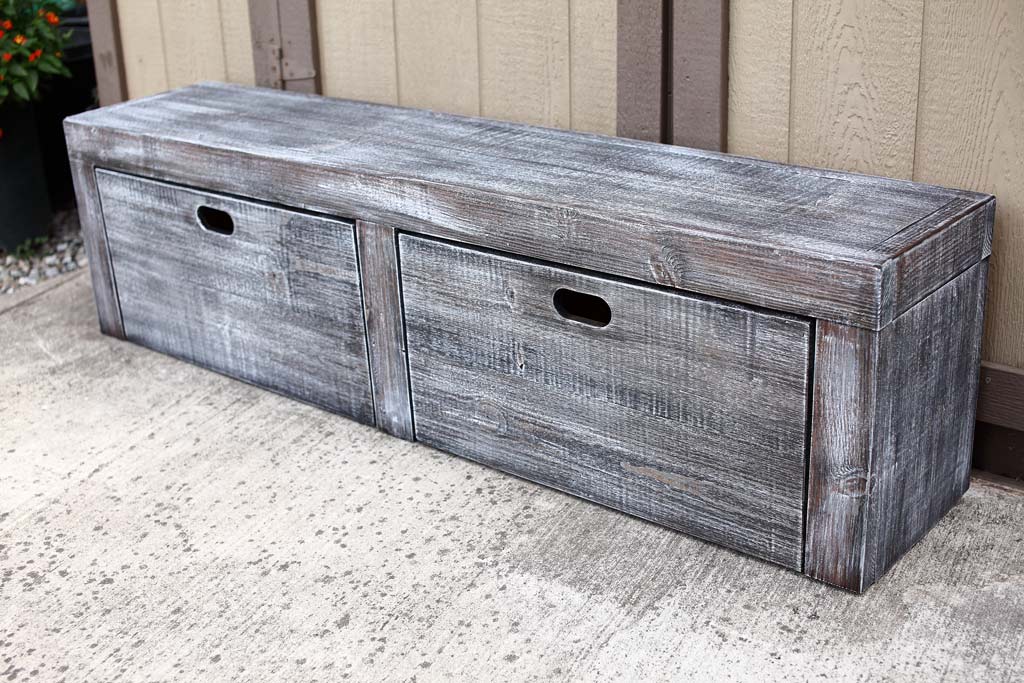


My wife and I wanted to change few things around our breakfast area, so I built a simple Bench with Storage for a start. It’s always nice to have extra storage, and it makes the area more clean and organized. Also placing a small throw blanket would make it cozier.
Tools
Kreg Tools


Other Tools
-
Miter Saw

-
Table Saw
-
Tape Measure
-
Clamps
-
Tape Measure
Materials
Wood Products
- 1 Plywood , 4x4 , Half Sheet
- 4 Board , 2x4 , 96"
- 1 Board , 1x12 , 96"
- 2 Board , 1x8 , 72"
Hardware & Supplies
- 50 1 1/4" Pockethole screws
- 50 2 1/2" Pockethole screws
- 50 1 5/8 Wood screws
- 1 Wood glue
- 50 1 1/4'' Brad nails
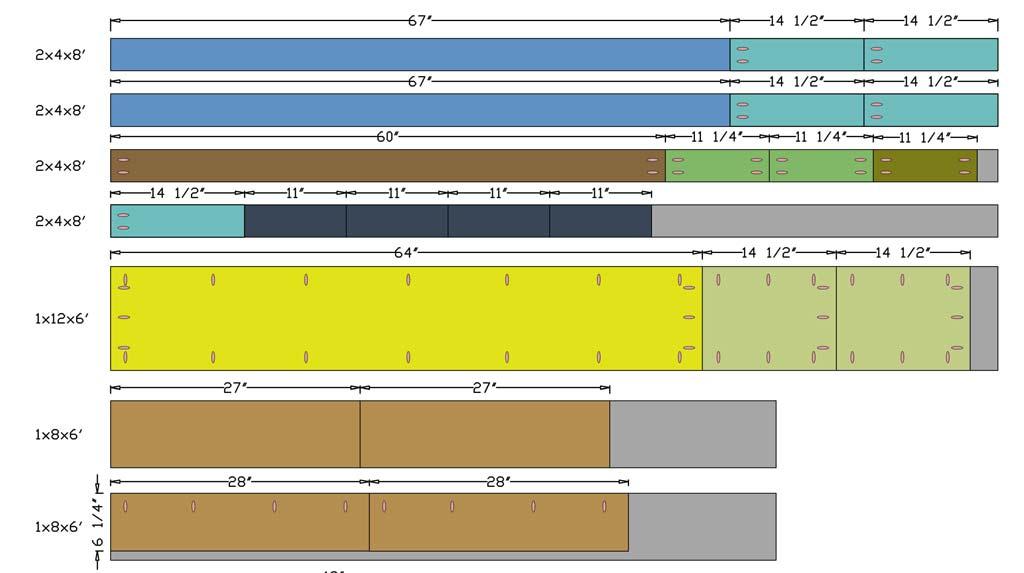
Cut List & Parts
- 4 Boards , 2x4x8'
Directions
-
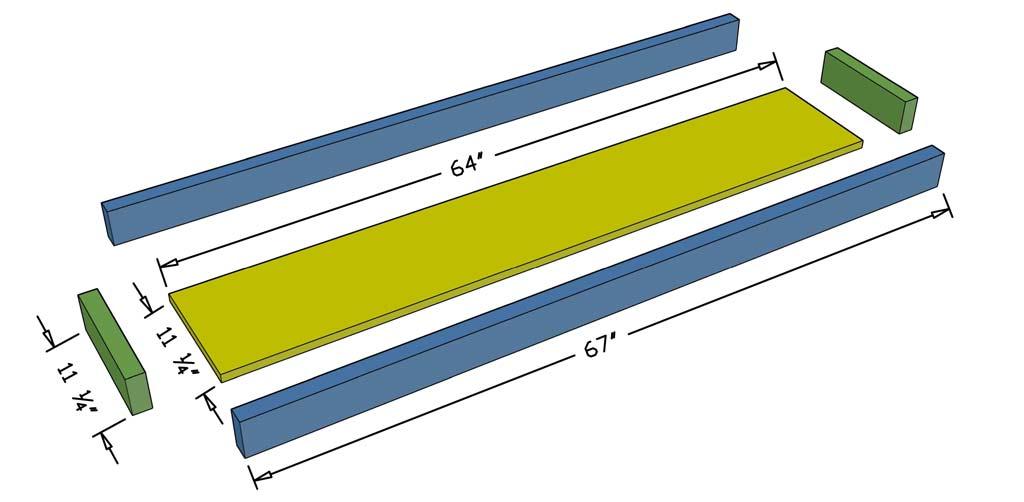
Step-1 Cut Boards for Top of the Be
First cut two pieces of 2x4 to 67” in length and two pieces to 11 1/4". Then using a Table Saw, rip off ¼” on both sides of the 2x4s pieces to eliminate round edges. Since 2x4s come with rounded edges and 1x12s come with straight edges we need to cut off rounded edges on the 2x4s for the boards to match perfectly. See picture of 2x4s with cut rounded edges. Than cut 1x12 to 64” long. Sand the boards before attaching them together. It makes things easier later on.
-
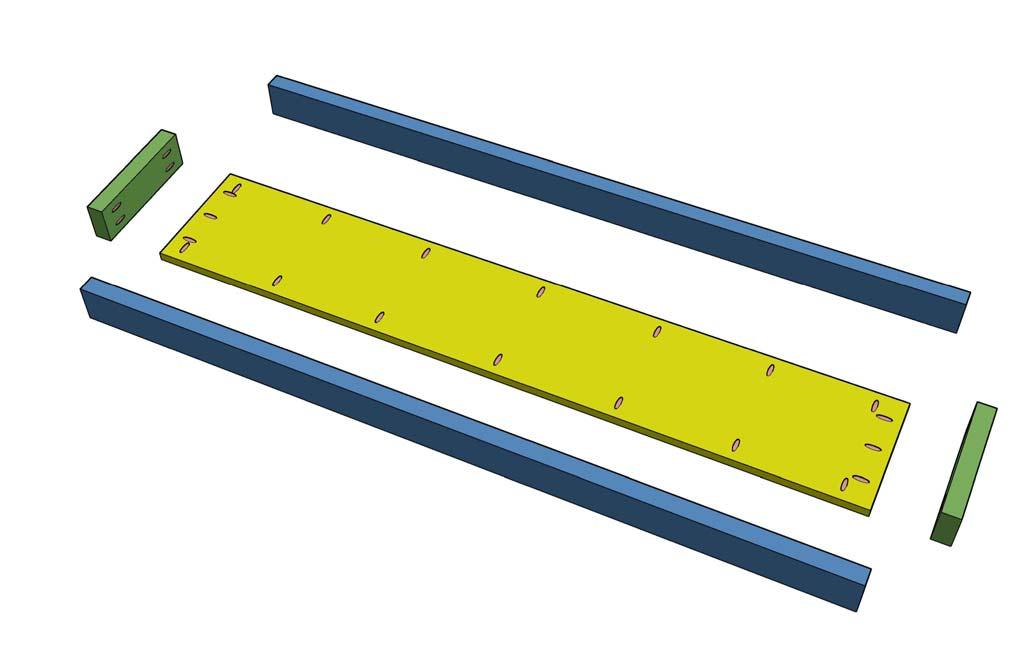
Step-2 Drill Pocket Holes
Using a Kreg Jig tool, drill pocket holes as shown on the picture. Make sure to set the Kreg Jig correctly to drill pocket holes for 1 1/4" screws on 1x12 board and 2 1/2" Pocket Hole Screws on 2x4 boards.
pocket holes on top of bench with storage
-
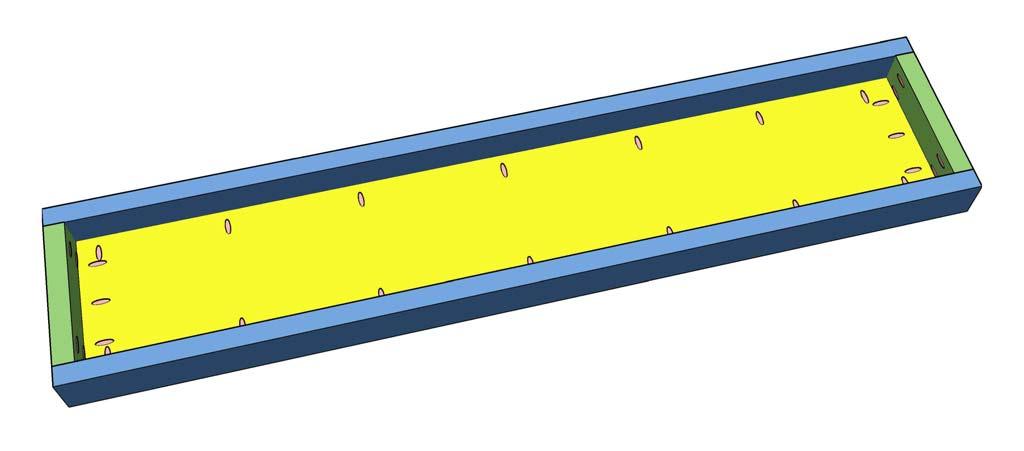
Step-3 Assemble Top of the Bench
Apply Wood Glue to all the seams and Clamp the boards together before using screws. This will prevent the board from shifting and creating unwanted misalignment while screwing in the boards.
top of bench with storage attached
-
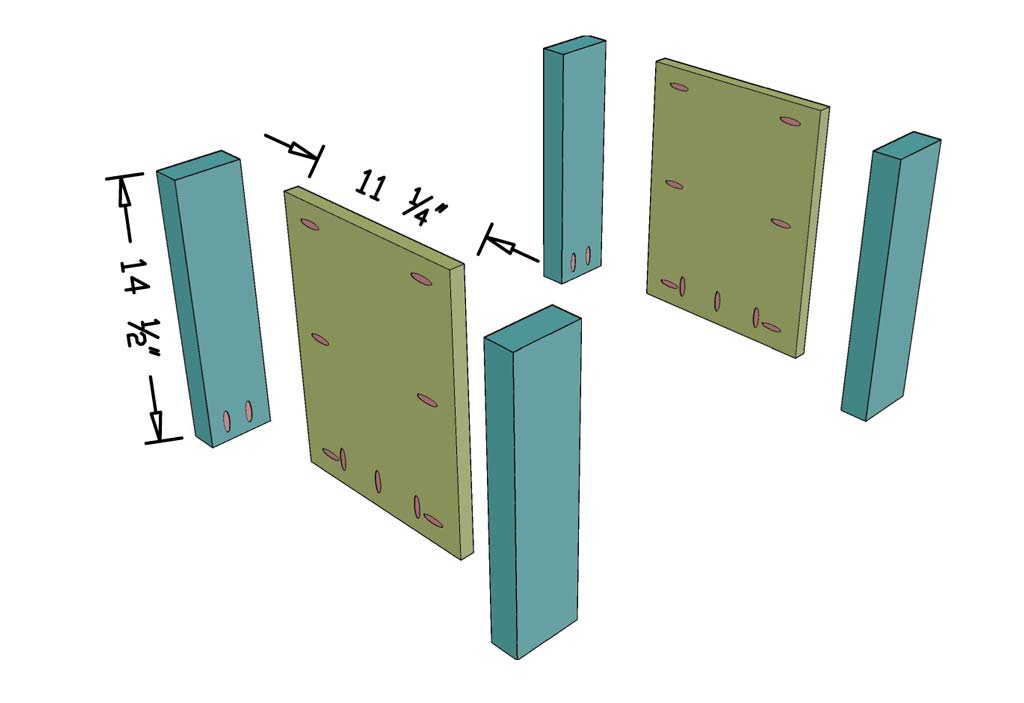
Step-4 Cut Leg Pieces
Next cut four pieces of 2x4 to 14 1/2" in length and two pieces of 1x12 to 14 1/2". Then drill pocket holes as shown on the picture.
-
Step-5 Assemble and Attach Legs to
Next cut four pieces of 2x4 to 14 1/2" in length and two pieces of 1x12 to 14 1/2". Then drill pocket holes as shown on the picture.
-
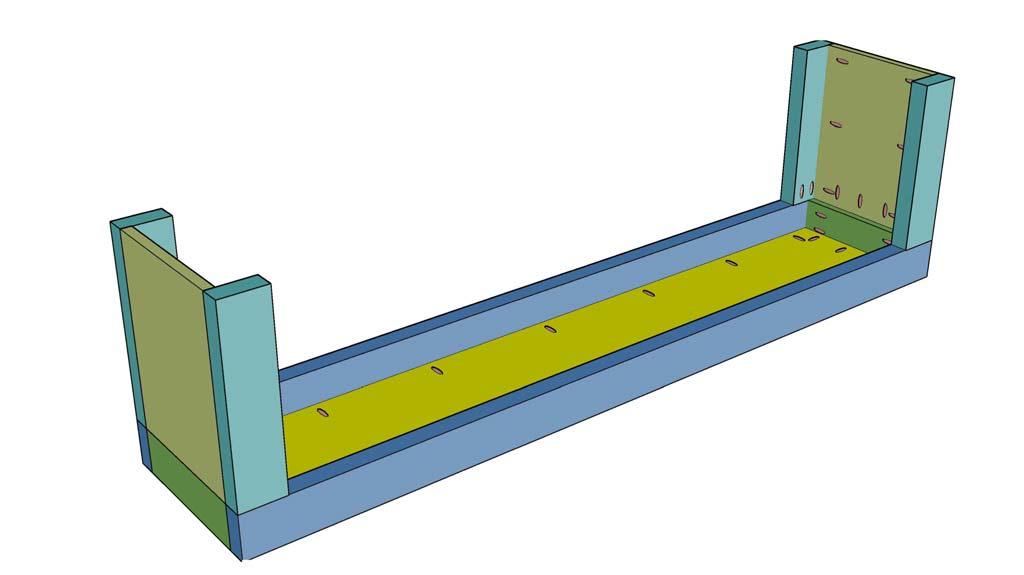
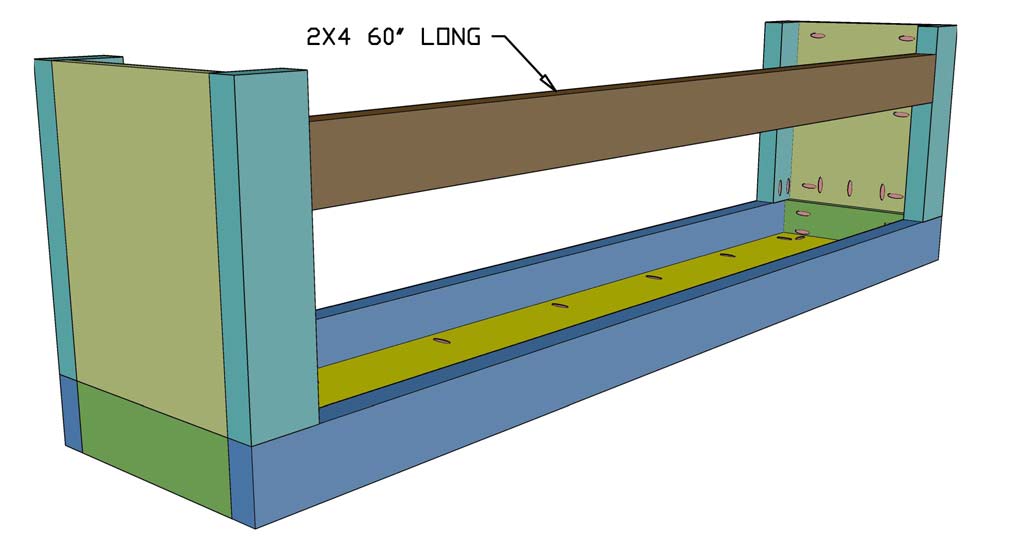
Step-6 Attach Back Support
Cut one 2x4 piece to 60” in length and attach it to the back side of the bench 2” from the ground.
-
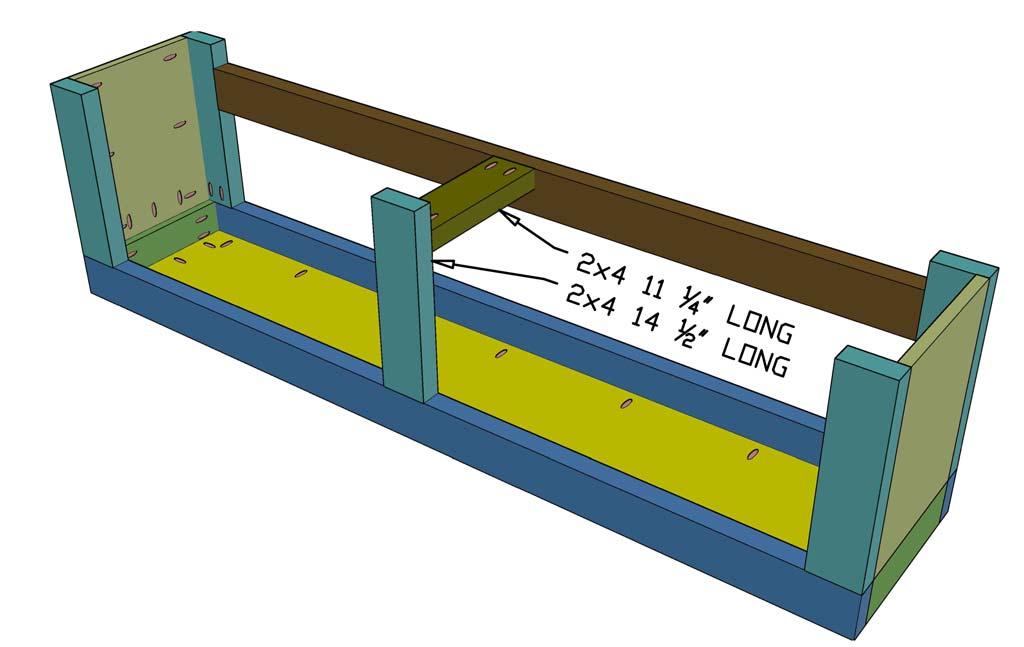
Step-7 Attach Middle Support
Next cut 2x4s for middle supports as shown on a picture. Place a mark exactly in the middle of the bench and then assemble using screws and Wood Glue. You're done with the bench, next step is to work on the boxes.
-
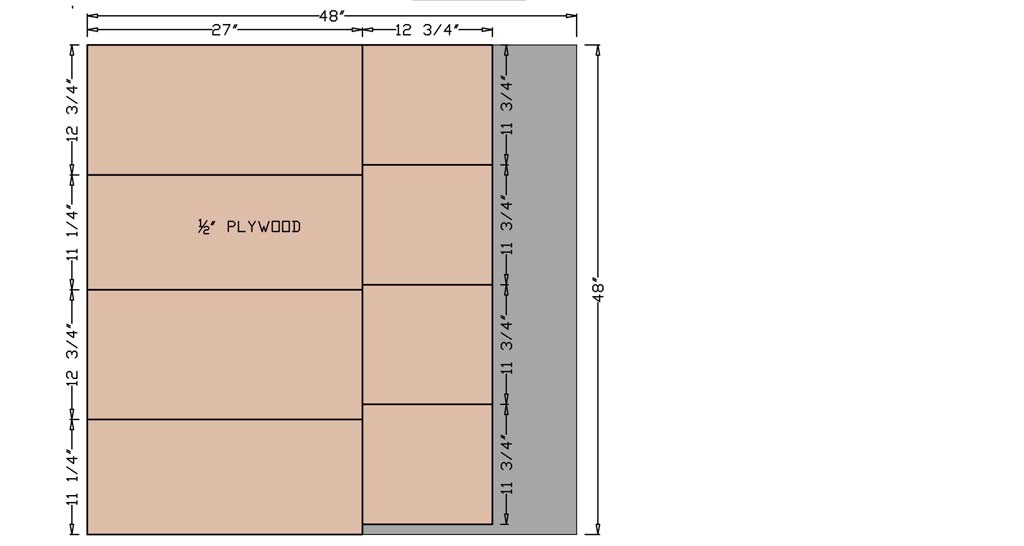
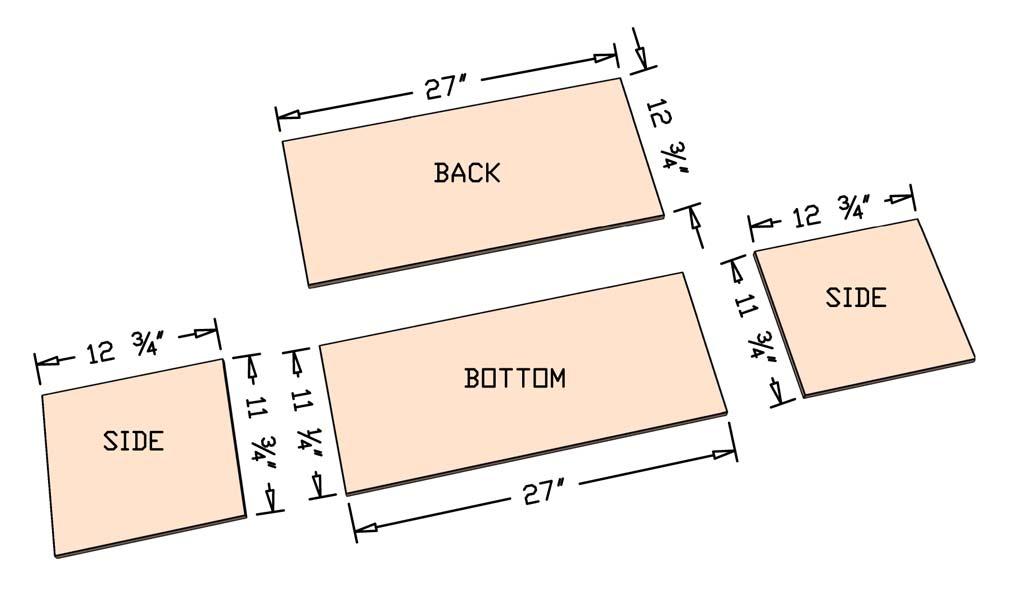
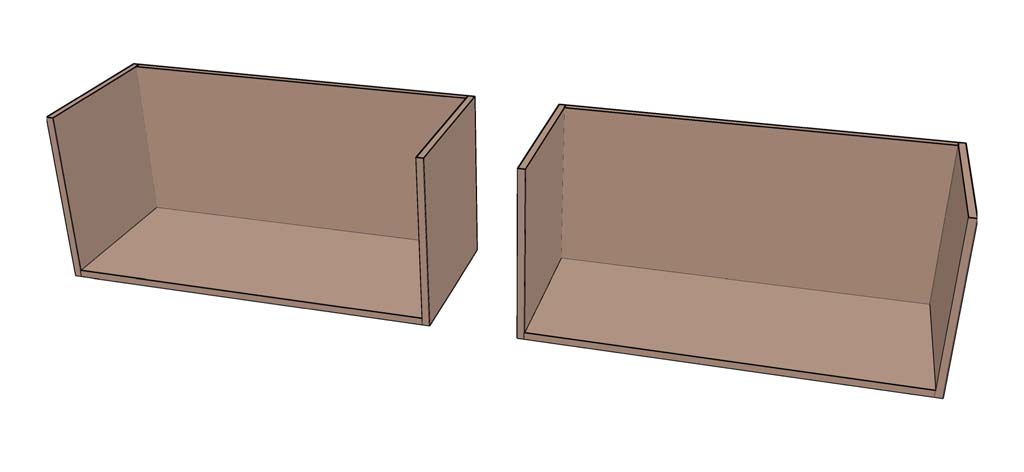
Step-8 Cut Plywood for Storage Boxe
Now we’ll work on the two boxes that go under the bench. Cut ½” plywood for the bottom, back and sides as shown on the picture. Since there are two boxes, cut two of each board.
-
Step-9 Assemble the Boxes
Assemble the boxes using Wood Glue and 1 1/4" Brad Nails using Nail Gun.
drawer assembled for bench
-
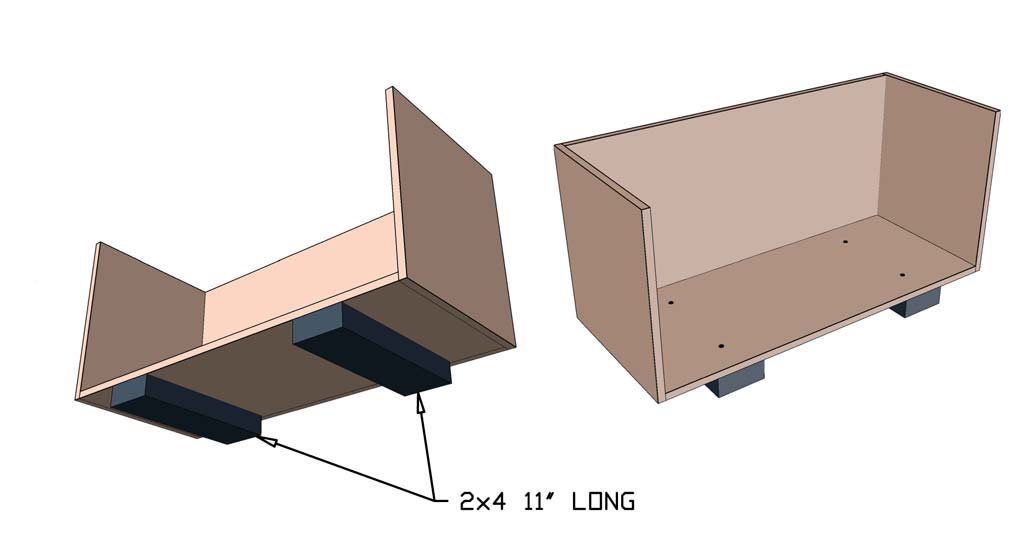
Step-10 Attach Box Supports
Both boxes will sit on two 2x4s that are 11" long. Attach these 2x4 using 1 5/8" Wood Screws.
-
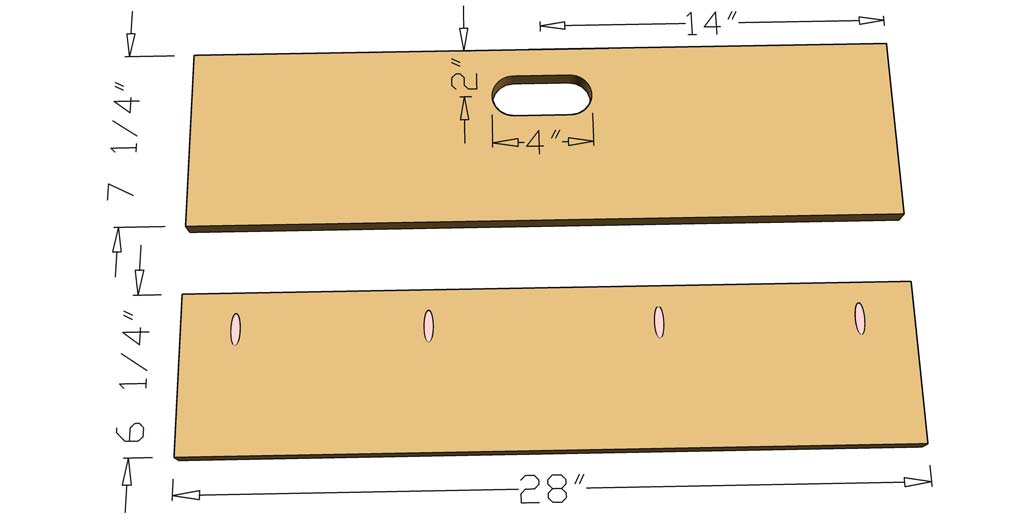
Step-11 Cut and Drill Holes for Fro
Take 1x8 and cut two pieces to 28" in length. One of the boards will be trimmed to 6 1/4" in width. Drill pocket holes on the smaller board. Using a 1 3/4" Hole Saw Bit, drill two holes to provided dimensions. Then with jig saw cut out between the two holes connecting them together. Connect both boards together using 1 1/4" Pocket hole screws.
-
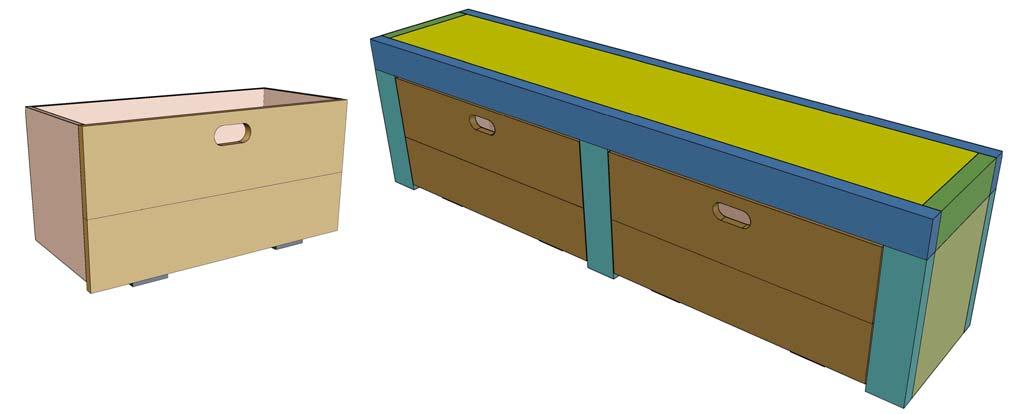
Step-12 Attach Front Cover to the B
Now attach the front boards to the box using Wood Glue and Nail Gun. If you choose not to use Brad Nails on the front board, than you'll need to drill pocket holes on plywood in step 8.
-
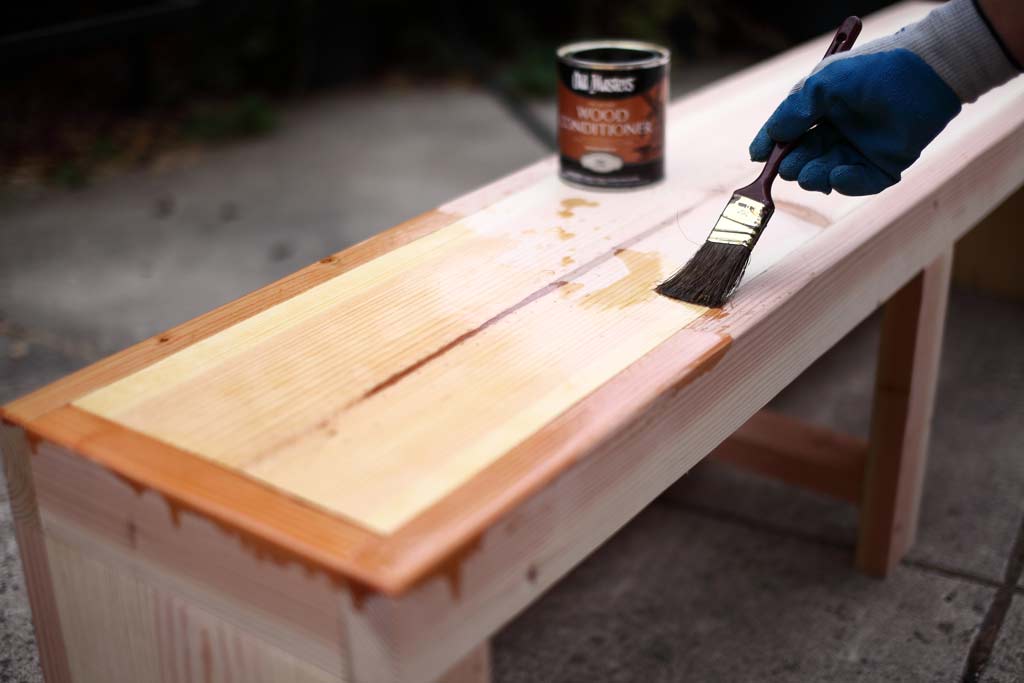
Step-13 Stain and Paint
Apply wood conditioner, stain and paint. You're done with DIY bench with storage!