Bench with Built-In Storage
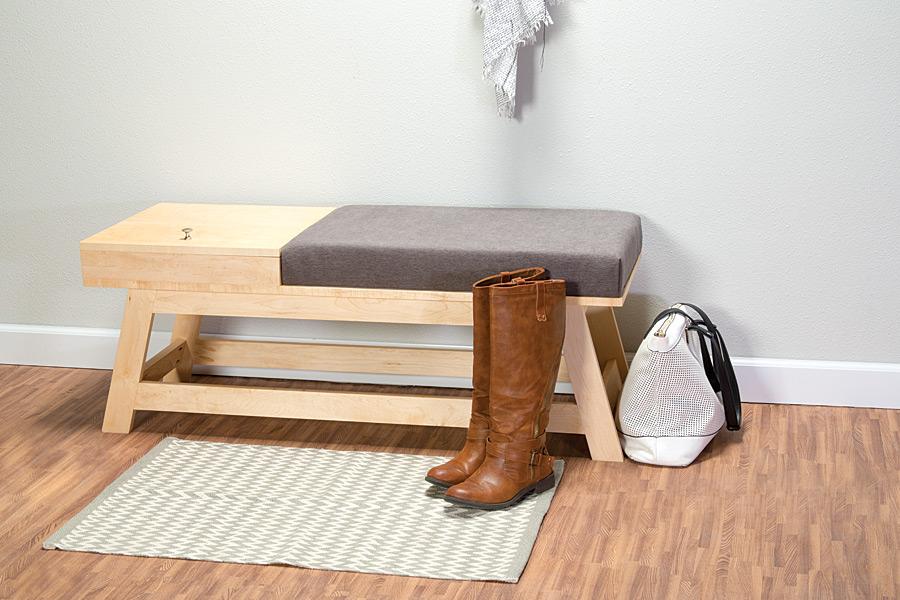
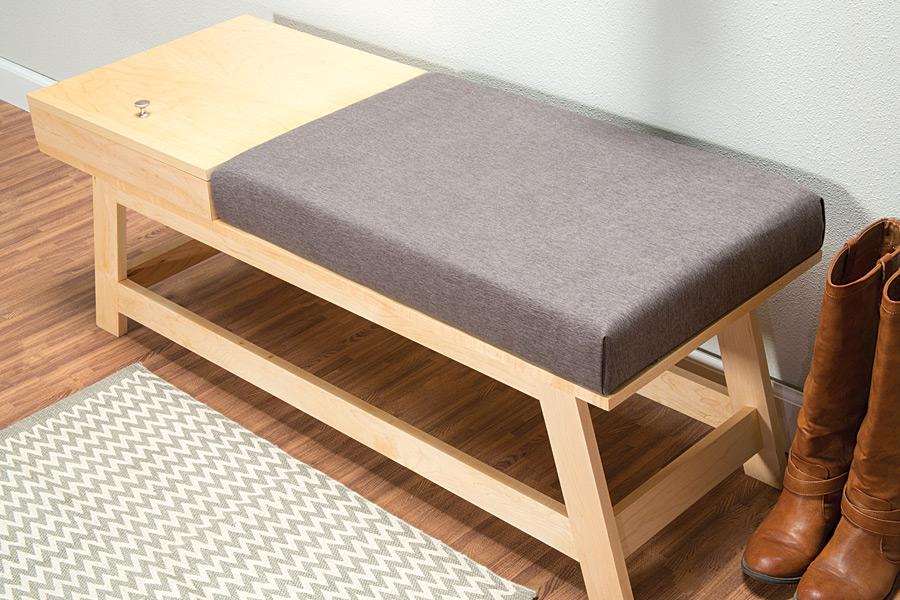
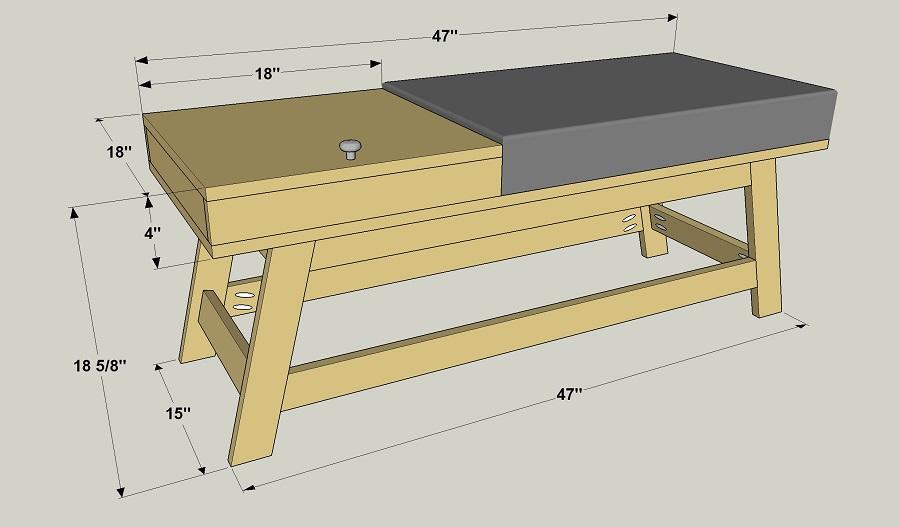
By Kreg ToolWhether you need seating in a hallway, a bedroom, or even your living room, this bench makes a beautiful addition. The upholstered cushion is comfortable and allows lots of customization options, and the storage compartment is handy. We made ours from four maple boards and a half sheet of plywood.
Directions
-
Cut the Legs
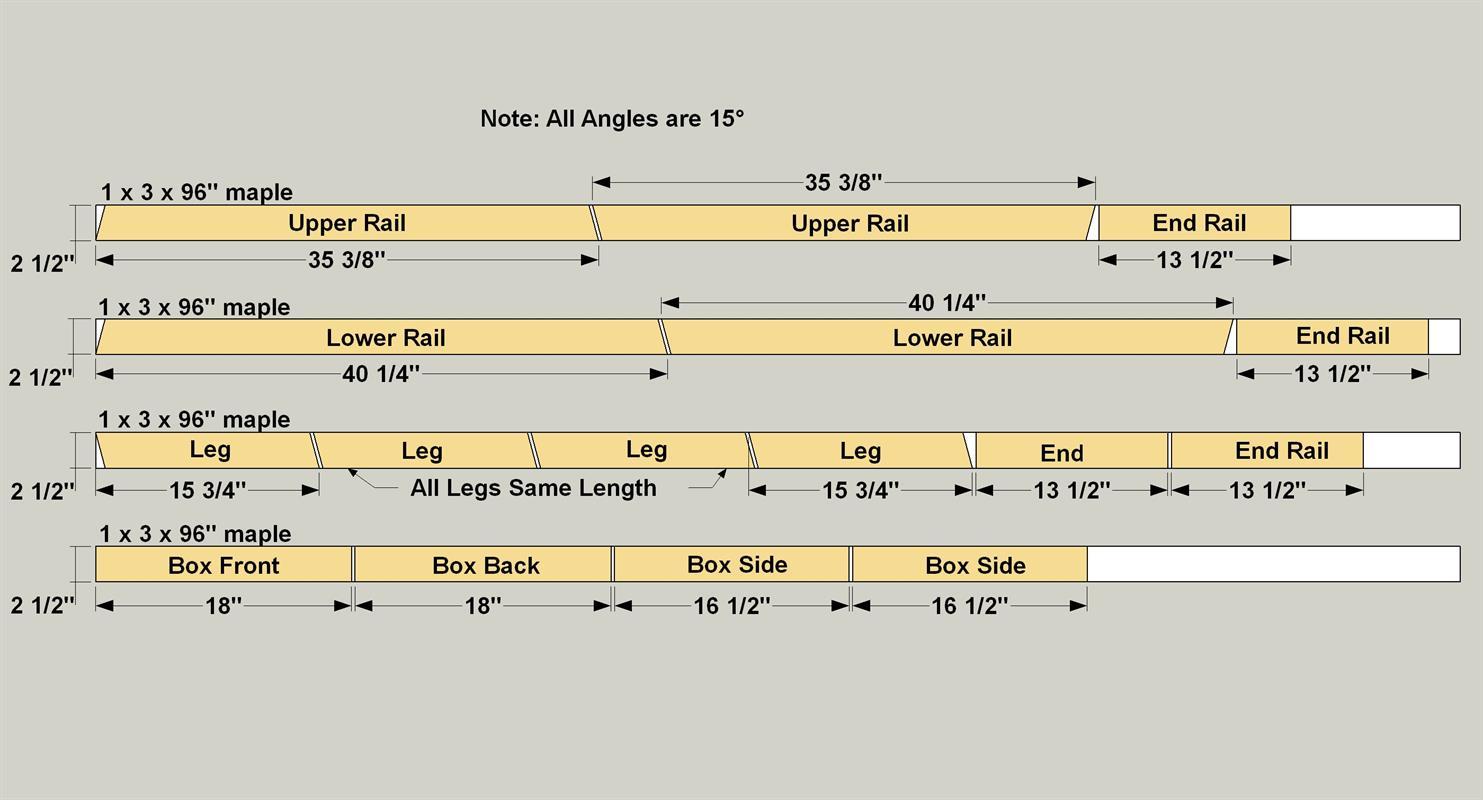
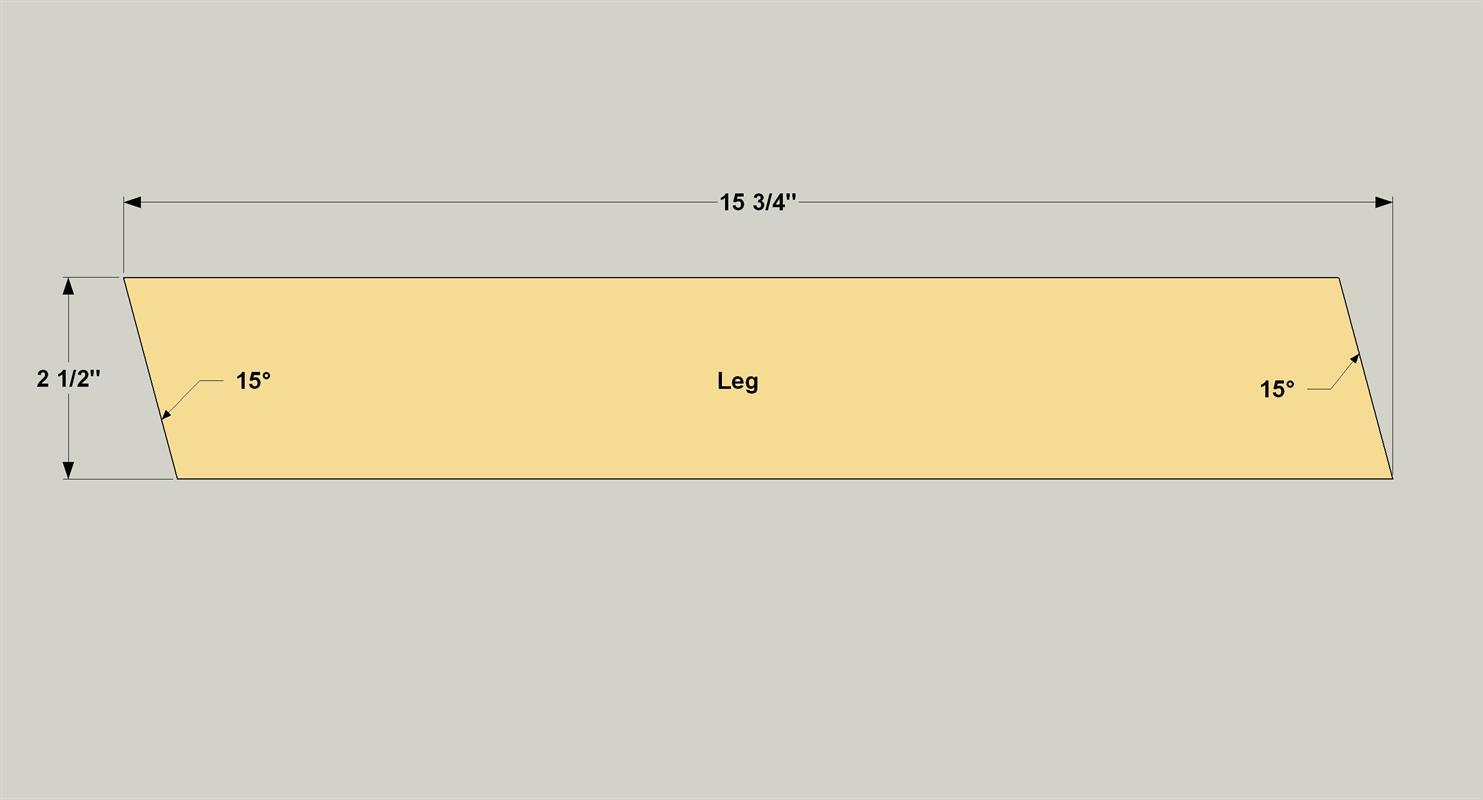
Cut four Legs to length from 1x3 maple boards, as shown in the cutting diagram. Note that the ends of each Leg have parallel 15° angles. Measure carefully, and use a stop block on your miter saw if possible to ensure that all four legs are the exact same length.
-
Create the End Rails
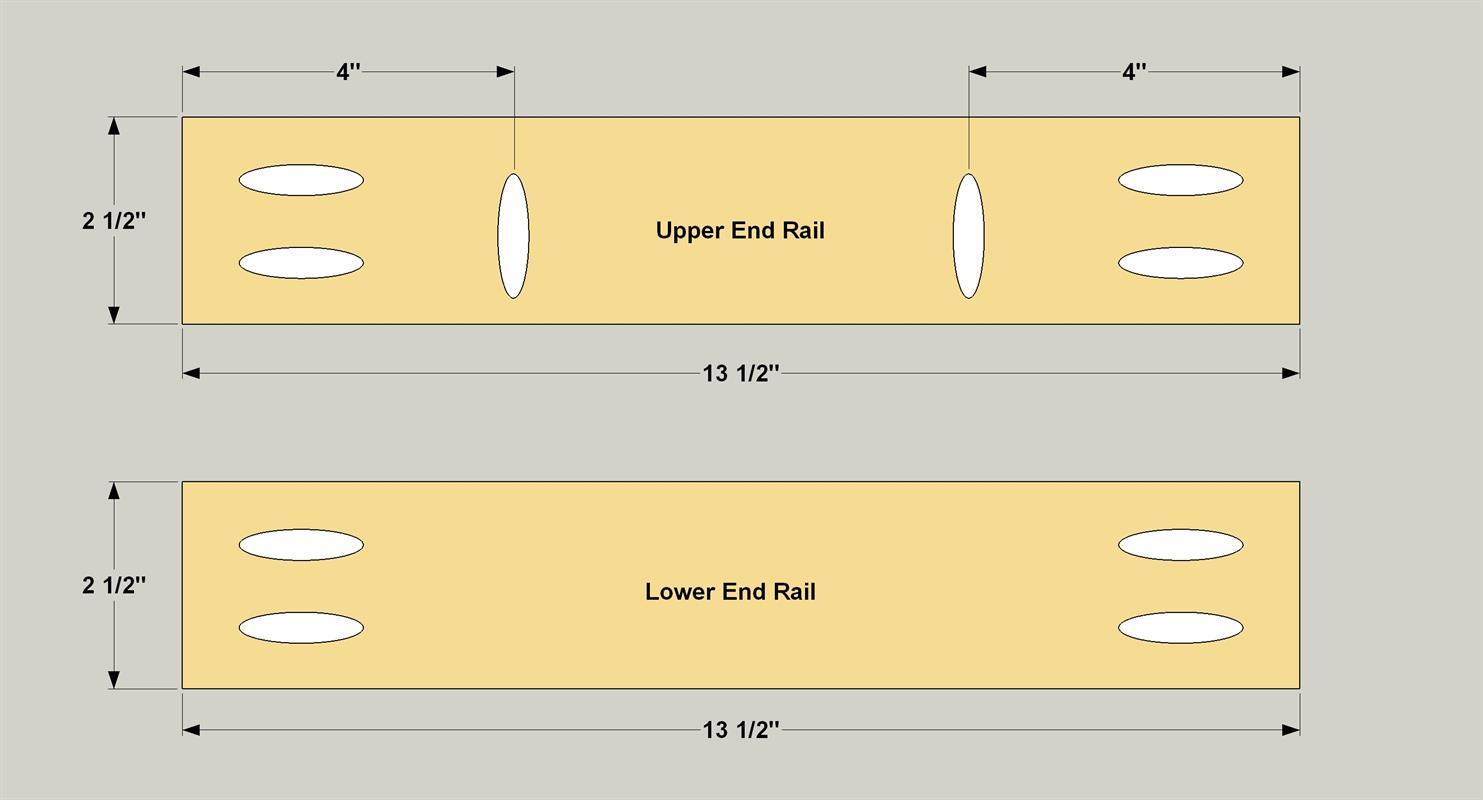
Cut four End Rails to length from 1x3 maple boards as shown in the cut diagram. Set your pocket-hole jig for 3/4" material, and then drill pocket holes at the locations shown.
-
Create Upper & Lower Rails
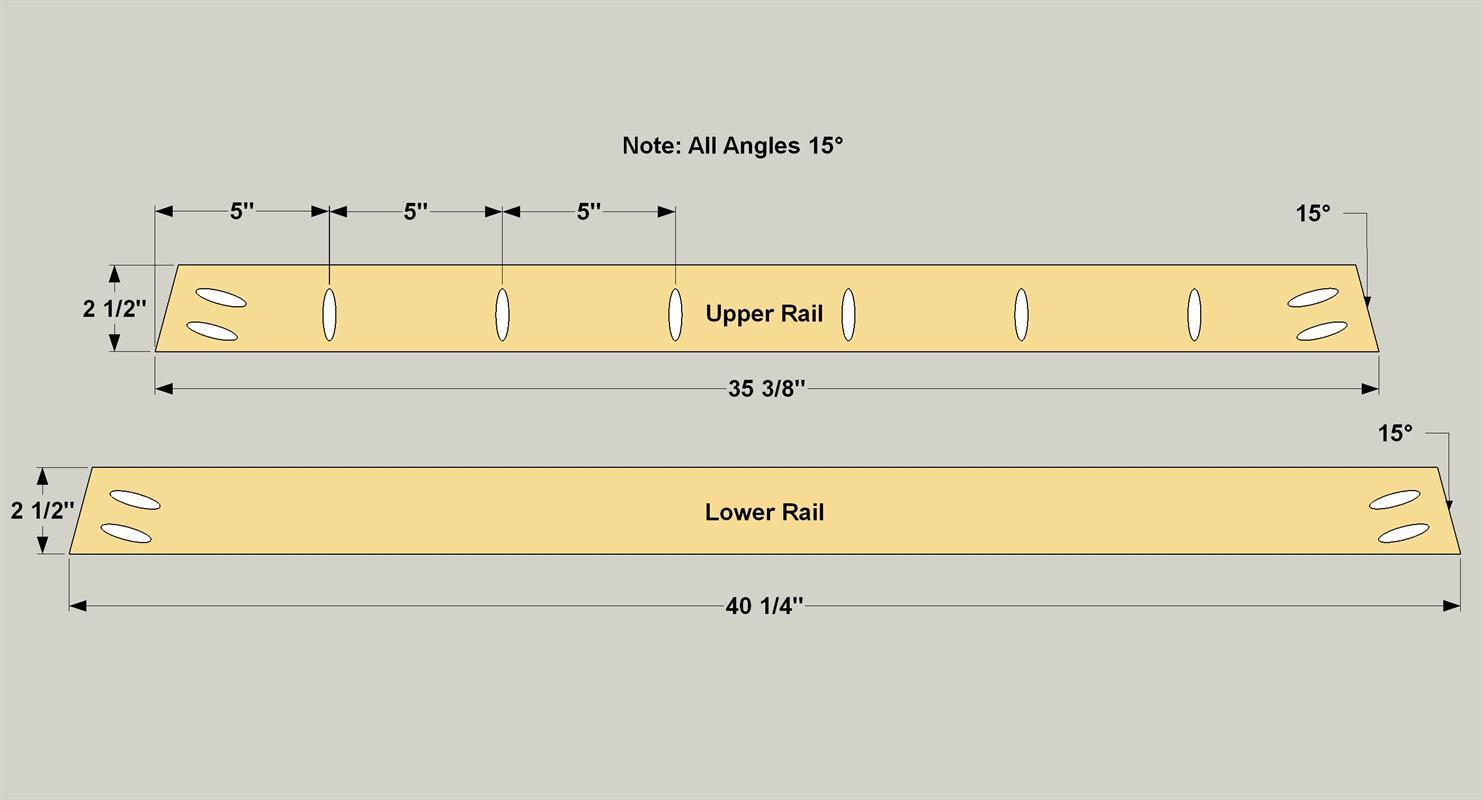
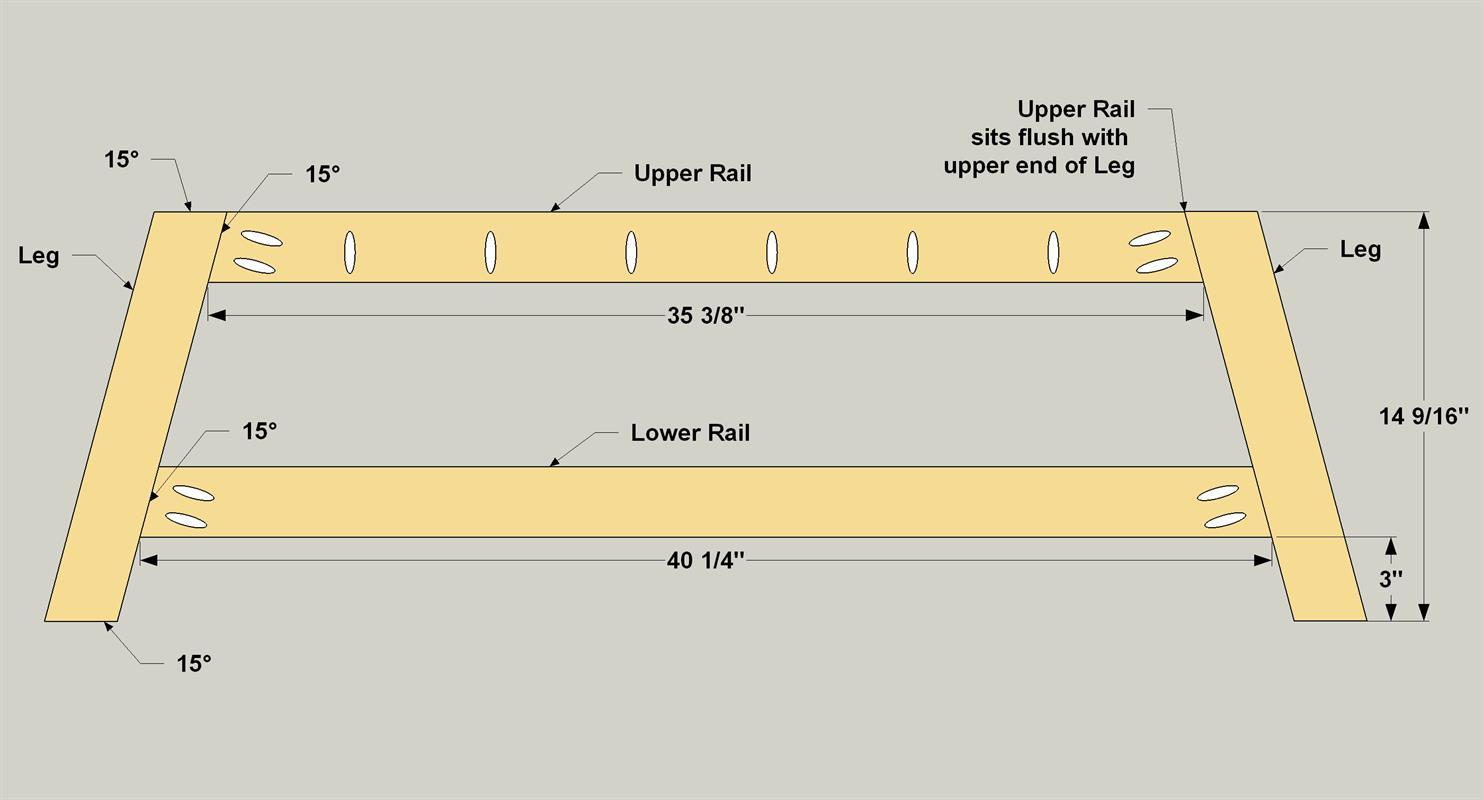
Cut the two Upper Rails and two Lower Rails to length with opposing 15° angles on each end, as shown in the cutting diagram. Drill pocket holes where shown. Note that the pocket holes at the ends of these rails should be drilled perpendicular to the angled end of the rail.
-
Attach the Legs to the Rails
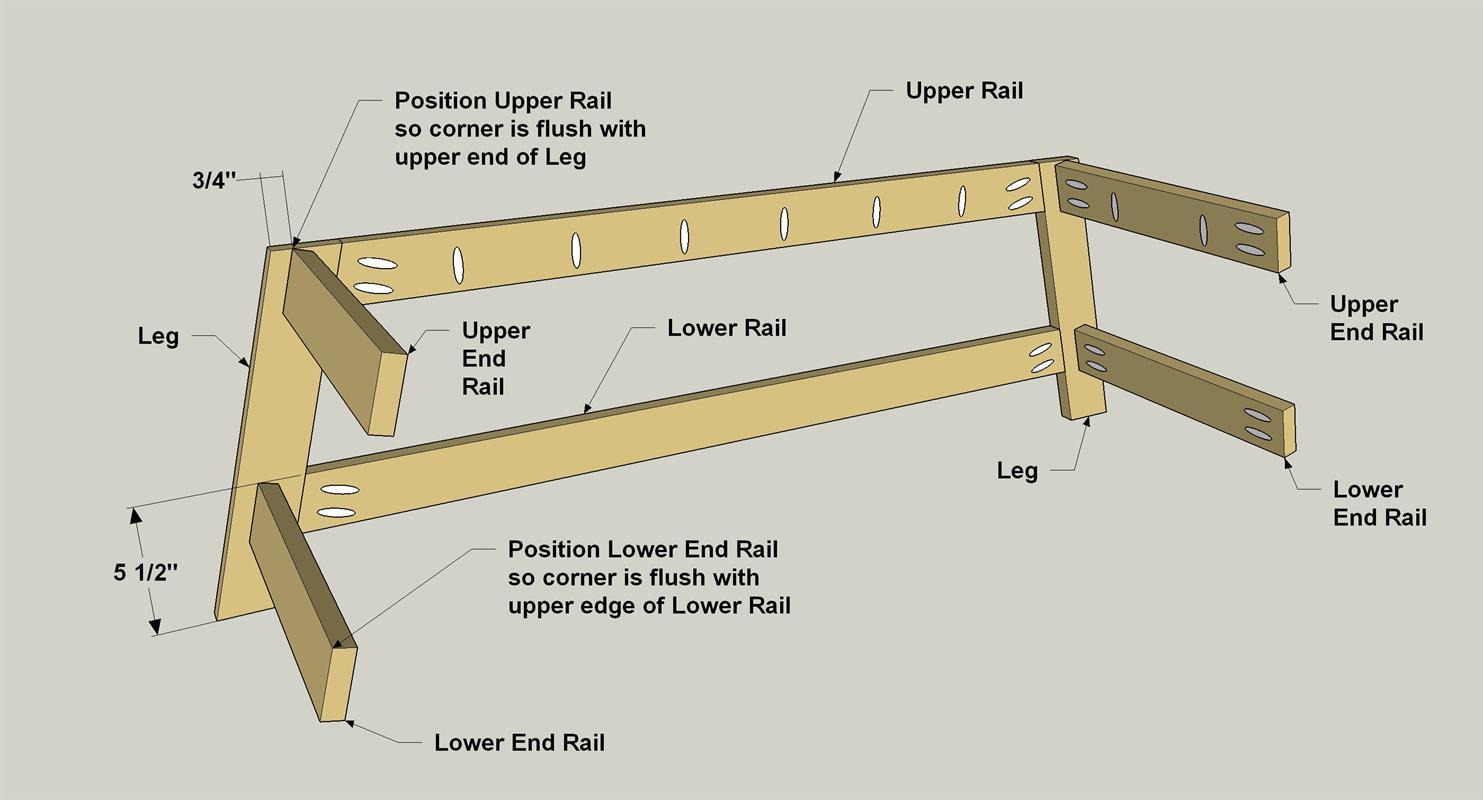
On a flat work surface, secure two Legs to one Upper Rail using 1 1/4" fine-thread pocket hole screws, as shown. Make sure the upper end of each Leg is flush with the top of the Upper Rail. Now set the Lower Rail between the Legs at the location shown and secure it to the Legs with 1 1/4" fine-thread pocket-hole screws. Do the same process for the other set of Legs and Rails. When both Leg assemblies are complete, you’ll want to plug the pocket holes on the Lower Rails, since they’ll be visible on the inside of the bench base. When the glue dries, sand the plugs flush.
-
Install the End Rails
On one Leg assembly, lay out the location of the Upper and Lower End Rails, as shown. Set the Upper End Rail in place, and secure it to the Leg with 1 1/4" fine-thread pocket-hole screws as shown. Repeat this for all four End Rails. Once you have the End Rails secured on one Leg assembly, flip that assembly over onto the second assembly and repeat the previous step. Before moving on, glue and plug the eight pocket holes on the lower End Rails. When the glue dries, sand the plugs flush.
-
Cut the Plywood Parts
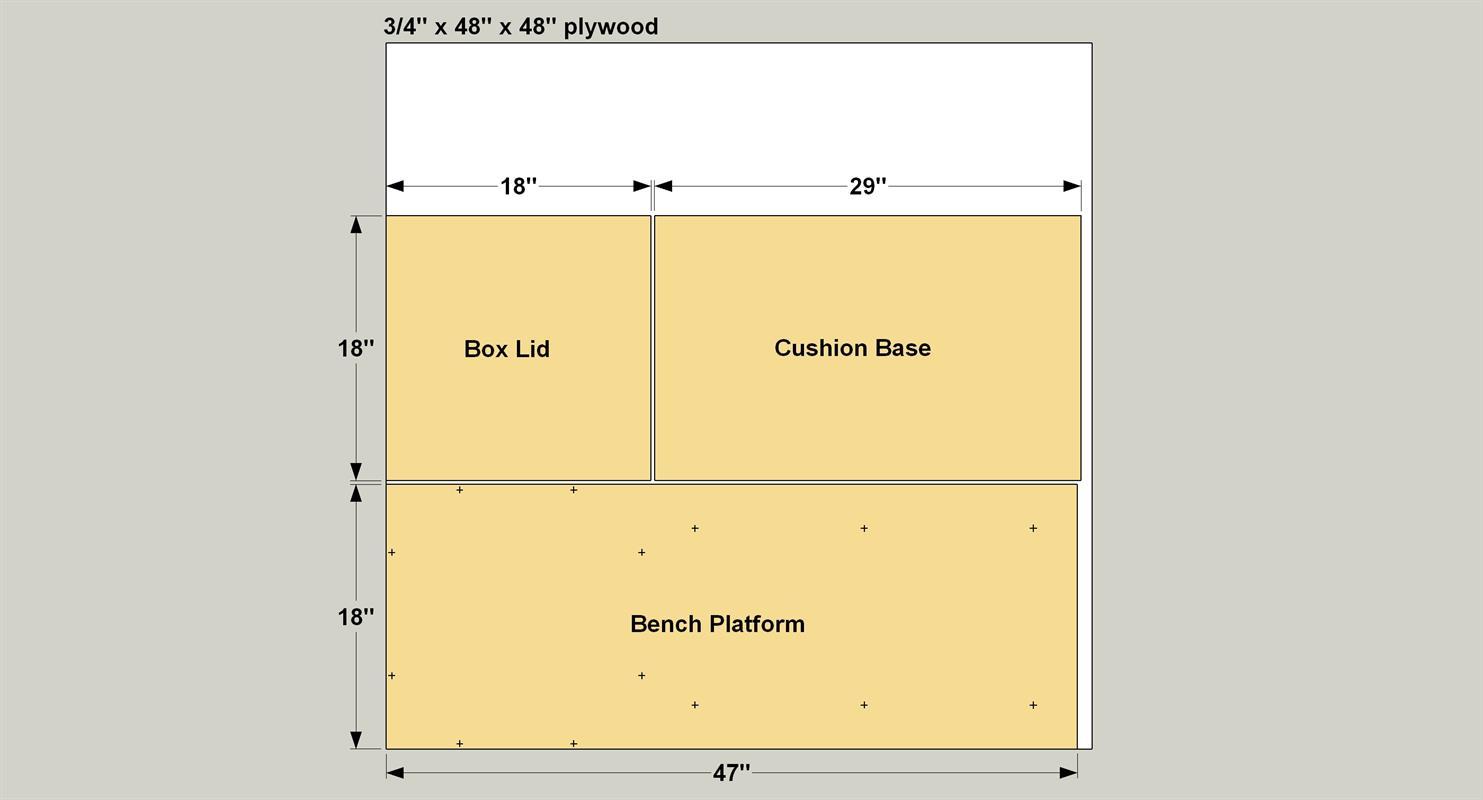
From 3/4" plywood, cut the Base Platform, the Box Lid and the Cushion Base to size, as shown in the cut diagram. Then you can set the Cushion Base aside for now. To cover the plywood edges of the Bench Platform and the Box Lid, cut strips of veneer edge banding slightly extra-long. Starting with the short ends, iron the edging onto the Bench Platform and the Box Lid. When the glue cools, trim the edging to final length using a utility knife, and to width (to match the thickness of the plywood) using an edging trimmer. Now complete the same procedure for the front and back edges. Gently sand the edges smooth.
-
Drill Holes in the Bench Platform
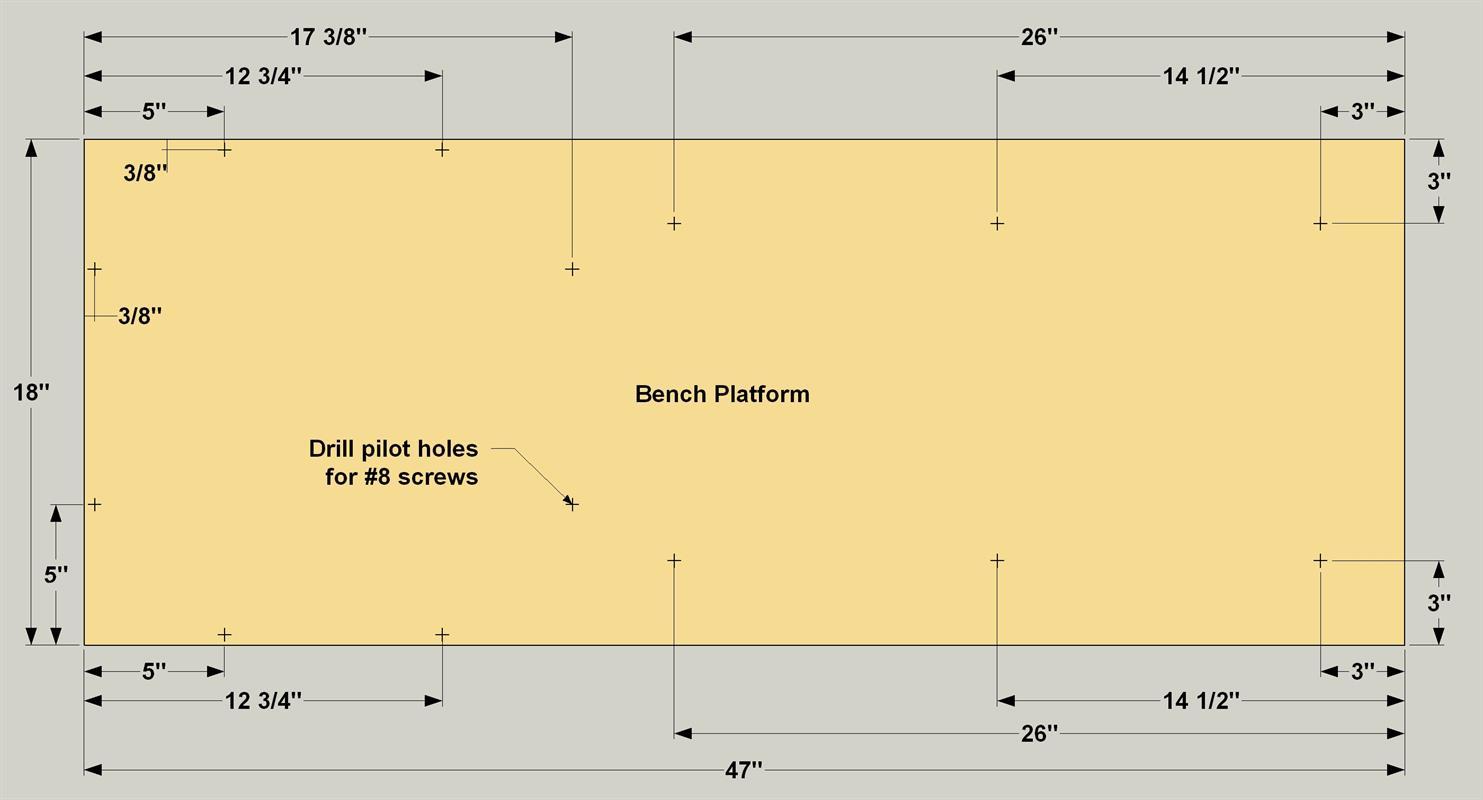
On the Bench Platform, lay out the locations, as shown, for holes that will be used to secure the box assembly and the cushion. Then drill countersunk 1/8" pilot holes at those locations.
-
Attach the Base to the Platform
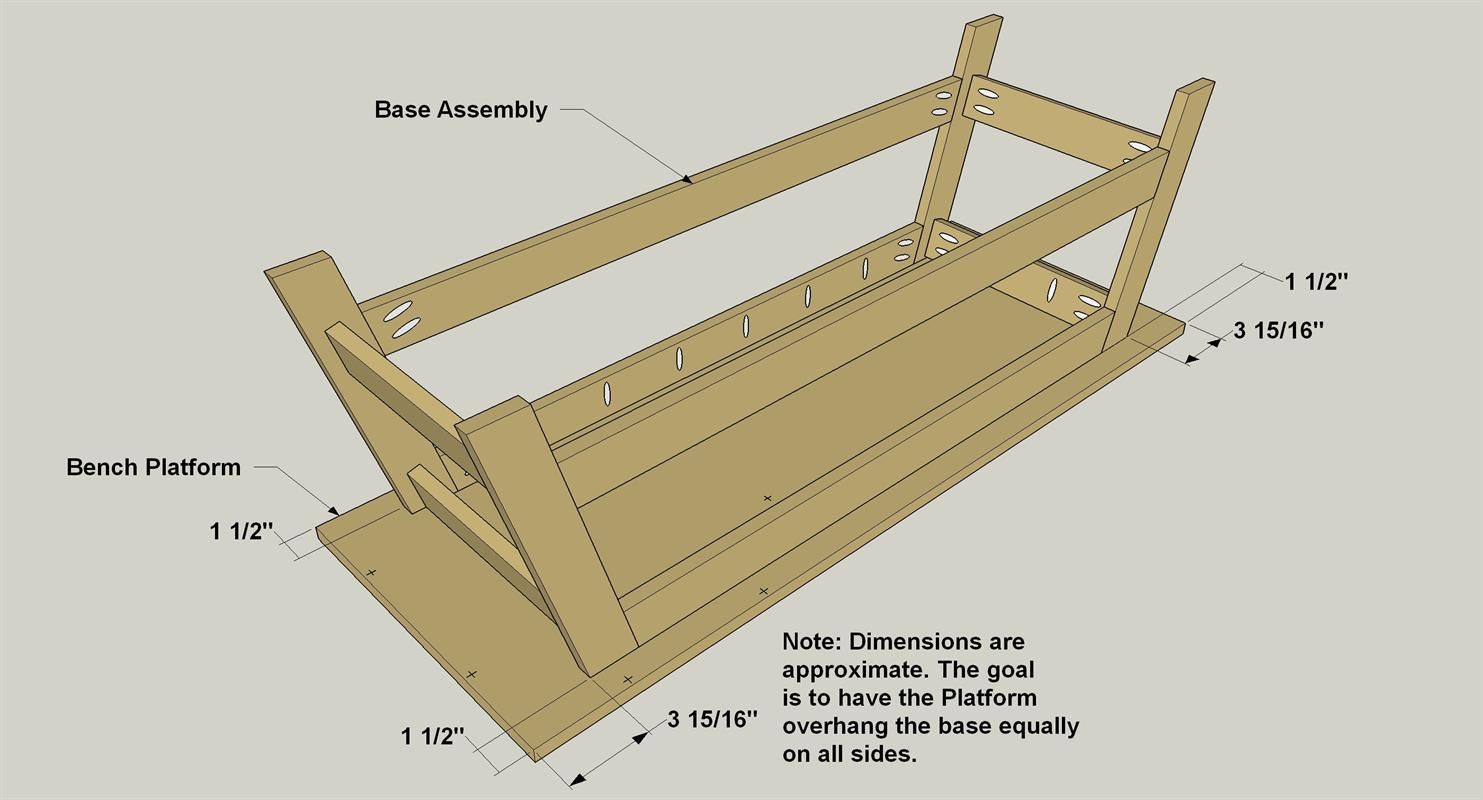
With the Bench sitting face-down on a work surface, place the base assembly in position and secure it using 1 1/4" coarse-thread pocket-hole screws. Though you used fine-thread holes for the sol-d-maple parts, coarse-thread screws are a better choice for attaching to the plywood.
-
Create the Box Parts
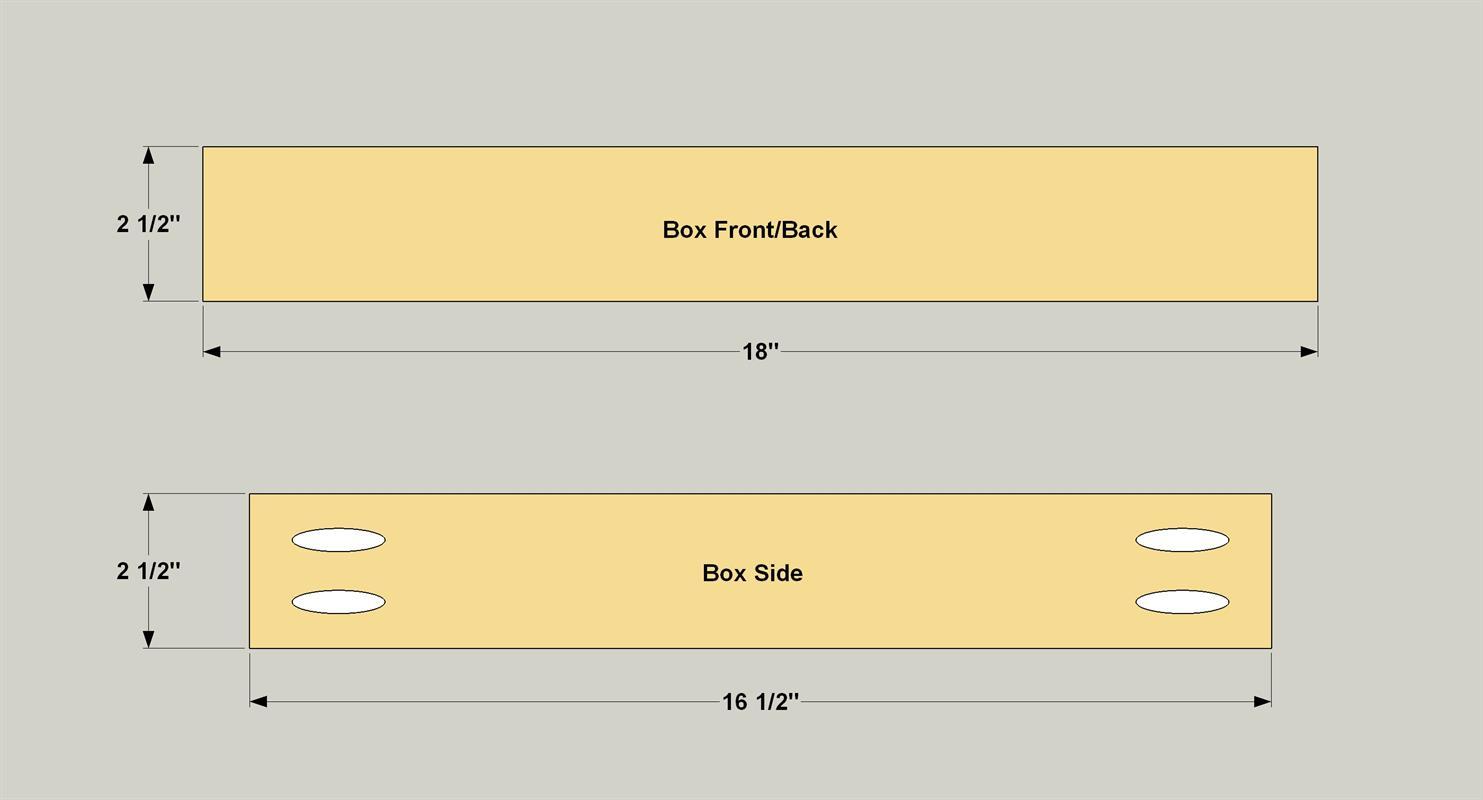
Cut two Box Sides, a Box Front, and a Box Back to length from a 1x3 board, as shown in the cut diagram.
Drill Pocket holes in the ends of the Box Sides as shown. -
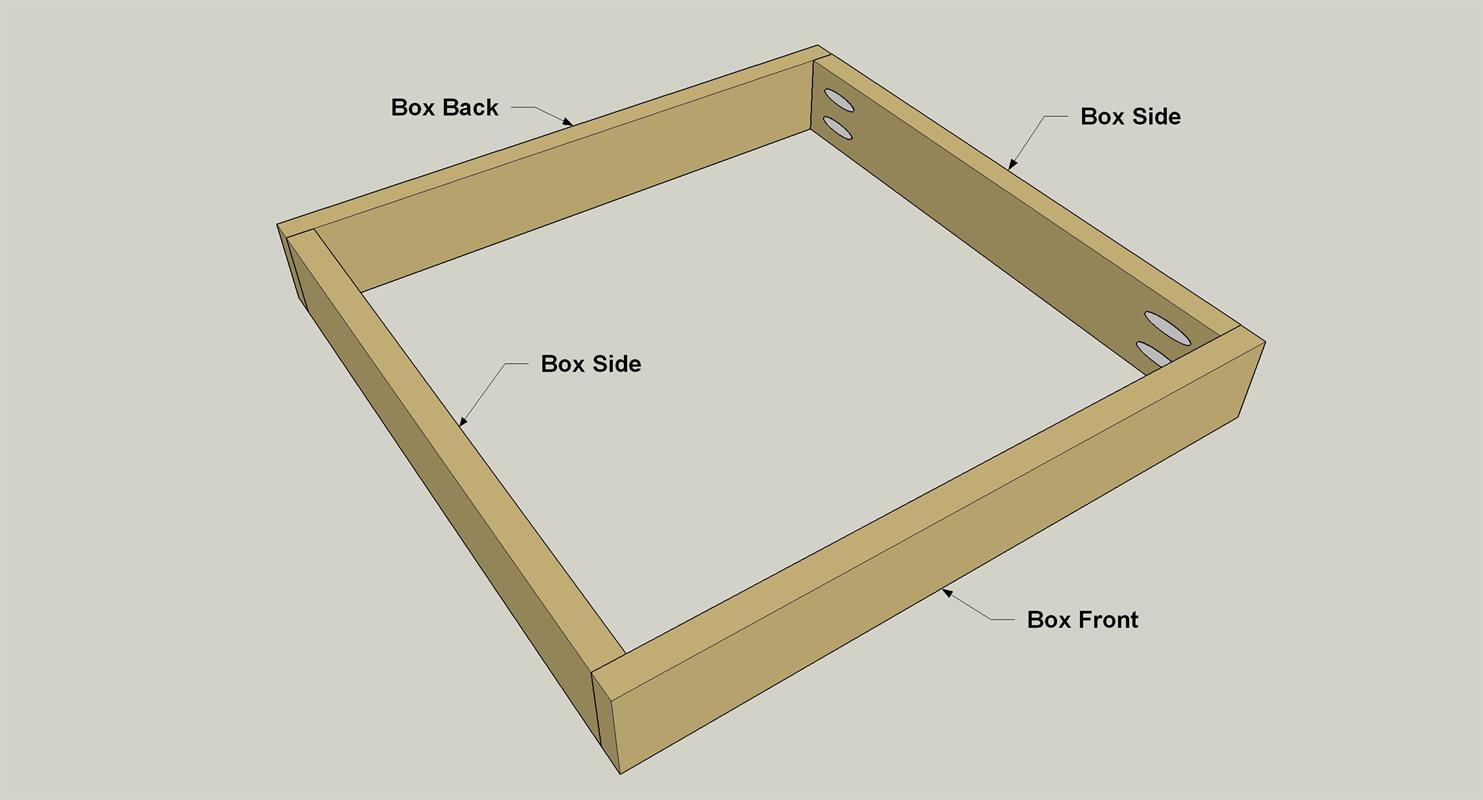
Assemble the Box
Attach the Box Sides to the Box Front and Box Back using 1 1/4" fine-thread pocket hole screws, as shown.
-
Attach the Box to the Platform
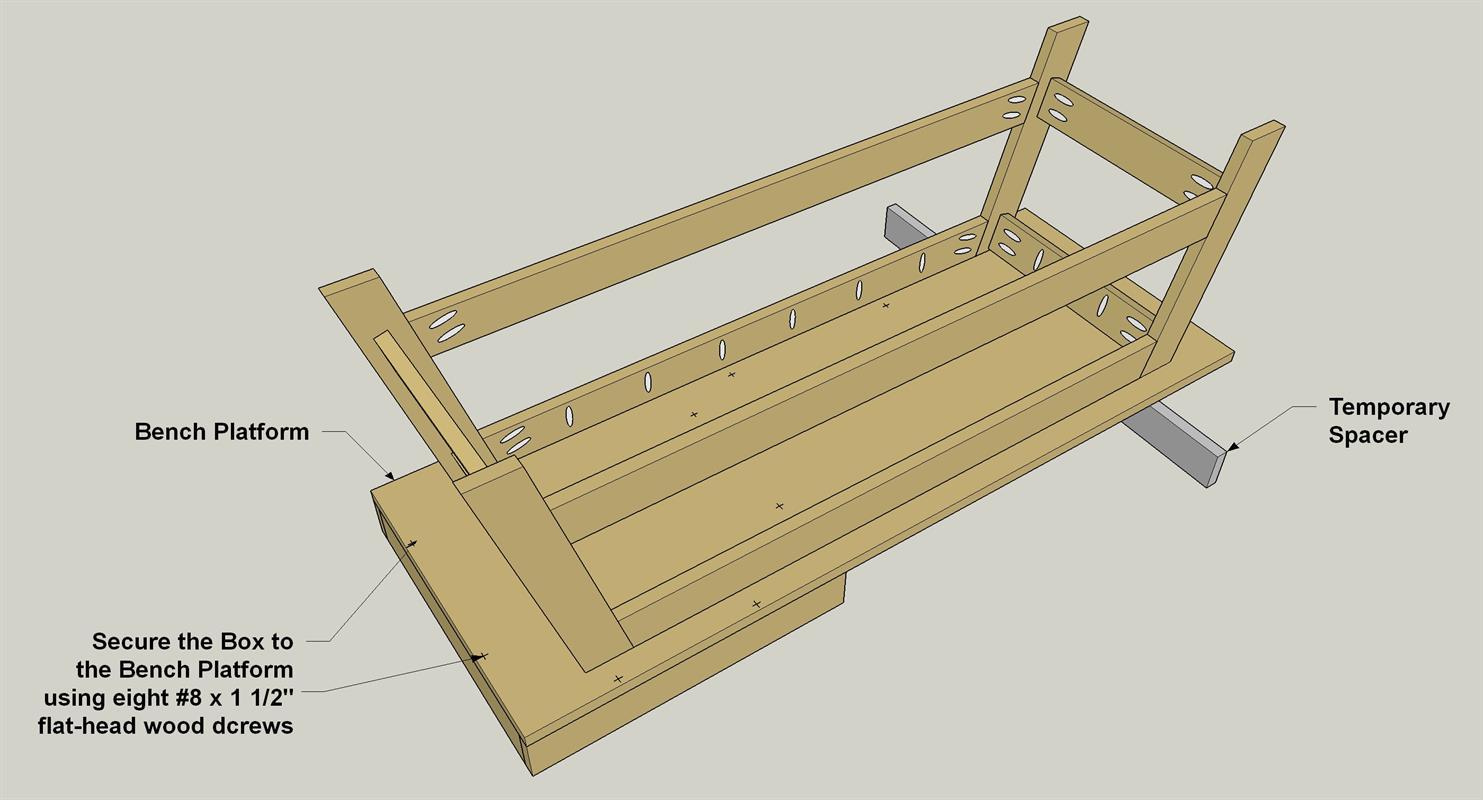
Position the base assembly on the box assembly, as shown, and support the other end of the base assembly with a spacer—just a scrap of 1x4. Align the box with the edges and end of the Bench Platform, and then secure the box using eight 1 1/2" flat-head wood screws.
-
Attach the Lid
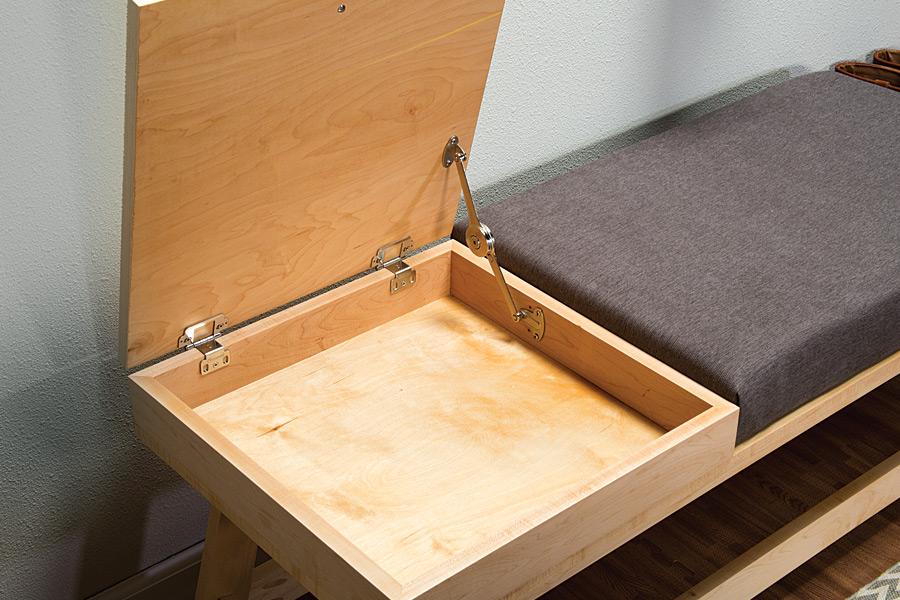
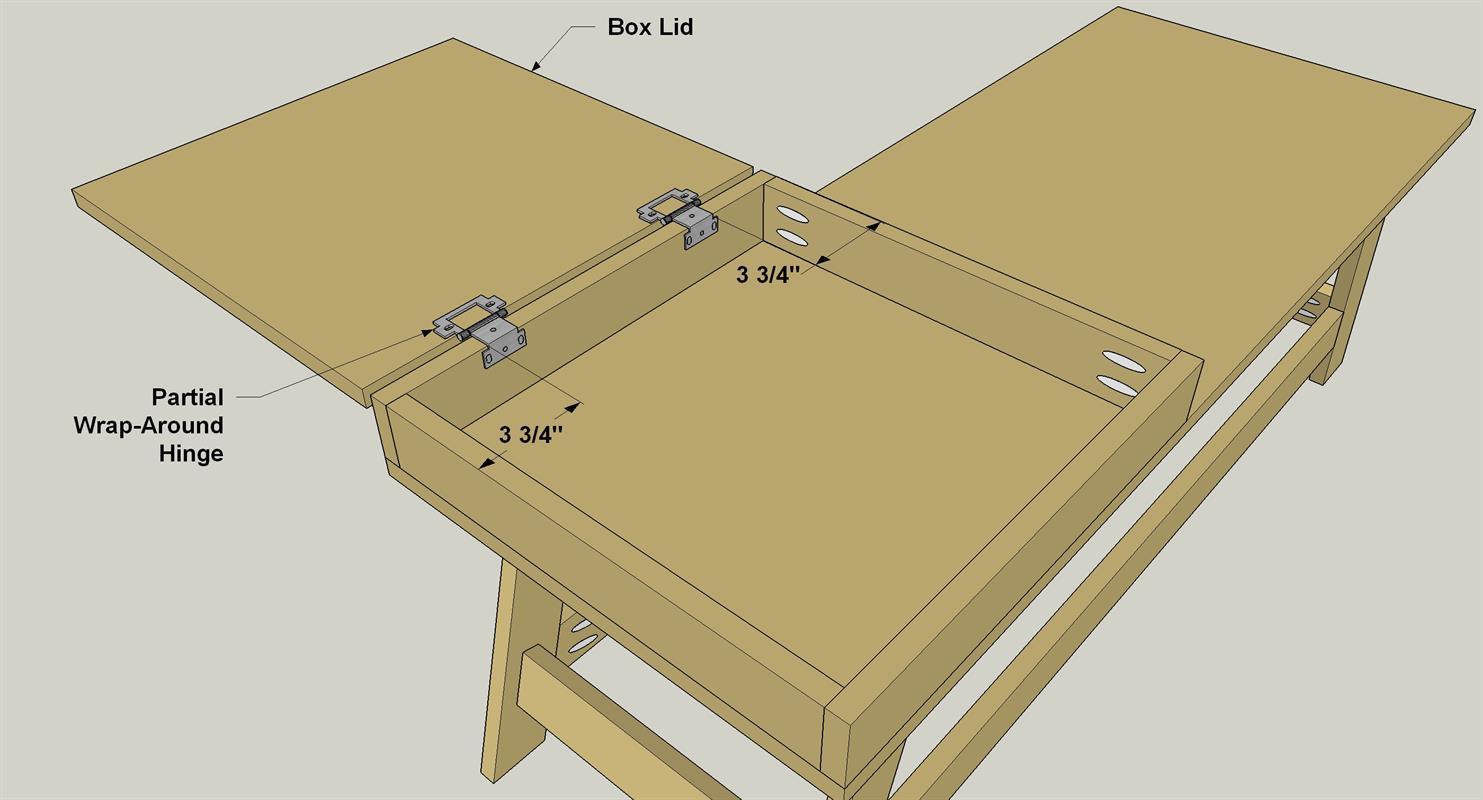
Flip the Bench upright again, and then mark the locations of the hinges on the Box Back. Drill pilot holes with the self-centering bit, and then secure the hinges to the Box. Align the Box Lid, and mark the locations of the hinges on the Lid. Drill pilot holes in the Lid and then secure the hinges to the Lid with the screws supplied. Close the Lid to check the fit. Make adjustments as needed. If you want to add a pull to the lid, position it where you want it, drill a pilot hole and attach it with the screw provided. Install the Lid supports per manufacturer's instructions.
-
Finish the Bench
Remove all of the hardware and then sand all of the parts as needed with 180-grit sandpaper, wipe away all dust, and then and apply your favorite finish. We used a wipe-on oil/varnish blend. When the finish dries, reinstall the hardware.
-
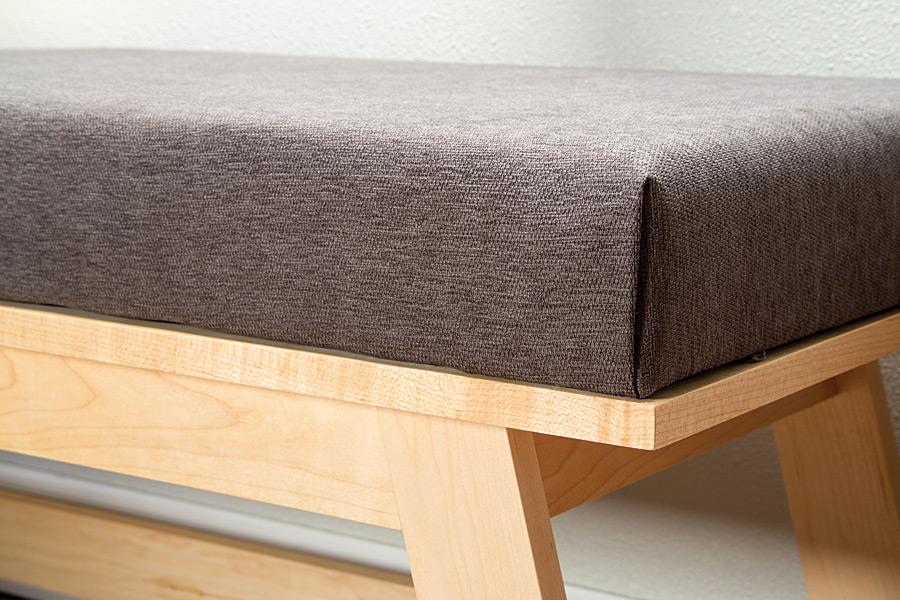
Create and Attach the Cushion
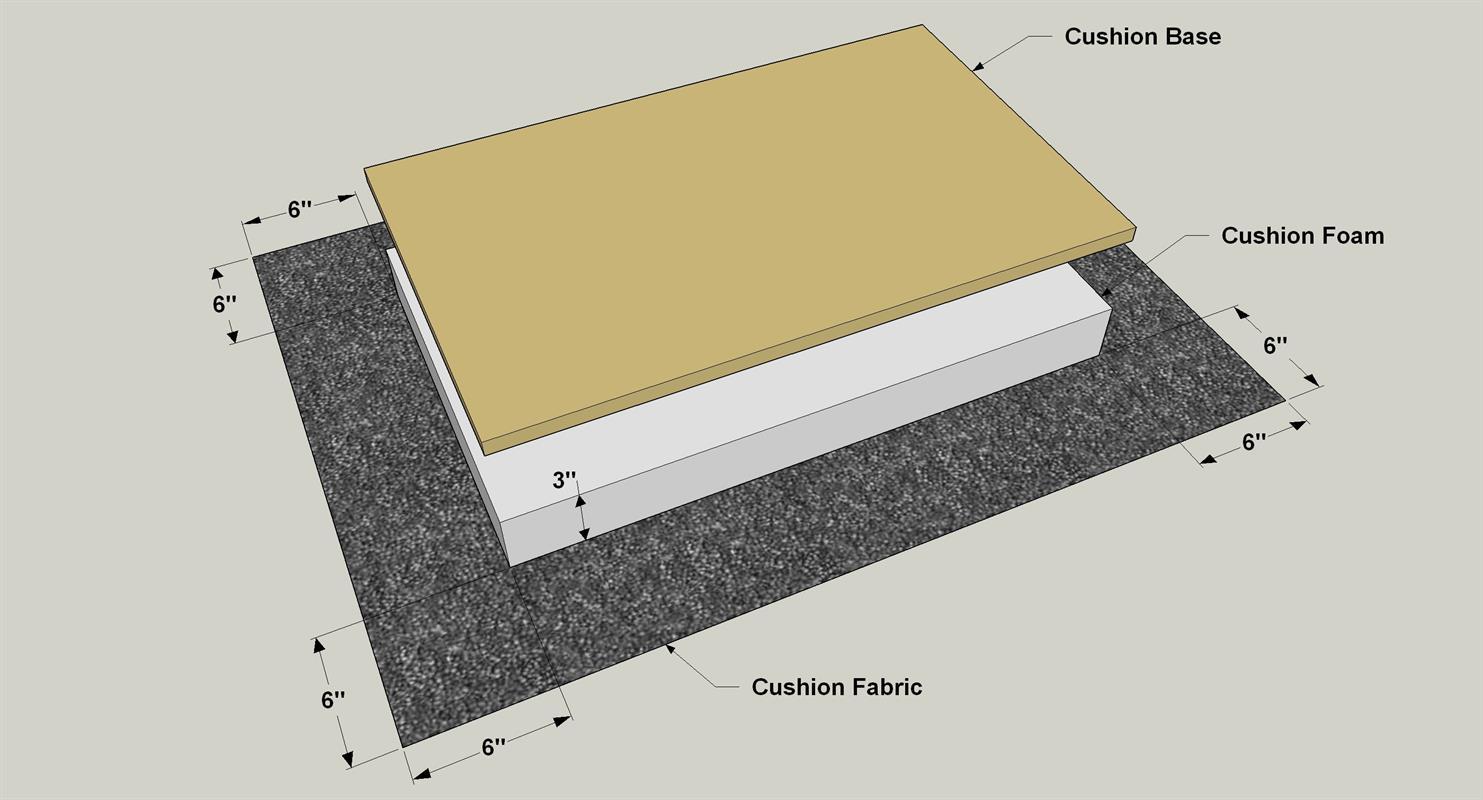
Cut cushion foam to the same size as the Cushion Base. Cut your fabric to 12" longer and 12" wider than the Cushion Base. Set the fabric face down on a work surface, center the foam on the fabric, and then set the Cushion Base on the foam. Fold one short end of the fabric over onto the plywood and staple it in place. Pull evenly, and place staples every 1" or so. Pull the second side tight and secure it the same way. Next, fold one long side over so the corner is square, trim away any extra fabric as needed, and then secure it to the plywood with staples. Repeat this for the final side. Finally, Set the cushion assembly on the bench so the edges are flush, and secure it from underneath with 1 1/2" flat-head wood screws.


