Bar Cart – Metric
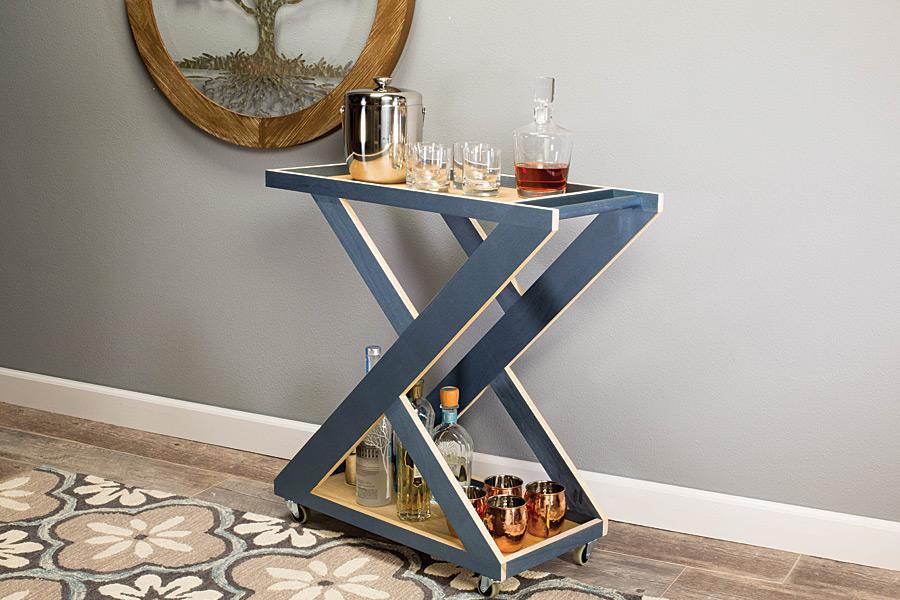
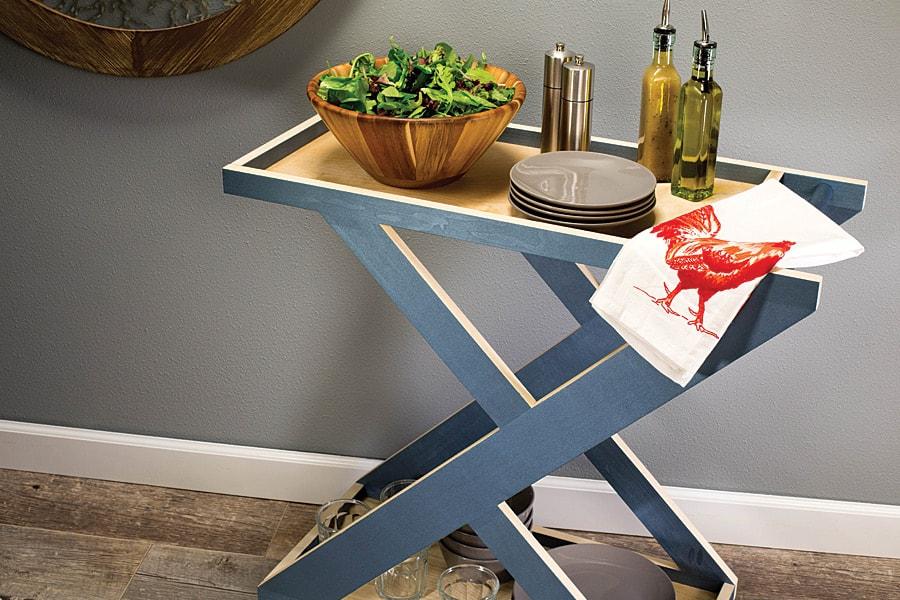
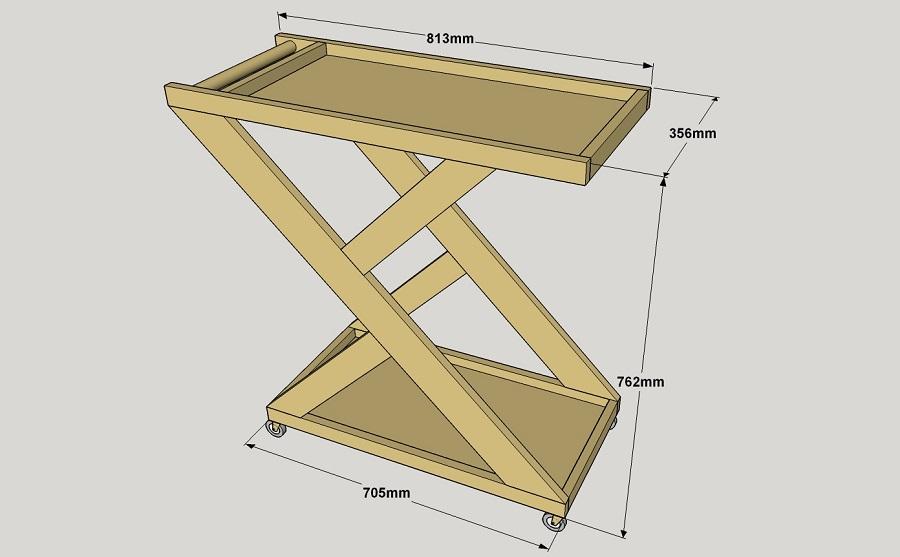
By Kreg ToolThis stylish bar cart is sure to be a hit at any party, whether it’s being used to serve up favorite foods or drinks. It’s easy to make from a few boards (we used poplar), a piece of plywood, and a dowel—which are all available on the shelf at any home center.
Directions
-
Make the Main Supports
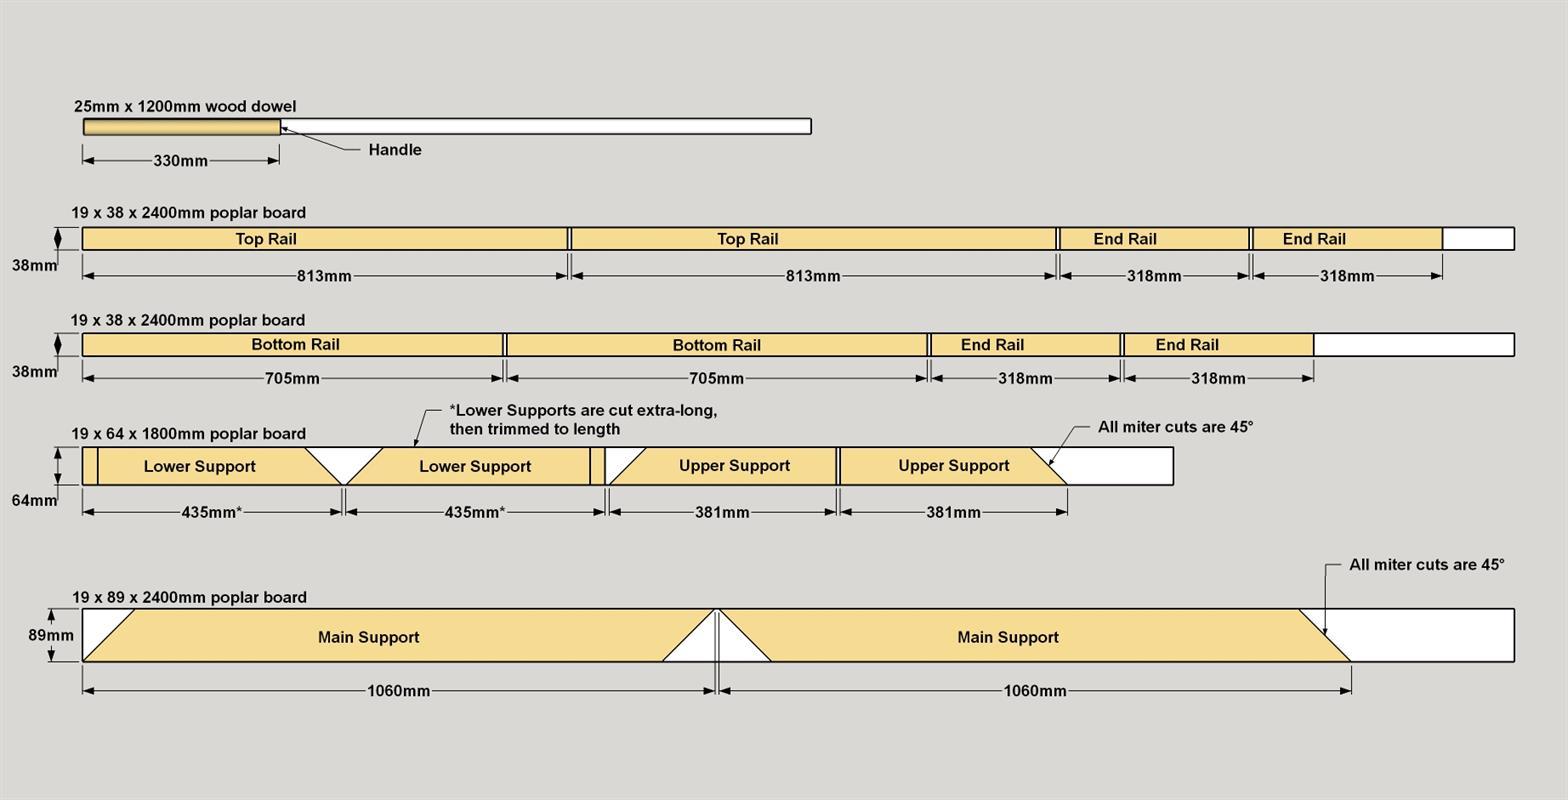
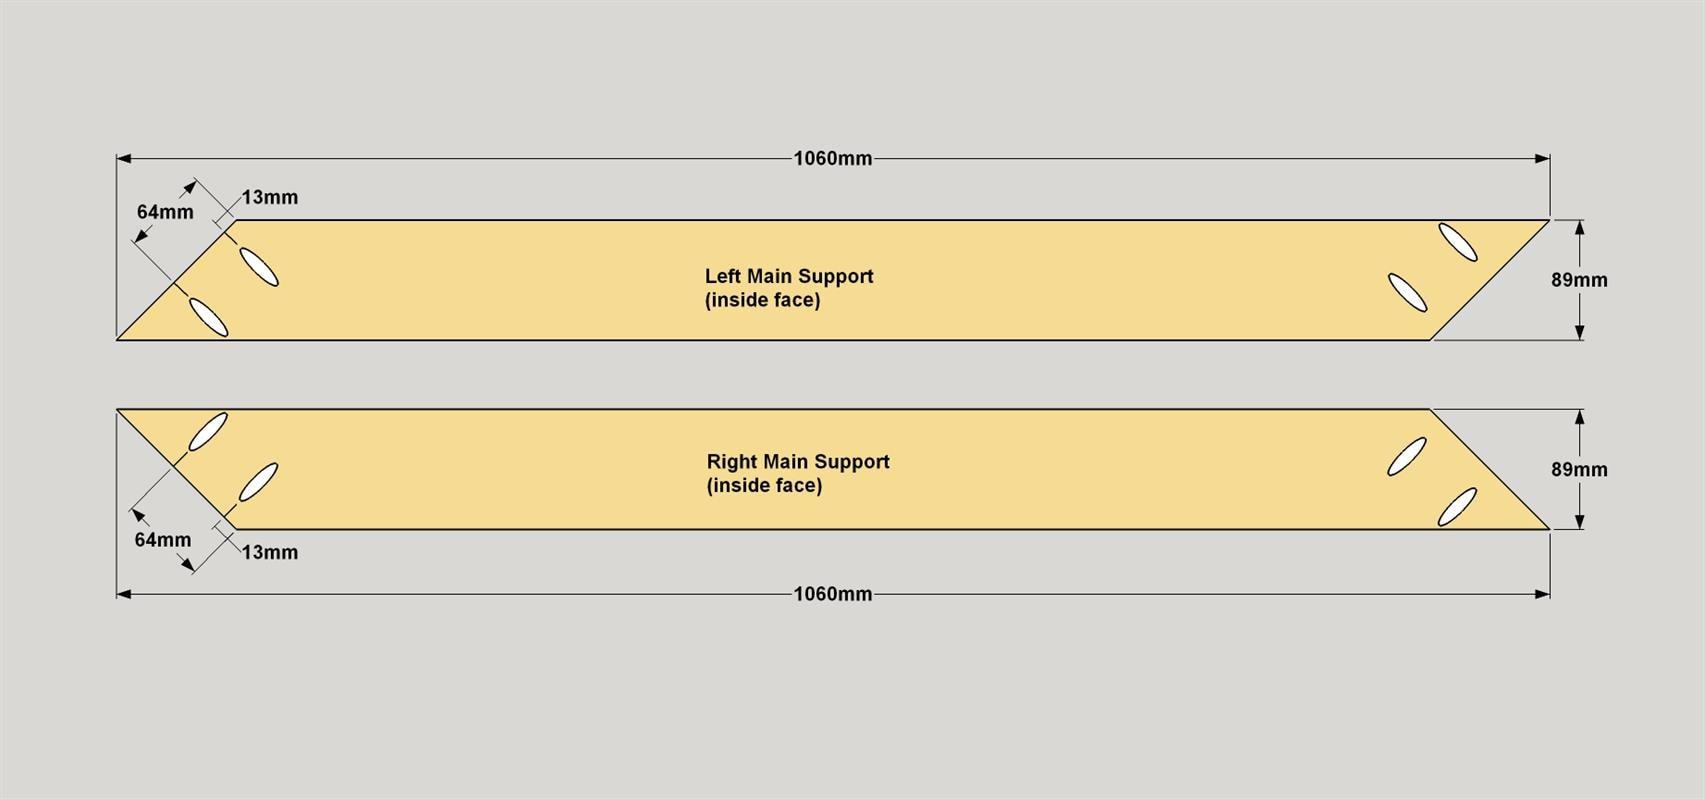
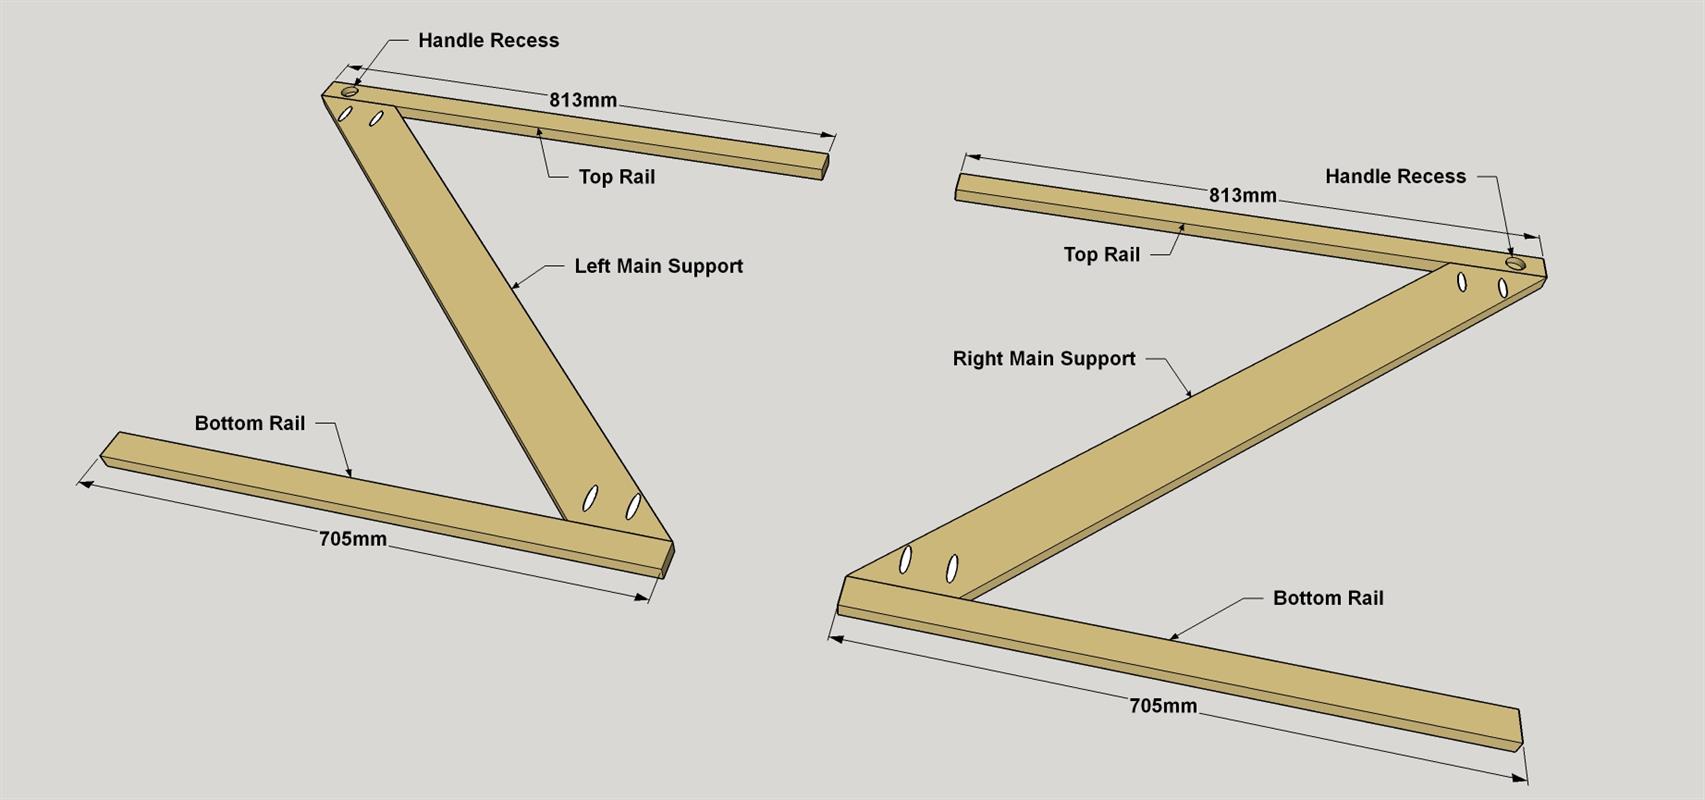
Cut two Main Supports to length from a 19x89mm board (we used poplar), as shown in the cutting diagram, so each Support has a 45° miter at each. Now lay the Main Supports on a work surface, as shown, and lay out the pocket-hole locations. This way, the pocket holes will all end up facing inward when you assemble your cart. Set your pocket-hole jig for 19mm-thick material, and then drill pocket holes perpendicular to the angled ends at the locations shown.
-
Make the Top Rails
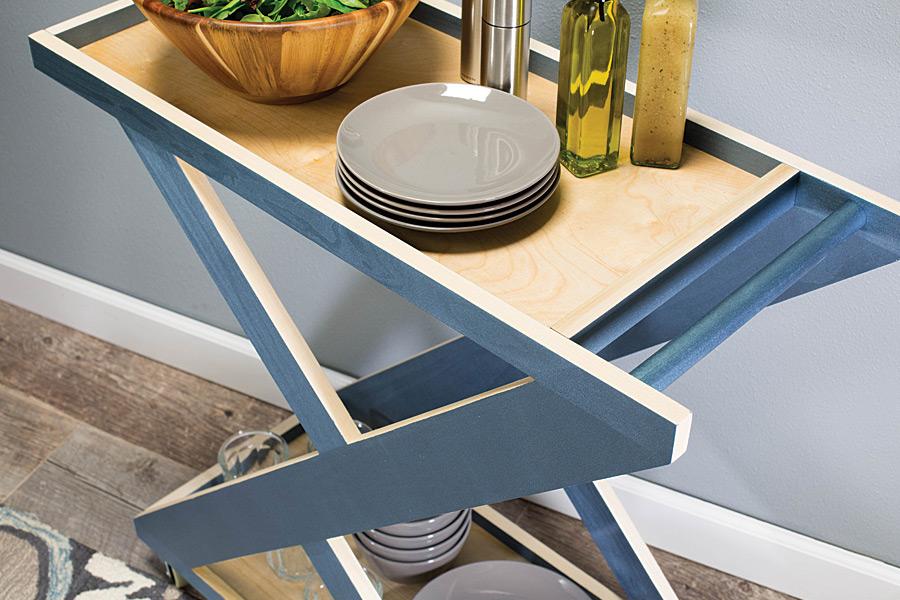
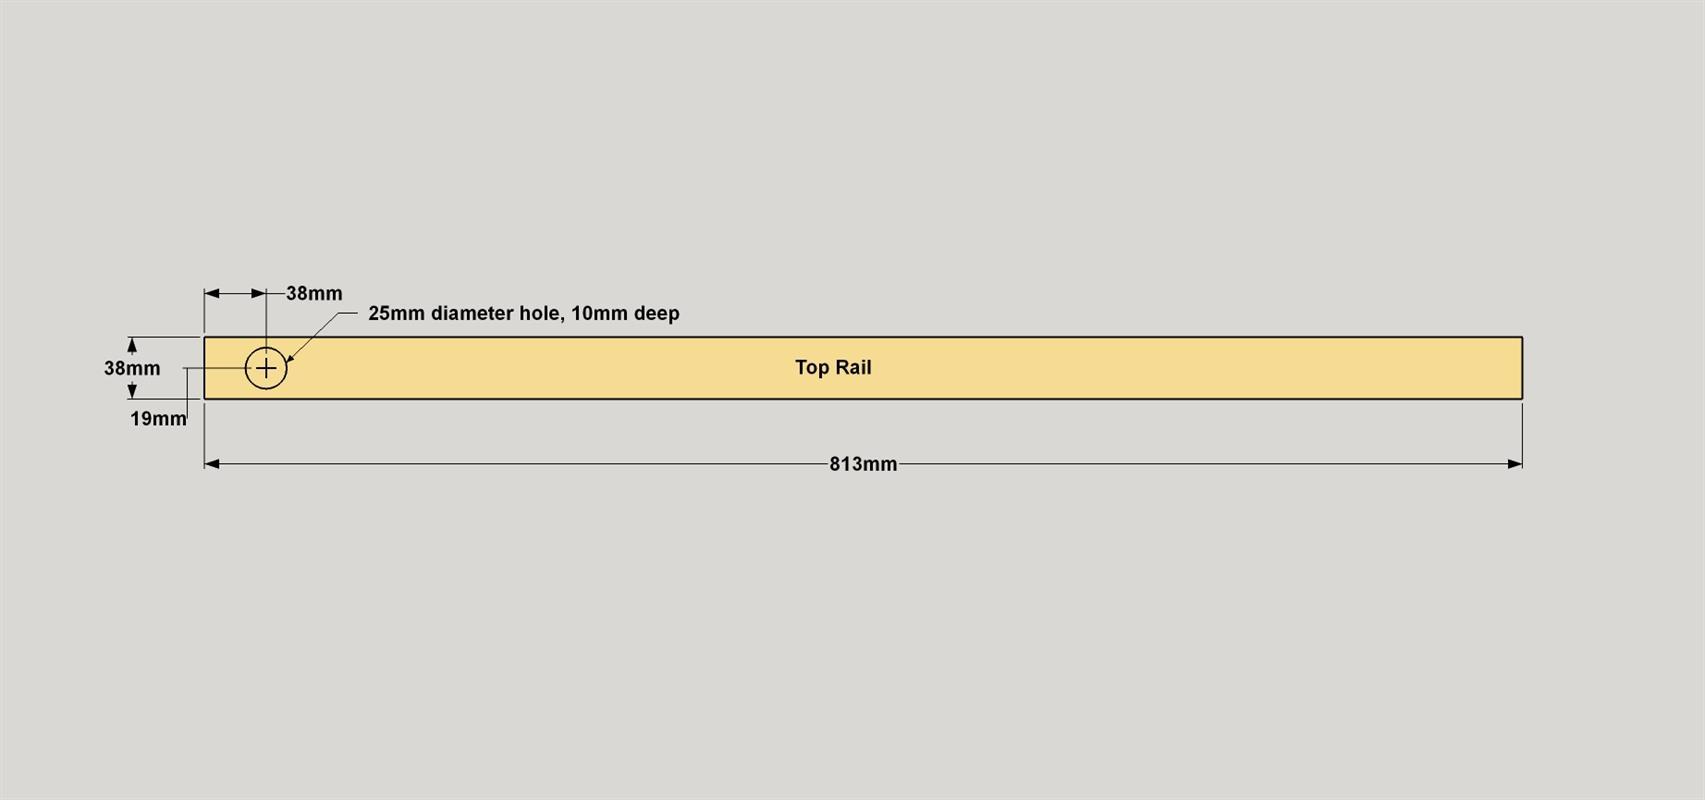
Cut two Top Rails and two Bottom Rails to length from 19x38mm boards, as shown in the cutting diagram. On the Top Rails, lay out a recess for the handle at the location shown, and then drill a 25mm hole, 10mm deep on each of the Top Rails. Use a Forstner-style bit for this hole, not a spade bit. The point on a spade bit is too long, and will poke through the opposite face of the Rail.
-
Attach the Main Supports
Now you can start assembly to create right and left “Z” frames. Lay out the Top Rails, as shown, with the handle recesses near the outsides. Then position the Right Main Support and a Bottom Rail with the right-hand Rail. Do the same to position the Left main Support and the final Bottom Rail. Apply glue to the mitered ends of the Main Supports, and then secure them to the Top Rails and Bottom Rails using 32mm fine-thread pocket-hole screws.
-
Make Upper and Lower Supports
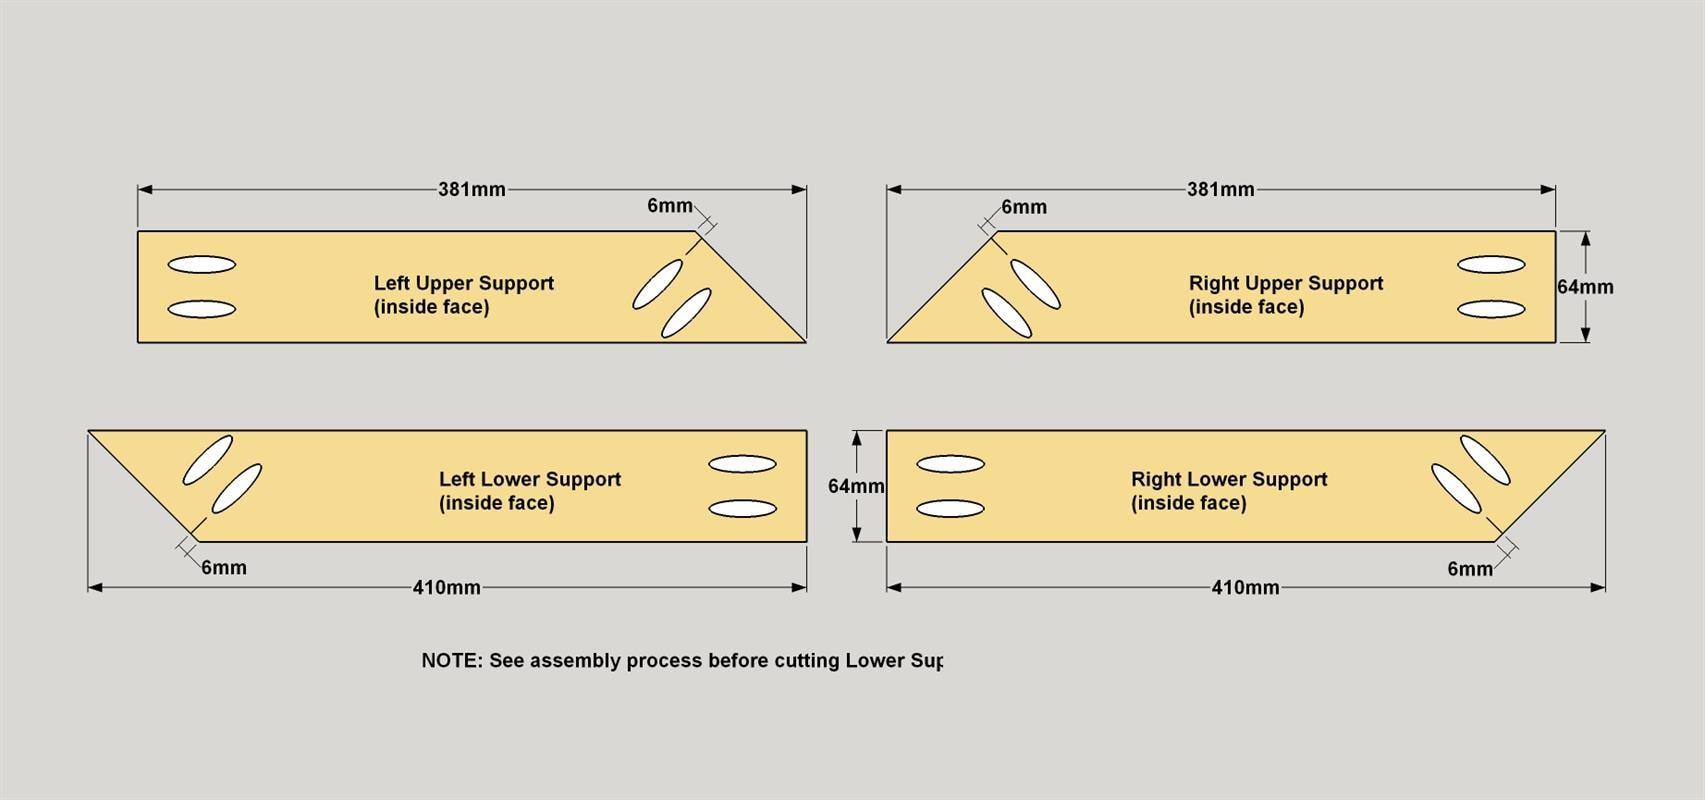
Cut two Upper Supports to final length from a 19x64mm board, as shown in the cutting diagram. Lay them out, as shown, so that you can once again make sure to locate the pocket holes on the inside faces. Drill pocket holes in the Upper Supports at the locations shown. Also cut two Lower Supports to rough length (435mm) from a 19x64mm board, as well. Don’t drill pocket holes in the Lower Supports yet.
-
Attach the Upper and Lower Supports
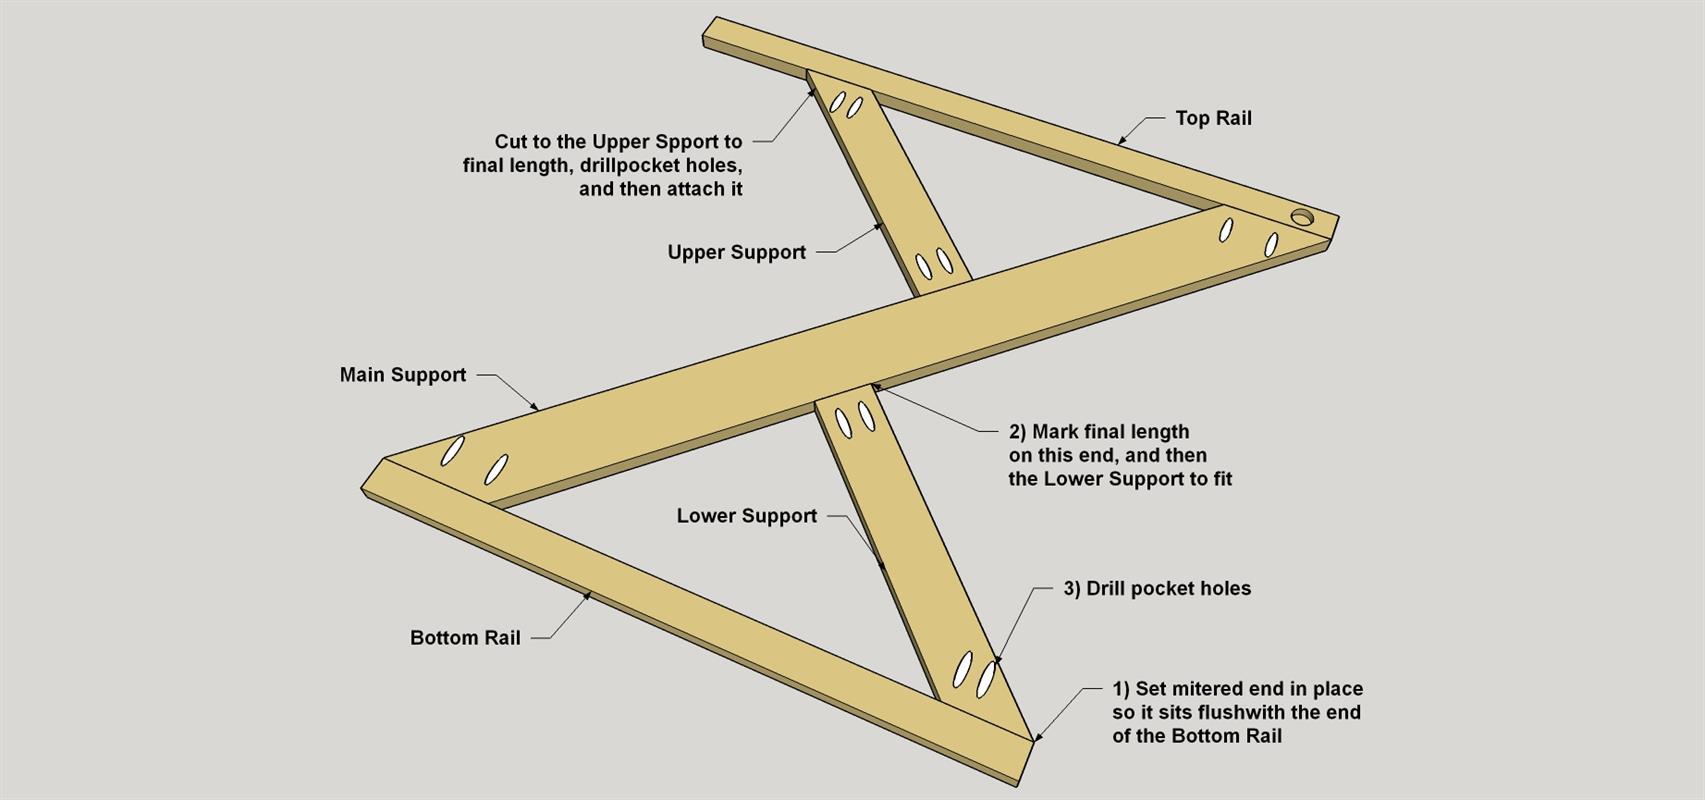
Now you can attach the right-hand Upper and Lower Supports, starting with the right “Z” frame. Spread glue on the ends of the Upper Support, position it between the Top Rail and the Main Support, and then attach it using 32mm fine-thread pocket-hole screws. Now you can lay the Lower Support in position so the mitered end is flush with the end of the Bottom Rail, as shown. Carefully mark the final length of the Lower Support where it meets the Main Support. Cut the Lower Support to final length, and then drill pocket holes at the locations shown. Spread glue on the ends of the Lower Support, and then attach it using 32mm fine-thread pocket-hole screws. Repeat these processes to attach the left-hand Upper and Lower Supports.
-
Plug the Pocket Holes
To give the cart a more finished look, you can plug the pocket holes in the frames. Apply glue in each pocket hole, and then press a pocket-hole plug into place. When the glue dries, trim the plugs flush with the surface, and then sand them flat.
-
Make the Shelf Bottoms
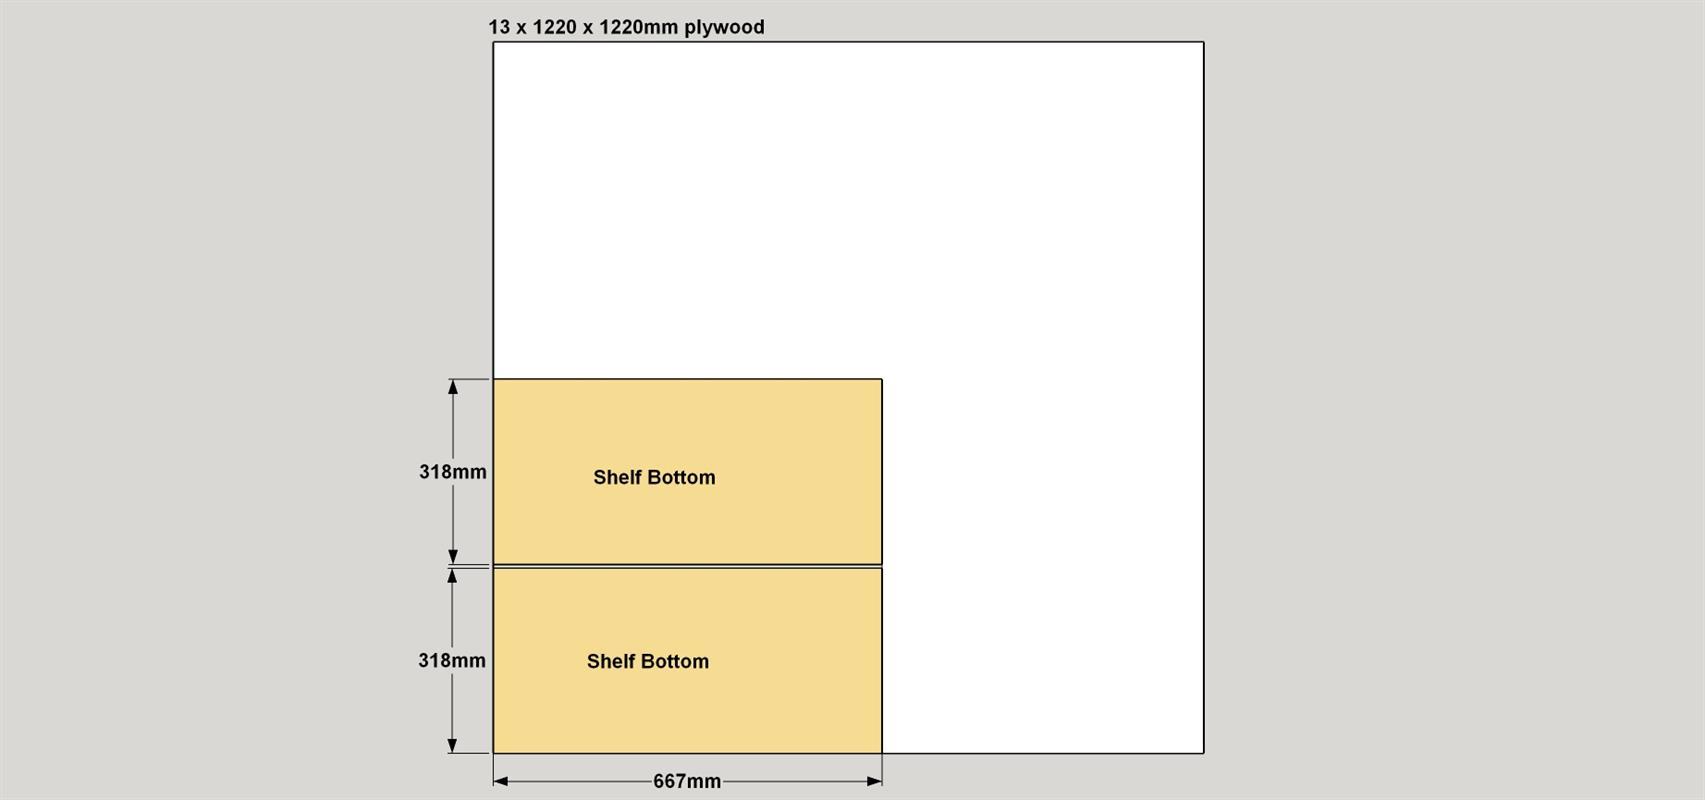
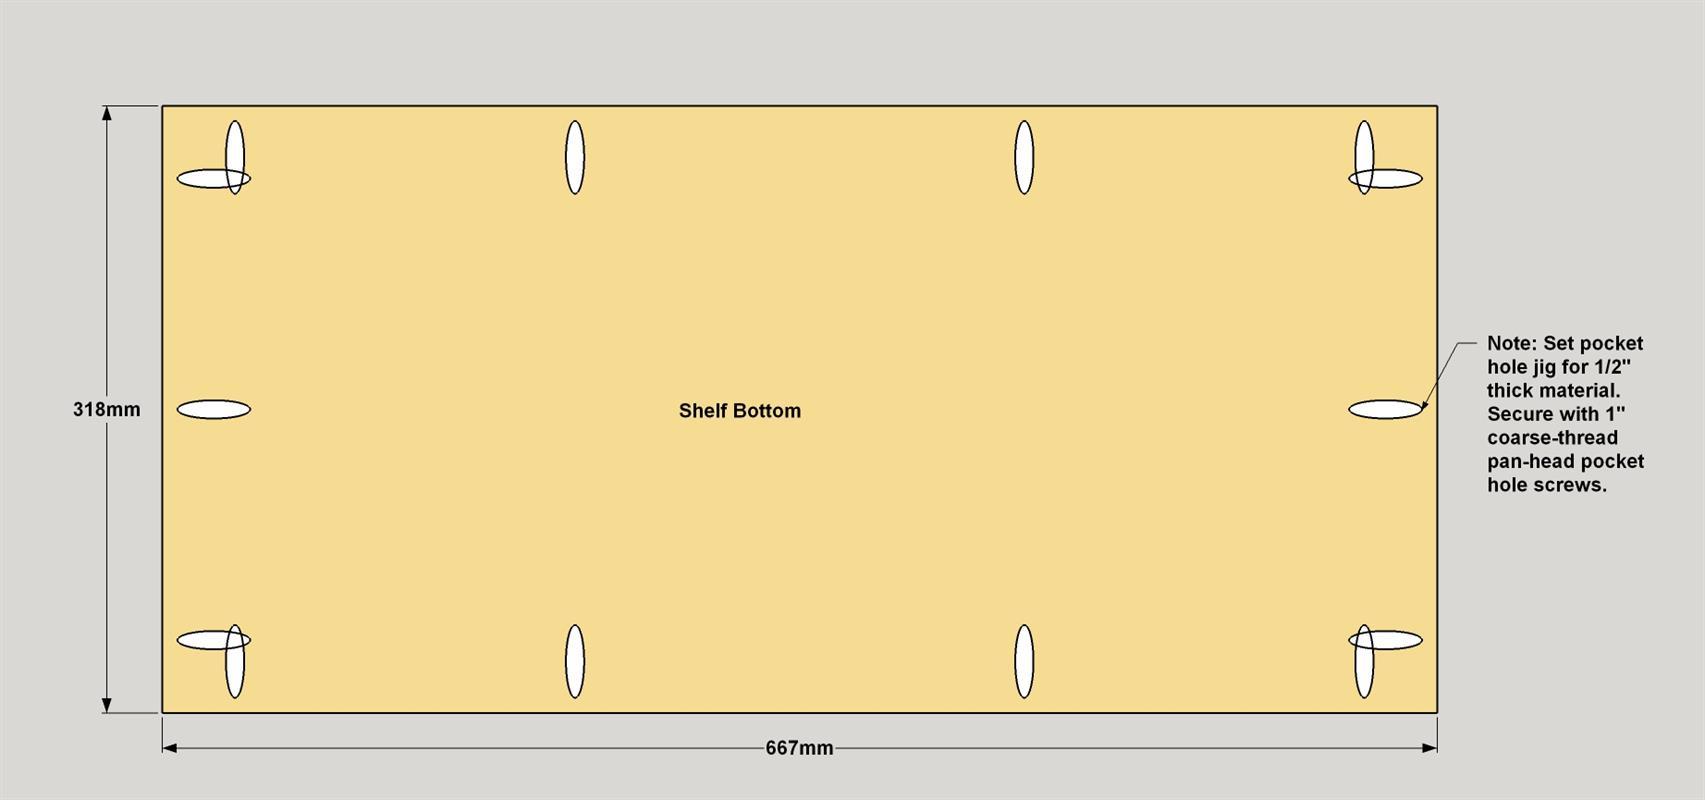
From 13mm plywood, cut two Shelf Bottoms to size, as shown in the cutting diagram. Set your pocket-hole jig and bit for 13mm-thick material, and then drill pocket holes in the underside of each Shelf Bottom, as shown.
-
Add End Rails To the Shelves
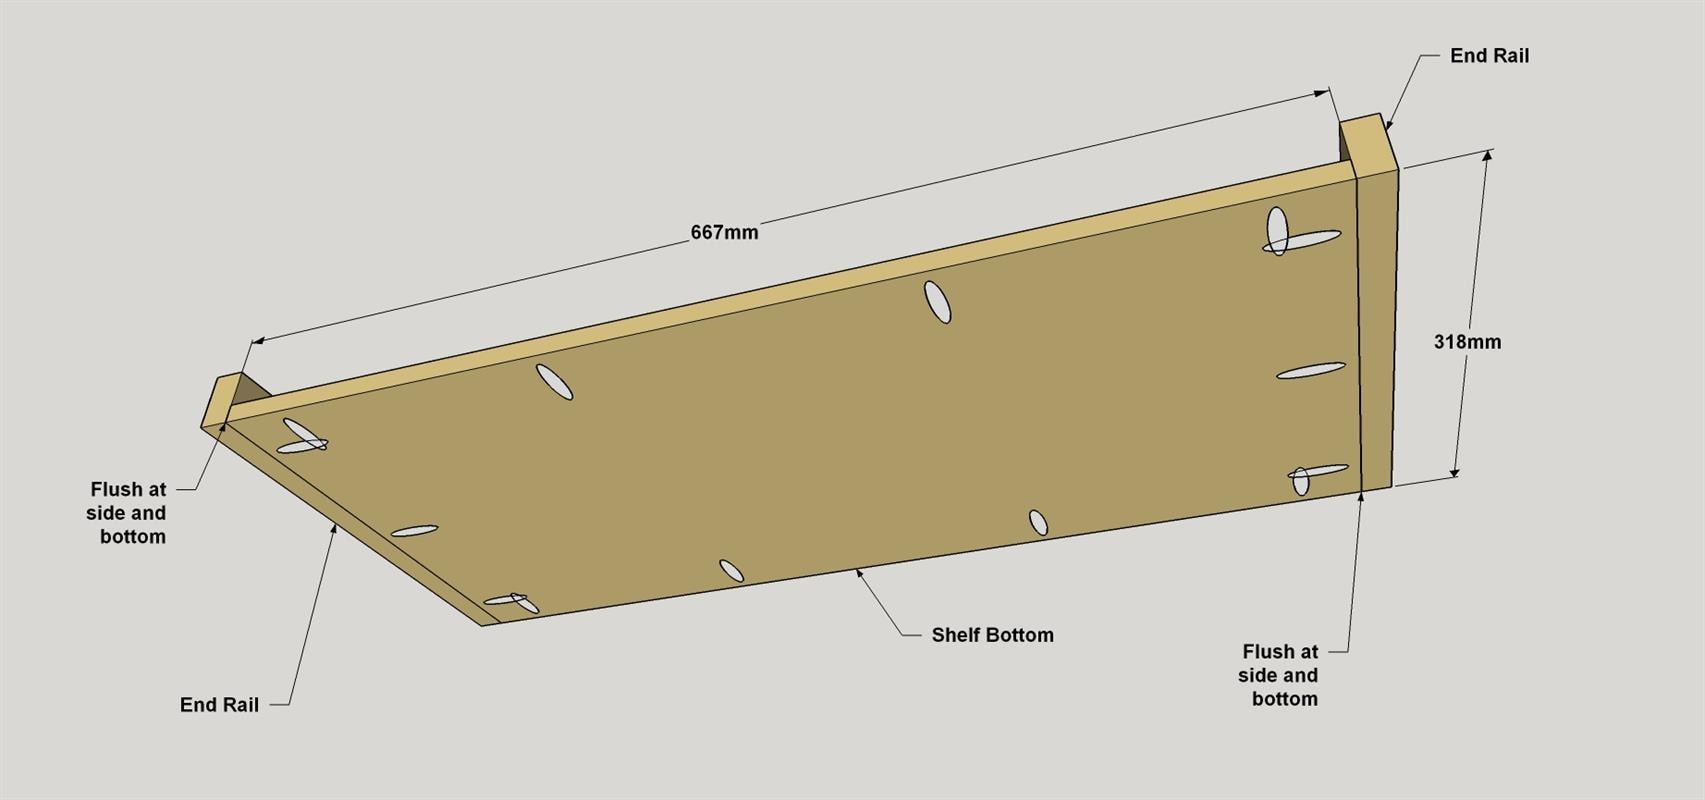
Cut four End Rails to length from a 19x38mm board, as shown in the cutting diagram. Secure the End Rails to each Shelf using 25mm pan-head pocket-hole screws, as shown.
-
Attach the Lower Shelf
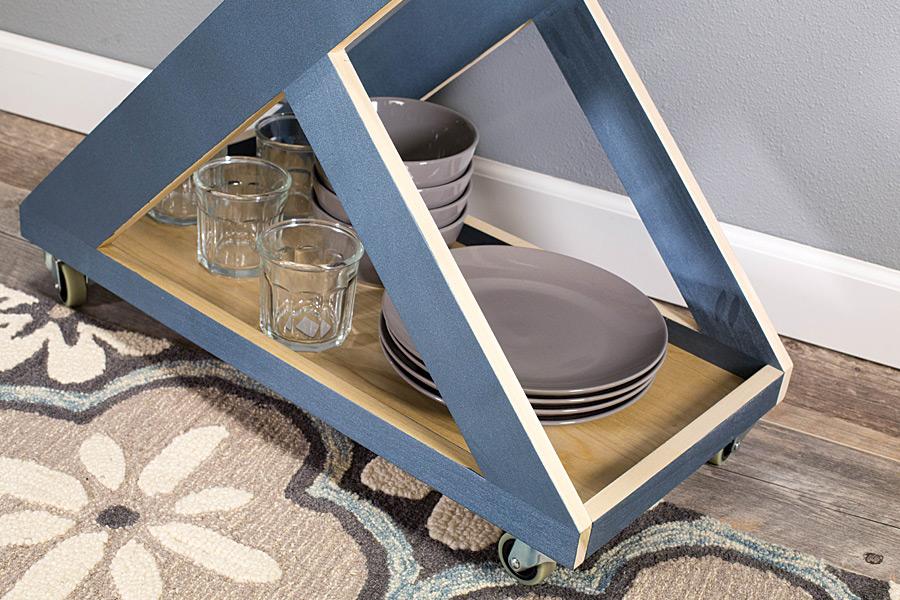
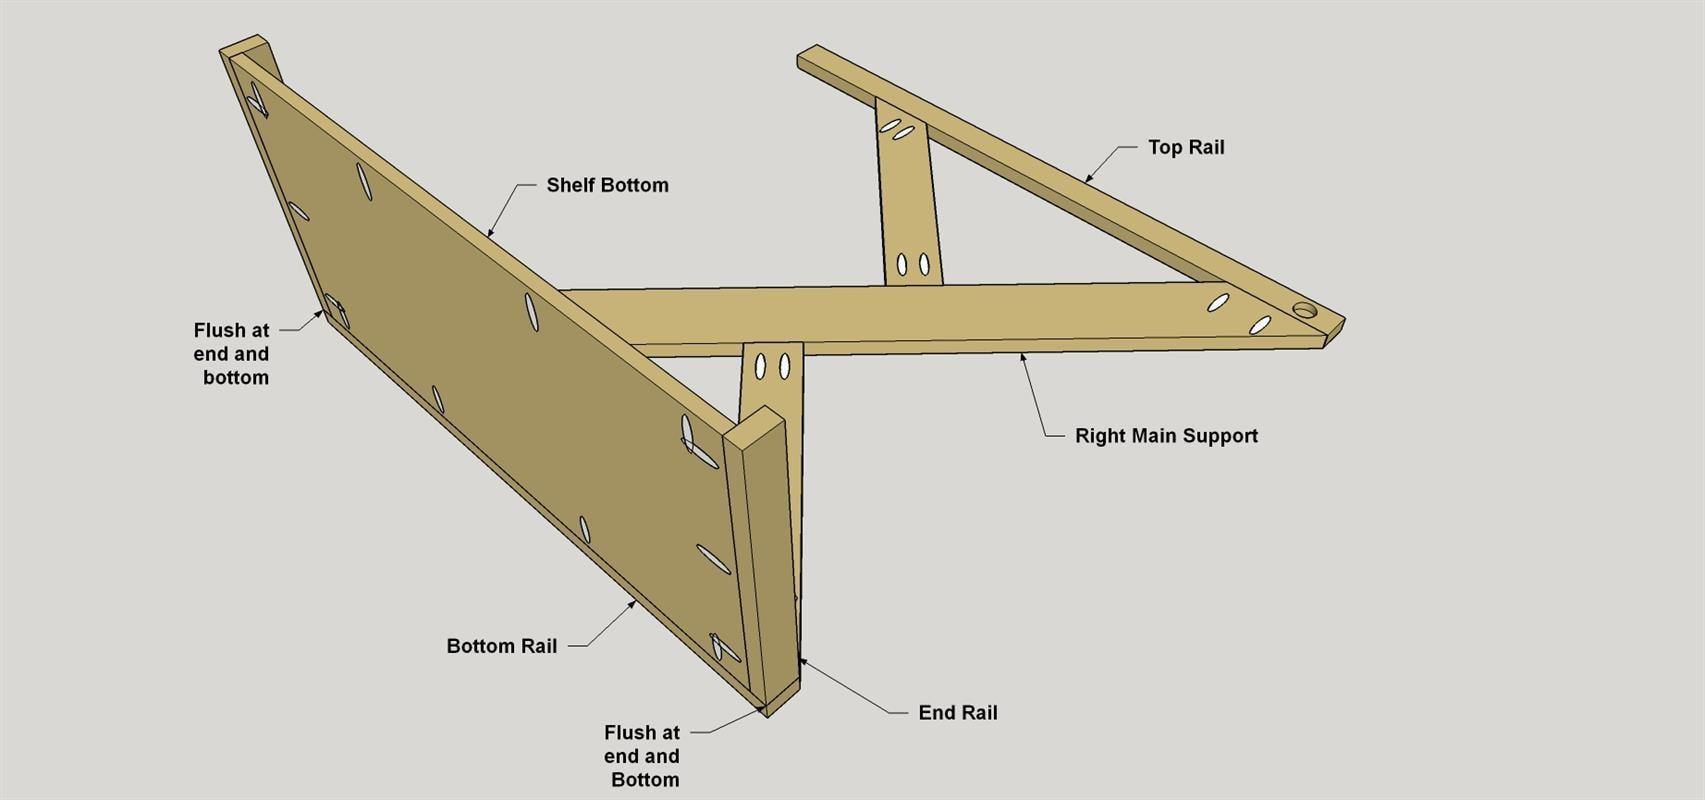
Next, you can begin final assembly by attaching the lower shelf. Lay the right-hand frame assembly with the inside face up. Now spread glue on the right edge of the lower shelf assembly, position the assembly on the frame as shown, and secure it using 25mm pan-head pocket-hole screws.
-
Add the Upper Shelf and Handle
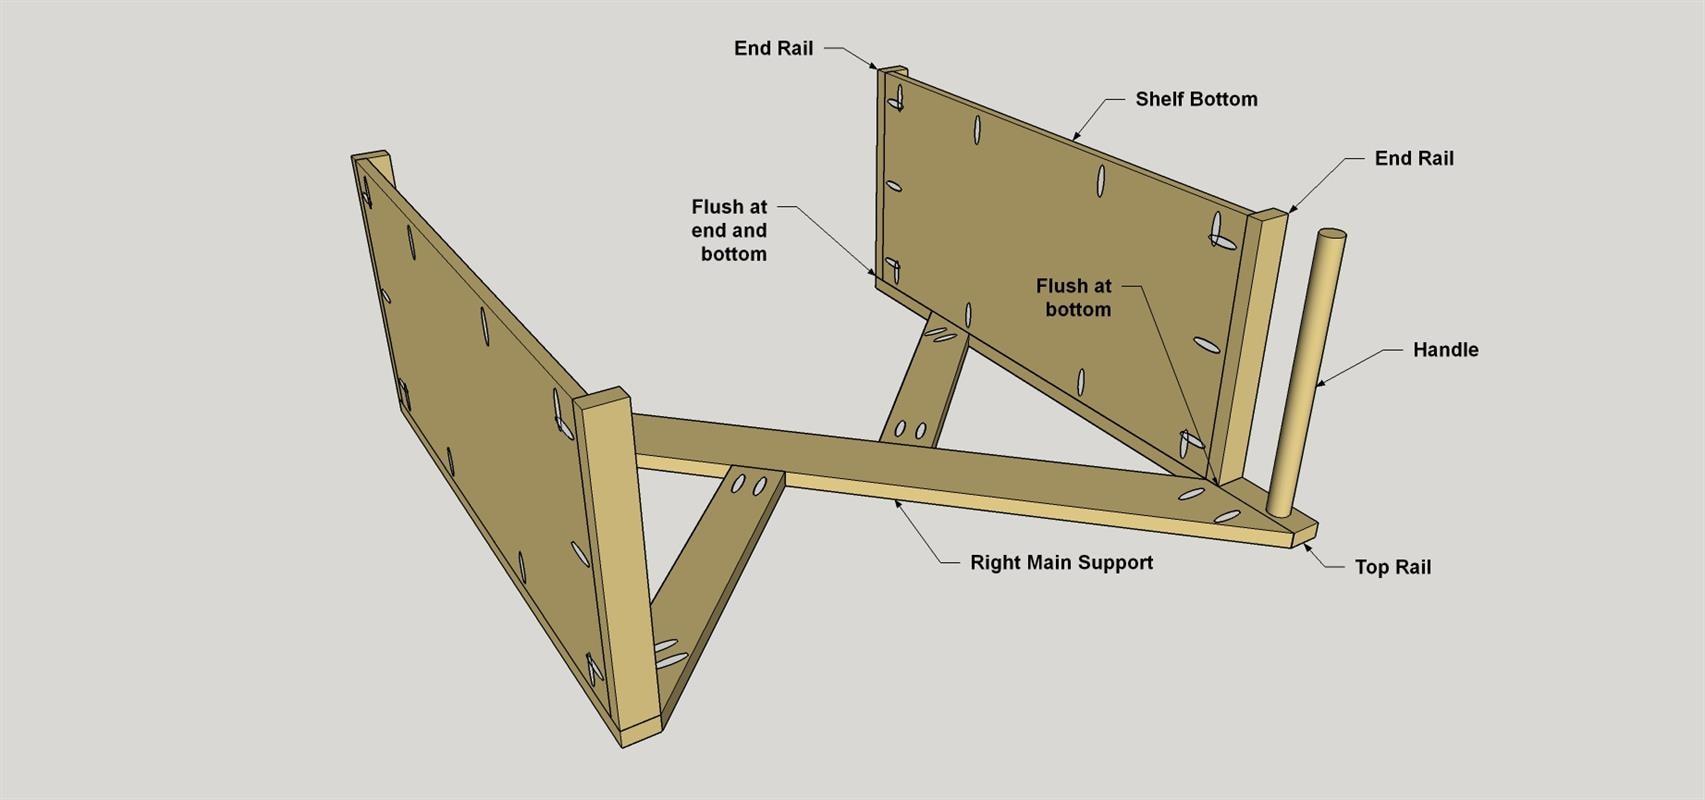
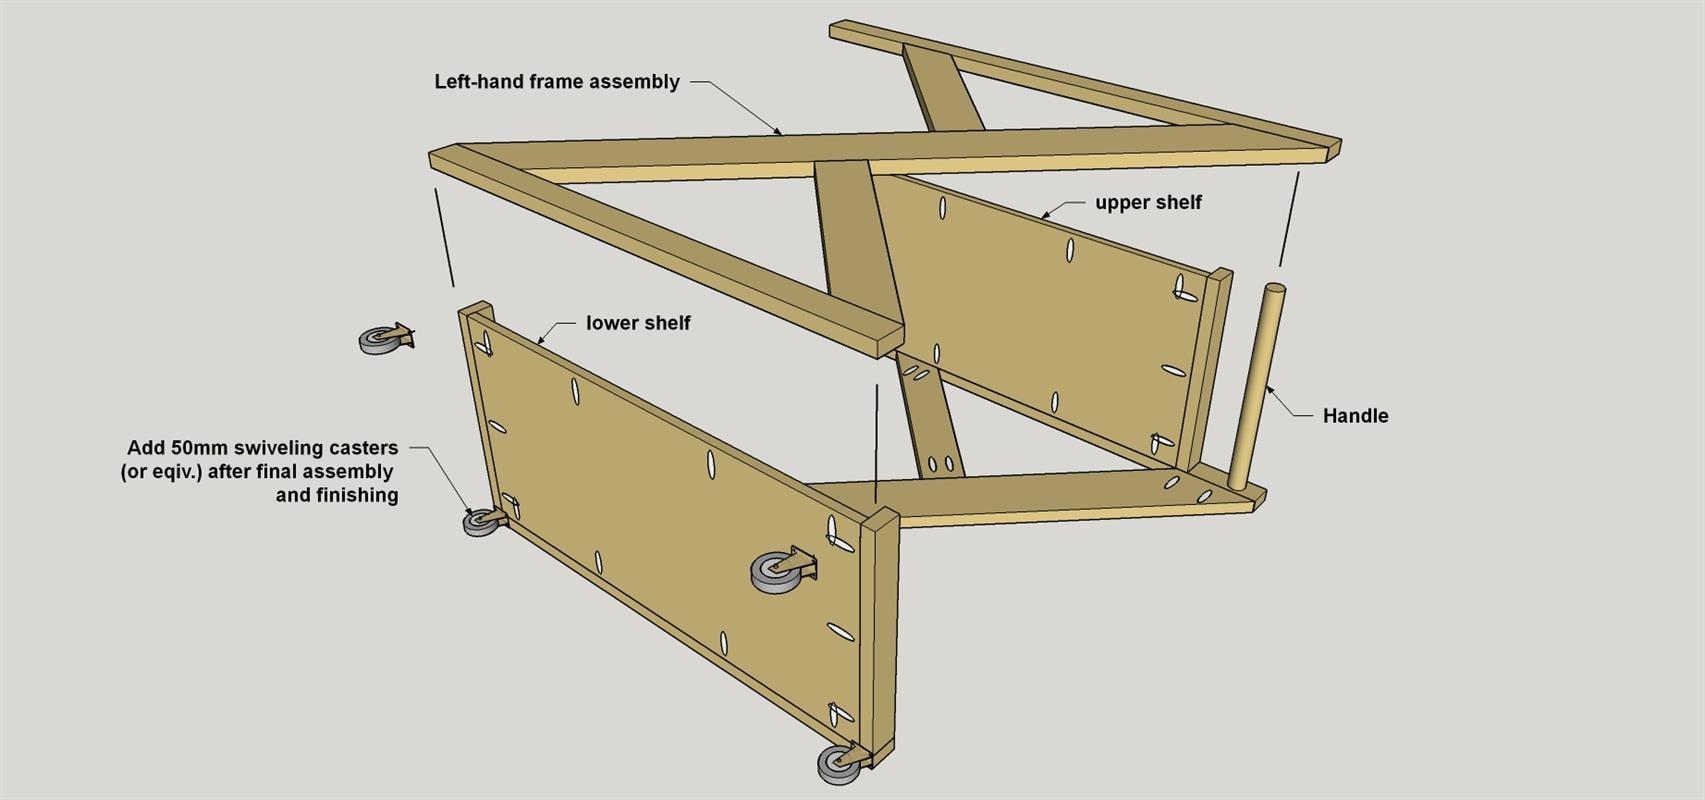
Now position the upper shelf assembly as shown, and secure it in the same way using glue and 25mm pan-head pocket-hole screws. You can then cut a Handle to length from a 25mm dowel. Put a dab of glue into the right-hand handle recess, and then set the Handle in place.
-
Add the Second Side
Apply glue to the shelf edges and the end of the Handle and then set the left-hand frame assembly in place. Secure it to the shelves, once again using 25mm pan-head pocket-hole screws. None of the pocket holes in the underside of the shelves will really be visible, so they don’t need to be plugged.
-
Add the Finish and Casters
With assembly complete, you can do any final sanding that’s needed to prepare your cart for the stain or finish of your choice. We painted ours with a metallic pewter paint that we applied just to the faces of the frames and the End Rails. Then we applied a clear finish to the edges and to the shelf surfaces. Once your paint or finish is dry, you can secure four casters to the lower shelf.
Paint with Natural Edges
The paint finish on this cart might look complicated, but it’s easy. The secret is to use foam rollers, and go lightly near the edges. Don’t load the roller with a lot of paint, and it won’t seep over the edges. You’ll have to apply several light coats, but the result is worth it. If any paint gets on the edges, just let it dry, and then sand it away. To protect he edges, wipe on a coat of natural oil finish after the paint dries.


