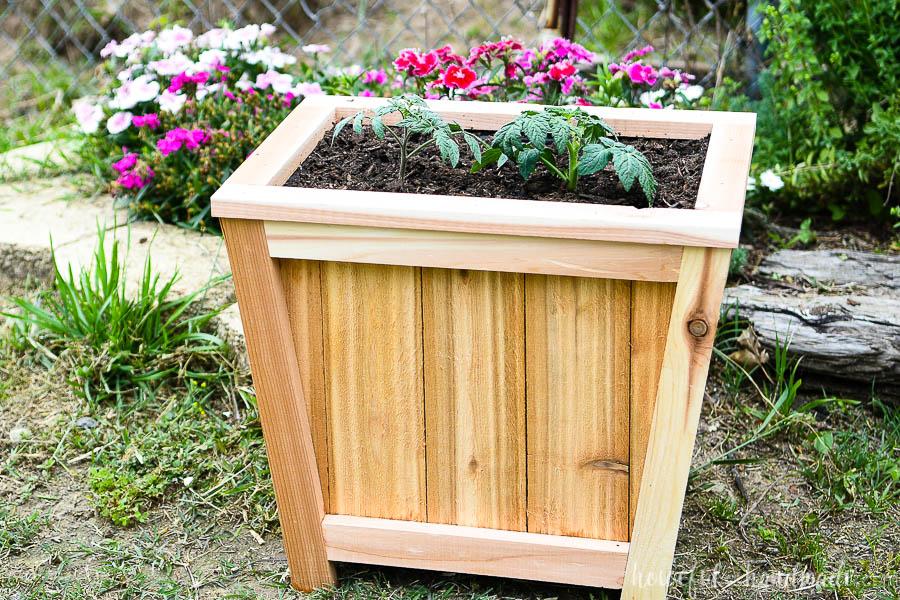
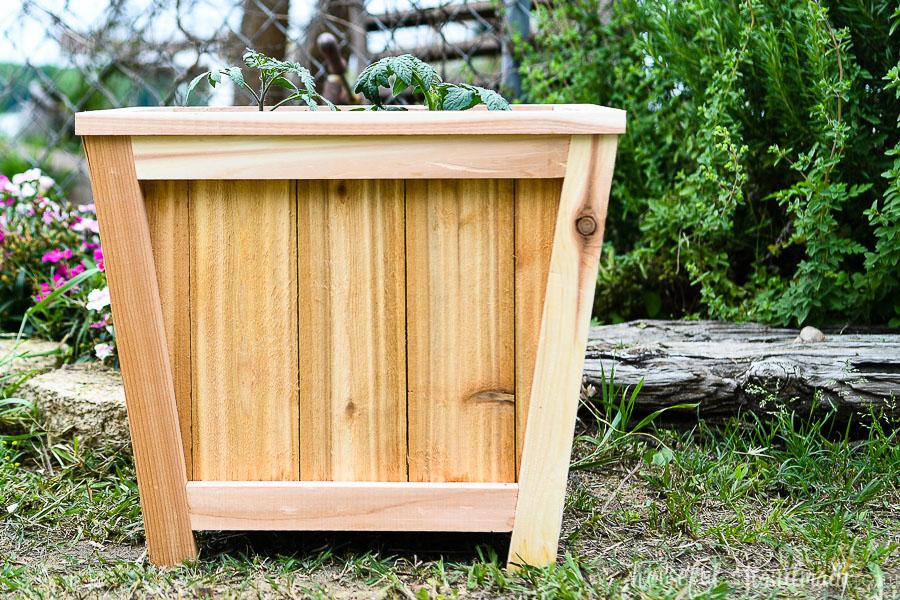
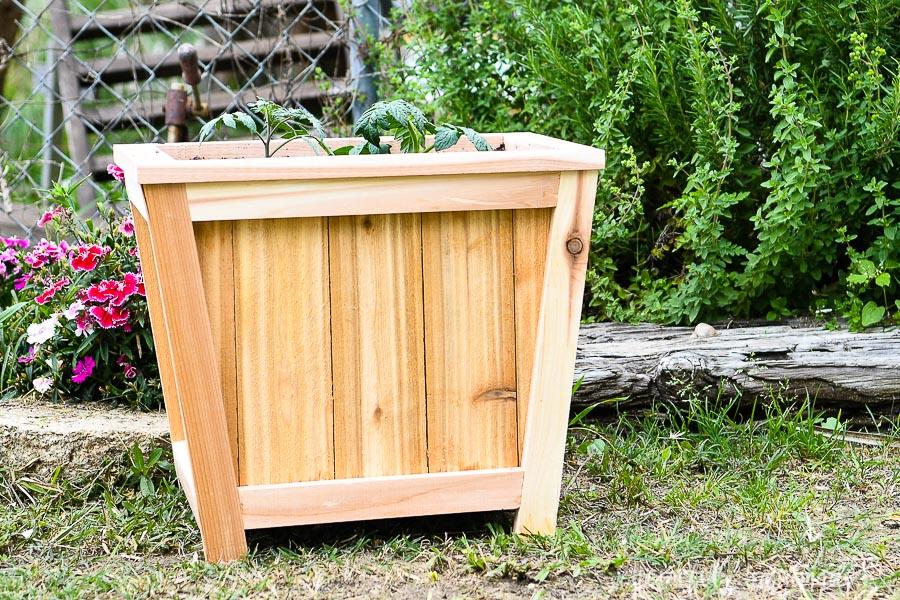
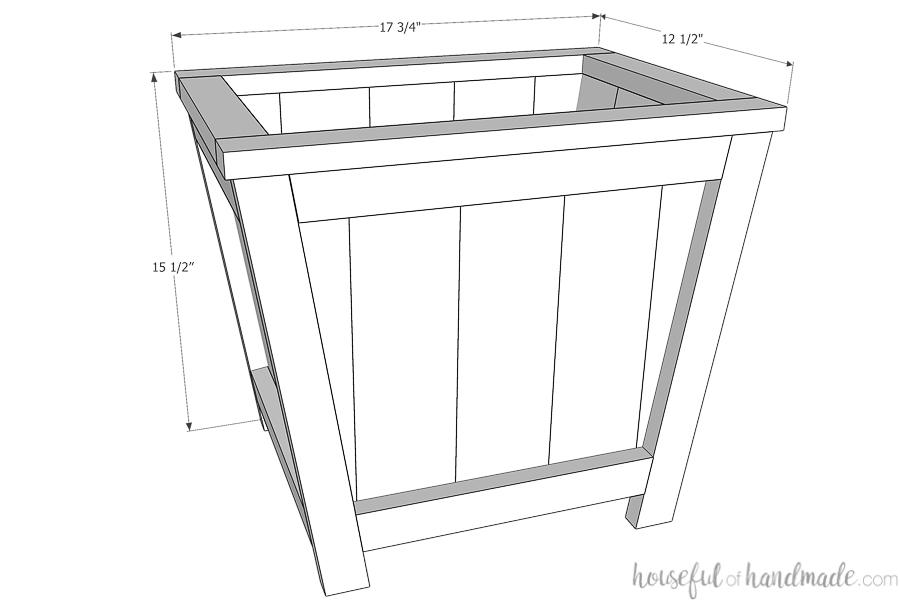


Turn simple 1x2s and fence pickets into a beautiful new planter. The slight angle on the front and back of the planter give it added style without making it challenging to build. The planter is large enough to plant bigger plants, vegetables or small trees.
Tools
Kreg Tools


Other Tools
-
Miter Saw

-
Tape Measure
-
Nail Gun
-
Stapler
Materials
Wood Products
- 3 Board , 1x2 , 96"
- 3 Fence picket , 1x4 , 72"
- 1 Board , 1x4 , 36"
Hardware & Supplies
- 52 1 1/4" Kreg pocket hole screws
- 1 Outdoor wood glue
- 100 1" finish nails
- 1 Landscape fabric
- 30 Staples
Directions
-
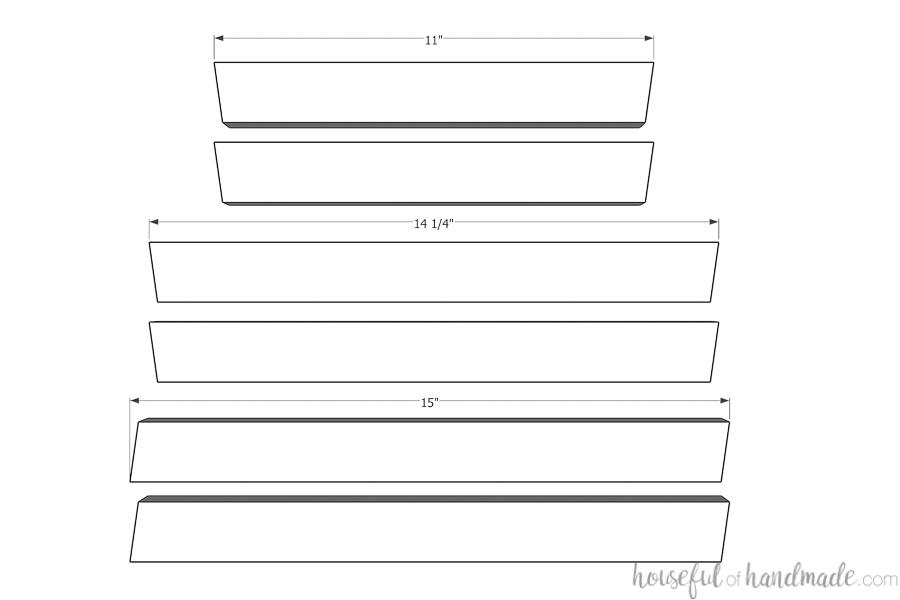
Cut 1x2 boards
Cut the 1x2 boards for the planter according to the cut list. The legs need to be cut so each edge is at an 8 degree angle with the ends parallel to each other. The front/back top and bottom rails need to be cut so each angle is cut at an 8 degree angle with the angles opposite each other.
-
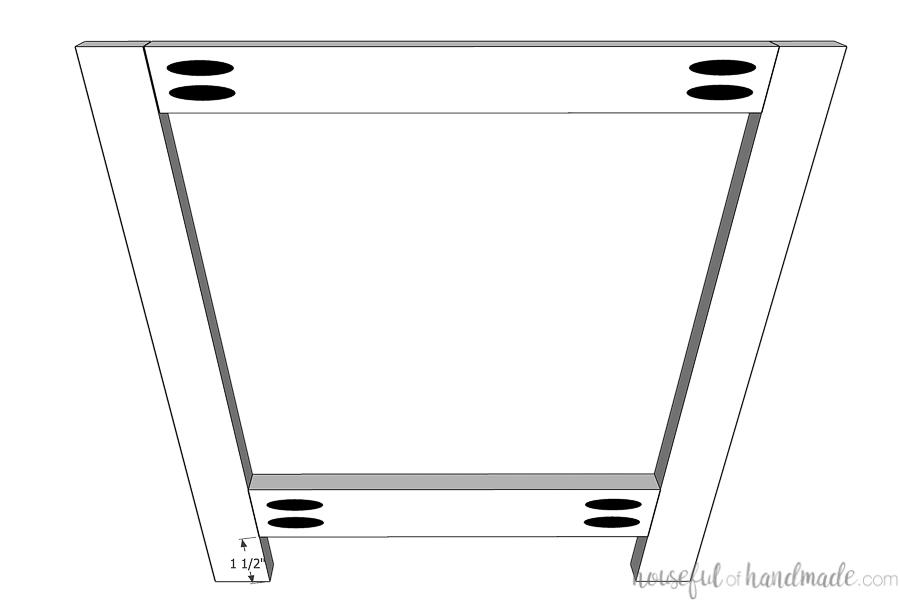
Assemble front/back
Set your pocket hold jig for 3/4" material. Drill 2 pocket holes in each end of the front/back top and bottom rails. Using wood glue and 1 1/4" pocket hole screws, attach the bottom rail so it is 1 1/2" up from the bottom of the legs and the top rail is flush with the top of the legs. Make sure the legs angle toward each other at the bottom.
-
Assemble planter frame
Drill 2 pocket holes in each end of the side rails. Attach them between the front and back frame so the top rails are flush with the outside of the front and back. The top rail will not be flush at the top, but this will be hidden later. The bottom rail should be 1 1/2" up from the bottom.

-
Attach bottom slats
Drill 2 pocket holes in each side of the bottom slats. Attach them between the front/back bottom rails so they are flush with the bottom. Use 1 1/4" pocket hole screws and wood glue. Leave a bit of a gap between the boards and the side of the planter for drainage.
-
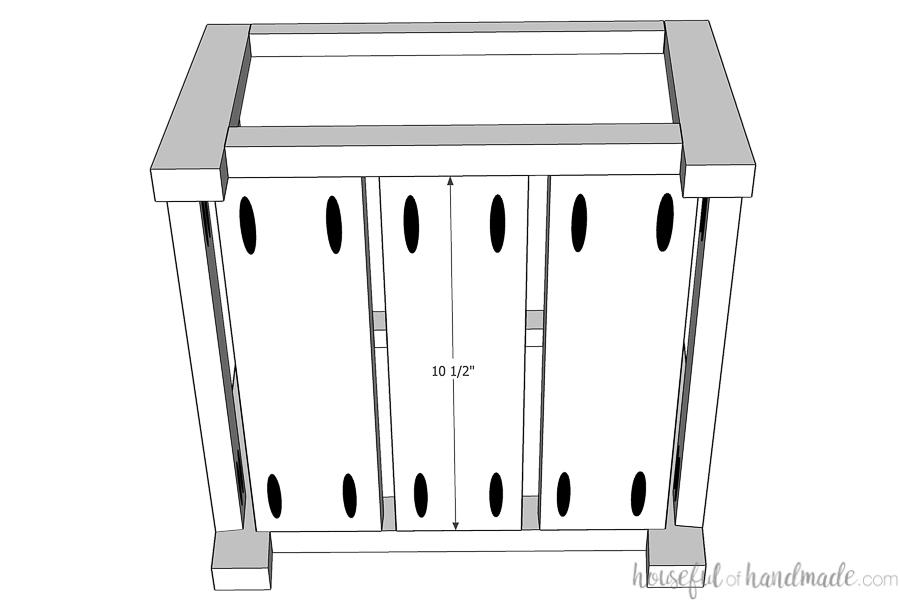
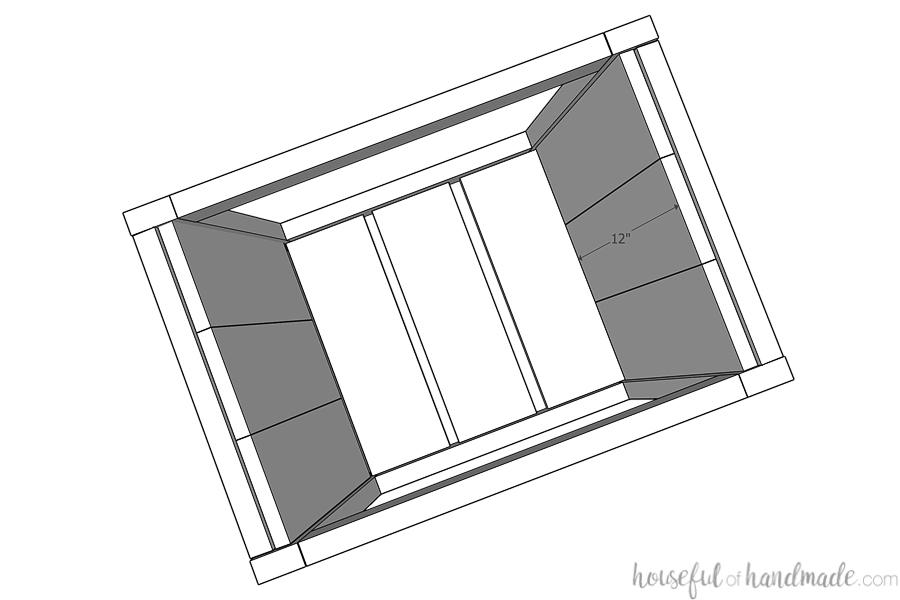
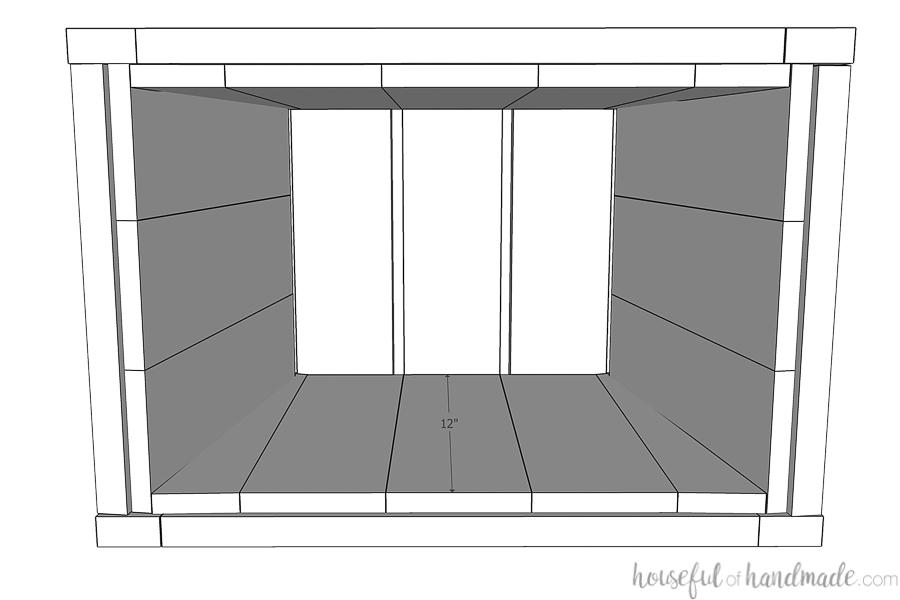
Add panels to sides of the planter
Add the fence picket panels to the sides of the planter first. Set the panels so they are 1/4" below the top of the planter. Use wood glue and finish nails to secure them to the inside of the planter frame.
-
Add panels to the front/back
Center 3 panels inside the front of the planter. Secure as above. Measure the space remaining and using a circular saw or jig saw, cut the triangle piece off one of the remaining panels to fit. Use the other side of the cut off panel to cut a piece for the other side of the planter. Repeat for the back.
-
Add landscaping fabric
Cut a piece of landscaping fabric to fin inside the planter. It needs to sit flat on the bottom of the planter and against the sides. Staple the fabric to the top of the slats not the frame. Trim the excess fabric.
-
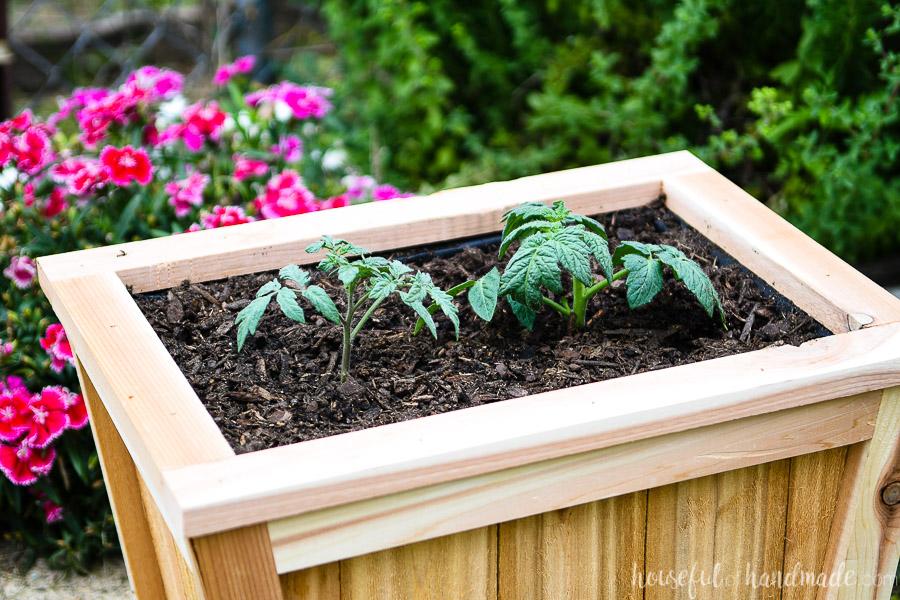
Add top frame
Build the top frame by drilling pocket hole screws in both ends of the top side boards. Attach them between the top front/back boards with 1 1/4" pocket hole screws and wood glue. Lay it on top of the planter frame and center. Attach with wood glue and finish nails making sure to cover the edges of the landscape fabric.

-
Fill with soil and enjoy!
Now you can fill your new planter with soil and get to planting. For more outdoor projects to build make sure to visit me at Housefulofhandmade.com and say hi!