


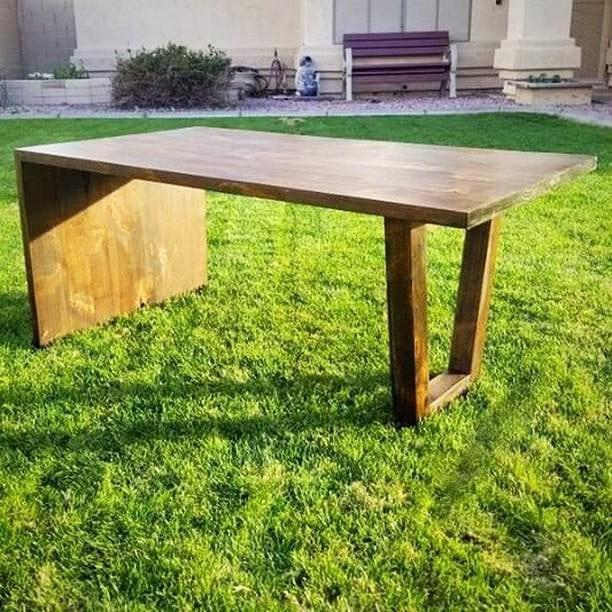


Your very own DIY waterfall coffee table that will add a modern feel to any home. You can build this using boards from our local big box hardware store, or you can use a hardwood of your choice to add even more character.
Tools
Kreg Tools


Other Tools
-
Square

-
Clamps
Materials
Wood Products
- 4 Board , 1x6 , 72"
- 1 Board , 2x3 , 72"
Hardware & Supplies
- 8 Kreg SML-C150-500 Pocket Hole Screws 2-1/2-Inch
- 1 Wood Glue
- 2 2" long wood screws
Directions
-
Cut Parts
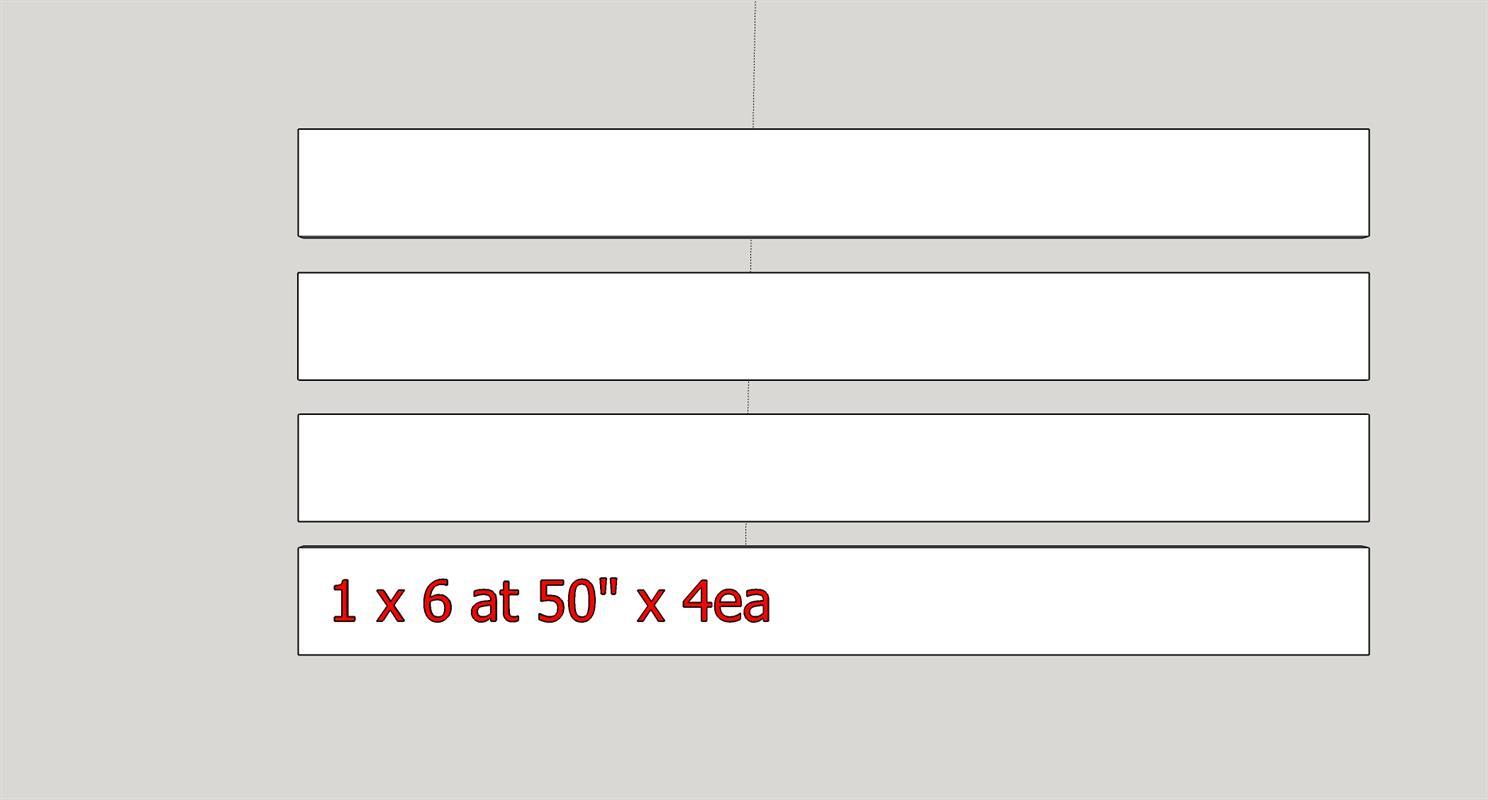
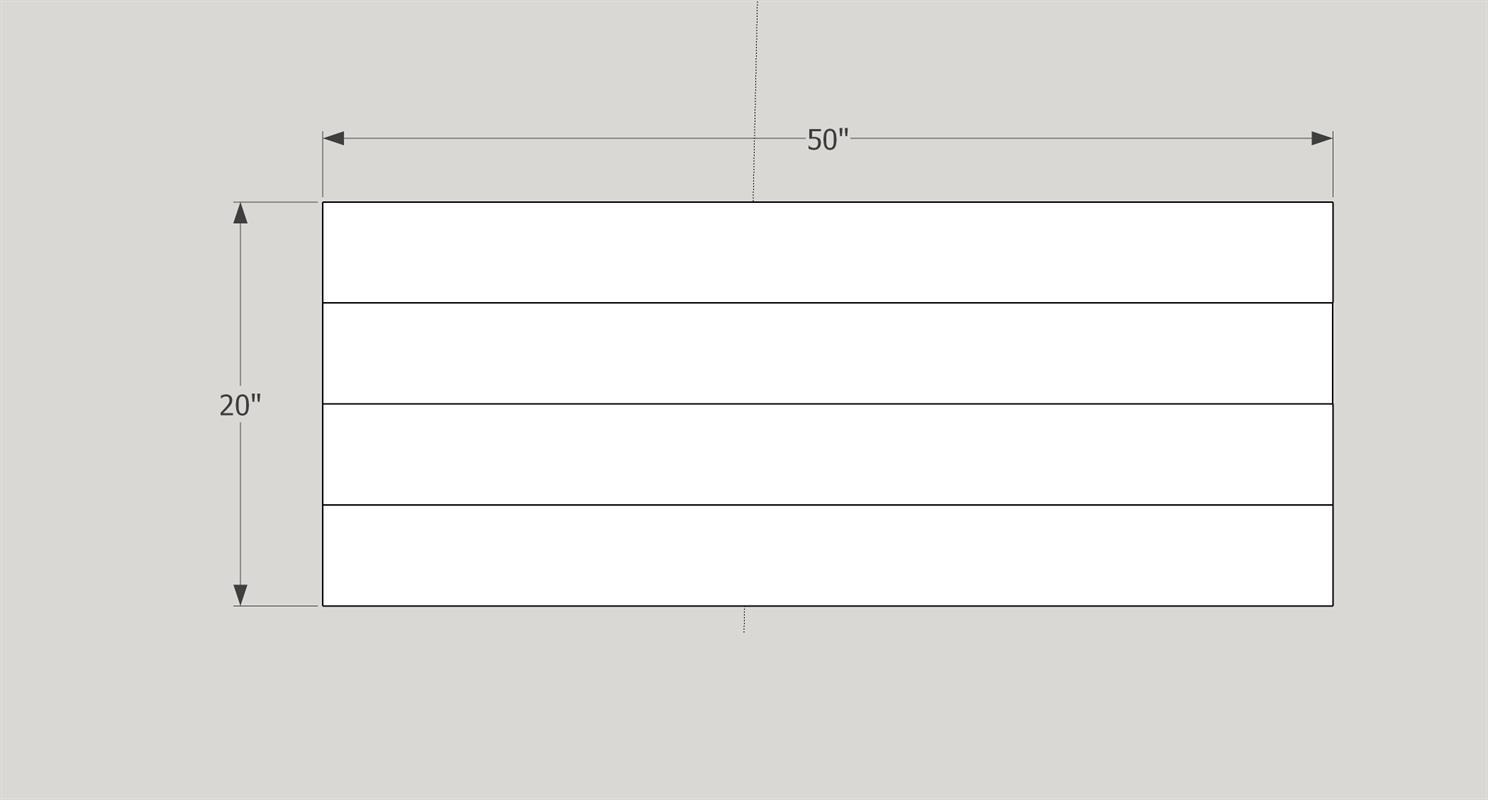
Cut (04ea) 1" x 6" boards to 50" each.
-
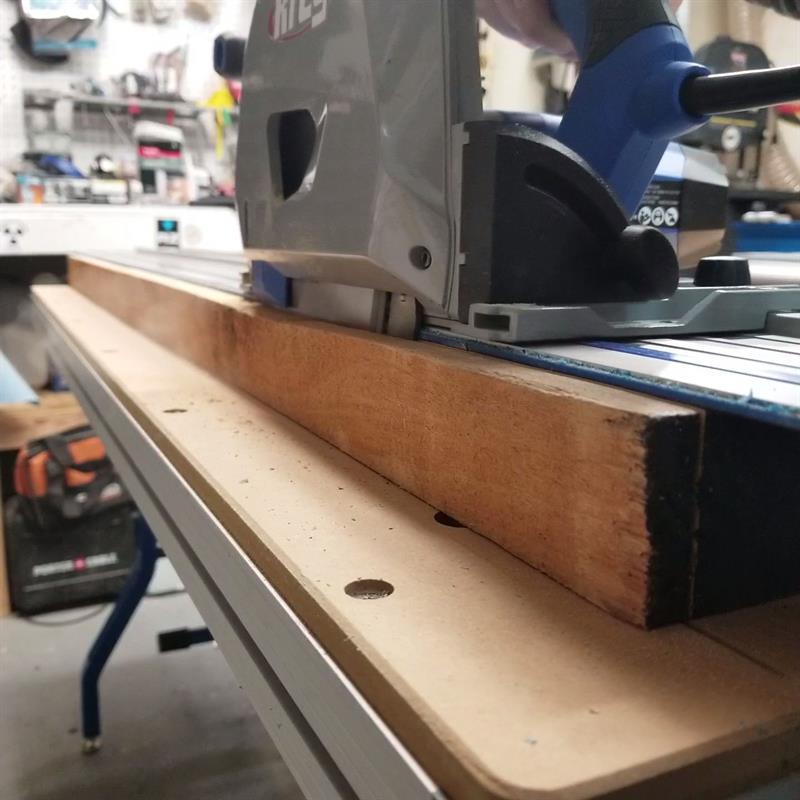
Straight Line Rip boards (optional)
***This step is optional*** - it will give you tighter, cleaner seams during the final glue up. I used my Kreg Adaptive Cutting System for this step. Using it made it quick and easy. If you don't have this system there are a number of other ways to do this - with a table saw or a jointer. If you complete this step, you are looking for a final width of 5" on your boards.
-
Glue Up Boards
Glue up the (4) 1" x 6" x 50" boards to create a panel that is 22" x 50" (if you chose to do step 2, your dimension will be 20" x 50")
Wipe excess glue off from glue joints to save you time once it dries. *** Finishing tip - Stain will not take to the dried glue - you'll need to sand the glue completely off before applying a stain.
-
Make The Cut For The Top
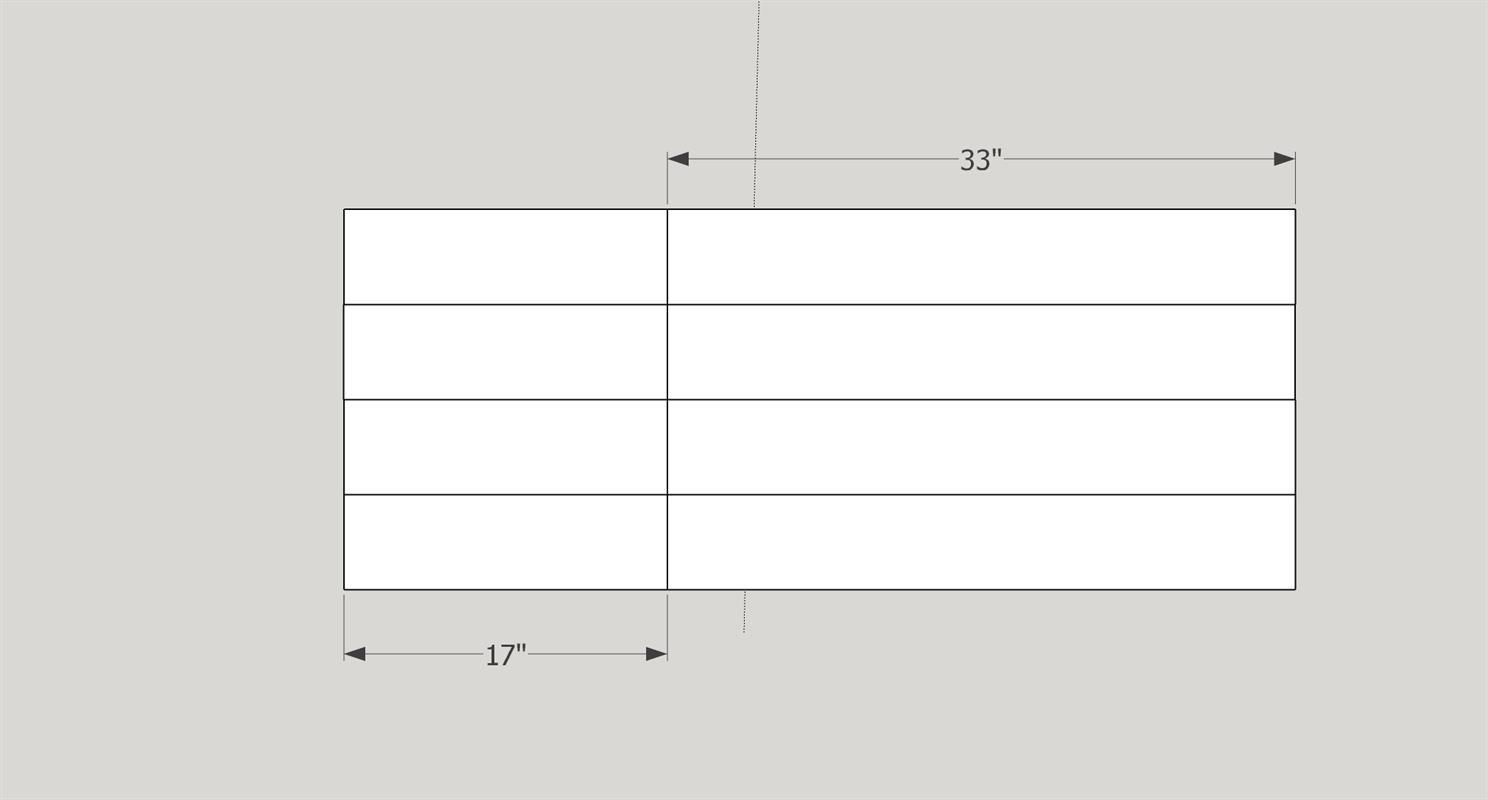
Now that you have a panel glued up - you need to measure 33" off one end and make a mark. With a square, make a line across the width of the panel. With your finish side up (determine what side will be your top, that is now your finish side), you want to make a beveled cut (45 degree) with the bevel leaning into the top - not away. I did this on the ACS - using the stops that came with the system, I set them at 33", adjusted the saw to 45 degrees and made the cut. You can also use a circular saw with a straight edge.
-
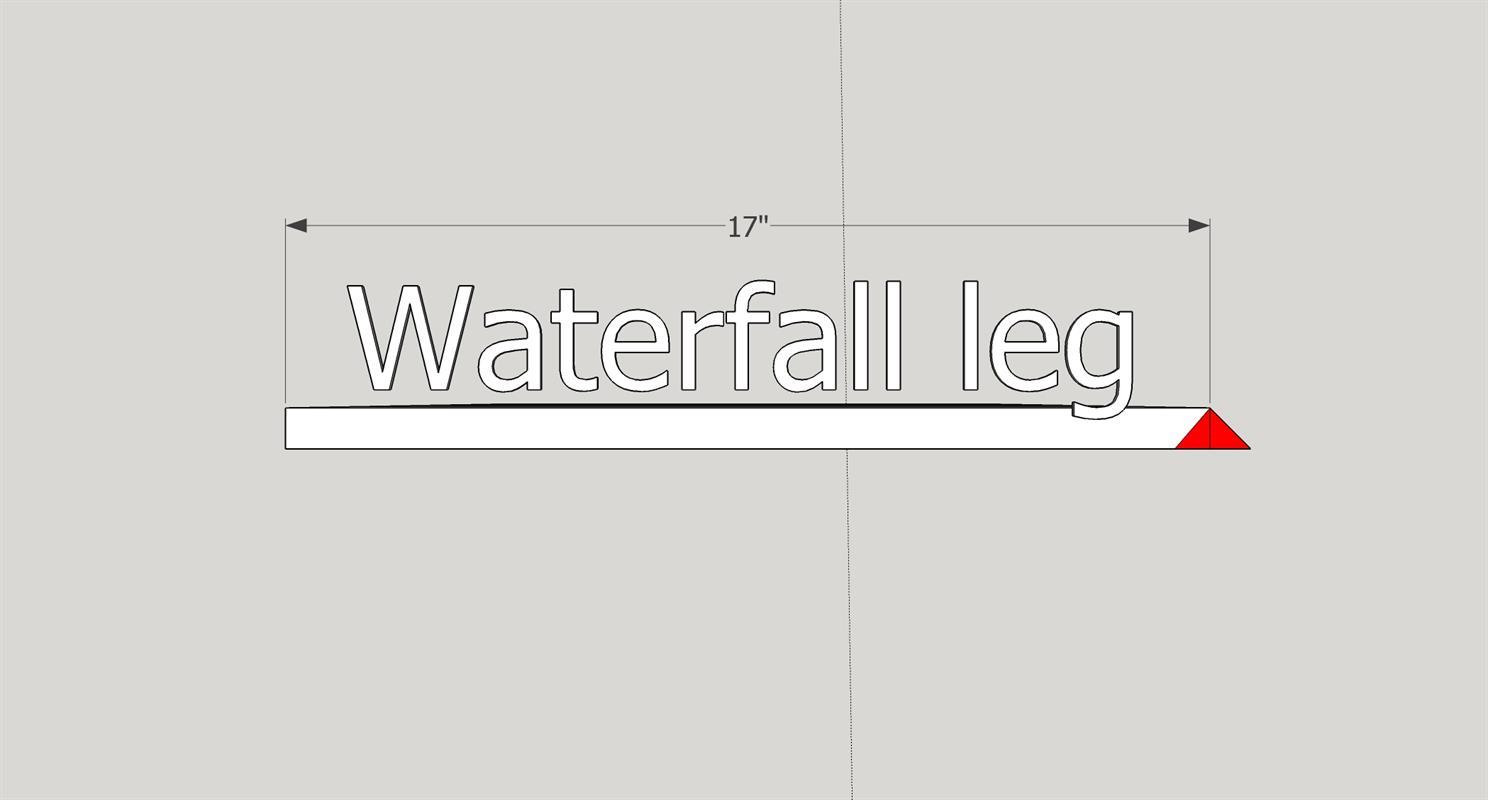
Make The Cut For The Waterfall Leg
With the remaining 17" of the panel, you are now going to make your waterfall leg. With the panel laying in front of you - the mitered cut will be going the wrong direction to mate up with your top - we are going to cut that mitered edge again, but this time with the miter going away from the cut side. When complete, the mitered top and leg will make a 90 degree joint. ***See attached image for illustration - you'll want to remove the RED area with your bevel cut.
-
Glue Up The Mitered Joint
For this step I recommend biscuits (#0). This will help with alignment and strength. Short dowels will work as well. *Caution - With a mitered edge you'll be drilling on an angle and you don't want to drill too deep* Once you've figured out your alignment method you'll need to cut 2ea pieces of 2x4 at 8" long - Then cut them in half with your miter saw at 45". Now you'll have 4ea beveled blocks at approximately 4" (long point). You will need these for clamping up the mitered edge. To hold these in place use a 18ga pin nailer (you'll use filler to fill the holes later). Mock up this step prior to gluing - make sure you have your clamps ready - then glue.
-
Build The Tapered Leg
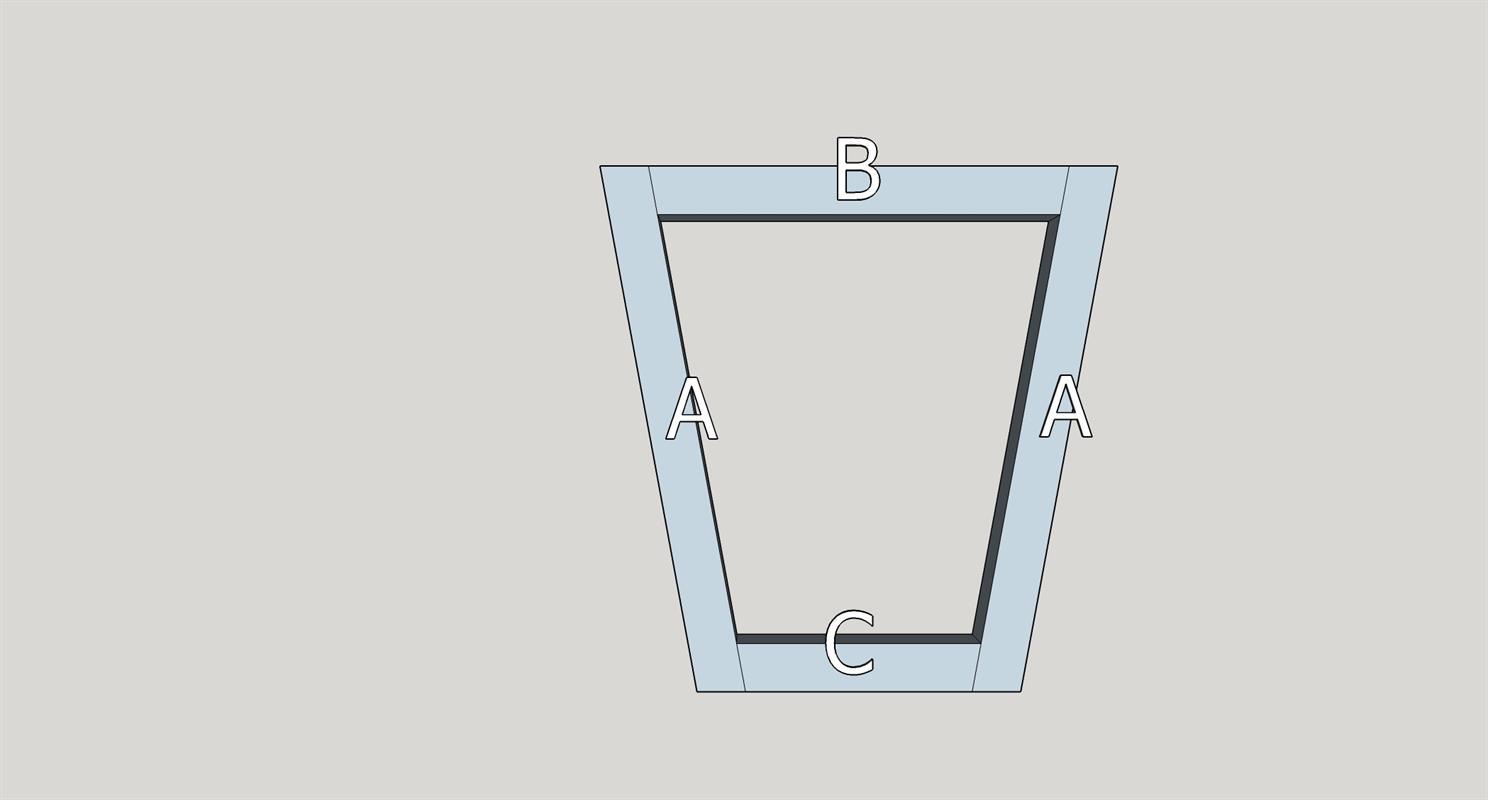
Take parts A, B & C (see parts list) and assemble the coffee table leg, per the attached drawing.
For this step you will use 2-1/2" Kreg pocket hole screws. Place pocket holes facing up, and facing down on parts B & C - so that when fully assembled and installed they will not be seen. You can plug the pocket holes once assembled and then sand flush.
-
Prep For Finish
Now that the waterfall coffee table and tapered leg are built, you can sand and prep your parts for the finish of your choice. *You will attach these 2 pieces together after the finish is applied, but it is much easier to prep/finish the individual parts this way.
-
Apply Finish
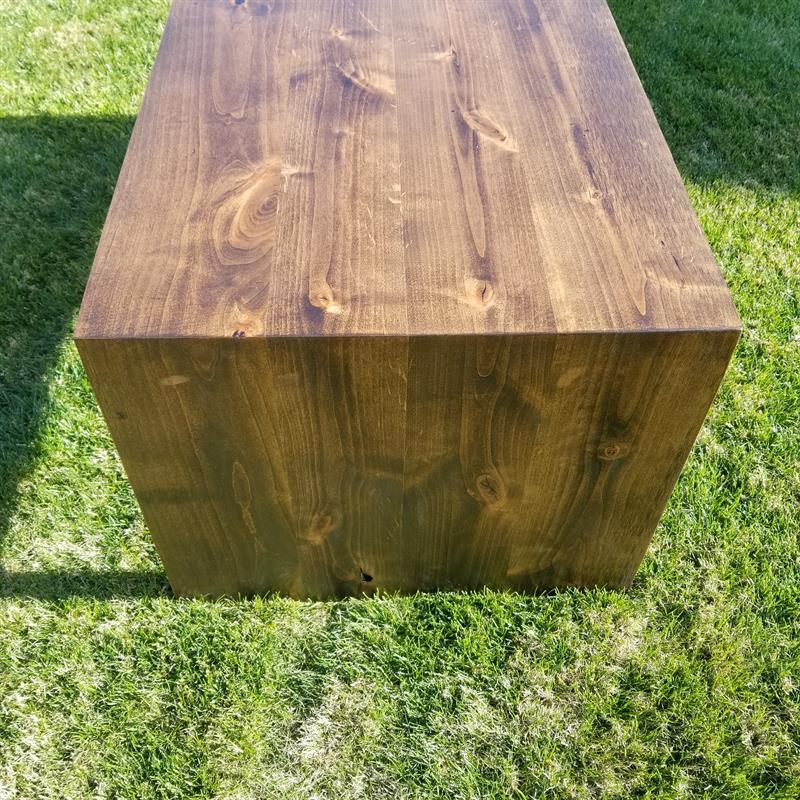
I chose to stain my coffee table with espresso stain and applied a satin poly on top of it. You can choose what suits your needs best.
-
Attach The Tapered Leg
To attach the tapered leg to the coffee table you will need 2ea 2" wood screws - Prep the leg for attachment, by drilling 2ea pilot holes thru part B on the leg - countersink them for wood screws. Layout and attach the leg to the underside of the coffee table - I used a 3" offset from the edge of the table and centered it on the width.