2-in-1 Outdoor Games
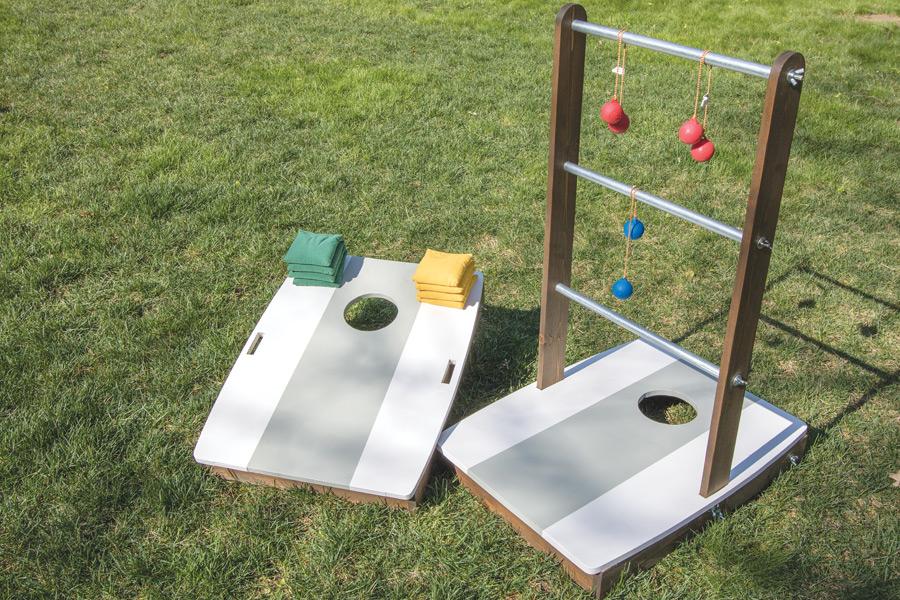
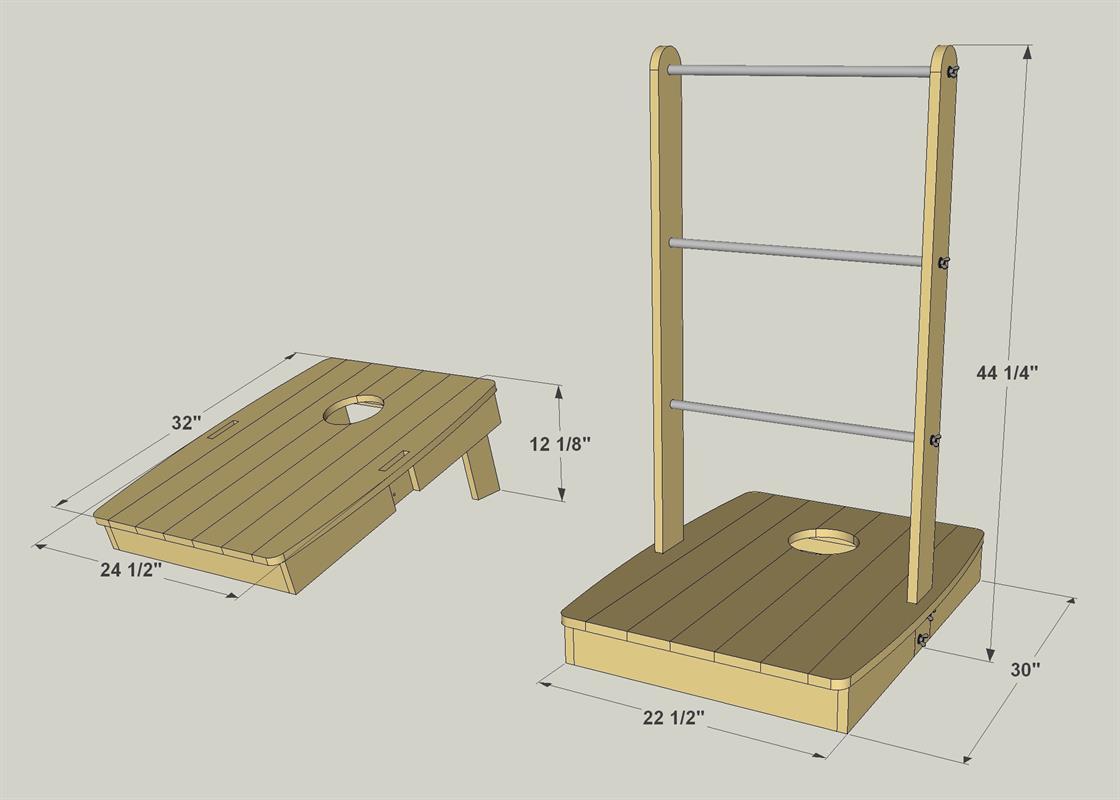
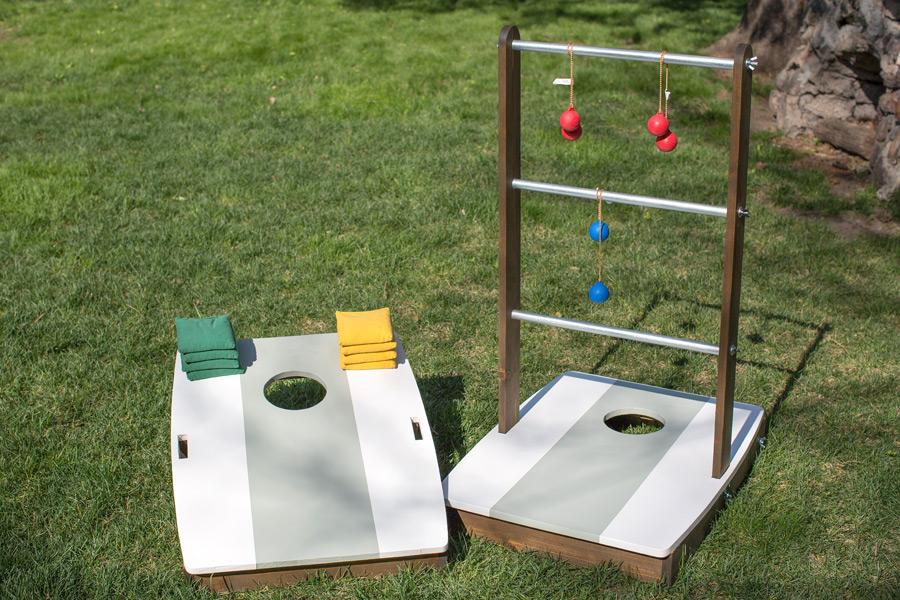
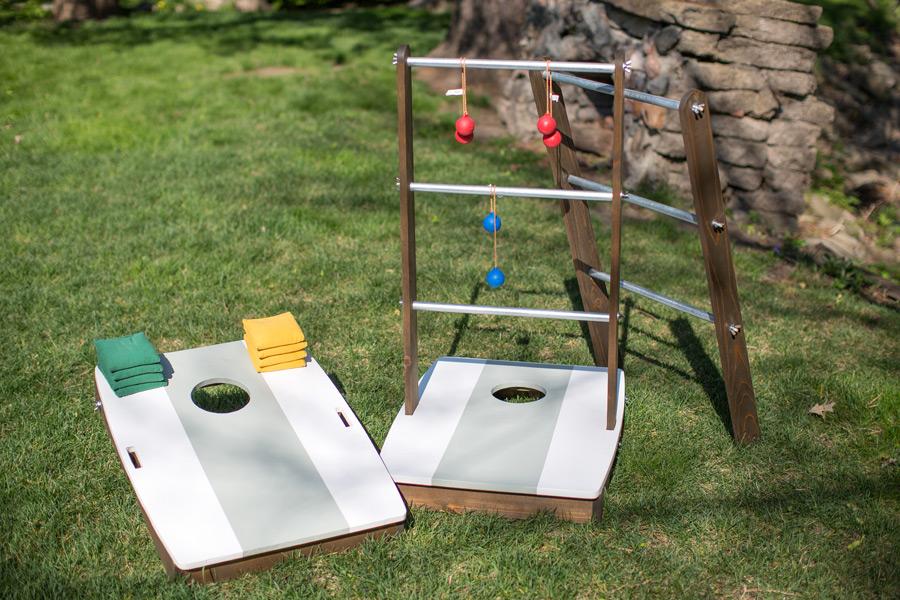
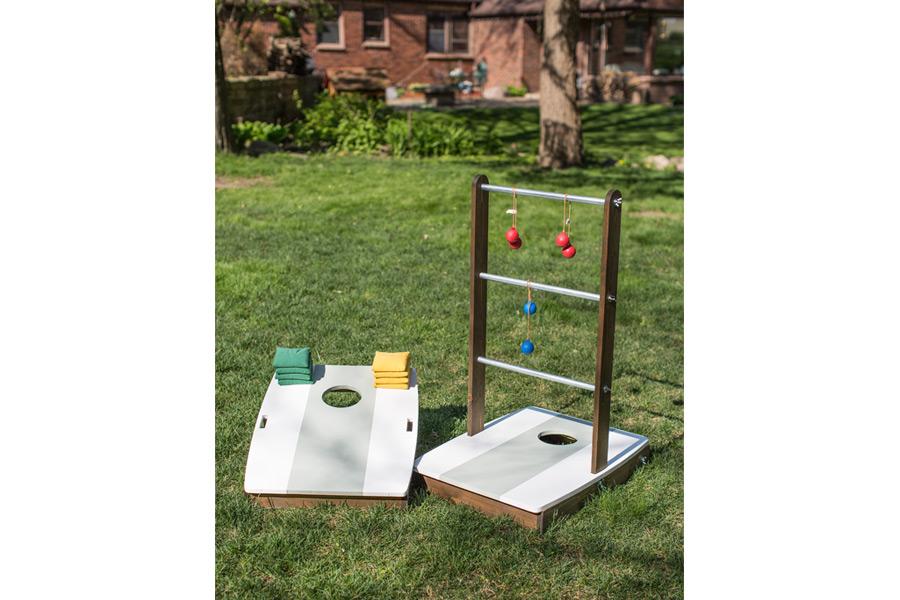
By Kreg ToolAdd some fun to your outdoor living with this clever combination of two popular outdoor games. With the uprights installed, you can play ladder ball. Remove the uprights and flip down the legs, and you’re ready for the fun of bean-bag toss/cornhole!
Directions
-
Create the Base Rails
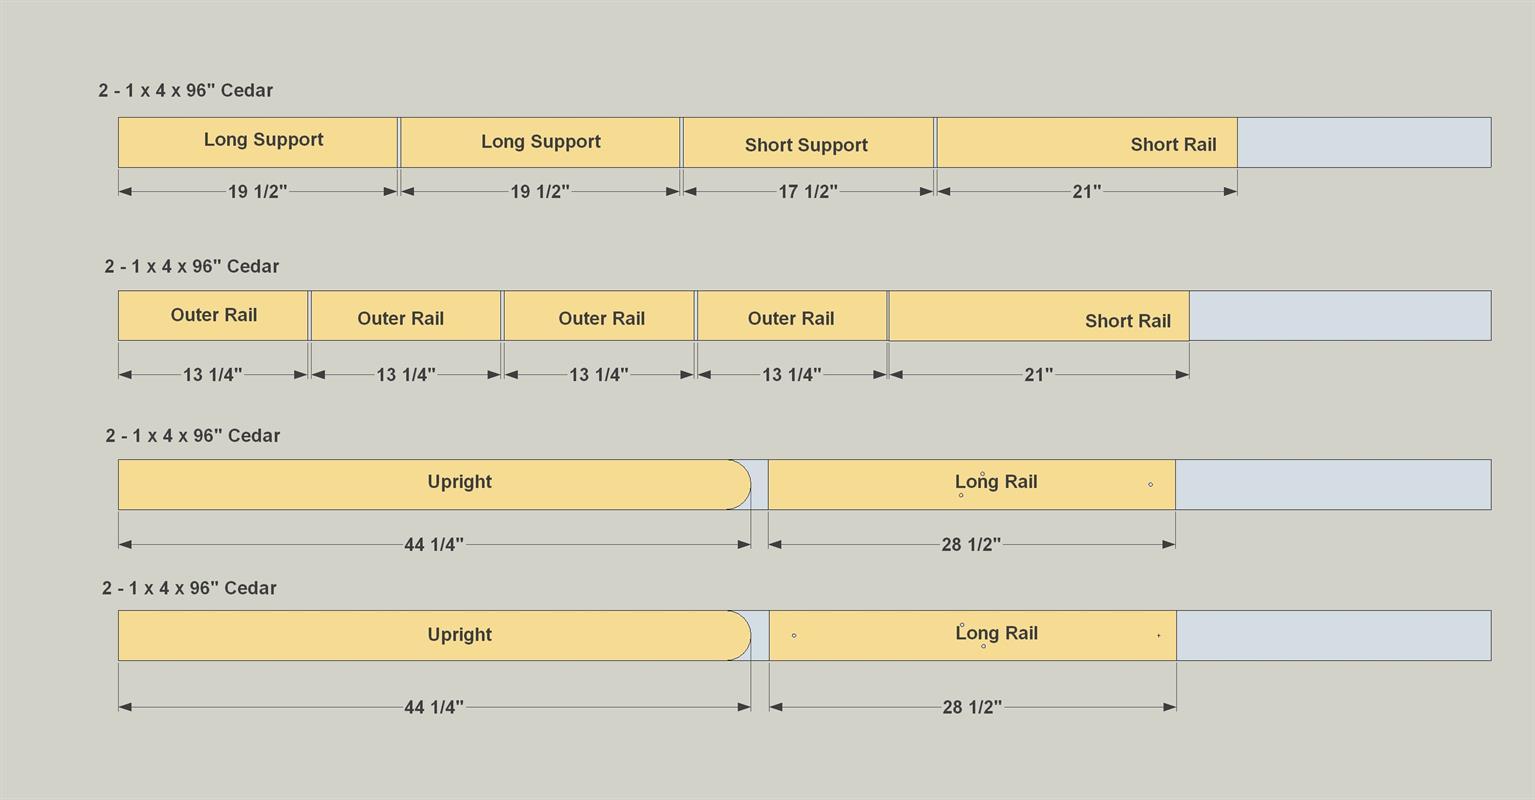
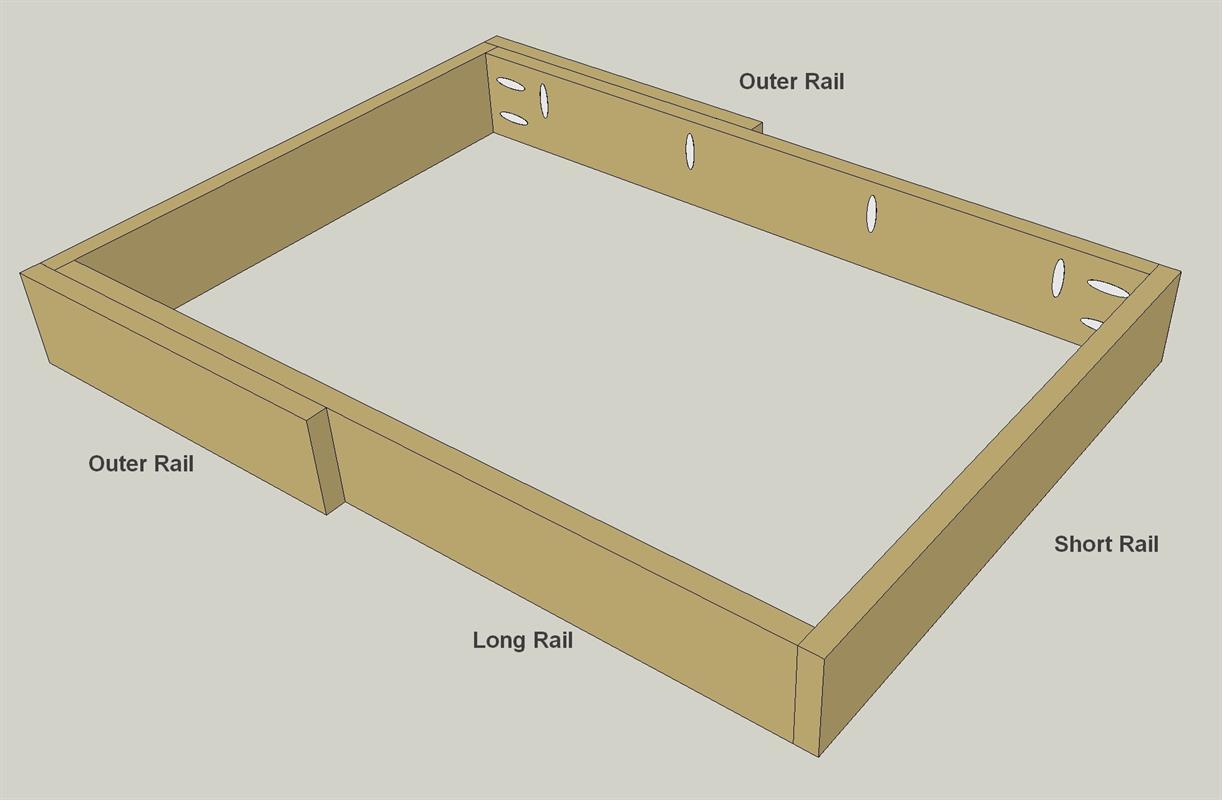
Using the Cutting Diagram as a guide, cut two Long Rails, two Short Rails, and four Outer Rails to length from cedar boards for each base. Then, with your pocket-hole jig, set up for 3/4" material and drill pocket holes in the Long Rails, as shown.
-
Start Base Assembly
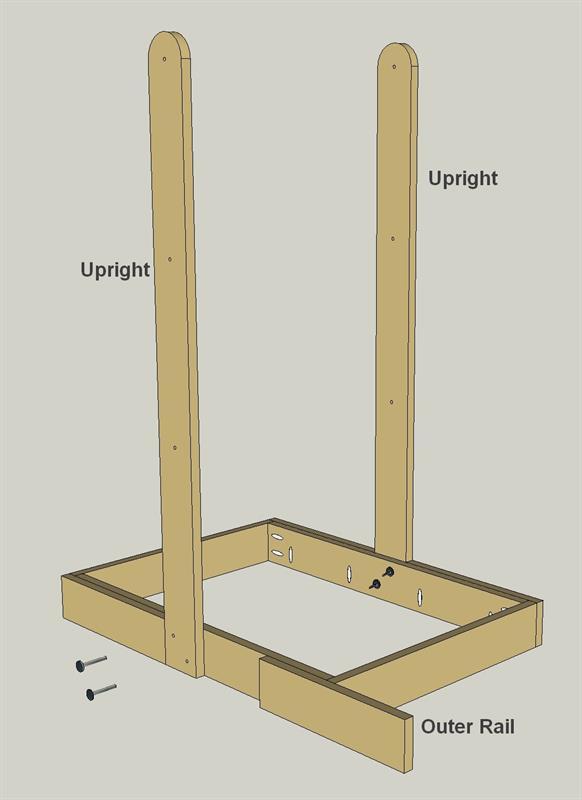
Start base assembly by joining the Long Rails to the Short Rails using 1 1/4" exterior-rated pocket-hole screws. Then add two of the Outer Rails, as shown, using 1 1/4" flat-head screws from the inside.
-
Make the Uprights
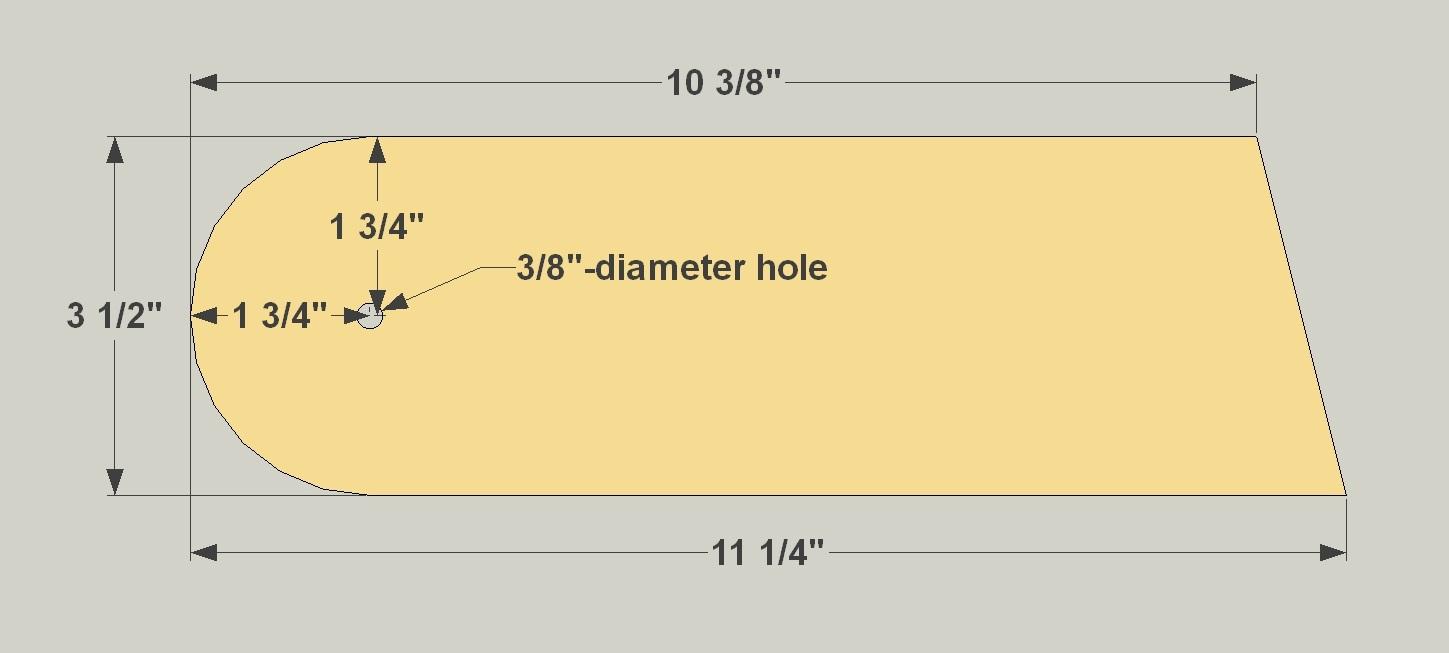
Using the Cutting Diagram as a guide, cut two Uprights to length from cedar boards for each base. Shape the curved end using a jig saw. Drill holes in the Uprights, as shown, for mounting bolts and for the threaded rods used to hold the Ladder Rungs that get added later.
-
Fit the Uprights to the Base
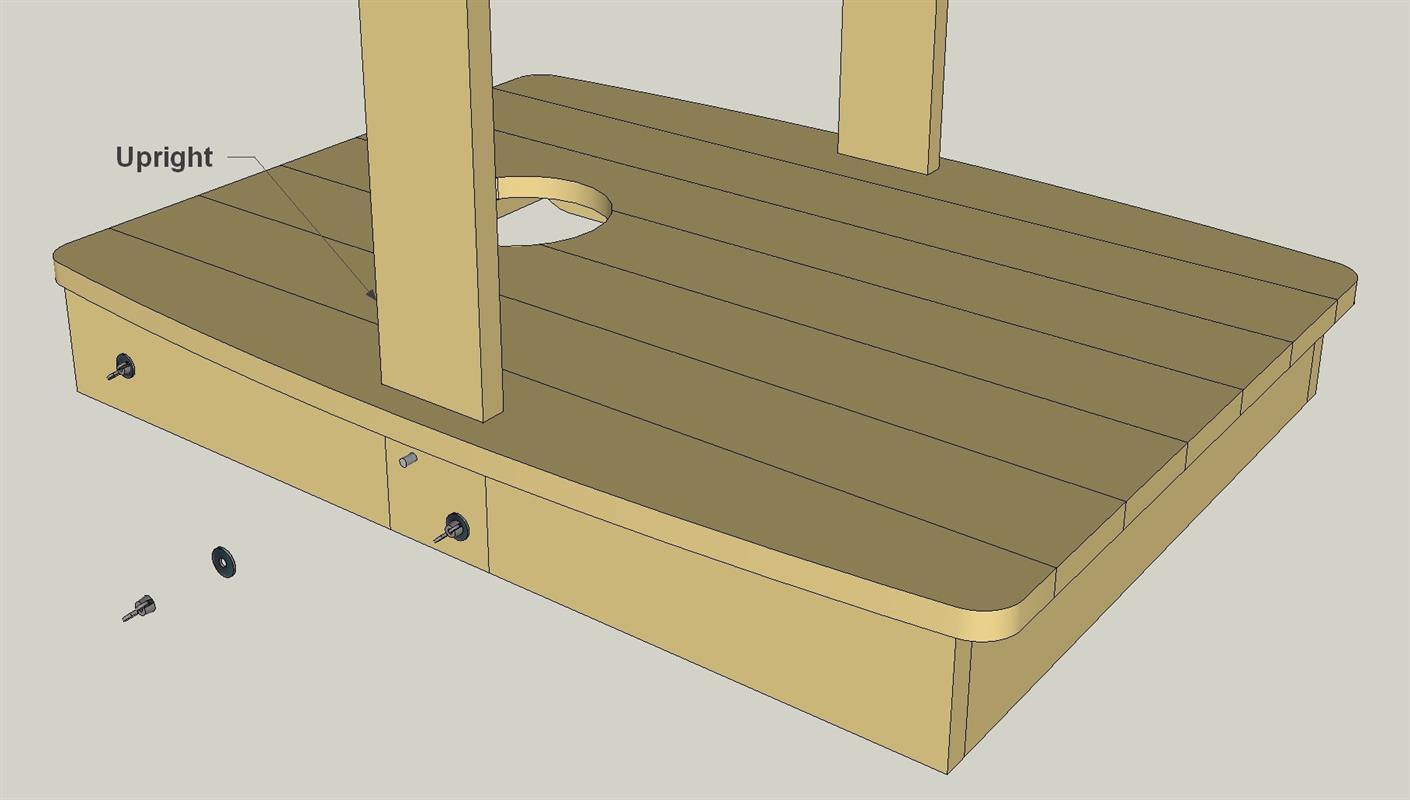
Hold the Uprights in position against the partially assembled base, and then position the other Outer Rails. Trim these Outer Rails to length if necessary. Use the holes in the Uprights as guides to drill holes through the base Rails. These holes will receive 3/8" x 2" carriage bolts to secure the Uprights.
-
Make a Pair of Legs
Using the Cutting Diagram as a guide, cut two Legs to length from cedar boards for each base. Shape the curved end using a jig saw. Then drill a pivot hole through each Leg, as shown.
-
Fit the Legs to the Base
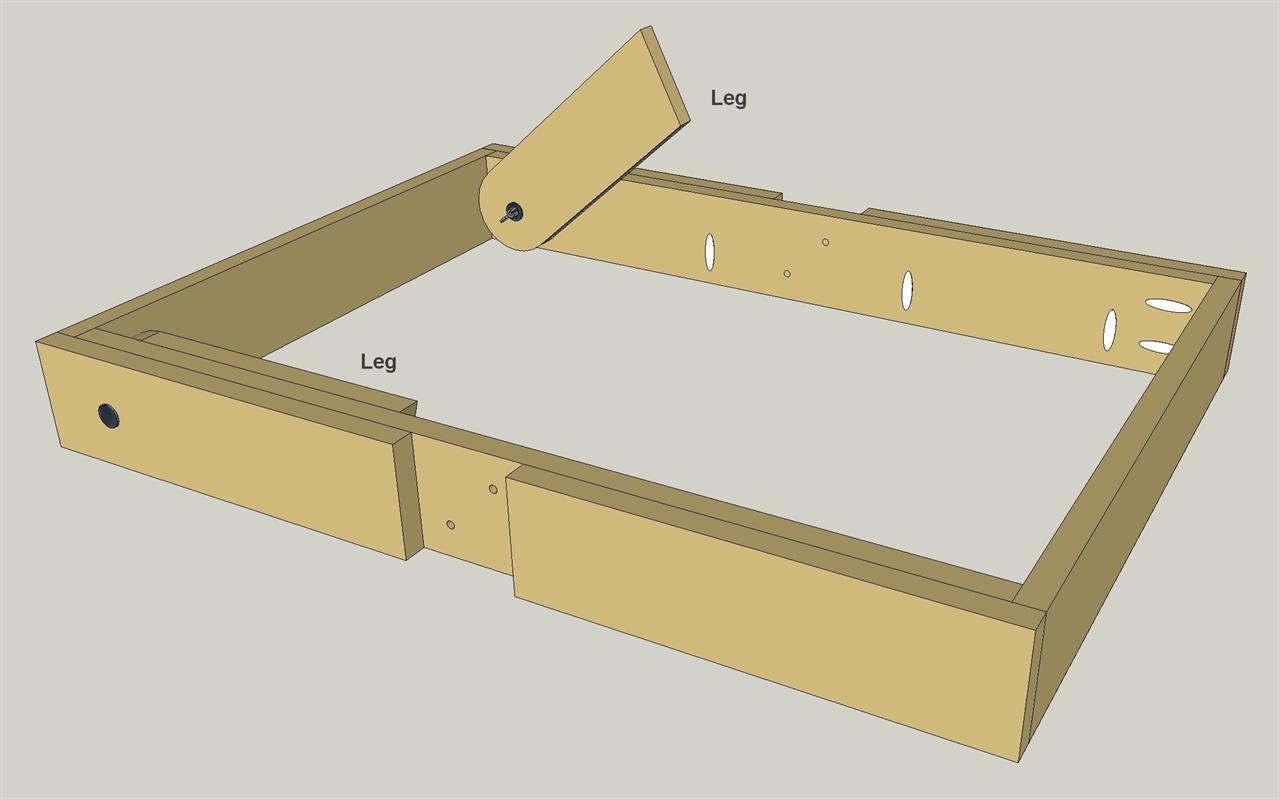
Position each Leg inside the assembled base, and use the hole in the Leg as a guide to drill through the base rails. These holes will receive 3/8" x 3" carriage bolts (with a washer on each side of the Leg) to secure the Legs.
-
Make Some Supports
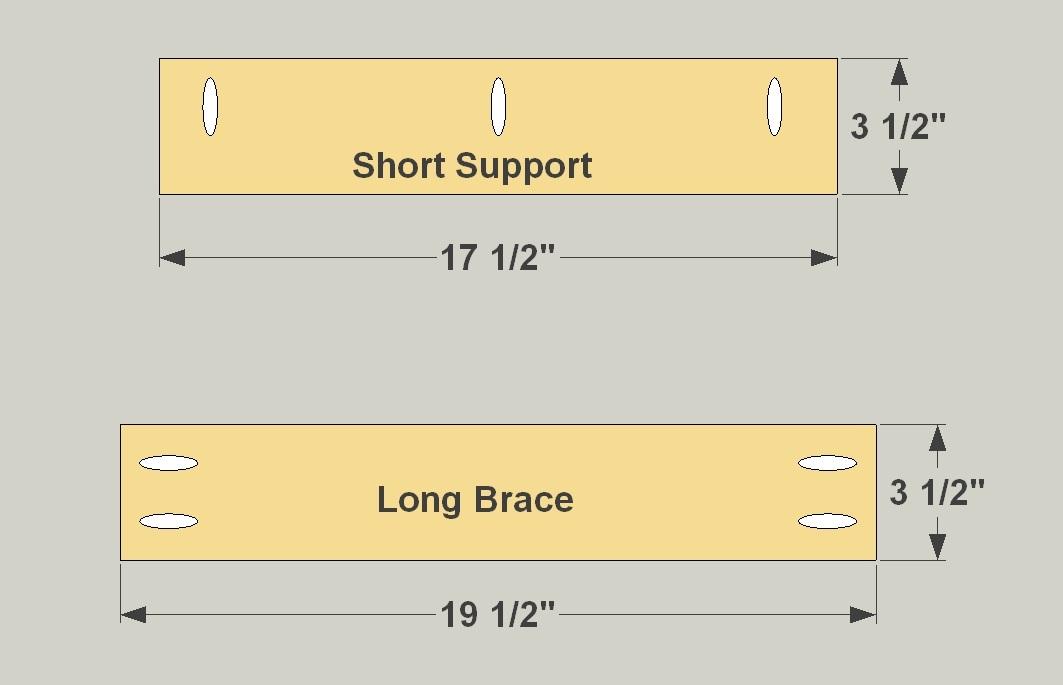
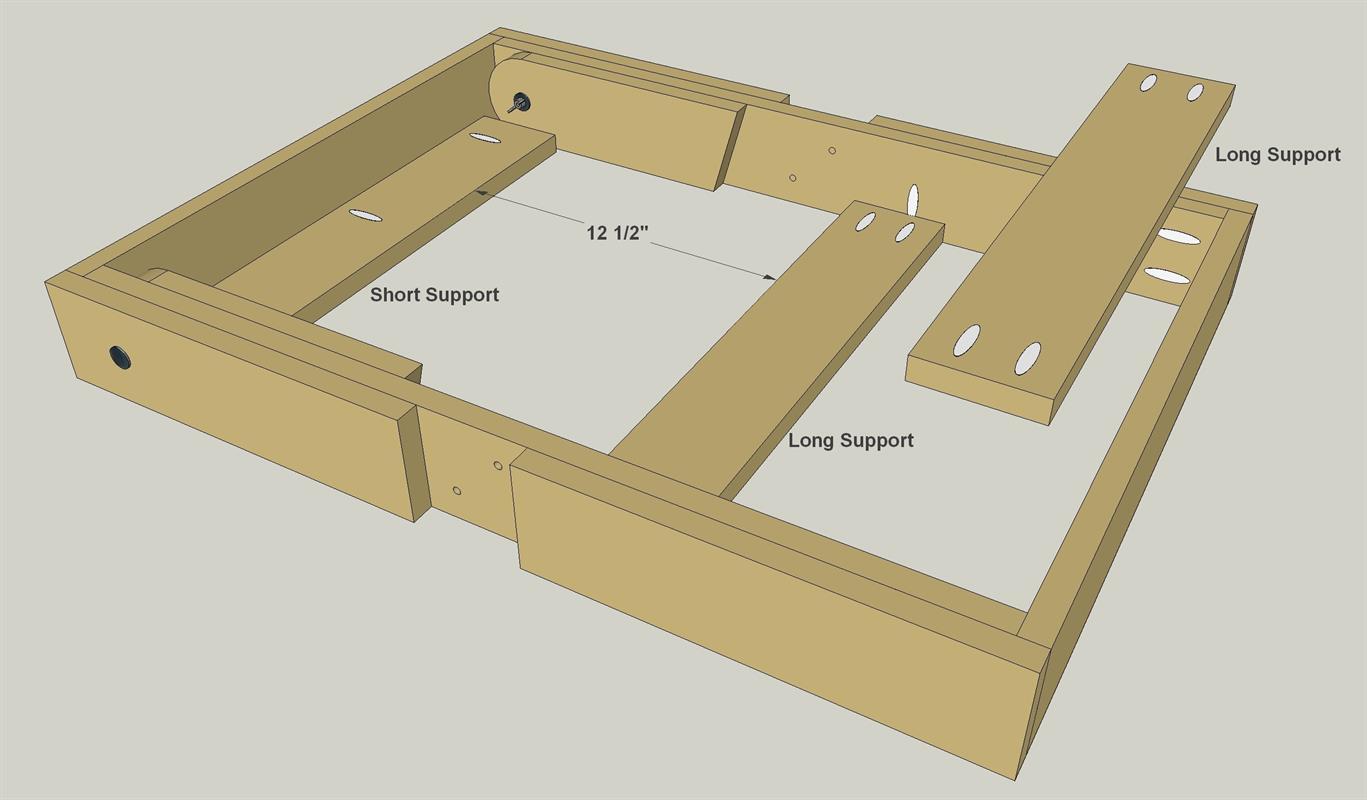
Using the Cutting Diagram as a guide, cut two Long Supports and one Short Support from cedar boards for each base. With your pocket-hole jig, set up for 3/4" material and drill pocket holes in the Supports, as shown.
-
Slip in the Supports
Install the Supports in the base using 1 1/4" exterior-rated pocket-hole screws.
-
Make Slats for the Top
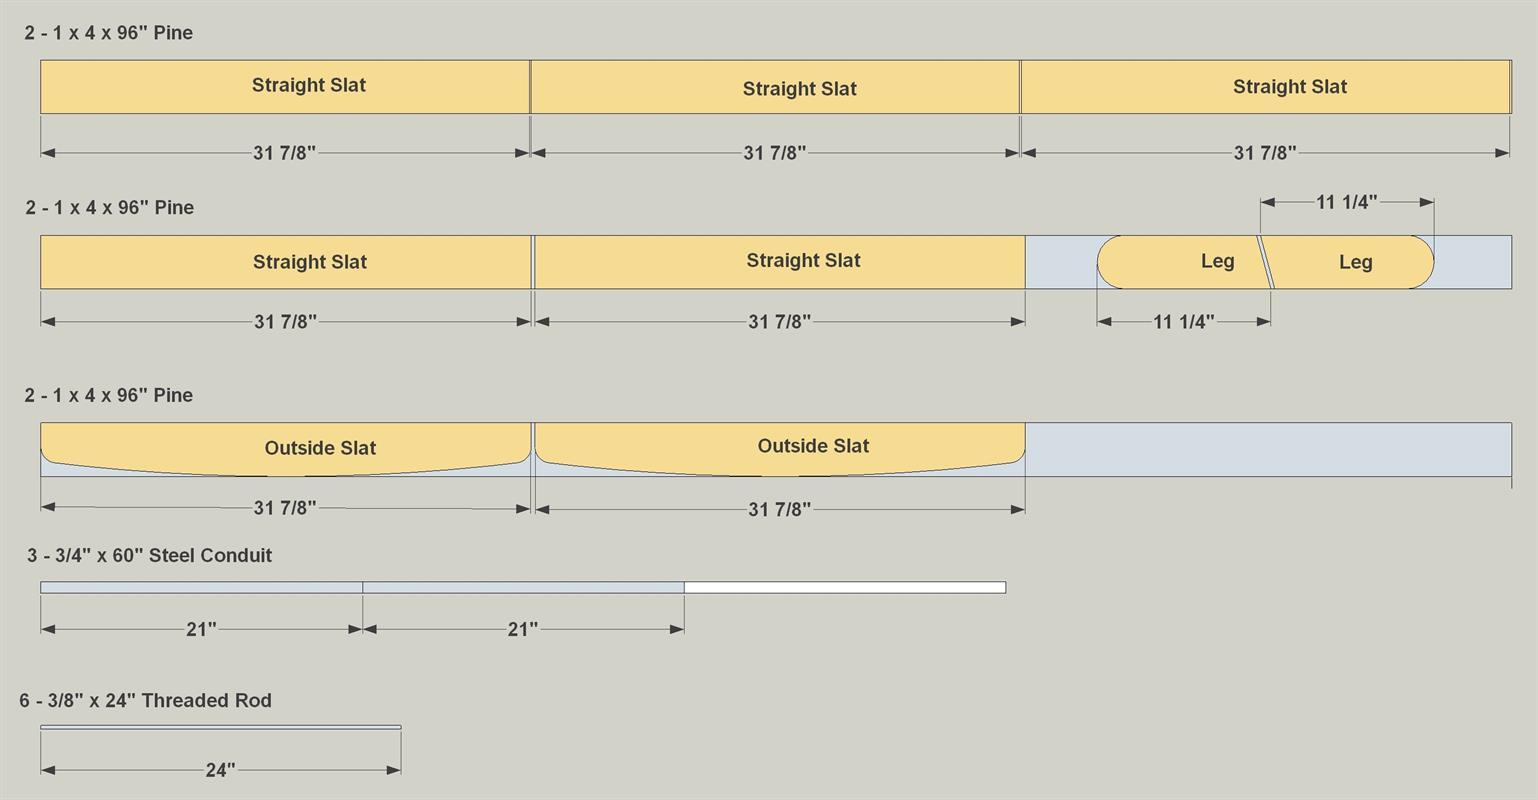
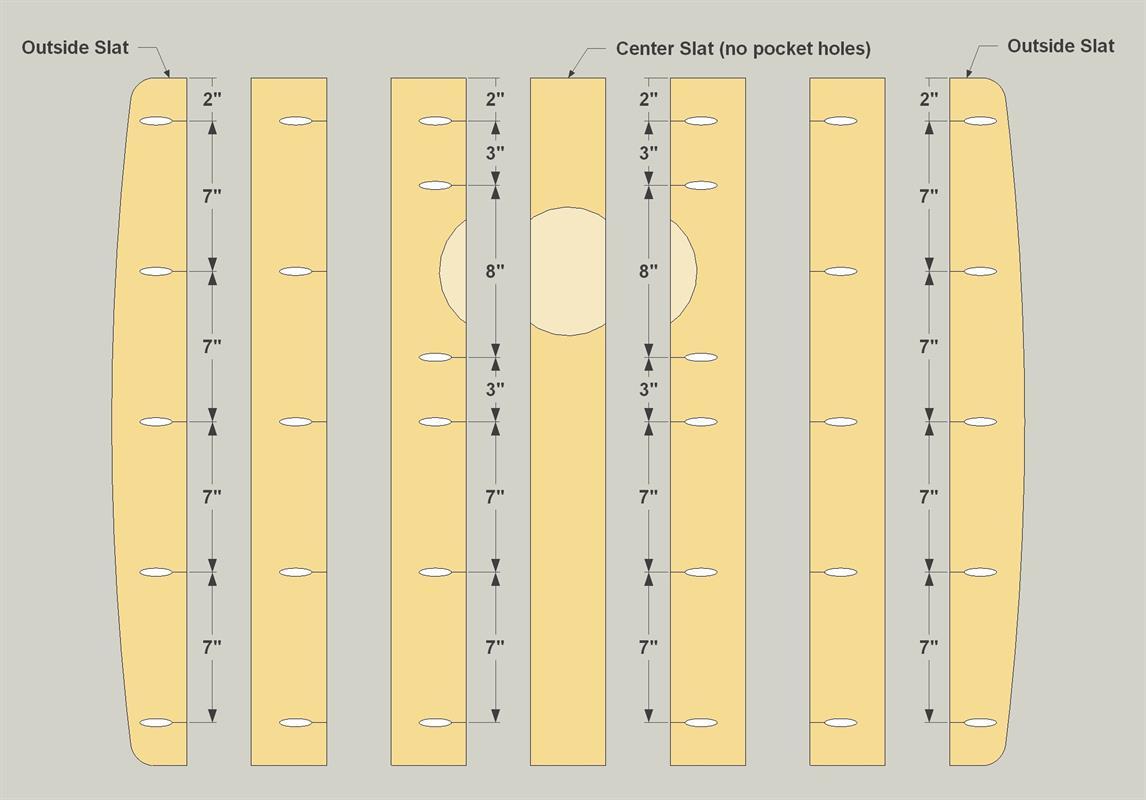
Using the Cutting Diagram as a guide, cut seven Top Slats to length from pine boards. Turn two of these into Outer Slats by drawing gentle arcs on the boards, and then cutting them to shape with a jig saw.
-
Put Pocket Holes in the Slats
Once you have all of the Top Slats shaped, lay them side by side — seven slats per base — and lay out the positions of the pocket holes. Note that there’s some difference in placement to avoid the area around the bean bag hole. Drill the holes with your pocket-hole jig set up for 3/4" material.
-
Add the Bean-Bag Hole
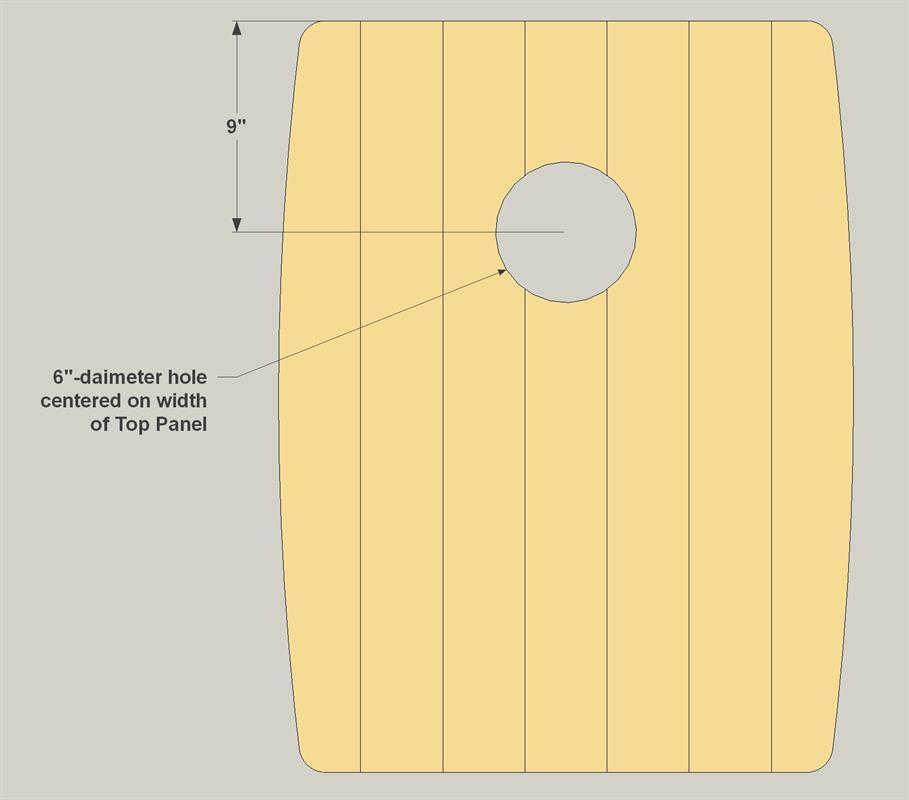
Lay out a 6"-diameter hole in the top panel so that it’s centered from side to side and 9" from one end. Create the hole by drilling a starter hole near one end, and then cutting the shape with a jig saw.
-
Locate Slots for the Uprights
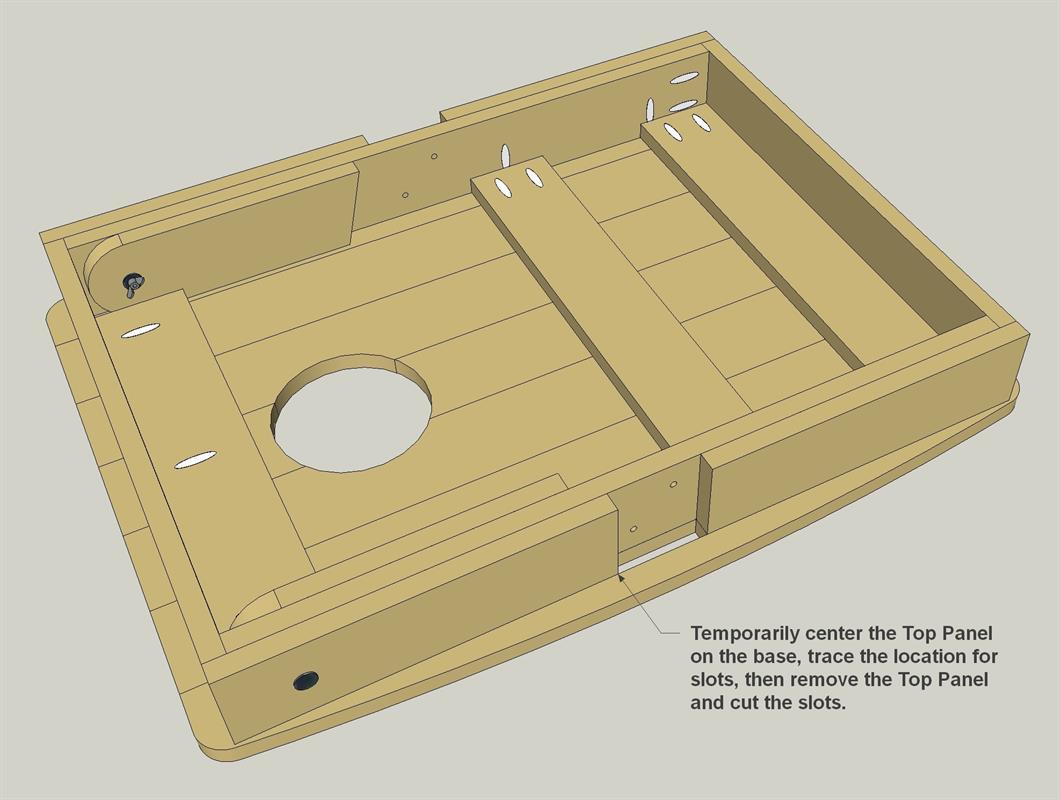
Lay the top panel facedown, and then place the base on it, making sure it is centered and the hole is at the same end as the Legs. Then mark the locations for slots where the Uprights will to come through the panel. Cut the slots by drilling starter holes in the corners, then cutting the shape with a jig saw.
-
Time for Paint and Stain
After sanding the panel, decide how you want to paint or stain it. Paint provides a slick surface for the beanbags to slide on. Also sand the base and Uprights, and then stain or finish them.
-
Attach the Top Panel
Place the top panel in position on the base, then slide the Uprights into position and tighten the wing nuts that hold them in place. This will hold the top panel in place as you attach it from underneath using 1 1/4" exterior-rated pocket-hole screws.
-
Finish Up with the Ladder
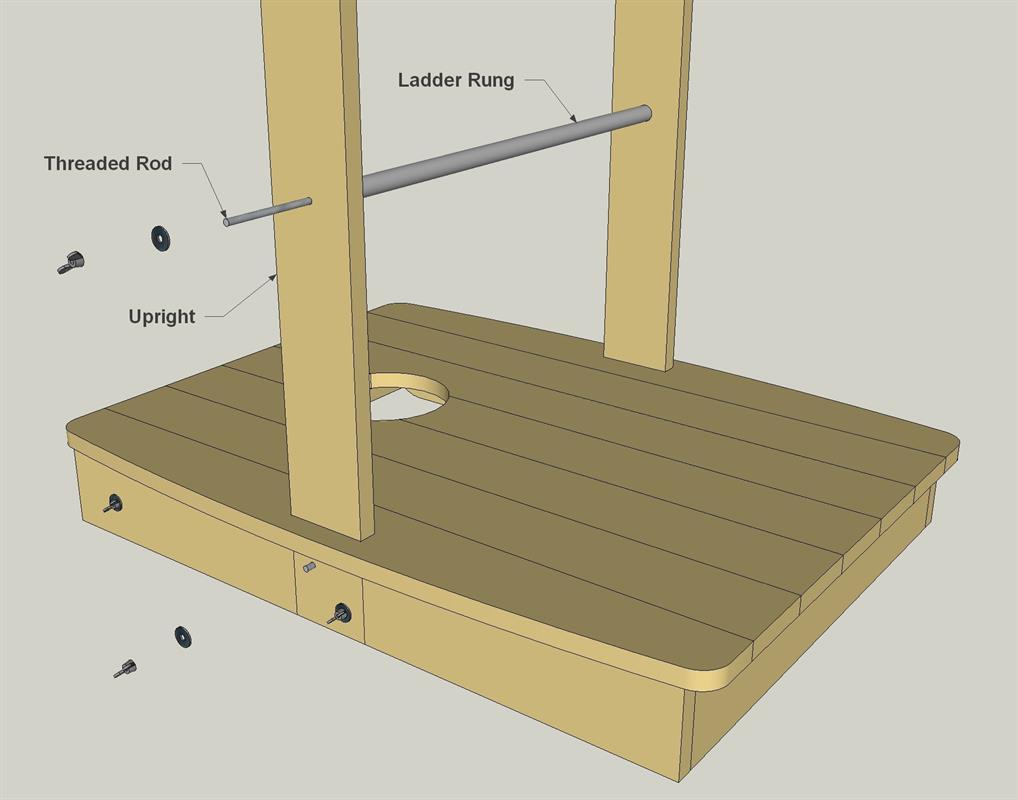
Using the Cutting Diagram as a guide, cut three Ladder Rungs to length from conduit for each base. A hacksaw works fine, but a pipe cutter makes straight, clean cuts. Push the threaded rods through the Uprights and Rungs, then secure the rods with washers and wing nuts.
In the future, when you remove the ladders, leave the Rungs attached and just unbolt the Uprights from the base.


