Elevate your cabinetry game – learn expert tips on installing cabinet doors, drawers, and shelves for a seamless and functional kitchen or storage space.
14 Results
14 Results
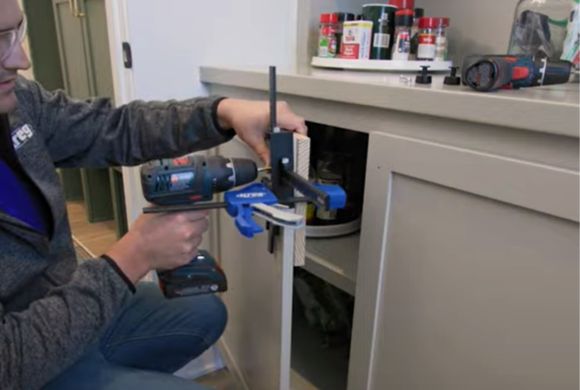
Video: How to Install Cabinet Doors and Drawers
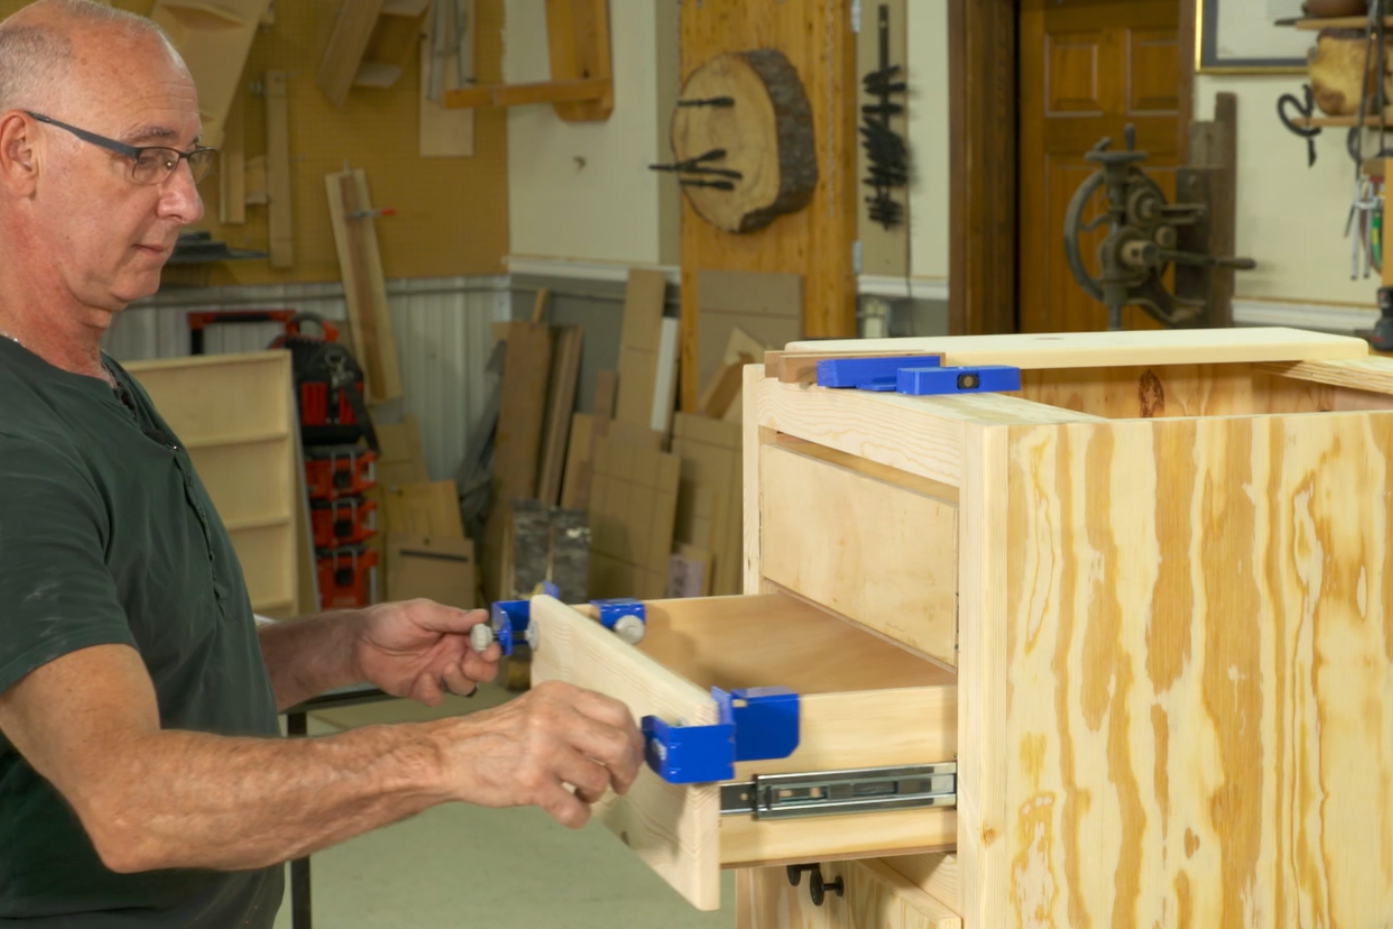
Cabinet-Making Video Series – Building a DIY Storage Unit with Drawers, Doors & Shelves
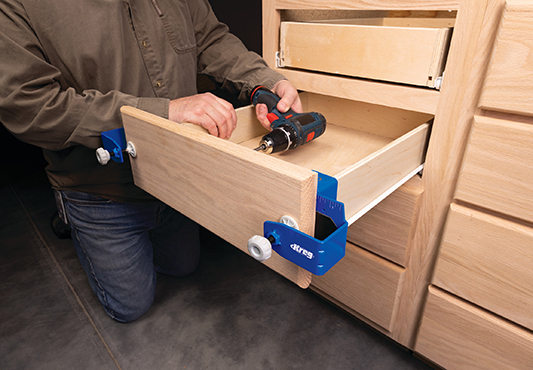
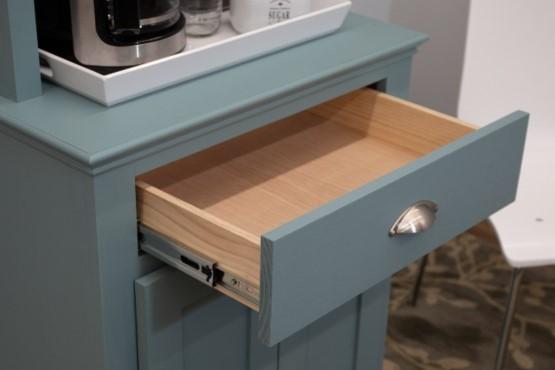
Quickly and Easily Install Drawer Fronts
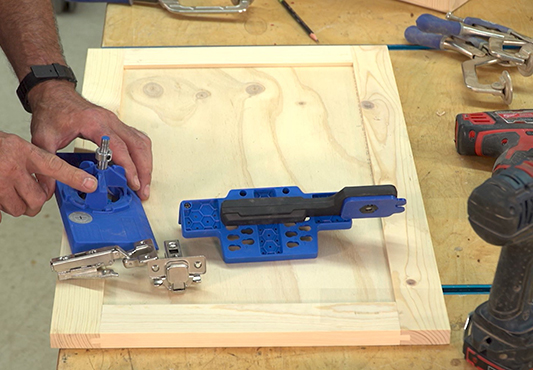
How To Easily Install Concealed Hinges And Cabinet Doors
How to simplify installing cabinet doors
How to simplify installing adjustable shelves
How to make a frame-and-panel door
How to build a simple, sturdy drawer
How to add adjustable shelves easily

Demystifying drawer sizing
How to strengthen shelves by adding edging
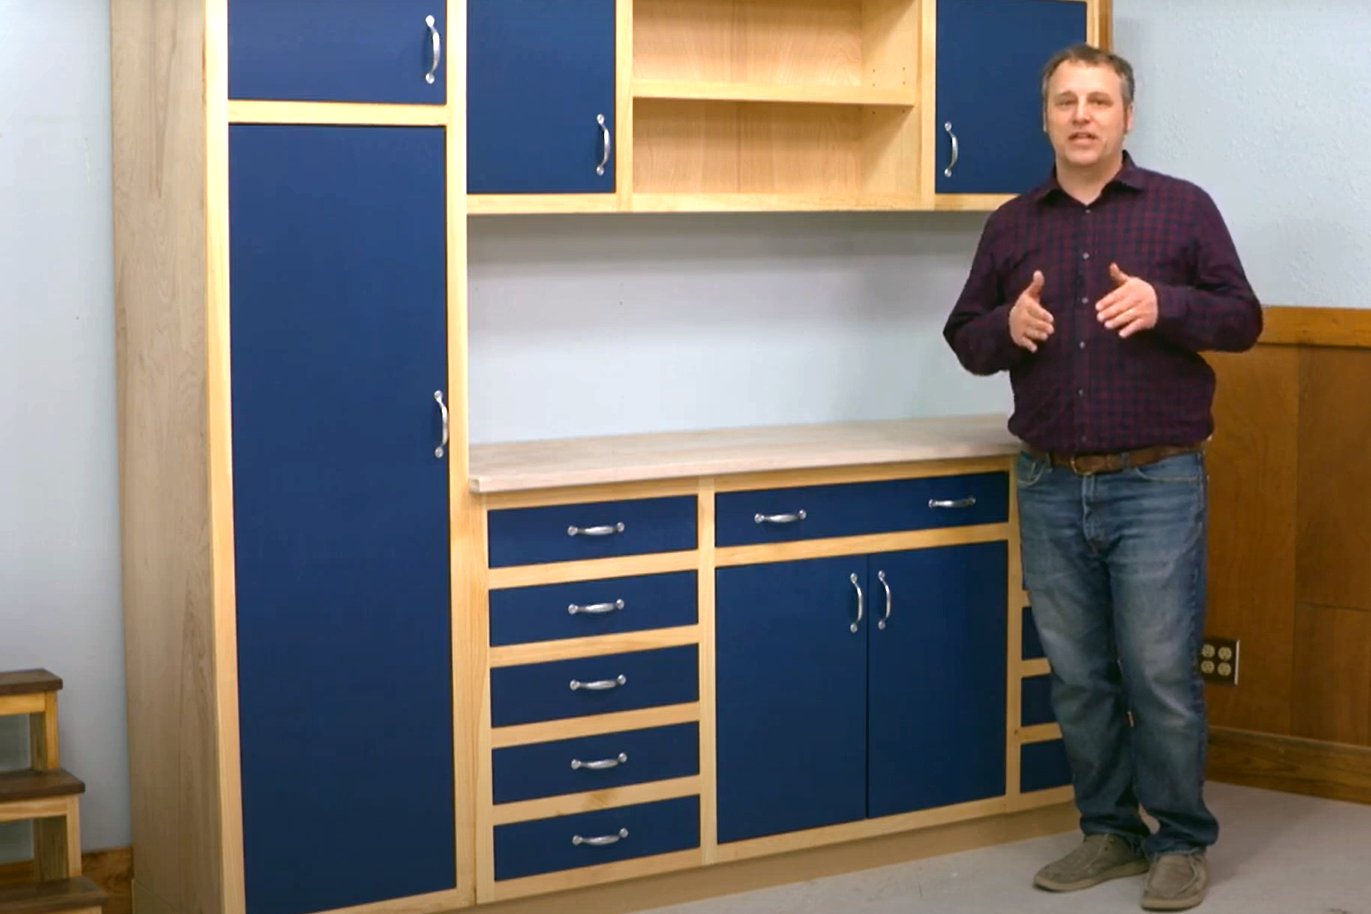
Crafting Excellence: Adding Doors, Drawers & Shelves to Cabinets
Embarking on a cabinet upgrade is a transformative journey for any woodworker. Whether you’re looking to enhance functionality or breathe new life into your space, adding doors, drawers, and shelves is a skill that elevates your craftsmanship. In this comprehensive guide, we’ll walk you through the meticulous process of planning, crafting, and finishing, ensuring your cabinet upgrade reflects the essence of excellence.
Planning Your Cabinet Upgrade
Assessing Cabinet Structure
Before diving into the creative process, it’s crucial to assess the foundation. Evaluate your existing cabinet structure, identifying any wear, tear, or modifications needed to accommodate new additions. A thorough examination ensures a solid base for your upgrade.
Consider the age of your cabinets and the materials used in their construction. Are there any signs of wear and tear, such as warped wood or damaged edges? Assessing the structural integrity of your cabinets is the first step in ensuring a successful upgrade.
If your cabinets are relatively new and in good condition, you may only need to make minor adjustments. However, if you discover any significant issues during this assessment, it’s essential to address them before proceeding with the addition of doors, drawers, and shelves.
Design Considerations
Understand the overarching design goals for your cabinet upgrade. Dive into the details, selecting materials that resonate with your style, finishes that bring out the best, and styles that seamlessly integrate with your space.
Consider the overall aesthetic you want to achieve. Are you aiming for a modern, sleek look, or do you prefer a more traditional and rustic feel? The design considerations will influence the types of doors, drawers, and shelves you choose.
Think about the functionality of your cabinets. Will they primarily store dishes, pantry items, or serve as a display space? Tailor your design choices to meet the specific needs of each cabinet in your space.
Adding Cabinet Doors
Door Installation
Measurement and Planning:
-
- Precision is key. Learn how to measure for doors, considering dimensions and placement. Plan strategically to achieve a harmonious visual balance.
Measuring accurately is critical for a seamless door installation. Begin by measuring the height and width of the cabinet openings. Take precise measurements, accounting for any variations in the size of each opening.
Consider the overlay of the doors—how much they will overlap the cabinet frame. The choice of overlay can impact the overall look of your cabinets, so it’s essential to decide on the desired style.
Planning the placement of doors involves determining the number of doors needed for each cabinet and their arrangement. Consider symmetry, especially in kitchen cabinets, where a balanced look is often preferred.
Choosing Hinges:
-
- Hinges are the unsung heroes of cabinet doors. Explore hinge types and select the ones that align with your design and functionality goals.
Hinges play a crucial role in how cabinet doors open and close. There are various types of hinges, each with its unique features:
- Butt Hinges: These are the most common and consist of two interconnecting metal plates. They are ideal for traditional cabinet styles.
- European Hinges: These hinges are concealed when the door is closed, providing a clean and modern look. They are commonly used in contemporary kitchen designs.
- Overlay Hinges: Designed for cabinets with face frames, overlay hinges allow the door to lay over the frame, concealing it when closed.
Select hinges based on the style of your cabinets and the level of visibility you prefer.
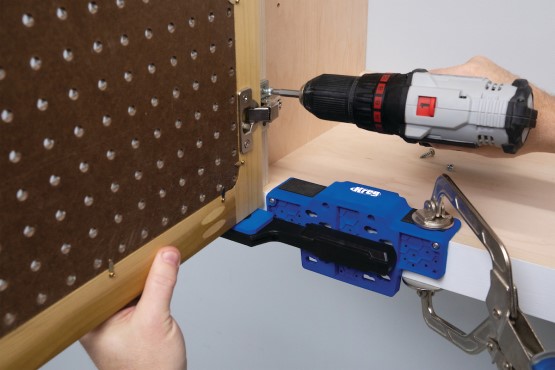
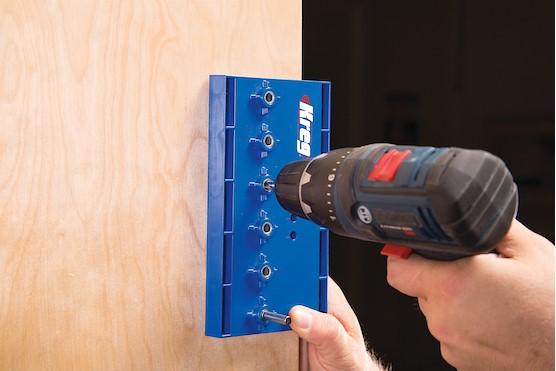
Cutting and Preparing Doors:
-
- The transformation begins. Follow a step-by-step guide on cutting doors to size and preparing them for installation, ensuring a flawless finish.
Once you’ve measured and planned, it’s time to bring your vision to life by preparing the doors. Use high-quality plywood or solid wood for durable and aesthetically pleasing results.
Follow these steps for cutting and preparing doors:
- Marking and Cutting: Transfer your measurements onto the door material, marking the areas to be cut. Use a circular saw or table saw for precise cuts.
- Sanding and Edging: Sand the cut edges to create a smooth finish. Consider adding edge banding to conceal the exposed edges and enhance the overall appearance.
- Drilling Holes: If your chosen hinge requires holes for installation, use a drill to create precise holes. Ensure that the holes align accurately for a proper fit.
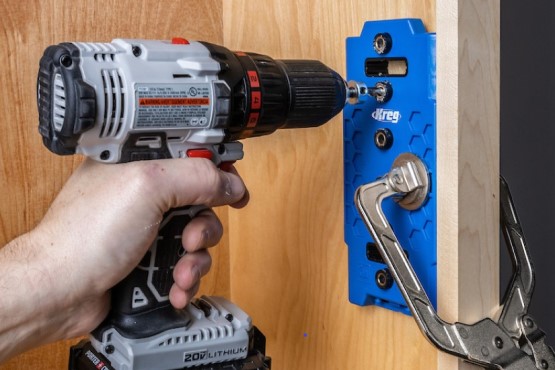
Attaching Doors:
-
- Bring your vision to life. Receive clear instructions on attaching doors to cabinets and fine-tuning for a perfect fit. Master the art of alignment and symmetry.
Attaching doors requires attention to detail to achieve a professional and polished look. Follow these steps:
- Aligning Hinges: Attach the hinges to the doors, ensuring proper alignment. Use a carpenter’s square to guarantee accuracy.
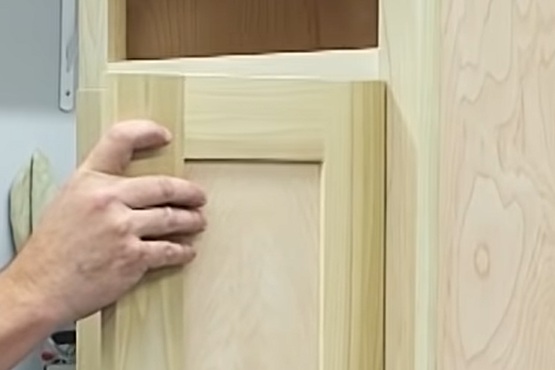
- Mounting Doors: With the hinges attached to the doors, mount the doors onto the cabinet frames. Double-check the alignment and make adjustments as needed.
- Adjusting for Fit: Check for even gaps between doors and ensure they open and close smoothly. Make any necessary adjustments to achieve a perfect fit.
Installing Cabinet Drawers
Drawer Installation
Drawer Slide Selection:
-
- Understand the mechanics. Delve into explanations of various drawer slide options and make informed choices based on your specific needs.
Drawer slides, also known as drawer glides, are essential for the smooth operation of drawers. There are several types to choose from:
- Ball-Bearing Slides: These are popular for their smooth and quiet operation. They consist of steel balls that allow the drawers to slide in and out effortlessly.
- Side-Mount Slides: These are attached to the sides of the drawers and cabinet interiors. They are a traditional choice and provide good stability.
- Undermount Slides: Hidden beneath the drawers, undermount slides offer a clean and modern look. They are commonly used in contemporary kitchen designs.
Choose the type of drawer slides that align with your design preferences and functional requirements.
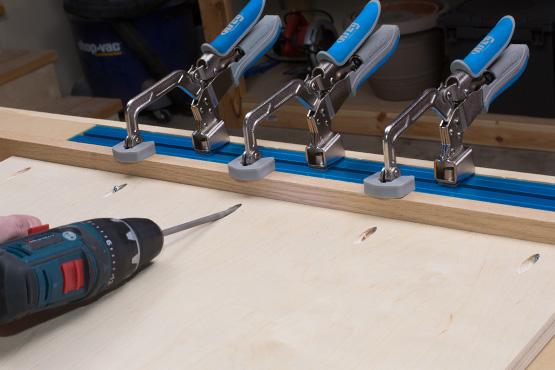
Drawer Construction:
-
- Craftsmanship in every detail. Follow a comprehensive guide on constructing drawers, from choosing materials to the final assembly.
Constructing drawers involves selecting the right materials and assembling them with precision:
- Choosing Drawer Material: Opt for sturdy materials such as plywood or solid wood for the drawer box. Consider the weight the drawer will bear when choosing the thickness of the material.
- Cutting Drawer Pieces: Use a table saw or circular saw to cut the pieces for the drawer box. Ensure that the pieces are cut accurately to the desired dimensions.
- Assembling Drawer Box: Assemble the pieces using wood glue and screws. Check for squareness and make any adjustments to ensure the drawer is perfectly square.
- Attaching Drawer Front: Attach the chosen front piece to the drawer box. Ensure proper alignment and spacing for a polished appearance.
Drawer Installation:
-
- Precision in motion. Learn the intricacies of installing drawers, ensuring not just functionality but a smooth operation and perfect alignment.
Installing drawers involves attaching the drawer slides to the cabinet and drawer box.
Mounting Cabinet Slides: Attach the drawer slides to the sides of the cabinet interior. Ensure that they are level and securely mounted.
- Attaching Drawer Slides to Box: Mount the corresponding drawer slides to the sides of the drawer box. Test the drawer to ensure smooth sliding and adjust the slides if necessary.
- Fine-Tuning for Alignment: Check for even gaps between the drawer front and the cabinet. Adjust the slides and make any necessary tweaks to achieve perfect alignment.
Introducing Functional Shelves
Shelf Installation
Determining Shelf Placement:
-
- Elevate your space. Receive valuable tips on deciding optimal shelf heights and spacing for a visually appealing and functional layout.
Shelf placement is a critical aspect of achieving both functionality and aesthetics. Consider the following factors when determining shelf placement:
- Item Height: Take into account the height of items you plan to store on the shelves. Adjust shelf heights to accommodate tall items while maximizing storage space.
- Visual Harmony: Aim for visual balance by spacing shelves evenly. Consider the overall design of the space and ensure that the placement enhances the room’s aesthetics.
- Accessibility: Place frequently used items at eye level for easy access. Reserve lower and higher shelves for less frequently used items.
- Installing Shelf Supports:
-
- The foundation of stability. Understand different support types and master their installation, providing a strong base for your shelves.
Shelf supports, also known as brackets or corbels, play a crucial role in providing stability to shelves. Explore different support types:
- L-Brackets: These brackets are shaped like an “L” and are attached to both the cabinet and the underside of the shelf. They provide excellent support.
- Hidden Brackets: These brackets are concealed within the cabinet and shelf, offering a clean and minimalist look. They are ideal for modern and contemporary designs.
- Decorative Corbels: These are ornamental brackets that add a touch of elegance to your shelves. While they contribute to aesthetics, they may not provide as much support as other bracket types.
Choose the type of support that aligns with your design preferences and the weight-bearing capacity required for your shelves.
Adding Shelves:
-
- Step into the final phase. Follow a step-by-step guide on adding shelves, ensuring stability and functionality in every layer.
Adding shelves is the culmination of your planning and preparation. Follow these steps for a successful shelf installation:
- Positioning Shelf Supports: Install the chosen shelf supports at the predetermined locations. Ensure that they are level and securely attached to both the cabinet and the shelf.
- Placing Shelves: Carefully place the shelves on the installed supports. Check for even spacing and adjust the placement if necessary to achieve a balanced look.
- Securing Shelves: Once the shelves are in position, secure them to the supports using screws or other appropriate fasteners. Ensure that the shelves are stable and can bear the intended load.
Finishing Touches and Maintenance
Cabinet Finishing
- Polished Perfection:
-
- Uncover tips on finishing doors, drawers, and shelves for a polished look. Consider finishes that complement the overall design, transforming your cabinet into a work of art.
The finishing touches are what elevate your cabinets from functional to exceptional. Follow these tips for achieving a polished and refined look:
- Sanding and Smoothing: Before applying any finish, sand all surfaces of doors, drawers, and shelves to create a smooth and even surface. This step is essential for achieving a professional-looking finish.
- Choosing the Right Finish: Consider the style of your space and the materials used in your cabinets when selecting a finish. Common finishes include paint, stain, varnish, or polyurethane. Each has its unique characteristics, so choose one that enhances the natural beauty of the wood or complements your overall design.
- Applying the Finish: Follow the manufacturer’s instructions for applying the chosen finish. Use even strokes to prevent streaks or drips, and allow each coat to dry thoroughly before applying the next. Multiple thin coats often yield better results than a single heavy coat.
- Adding Decorative Elements: If desired, consider adding decorative elements such as hardware, knobs, or handles to enhance the overall aesthetic. Choose elements that complement your design theme and provide a cohesive look.
Maintenance Tips
- Long-Lasting Functionality:
-
- Guidance on maintaining doors, drawers, and shelves for enduring functionality. Troubleshoot common issues with quick fixes, ensuring your craftsmanship stands the test of time.
Maintaining the functionality and appearance of your newly added doors, drawers, and shelves requires ongoing care. Follow these maintenance tips for long-lasting results:
- Regular Cleaning: Dust and clean your cabinets regularly to prevent the buildup of dirt and grime. Use a soft cloth or sponge and a mild cleaning solution to avoid damaging the finish.
- Inspecting Hardware: Periodically check hinges, drawer slides, and shelf supports for any signs of wear or looseness. Tighten screws or replace hardware as needed to ensure smooth operation.
- Avoiding Excessive Weight: Be mindful of the weight placed on shelves and in drawers. Avoid overloading them with heavy items to prevent sagging or damage.
- Addressing Issues Promptly: If you notice any issues such as misalignment, sticking doors, or uneven shelves, address them promptly. Small adjustments and repairs can prevent more significant problems down the line.
- Seasonal Considerations: Wood can expand or contract with changes in humidity. Be aware of seasonal variations and make minor adjustments to account for any movement in the wood.
- Refinishing as Needed: Over time, finishes may wear or become scratched. If the appearance of your cabinets starts to diminish, consider refinishing the doors, drawers, or shelves to restore their original beauty.
By following these maintenance tips, you can ensure that your cabinet upgrade remains both functional and visually appealing for years to come.