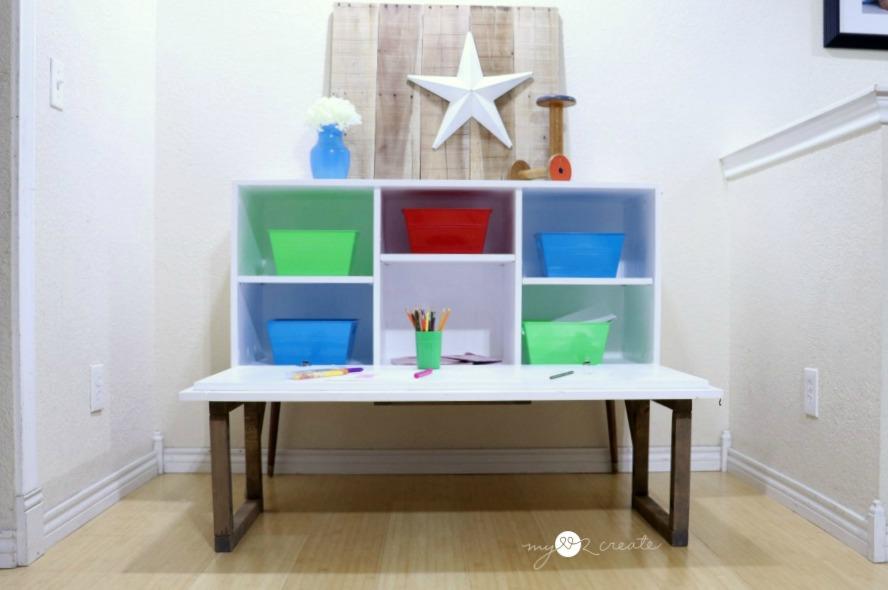
Kid’s Pull Down Table
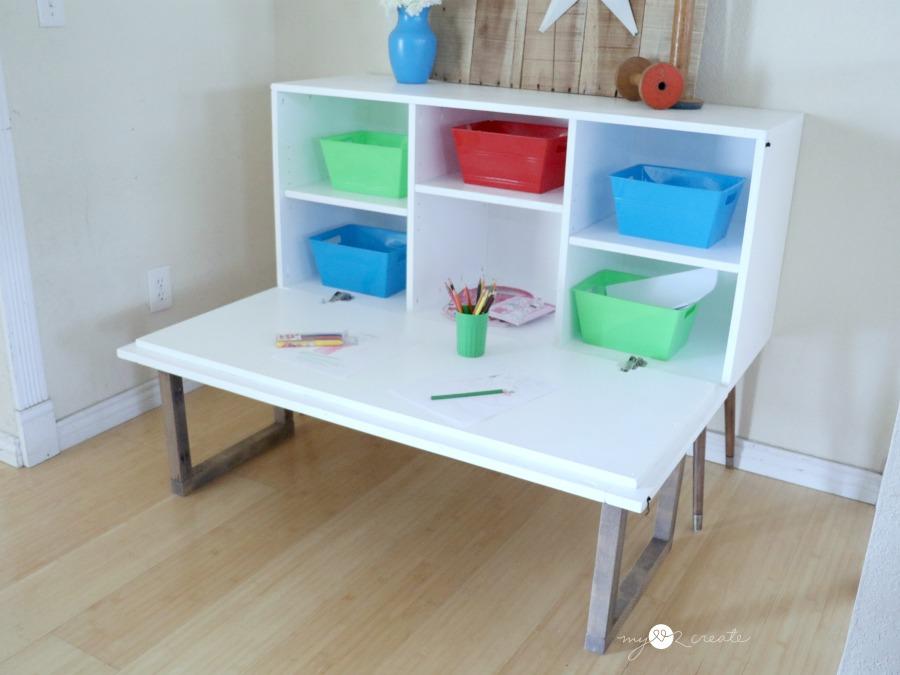
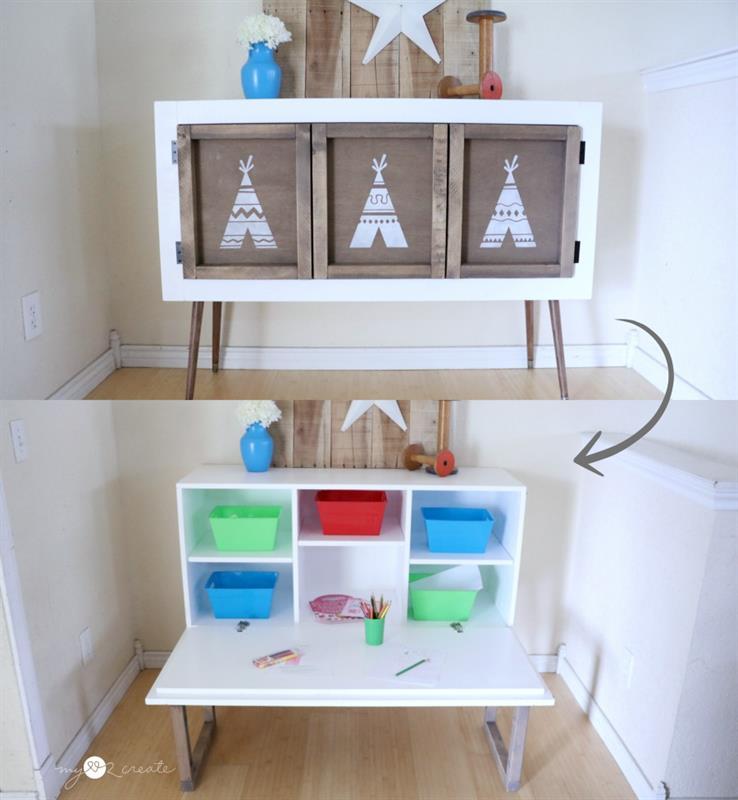
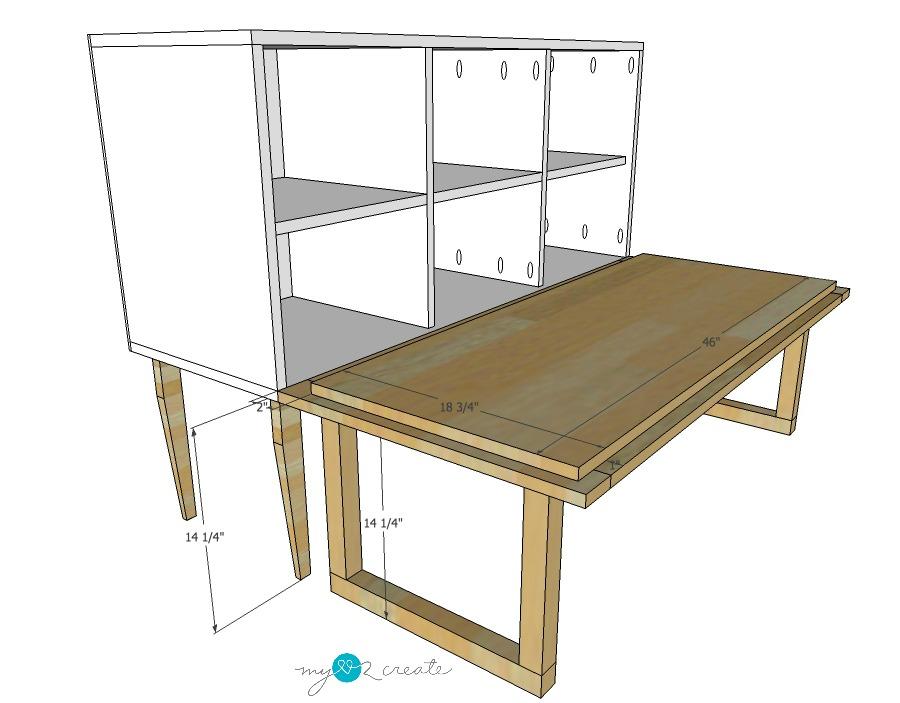
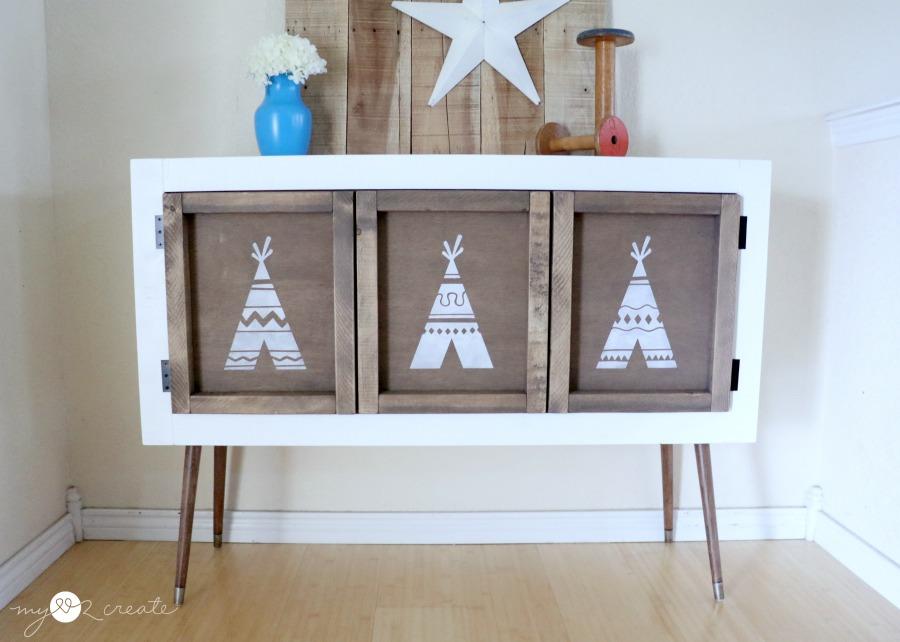
By My Love 2 CreateGet both style and function with this amazing Kid’s Pull Down Table! Enjoy the look of a beautiful mid-century style credenza, and in only a few seconds transform it into the perfect place for the kids to eat or play. Use it in any room in your home, perfect for dining, art, legos, and more!
Directions
-
Attach sides and dividers
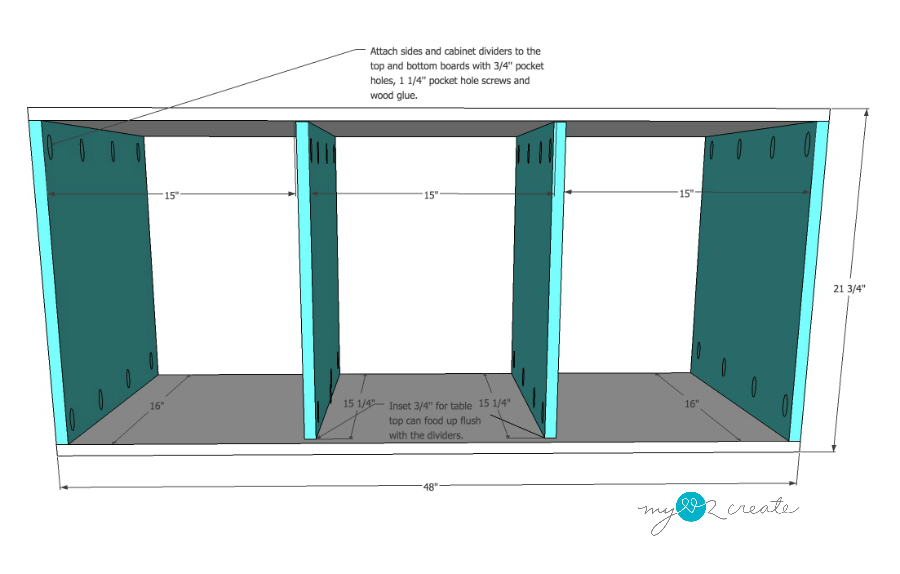
Attach the side and dividers as shown to the top and bottom boards. Use wood glue and 3/4'' pocket holes and 1 1/4'' pocket hole screws.
Make sure to inset the dividers back 3/4''.
-
Add shelves
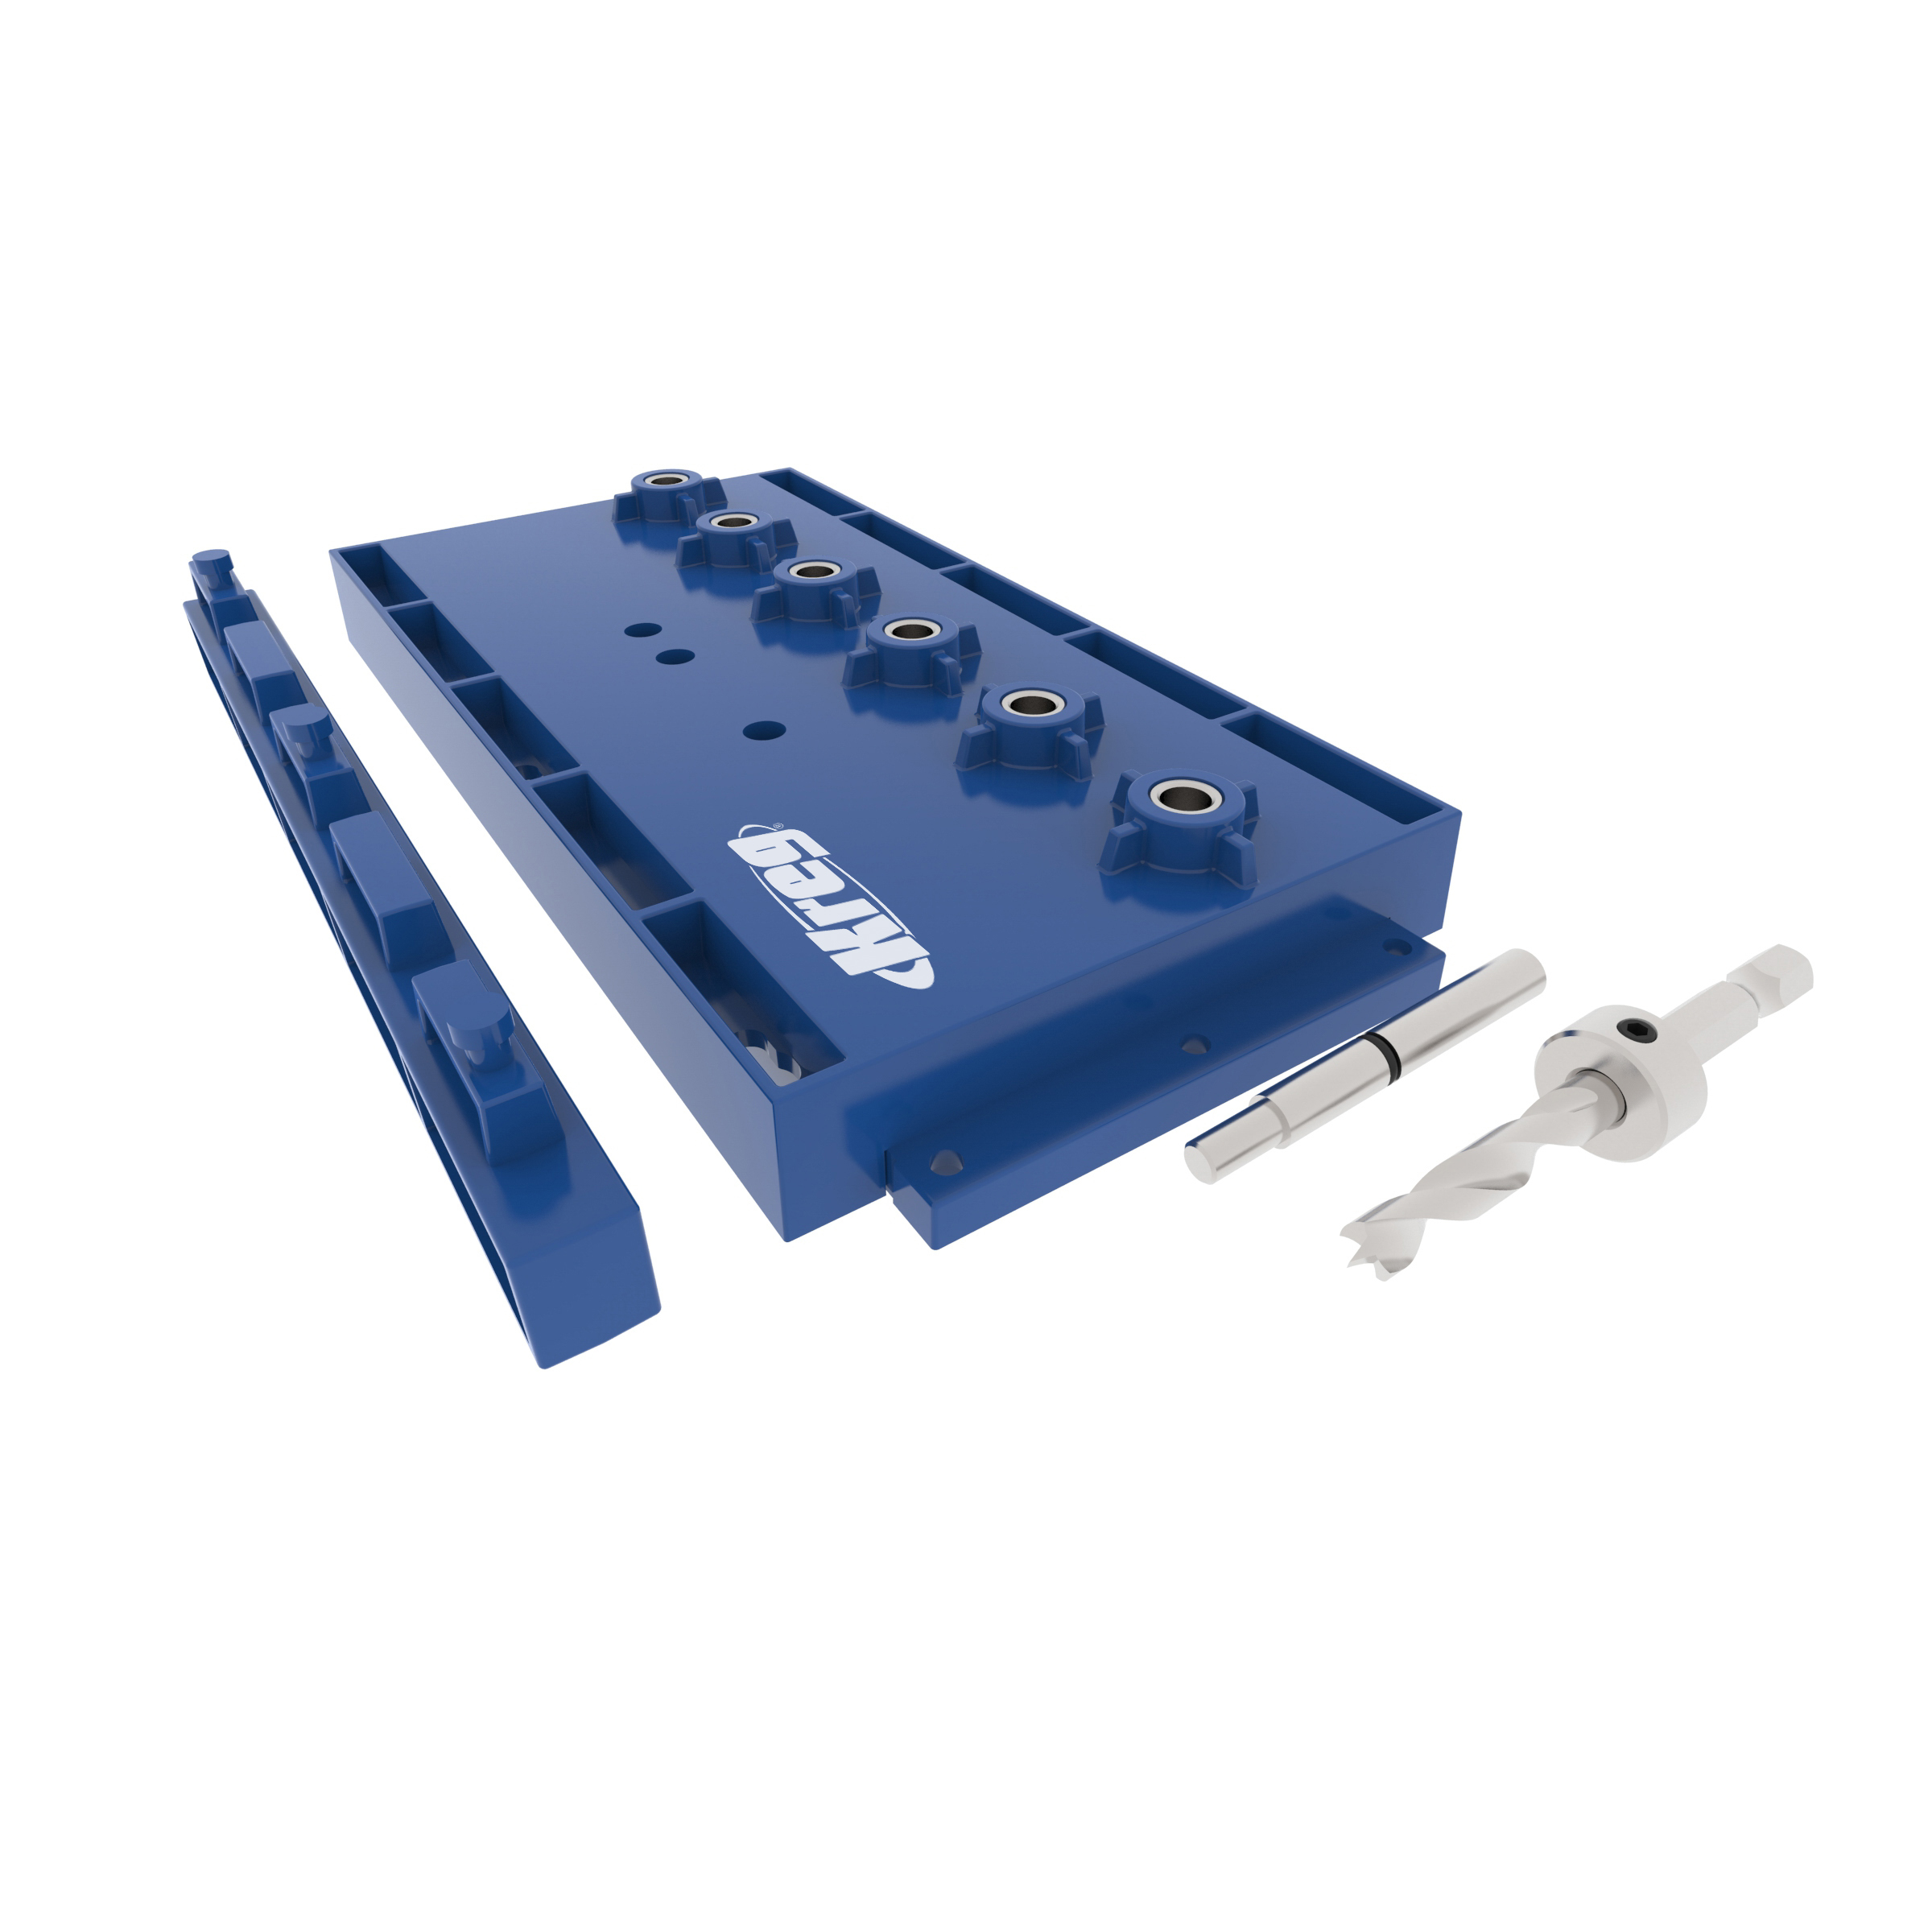
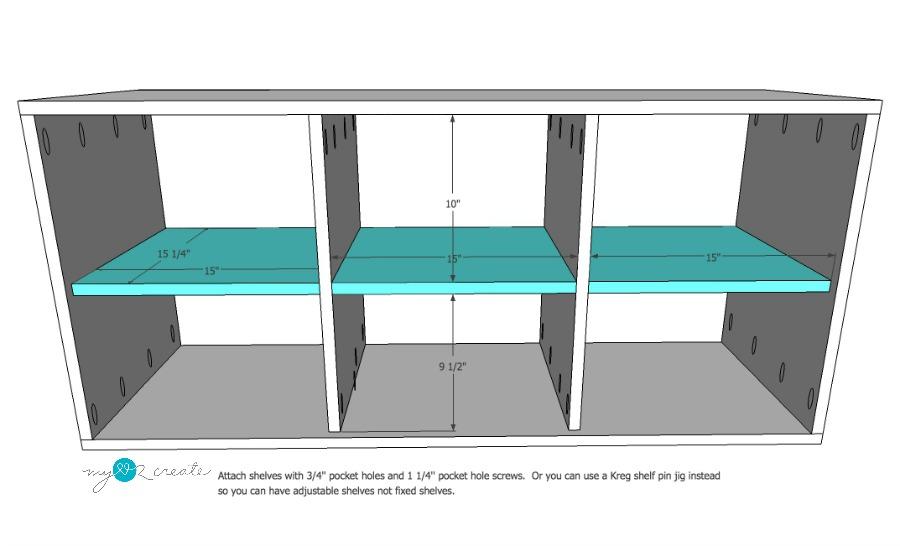
Add the shelves at your desired height with 1 1/4'' pocket hole screws and wood glue. If you want your shelves adjustable use the Kreg shelf pin jig.
-
Attach the back
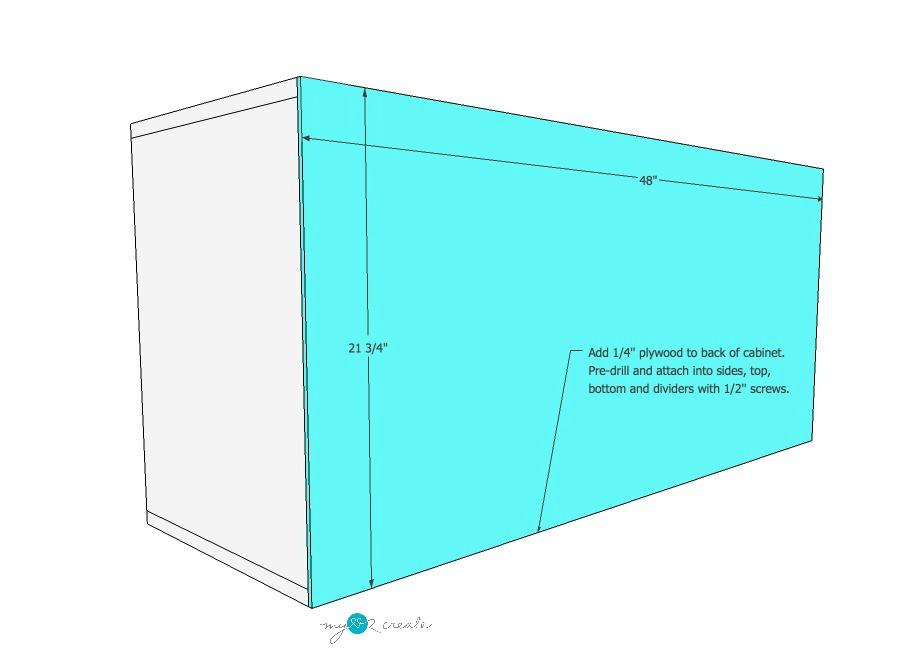
Attach the 1/4'' plywood to the back of the cabinet with 1/2'' screws, pre-drill and drill into the sides, dividers, top and bottom.
-
Build the face frame
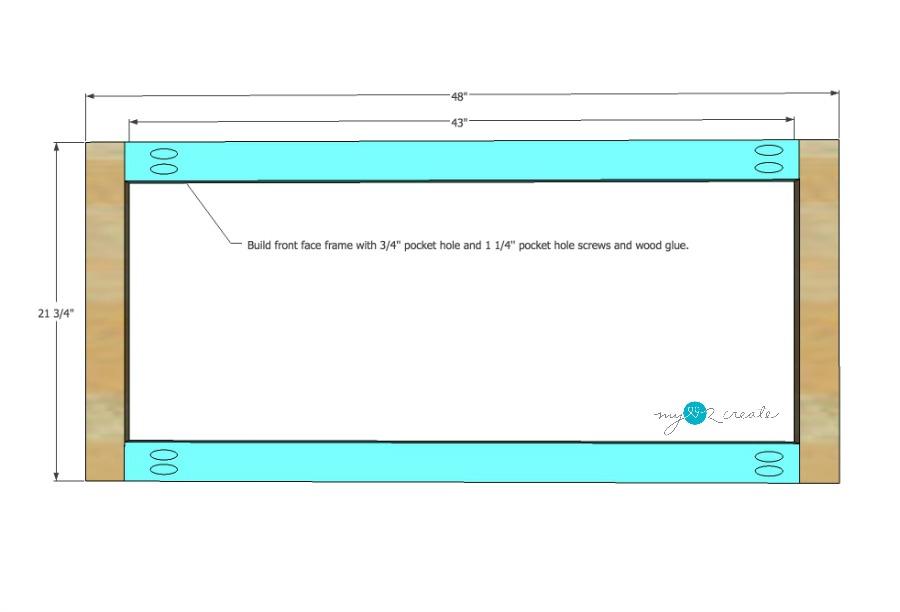
Build the face frame as shown.
-
Build the front three frames
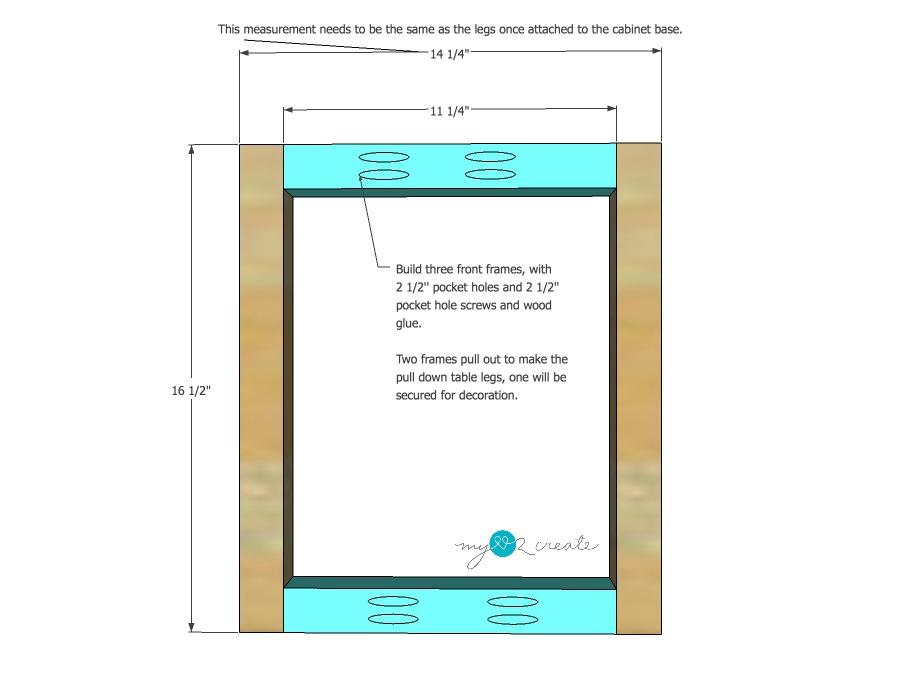
Build the front three frames as shown. Be sure to use 2 1/2'' pocket holes and screws.
-
Notch out area for hinges
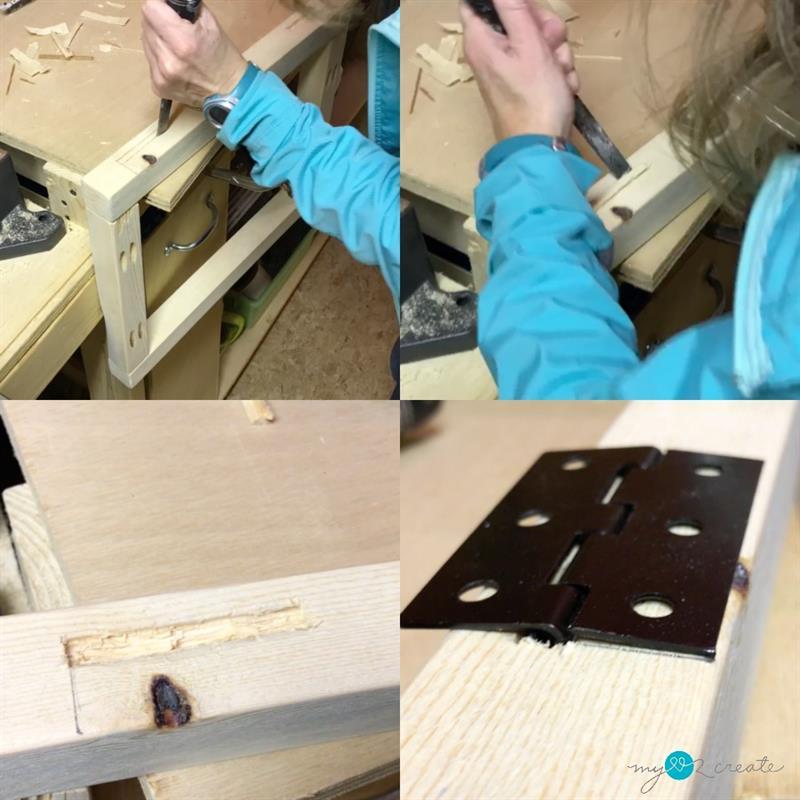
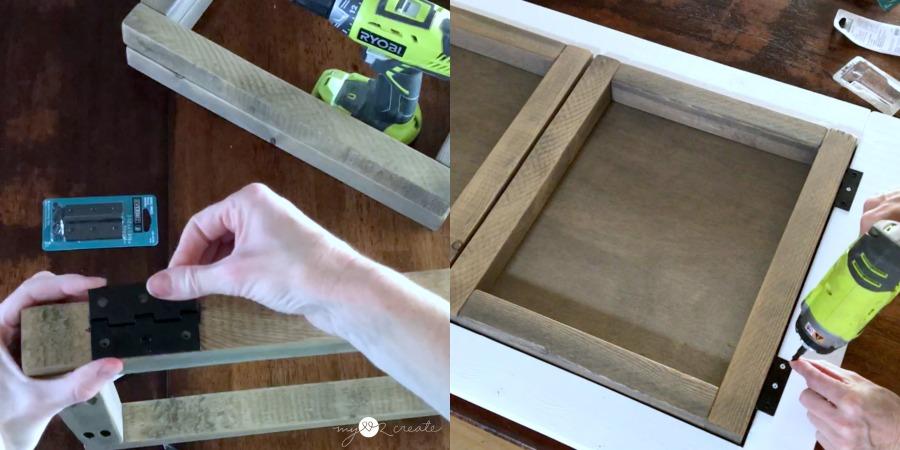
Notch out the area on your outside frames which will become the table legs, for the hinge to sit so it lays flat on the frame. See photos for details.
-
Stain and Paint
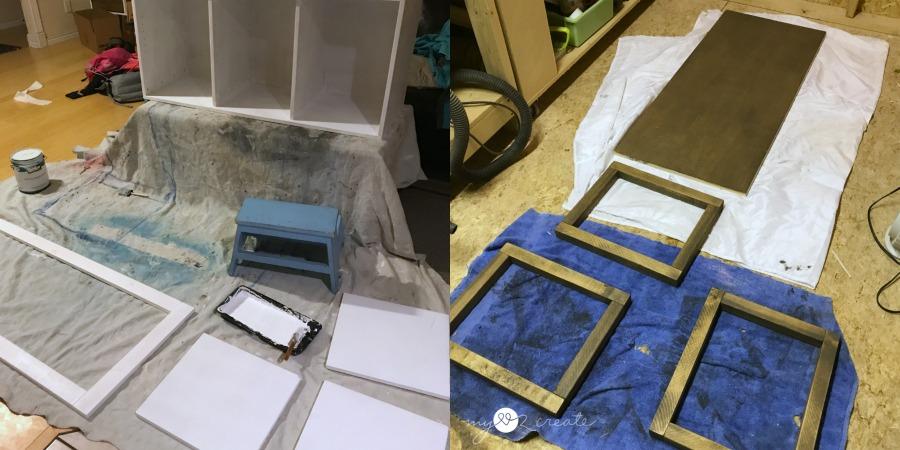
Stain and paint your pieces as desired up to this point. Of course you can wait until it is all built, but for me it is better to do it now and do touch ups later if needed.
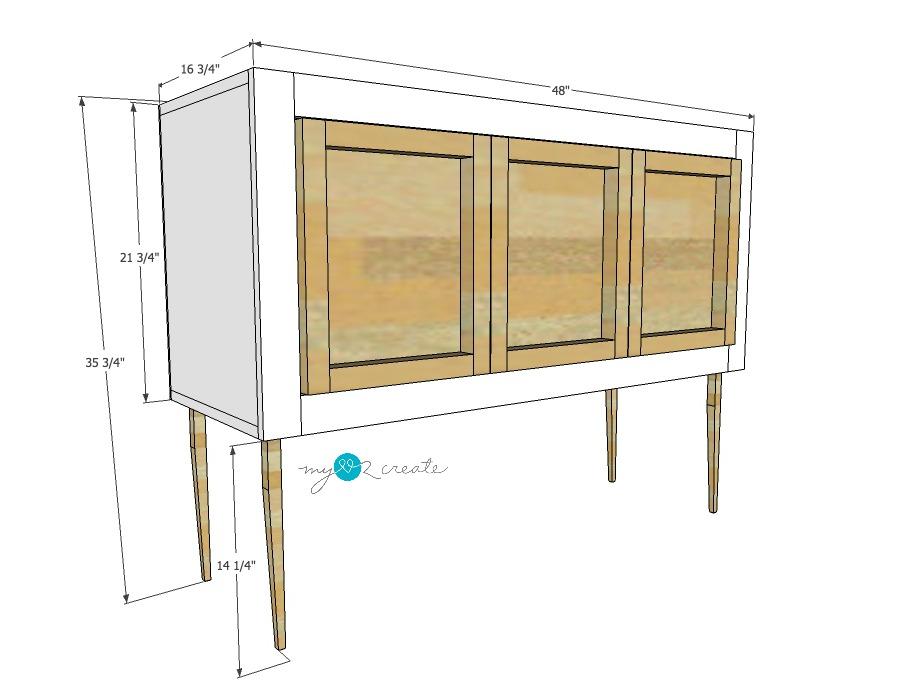
When my cabinet was finished and built, I added the legs to the bottom of the cabinet. This is important to do before you add your table top and face frames, because you will need the cabinet at the correct height for adding your face frame and table top.
-
Attach outside frames to face frame
Add the hinges to the outside frames, then attach them to the face frame as shown.
-
Add spring hinges
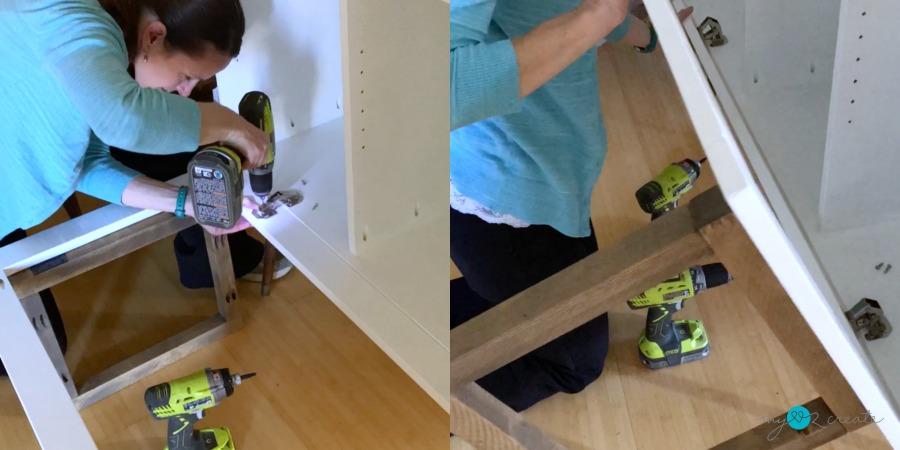
Attach the spring hinges to the face frame and the inside of the cabinet following the package directions. Close to see if it fits, and adjust accordingly.
-
Notch out table top
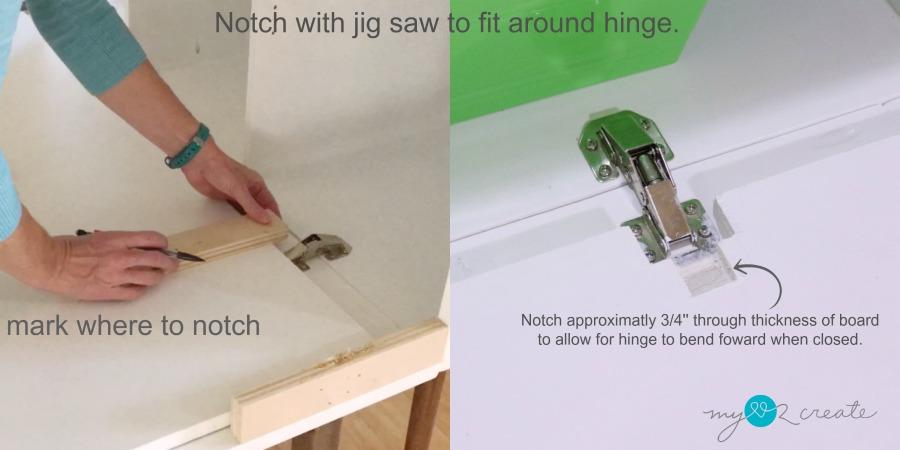
You will need to notch out the table top around the spring hinges. Measure and mark where to notch, then cut with a jigsaw. Make sure you are aware that you do not notch too high or you will go past the face frame and cause a gap. Note the reference to the other notch in the photo, it will be covered in the next step.
-
Add the latch
Add the latch and hook to the face frame and side of the cabinet.
-
Notch for closed spring hinge
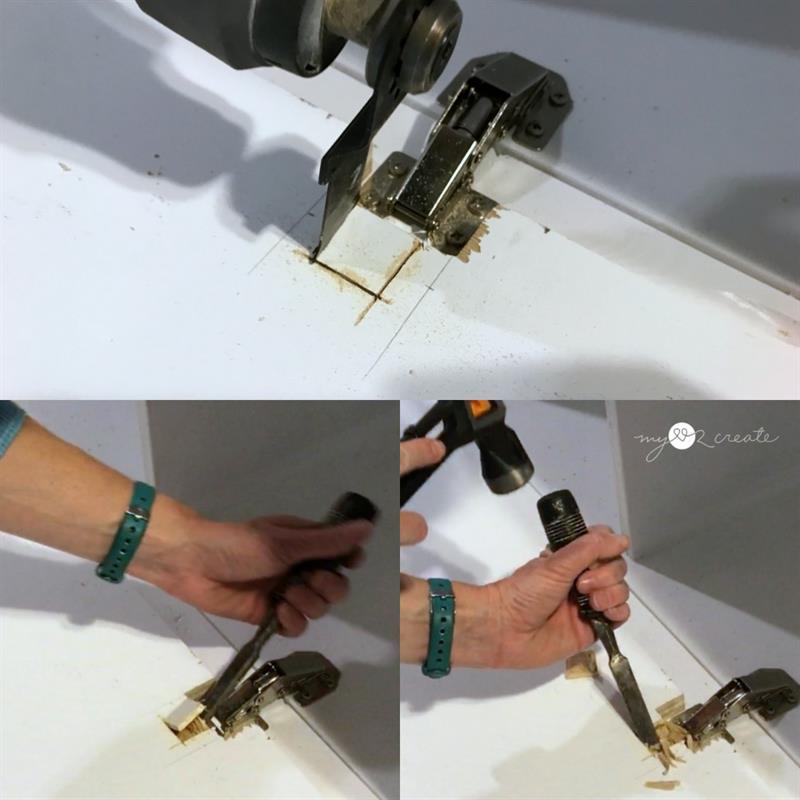
Once you have notched out the area around the hinge you will need to notch an area for the hinge when it closes, I went just over half the width of the board. I used a multi-tool to cut the wood, then used a chisel and a hammer to notch out the area.
-
Attach table top to face frame
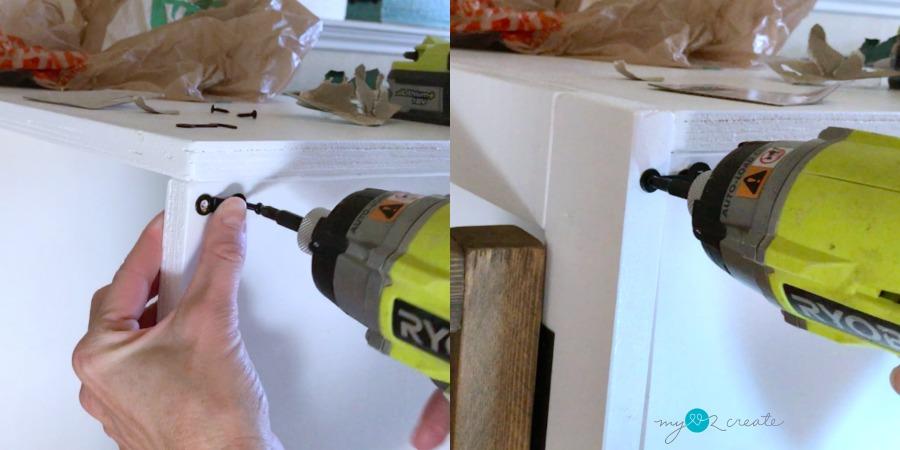
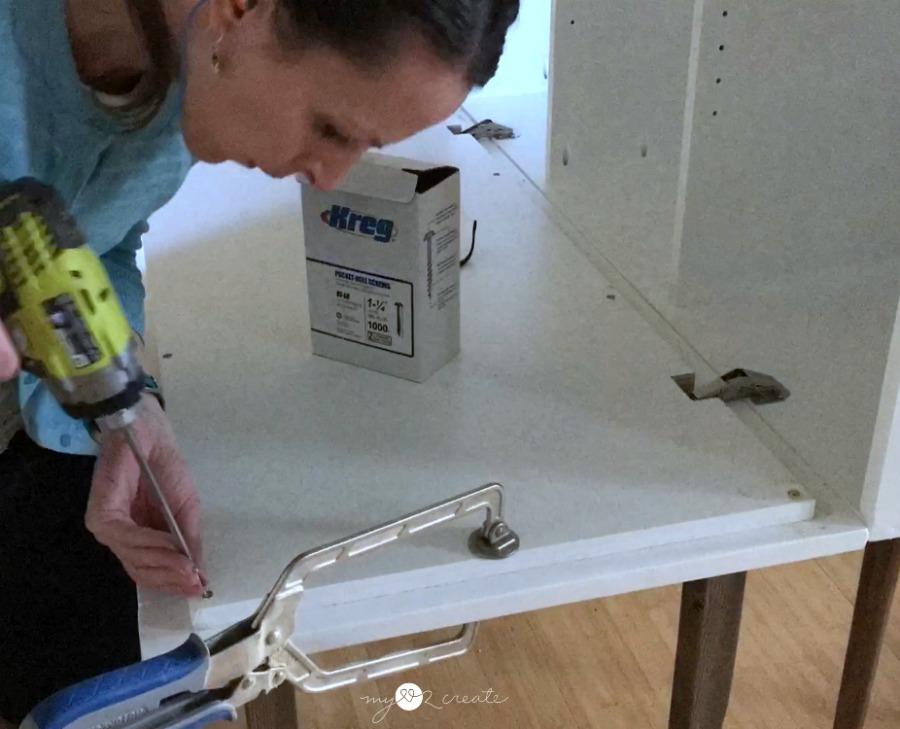
With all the notches done now you can attach the table top to the face frame. I countersunk 1 1/4'' screws through the table top into the face frame. It is helpful to use a clamp to avoid shifting. Then I filled in the holes.
-
Add middle frame to front
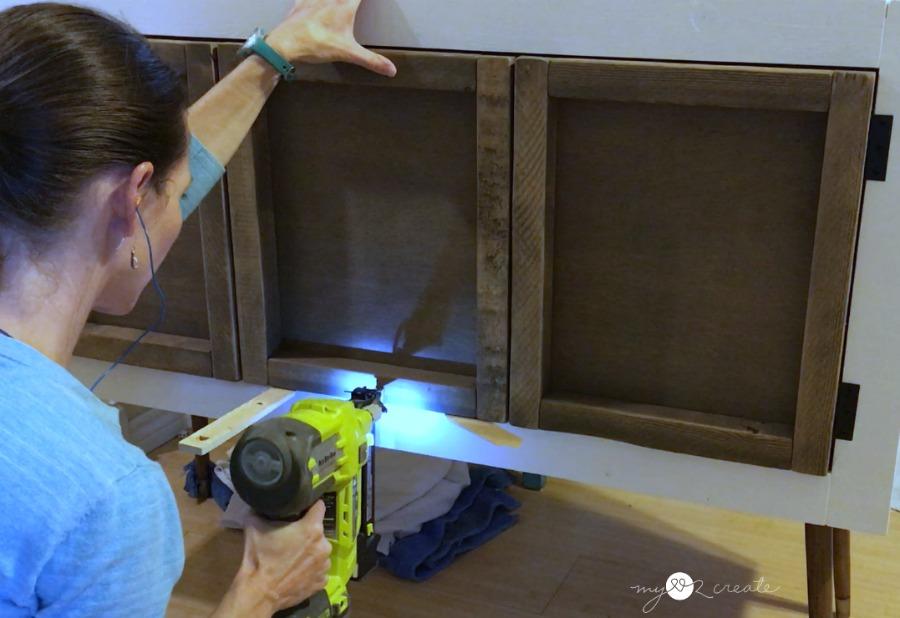
Now you can add the middle frame to the front. Use wood glue on the back of the frame and center it between the side frames, use shims to help. Then secure with 2'' finish nails.
-
Cut wood
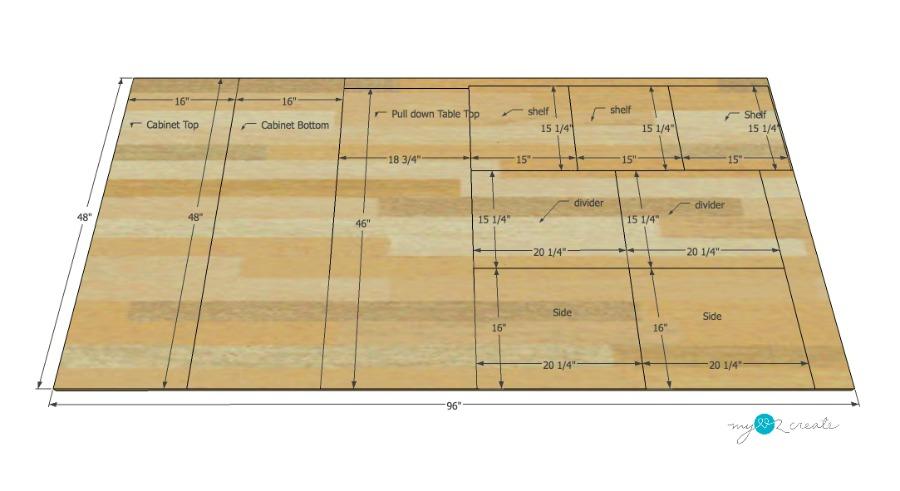
Use the diagram for your plywood cuts to get all of them in one sheet.
-
Read through plans
Make sure to read through the plans before beginning.
-
Finish as desired
Because it was for the kids I did some fun teepee stencils on the front. Get creative with your finish! For more photos and tips and tricks on this build check out my blog post. http://www.mylove2create.com/2017/10/kids-pull-down-table.html


