DIY Nightstand
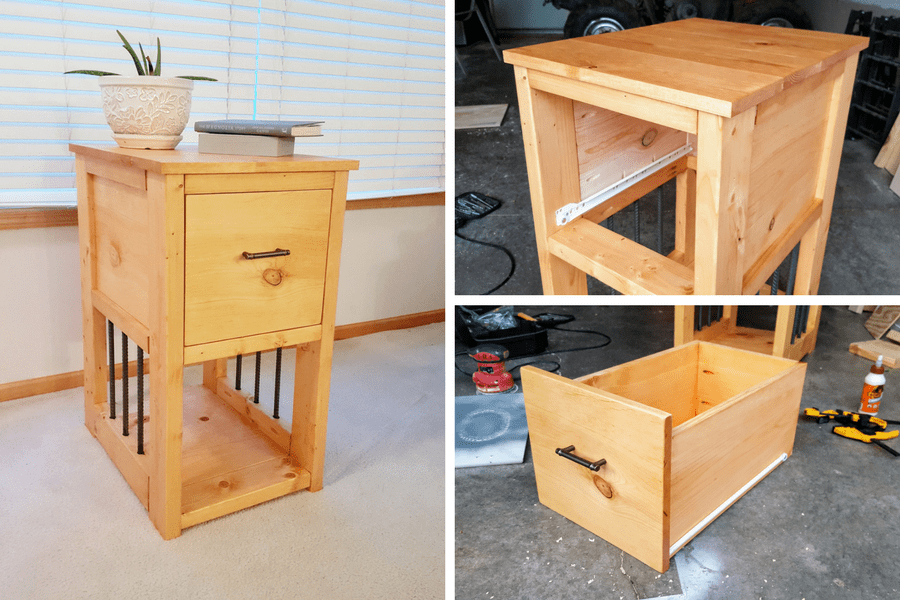
By Tylynn MBuild your own nightstand – complete with rebar accents for a fun rustic farmhouse twist. This nightstand has a large drawer and bookshelf for maximum storage capacity.
Directions
-
Step 1.
Build the frame of the nightstand. Attach the frame pieces with 2-1/2" pocket holes and screws. Place pocket holes and screws on the bottom side of the frame in order to hide them.
-
Step 2.
Add the cross pieces to the frame. Attach with 2-1/2" pocket holes and
screws. Position the 2x2s flush with the top of the legs. Position the 2x4s 4" from the bottom of the legs. Place pocket holes and screws on the bottom
side of the frame in order to hide them. Next, add the back 1x12 of the
nightstand. Attach with 1-1/4" pocket holes and screws. -
Step 3.
First, add the middle 2x4 frame across the back of the nightstand. Position
the 2x4 flush with the 1x12 back of the nightstand. Attach with 2-1/2" pocket holes and screws from the bottom side. Next, attach the 1x12 sides of the nightstand with 1-1/4" pocket holes and screws. Place pocket holes and screws on the inside of the frame in order to hide them in the final design. -
Step 4.
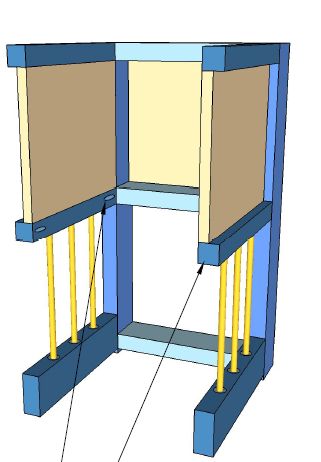
Drill holes for the rebar accents into the bottom side of the two lower 2x2
cross pieces. The holes are spaced 3-5/8" center-to-center. -
Step 5.
Drill holes for the rebar accents into the top of the lower 2x4 frame cross
pieces. Again, the holes are spaced 3-5/8" center-to-center. -
Step 6.
Once you have drilled the holes for the rebar accent, insert rebar into the 2x2 cross pieces. You may have to hammer the rear down a bit since the
edges are rough and may be slightly wider than 1/2" in some places. You should now have three pieces of rebar sticking out of each of your 2x2s. Position the 2x2 and rebar over the lower 2x4 cross pieces and insert into
place. Again, this may take some finagling to get the rebar and cross pieces into place. Once the 2x2s and rebar are in place, attach the 2x2s to the frame with 2-1/4" pocket holes and screws. -
Step 7.
Add the bottom shelf (see steps for bottom shelf below). Attach to
the frame from the bottom with 1-1/4" pocket holes and screws. -
Step 8.
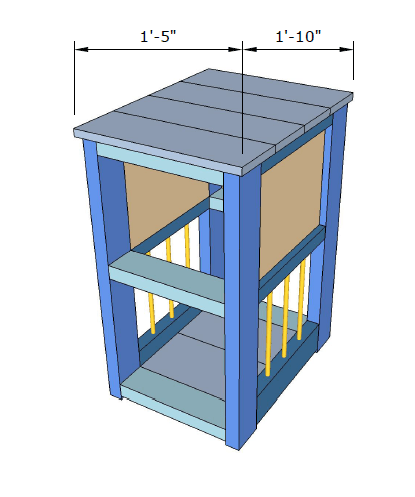
Attach the front framing of your nightstand. Start with the front legs, then add the cross 2x4s. Check, check, recheck for square.
Attach front frame the same as the back frame: 2-1/4" pocket holes and screws from the 2x2 and 2x4 cross pieces, 1-1/4" pocket
holes and screws from the side 1x12s and bottom shelf. -
Step 9.
Add the top shelf (see plans for top shelf below). Attach to the frame from the bottom with wood glue and 1-1/4" pocket holes and screws.
-
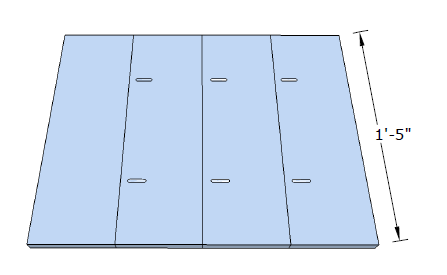
Top Shelf
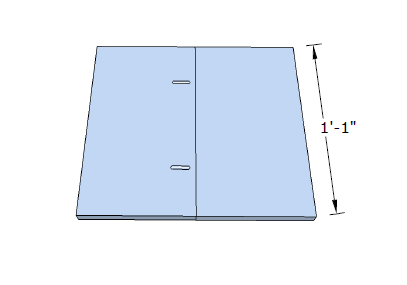
To build the top shelf, attach four 1x6s from the bottom with wood glue and 1-1/4" pocket holes and screws.
-
Bottom Shelf
To build the bottom shelf, attach two 1x8s from the bottom with wood glue
and 1-1/4" pocket holes and screws. -
Drawer
To add the drawer to this nightstand, I used a tutorial from Build-Basic.com. You can find the tutorial at http://build-basic.com/build-a-basic-diy-drawer/#.WUAyeevythE.
To modify the dimensions to fit this nightstand: use a 1x10 for the drawer sides, 1/4" plywood for the base, and a 1x12 as the drawer face.
All drawer hardware can be found at Home Depot.


