DIY Cane Cabinet
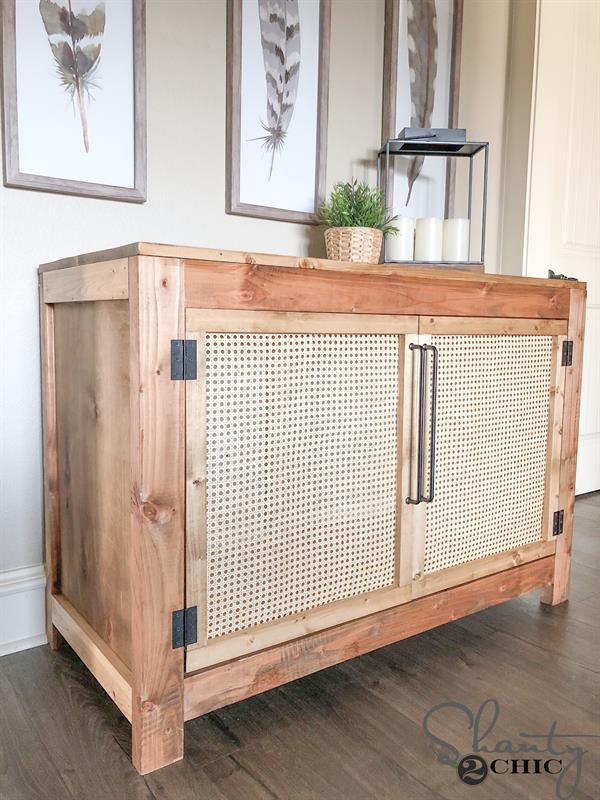
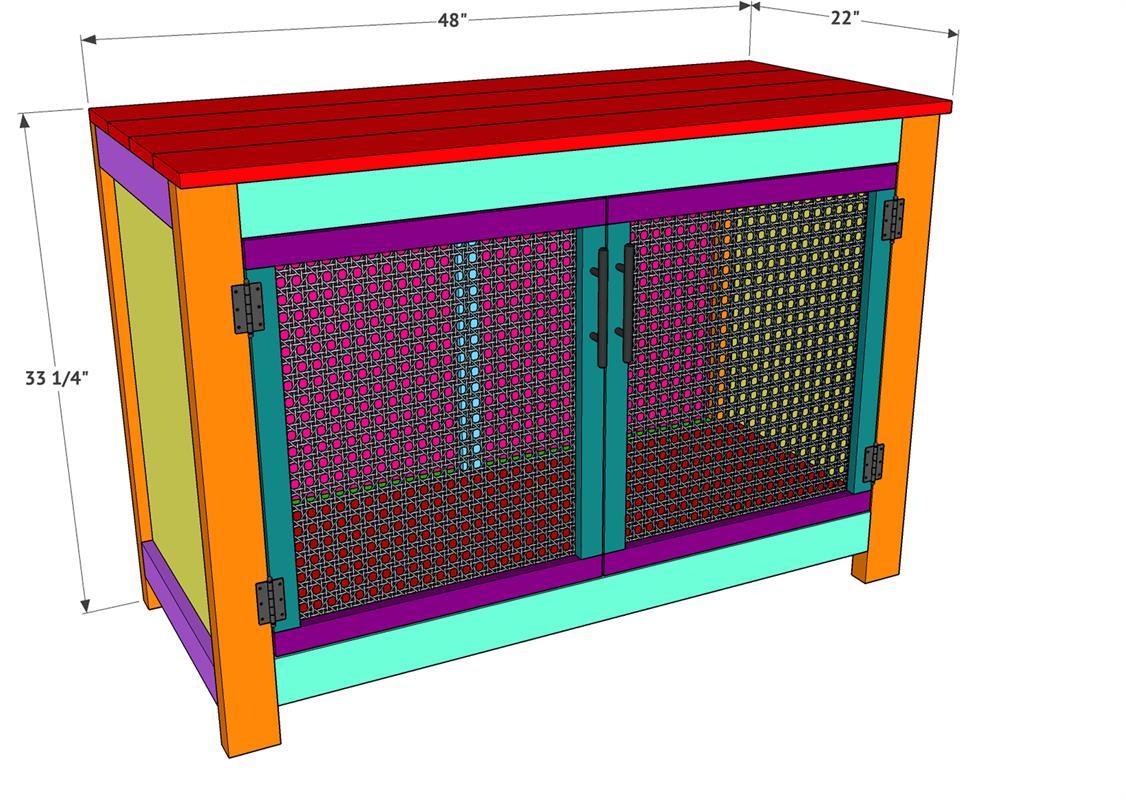
By Shanty2ChicLearn how to build this DIY Cane Cabinet with free plans and how-to instructions by Shanty2Chic! This is the perfect storage console for any space! Check out the how-to on our website for links to products used and access to the FREE Printable version of the plans!
https://www.shanty-2-chic.com/2019/06/diy-cane-cabinet-how-to-build-with-free-plans.html
Directions
-
Step 1
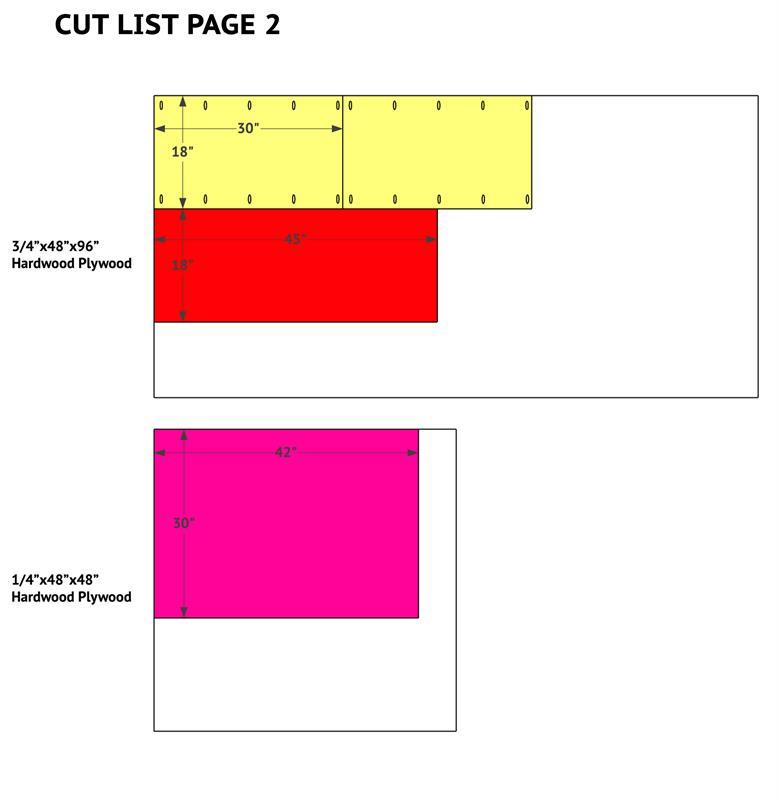
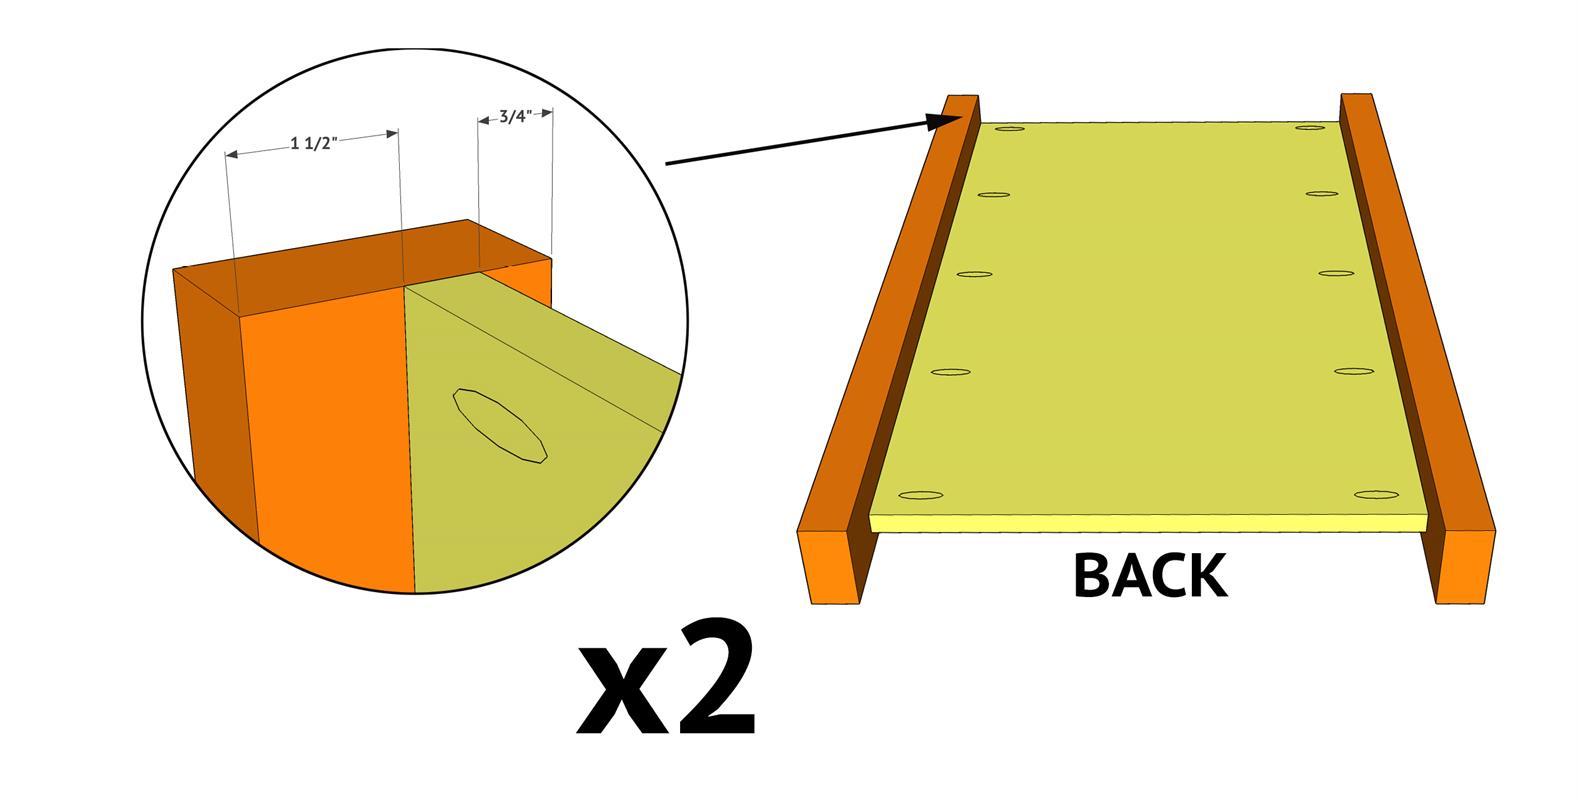
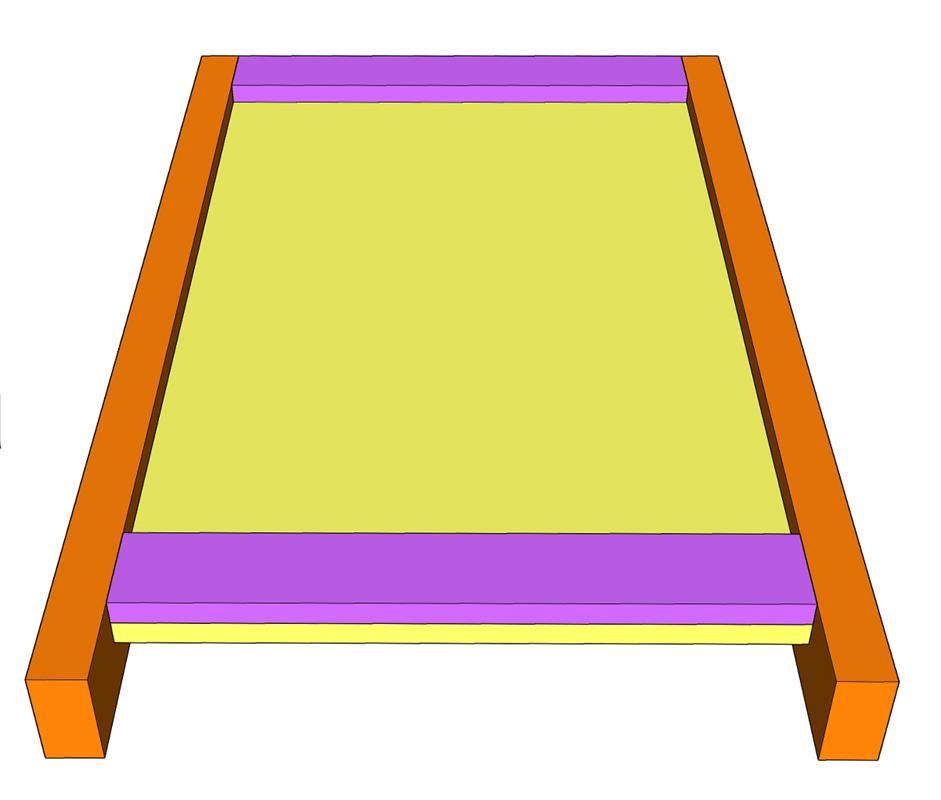
Cut the plywood and legs to create the side panels. Drill 3/4" pocket holes into each side of the plywood. Attach a leg to each side with 1 1/4" pocket hole screws and wood glue. The top of the legs should be flush with the top of the plywood and there should be a 3/4" gap on the front of the panels and a 1 1/2" gap on the back. Build two of these assemblies.
-
Step 2
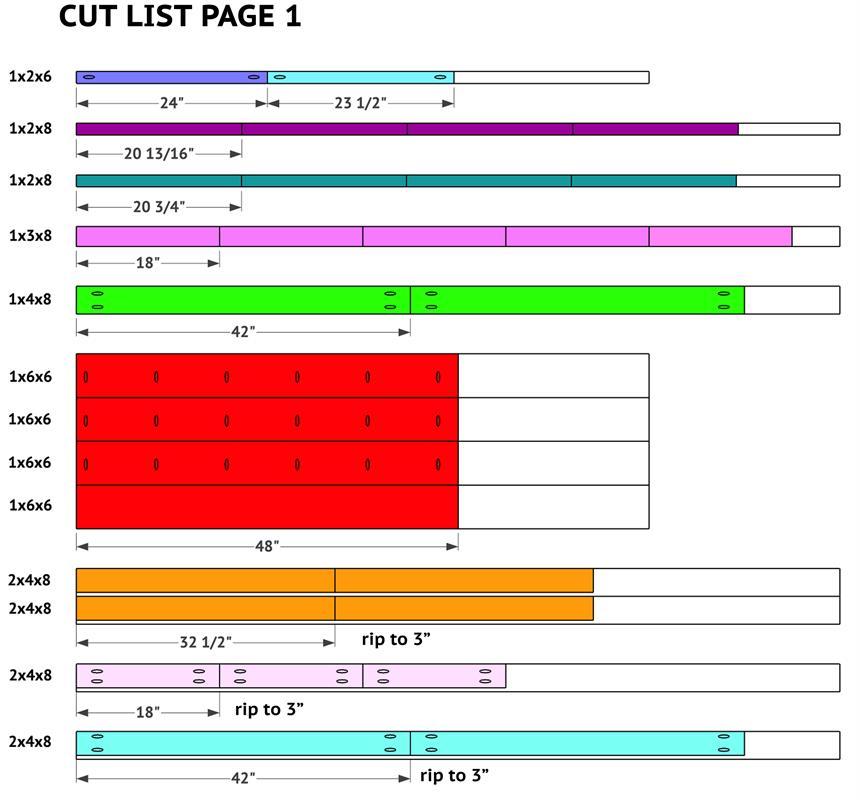
Measure and cut the top and bottom, side panel trim to size. Flip the side panels right-side-up and attach the trim pieces to the front of the side panels with 1 1/4" brad nails and wood glue.
-
Step 3
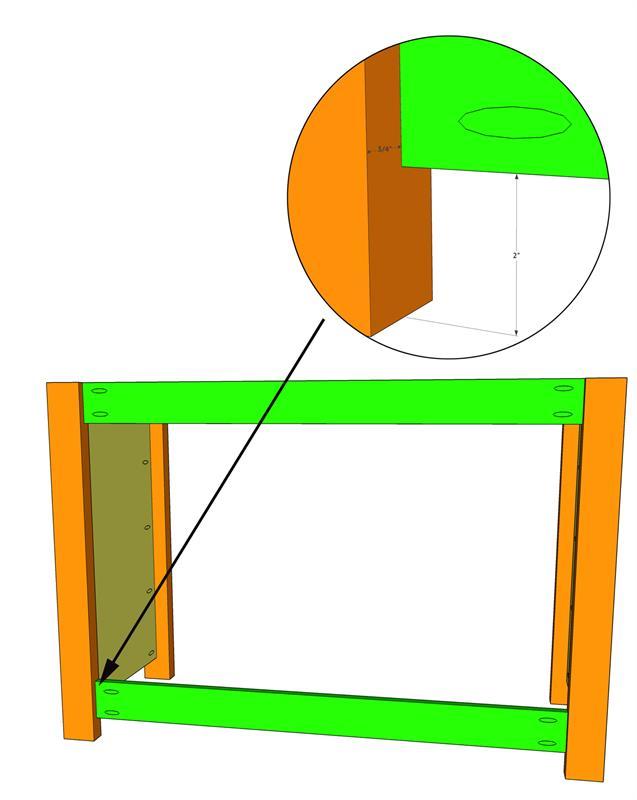
Cut the back aprons to size and drill 3/4" pocket holes into both ends. Attach them to the back legs with 1 1/4" pocket hole screws and wood glue, flush with the inside of the legs. The bottom apron should be 2" from the bottom of the legs and the top apron should be flush with the top of the legs.
-
Step 4
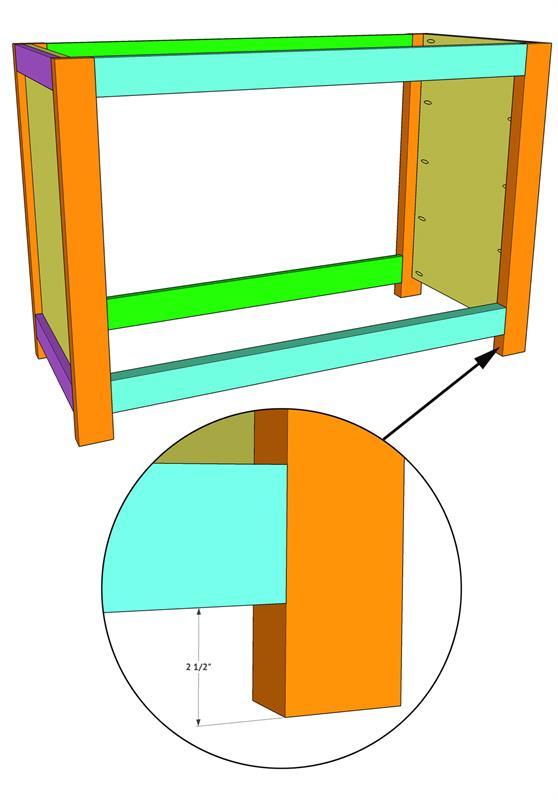
Cut the front aprons to size and drill 1 1/2" pocket holes into each end. Attach the aprons to the front legs with 2 1/2" pocket hole screws and wood glue. The top apron should be flush with the top of the legs and the bottom apron should be attached 2 1/2" from the bottom of the legs.
-
Step 5
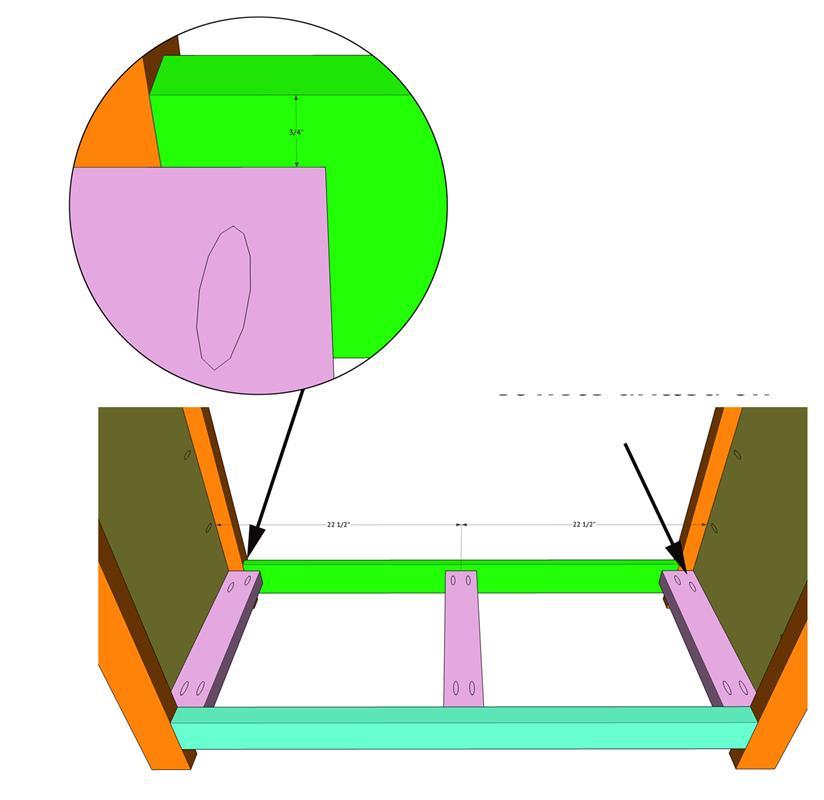
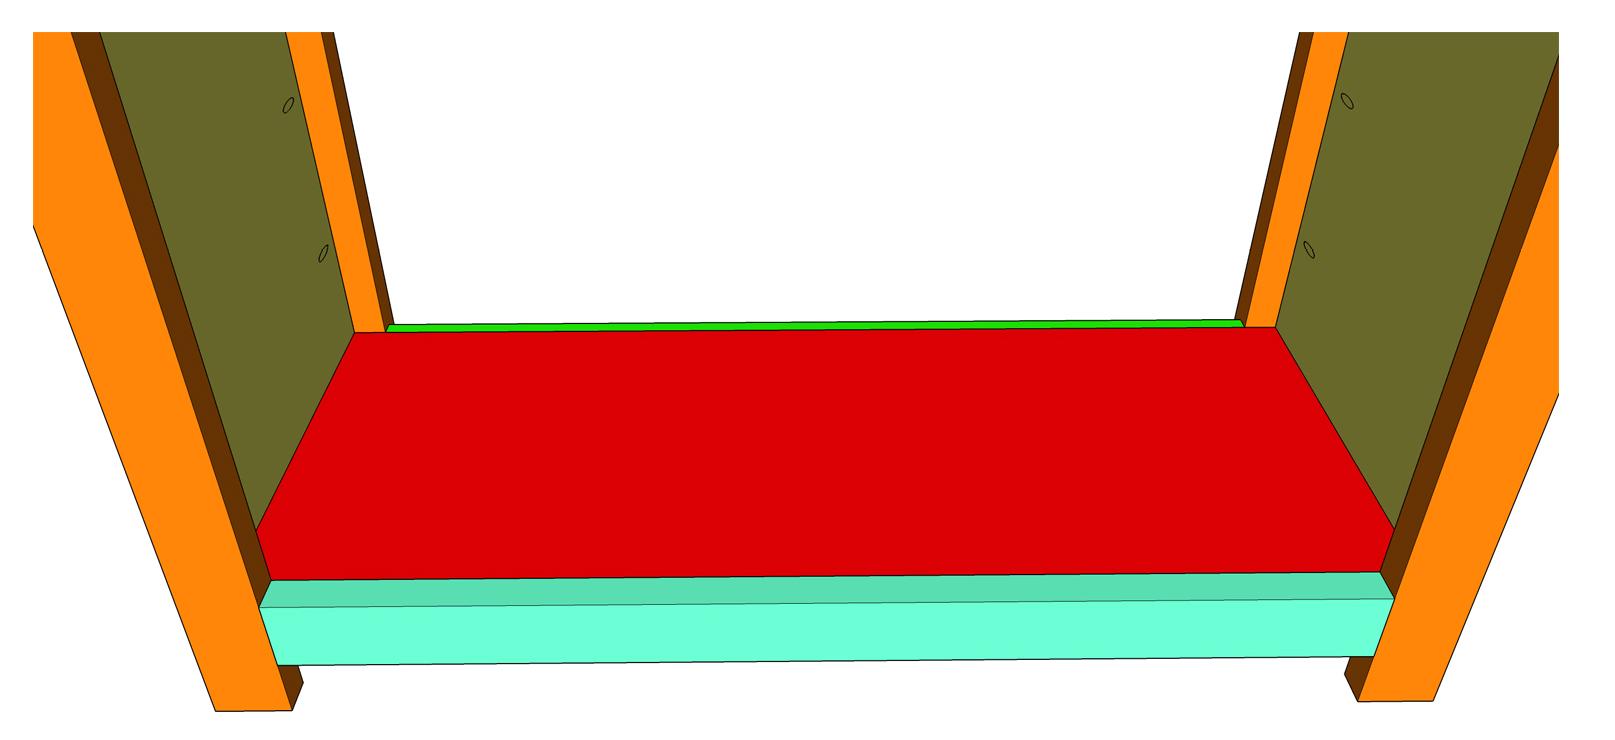
Cut the bottom support pieces to size and drill 1 1/2" pocket holes into the ends that will attach to the front apron. Drill 3/4" pocket holes on the other ends. Attach the supports with 1 1/4" and 2 1/2" pocket hole screws and wood glue.
-
Step 6
Cut the plywood for the bottom of the cabinet. Apply wood glue to the top of the bottom support pieces, lay the plywood on top of the supports and attach it to the supports with 1 1/4" brad nails.
-
Step 7
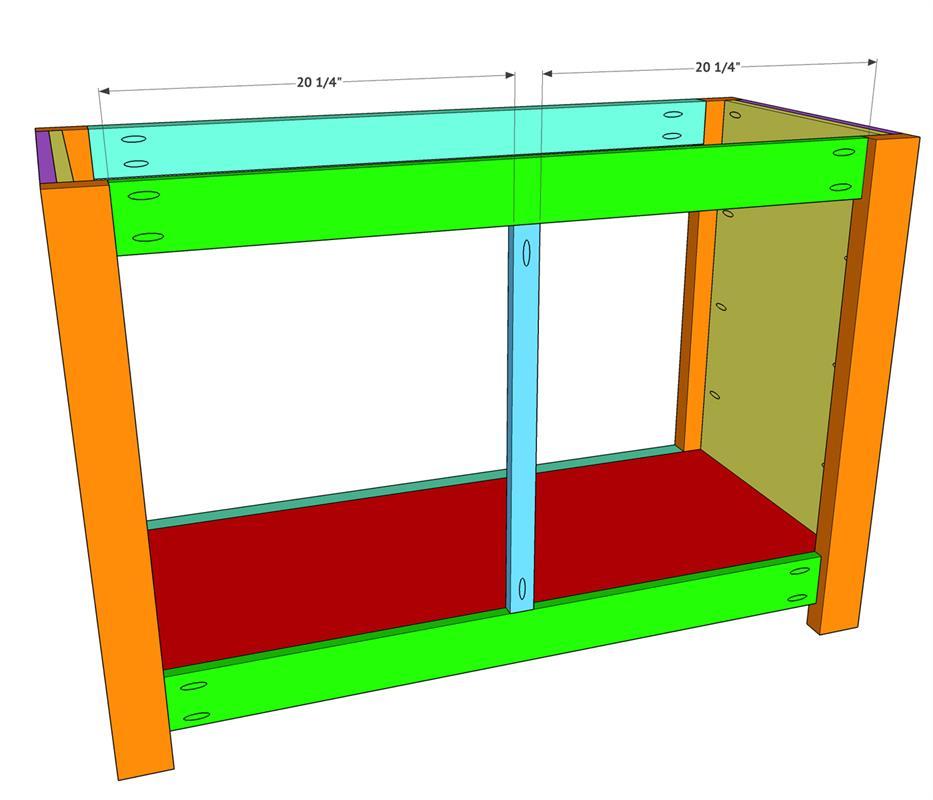
Cut the back support piece to size and drill 3/4" pocket holes into both ends. Center it on the back aprons and attach it to the back aprons with 1 1/4" pocket hole screws and wood glue.
-
Step 8
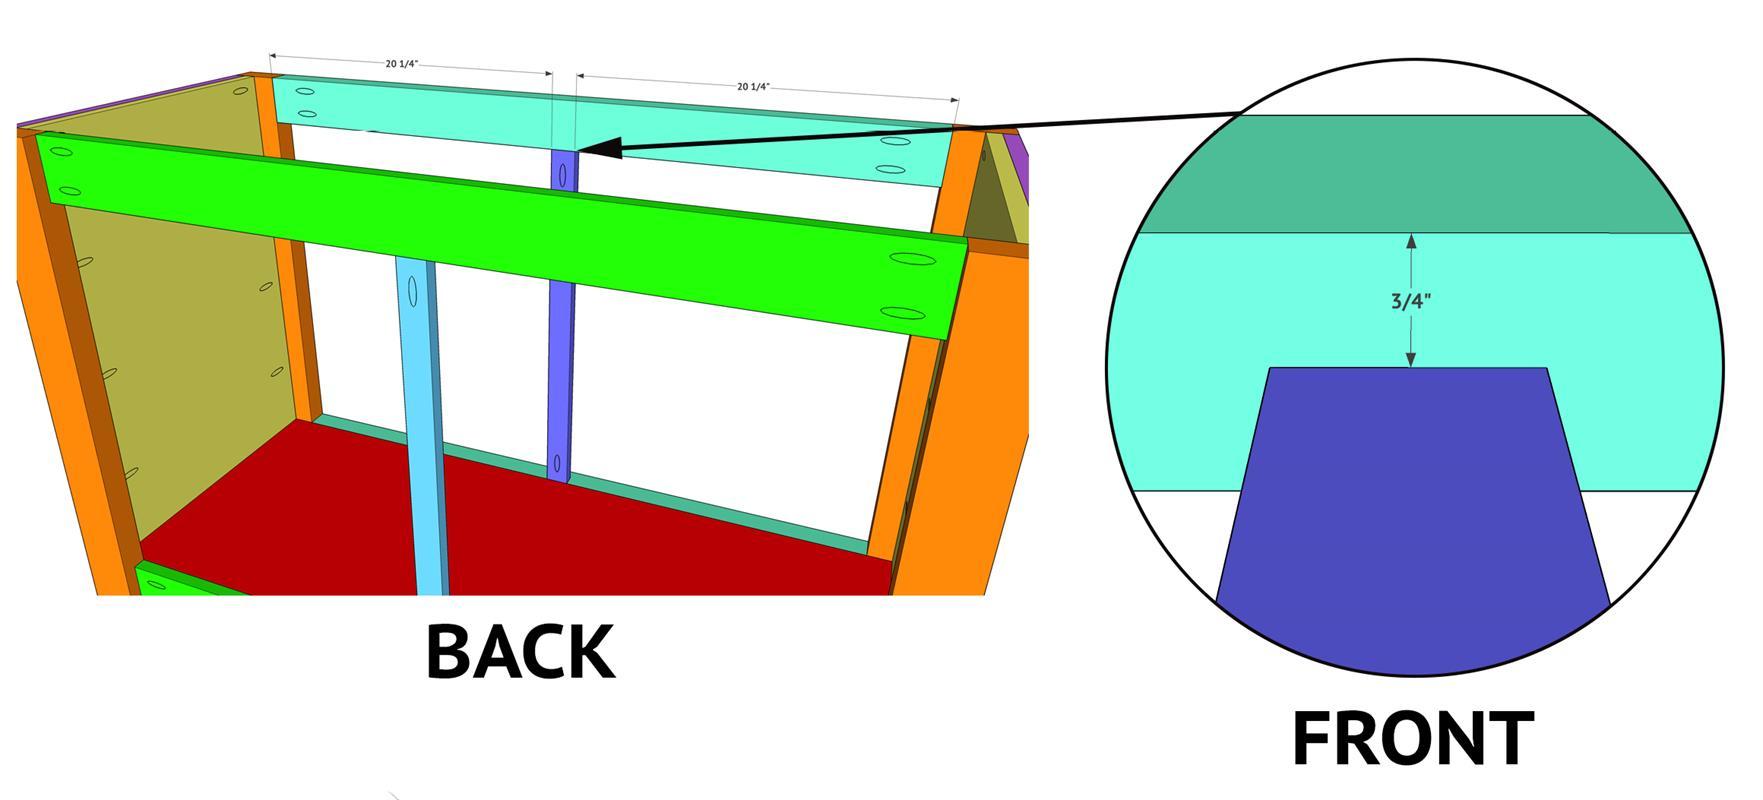
Cut the front divider to size and drill 3/4" pocket holes into each end. Center it on the front aprons and attach it to the front aprons with 1 1/4" pocket hole screws and wood ge. luThe back of the divider should be flush with the back of the aprons and set back 3/4" from the front.
-
Step 9
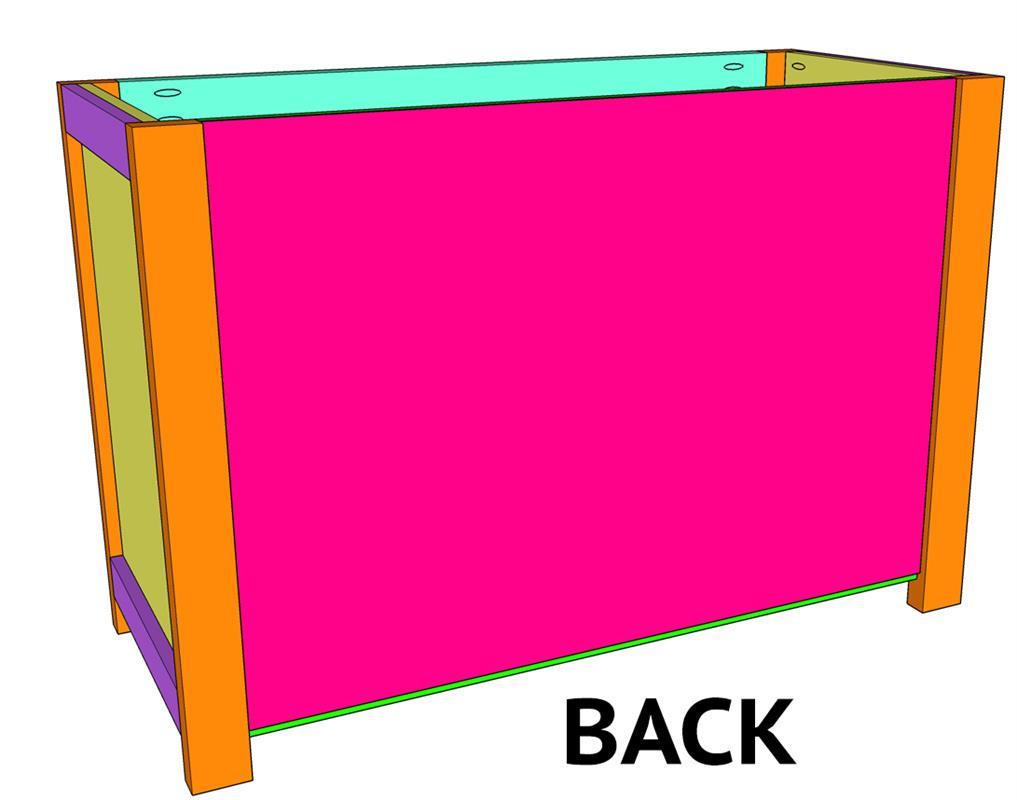
Cut the 1/4" plwyood to size and attach it to the back of the cabinet with 3/4" staples and wood glue.
-
Step 10
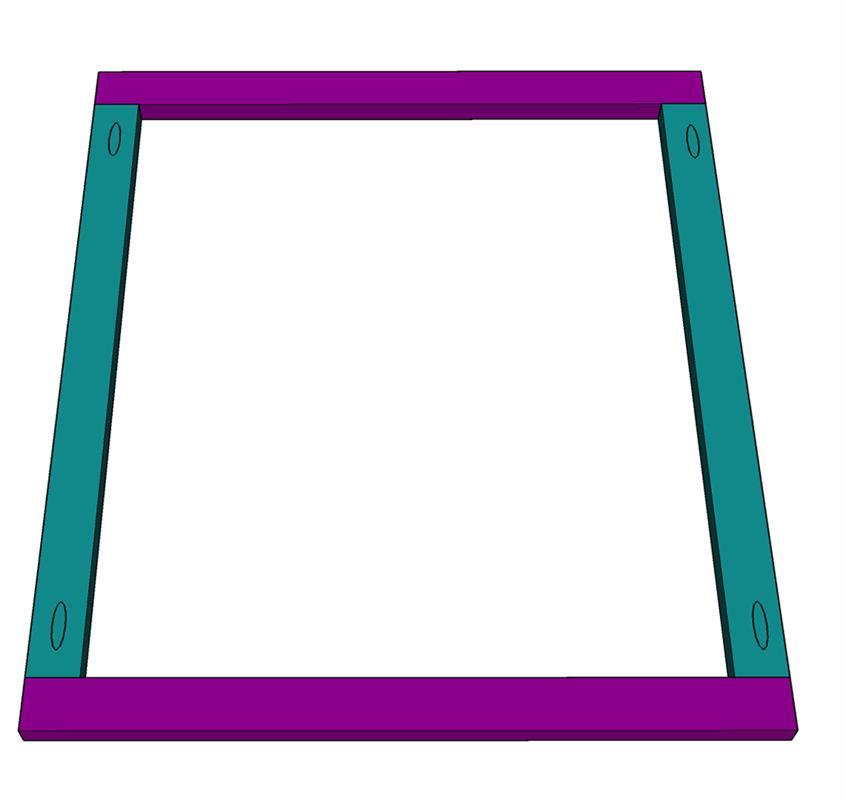
Measure and cut the door frame pieces to size and drill 3/4" pocket holes into both ends of the side pieces. Attach the side pieces to the top and bottom pieces with 1 1/4" pocket hole screws and wood glue.
-
Step 11
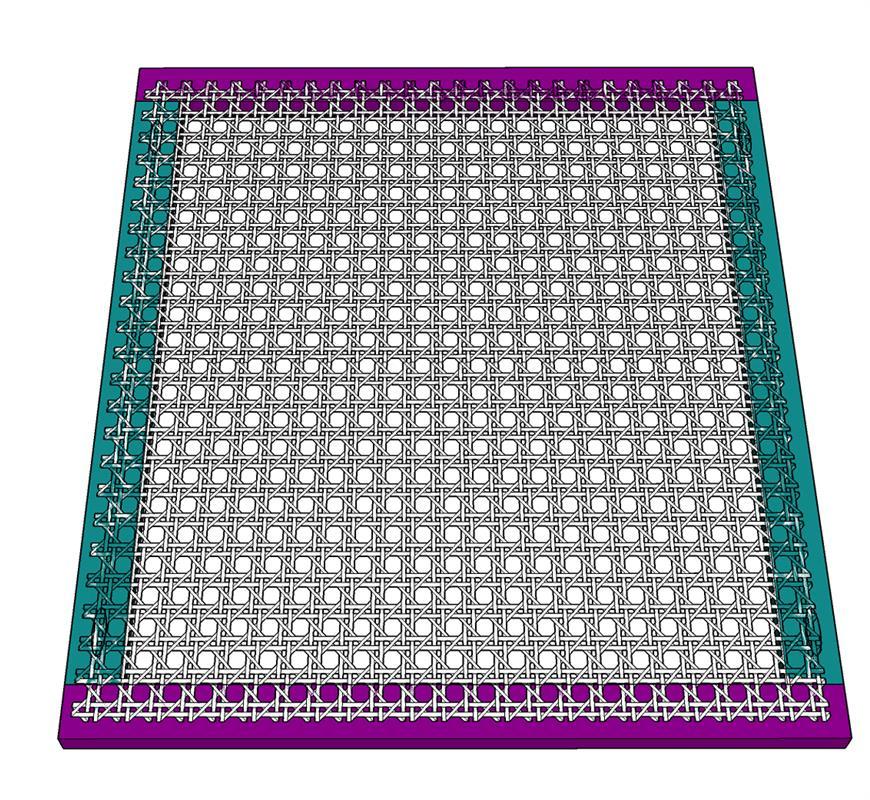
Cut the cane webbing to size and attach it to the back of the door frames with 3/8" staples.
-
Step 12
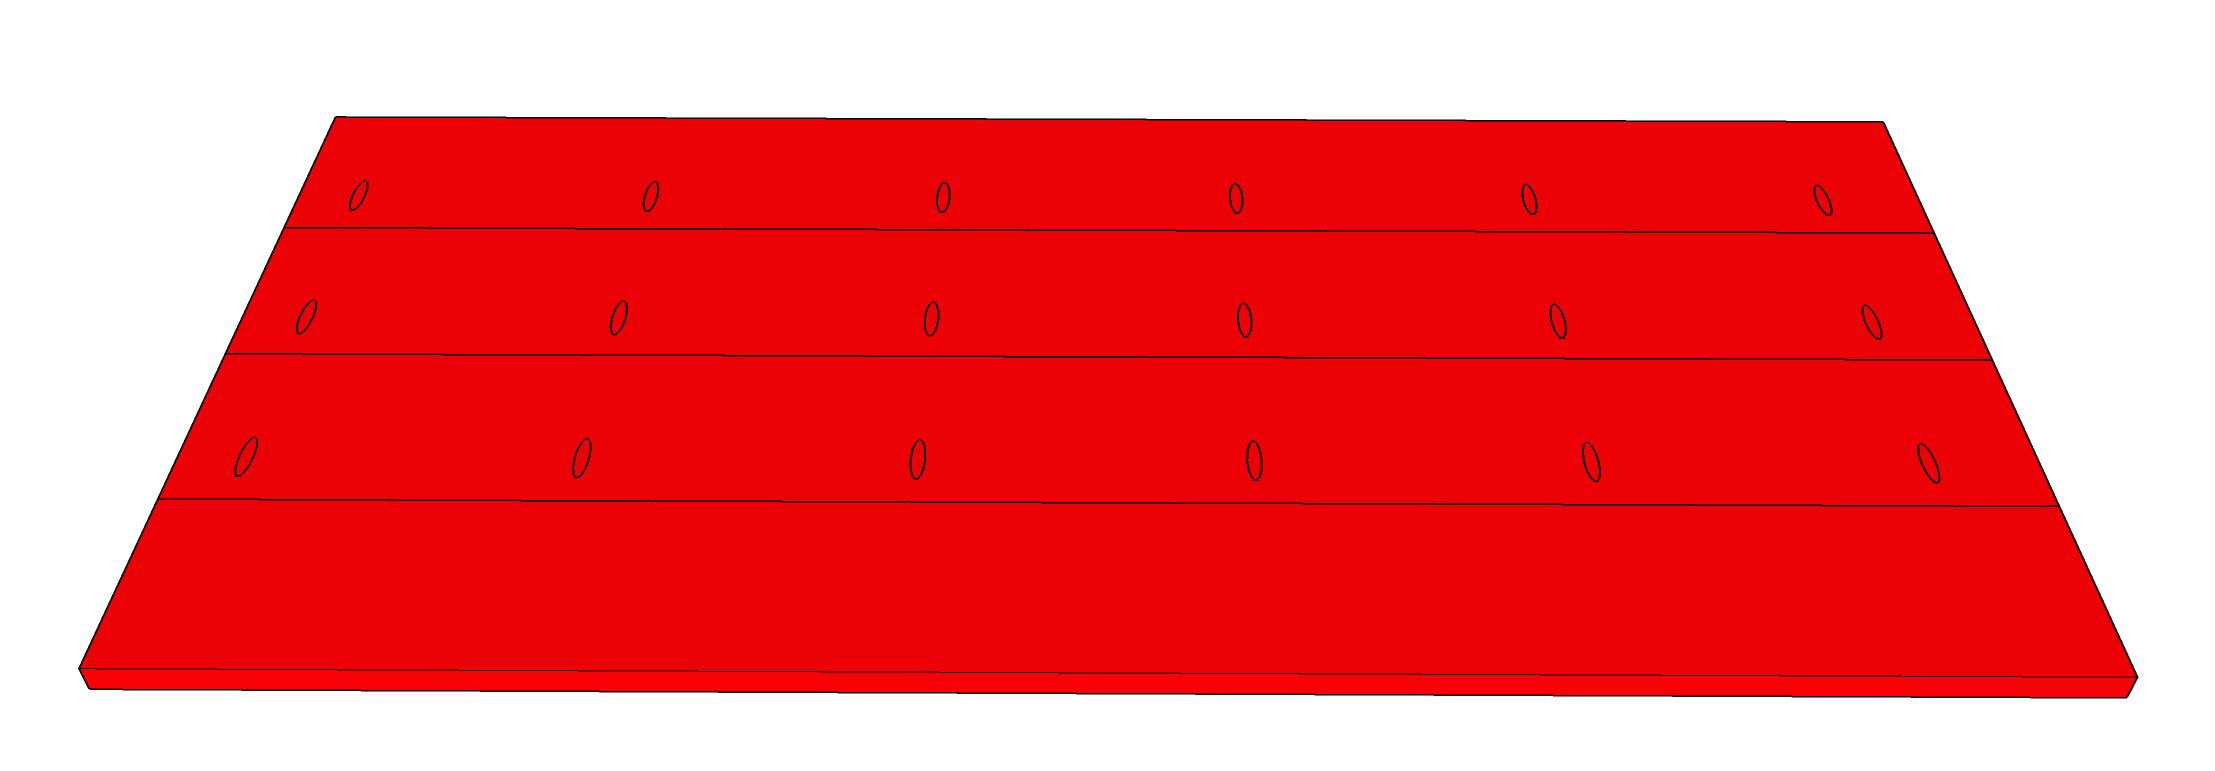
Cut the top planks to size and drill 3/4" pocket holes along one edge of three of the planks. Attach them together with 1 1/4" pocket hole screws.
-
Step 13
Attach the planked top to the cabinet with 1 1/4" brad nails and wood glue. Attach the doors with hinges and add a finish! Make sure to share your builds with us on social media and use #shanty2chic so we can share them too! Happy Building!


