Convertible Picnic Table and Bench
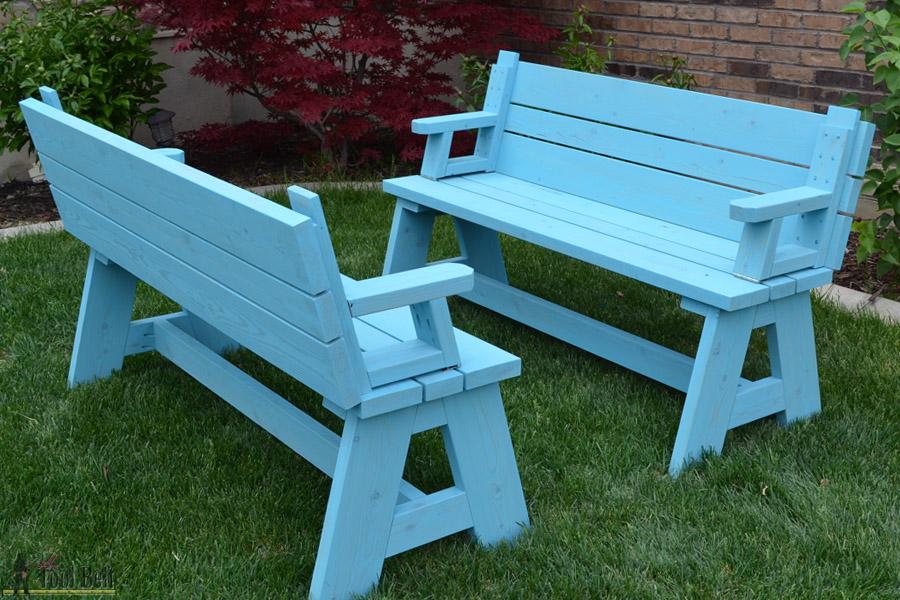
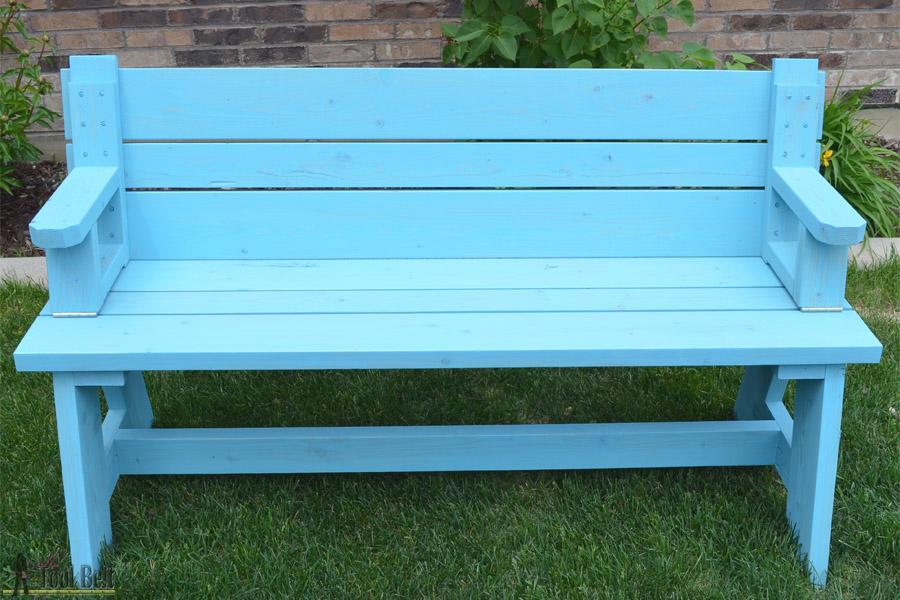
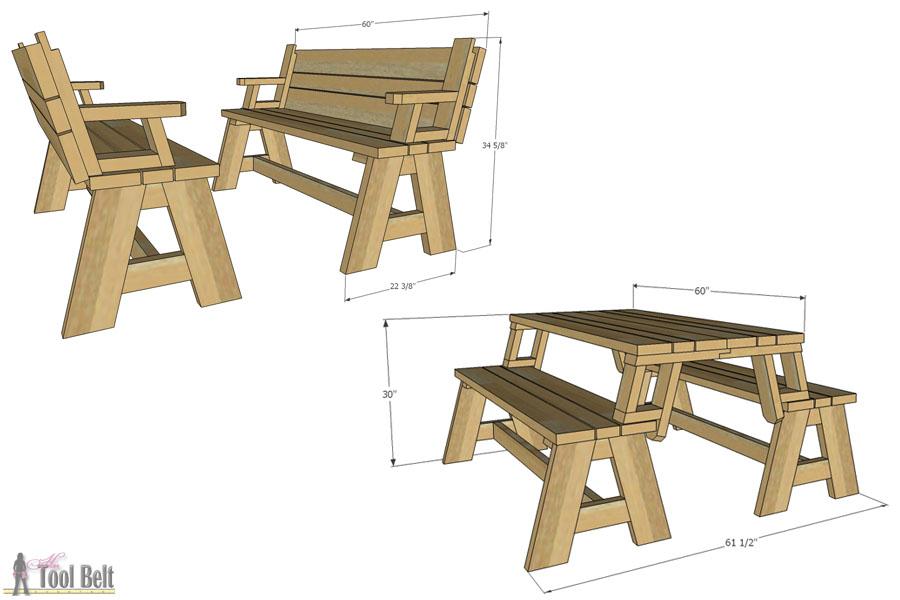
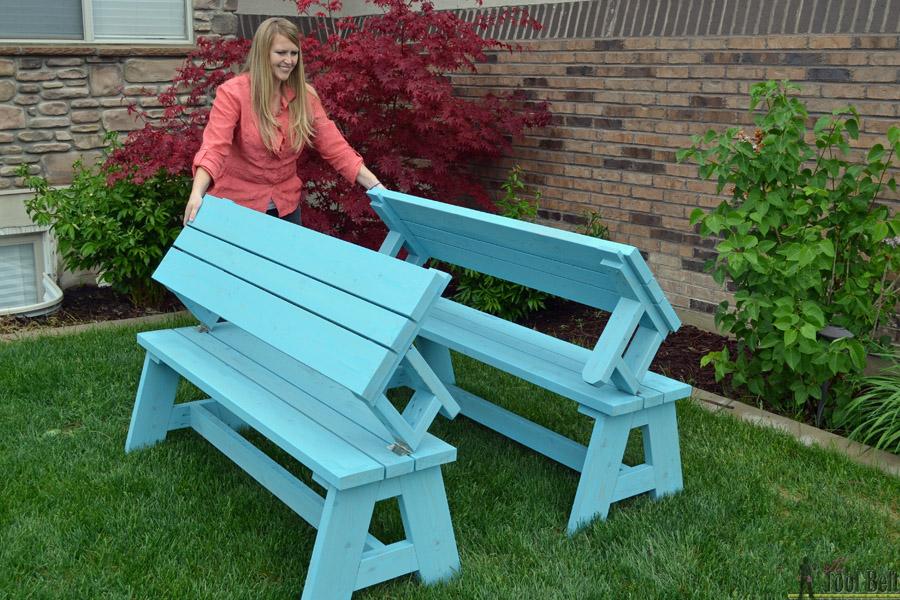
By HertoolbeltThis is a dual purpose picnic table. Not only is this picnic table great for outdoor eating, but it easily converts into two cute garden benches. The picnic table’s top folds down to create the back of the bench, for a relaxing seat.
Directions
-
Assemble Legs
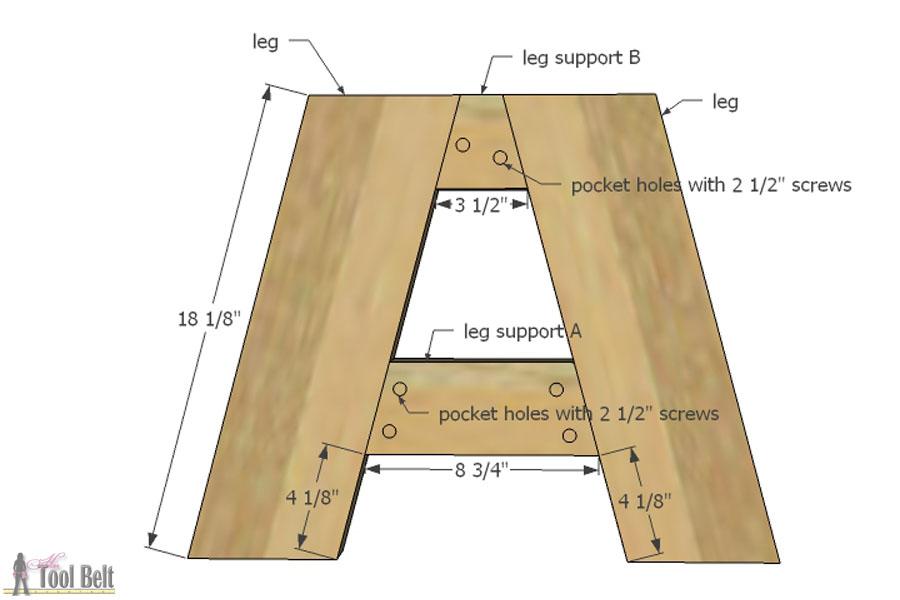
All pocket holes for this project are for 1 ½” material.
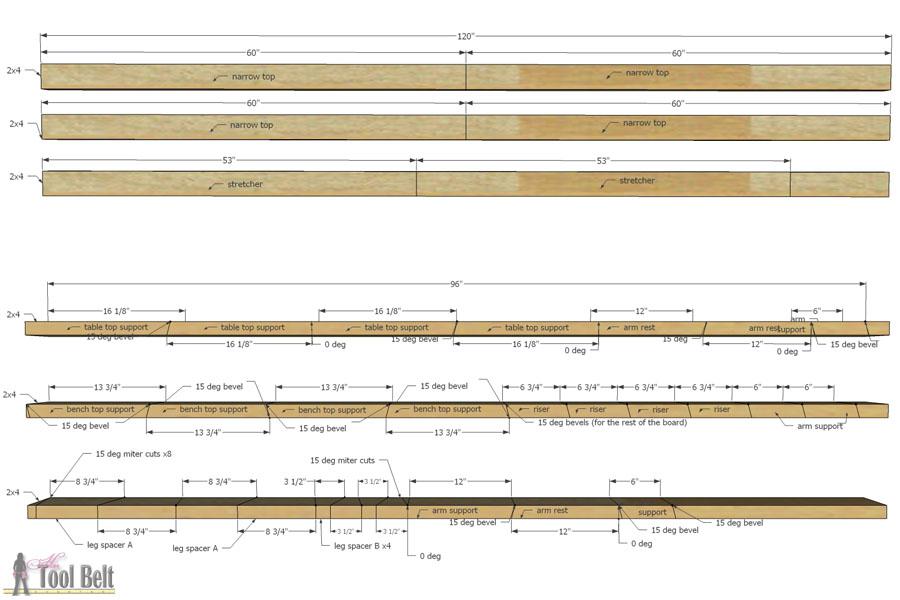
Drill pocket holes in the leg support A and leg support B pieces. Mark 4 1/8” up from the bottom of the legs for the placement of leg support A. Use wood glue and 2 ½” screws to attach the leg support pieces to the legs. Repeat to make 4 leg sets.
-
Attach Stretcher
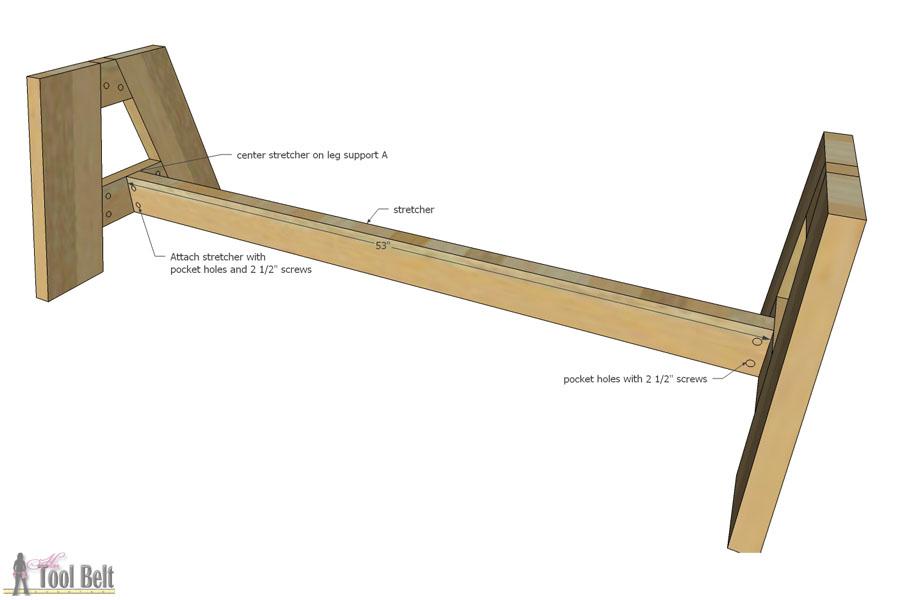
Drill pocket holes in both ends of the stretcher. Mark the center of the leg support A pieces. Use wood glue and 2 ½” screws to attach the stretcher to the leg support A centers. Repeat for other leg set and stretcher.
-
Assemble Bench Top
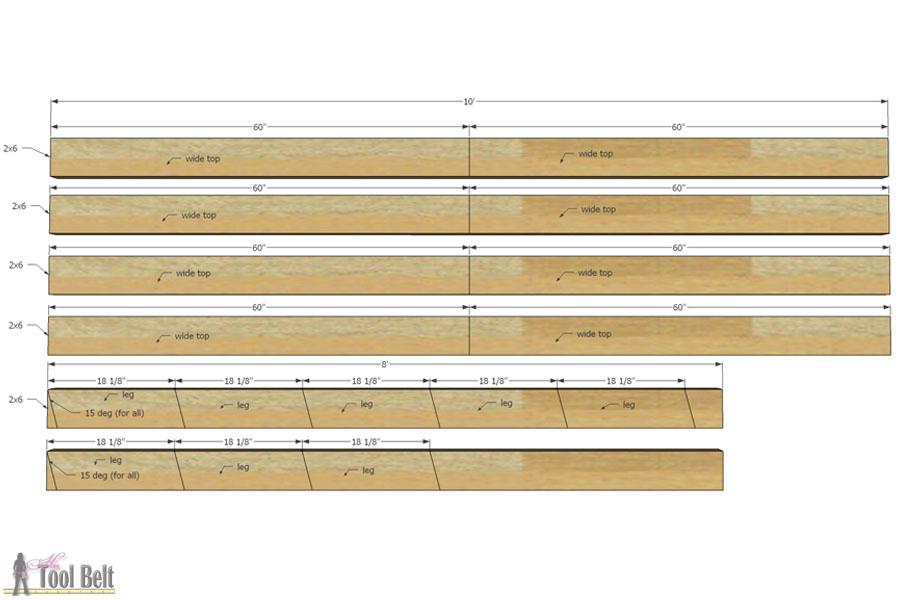
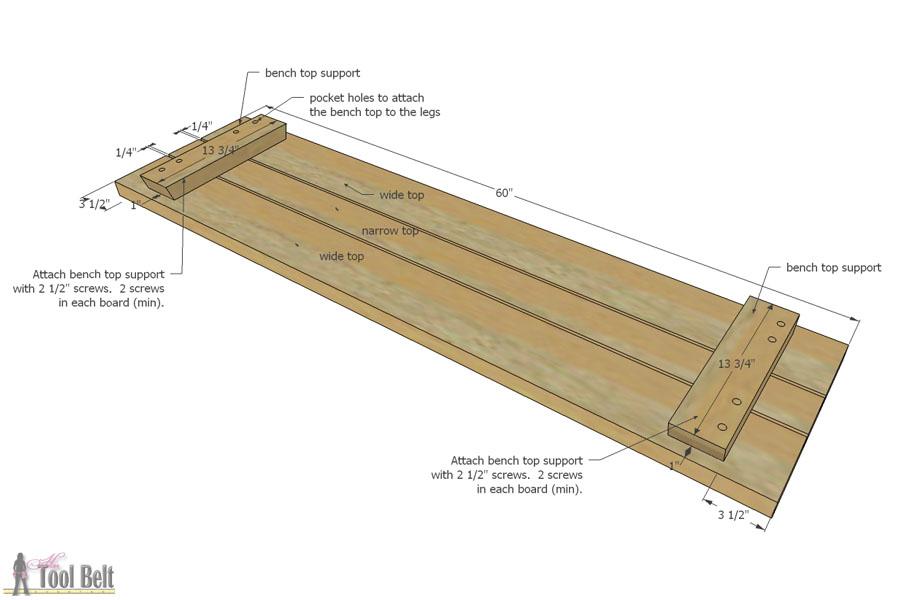
Drill pocket holes in the bench top support pieces to attach to the legs later. Lay out wide top, narrow top and wide top boards with a ¼” gap between the boards. Mark over 3 ½” from each end and 1” from the sides of the wide top boards. Glue the bench top support pieces (narrow side down) to the top boards. Use 2 ½” screws to secure the bench top support pieces to the top boards (2 min screws for each board). Repeat for other bench top assembly.
Note: it may be useful to cut 4 pieces of scrap wood ¼” wide to use as a spacer for the top boards.
-
Attach Table Legs to Top
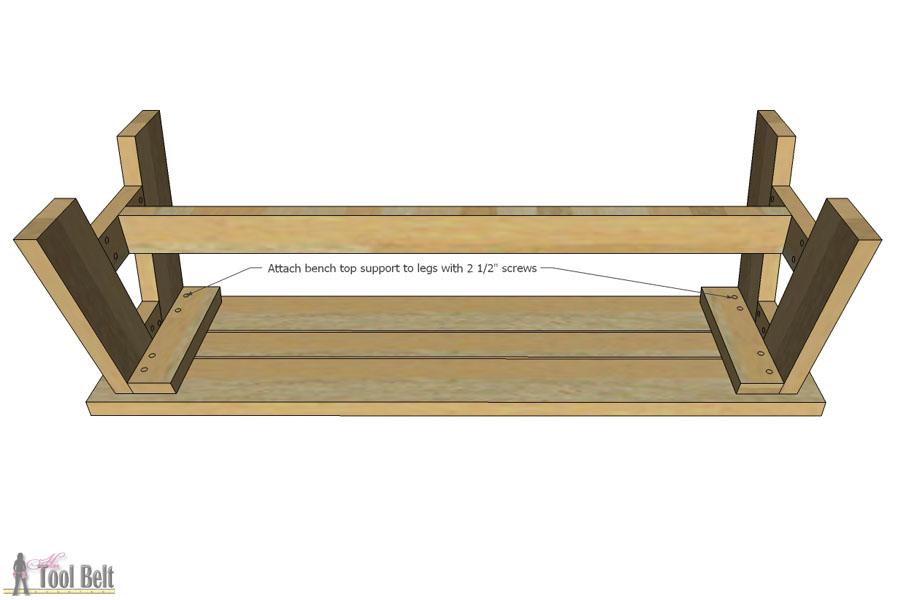
Turn the leg assembly upside down; use wood glue and 2 ½” screws to attach the bench top to the legs. Repeat for 2nd bench.
-
Assemble Arms
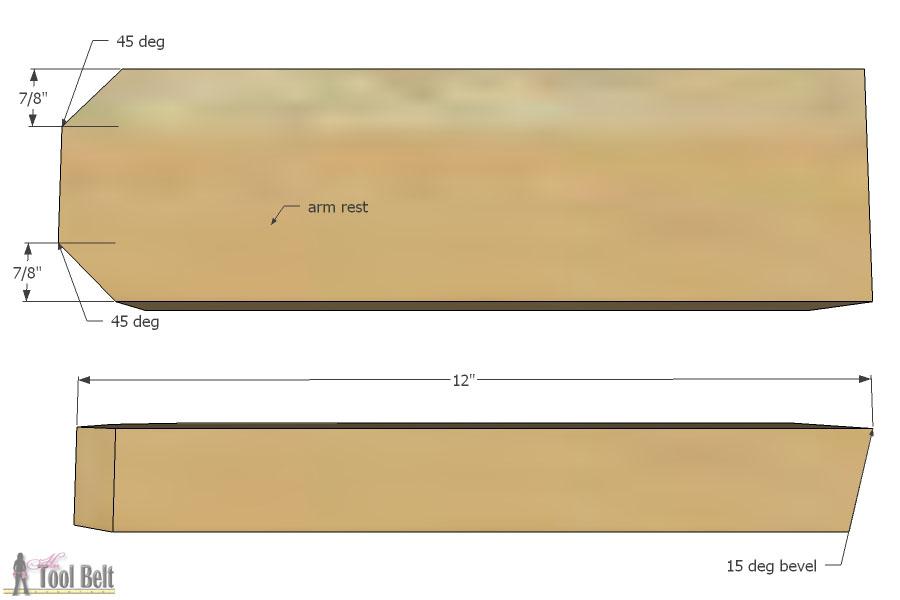
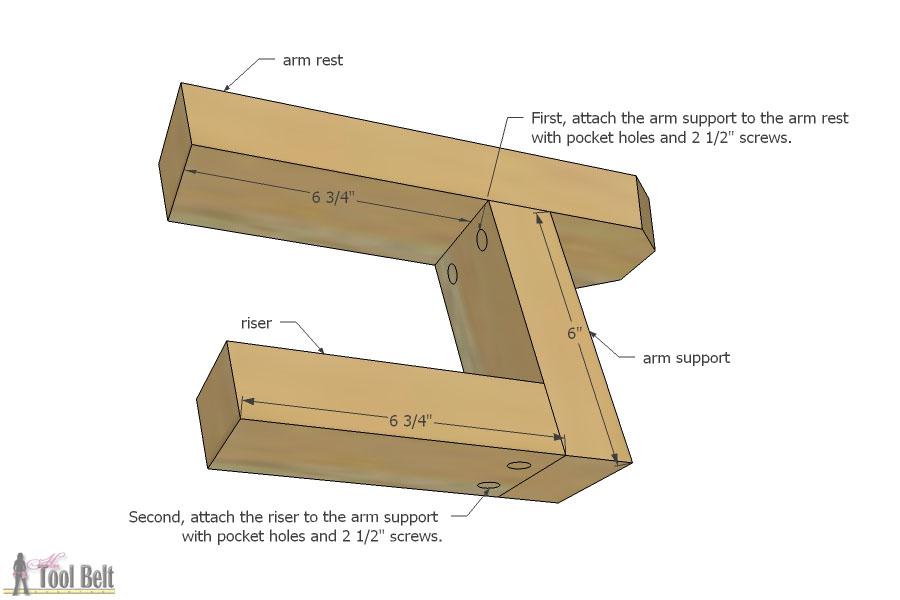
Drill pocket holes in one end of the arm support pieces and the riser pieces. Mark over 6 ¾” from the narrow side of the arm rest pieces. Use wood glue and 2 ½” screws to attach the arm support pieces to the arm rest pieces. Use wood glue and 2 ½” screws to attach the riser pieces to the arm support pieces.
-
Assemble Arm and Support
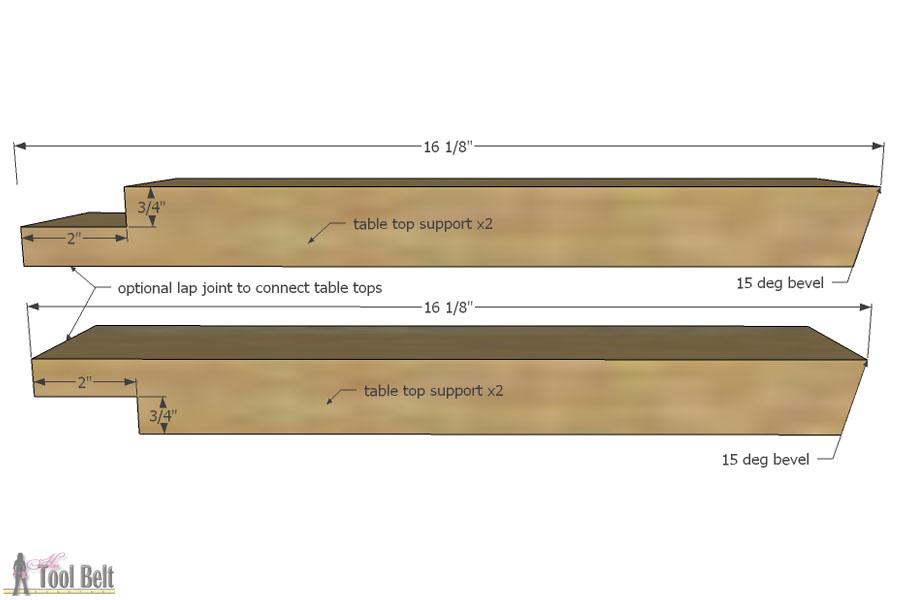
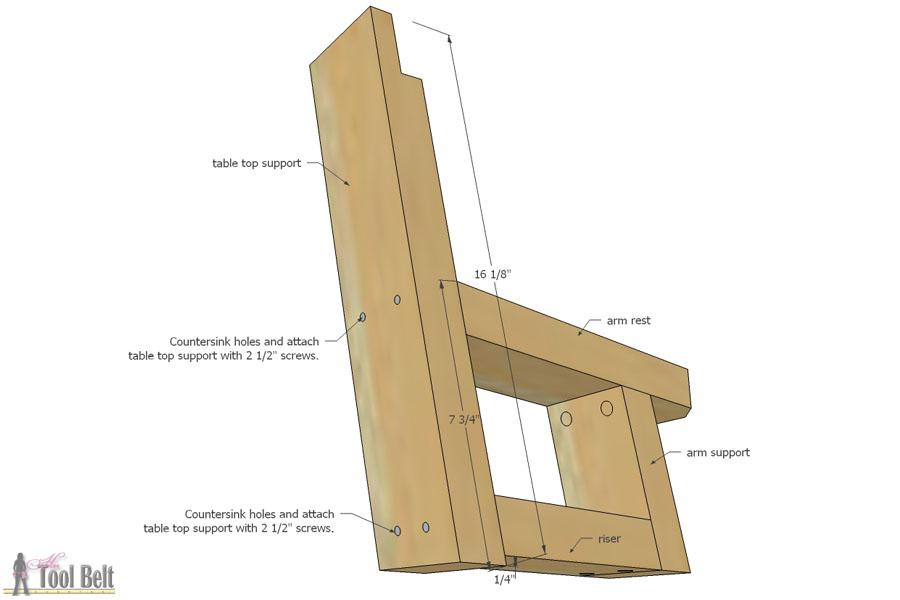
(Note: The cut list includes optional lap joints on the table top supports to keep the picnic table top together. If the lap joints are not desired, cut the table top supports down to 15 1/8" long instead of 16 1/8".)
On the long side of the table support pieces, mark at ¼” and 7 ¾” up from the bottom. Pre-drill countersink holes in the narrow side of the table top support pieces to attach the riser and arm rest. Use wood glue and 2 ½” to attach the arm rest and riser through the table support pieces. Repeat for each arm assembly. -
Assemble Table Top
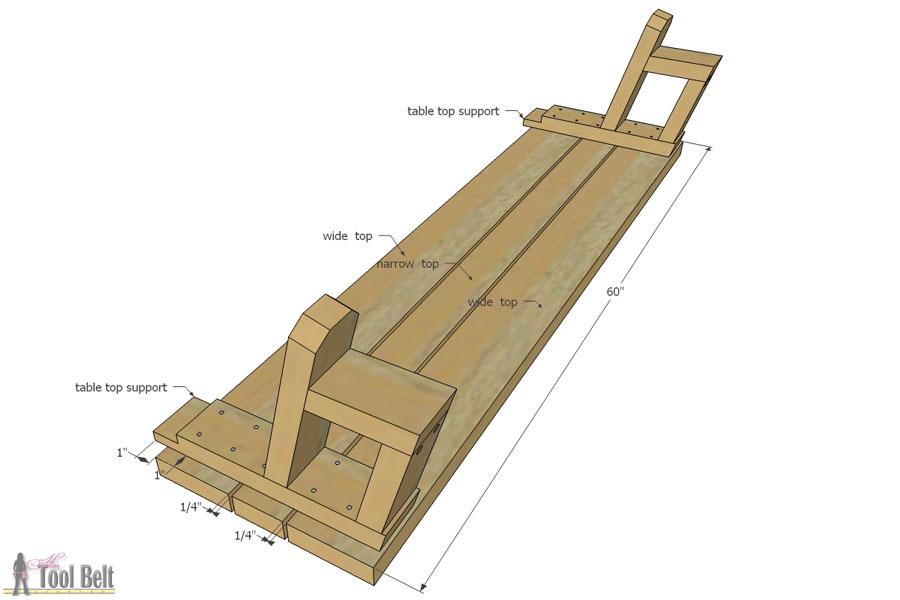
Lay out wide top, narrow top and wide top boards with a ¼” gap between the boards. Mark over 1” from each end and 1” from the top of the table top support pieces. Glue the table top support pieces (narrow side down) to the top boards. Use 2 ½” screws to secure the table top support pieces to the top boards (2-4 screws for each board). Repeat for other table top assembly.
-
Attach Table Top To Bench
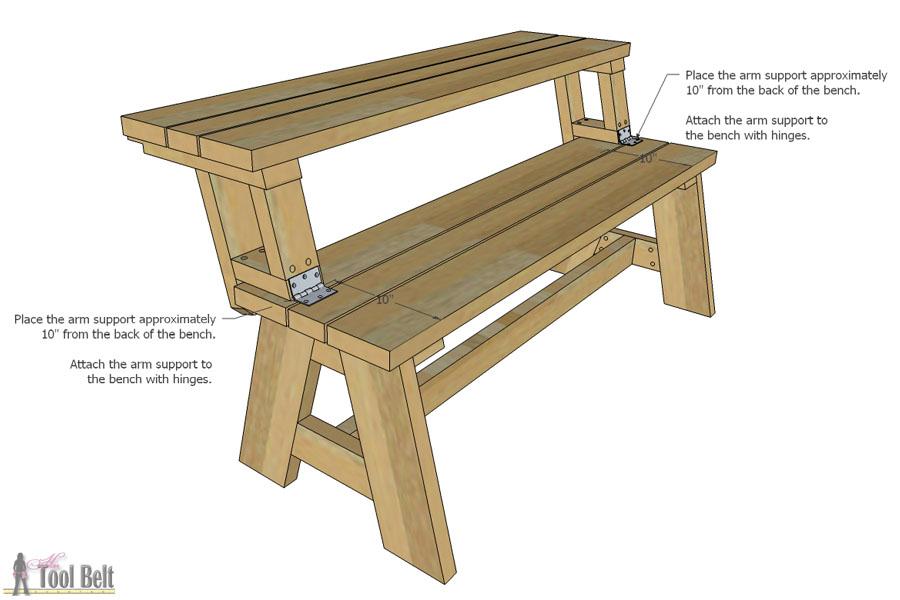
Mark approximately 10” from the backside of the bench. Place the table top assembly on the bench, placing the end of the arm support at the 10” mark. Mark the hinge attachment holes, pre-drill holes for the screws. Attach the hinges to the bench and arm supports. Make adjustments as necessary.
Sand the picnic table/bench wood. Apply stain or paint to the table to protect the wood. Apply an outdoor polyurethane as desired.


