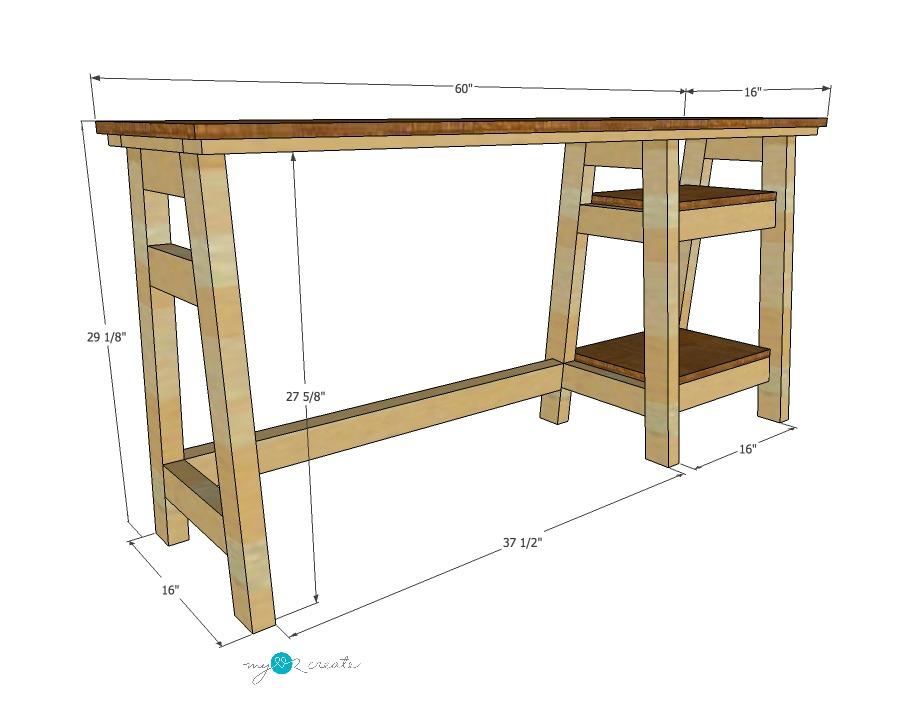
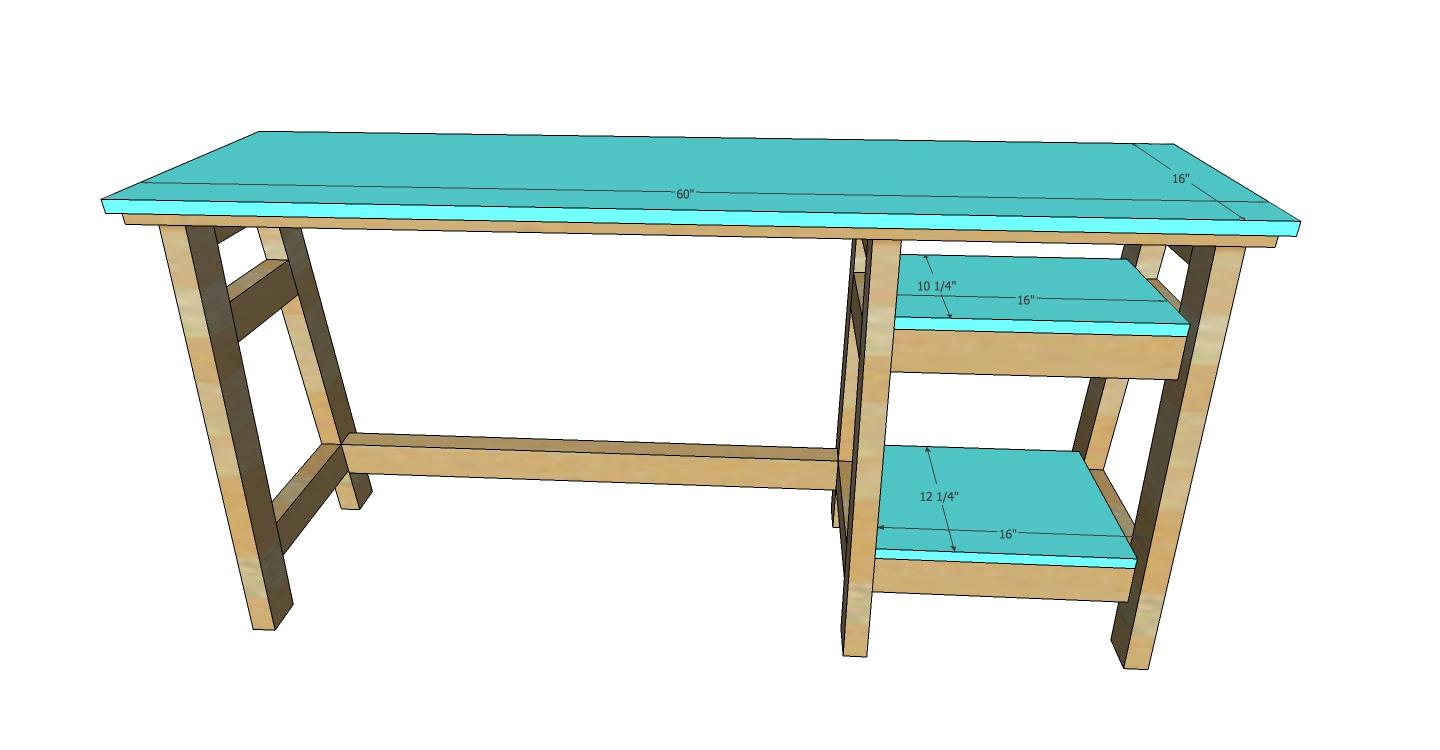
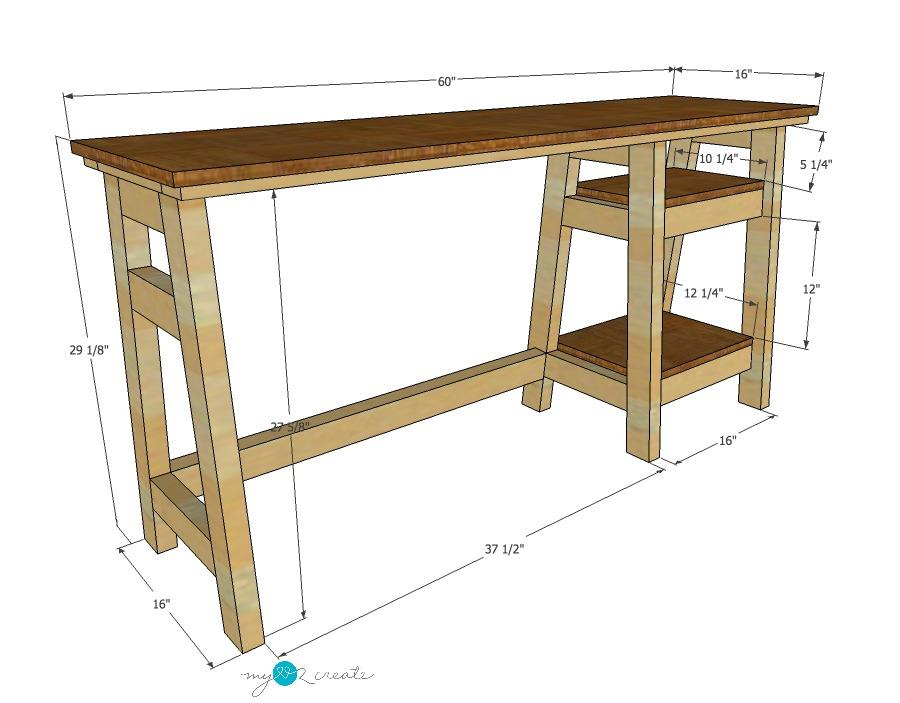
A-frame Desk
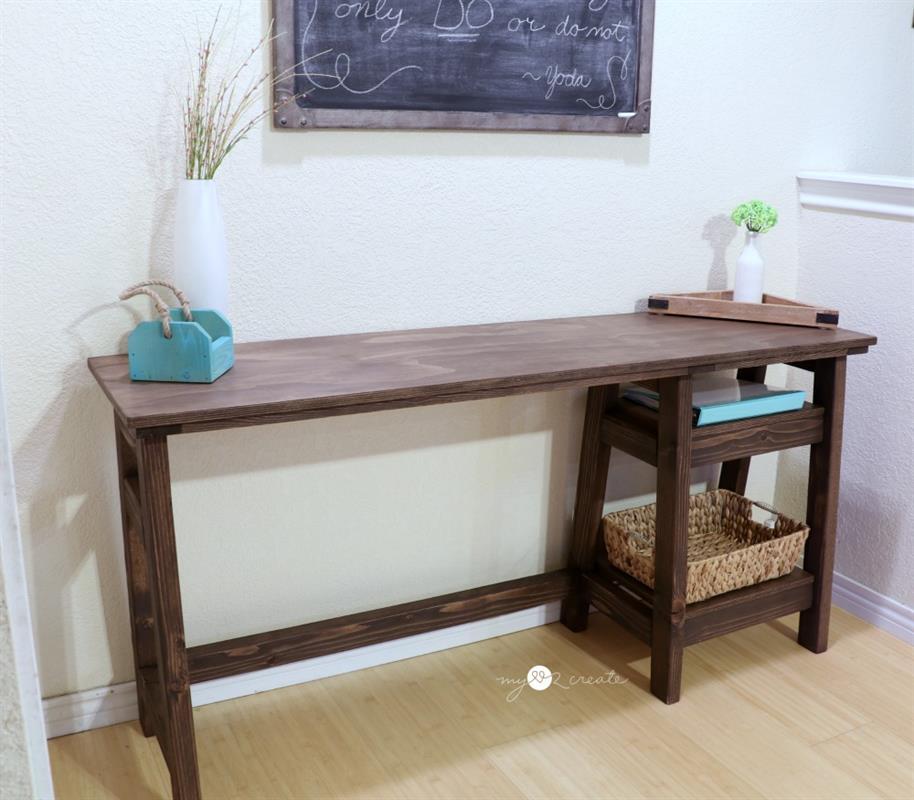
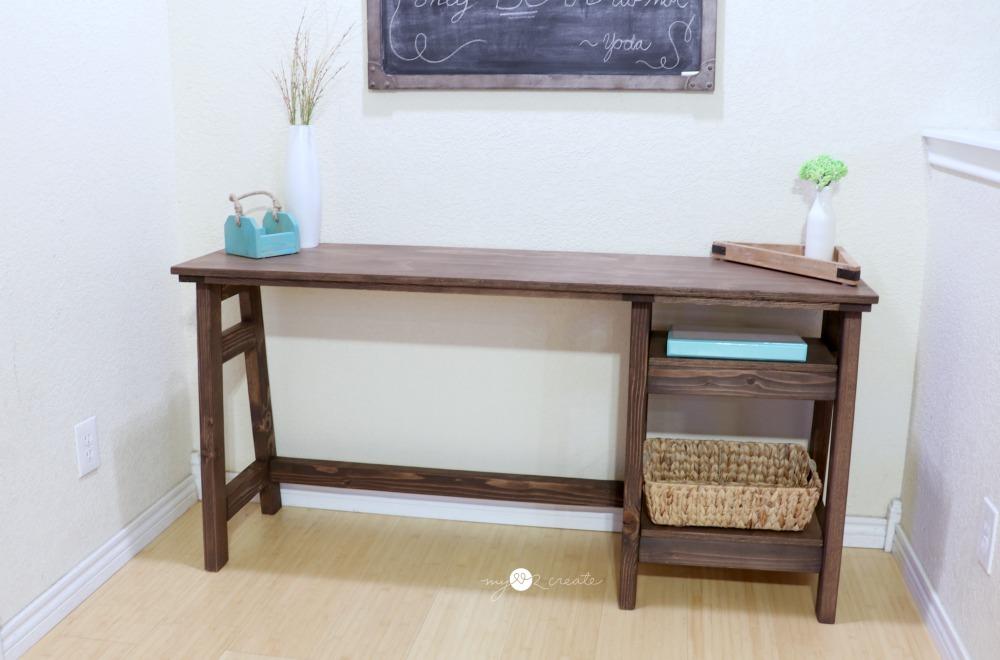
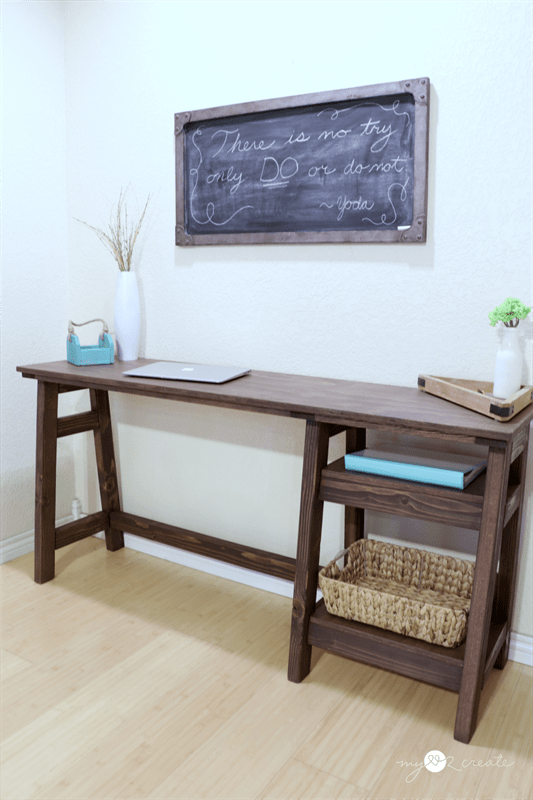
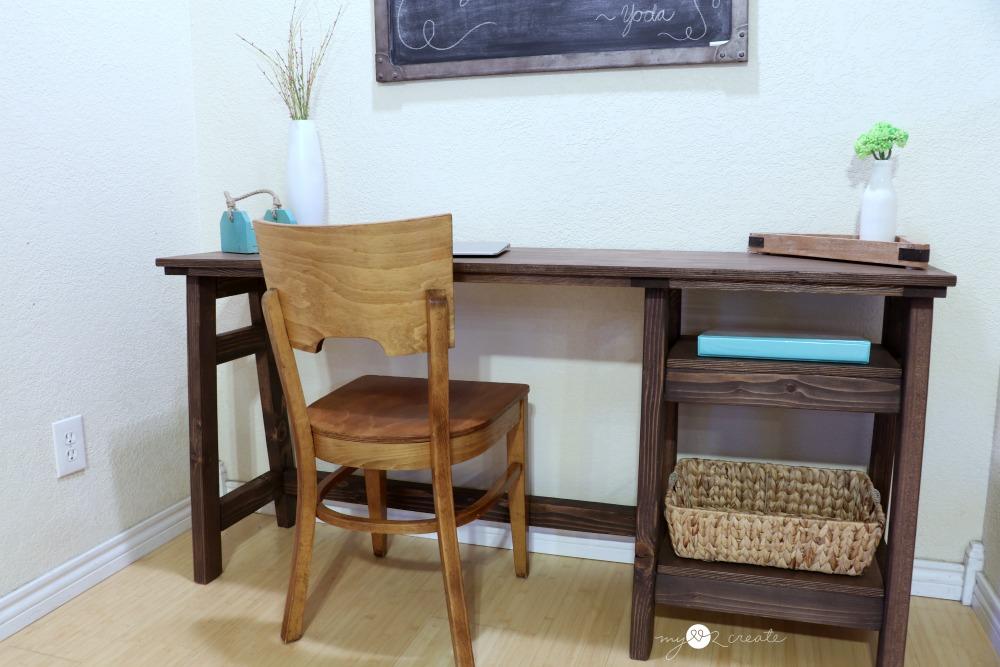
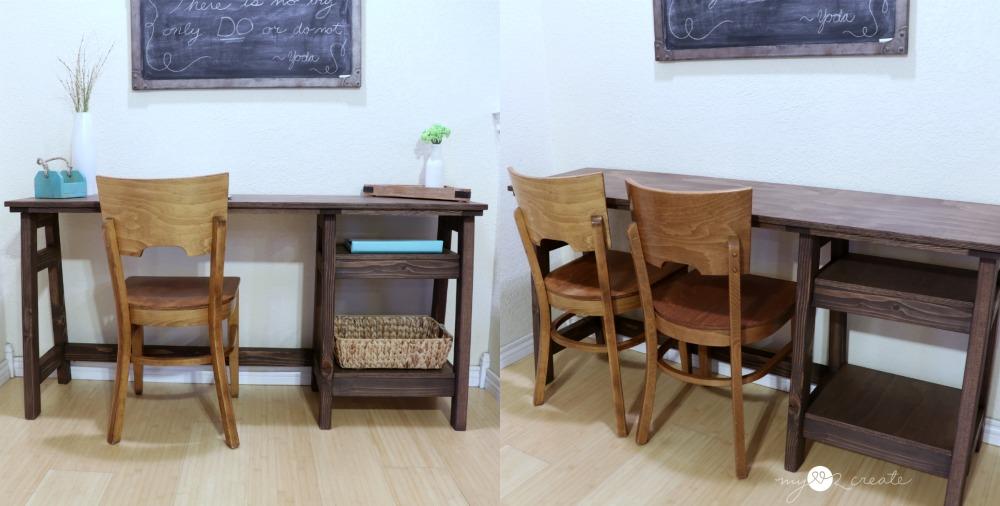
By My Love 2 CreateUpdate your home office with this beautiful contemporary desk! Featuring a narrow a-frame design and two fixed shelves for extra storage. This desk combines function and style to compliment your working and decorating needs perfectly!
Directions
-
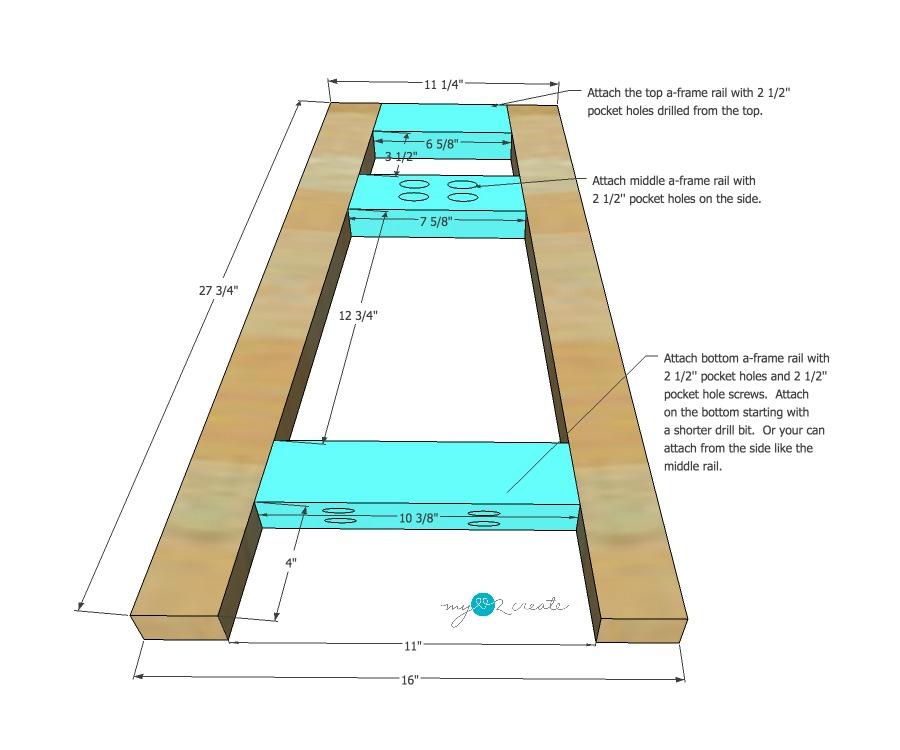
Build 3 A-Frame Sides
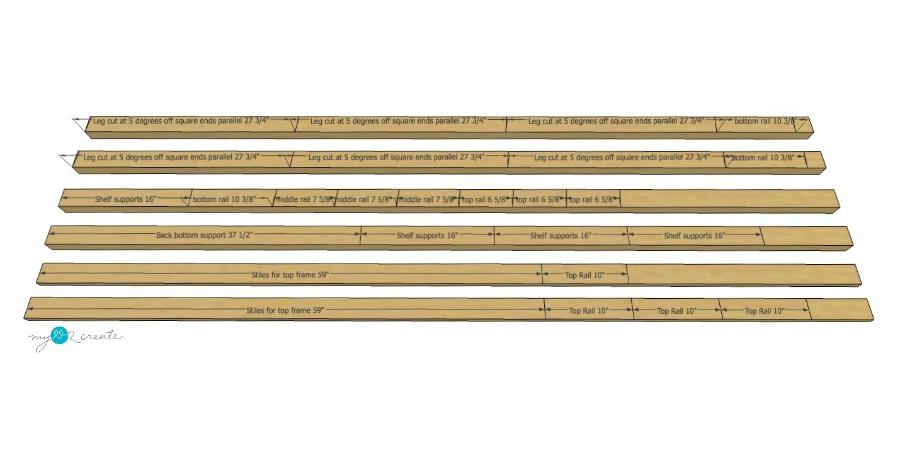
You will need to build three a-frame sides as shown in the photo. Each side will have two legs and an a-frame top, middle and bottom rail. Drill 2 1/2'' pocket holes into the rails. For the top rail drill them into the 1 1/2'' top (short side), the middle rail on the 2 1/2'' sides, and the bottom on the 1 1/2'' bottom (long side). Use wood glue and clamps to secure your sides as you drill. For tighter areas, you may need to use a shorter drill bit to get started (bottom).
-
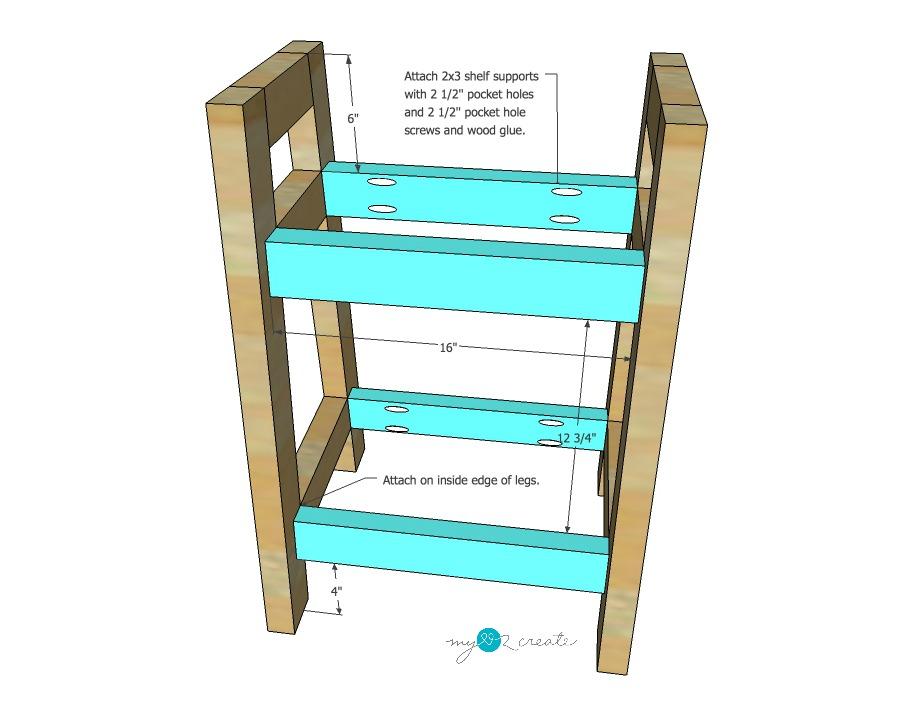
Add Shelf supports
Drill 2 1/2'' pocket holes into the sides of the 4- 16'' shelf supports. You will also want to drill 2 more pocket holes into each of the long sides for attaching the shelves in step 5 below.
Then add the shelf supports as shown below attaching them to two of the A-frame sides.
-
Build top frame
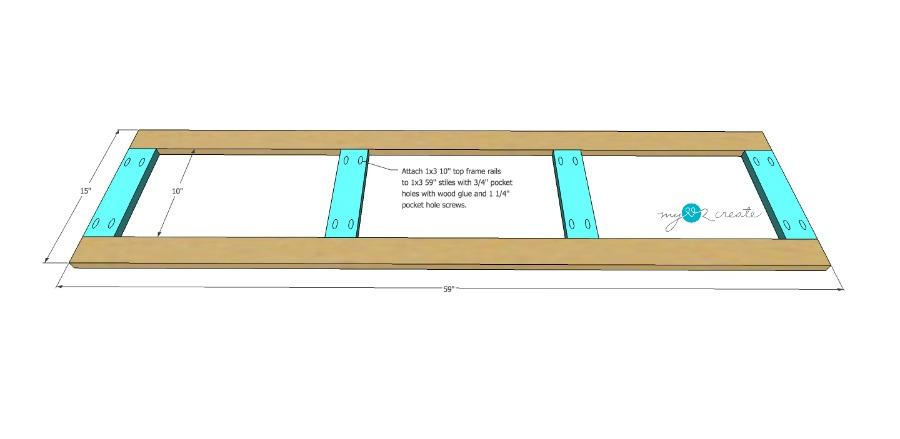
Build the top frame as shown by attaching the rails to the stiles with 3/4'' pocket holes and 1 1/4'' pocket hole screws and wood glue. Always clamp your joints to keep them secure when adding your screws to avoid the wood shifting.
-
Add Back bottom support board
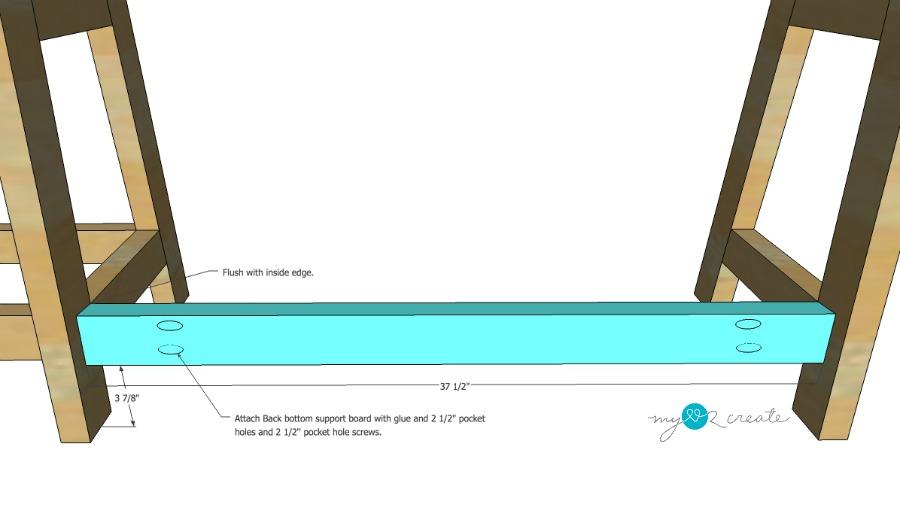
Attach the last A-frame side with the back bottom support board using 2 1/2'' pocket holes and 2 1/2'' pocket hole screws as shown.
-
Attach top frame to desk base
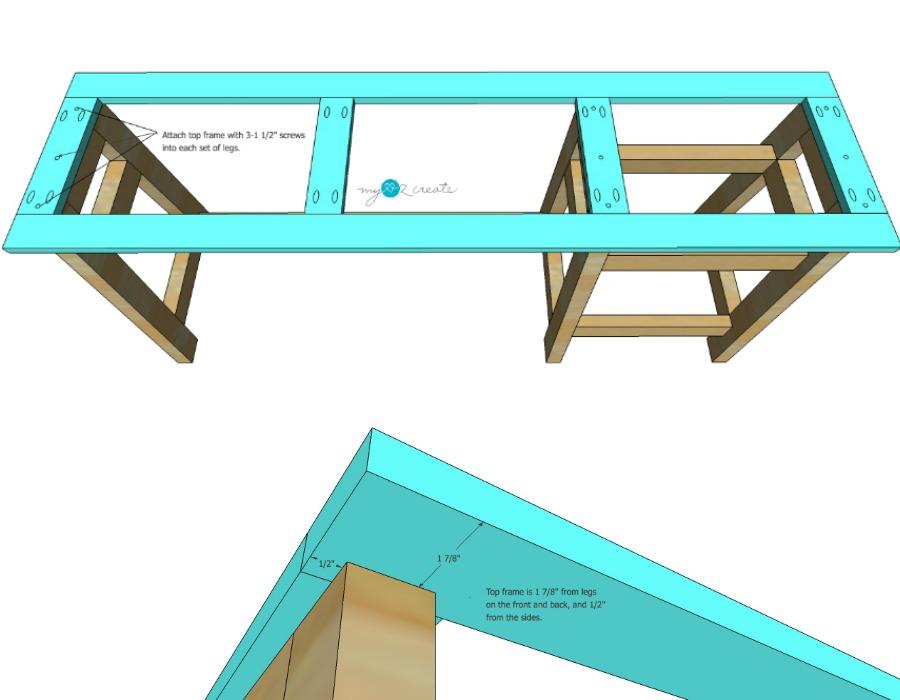
Next you are going to attach the top frame. Place the frame as shown in the photo over the a-frame sides. Then using 1 1/4'' pocket hole screws drill through the frame into the top of all three sides. You will need to counter sink these screws so the heads are inset into the wood, making the wood flush for later attaching the desk top.
-
Add Desk Top and shelves
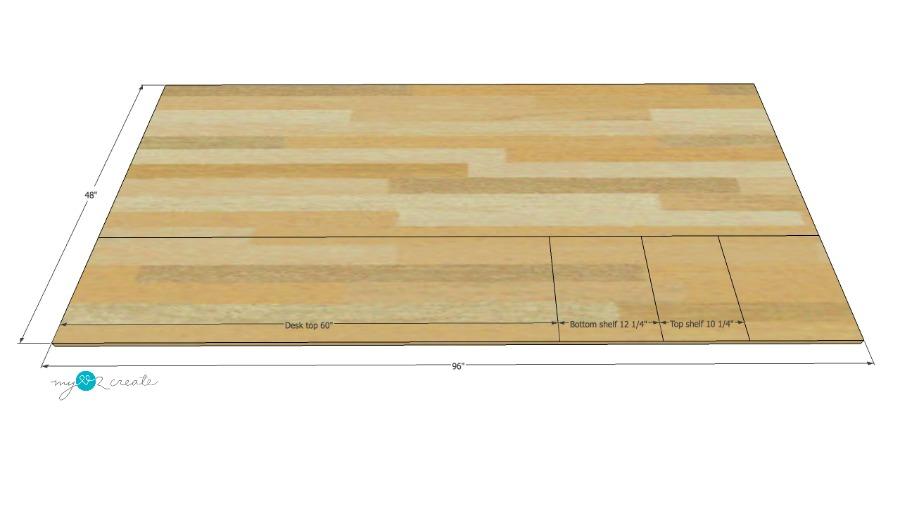
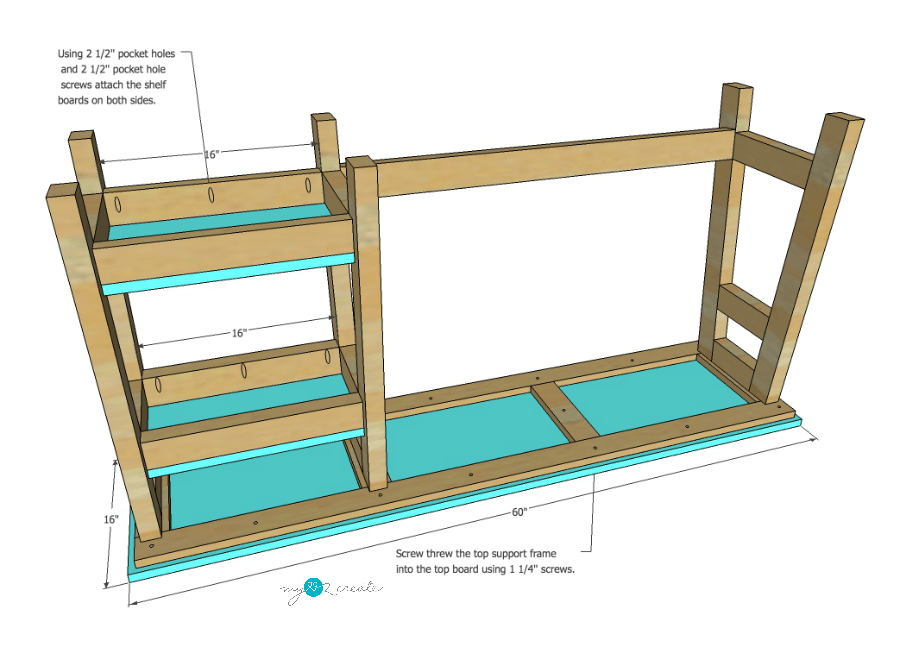
Place the plywood desk top up side down and flip the desk over to center it on the top. You should have a 1/2'' over hang on all sides. Then using 1 1/4'' pocket hole screws drill through the top frame into the desk top to secure it in place.
Use clamps to secure the shelves in place and attach them with 2 1/2 pocket hole screws that you drilled through the shelf supports in step 2.
-
Finish and Enjoy!
Fill all exposed holes and sand smooth. Paint/stain and seal as desired! Enjoy your new desk!
Be sure to visit my blog for a full picture tutorial of the build!


