Wall-Mounted Hardware Organizer
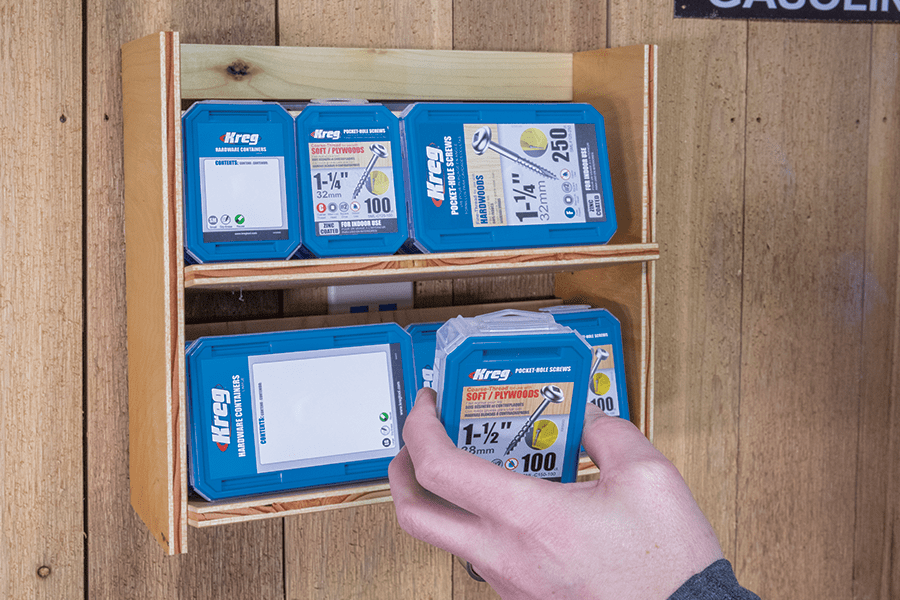
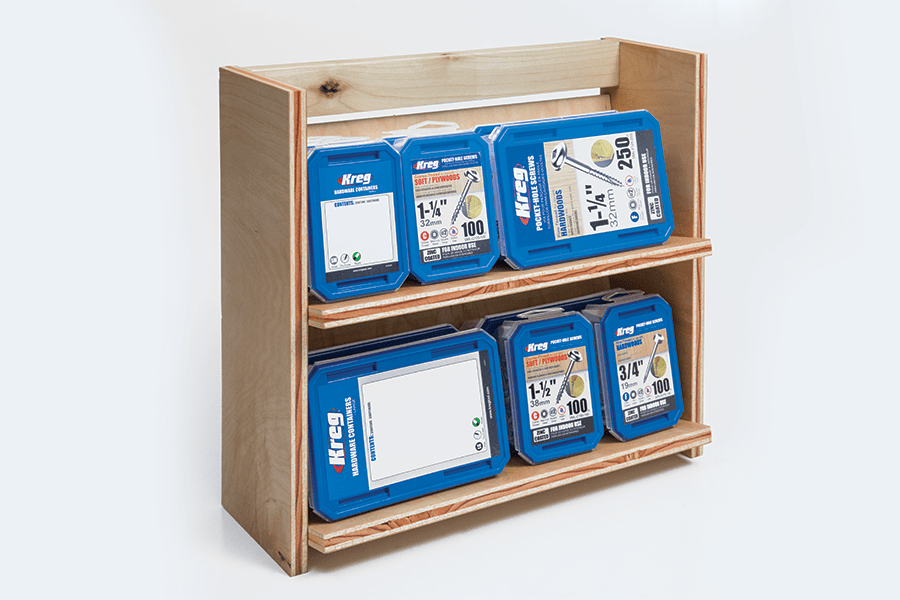
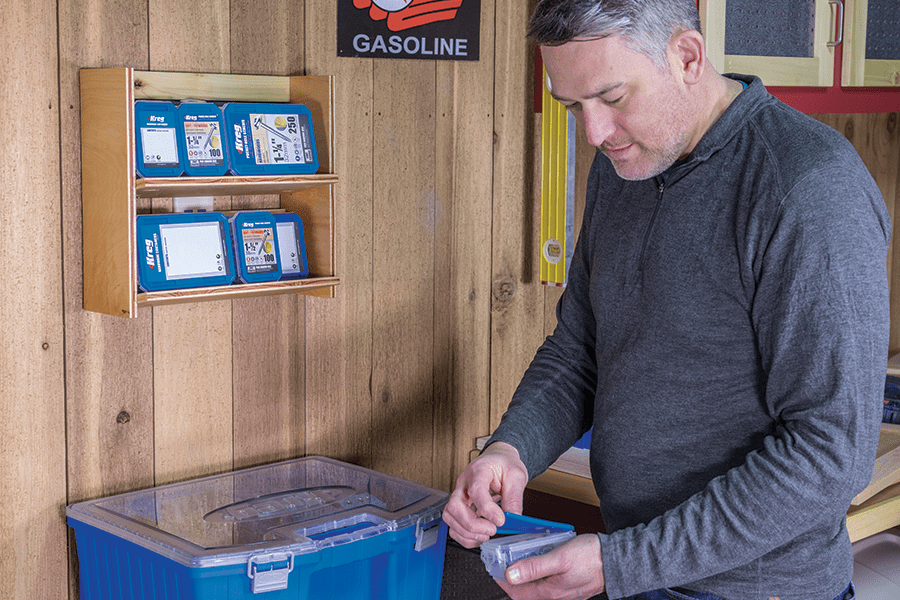
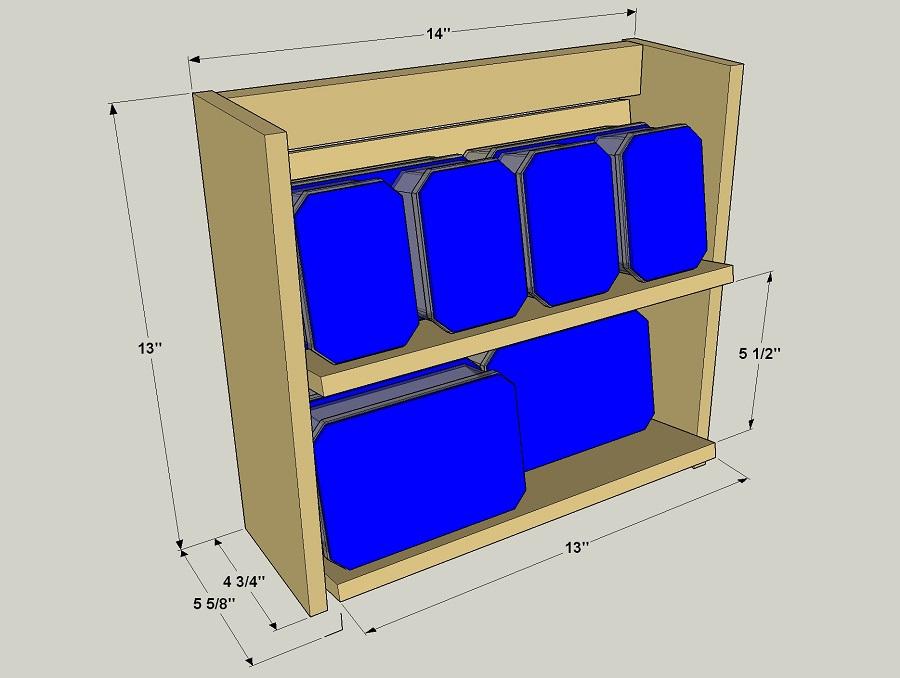
By Kreg ToolHow easy is it to keep screws, hardware, and other small items organized instead of in the way? Just cut six identically sized pieces of plywood, add a 1x2 cleat, and put it together with pocket-hole joinery. Then add some hardware containers, hang it on the wall, and you’re all set.
Directions
-
Make the Shelf Parts
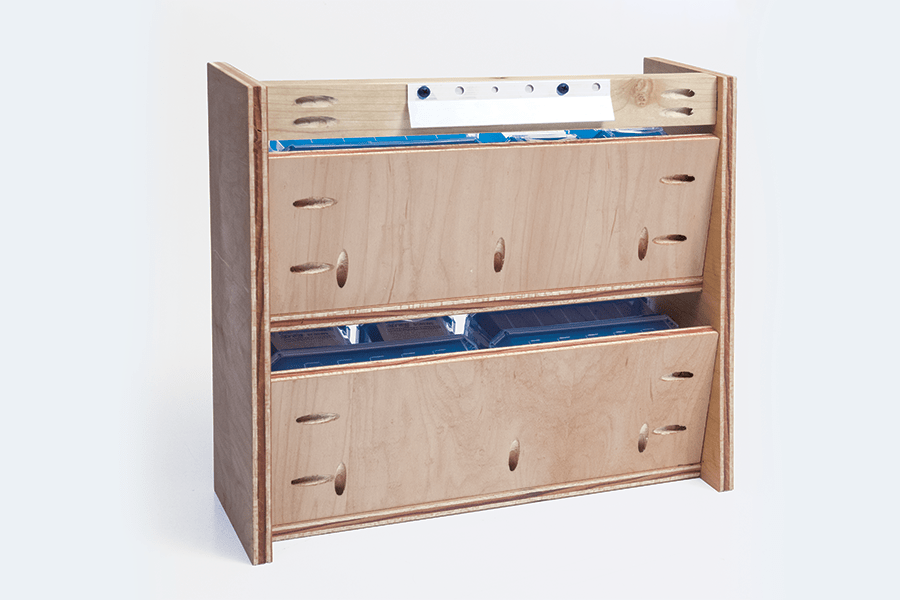
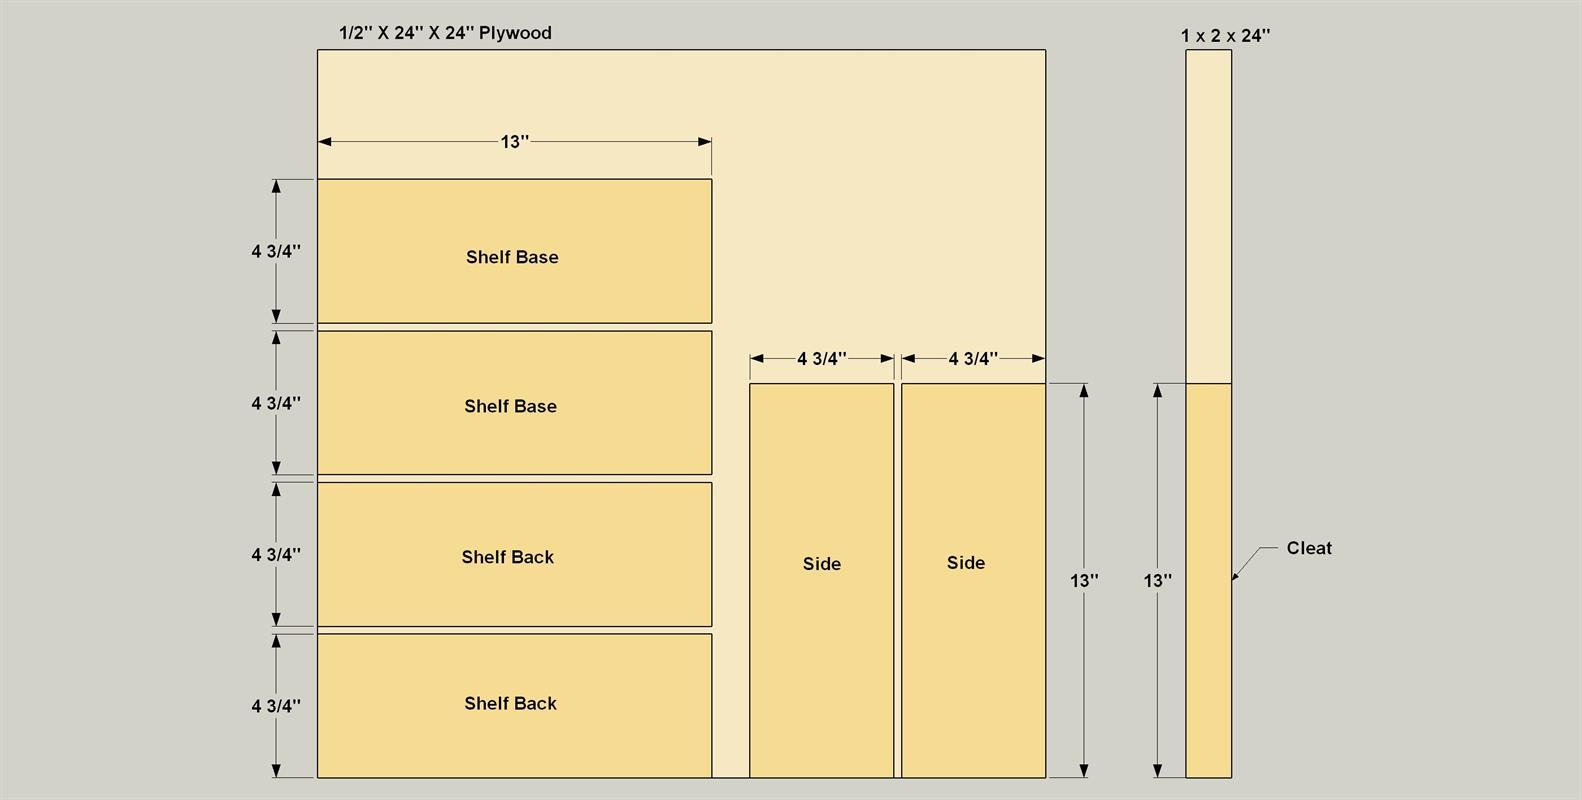
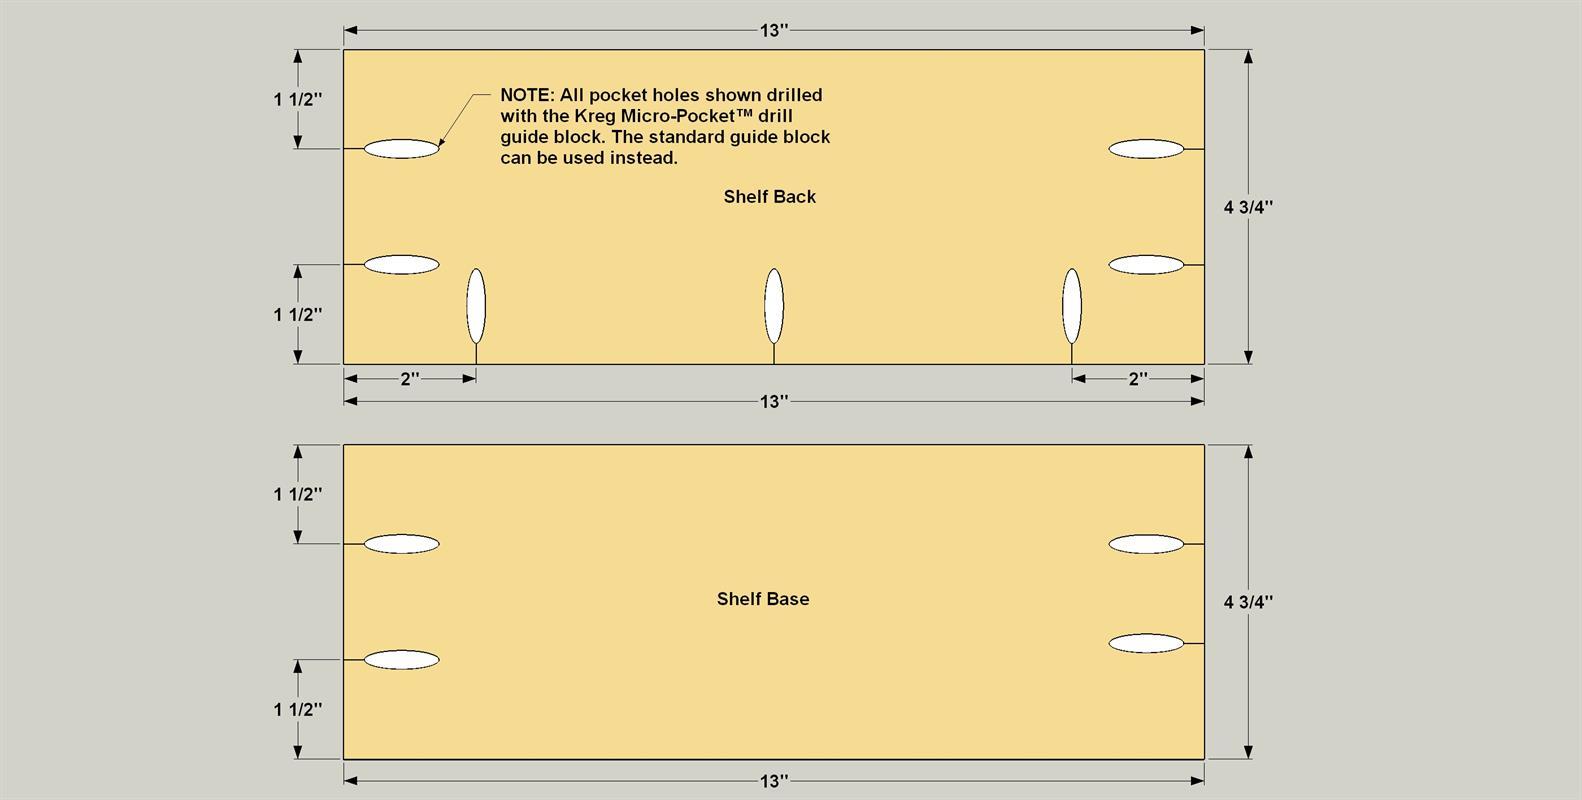
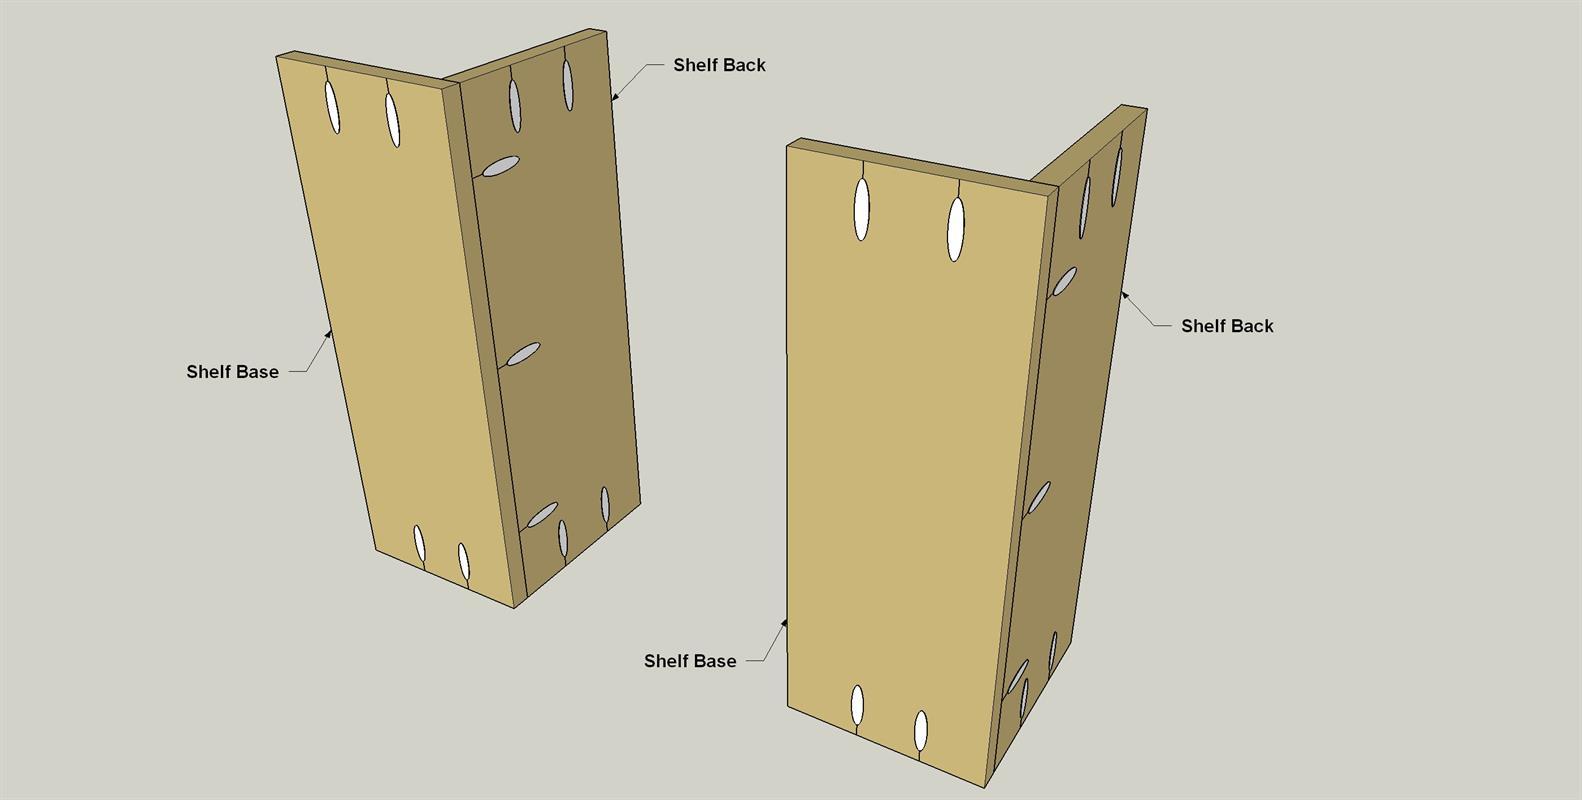
Cut two Shelf Bases and two Shelf Backs to size from 1/2" plywood, as shown in the cutting diagram. The easiest way to get consistent cuts when using a circular saw is to use a saw guide. See the Tip. Set your pocket-hole jig for 1/2"-thick material, and then drill pocket holes in the Shelf Bases and Shelf Backs at the locations shown. We used the Kreg® Micro-Pocket™ drill guide for this project. It makes smaller pocket holes than the standard Kreg pocket-hole jig, and uses smaller screws. That makes it perfect for 1/2"-thick material. If you don’t have the Micro-Pocket accessory, the standard Kreg Jig drill guide and bit will work fine. After drilling the pocket holes, sand the faces and edges smooth using 150-grit sandpaper.
Guide Your Saw for Straight Cuts
The biggest challenge when cutting with a circular saw can be keeping the saw straight along your cut line. To make it easier, use a circular saw guide, such as the Kreg® Rip-Cut™. It has a sled that holds the saw, and that can be locked on a long rail at your measurement. Then, all you have to do is hold the Rip-Cut edge guide against the edge of the plywood and push the saw along. You’ll still need to support the plywood as you cut. A piece of 2"-thick rigid-foam insulation works great. Lay the foam on the ground or on sturdy supports, then lay your plywood on the foam. Adjust your saw blade to the correct depth, and make your cuts. The foam holds the plywood and prevents your cutoffs from falling after they’re cut.
-
Assemble the Shelves
Now you can attach the Shelf Backs to the Shelf Bases using glue and 3/4" panhead pocket-hole screws. Take care not to over-drive the screws, as only fine-thread are available in this short length.
-
Attach One Shelf Assembly to a Side
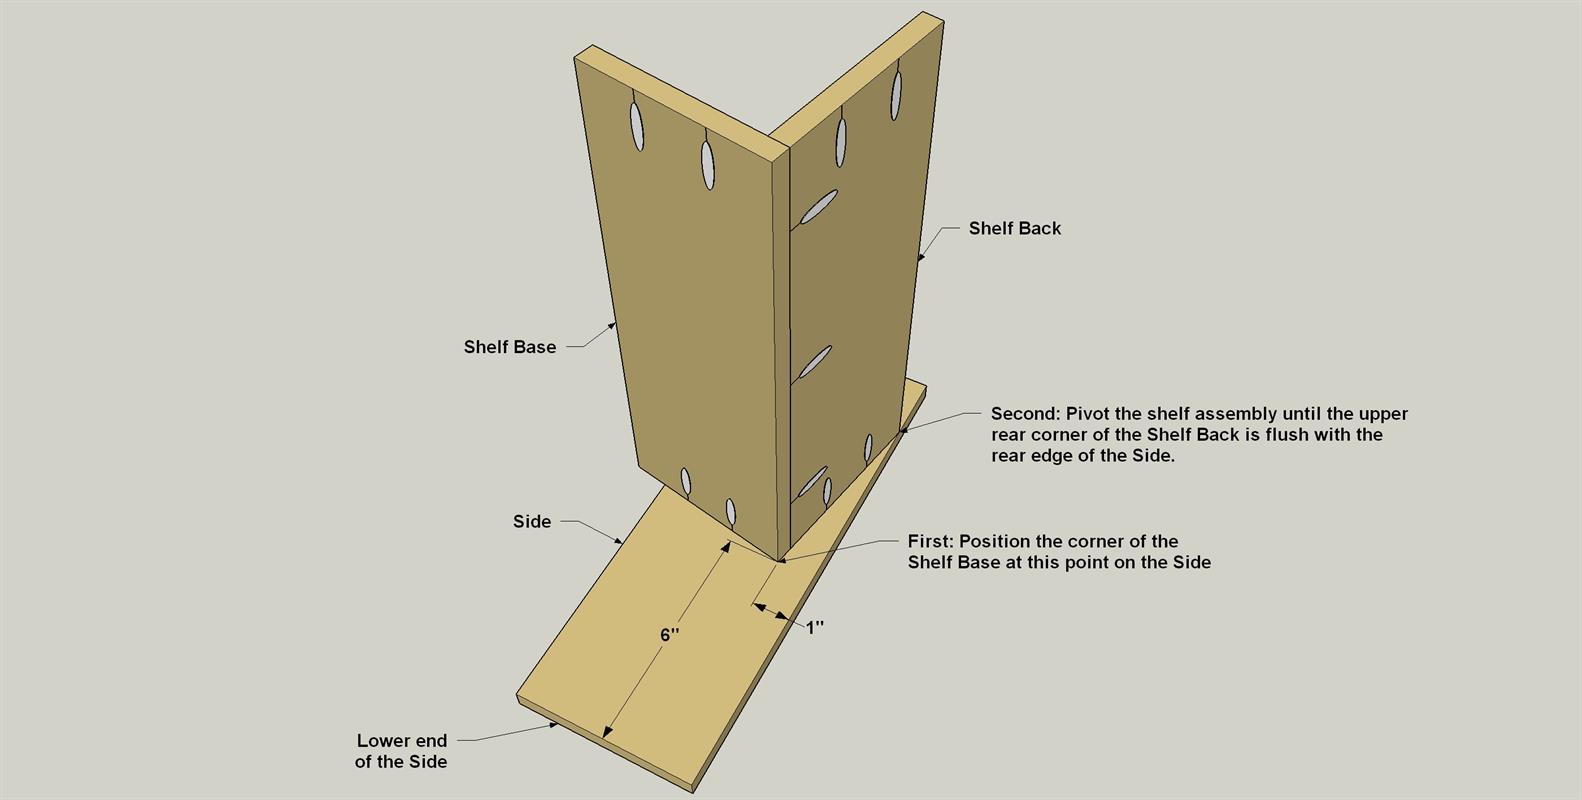
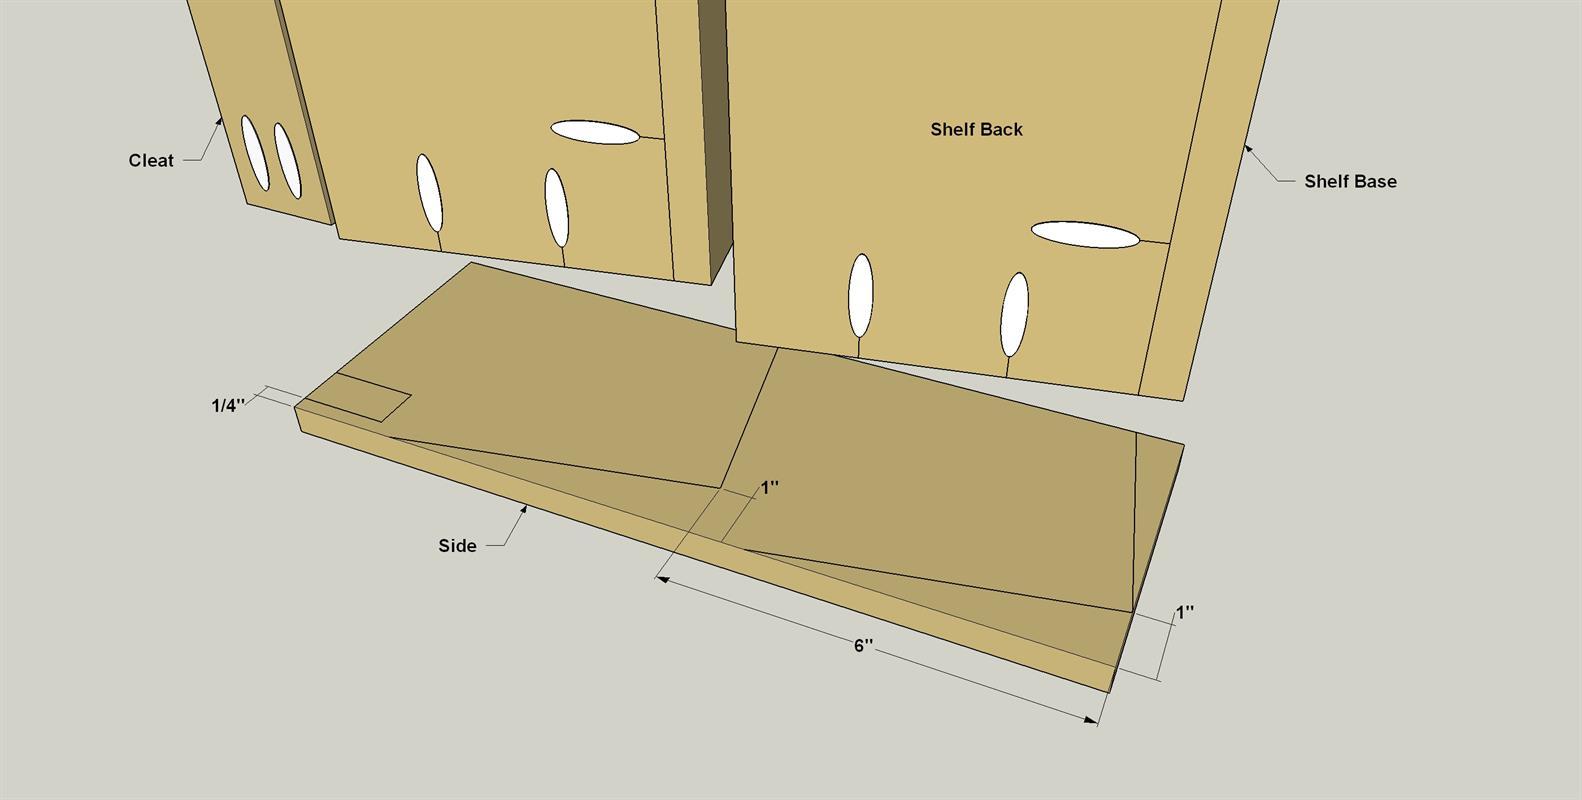
Now cut two Sides to size from 1/2" plywood, as shown in the cutting diagram. Then sand the faces and edges smooth using 150-grit sandpaper. Next, position the upper shelf assembly on one side, as shown, so that it’s tilted back at a slight angle, this helps keep containers in place securely in the organizer. Once you have the position figured out, spread glue on the end of the shelf assembly, and then attach it to the side using 3/4" panhead pocket-hole screws.
-
Attach the Other Shelf Assembly
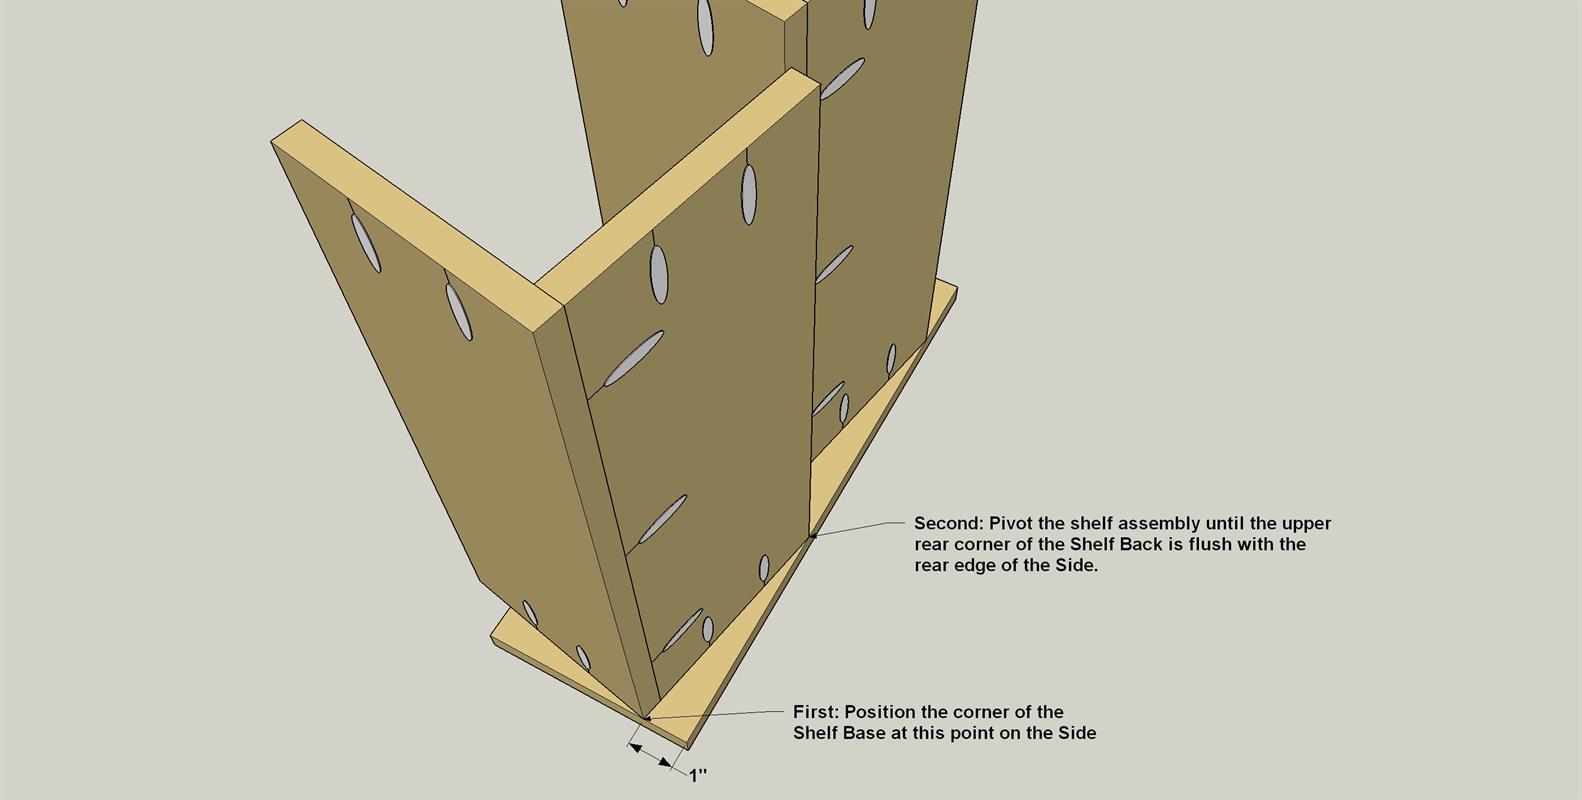
After attaching the first shelf assembly, you can position and attach the second shelf assembly in the same way.
-
Make the Cleat
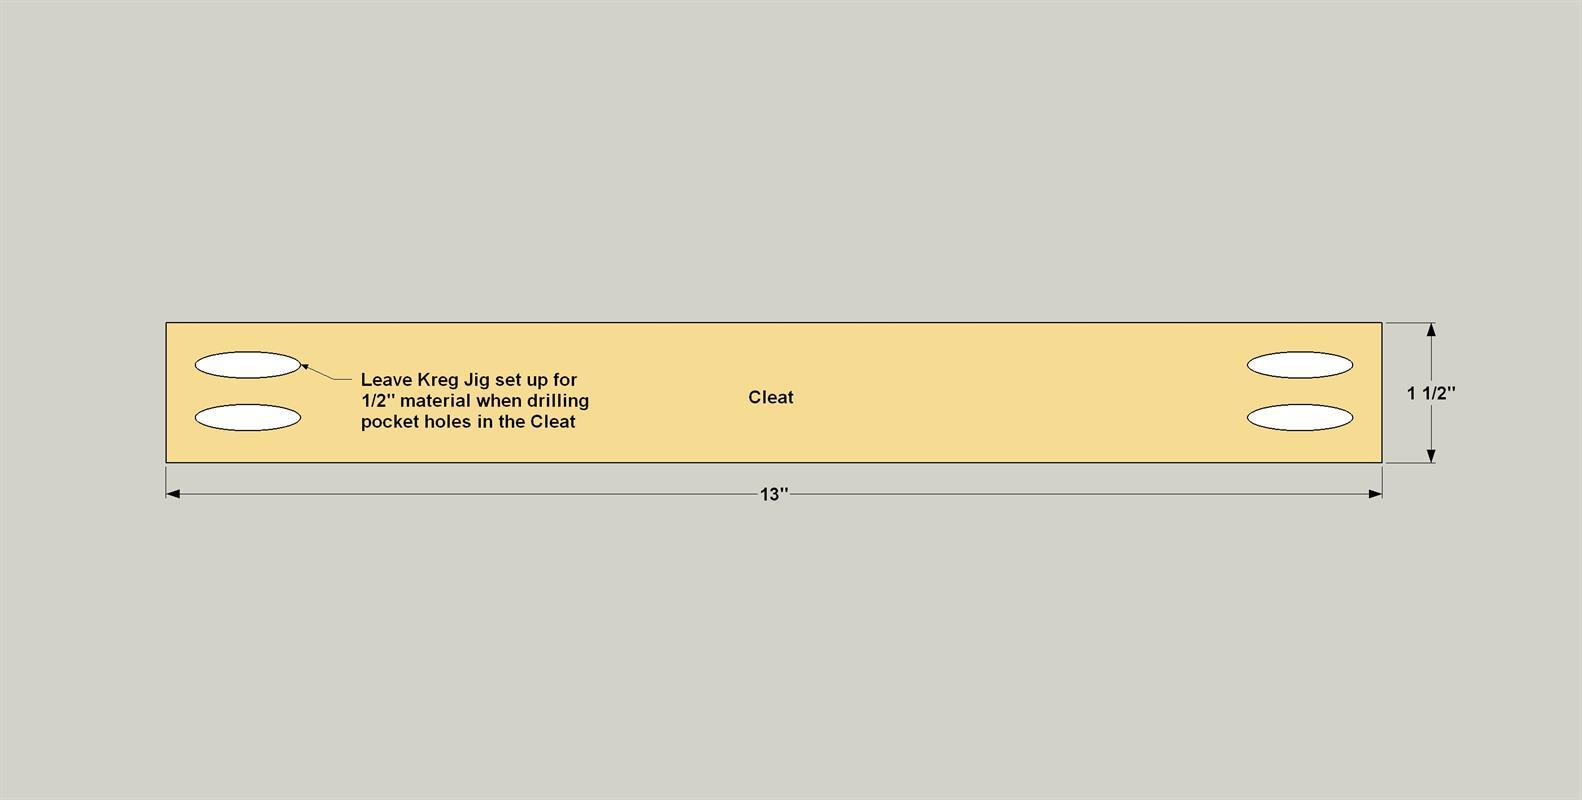
Cut a Cleat to length from a 1x2 board, as shown in the cutting diagram. Then drill pocket-holes in Cleat, as shown. Though the Cleat is 3/4" thick, still use the jig settings for 1/2"-thick material.
-
Attach the Cleat
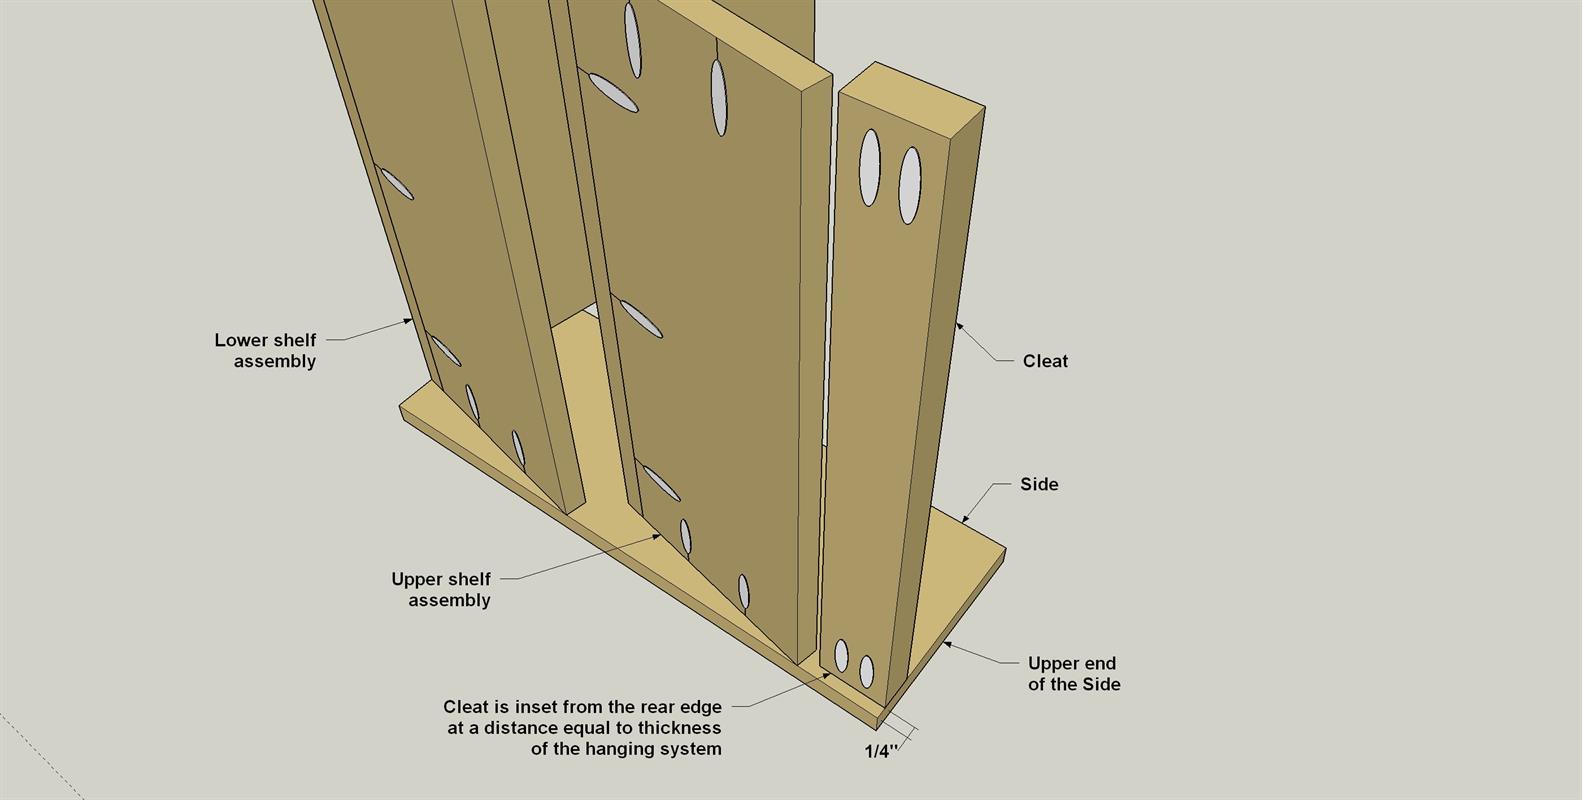
Now you can position the cleat at the top end of the Side. When doing this, be sure to account for the thickness of the hanger you plan to use. We used a “Hangman” system. It has a hanger that gets mounted to the project, and a wall cleat that gets screwed to the wall. This makes projects easy to hang. Once you’ve determined the proper position, attach the Cleat using glue and 3/4" panhead pocket-hole screws.
-
Add the Second Side
Now you can add the second Side. Make sure the shelf assemblies and the Cleat are aligned properly before you attach the side using glue and 3/4" panhead pocket-hole screws.
-
Finish, Add Hardware and Hang
With the project done, you can apply a finish. We wiped on a coat of oil-based finish to protect the wood. When the finish dries, hang your organizer following the hanger manufacturer’s instructions, and then load it up to help keep hardware, screws, and other small items from cluttering your shop.


