Serving Tray
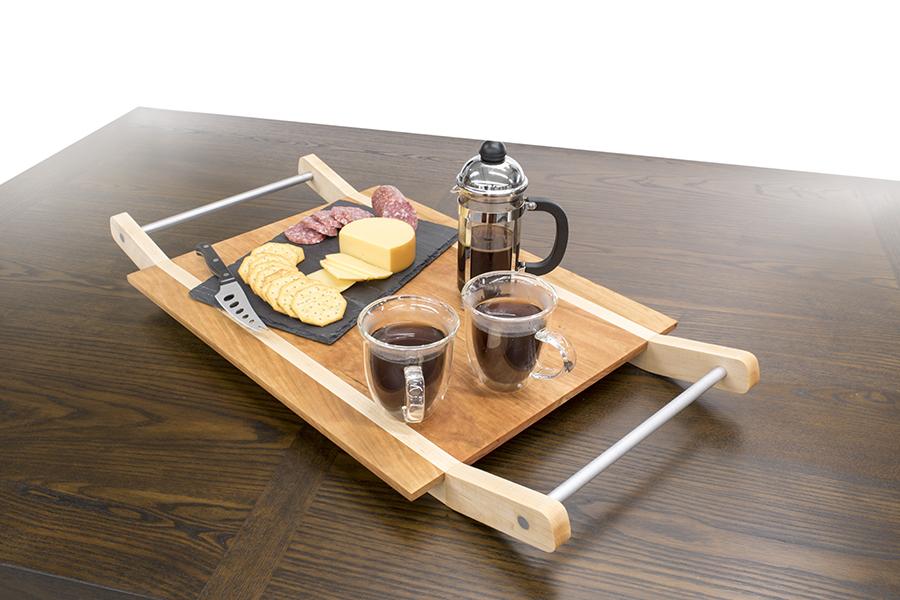
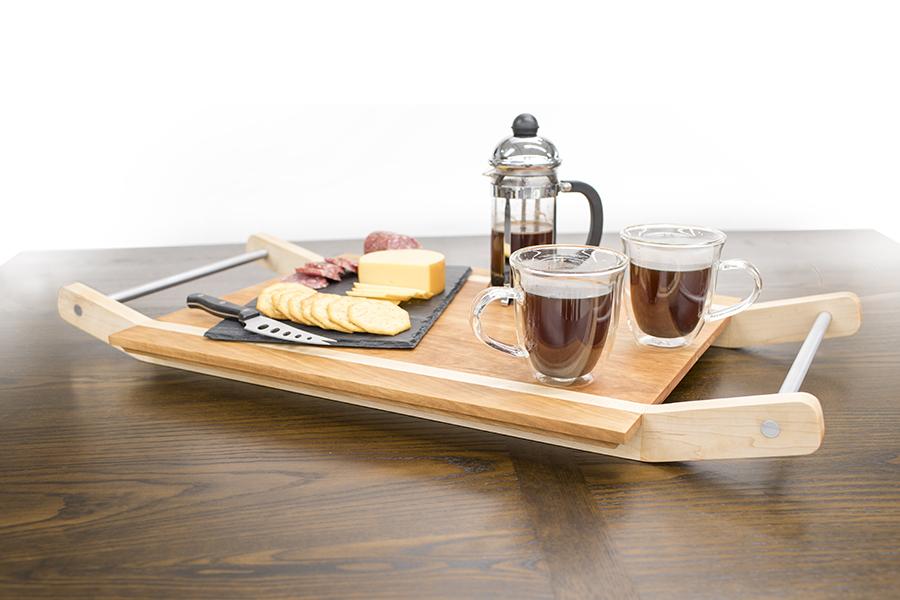
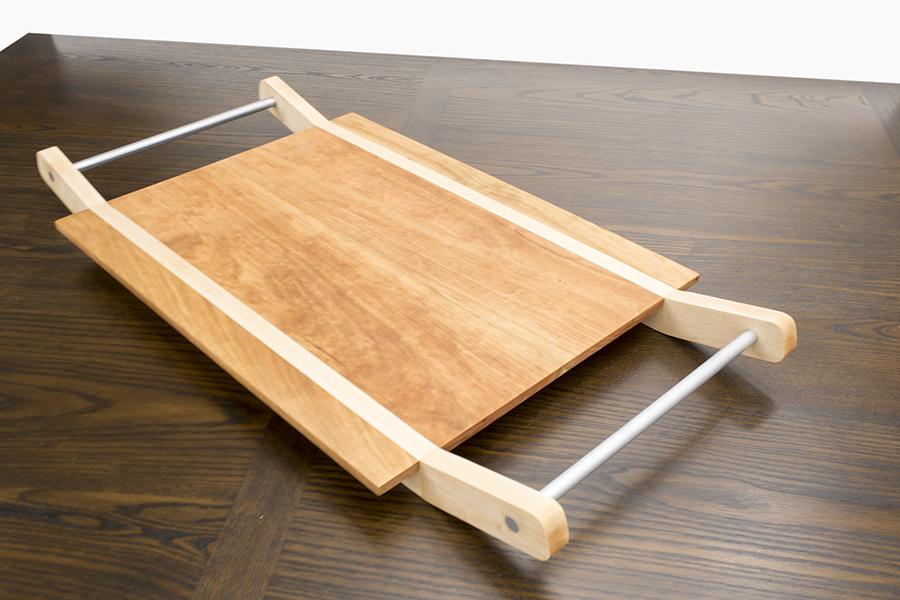
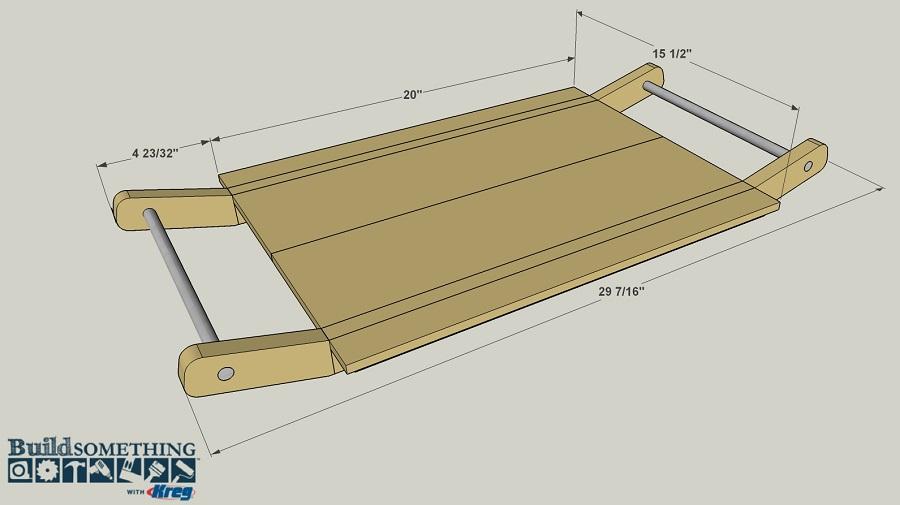
By Kreg ToolThis serving tray offers a unique style by incorporating two classic American hardwoods—cherry and maple—along with aluminum bar stock for the handles, and a subtle routed detail that you can add if desired. They tray is easy to build, though, using three boards, the aluminum bar, and some screws.
Directions
-
Make the Bottom Rails
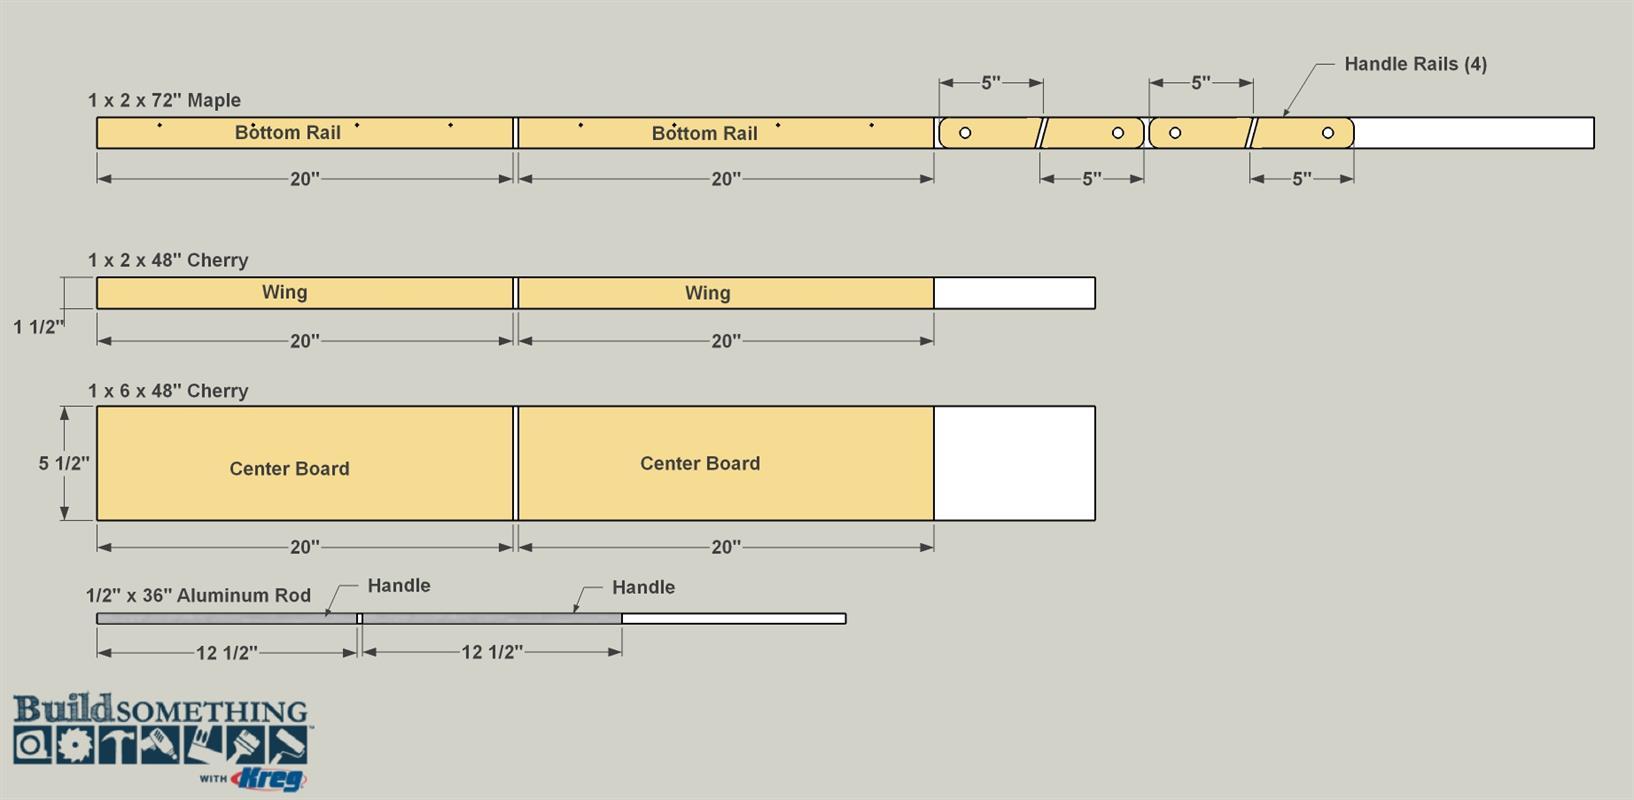
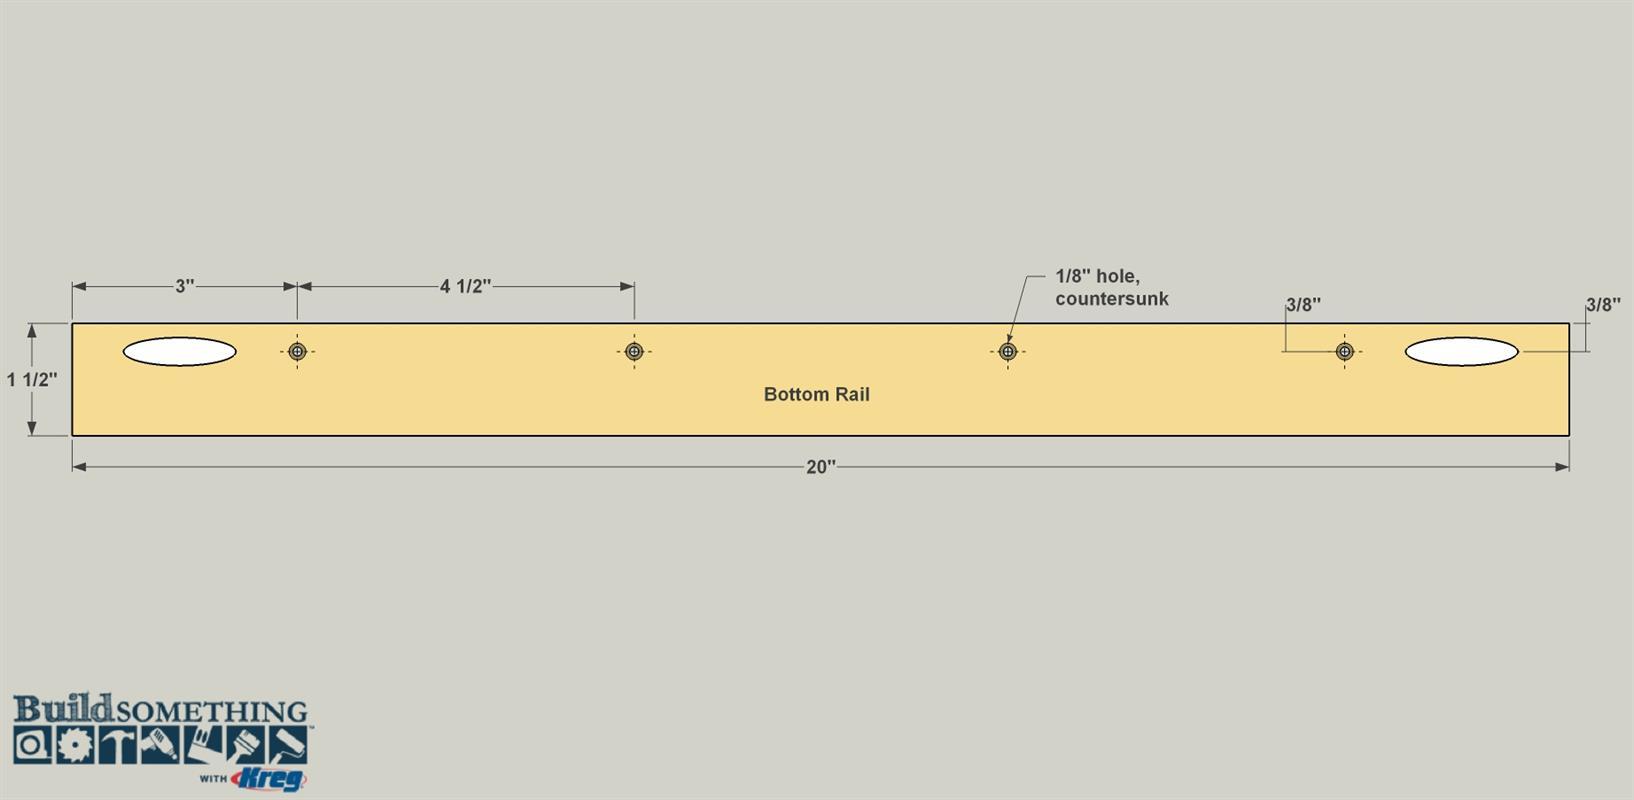
Start by cutting Two Bottom Rails to size from 1x2 maple, as shown in the cutting diagram. Set your Kreg Jig for 3/4"- thick material and drill pocket holes at each end at the locations shown. Notice that the pocket holes are off center. That way, when the center panel gets attached, the holes will be covered up. Now you need to drill four holes, as shown, in line with the pocket holes. These will be used to attach the outer parts of the tray, called Wings, later. Use a 1/8" drill bit with a countersink, or follow up with a larger-diameter bit to countersink the holes, as shown.
-
Make the Handle Rails
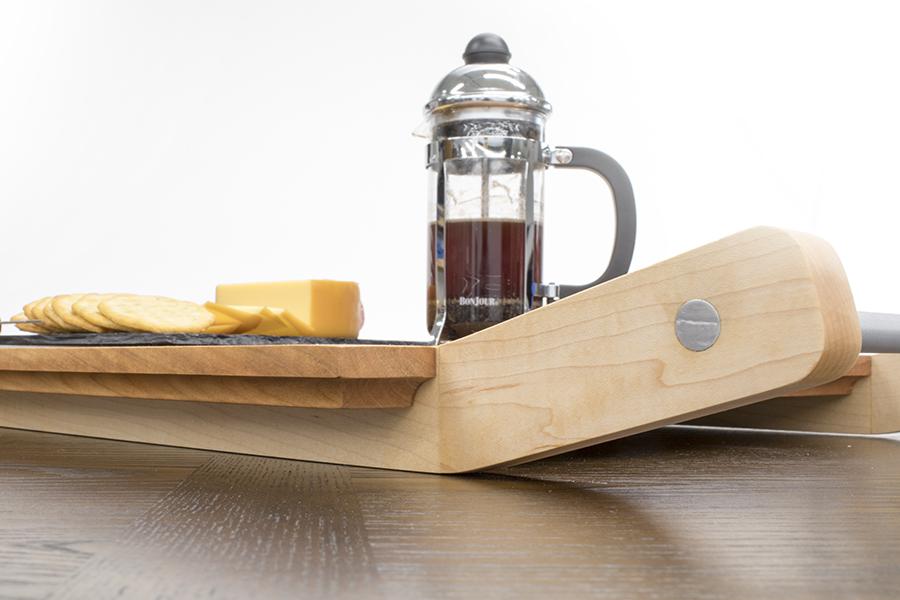
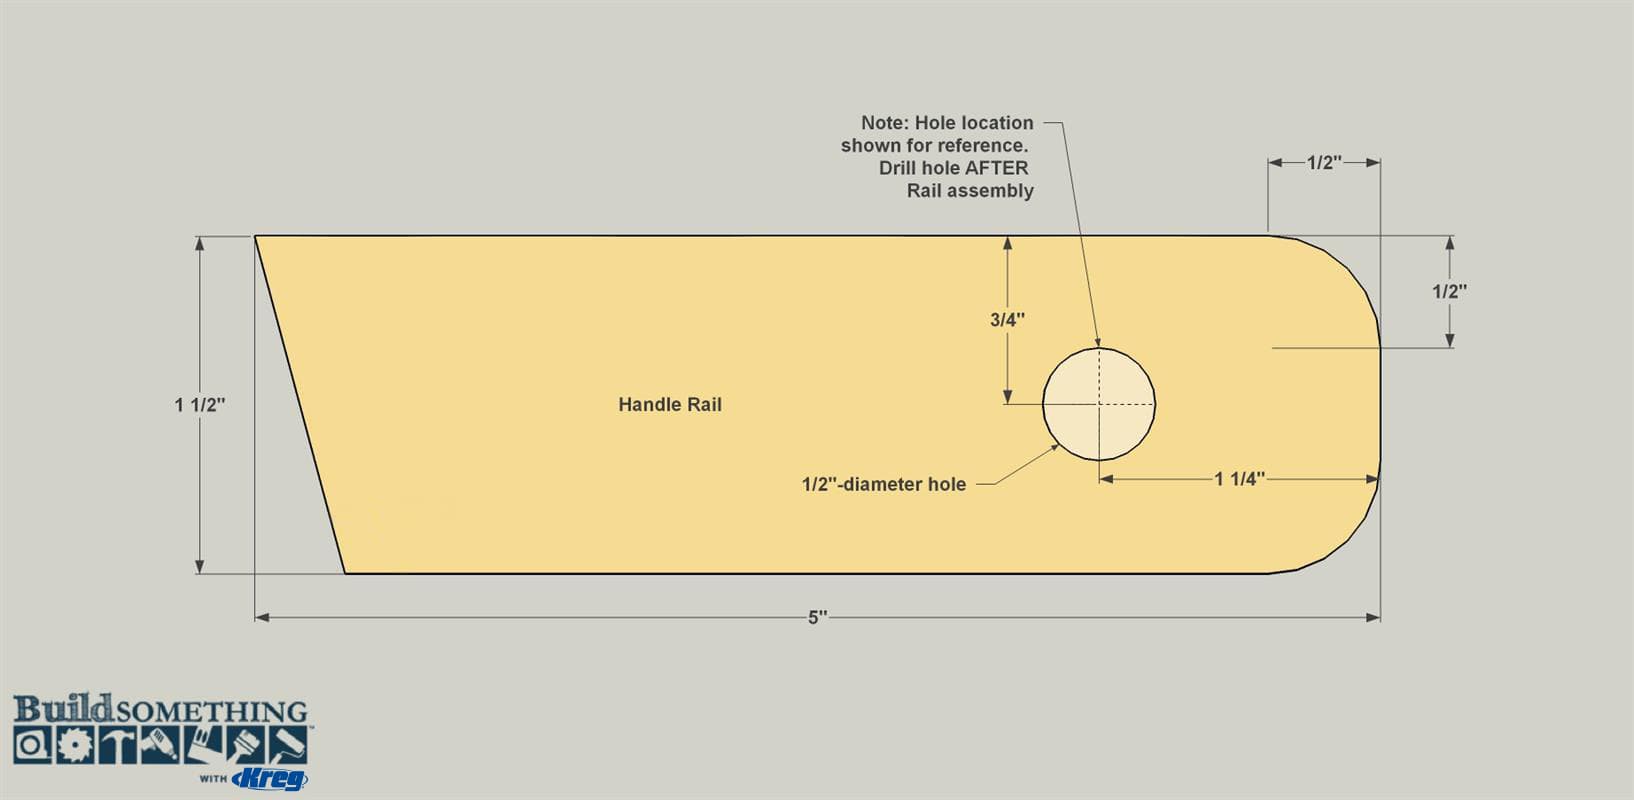
Cut two Handle Rails to length from a 1x2 maple, as shown in the cutting diagram. One end of each Handle Rail is cut square, and the other at a 15° angle. After cutting the pieces, round over the square end of each rail, as shown. The roundover is fairly small, so you can do it with a sander pretty quickly. Don’t drill the hole that will receive the Handle yet. It gets added after the Rails are assembled.
-
Join Rails
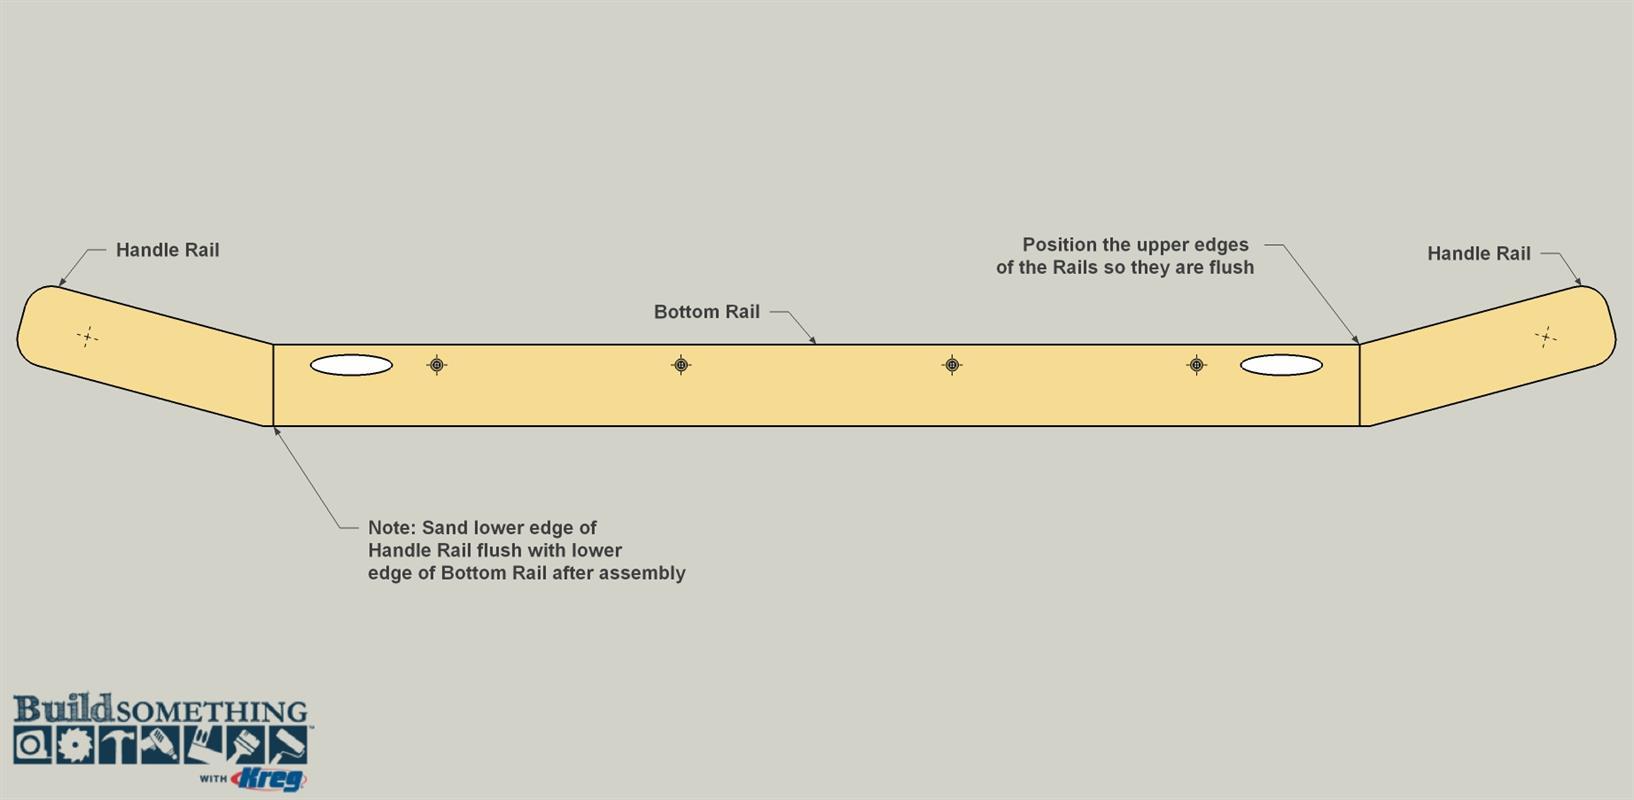
Lay the Bottom Rails with the pocket holes face up on a flat surface. Then position the first Handle Rail against a Bottom Rail, as shown. Note that the upper edge of the Handle Rail will sit flush with the upper edge of the Bottom Rail and there will be a slight overhang on the bottom. You can sand this flush after the glue dries. Apply glue to the mating edge of Handle and Bottom Rails, and then attach the parts using 1 1/4" fine-thread Kreg Screws. Repeat this for all four Handle Rails.
-
Drill the Handle Holes
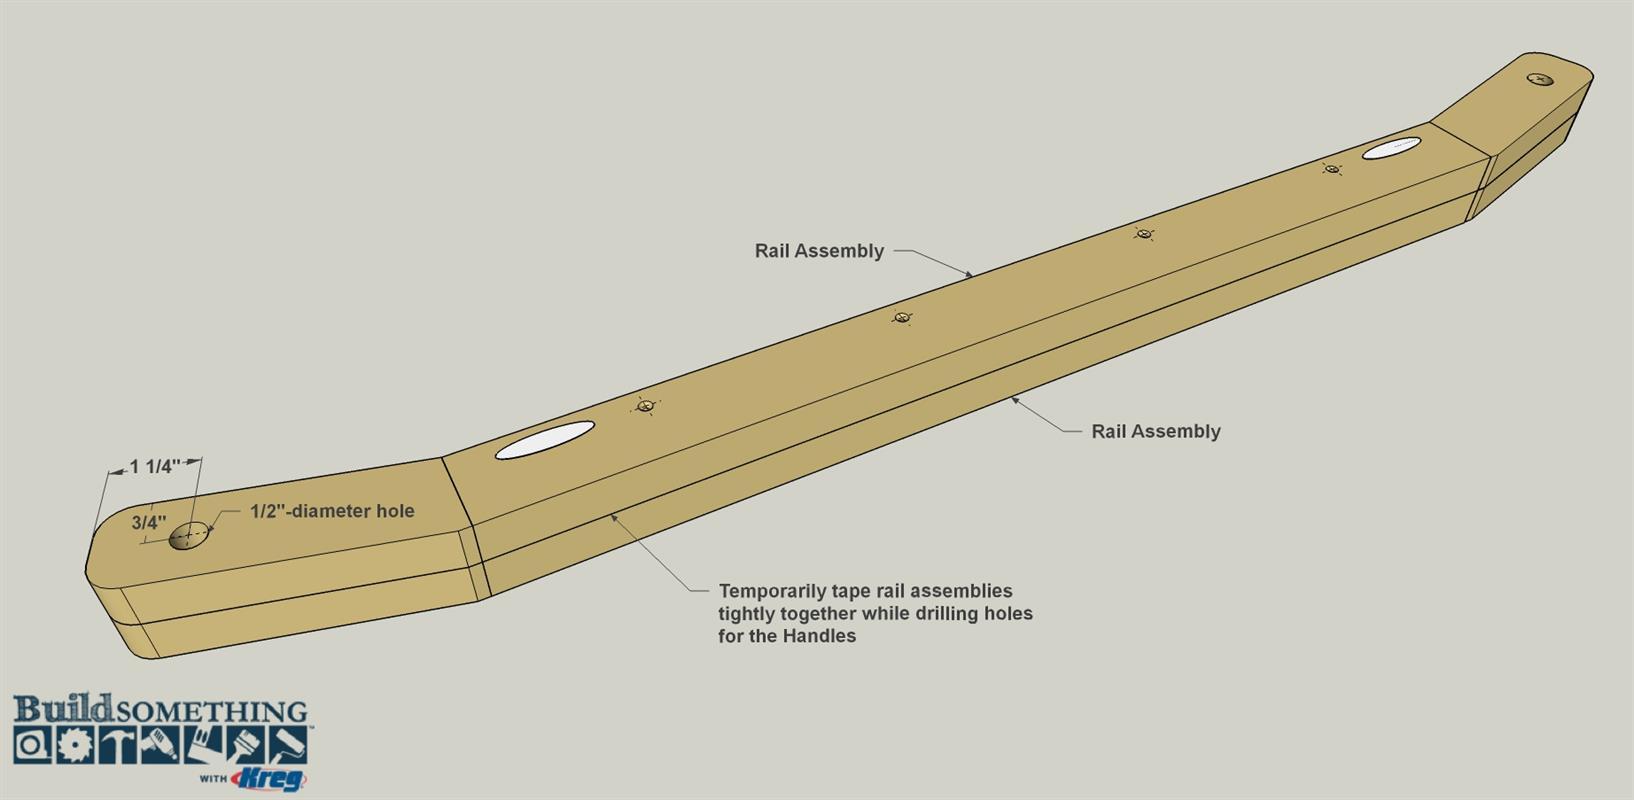
When the glue dries on the Rail assemblies, sand them flat. This is also a good time to sand the Bottom Rail and Handle Rail connections so they are flush. Now you can drill the holes for the aluminum handles. To assure that the holes align properly, tape the two Rail assemblies tightly together, as shown. Mark the location of the Handle holes and then lay the assemblies on a scrap piece of plywood or wider board to help prevent tearout as you drill through the pieces. Secure the Rails to the work surface with clamps, and drill each set of holes making sure to keep the drill as perpendicular as possible.
-
Make the Wings
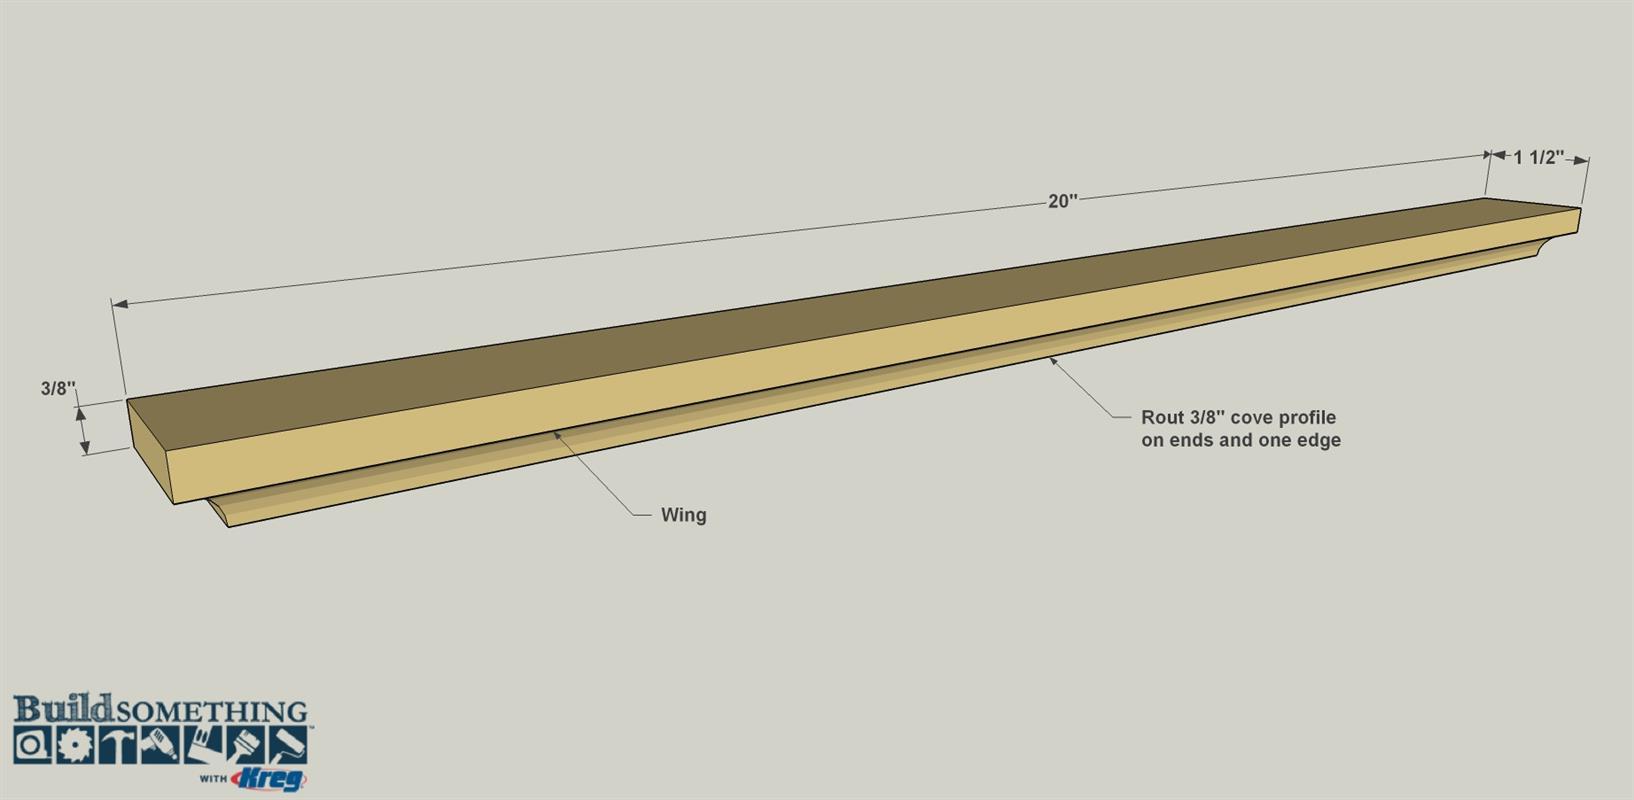
Cut two Wings to length from 1x2 cherry, as shown in the cutting diagram. If you want to add the cove detail shown, chuck a 3/8" cove bit into your router, and then, rout a profile on one edge and both ends of each Wing as shown. If you don’t have a router or don’t want to add this detail, you can leave the edges square, or sand the edges of one face slightly to ease the sharp corner. Sand each Wing smooth.
-
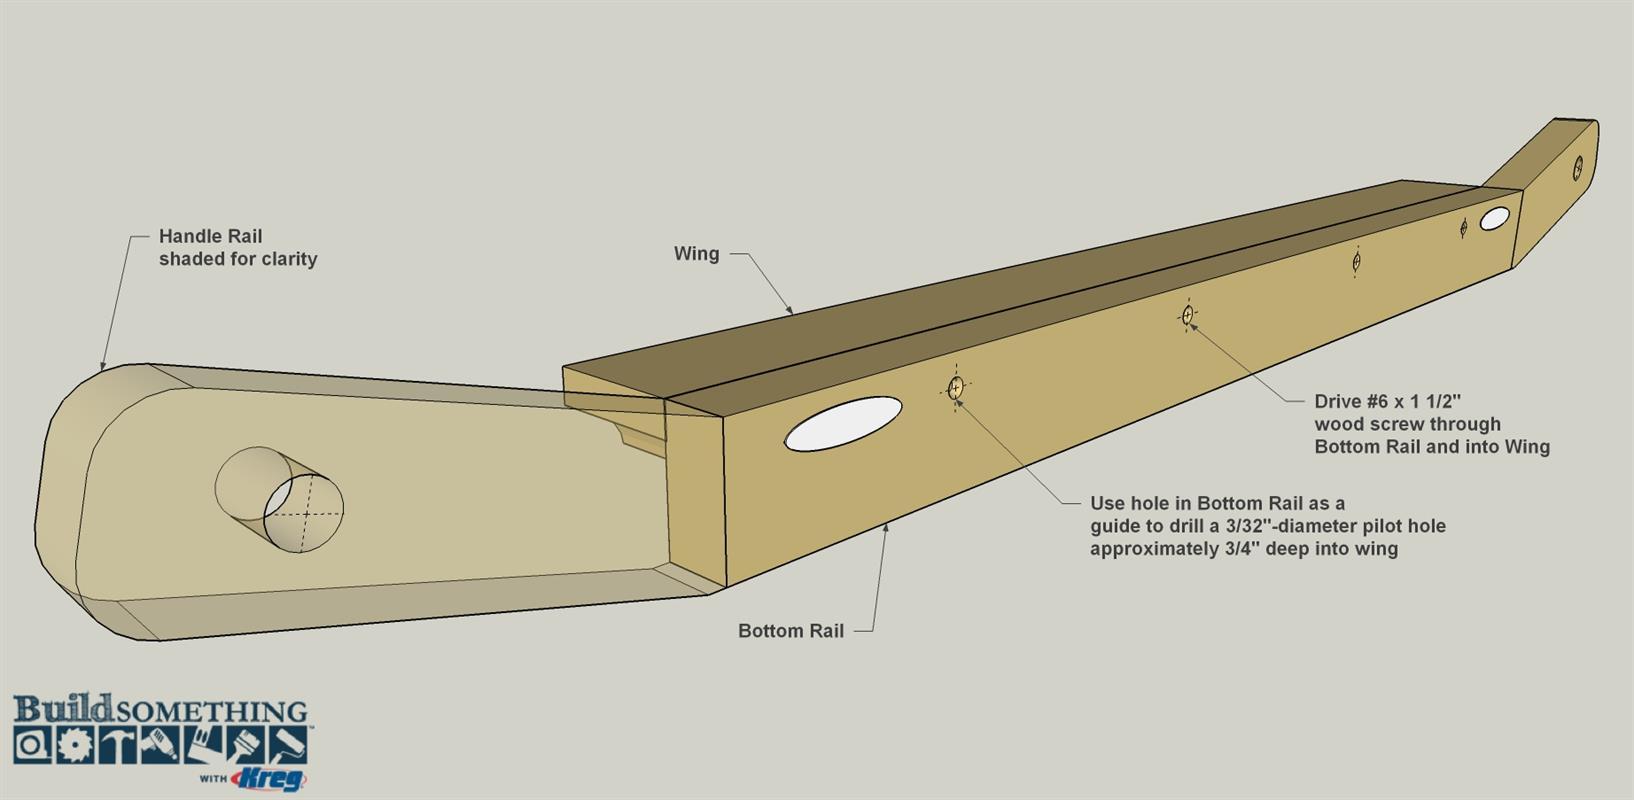
Attach the Wings to the Rails
Apply glue along the flat edge of the Wing, and then align it with the Rail assembly so the upper face of the Wing is flush with the upper edge of the Bottom Rail, as shown. Clamp the Wing in place. Then use the holes in the Bottom Rail as guides to drill pilot holes in the Wings, as shown. This will prevent the wood from splitting as you next drive in four #6 x 1 1/2" flat-head wood screws to secure the Wing. Make sure that the screw heads are flush with or slightly below the surface of the Bottom Rail so they won’t get in the way later. Repeat this to join the other Wing to the second Wing to the other rail assembly.
-
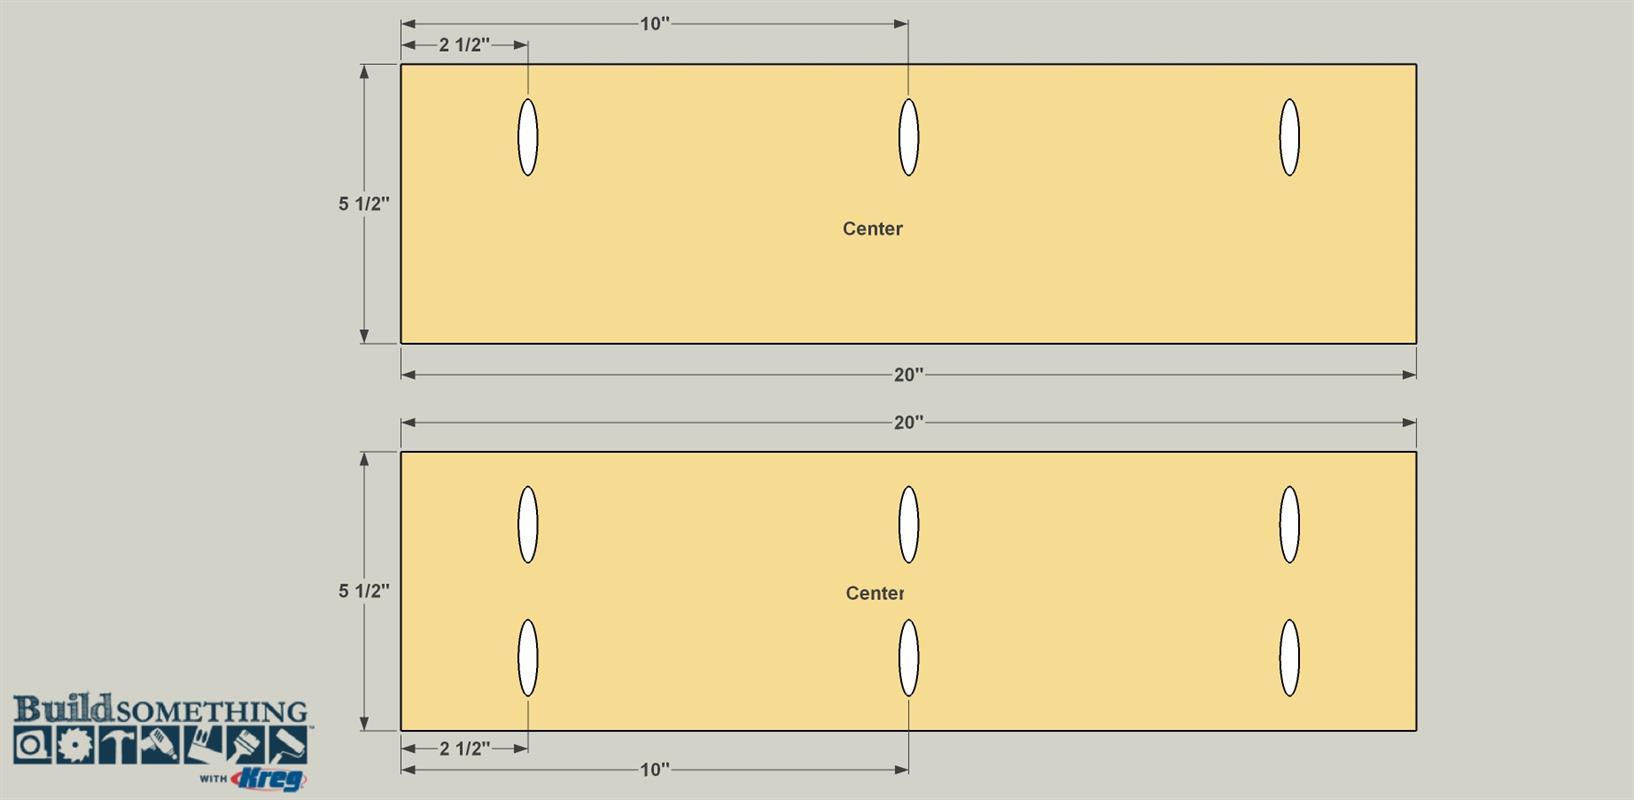
Make the Center Boards
Cut two Center boards to length from 1x6 cherry, as shown in the cutting diagram. Drill pocket holes at the locations shown.
-
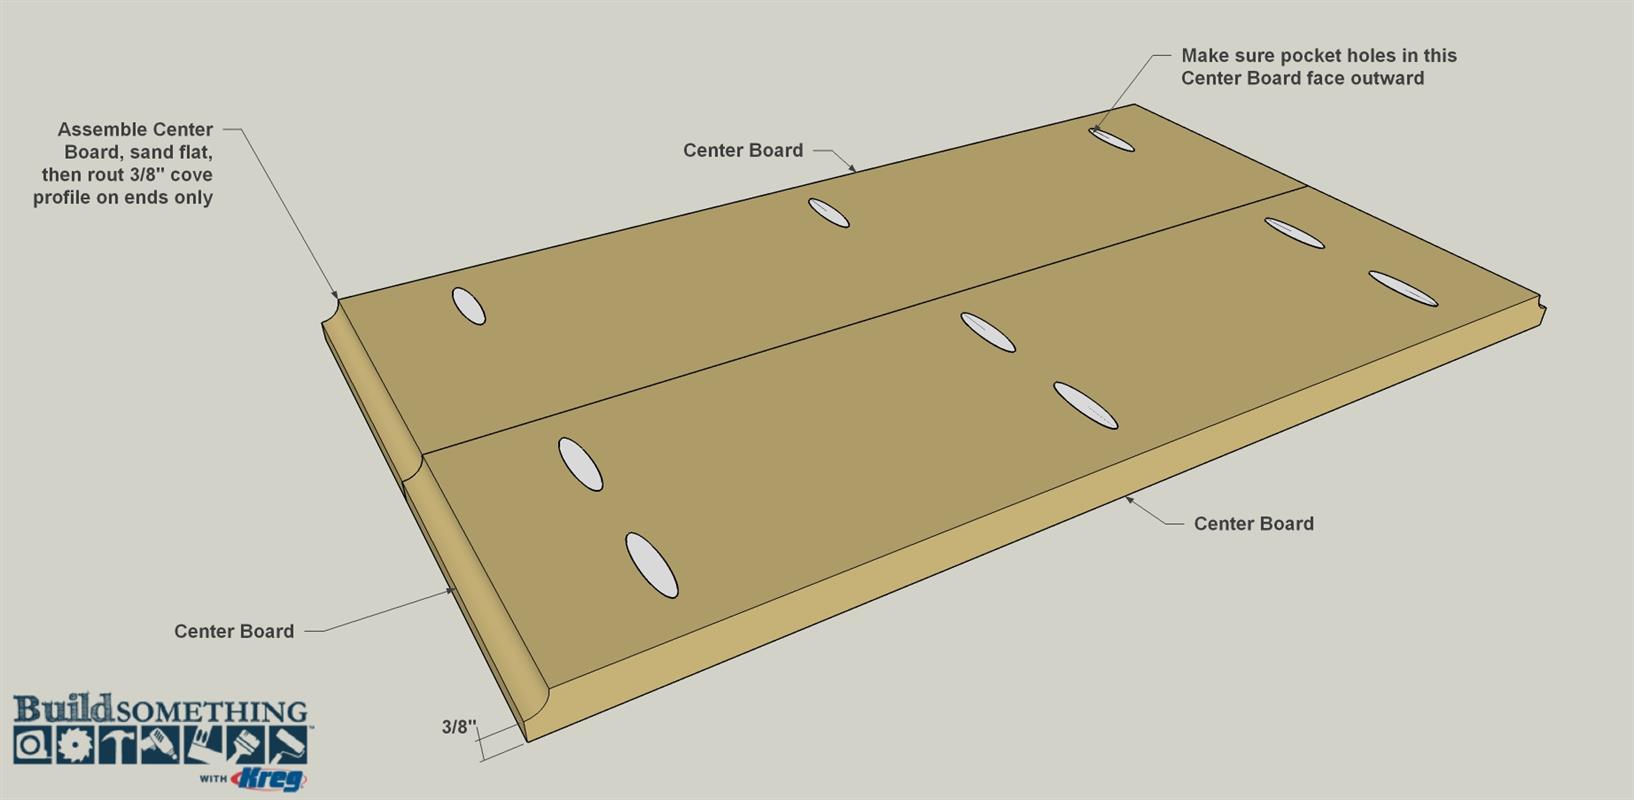
Complete the Center Panel
Apply glue the mating edges of the two Center Boards, align the ends and edges, and then clamp them together. Secure the boards together using 1 1/4" fine-thread Kreg Screws. After the glue dries, sand the surfaces flat. Using the same router set up as on the Wings, rout a cove profile on the ends of the panel (but not the edges) as shown.
-
Make the Handles
Using a hacksaw, cut two Handles to length from 1/2" aluminum bar, as shown in the cutting diagram. Use a file or sandpaper to sand the cut ends smooth. Then use a woven abrasive pad (such as Scotch-Brite) to polish the aluminum to a consistent finish.
-
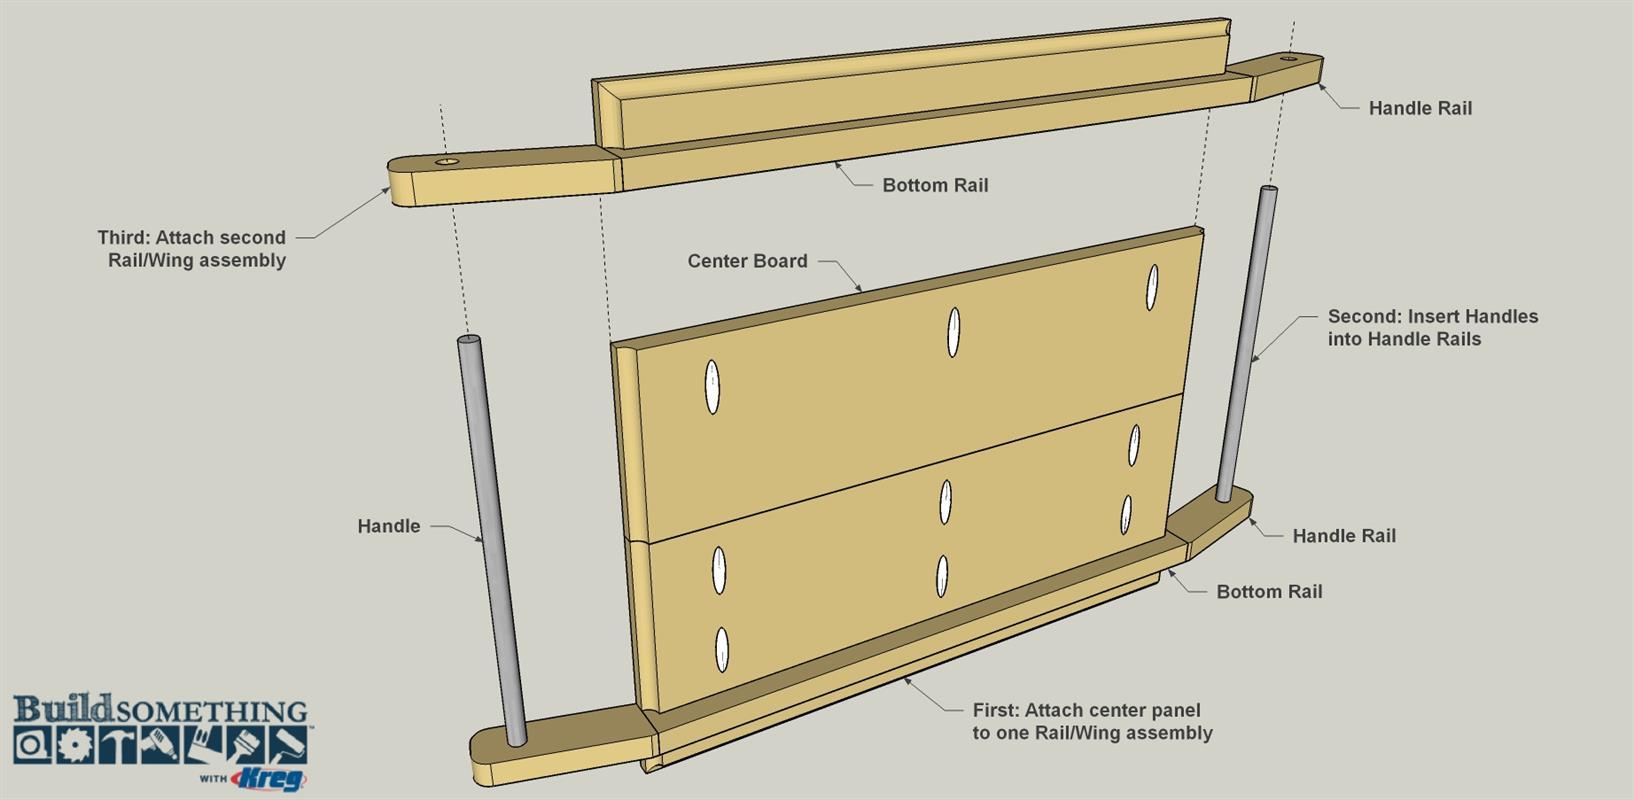
Final Assembly
Spread glue along one edge of the center panel, and then position it against one Rail/Wing assembly, as shown, so that the upper face of the panel is flush with the upper edge of the Bottom Rail. Clamp the panel in place, and then secure it using glue and 1 1/4" fine-thread Kreg Screws. Set the handles into the Handle Rails on that side. Then attach the second Rail/Wing assembly in the same way.
-
Finish It Up
Once the glue dries, clean away any excess that has squeezed out. Then do any final sanding that’s necessary. You’ll especially want to make sure the center panel is flush with the rails. Once that’s done, you need to add a protective finish. If you intend to use the serving tray for food, you need to make sure the finish is food safe. Common finishes include salad bowl finish, boiled linseed oil, or another finish that’s listed as food safe. We wiped on a couple of coats of. We applied a couple coats of Tried and True natural oil. It’s safe, offers protection, and really brings out the beauty of the maple and cherry.


