Raised Dog Bowl Stand
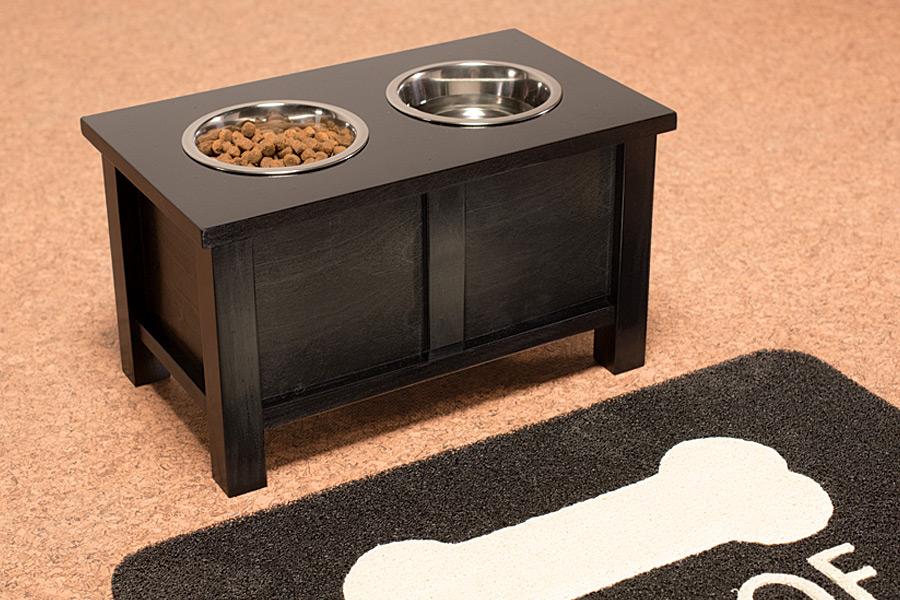
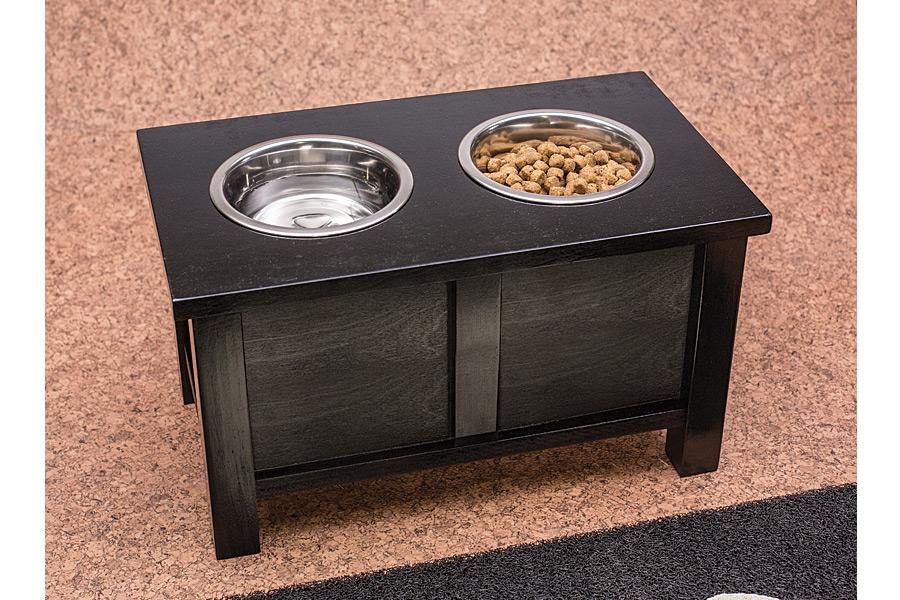
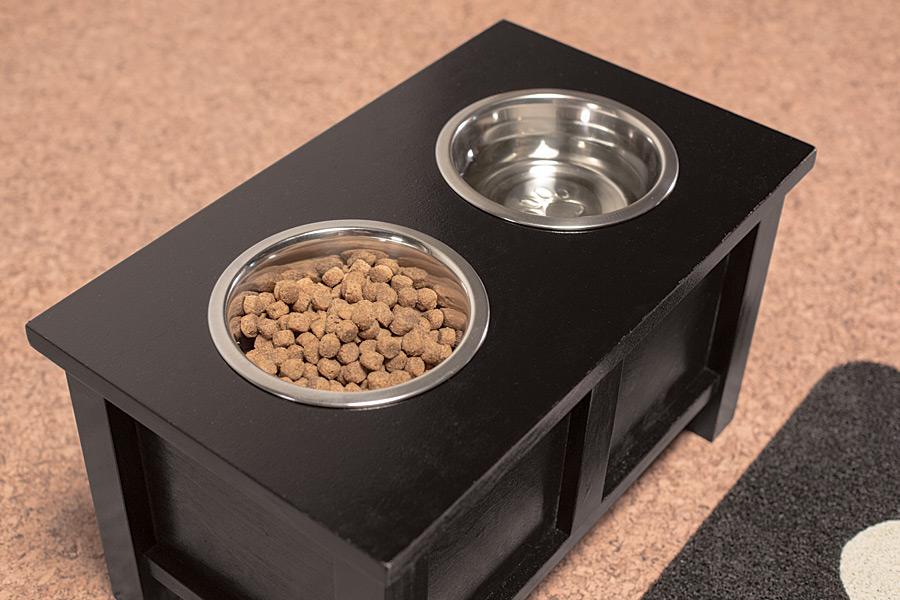
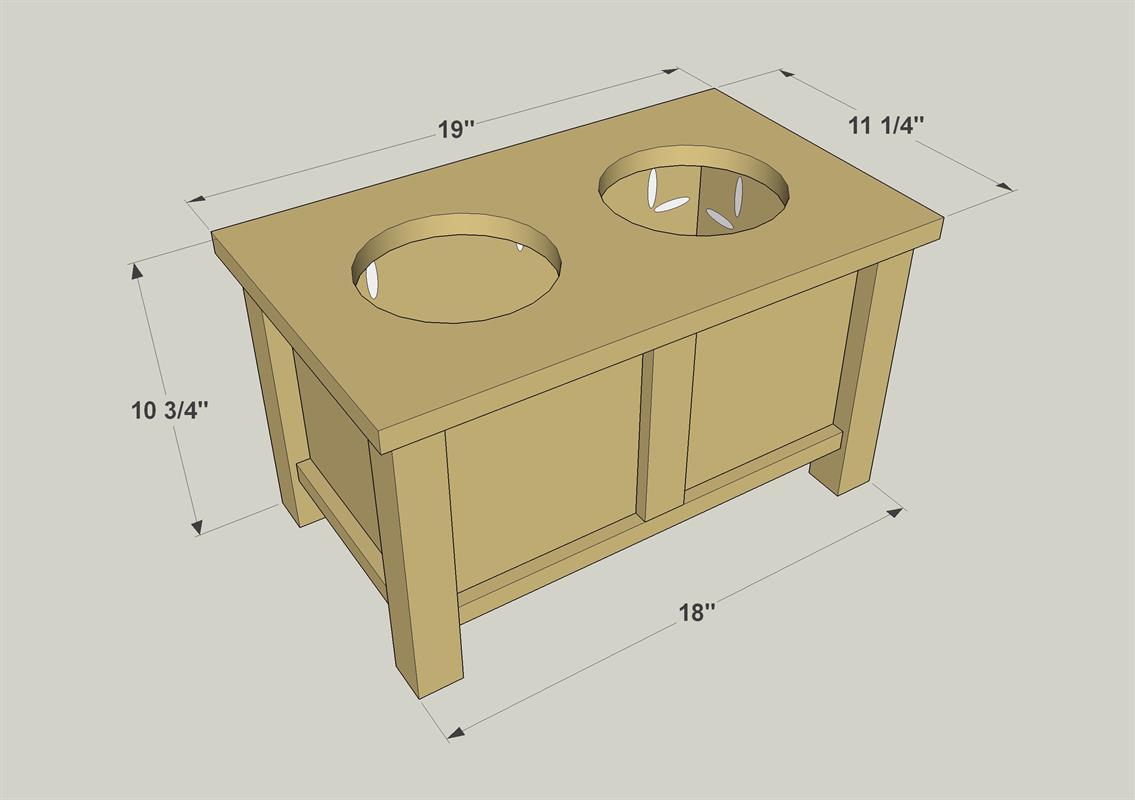
By Kreg ToolElevate your dog’s dining experience with a raised stand for its food and water bowls. The stand holds two 6″ dog bowls at a convenient height for larger dogs. You can build one for your furry friend with just a few pine boards, a few tools, and some paint or stain.
Directions
-
Make a Pair of End Panels
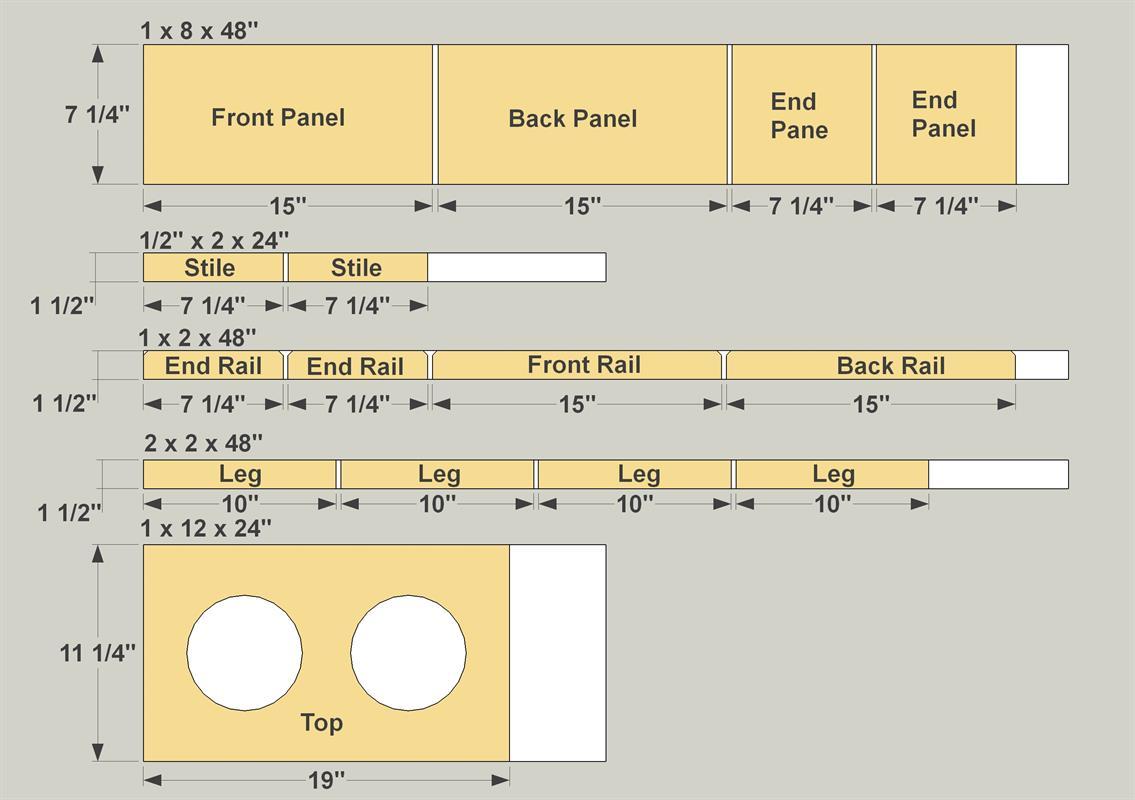
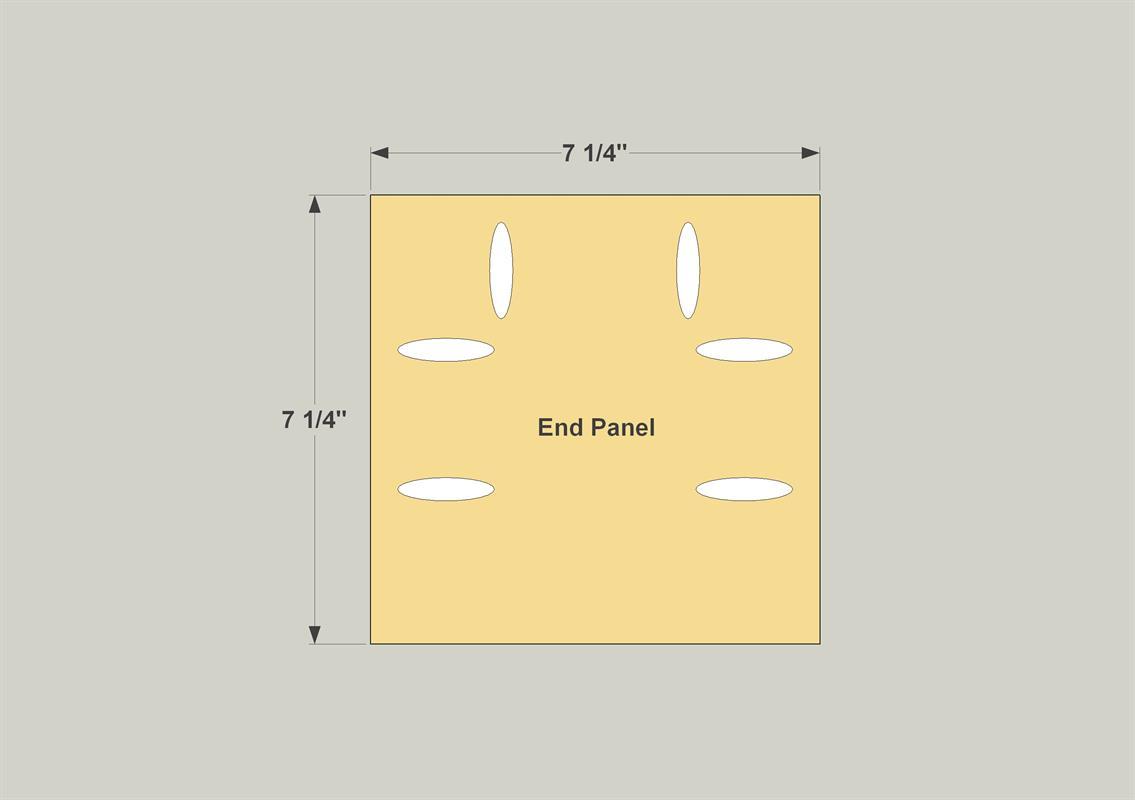
Cut two End Panels to length from a 1x8 board, as shown in the cutting diagram. Then, with your pocket-hole jig set up for 3/4" material, drill pocket holes where shown.
-
Attach the End Panels to the Legs
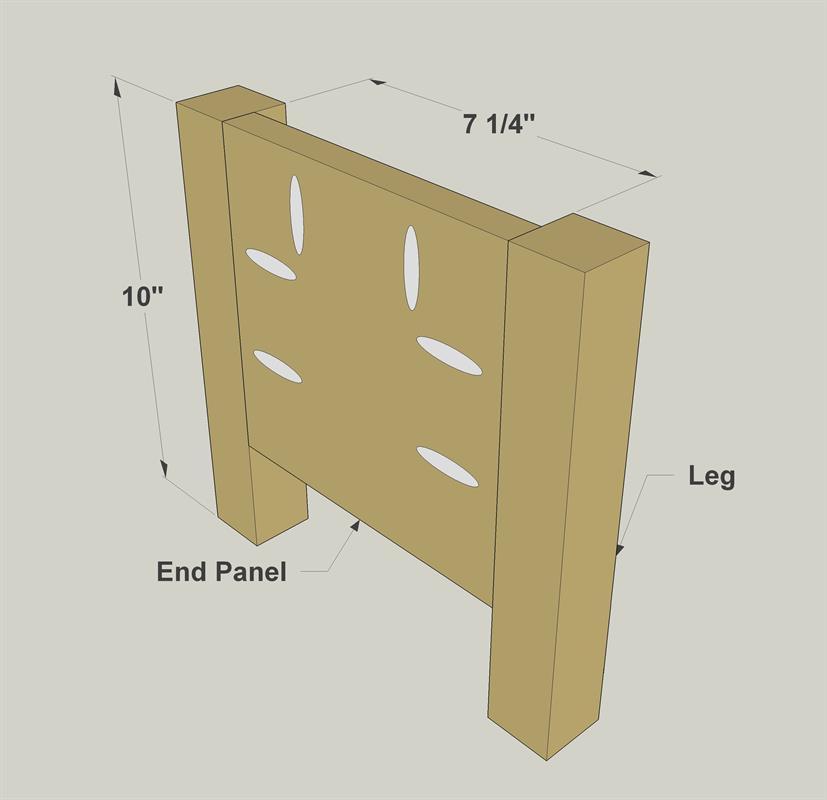
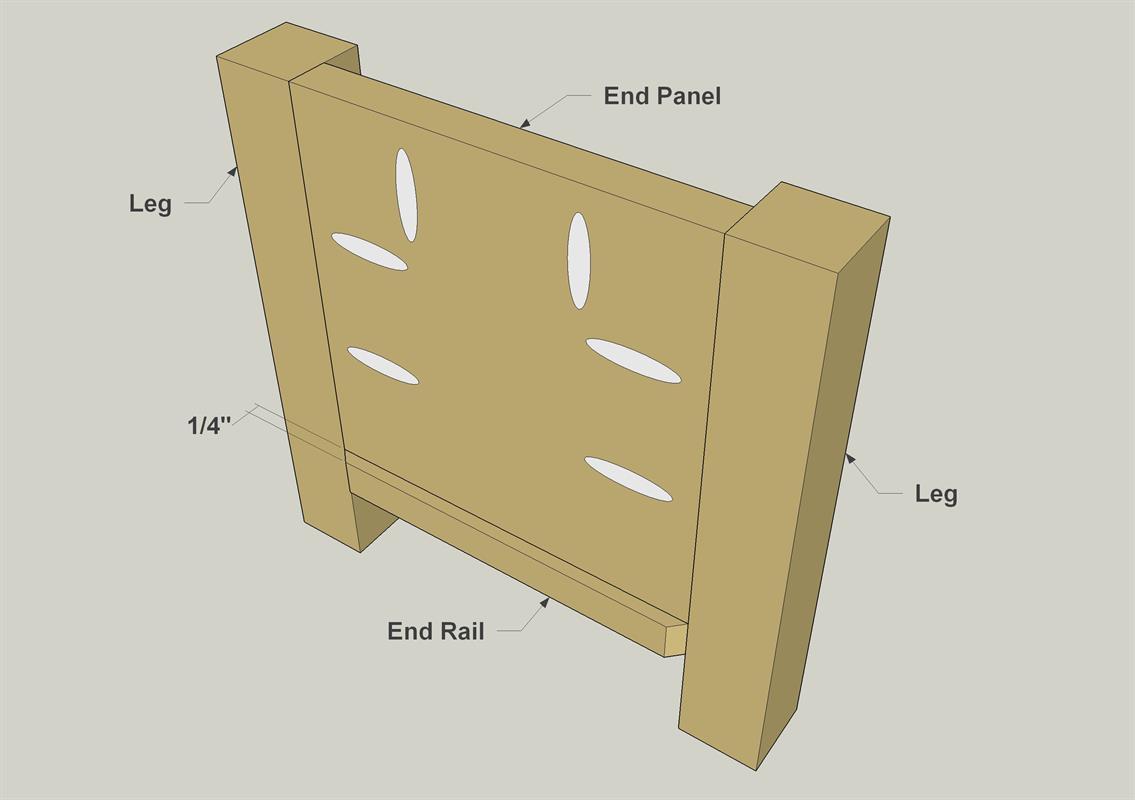
Cut four Legs to length from a 2x2 board, as shown in the cutting diagram. Secure two Legs to each End Panel with 1 1/4" pocket hole screws as shown.
-
Make the End Rails
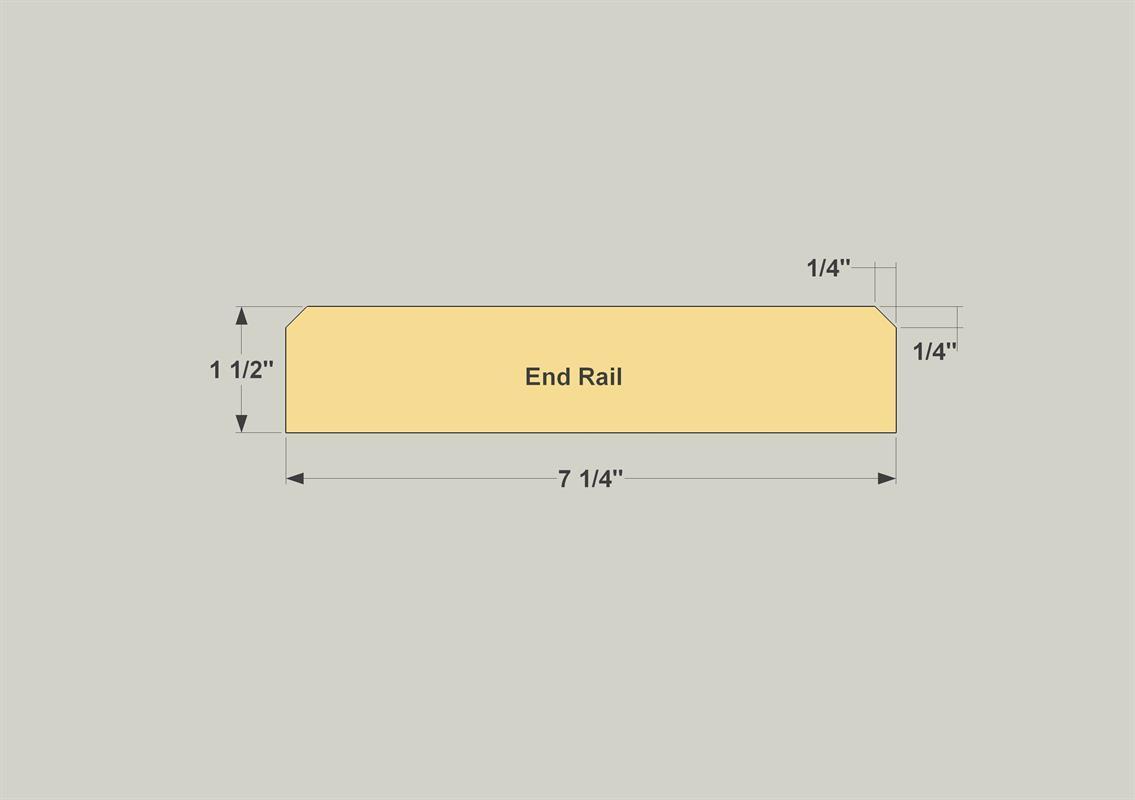
Cut two End Rails to length from a 1x2 board, as shown in the cutting diagram. Then, using a jig saw or a miter saw set at 45°, cut off two corners on each Rail, as shown.
-
Attach the End Rails
Glue and clamp Each End Rail to the bottom of each End Panel so that the End Rails are offset 1/4" toward the inside face of the End Panels, as shown.
-
Make Front and Back Panels
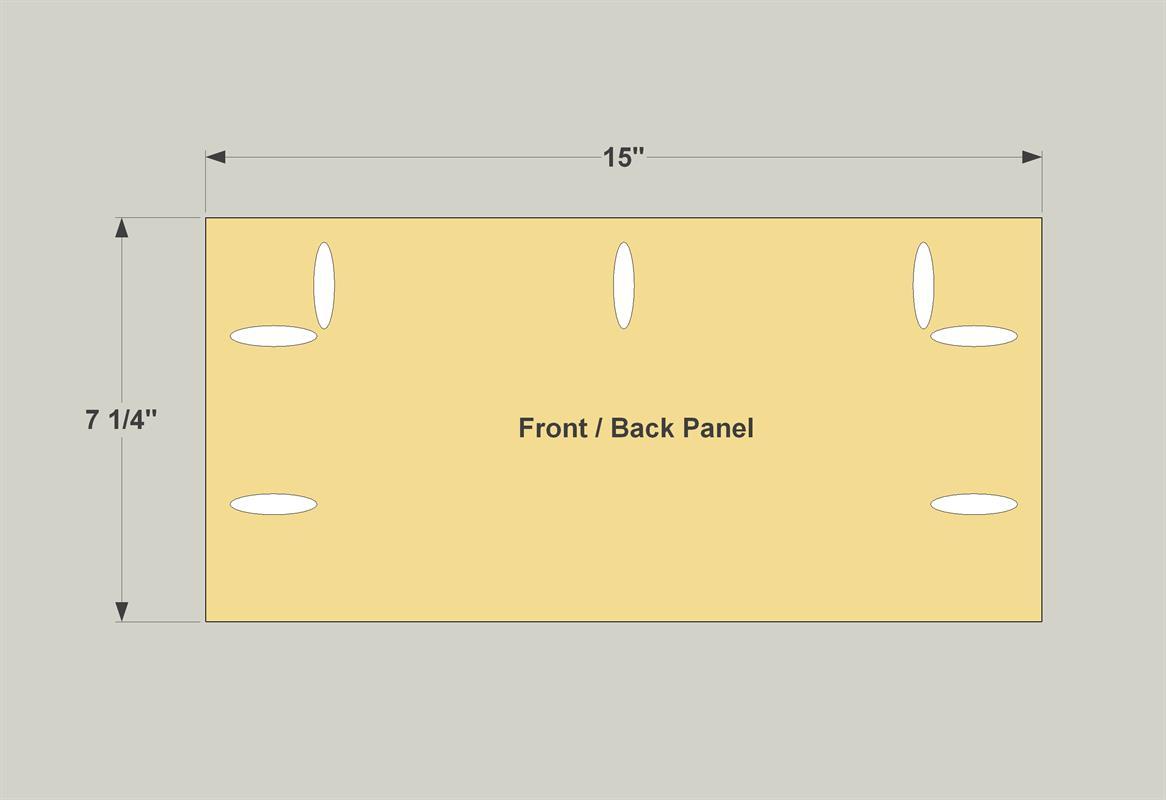
Cut one Front Panel and one Back Panel to length from a 1x8 board, as shown in the cutting diagram. Then, with your pocket-hole jig set up for 3/4" material, drill pocket holes in these panels, as shown.
-
Attach the Front Back Panels
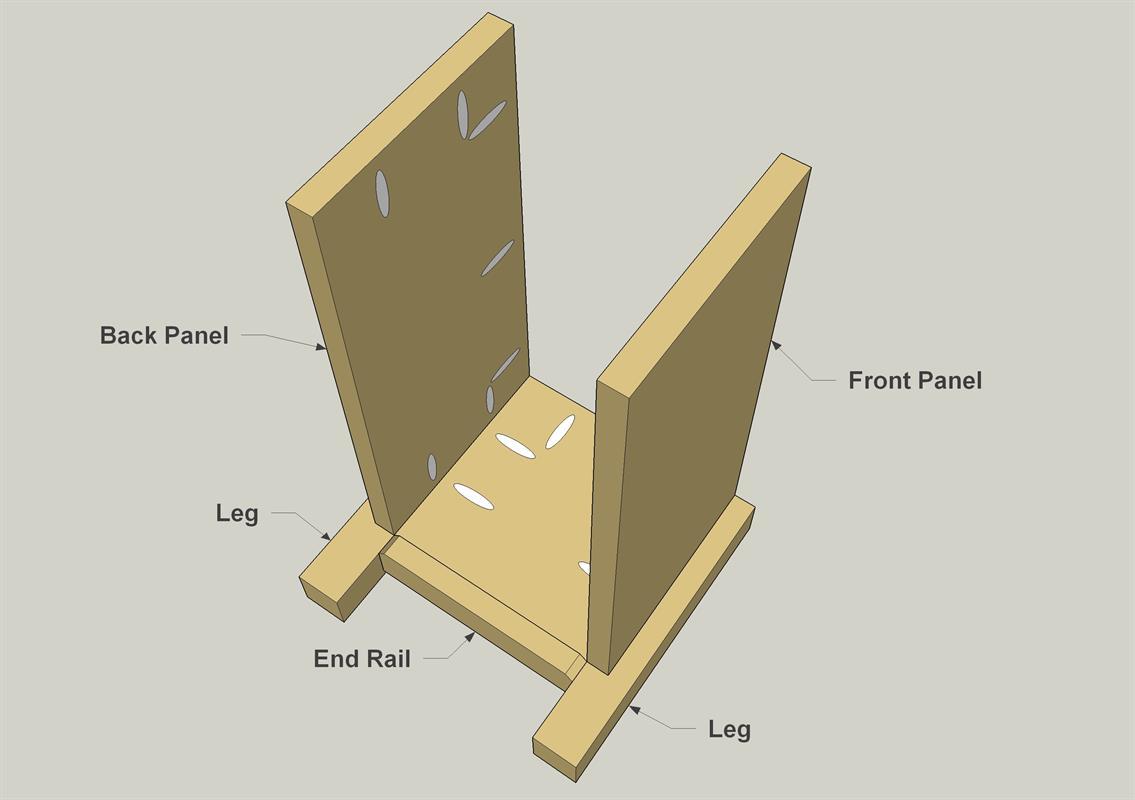
Attach the Front Panel and Back Panel to one end assembly using 1 1/4" pocket hole screws, as shown. Then secure the second end assembly in place.
-
Make Front and Back Rails
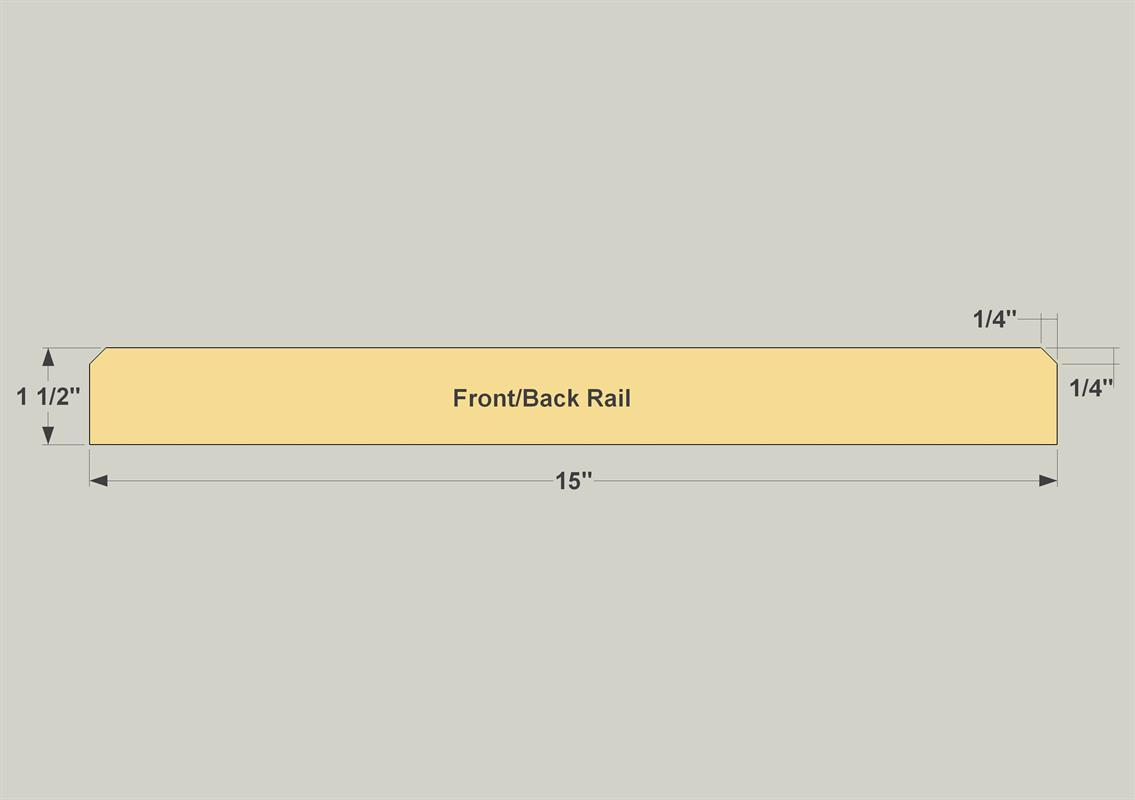
Cut one Front Rail and one Back Rail to length from a 1x2 board, as shown in the cutting diagram. Then, using a jig saw or a miter saw set at 45°, cut off two corners on each Rail, as shown.
-
Attach the Front and Back Rails
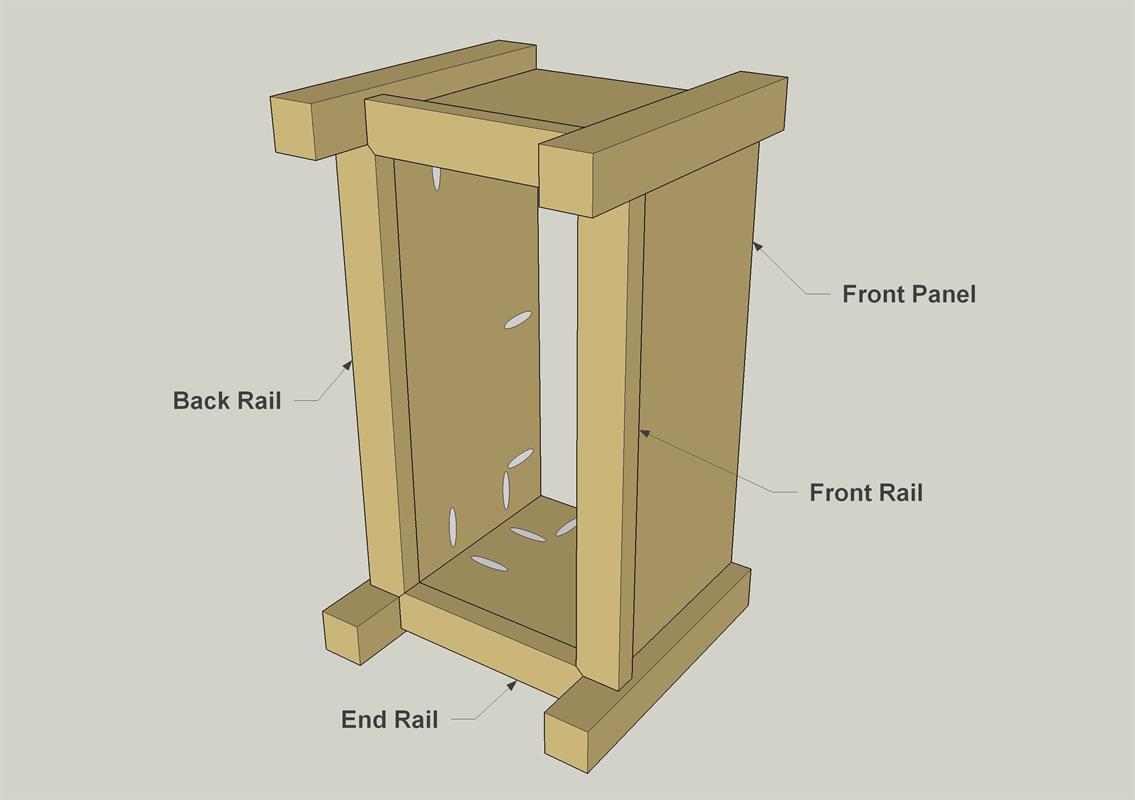
Glue and clamp the Front and Back Rails in place, as shown. To position them, make sure that thee cut-off corners meet with the cut-off corners on the End Rails.
-
Add a Pair of Stiles
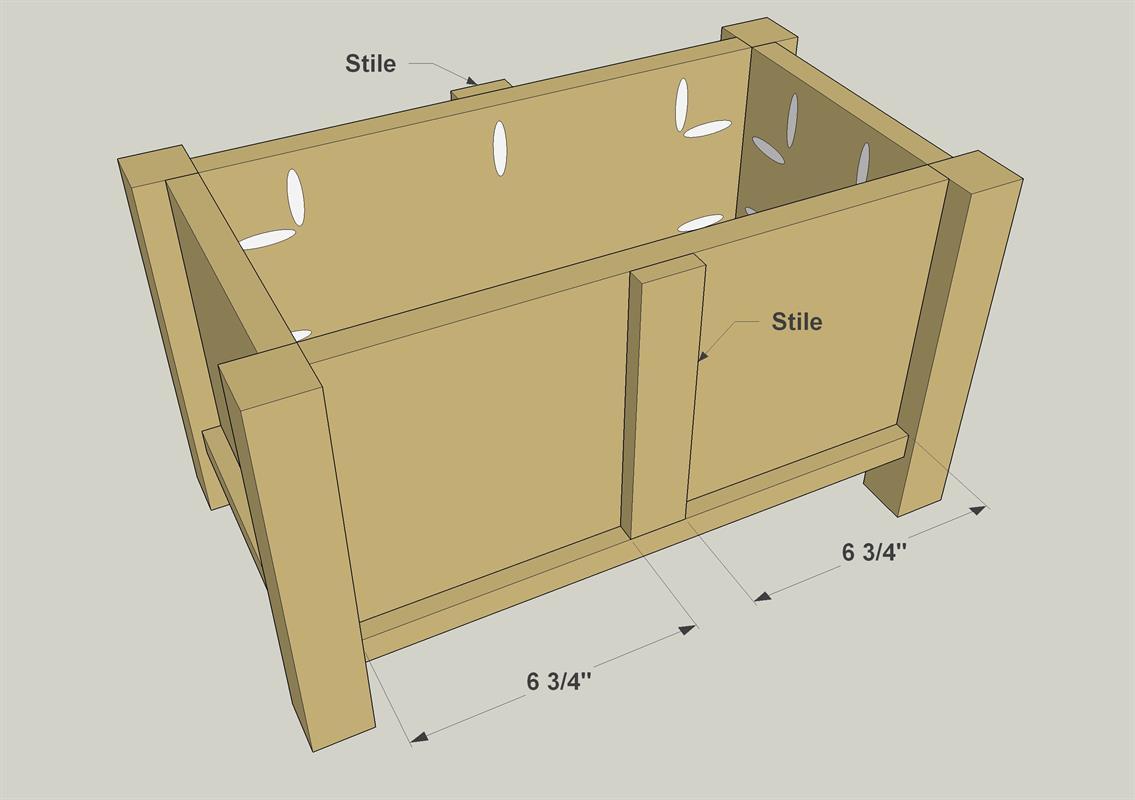
Cut two Stiles to length from a 1/2" x 2" board (1 1/2" actual width), as shown in the cutting diagram. Then glue and clamp the Stiles to the Front and Back Panels where shown.
-
Make the Top
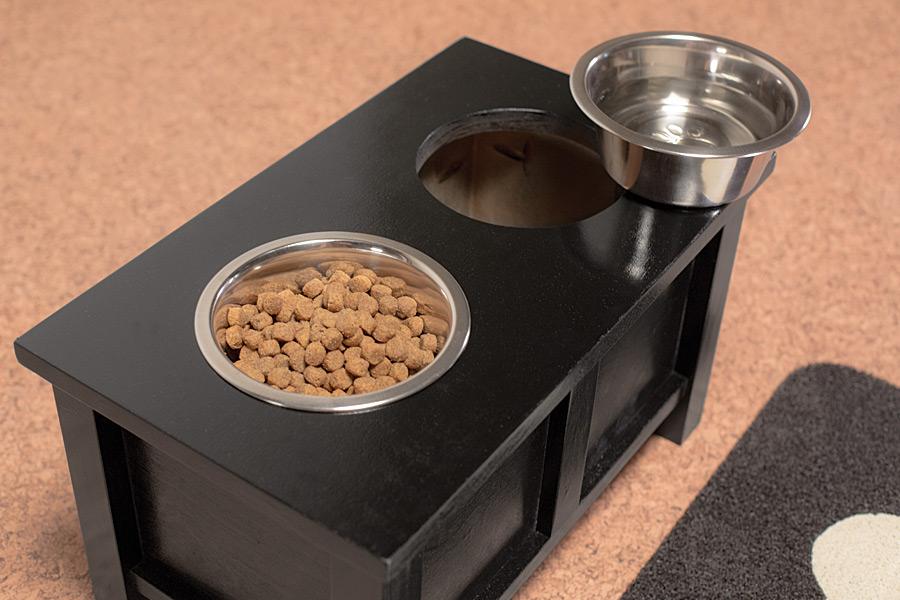
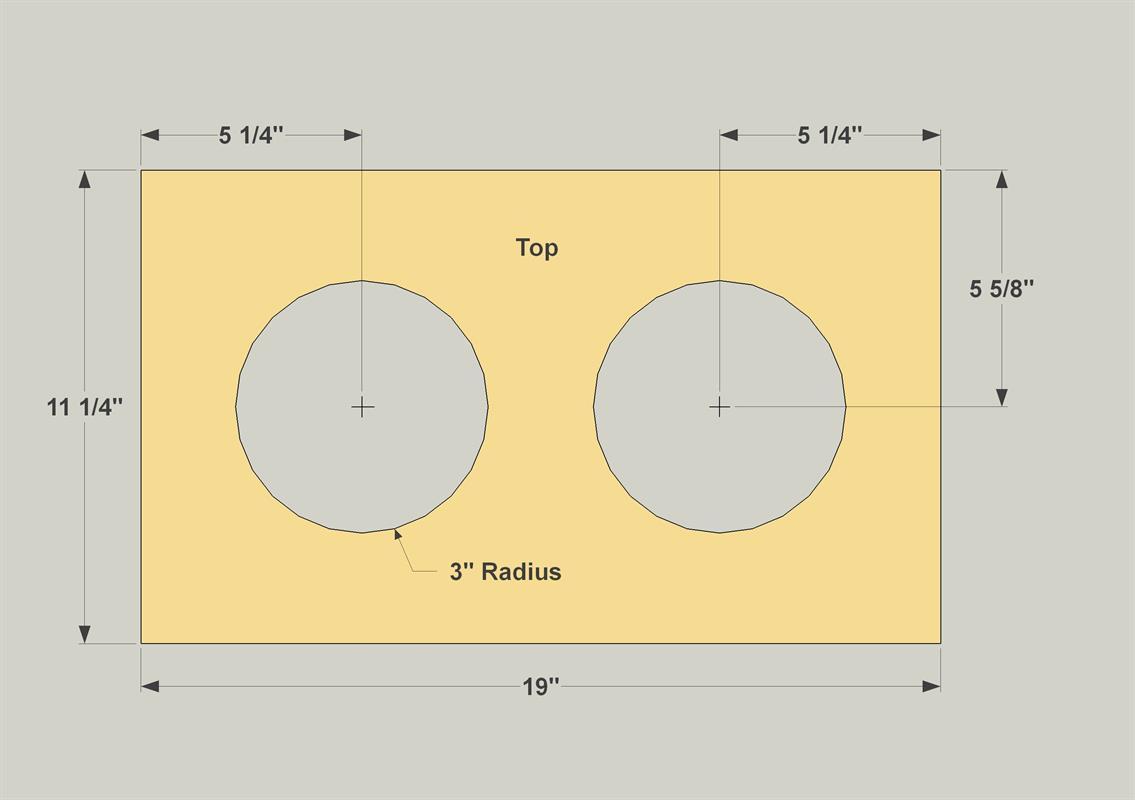
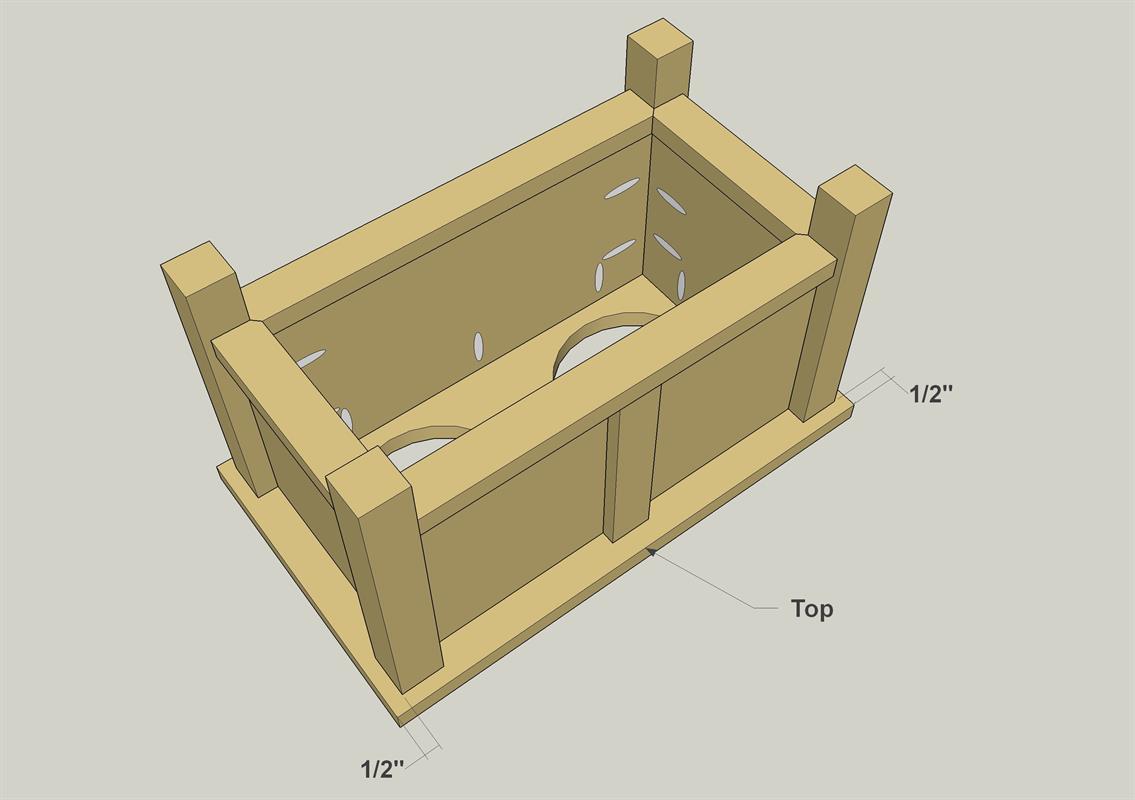
Cut the Top to length from a 1x12 board, as shown in the cut diagram. Use a compass to lay out holes for the bowls, as shown. Make sure to get your bowls first so that you can verify their size. After laying out the holes, drill a 3/8" starter hole just inside each marked circle. Use a jigsaw to cut out the circles. Just insert the blade in the starter hole, and then cut. Sand the openings smooth when you are done.
-
Attach the Top
Attach the Top to the base using 1 1/4" pocket hole screws, as shown. Then you can sand the project, and apply the paint or stain of your choice.


