Pub Chairs
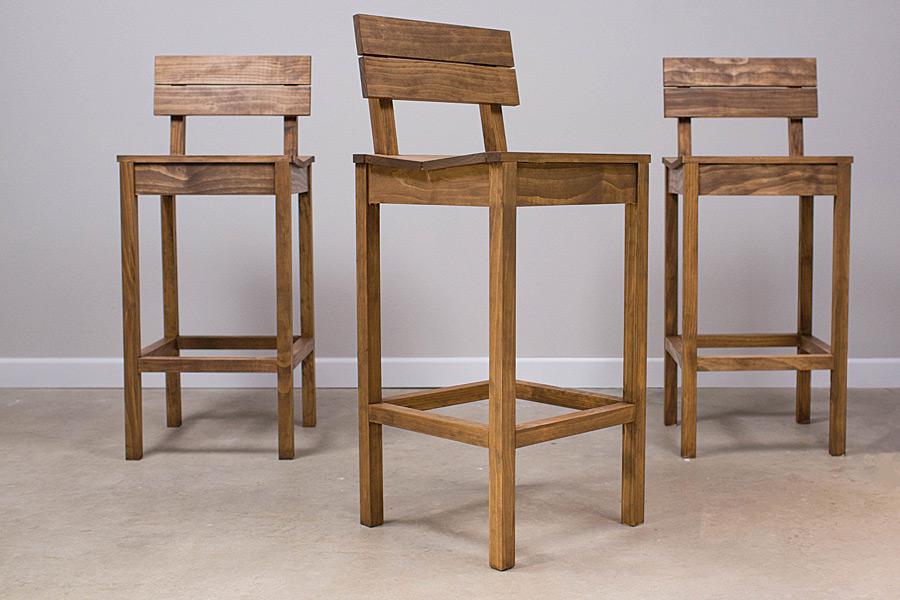
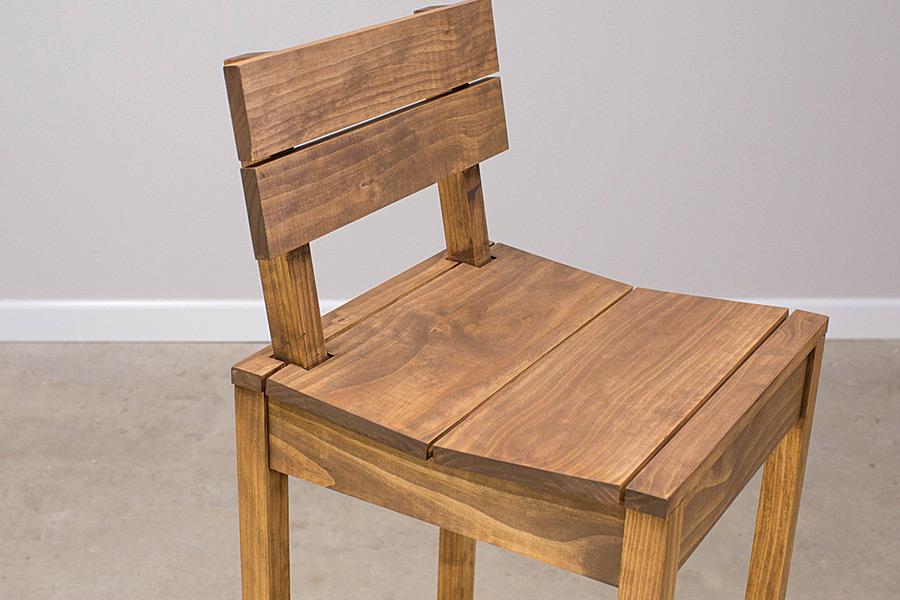
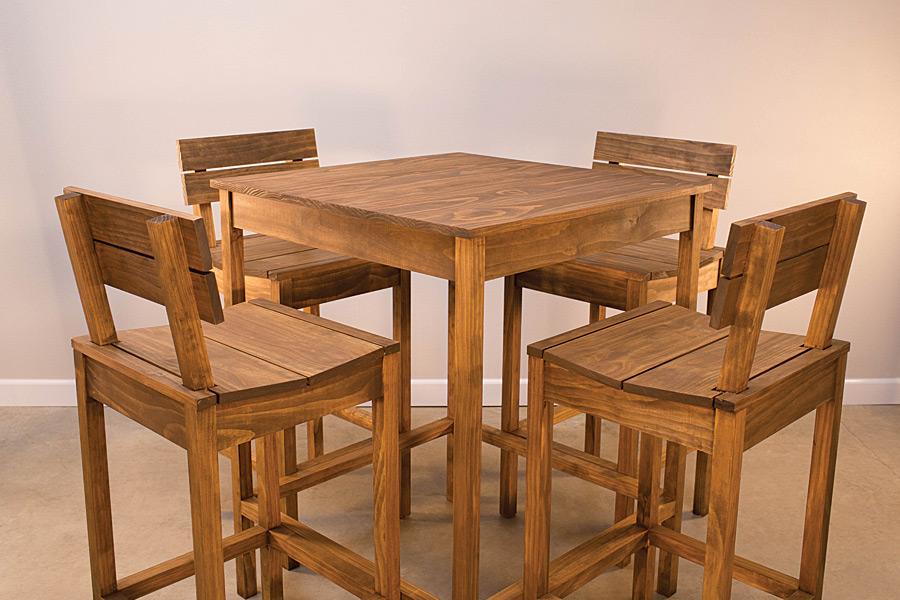
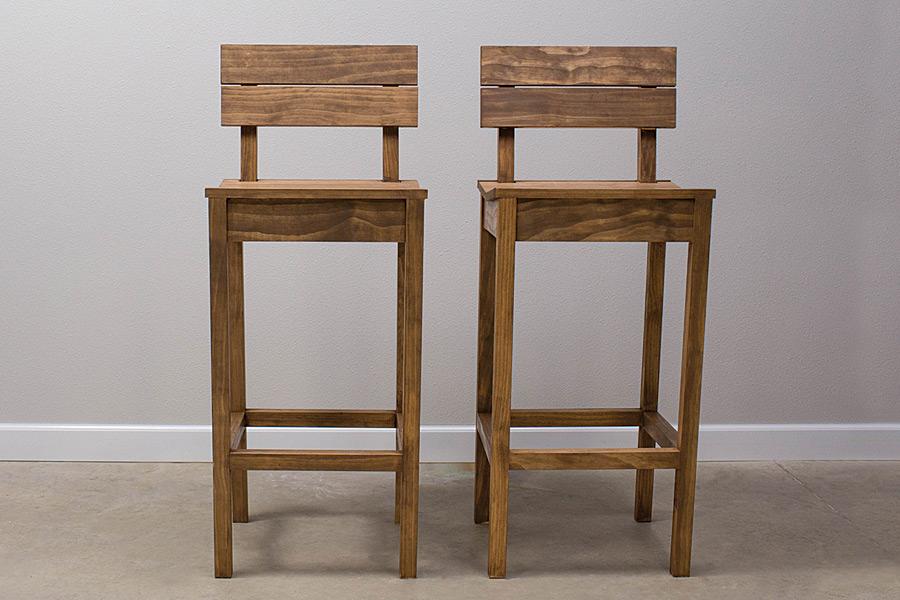
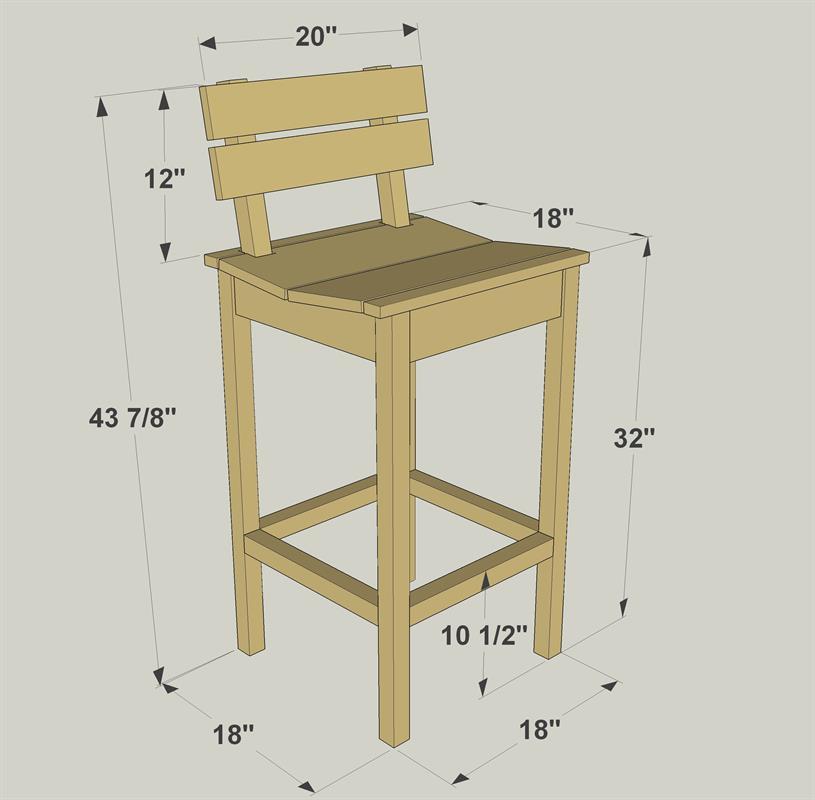
By Kreg ToolThese tall pub chairs look great, whether you have them sitting at a counter or pair them with a pub table (which we’ll show you in another project plan). Plus, the chairs are comfortable thanks to the shaped seat and angled back. Neither of these great features makes the chairs difficult to build.
Directions
-
Review the Materials List
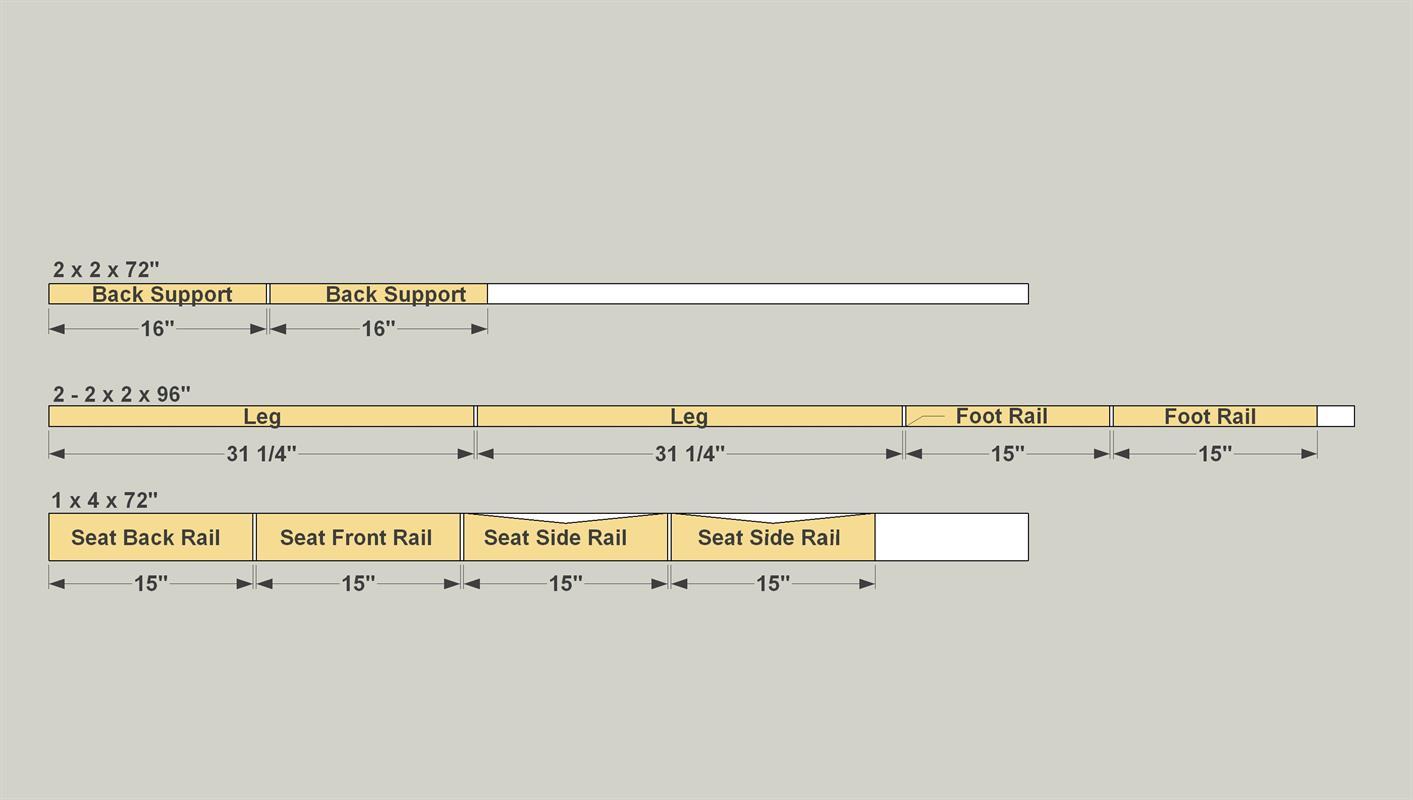
Before you start building your Pub Chairs, take a look at the parts list, the supplies, and the cutting diagram. All are shown for building one chair. You’ll need to multiply everything by the number of chairs you want to build. Once you have all of your quantities, you can get your materials.
-
Make the Foot Rails
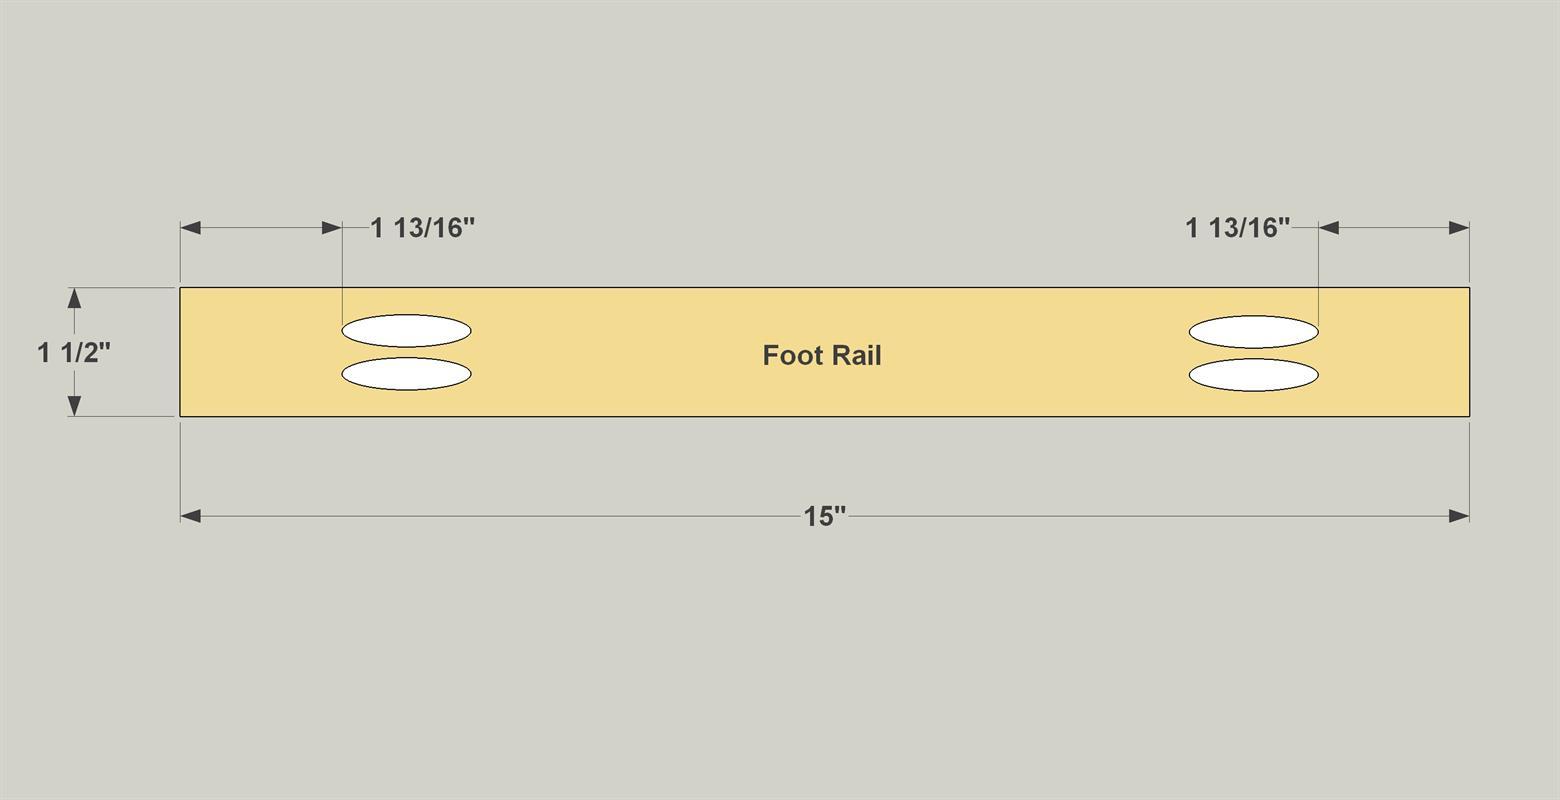
Cut four Foot Rails to size from a 2 x 2 board, as shown in the cutting diagram. Then, with your pocket hole jig set for 1 1/2" material, drill pocket holes in these pieces where shown.
-
Cut the Legs to Size
Cut four Legs to size from a 2 x 2 board, as shown in the cutting diagram.
-
Make the Seat Rails
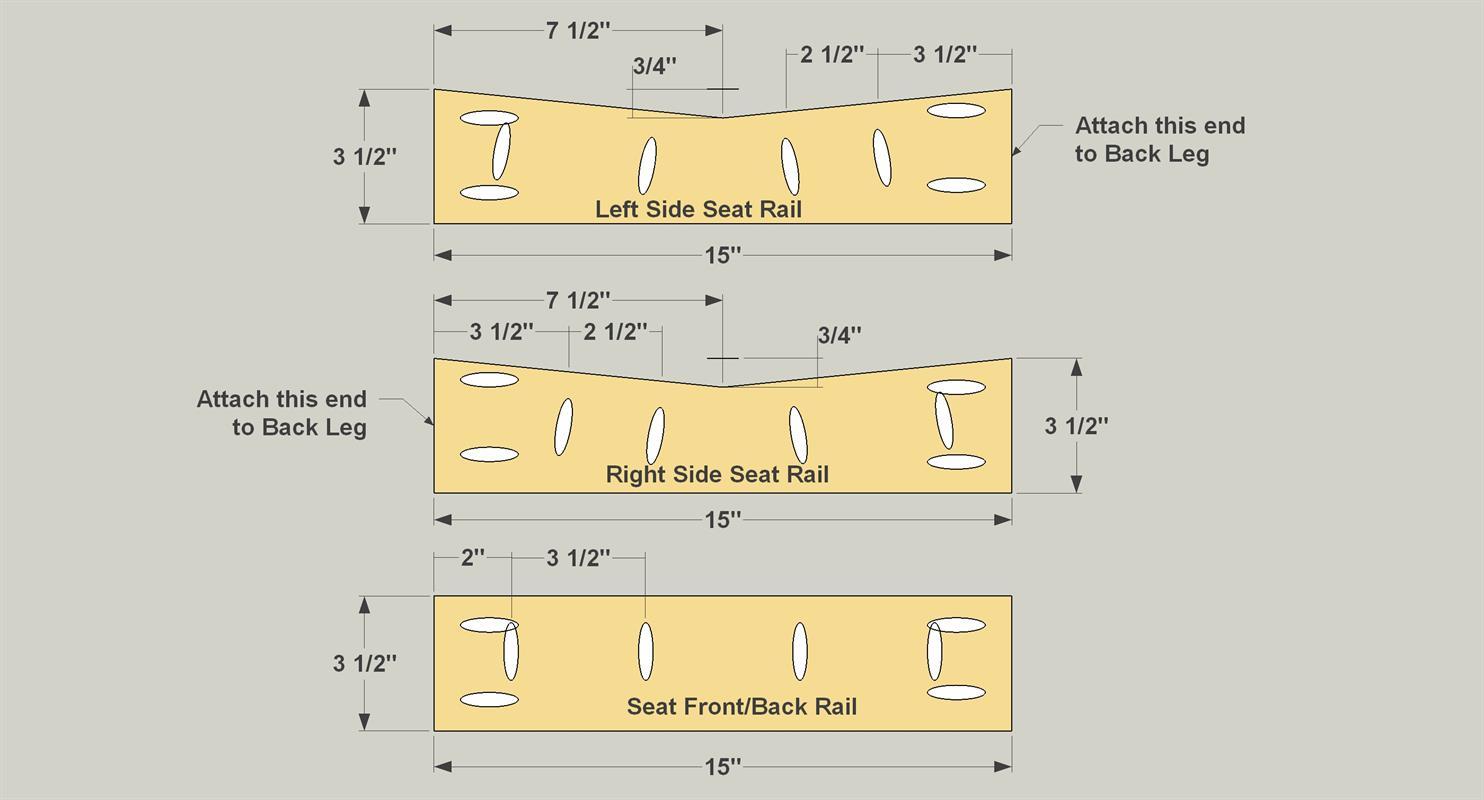
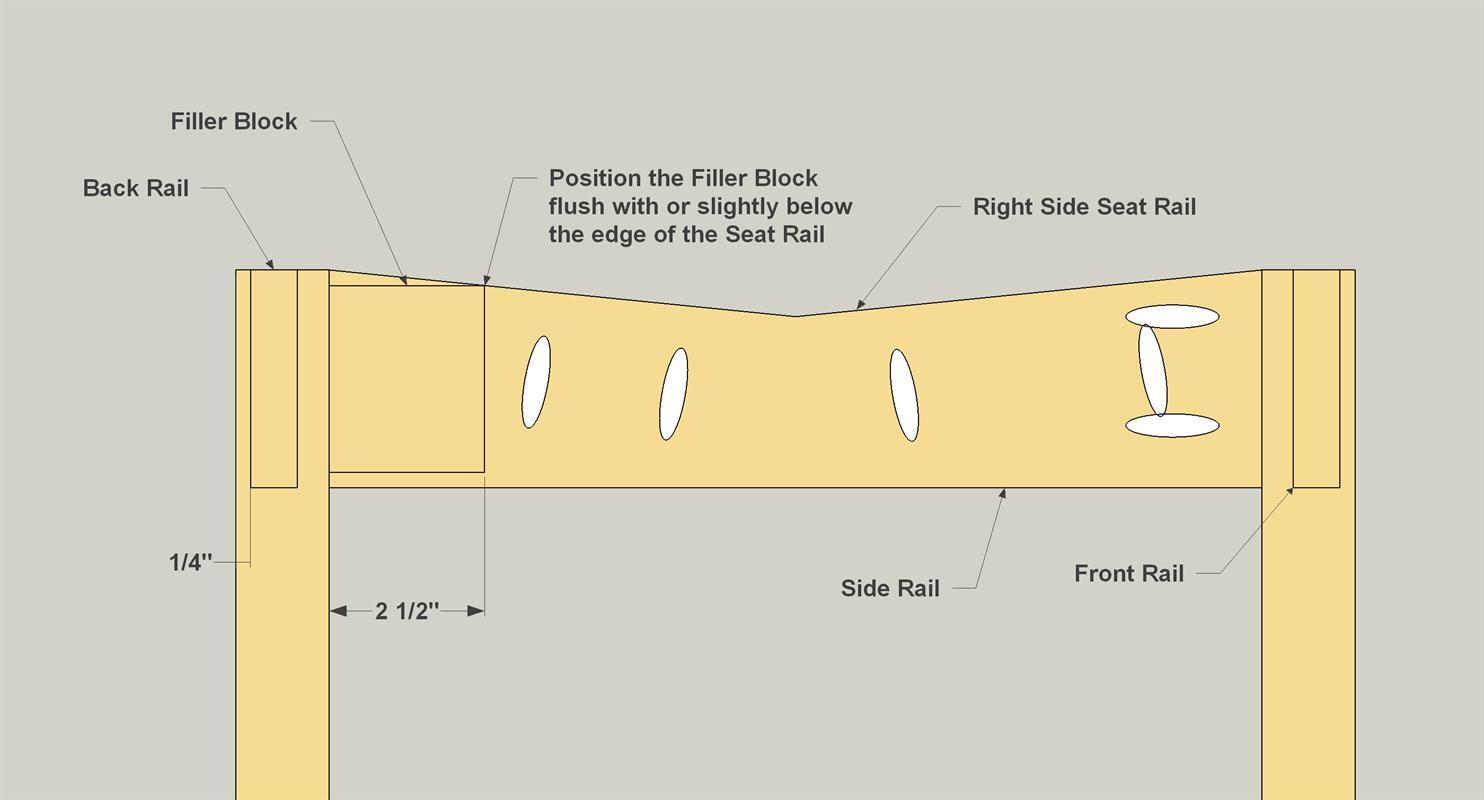
Cut two Seat Front/Back Rails and two Seat Side Rails to size from a 1 x 4 board, as shown in the cutting diagram. Using a jigsaw, cut the “V” shape on the two Seat Side Rails, as shown. Then sand the cut edges smooth. With your pocket hole jig set for 3/4" material, drill pocket holes in the Front/Back Rails, as shown. Then drill pocket holes in the Side Rails. Note that there’s a difference in pocket hole spacing on the Left Seat Side Rail and the Right Seat Side Rail. The pocket holes closest to the back end in each Side Rail are offset slightly forward. That’s so they pocket holes will clear the Filler Blocks that get added during assembly.
-
Start Base Assembly
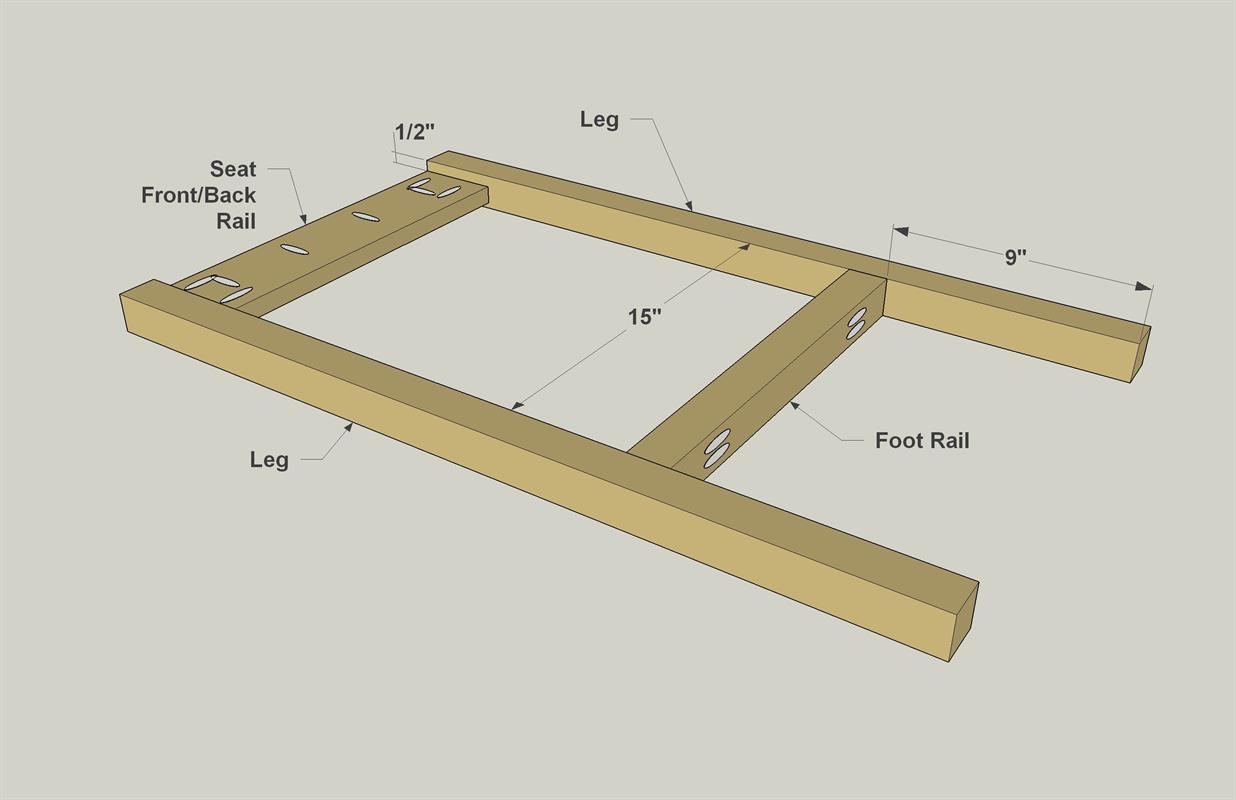
Begin assembling the chair base by creating front and back assemblies that each consist of two Legs, one Foot Rail, and a Seat Front/Back Rail. Position the Foot Rail between the Legs, as shown, and then attach it using 2 1/2" coarse-thread pocket hole screws. Then position the Seat Front/Back Rail and attach it to the Legs using 1 1/4" coarse-thread pocket hole screws. Repeat the process for the other assembly.
-
Complete the Base
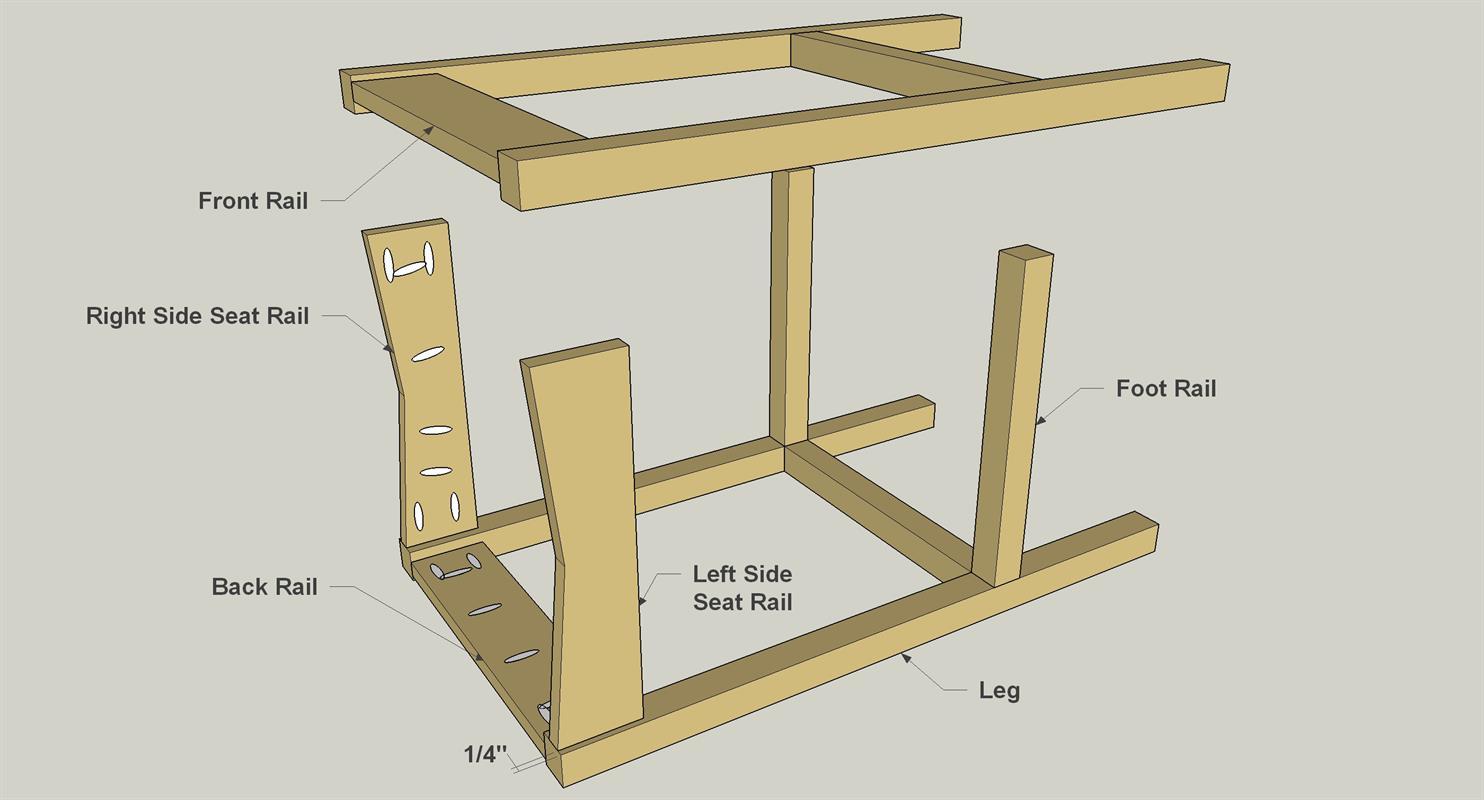
Now you can bring these two assemblies together to complete the base. Attach the final two Foot Rails using 2 1/2" course-thread pocket hole screws. Then position the Seat Side Rails, and attach them to the Legs using 1 1/4" coarse-thread pocket hole screws.
-
Add a Pair of Filler Blocks
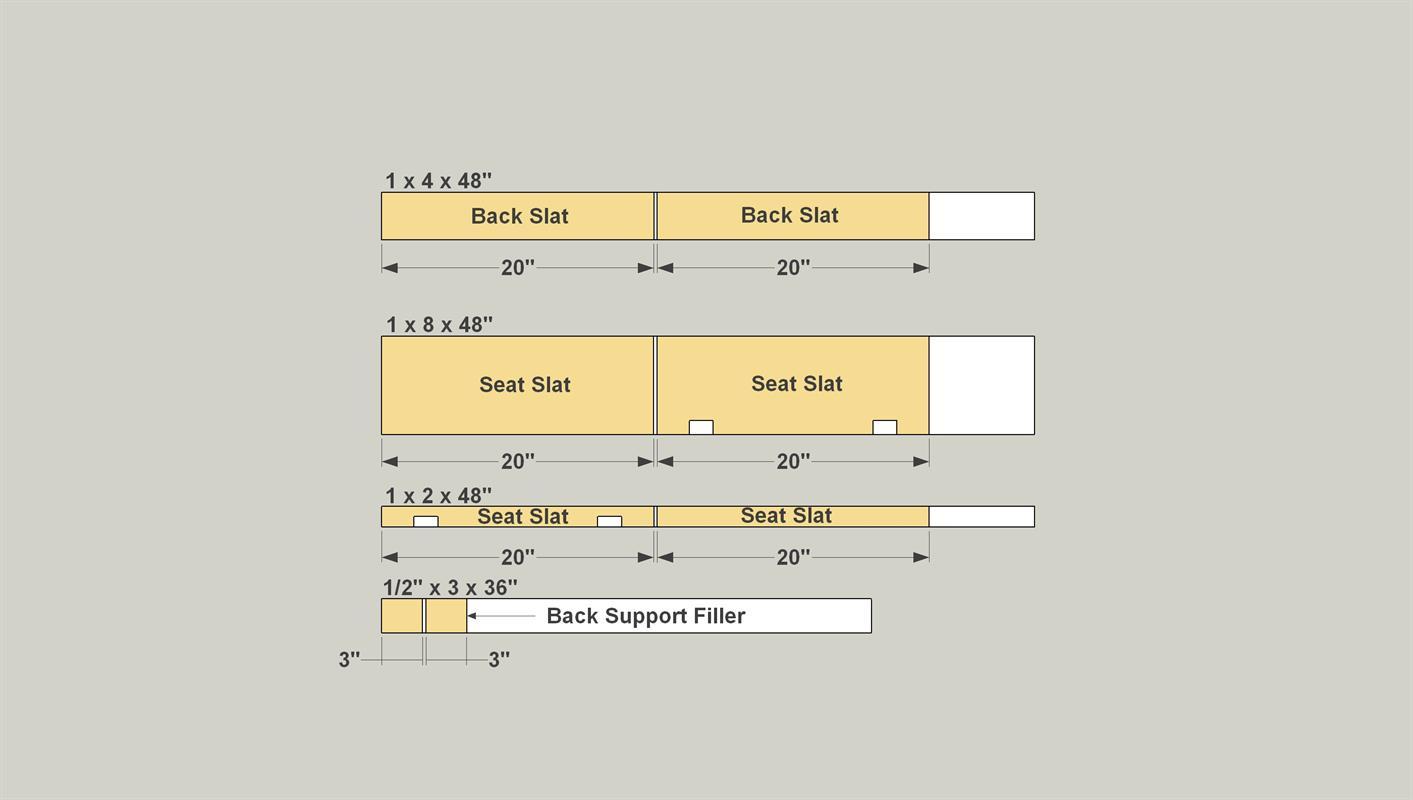
Cut two Filler Blocks from 1/2" x 3 board, as shown in the cutting diagram. Then attach the Filler Blocks to the Base with glue where shown. Clamp the Filler Blocks in place until the glue dries.
-
Create the Chair Back
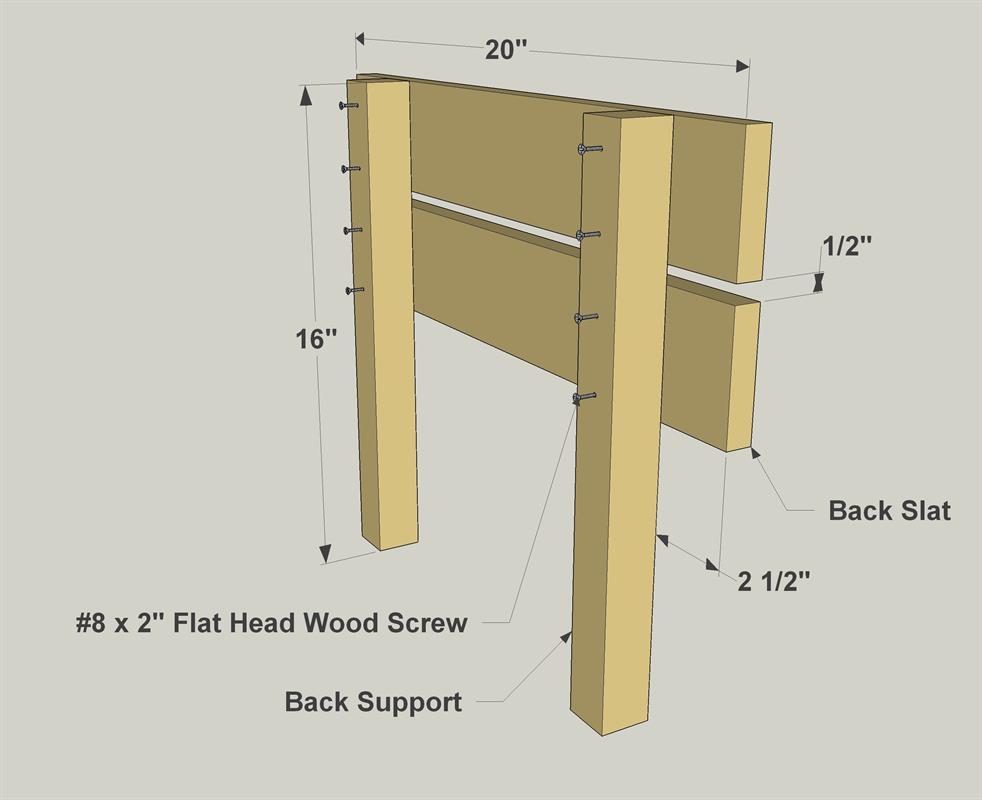
Cut two Back Slats to length from a 1 x4 board, and then cut two Back Supports to length from a 2 x 2 board, as shown in the cutting diagram. Drill pilot holes through the Back Supports where shown, and then attach the Back Supports to the Seat Slats with glue and 2" flathead wood screws, as shown.
-
Add the Back to the Base
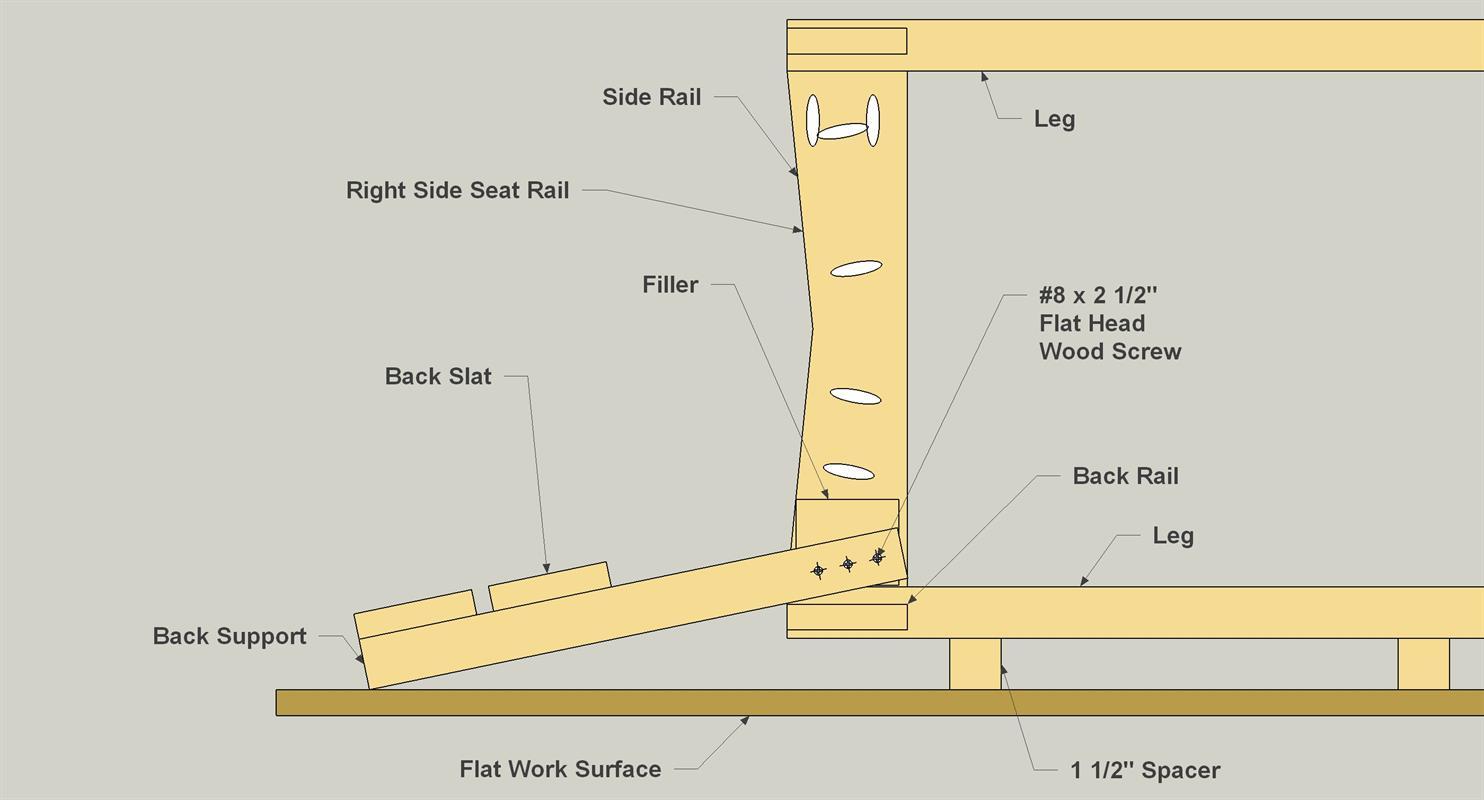
Lay the Base on 1 1/2" spacers, add some glue to the spacer blocks and place the assembled back in position as shown. Drill pilot holes and secure the back to the frame with six 2 1/2" flathead wood screws.
-
Make the Seat Slats
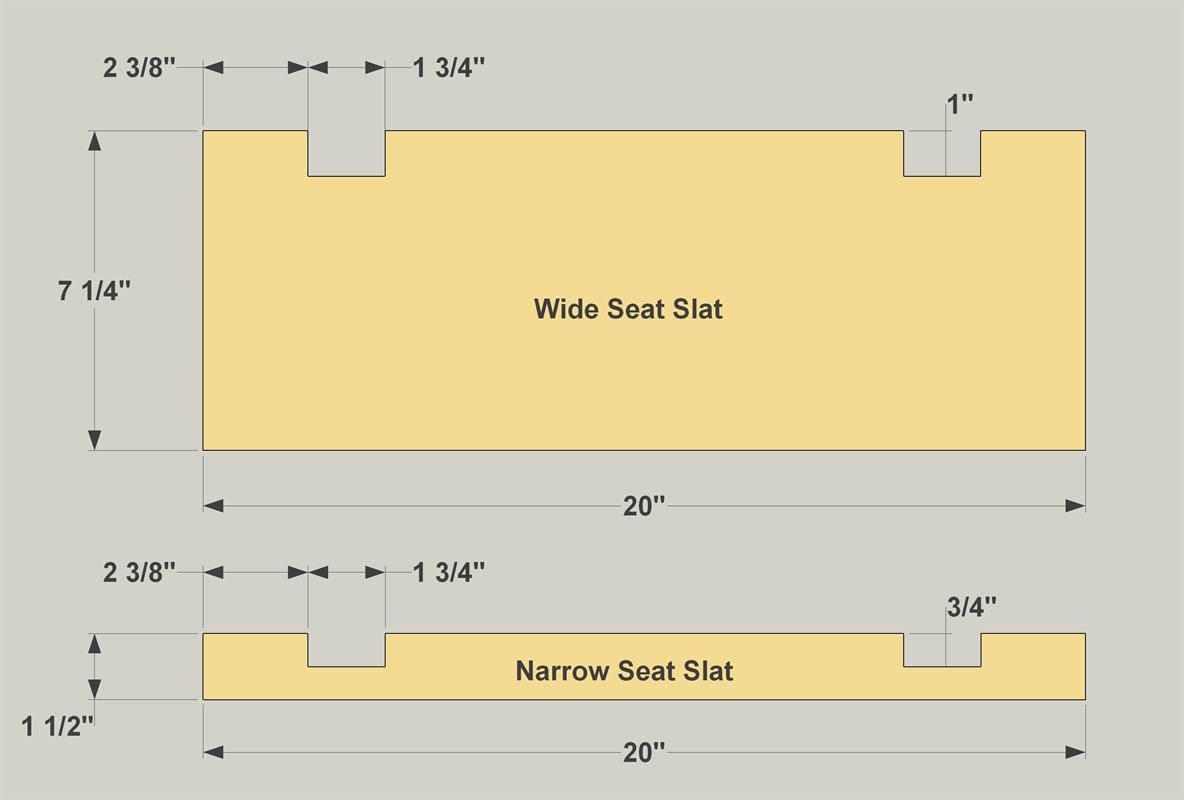
Cut two Wide Seat Slats from a 1 x 8 board, and then cut two Narrow Seat Slats from a 1 x 2 board, as shown in the cutting diagram. On one Narrow Slat and one Wide Slat, cut out the notches with a jigsaw, as shown. These will fit around the Back Supports.
-
Attach the Seat Slats
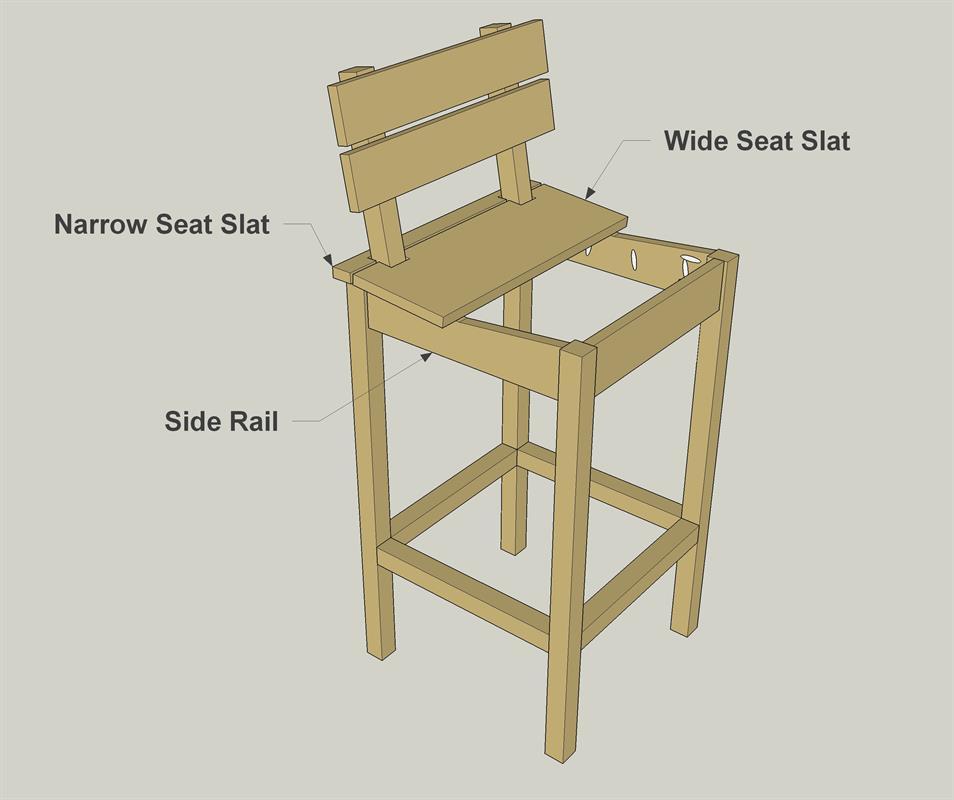
Now you can attach the Seat Slats. First, attach the Narrow Seat Slats so that they fit flush with the outside face of the Legs. Then attach them to the Seat Front/Back Rails using 1 1/4" coarse-thread pocket hole screws. Now position the Wide Slats so there are equal gaps (about 1/4") between all the slats, and screw the Wide Slats in place.
-
Sand and Finish
Once your chairs are assembled, you can give everything a final sanding. Then apply the stain or finish of your choice.


