Outdoor Serving Center
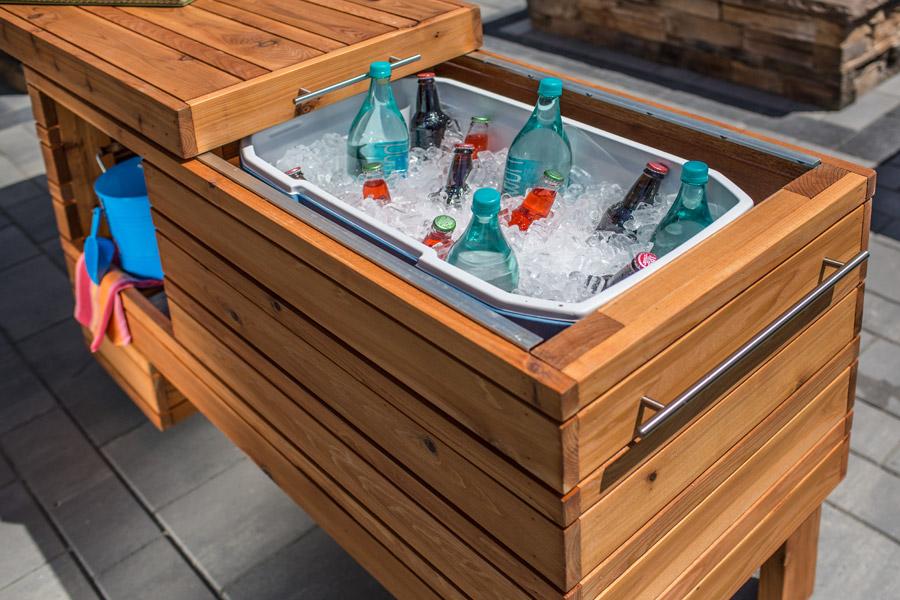
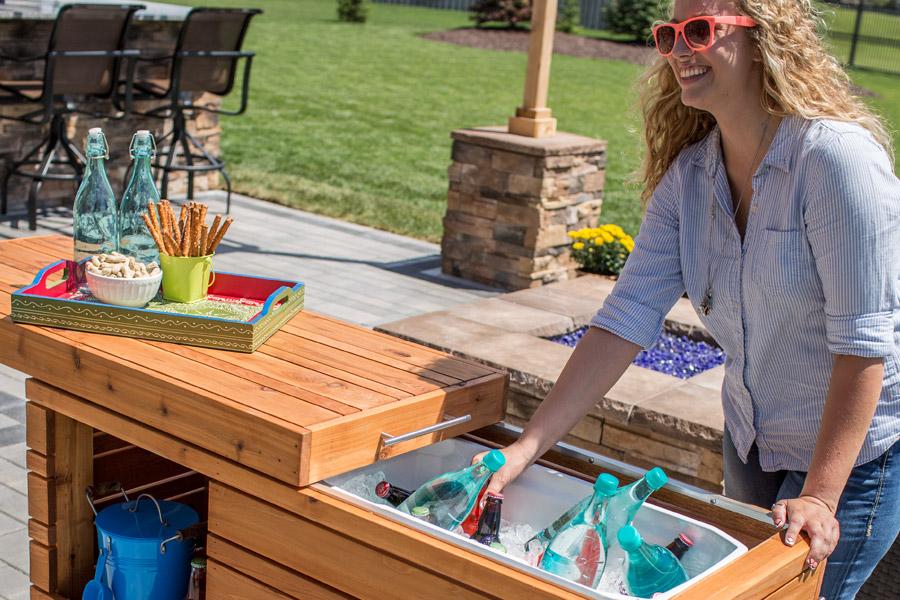
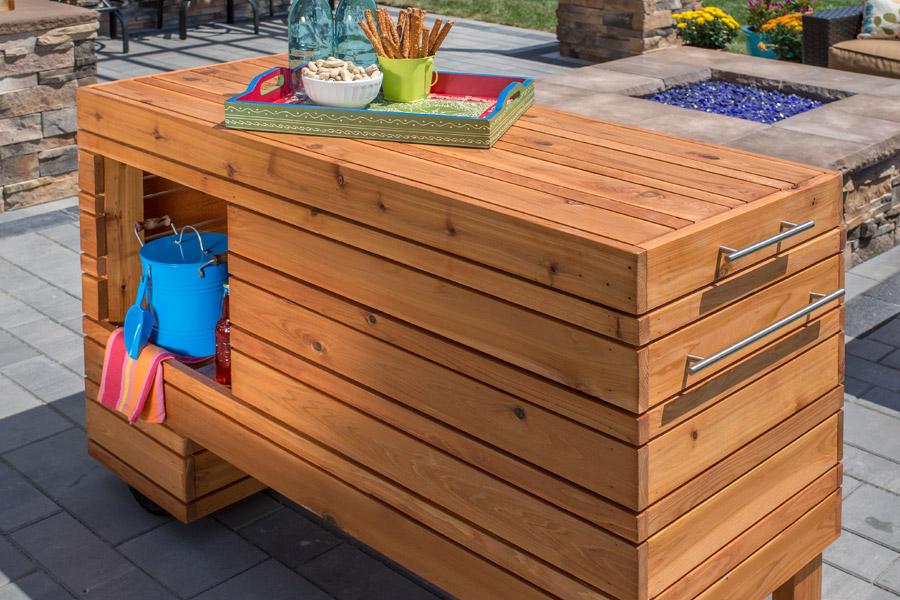
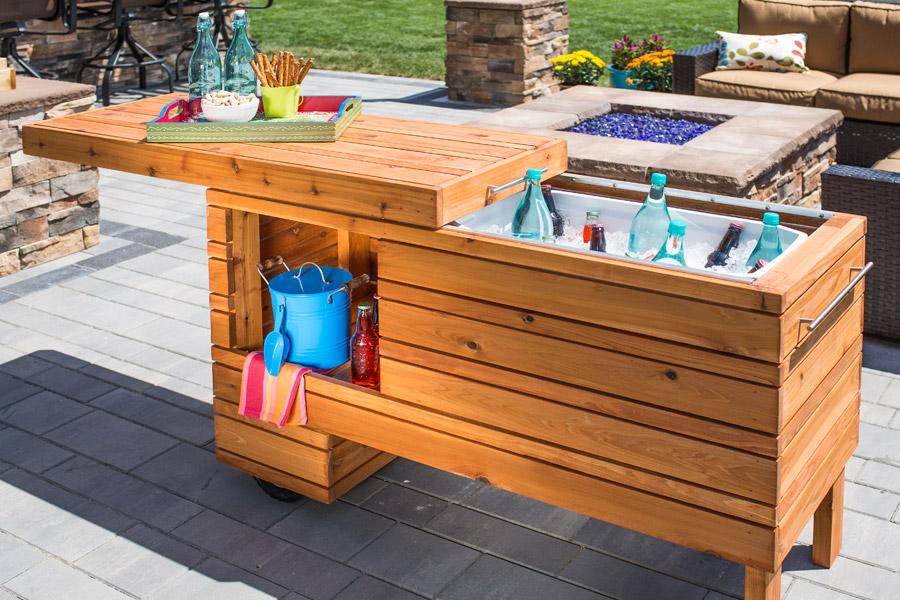
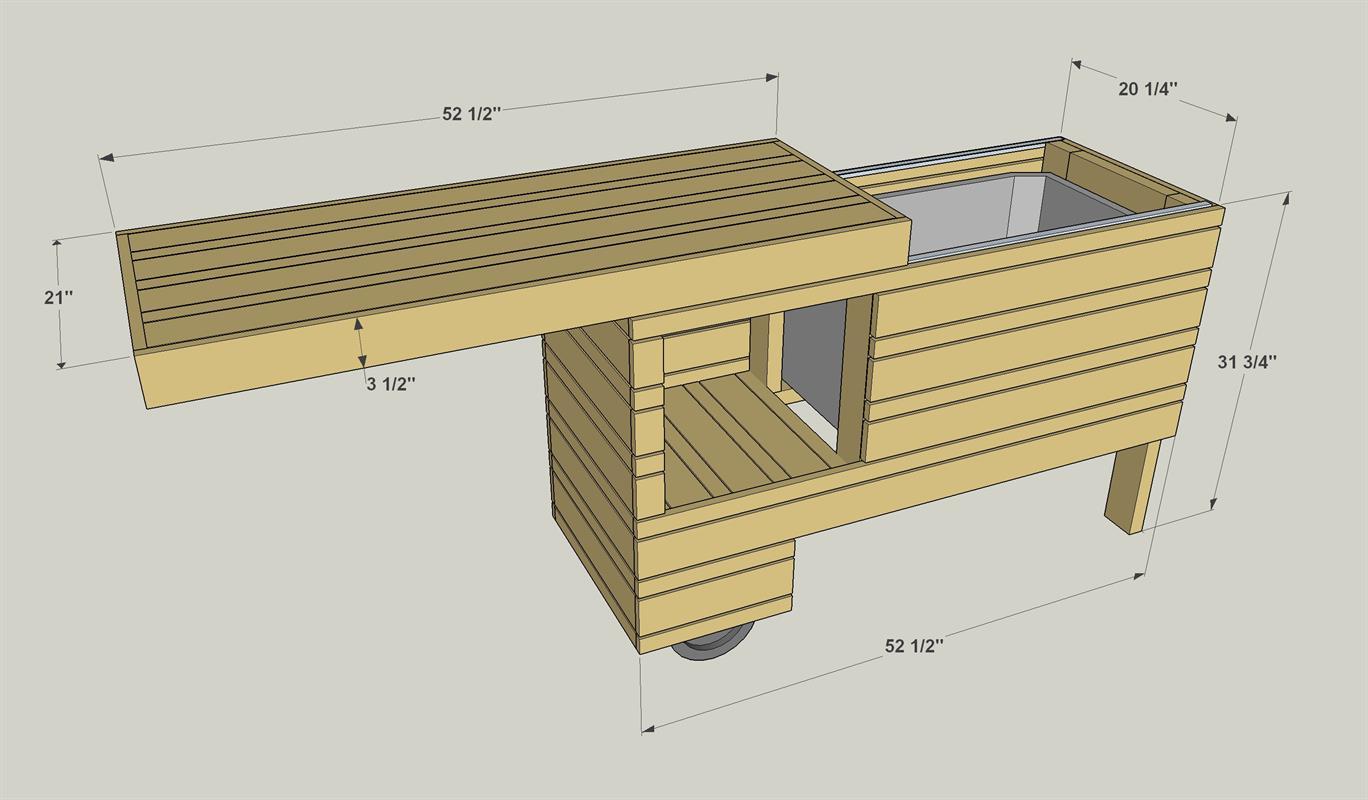
By Kreg ToolTake your outdoor entertaining up a notch with this rolling serving center. It holds a cooler plus offers shelf space for other items. The sliding top covers everything up when not in use, and it can still be used when open. Made from cedar, this project will serve you in style for years. It's designed to hold a 60-quart rectangular cooler (up to 29" long x 17" wide x 18" tall). Just remove the lid hinges so the lid lifts off.
Directions
-
Start with Frame Legs and Rails
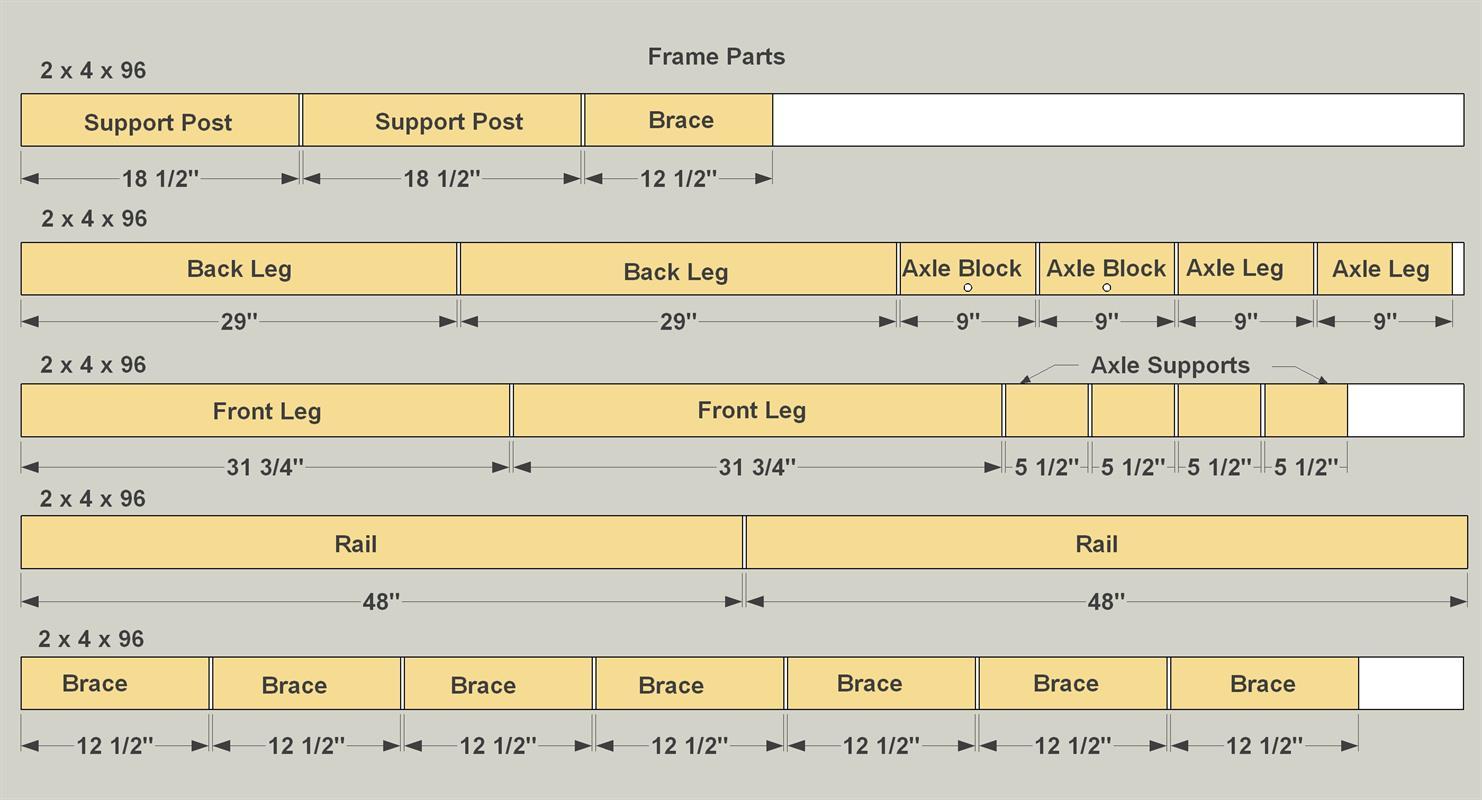
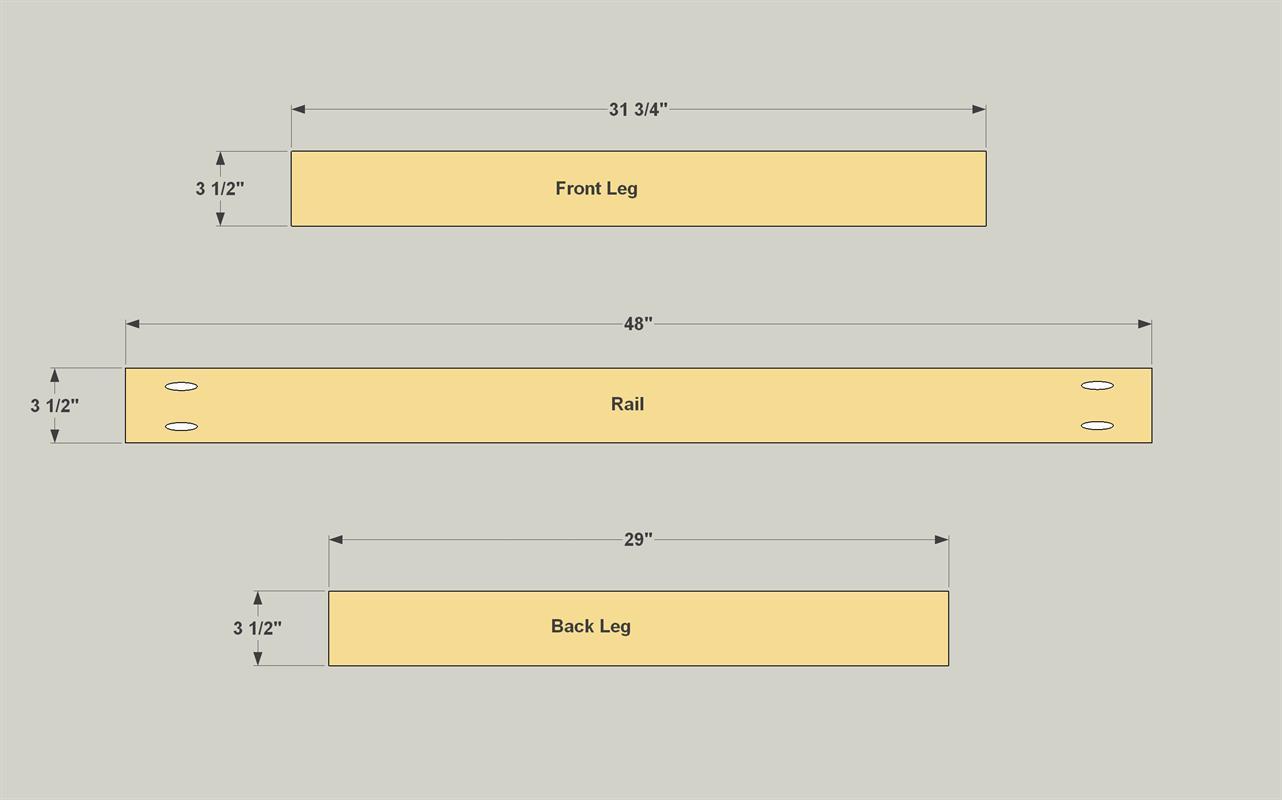
Cut the Front Legs, Back Legs, and the Frame rail to length from 2 x 4 Cedar, as shown in the cutting diagram. Then, with your pocket hole jig set for 1 1/2" material, drill pocket holes where shown.
-
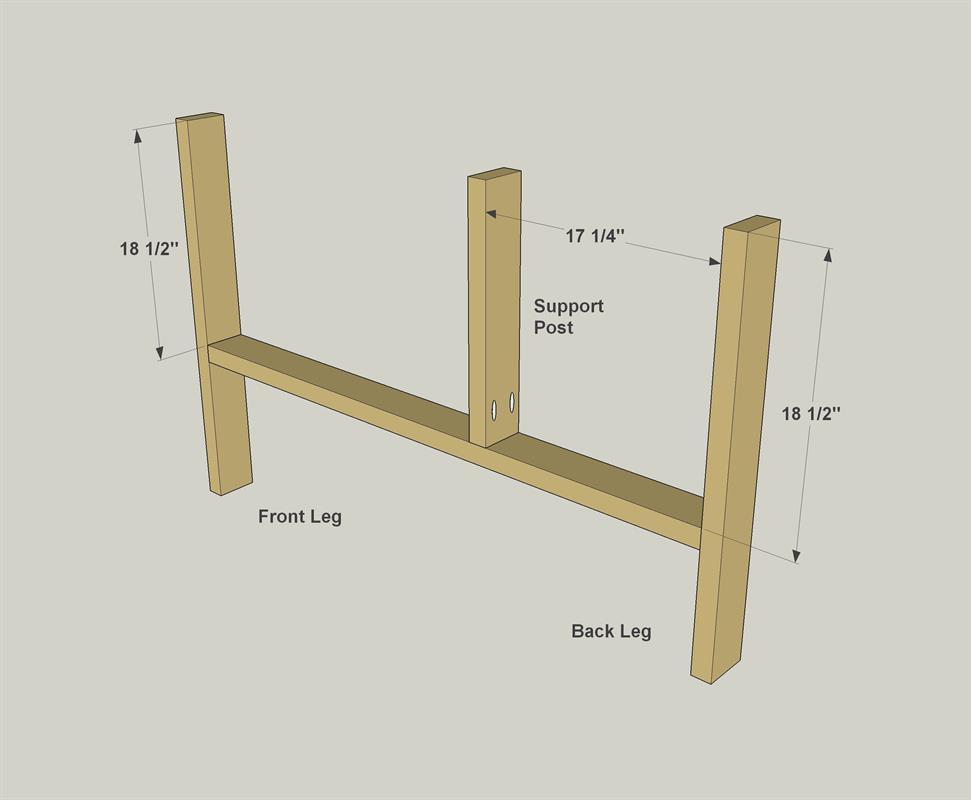
Assemble the Legs and Rails
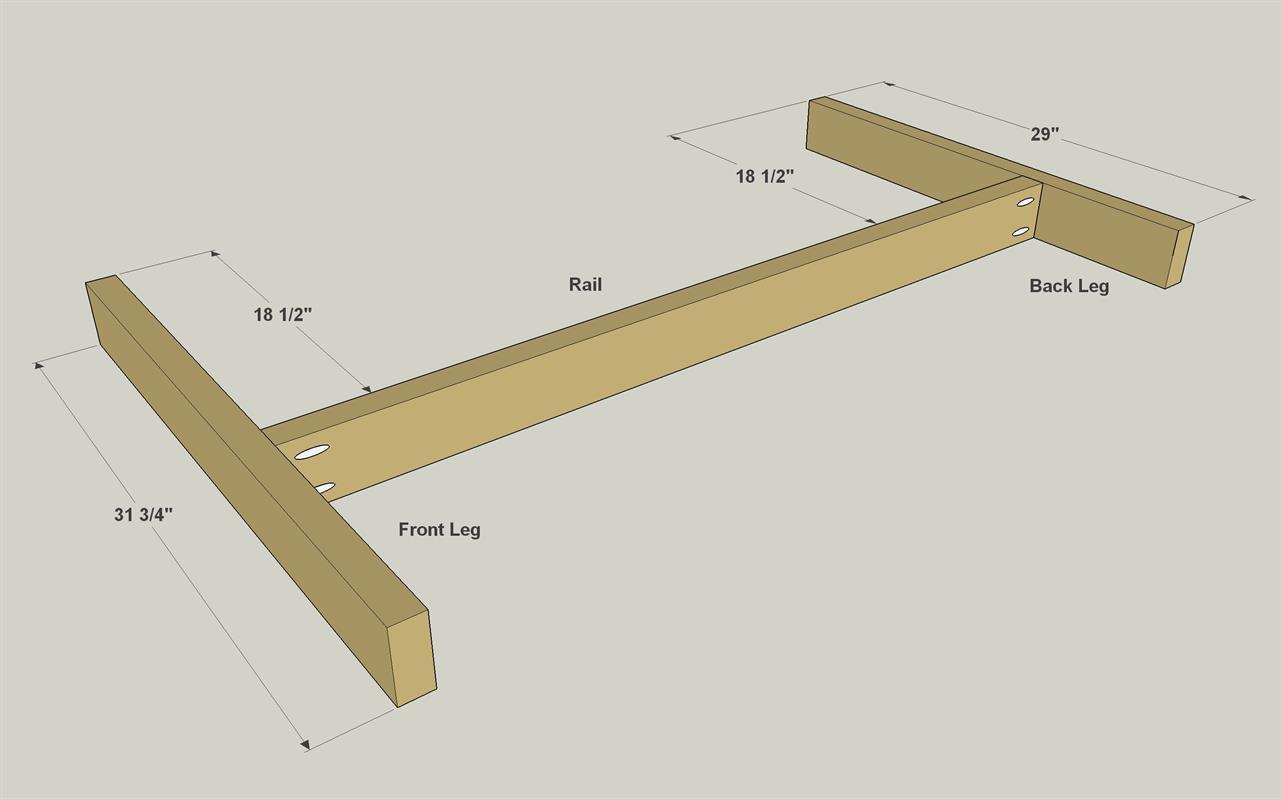
Attach the Legs to the rail as shown with 2 1/2" exterior-rated pocket hole screws.
-
Make Support Posts
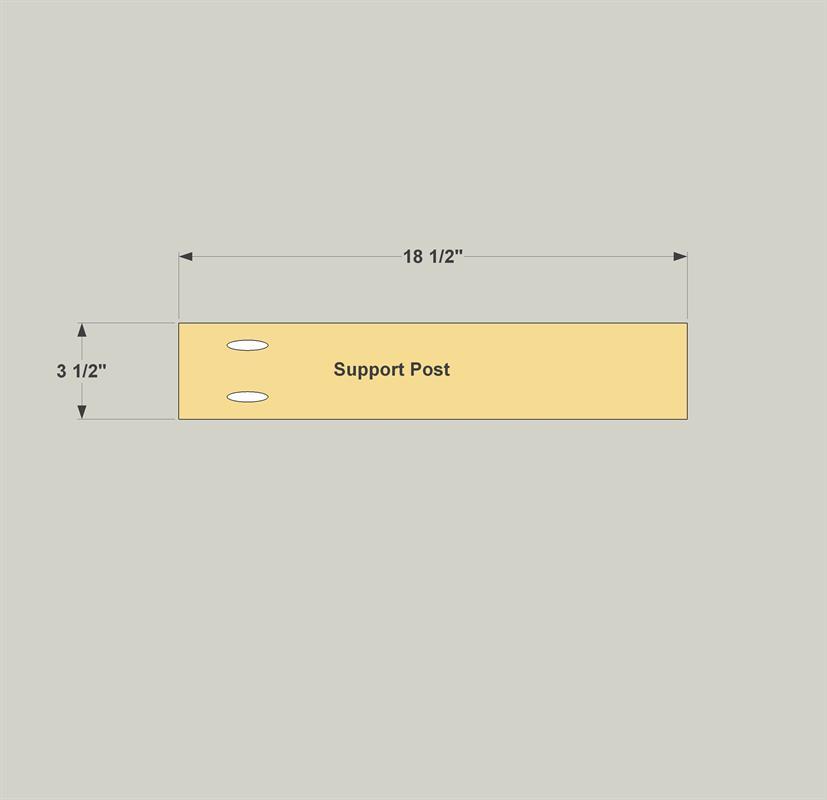
Cut two Support Posts from 2x4 Cedar boards, as shown in the cutting diagram. With your pocket hole jig set for 1 1/2" material, drill pocket holes where shown.
-
Install the Support Posts
Secure the Support Posts to the Rails, where shown, with 2 1/2" exterior-rated pocket hole screws.
-
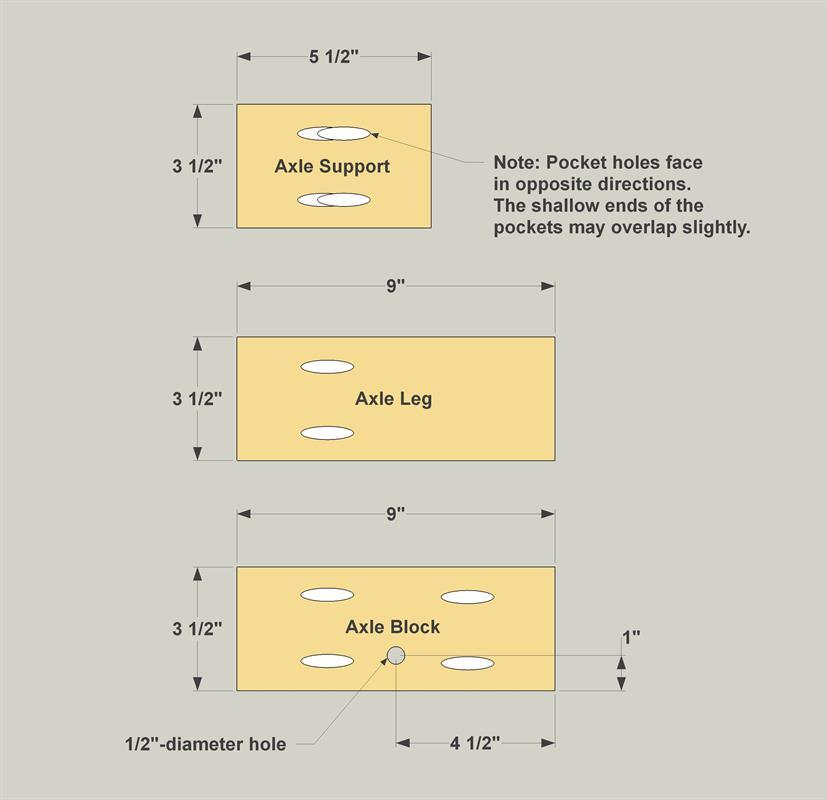
Create Axle-Mounting Parts
Cut all of the Axle mounting parts from 2x4 cedar boards, as shown in the cutting diagram. With your pocket hole jig set for 1 1/2" material, drill pocket holes where shown.
-
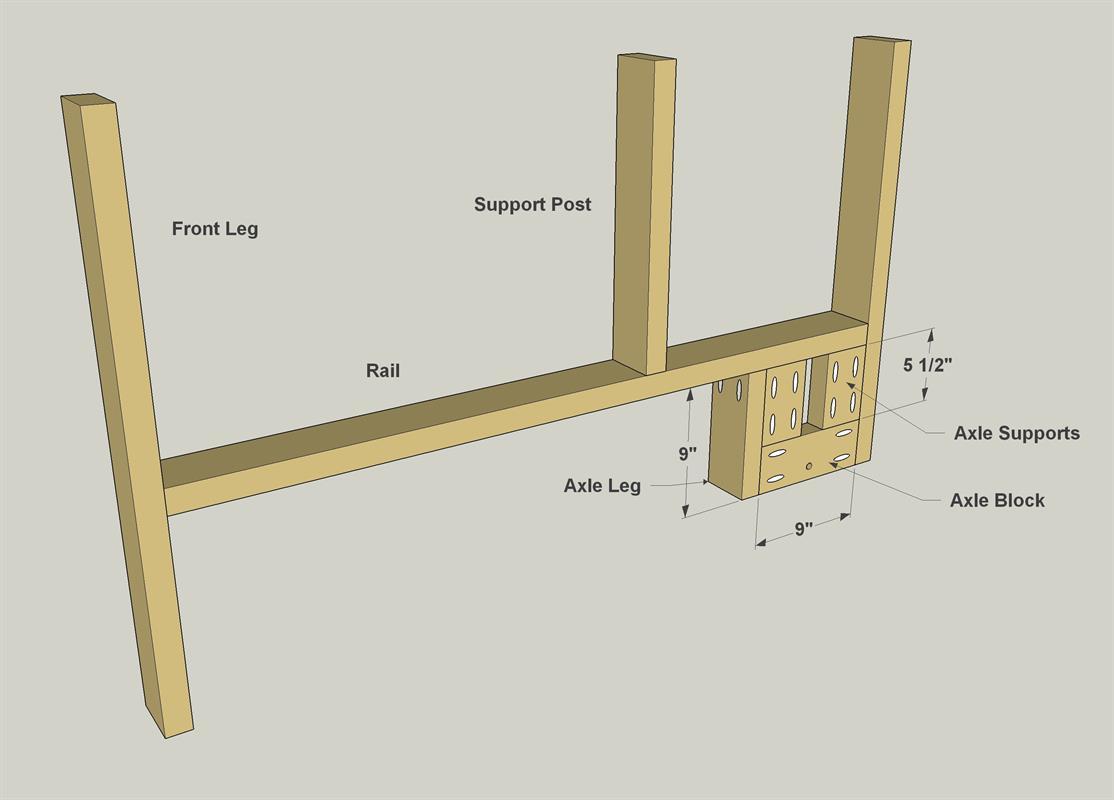
Attach the Axle Parts
Attach the Axle Block, Axle Leg and the Axle Supports to the rail as shown with 2 1/2" exterior-rated pocket hole screws.
-
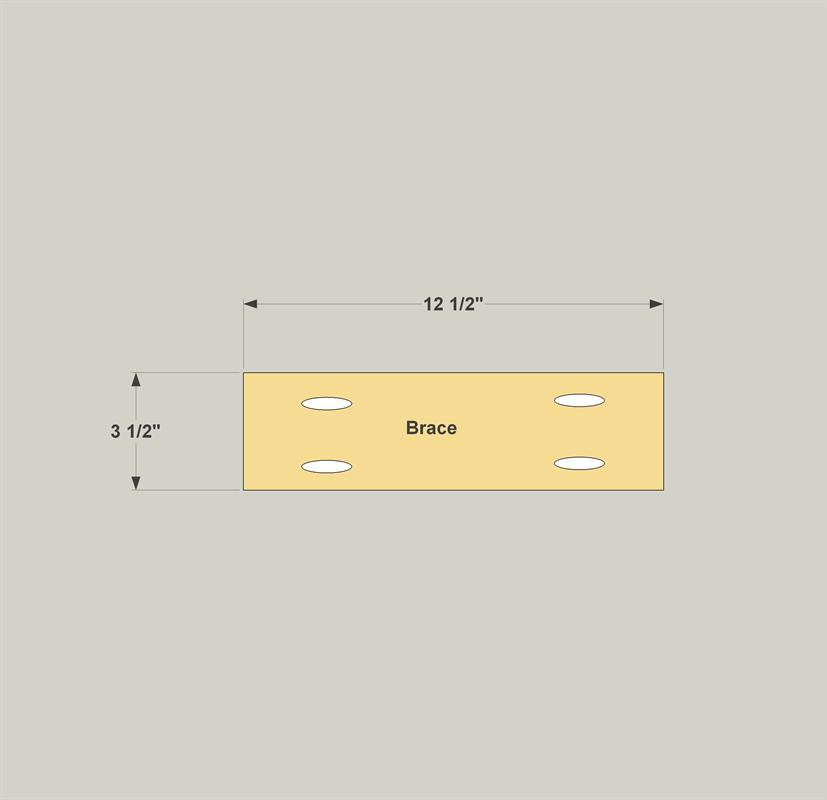
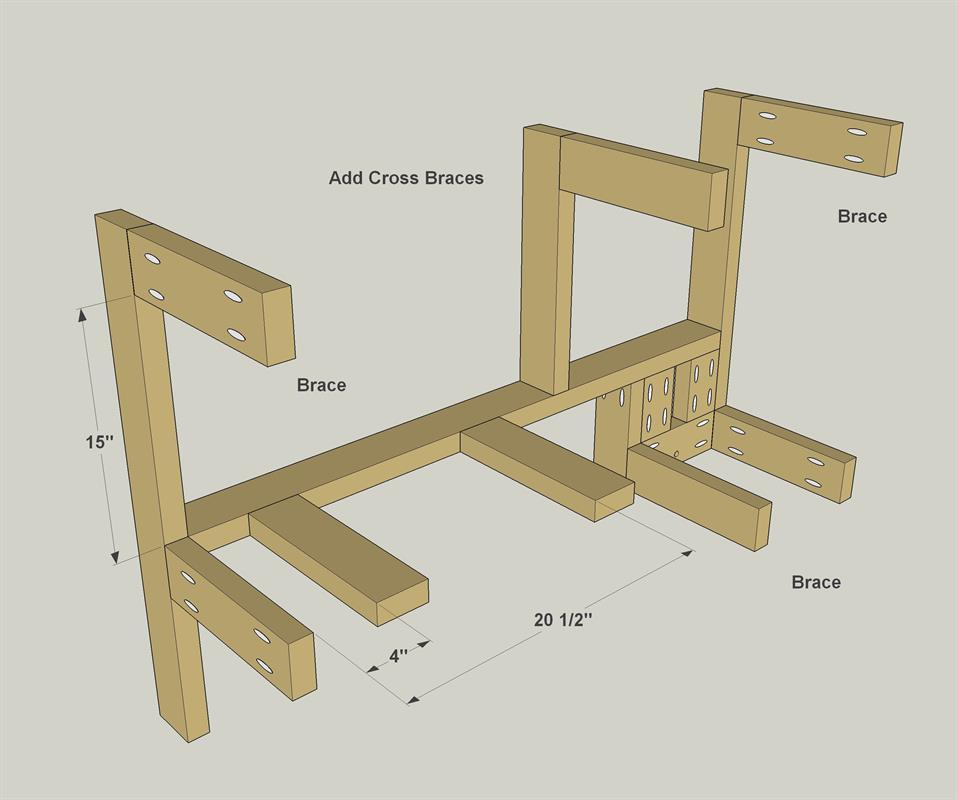
Make Frame Braces
Cut eight Braces from 2x4 Cedar boards, as shown in the cutting diagram. Drill pocket holes where shown.
-
Add the Braces
Attach the Braces to the Rail and Legs as shown and secure with 2 1/2" exterior-rated pocket hole screws.
-
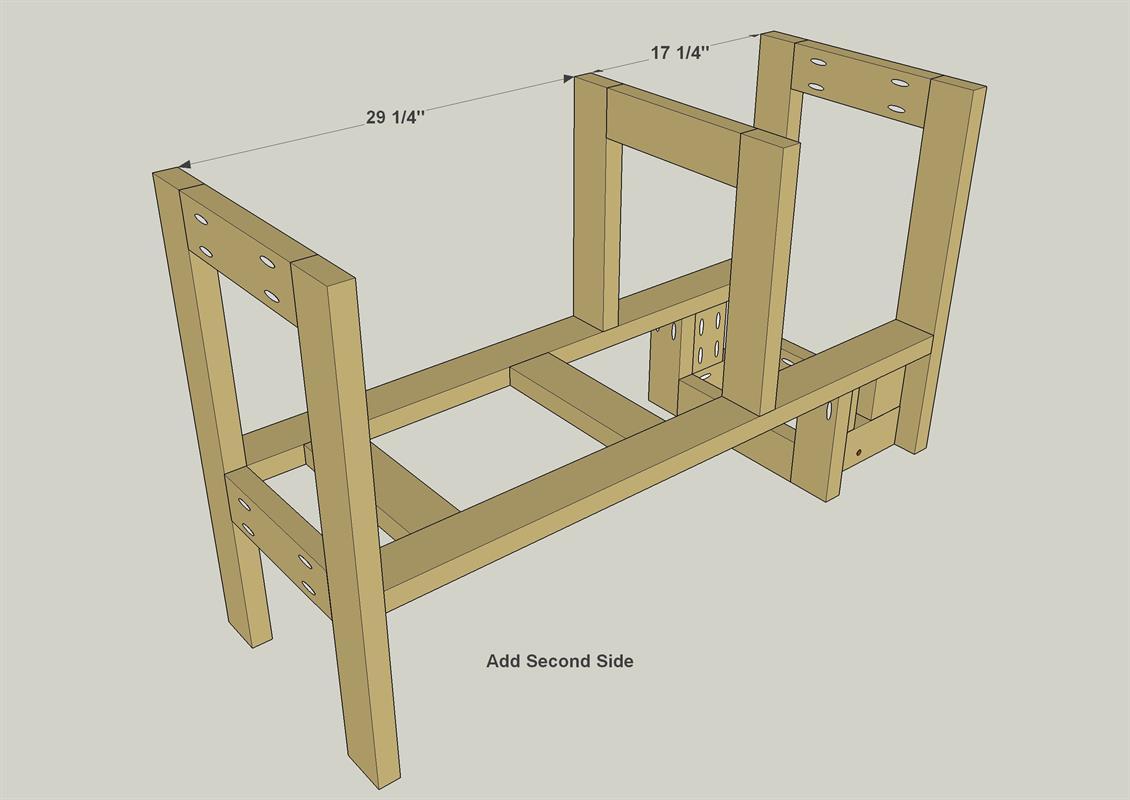
Add the Second Side
Now you can complete the frame by attaching the other Rail, Leg and Axle Assembly to the Braces with 2 1/2" exterior-rated pocket hole screws, as shown.
-
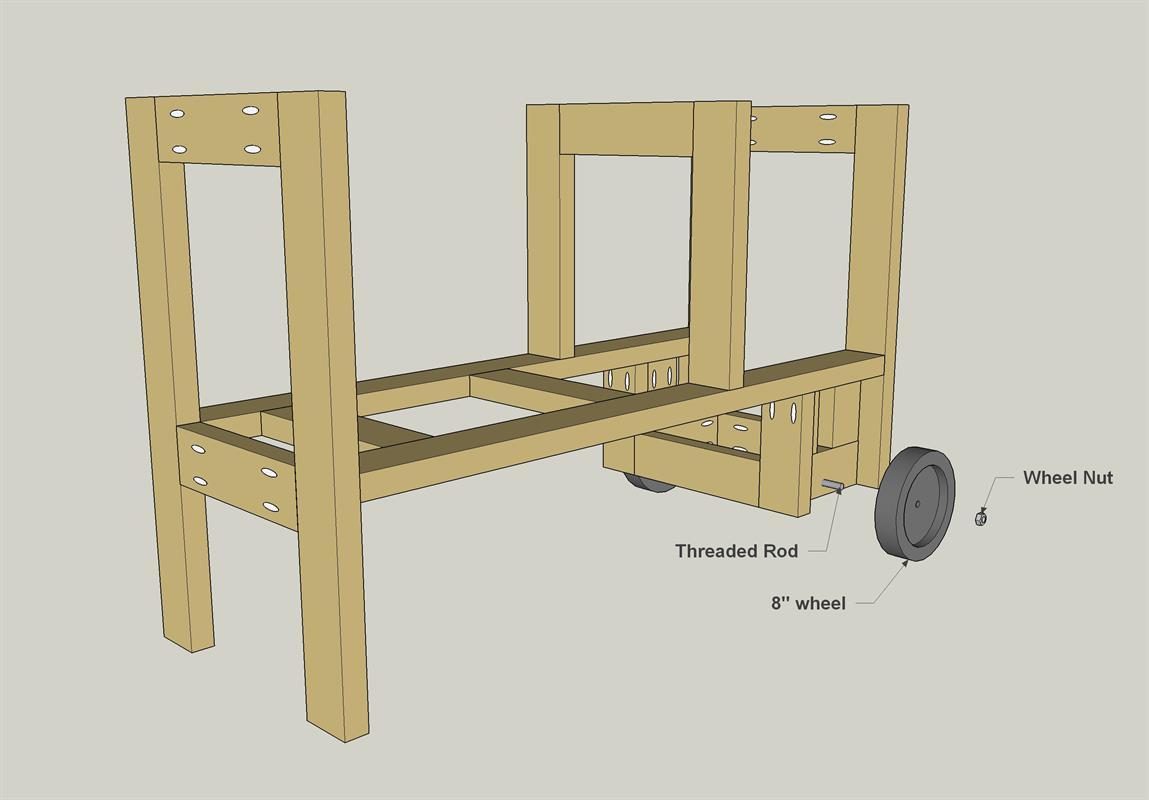
Add an Axle and Wheels
Cut an axle 19" long from threaded rod. Then feed it through the holes in the Axle Block, and attach the 8" Lawnmower wheels making sure they spin freely but are secure.
-
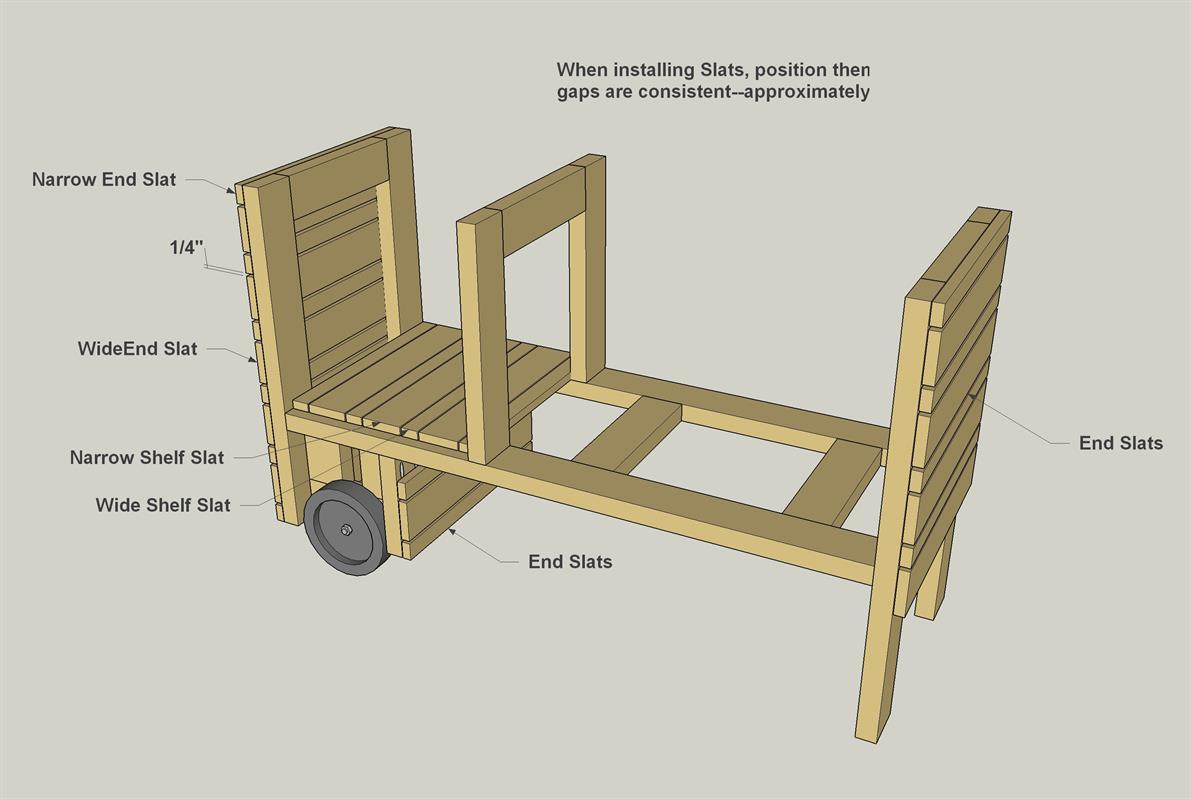
Add End Slats and a Shelf
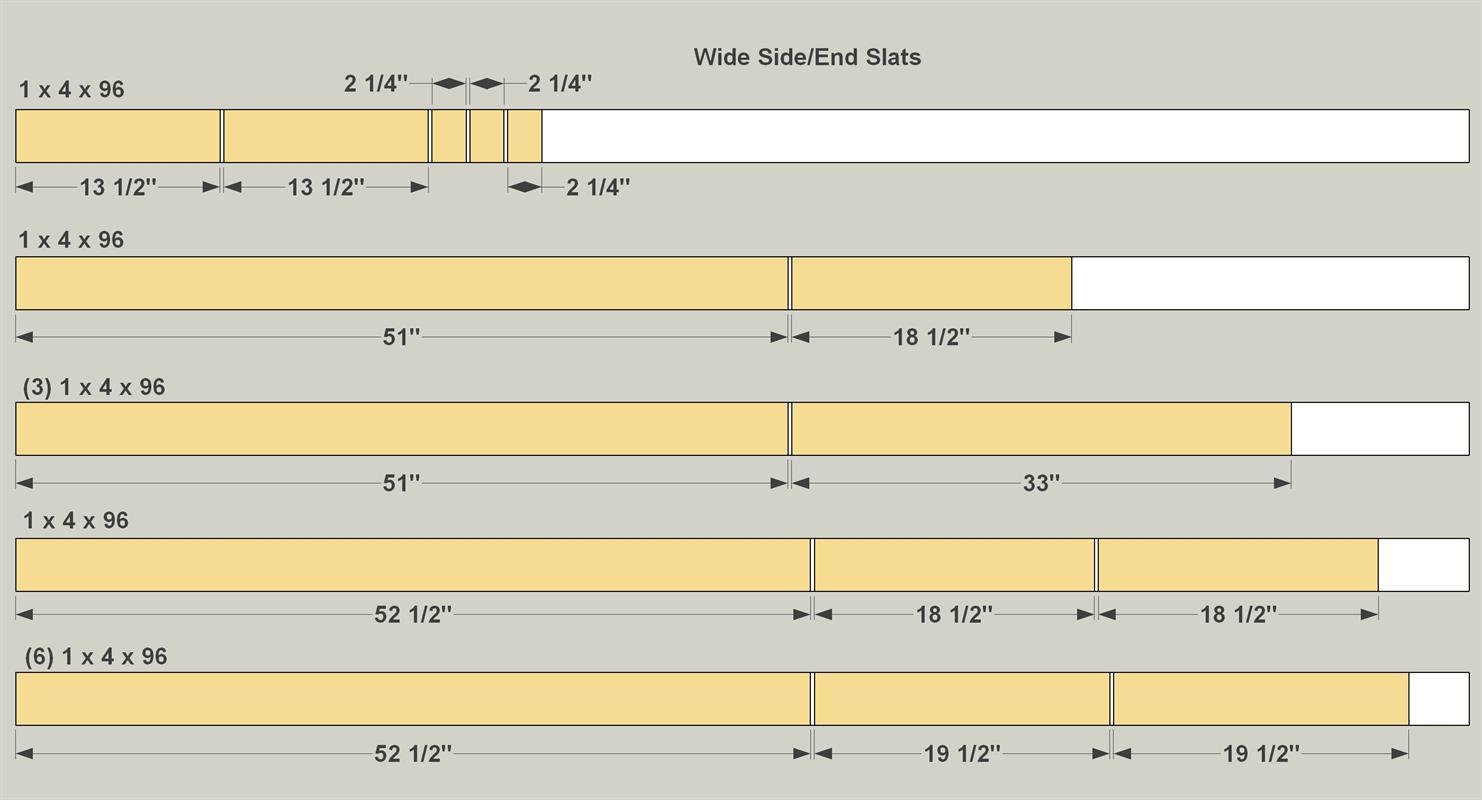
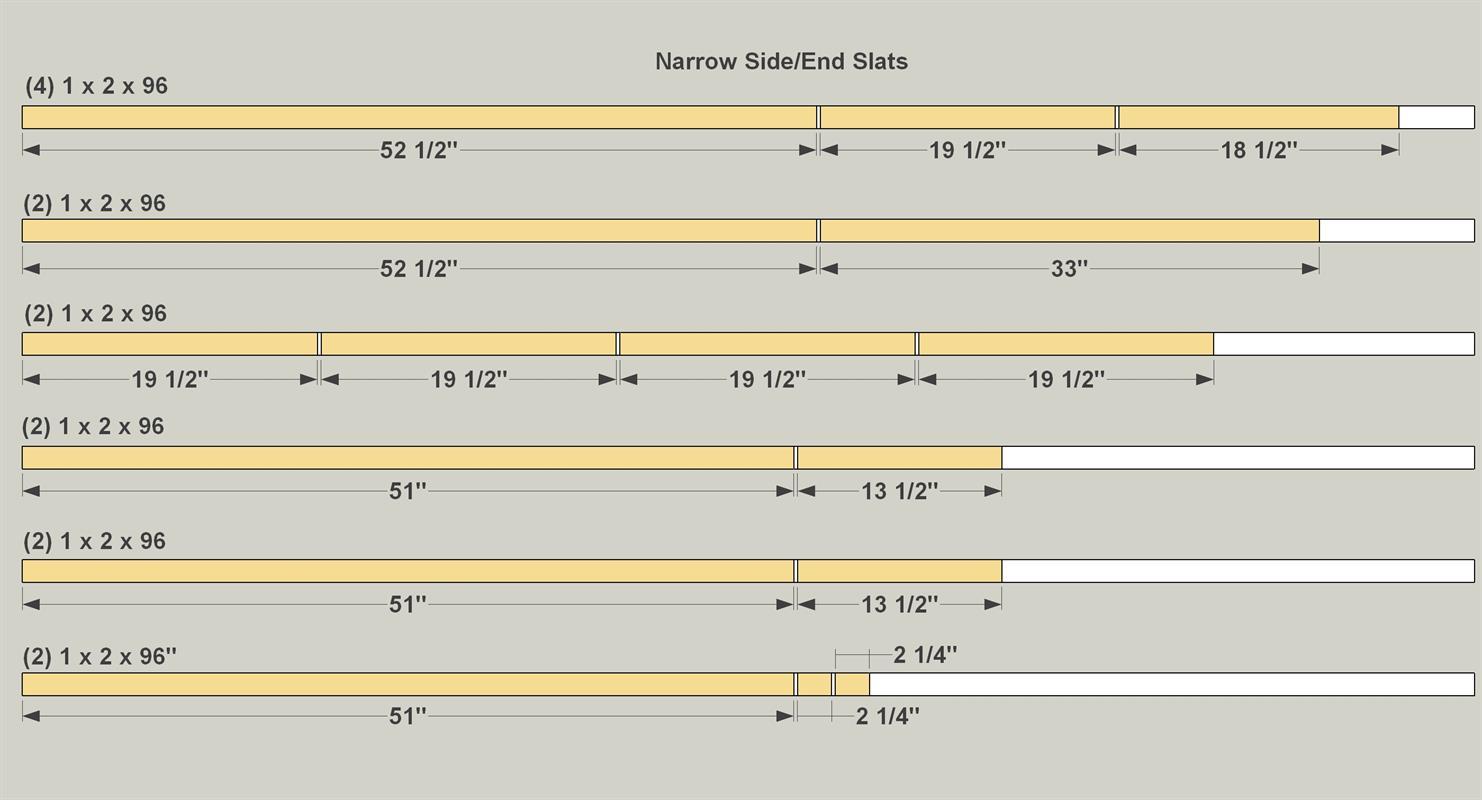
From 1x4 and 1x2 Cedar, cut the Narrow and Wide End Slats, as well as Narrow and Wide Shelf Slats, as shown in the cutting diagram. Note that the lengths are shown in the cutting diagram, but you should double-check your frame assembly, and cut these parts to match the overall width of your frame. Then secure the End Slats and Shelf Slats to the frame with glue and brad nails.
-
Add an Aluminum Track
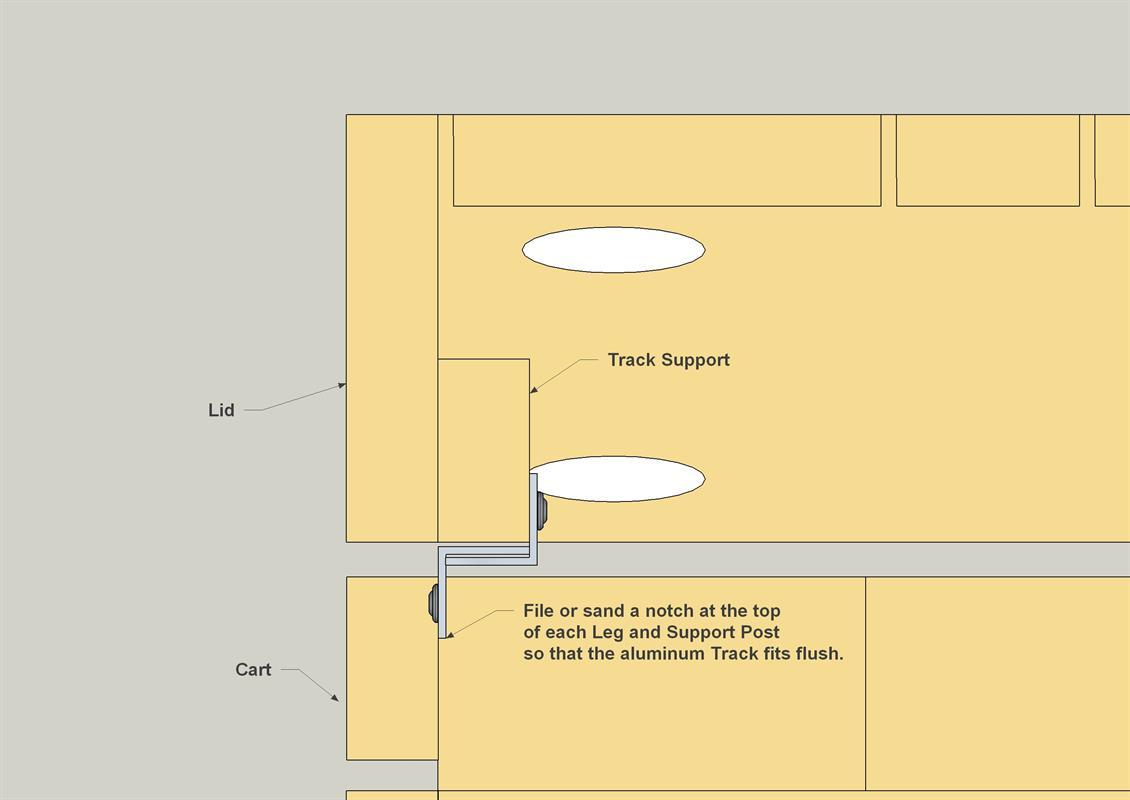
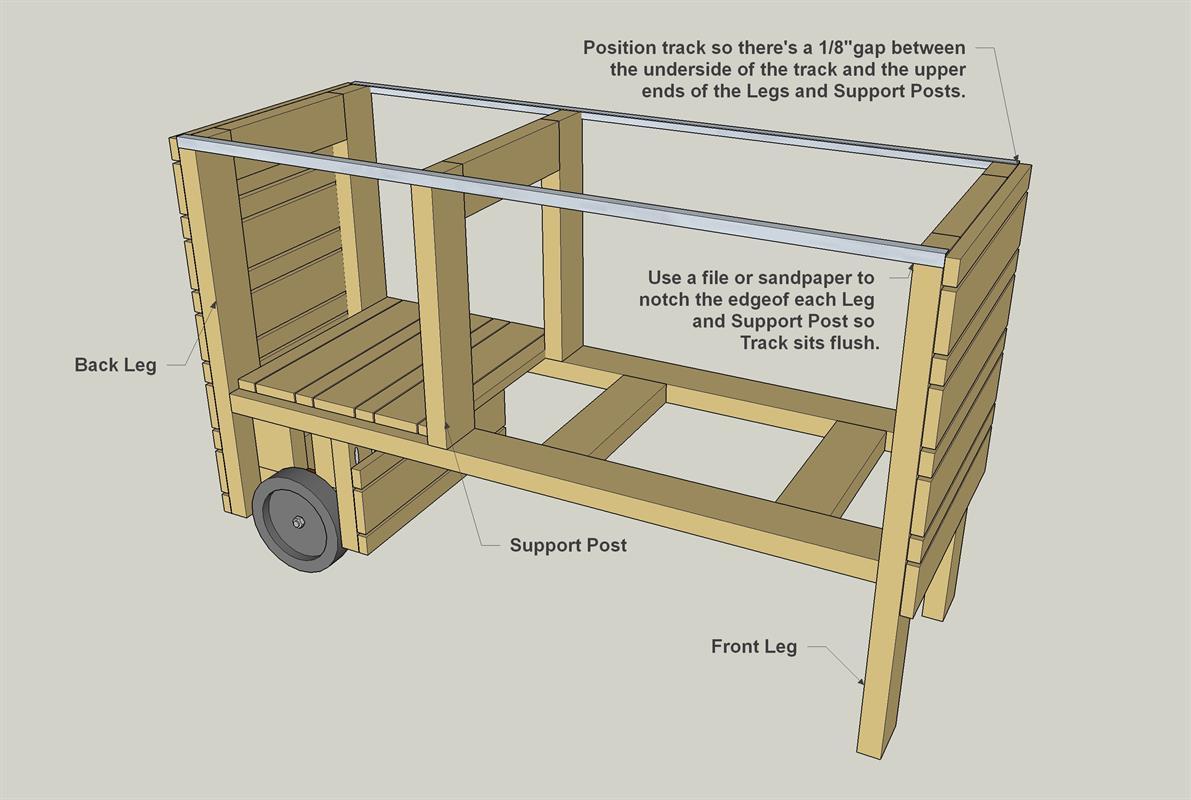
Cut two pieces of aluminum track to 51" long. Then you can secure them to the frame, as shown. First, file or sand slight notches in the Legs and Support Posts, as shown.
-
Attach the Bottom Track
Now you can attach the bottom track using 1 1/2" sheet-metal screws. Note that the Track should have a 1/8" gap between the aluminum and the ends of the Legs and Support Posts.
-
Add Side Slats
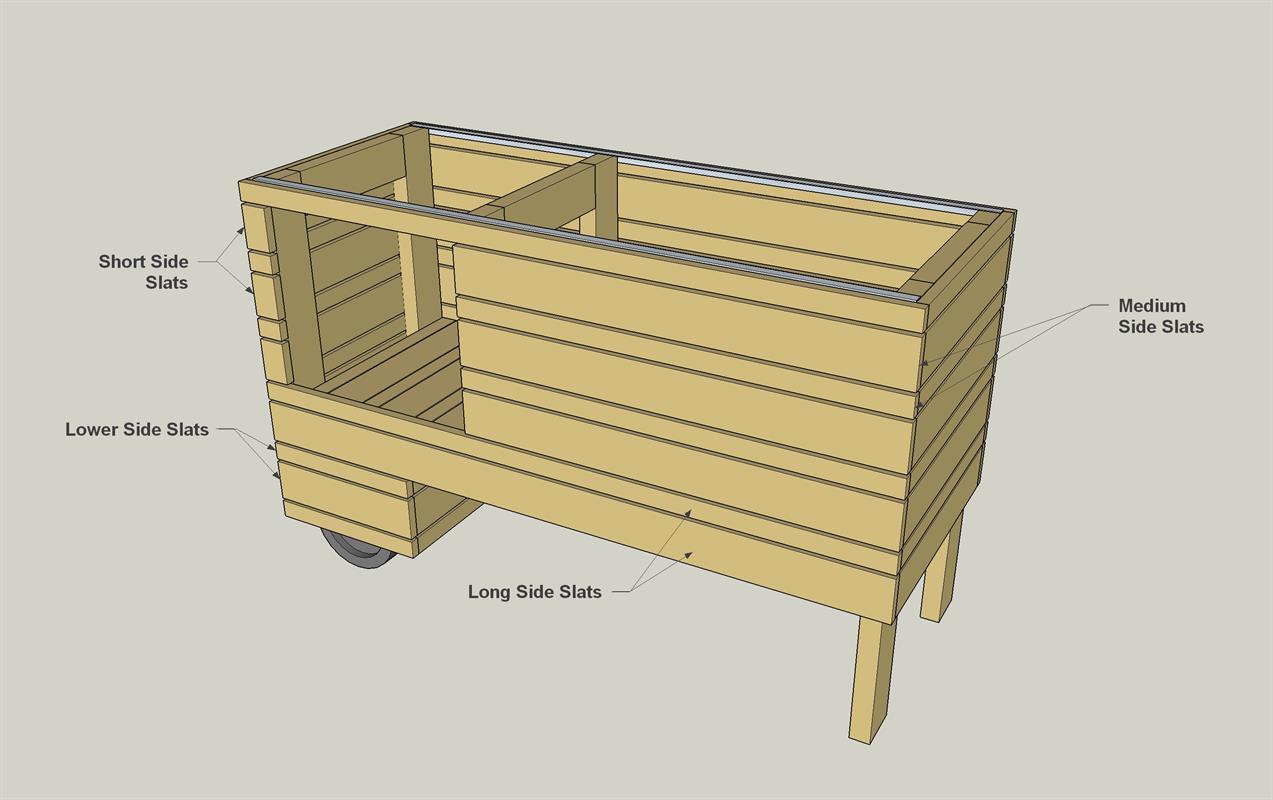
Cut Narrow and Wide versions of the Long Side Slats, Medium Side Slats, and Short Side Slats from 1x2 and 1x4 cedar material, as shown in the cutting diagram. Then you can attach them to the frame using glue and brad nails.
-
Begin Building the Top
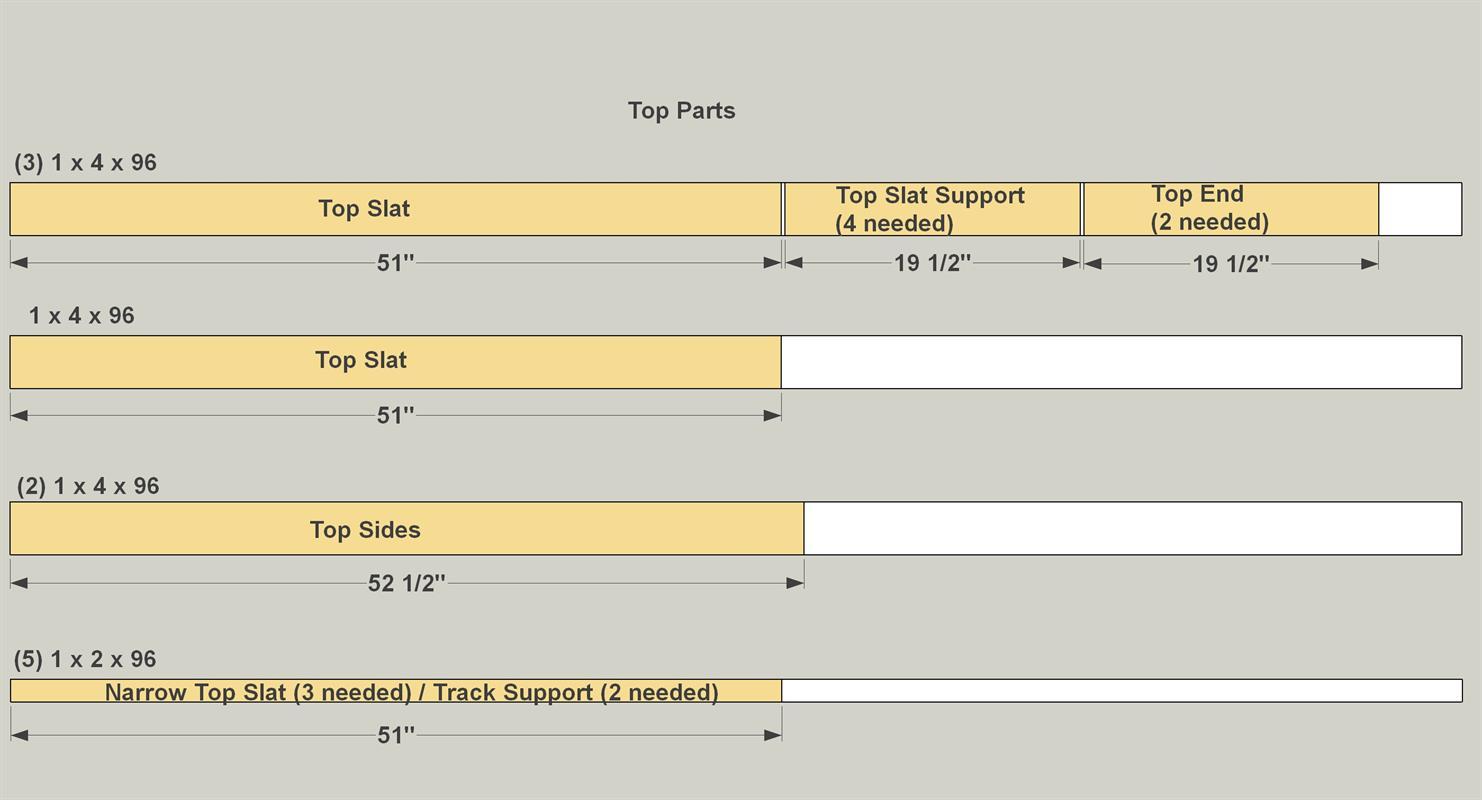
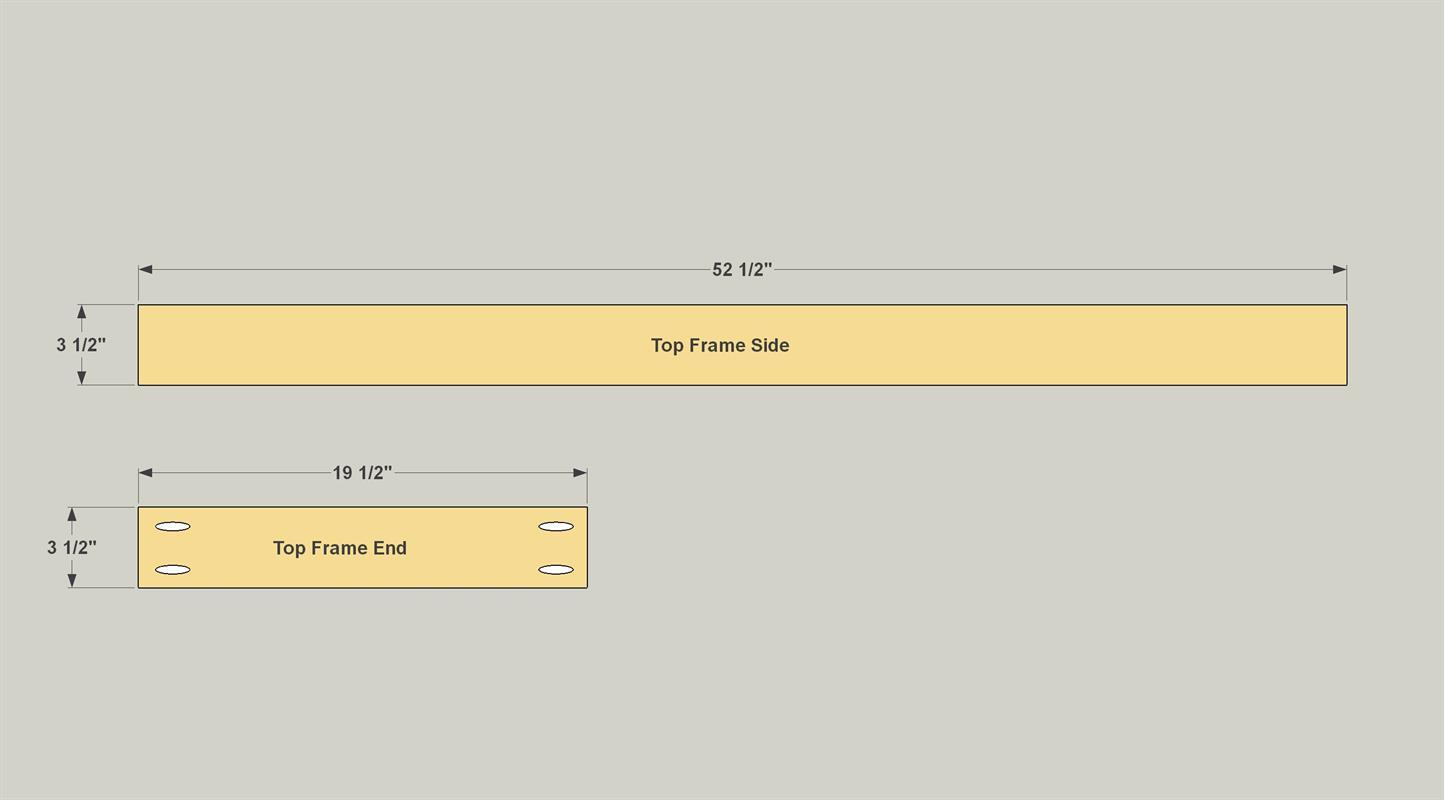
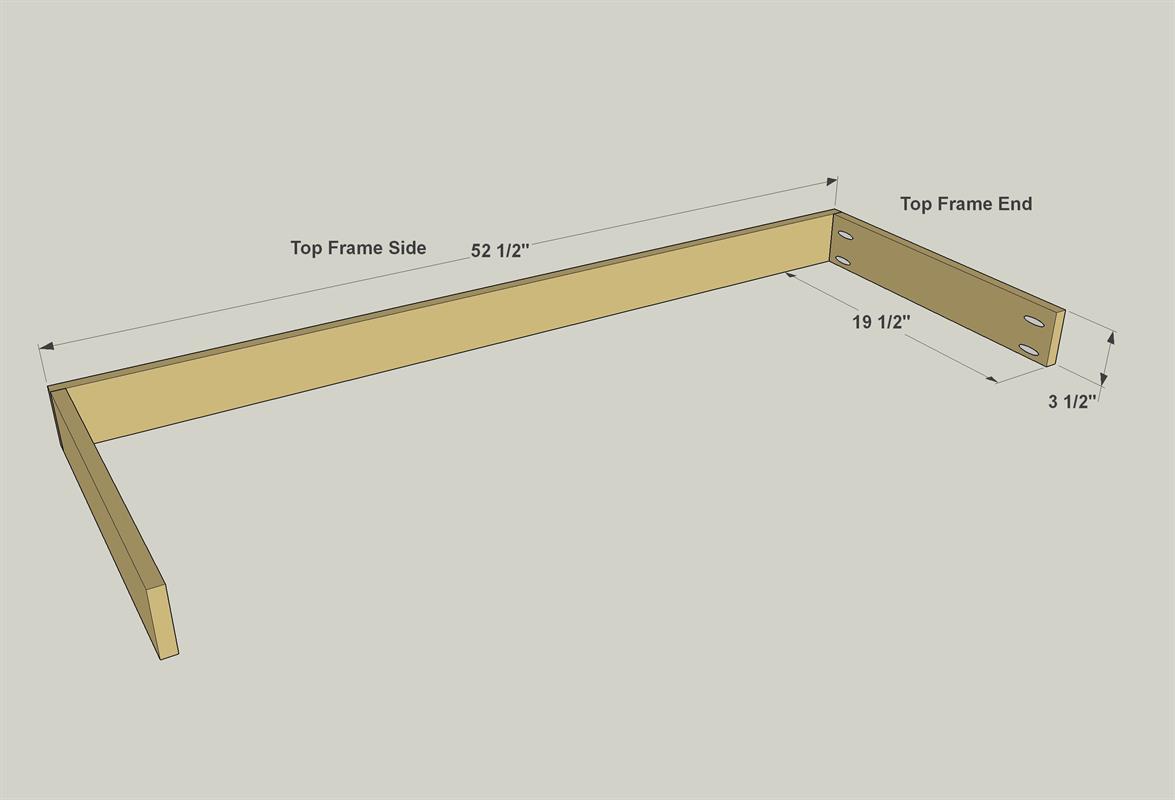
Cut the Top Ends and Top Sides from 1x4 cedar as shown in the cutting diagram. With your pocket hole jig set for 3/4" material, drill pocket holes in the Top Ends, as shown.
-
Assemble the Top Frame
Secure the two Top Ends to the Top Sidess with 1 1/4" exterior-rated pocket hole screws to create the Frame.
-
Make Slat Supports
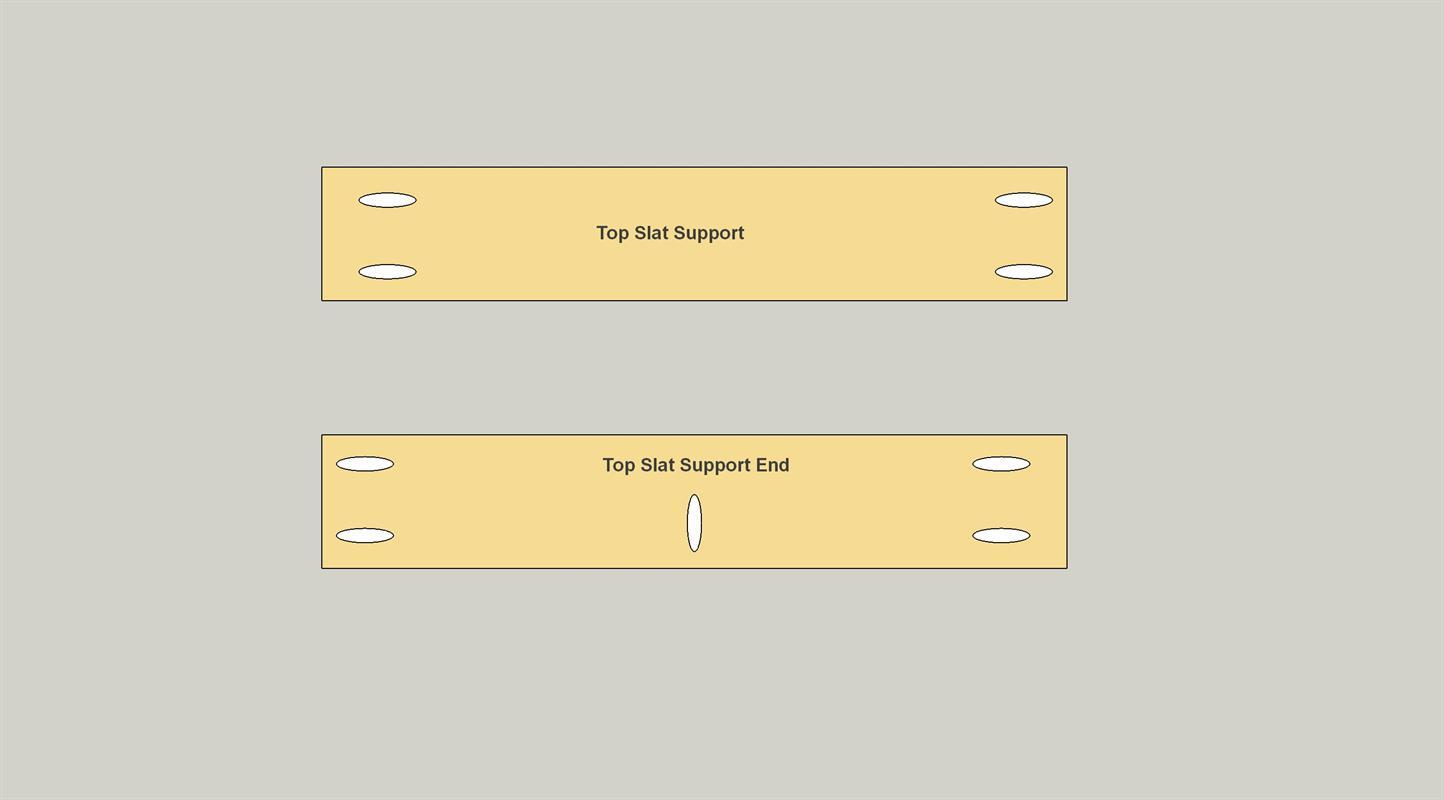
Cut four Slat Supports to length from 1x4 boards, as shown in the cutting diagram. With your pocket hole jig set for 3/4" material, drill pocket holes in the ends of all four pieces, and along one edge of two pieces.
-
Install the Slat Supports
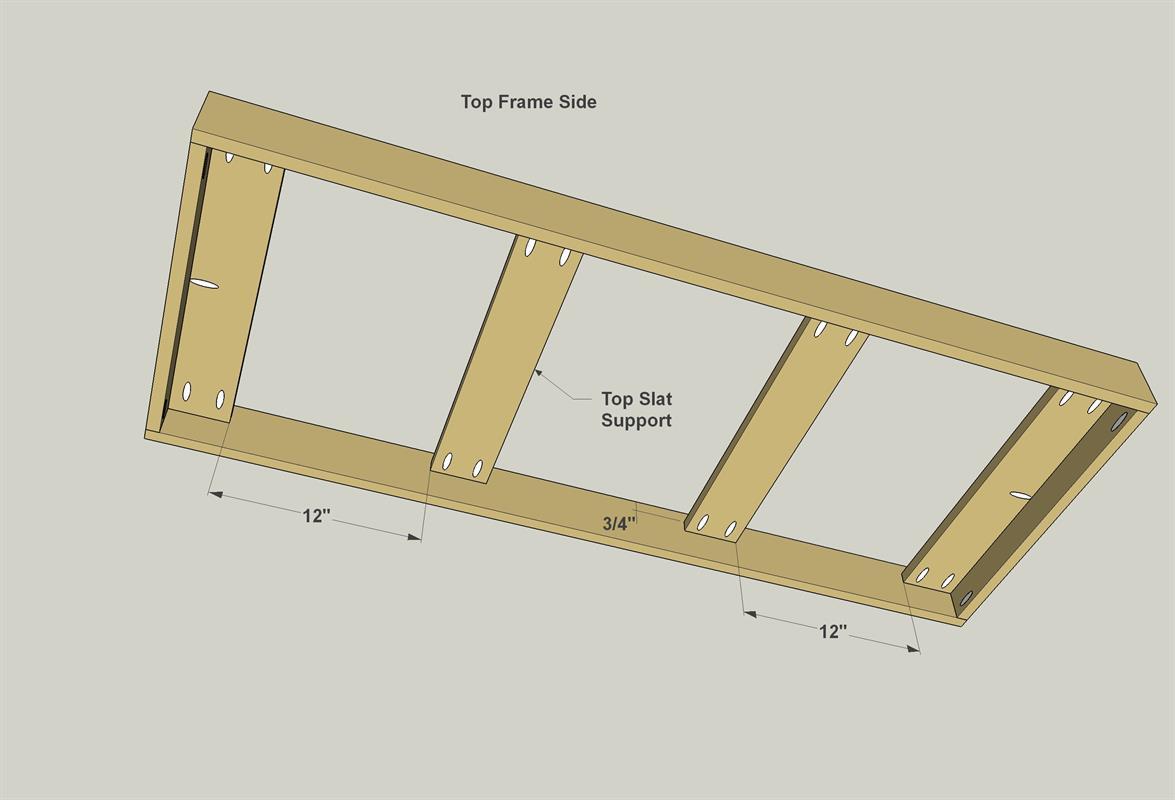
Install the four Slat Supports to the Top Frame where shown with 1 1/4" exterior-rated pocket hole screws. Make sure to note the Supports are spaced 3/4" down so that the slats will fit flush when they're installed.
-
Add a Top Track Support
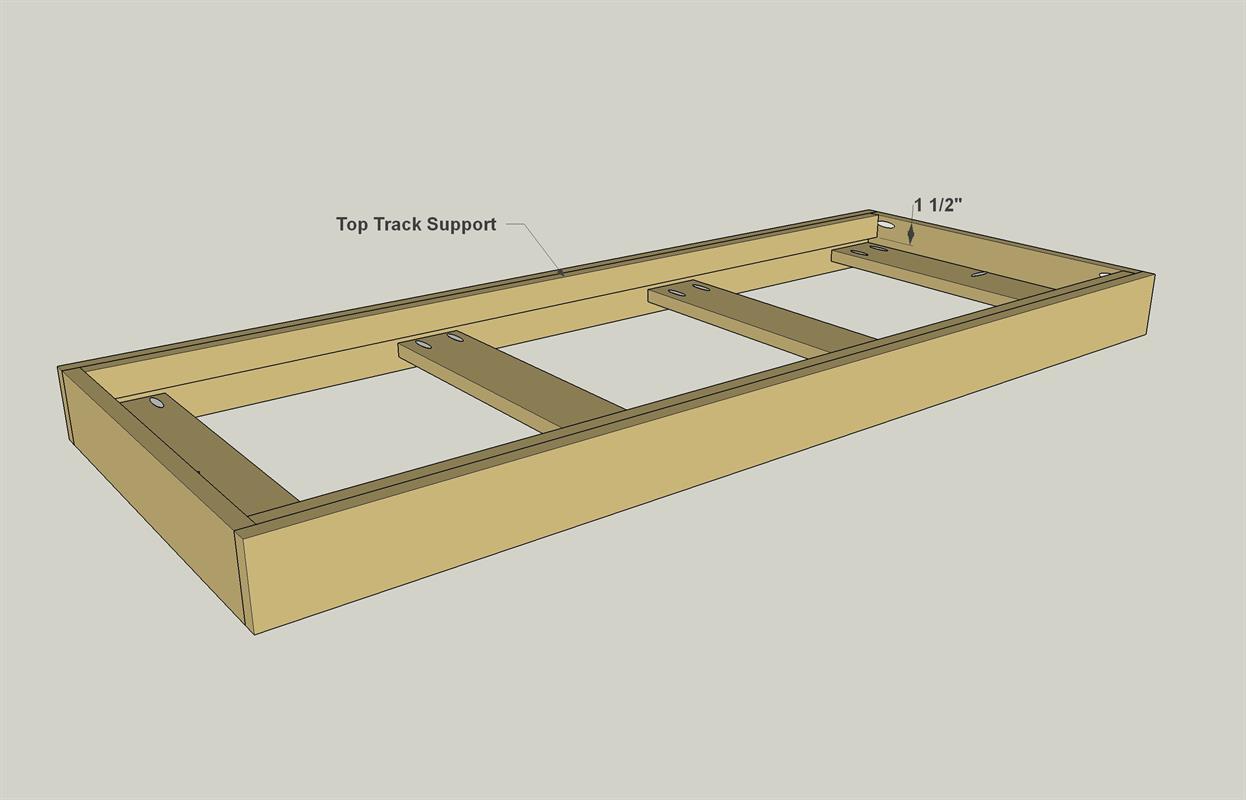
Cut two Top Track Supports to length from 1x2 boards, as shown in the cutting diagram. Then attach the Track Supports to the Top Sides with glue and brad nails.
-
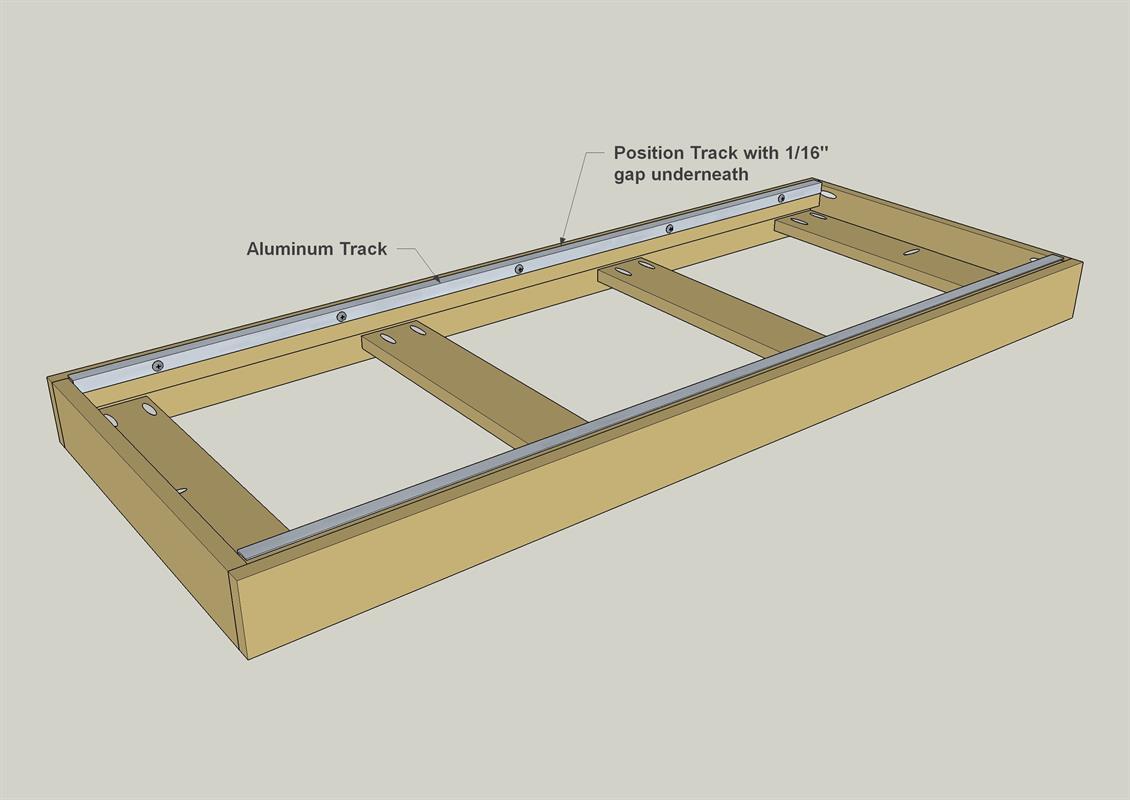
Add Top Tracks
Now you can cut a pair of aluminum Top Tracks to 51" long, and mount them to the Top Track Supports using 5/8" sheet metal screws. Note that these tracks are positioned so there's a 1/16" gap between them and the Top Track Supports. That lets them clear the Bottom Tracks.
-
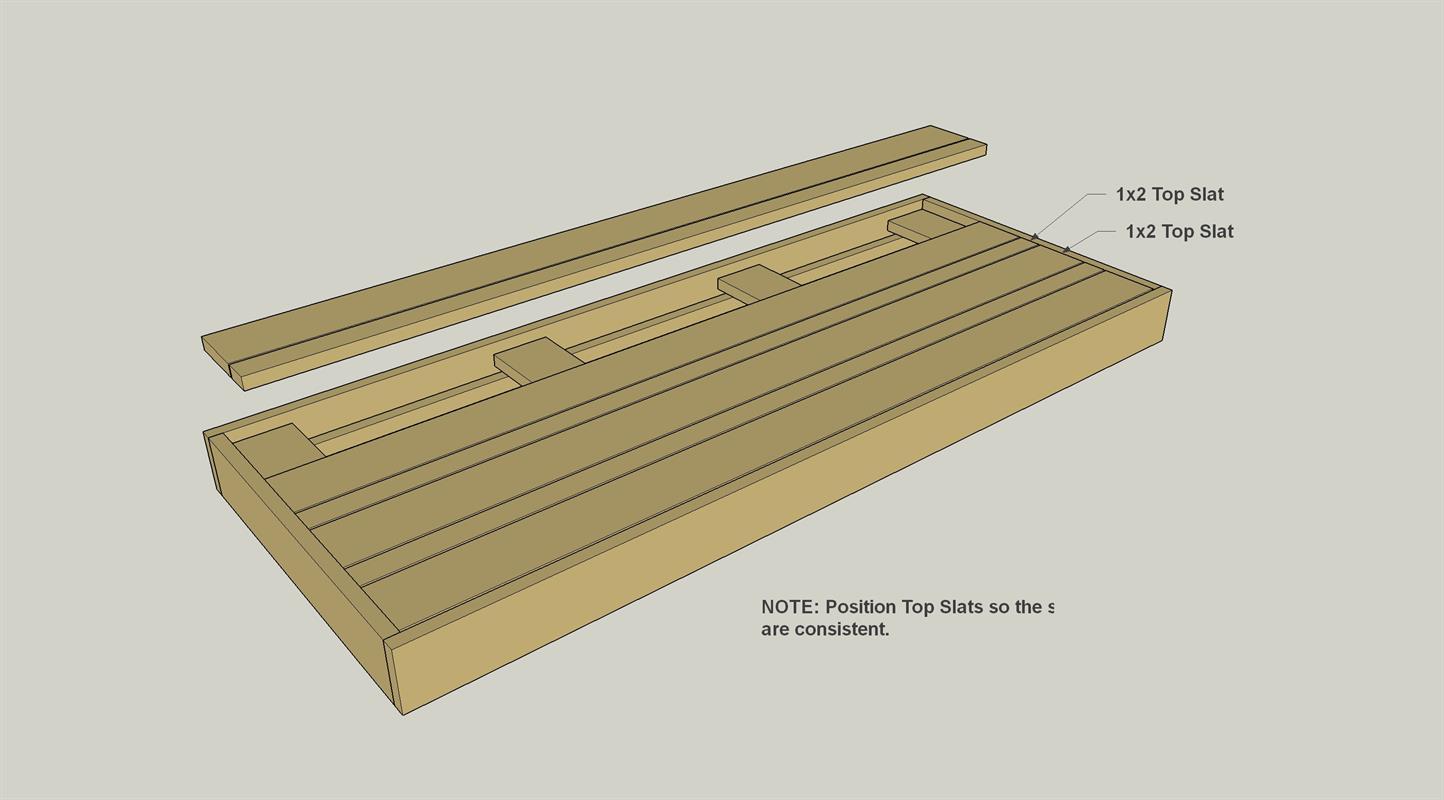
Make Top Slats
Cut Narrow Top Slats and Wide Top Slats to length from 1x2 and 1x4 cedar, as shown in the cutting diagram. Then, install the Top Slats using glue and brad nails.
-
Stain, Add Handles, and Assemble
With the parts all complete, protect everything with exterior stain or finish. Deck stain is a good choice. Once that dries, you can add a handle to the top and to the leg-end of the base. Rub some wax on the aluminum tracks for smooth sliding, and then slide the top on.


