Grilling Station
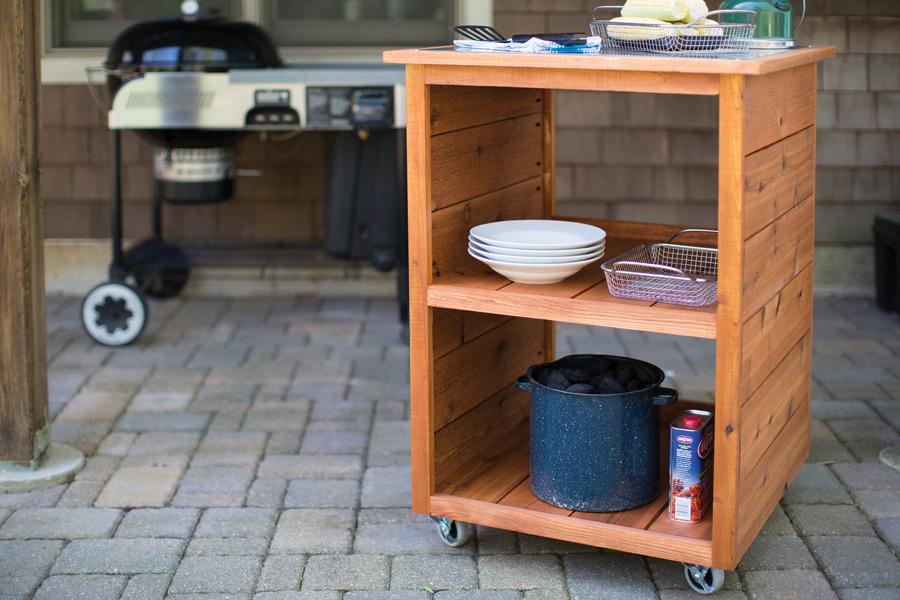
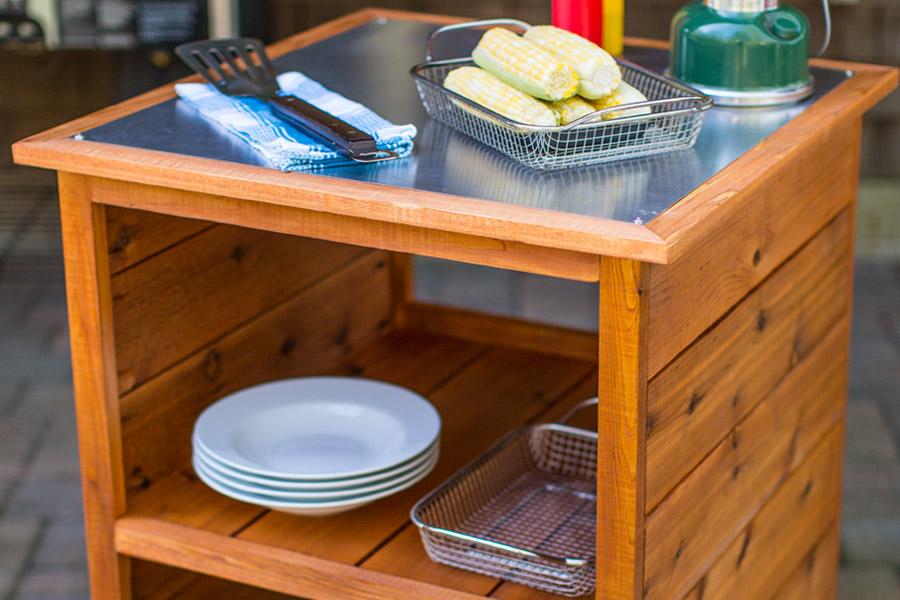
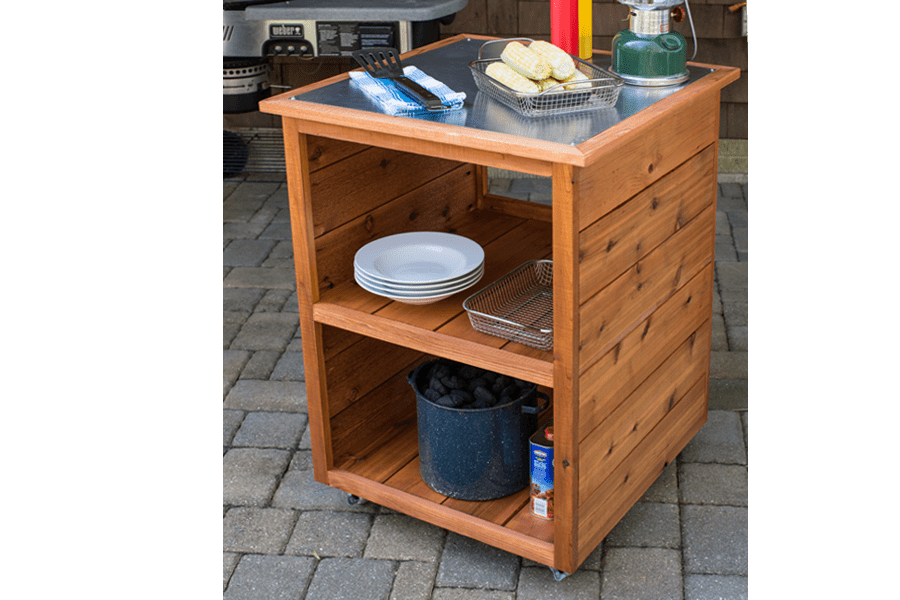
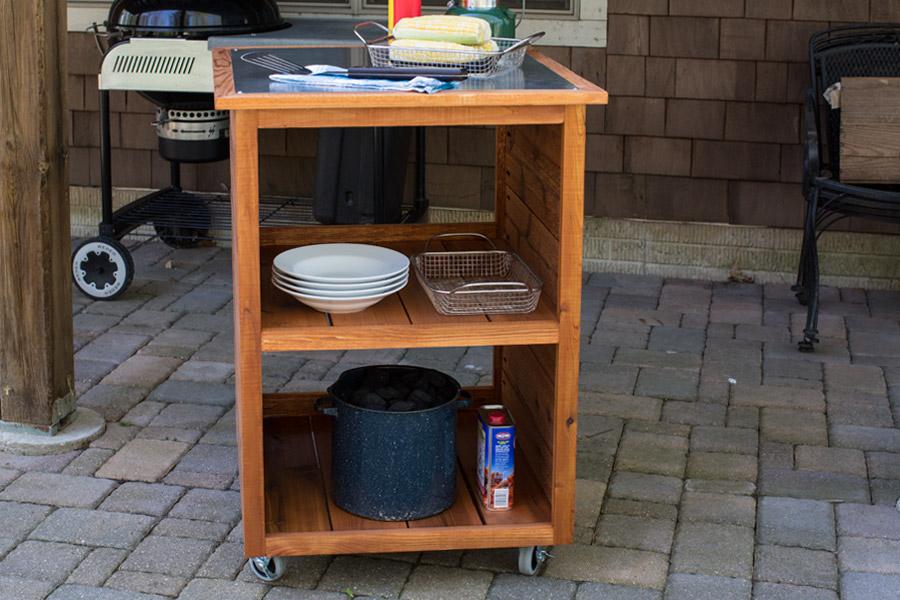
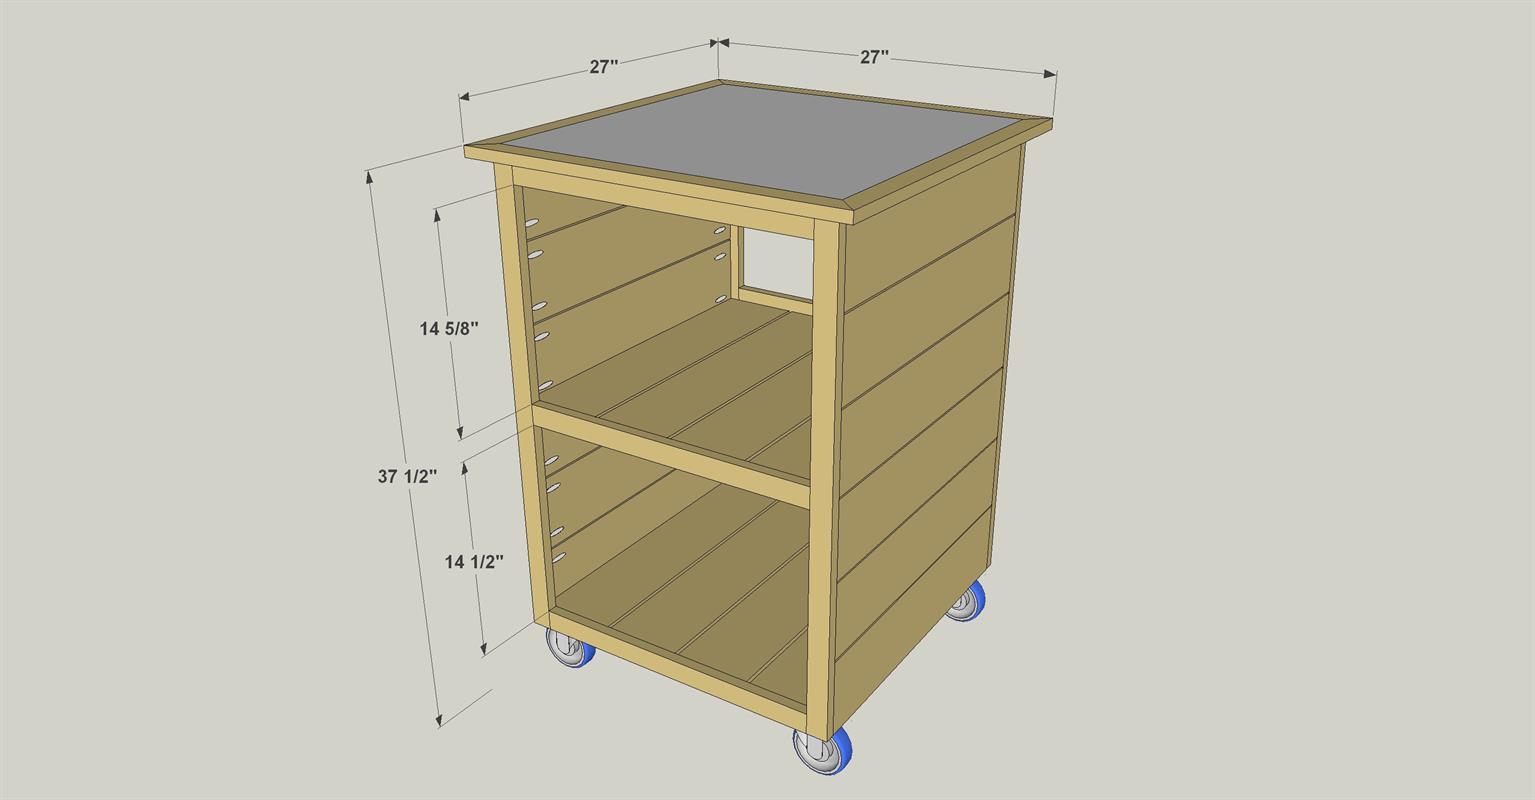
By Kreg ToolCreate the perfect companion to your outdoor grill with this rolling cart. It offers space to store your supplies and ingredients, plus a metal top that looks great and is easy to clean. Best of all, the cart sits on rubber wheels that make it easy to move around.
Directions
-
Cut Slats To Size
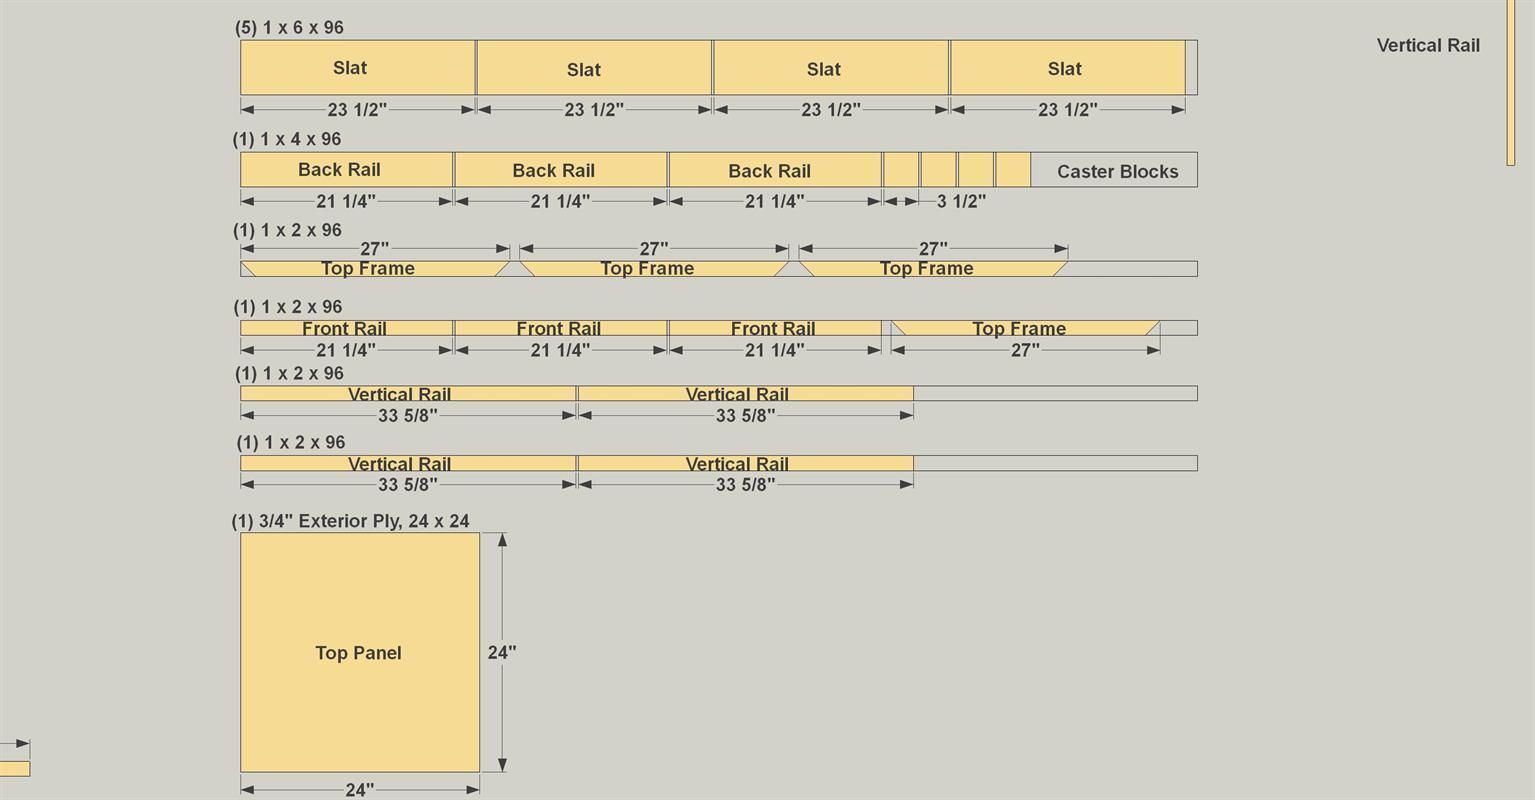
cut twenty Slats to length from 1x6 boards, as shown in the cutting diagram. Some of these Slats will be used to make the sides of the grilling station, and others will be used to make the shelves, but they all start off the same length.
Set Up Stopblocks
The best tool for cutting all the parts to size is a miter saw. To make cutting easier, set up a stop block so that you can cut all of your like-sized parts (such as the Slats) without having to measure each individual piece.
-
Make the Side Slats
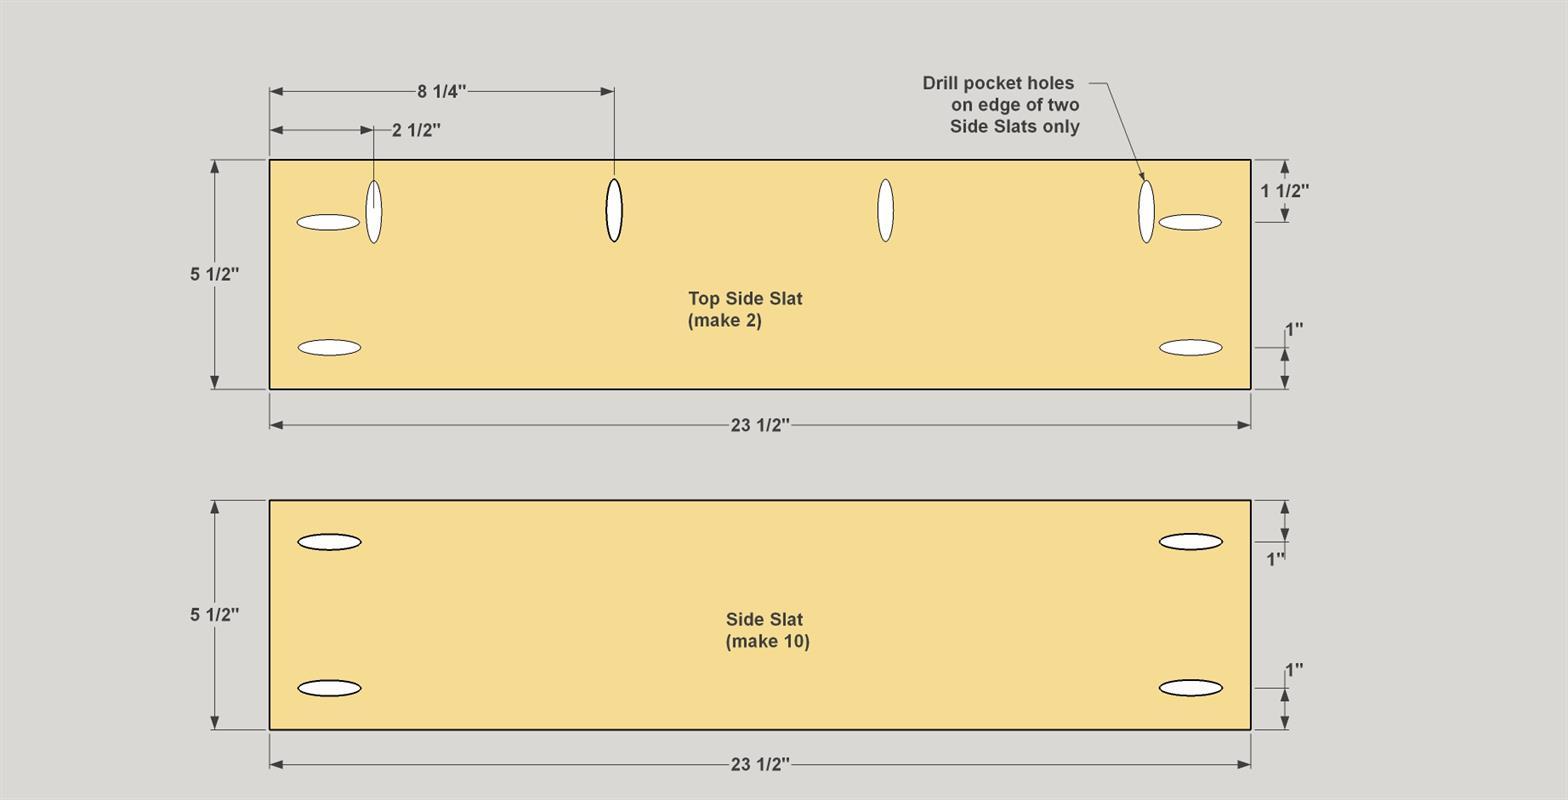
Using 12 of the slats you cut in Step 1, you can make the Side Slats. With your Kreg Jig set up for 3/4"-thick material, drill pocket holes in the ends of all 12, as shown. Then drill holes along one edge of two of these to create the Top Side Slats. These holes on the edge will be sued to attach the grilling station Top later.
-
Start Side Panel Assembly
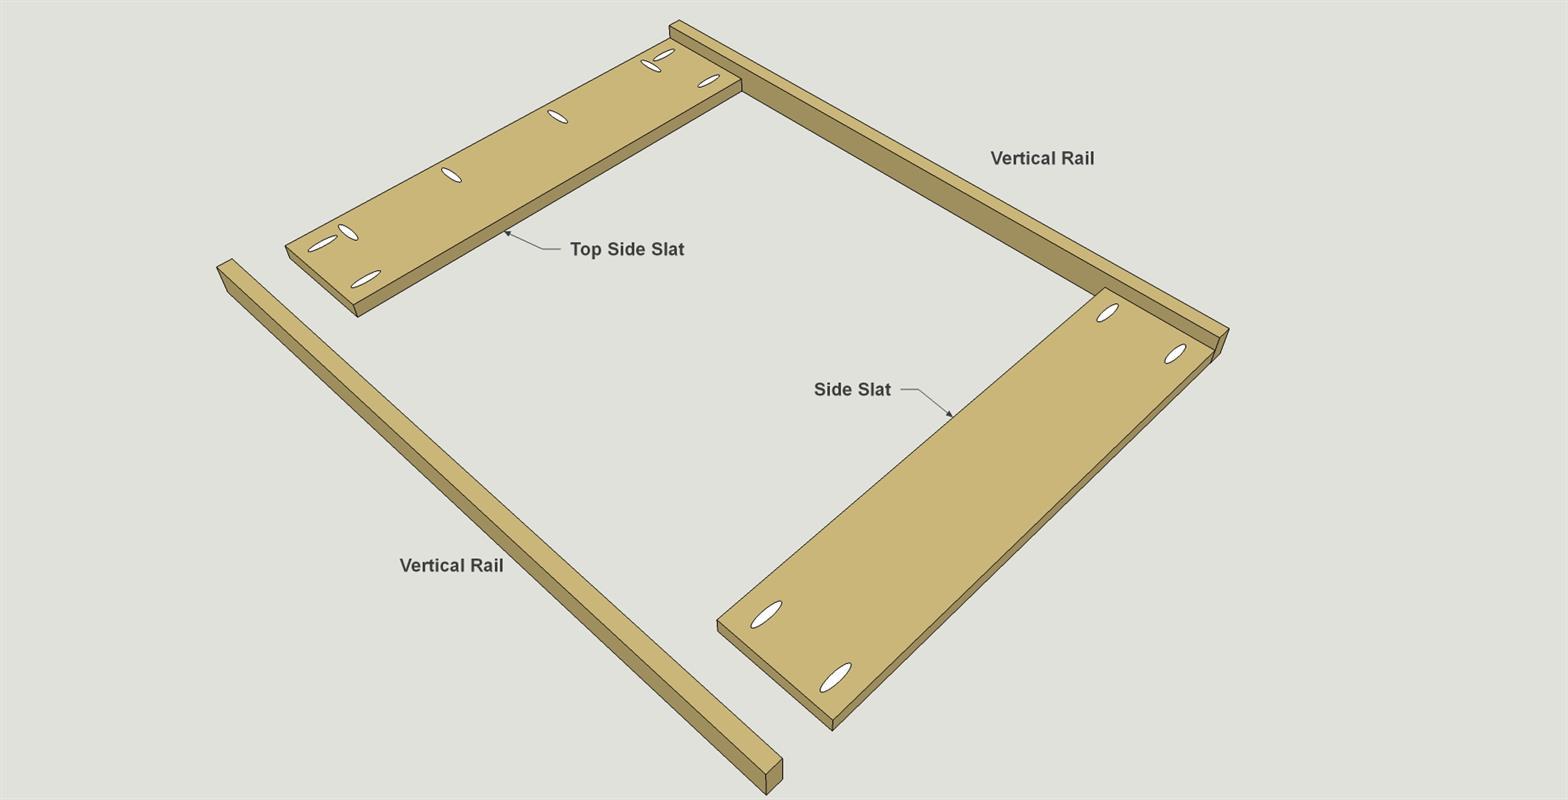
Cut four Vertical Rails to length from 1x2 boards, as shown in the cutting diagram. Then you can begin assembling the side panels. Position one Top Side Rail and one Side Rail between each pair of Vertical Rails, as shown. the Slats should be flush with the ends of the Vertical Rails, and flush with one edge. Attach the Slats to the Vertical Rails using 1 1/4" Blue-Kote™ pocket hole screws.
-
Complete Side Panel Assembly
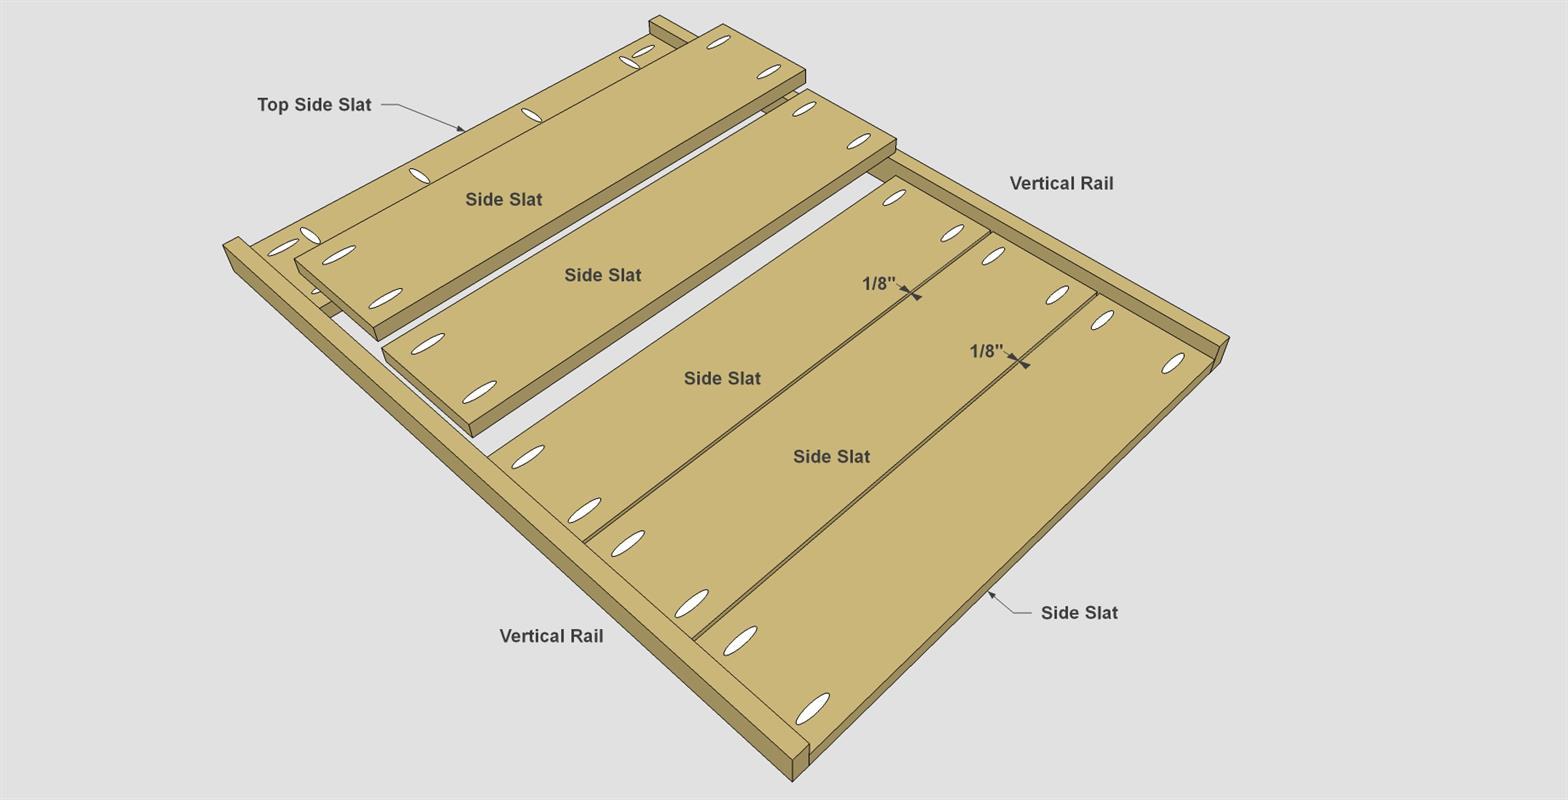
Position the remaining Side Slats as shown so that there are equal gaps between all of the Slats. Then attach these Side Slats to the Vertical Rails using 1 1/4" Blue-Kote™ pocket-hole screws.
-
Make the Shelf Slats
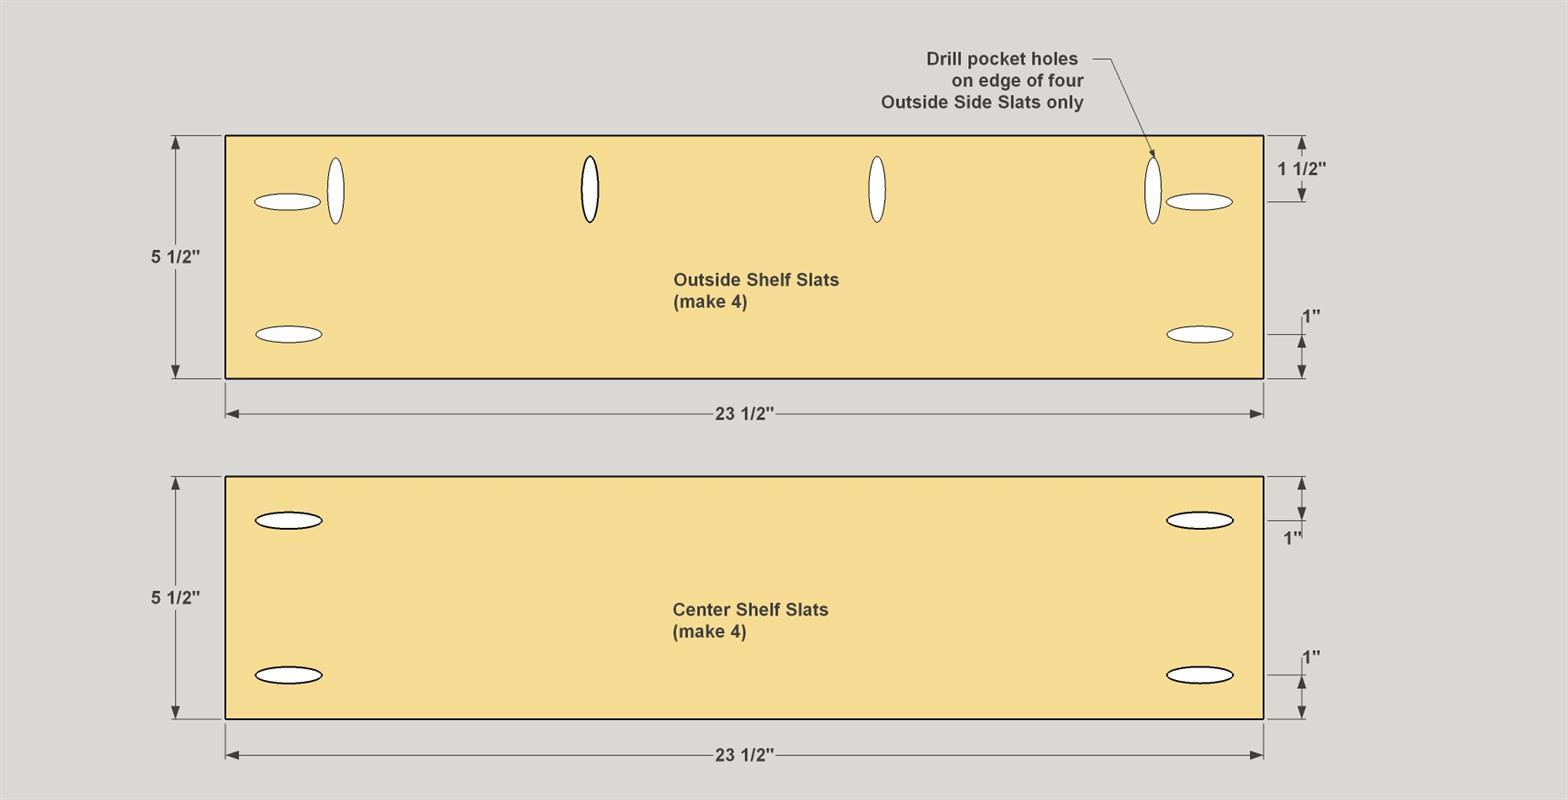
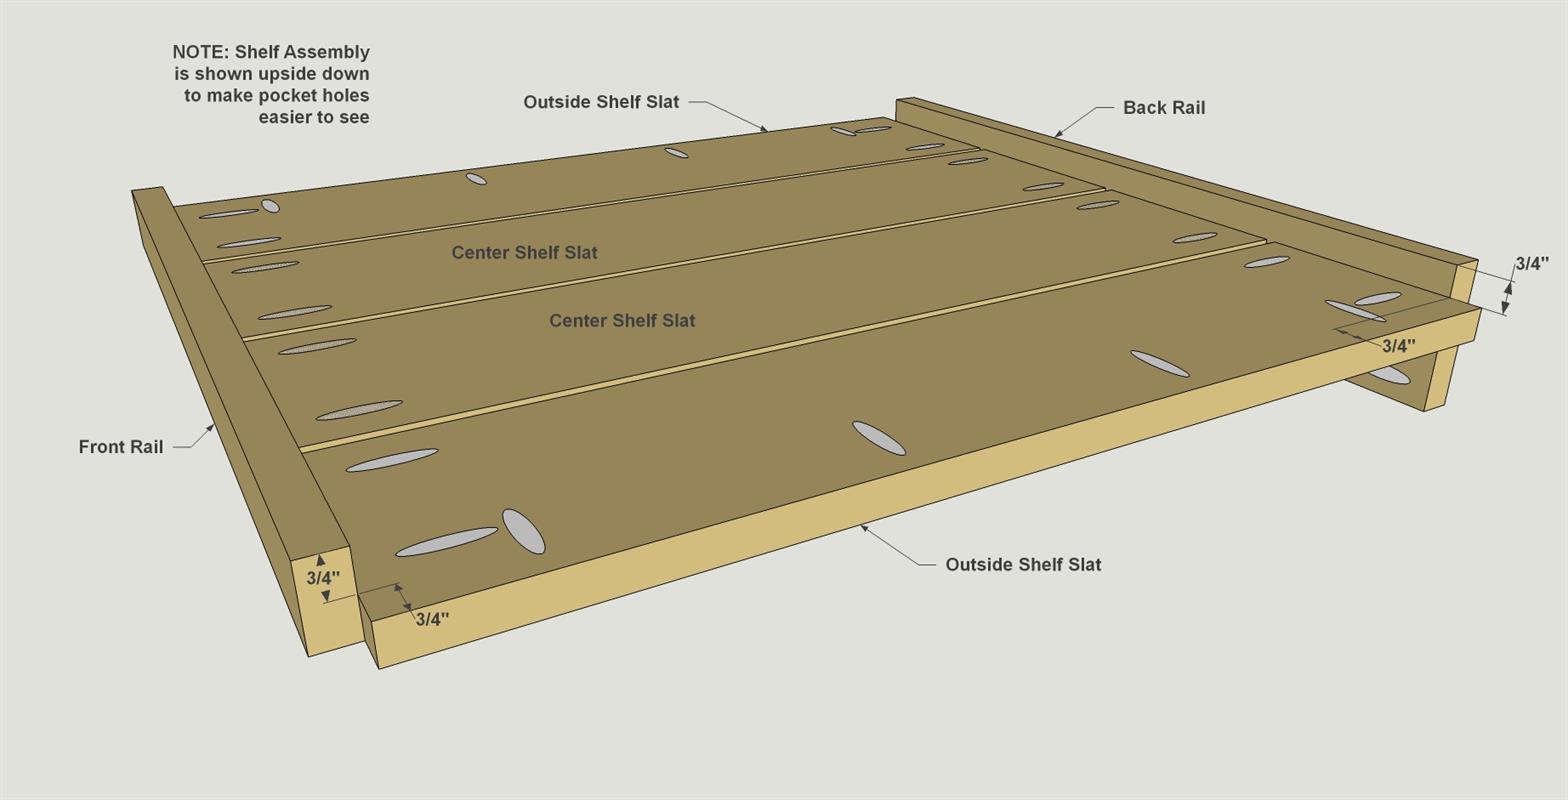
Now you can use the other eight Slats you cut in Step 1 to make Shelf Slats. With your Kreg Jig® set up for 3/4"-thick material, drill pocket holes in the ends of all eight of these Slats, as shown. Set four of the Slats aside. These will be the Center Shelf Slats. Then drill pocket holes along one edge of the other four Slats to create the Outside Shelf Slats.
-
Assemble the Shelves
Assemble two shelves by joining four Slats to a Front Rail and a Back Rail using 1 1/4" exterior-rated pocket-hole screws. Install the outer Slats first, making sure you have the Rails offset properly, as shown. Then add the other two Slats, spacing them evenly.
-
Create the Top Parts
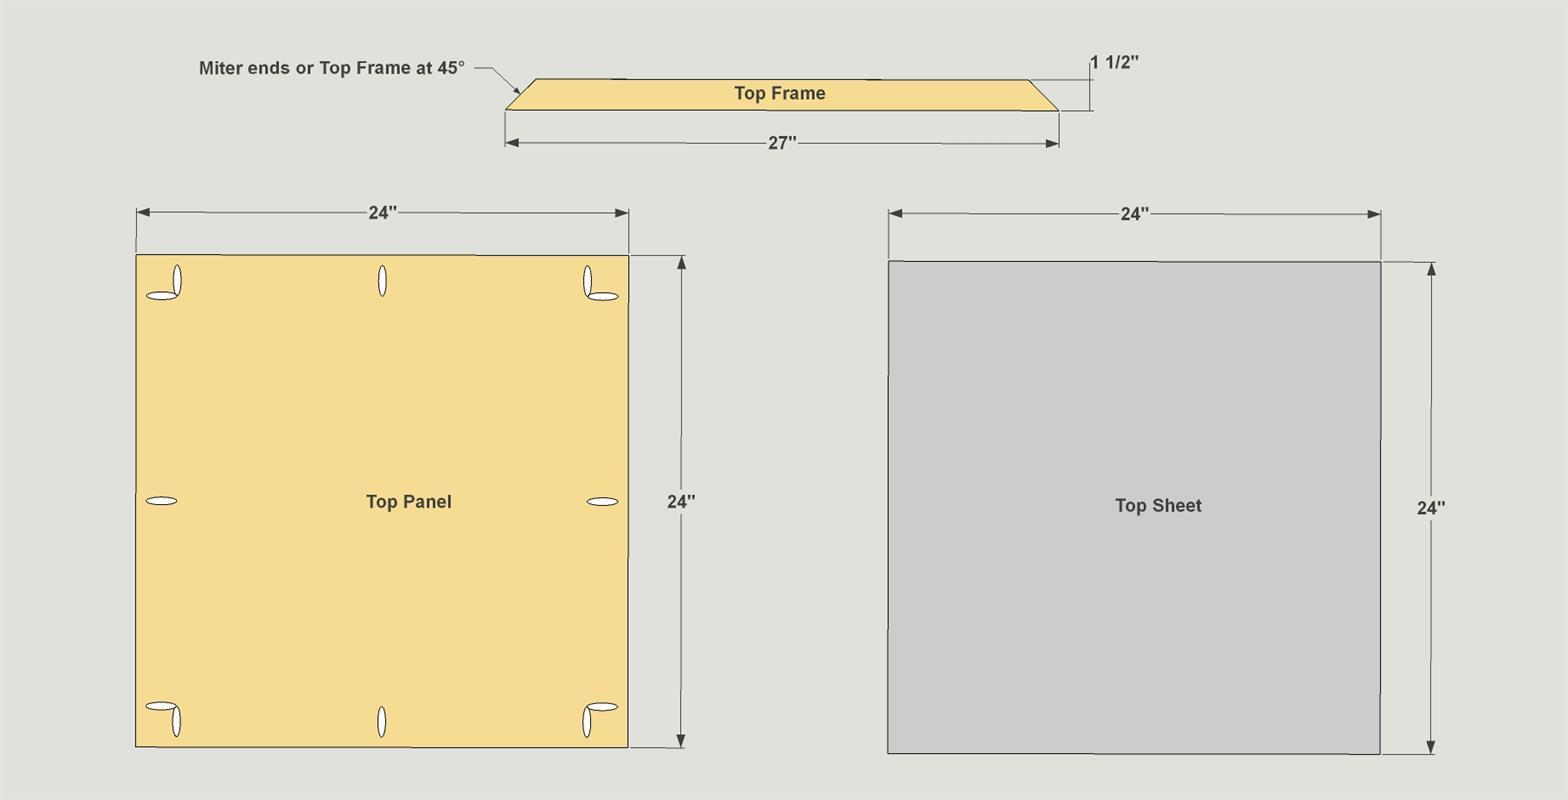
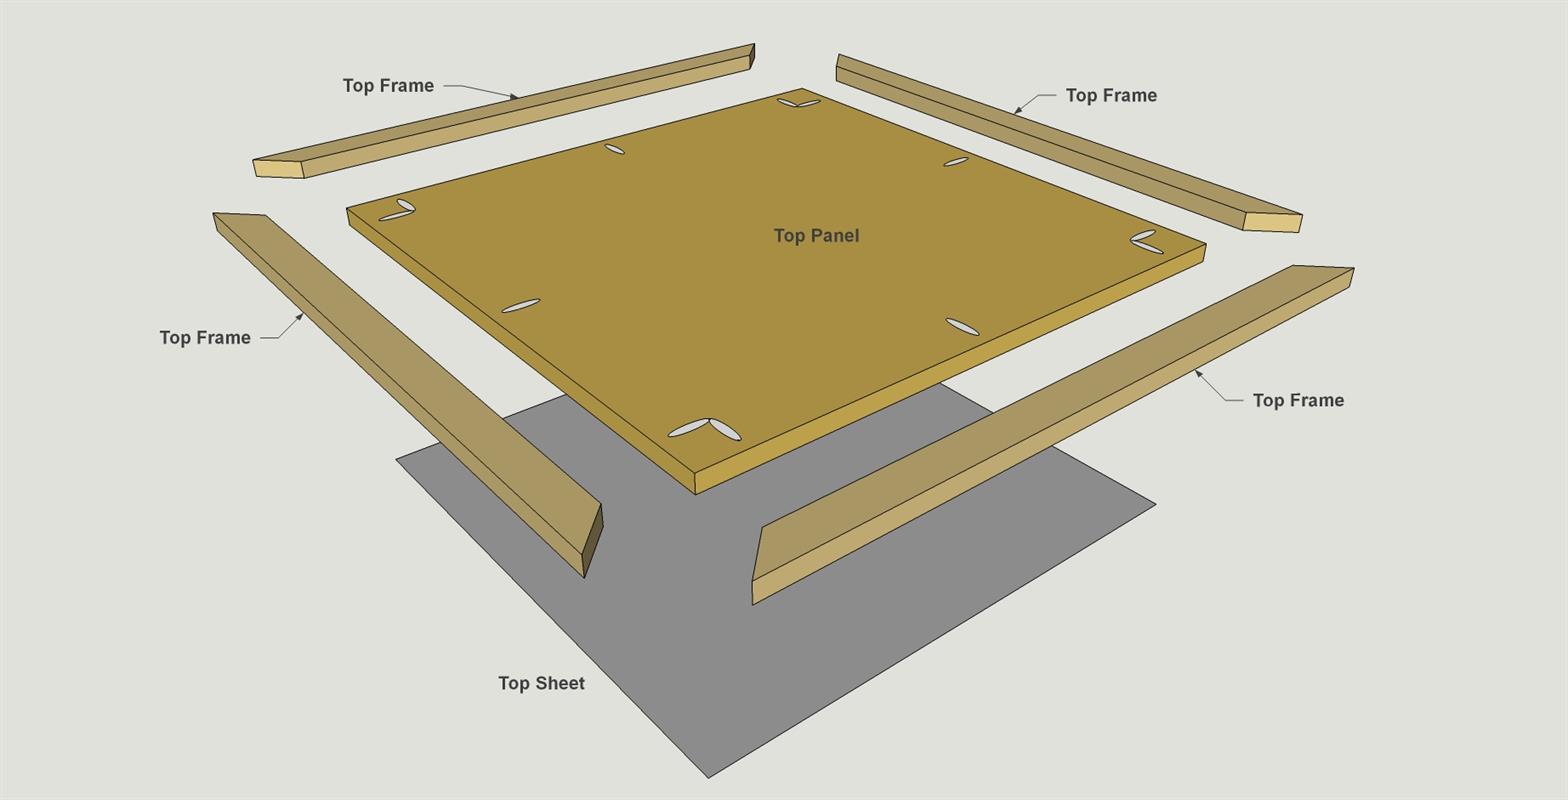
Cut a Top Panel to size from 3/4" exterior plywood, as shown in the cutting diagram. Then drill pocket holes in the Top Panel, as shown. Next, cut a Top Sheet from galvanized sheet metal to fit your Top Panel. Finally, cut four Top Frame pieces to length from a 1x2 board, mitering each end at 45°, as shown in the cutting diagram.
Proper Metal Prep
Be sure to clean up your steel to remove any oil or residue that could prevent adhesive from sticking. To do that, first sand the underside of the metal sheet with medium-grit paper. Then use denatured alcohol and a rag to clean the metal sheet.
-
Assemble the Top
Now you can assemble the top by first attaching the Top Frame pieces to the Top Panel using 1 1/4" Blue-Kote™ pocket-hole screws. Now attach the Top Sheet. To do that, place a dozen or so dabs of epoxy or construction adhesive on the Top Panel. Position the Top Sheet so it is centered, and press it into the adhesive. Place a scrap piece of plywood or a couple of boards on the Top Sheet, and then use weights to hold the Top Sheet in place while the adhesive sets up.
-
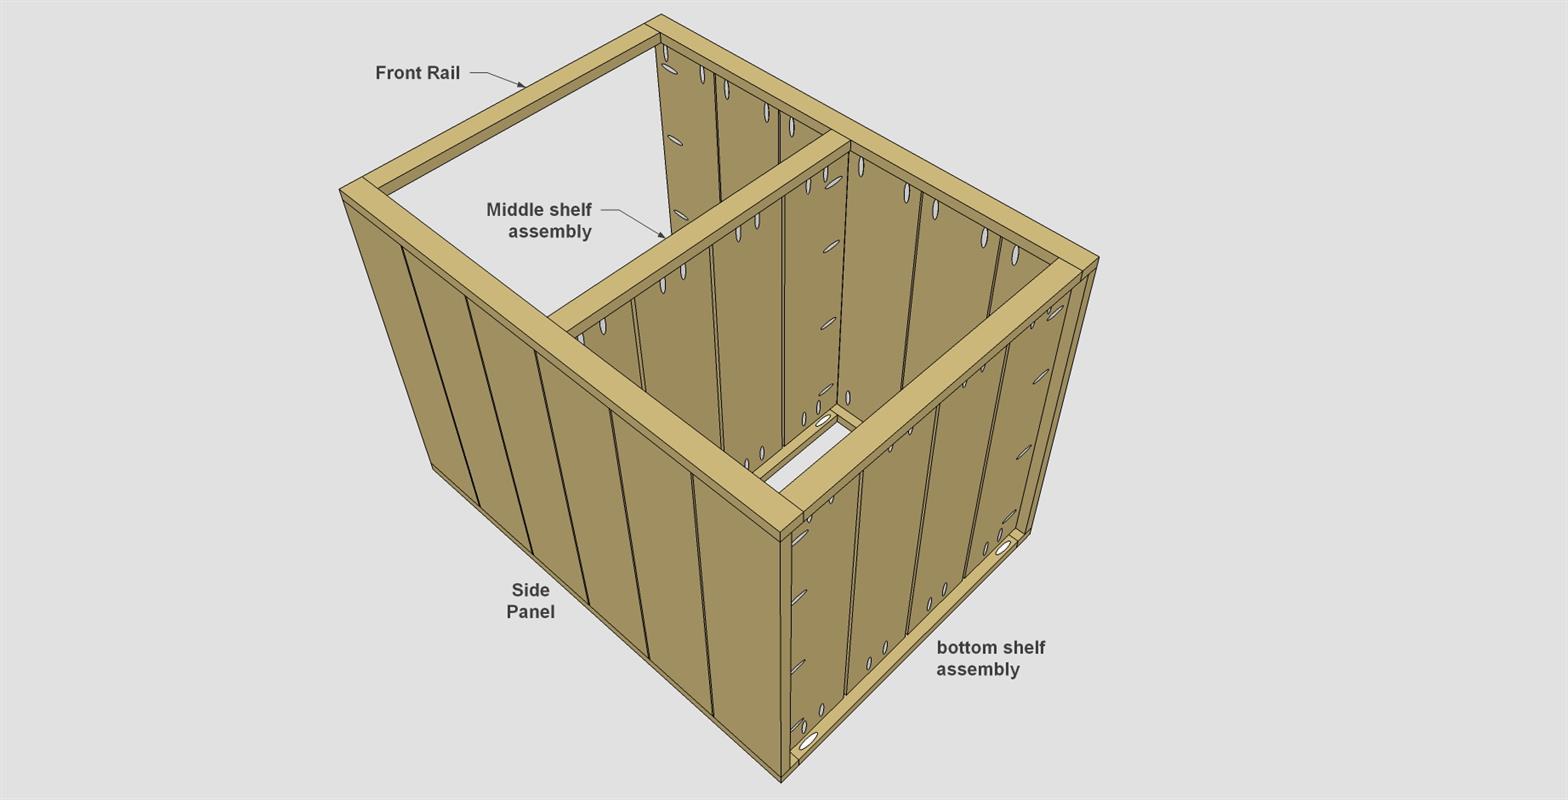
Assemble One Side of the Station
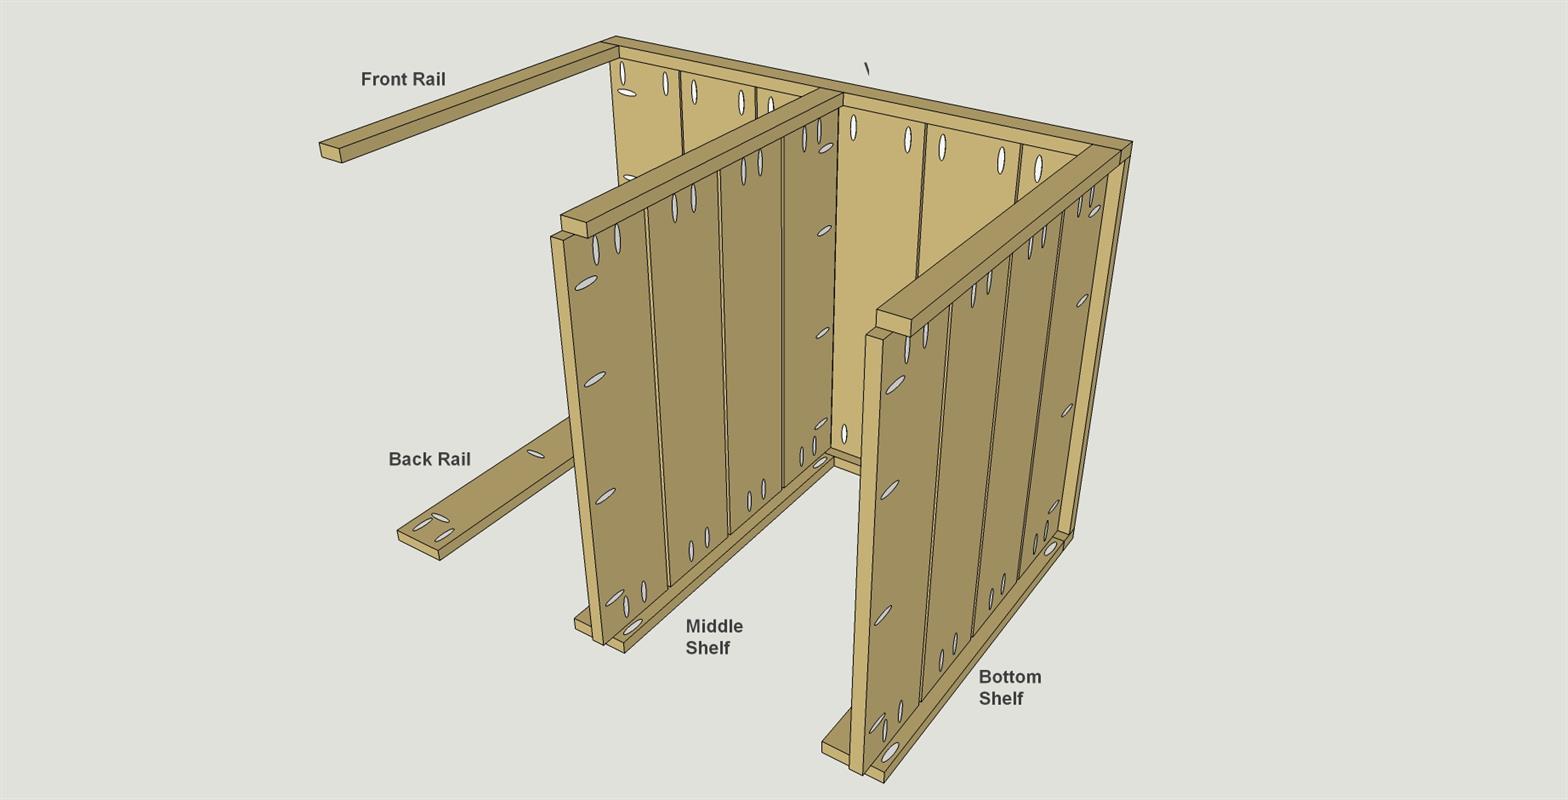
Start final assembly with the unit lying on its side. Attach the bottom shelf to one side assembly using 1 1/4" exterior-rated pocket-hole screws so it sits flush with the base of the Vertical Rails. Then add the middle shelf, aligning it with the lower edge of the third Side Slat.
-
Attach the Other Side
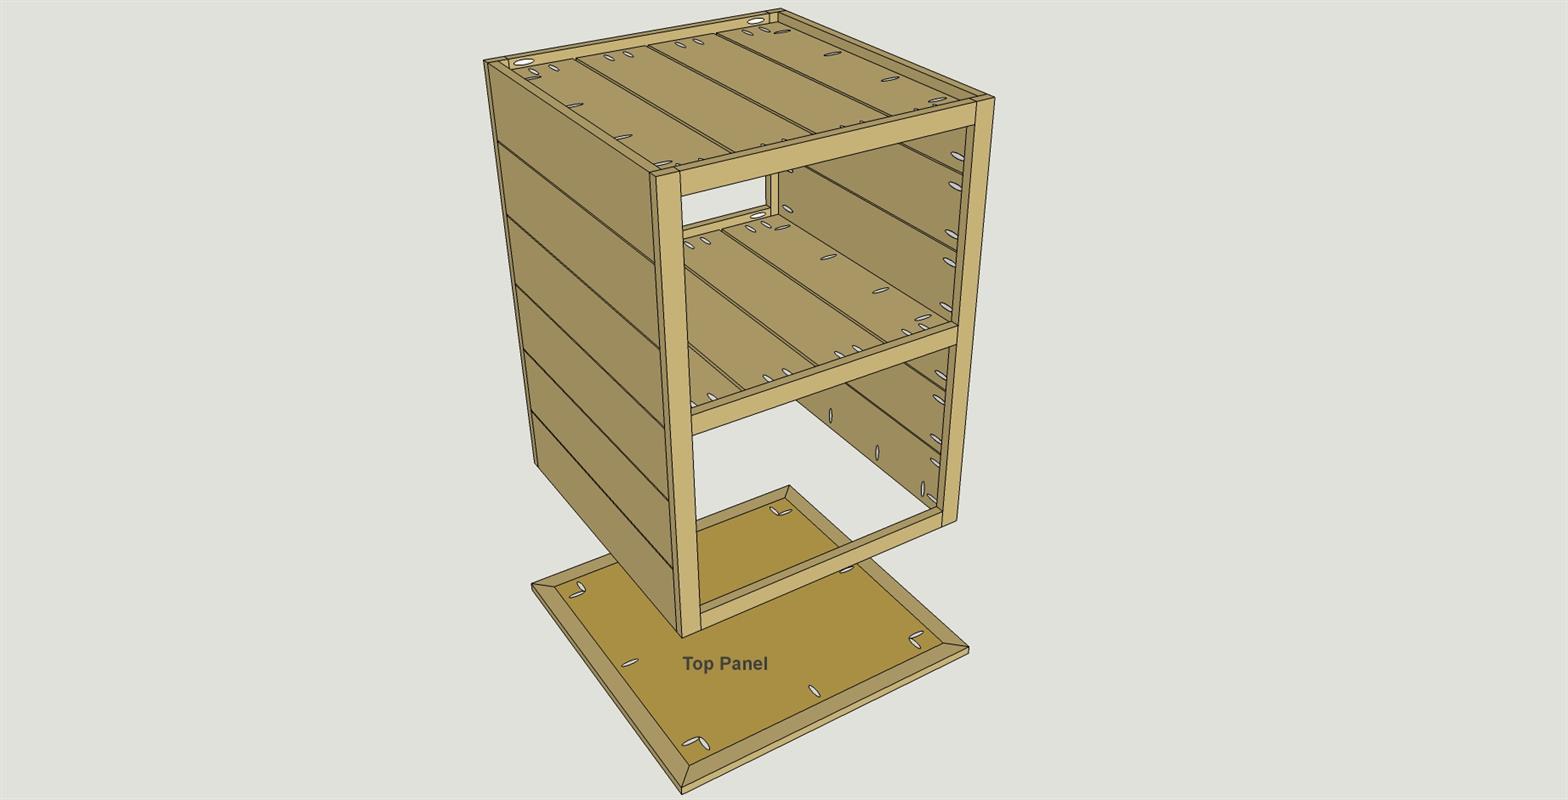
Next, attach the second side. Make sure that the assembly is square, and that the middle shelf will sit level.
Check for a Square Assembly
As you bring the cart assembly together, check to make sure you have the second side assembly oriented correctly. Also make sure that everything is square, and that the shelves will sit level.
-
Attach the Top Assembly
Lay the top assembly face down, then position the grilling station base on it making sure the top overhangs equally on all sides. Attach the base to the top assembly using 1 1/4" Blue-Kote™ pocket-hole screws.
-
Add Casters and Apply Stain
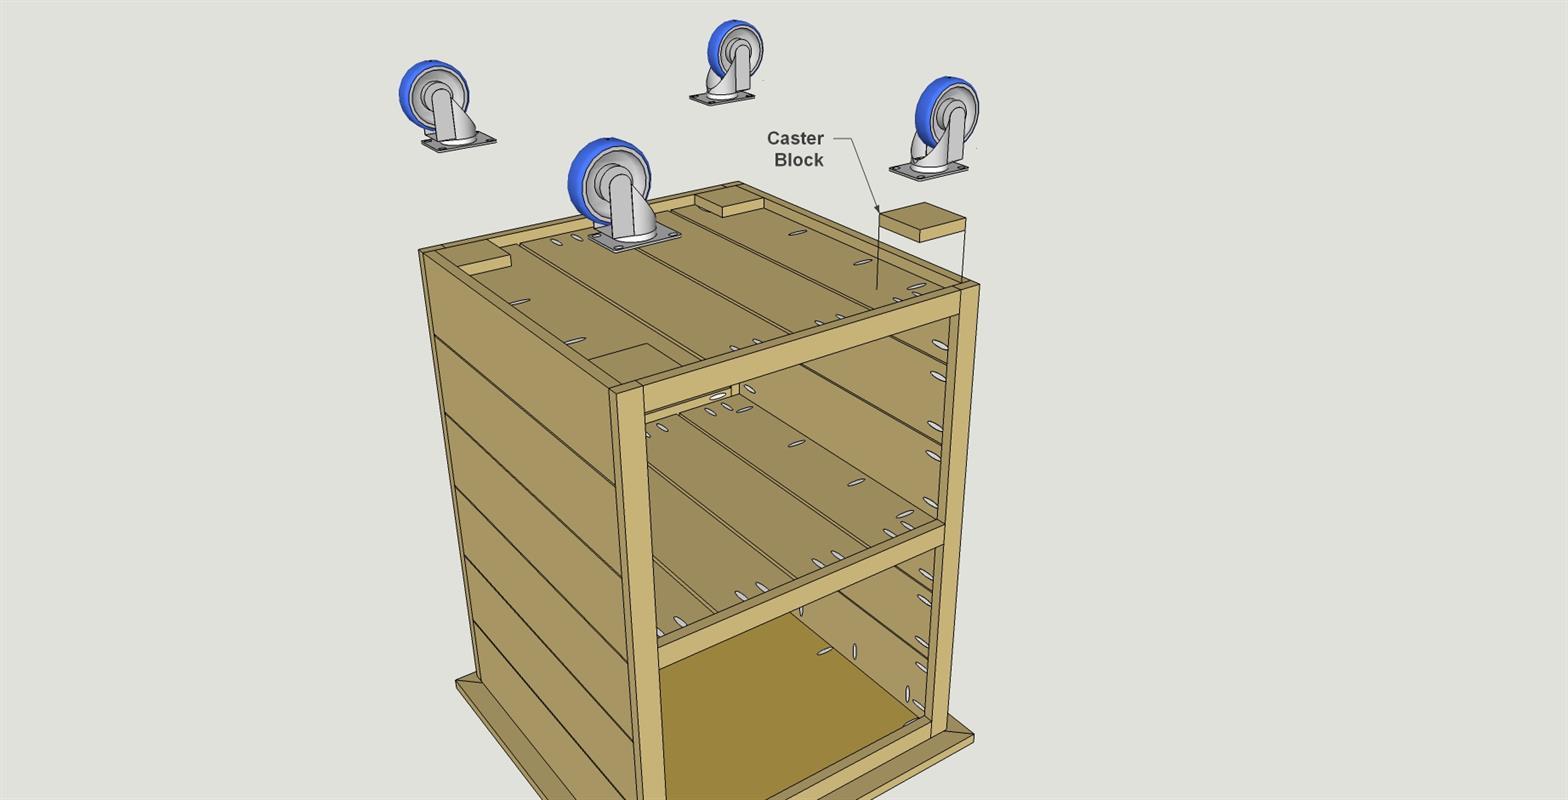
Cut four Caster Blocks to length from a 1x4 board, as shown in the cutting diagram. Then attach the Caster Blocks to the underside of the station, as shown. Use epoxy or construction adhesive to hold them in place while you drill holes and attach casters. With that done, you can apply finish to your grilling station. We used a transparent exterior deck stain in a "natural cedar" color.
-
Make the Front and Back Rails
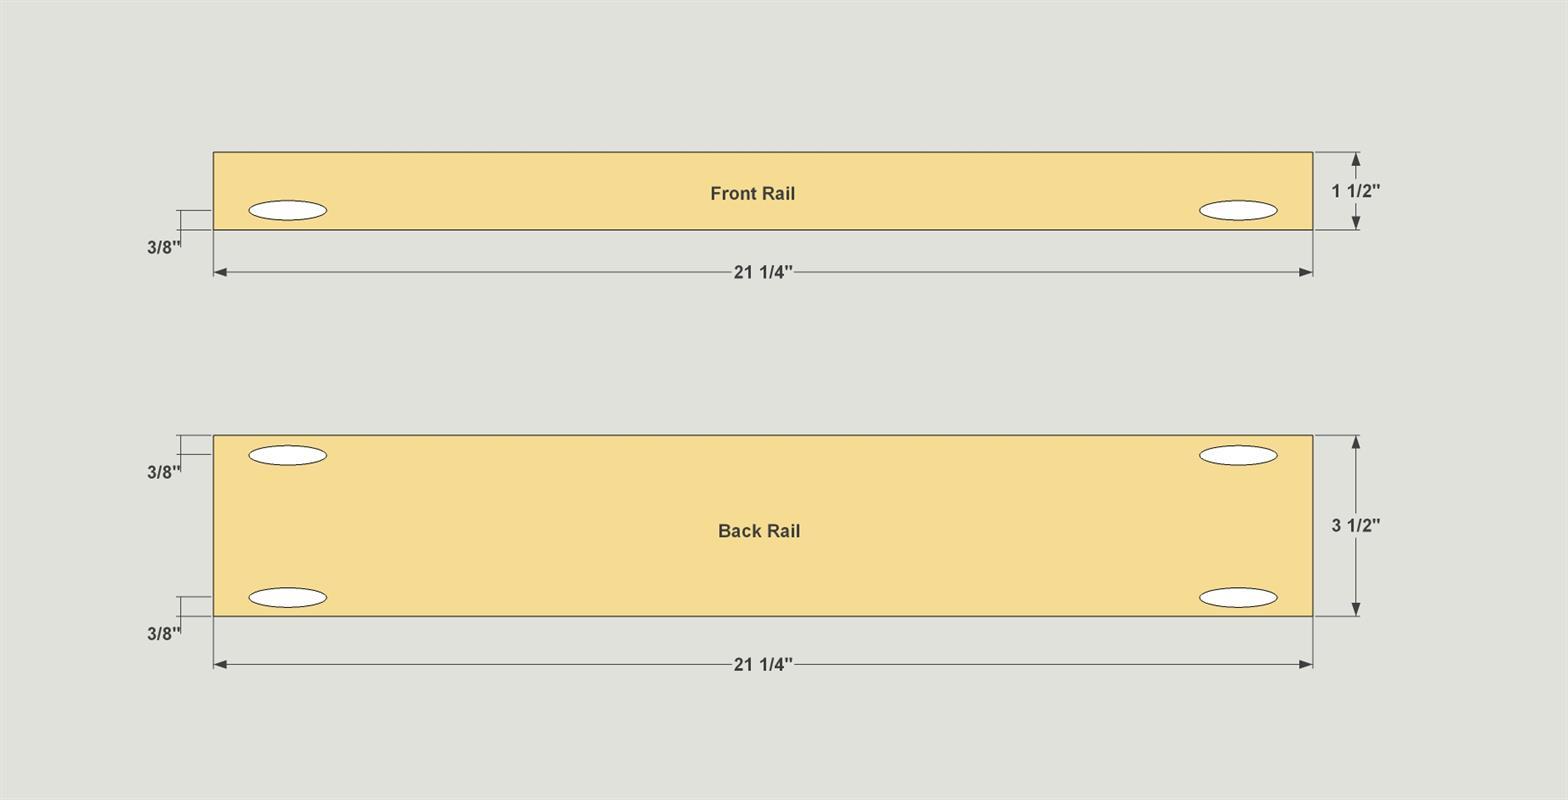
Cut three Front Rails to length from a 1x4 board, and cut three Back Rails to length from a 1x4 board, as shown in the cutting diagram. With your Kreg Jig® set up for 3/4"-thick material, drill pocket holes where shown in the Front and Back Rails.


