Creative Kids’ Easel
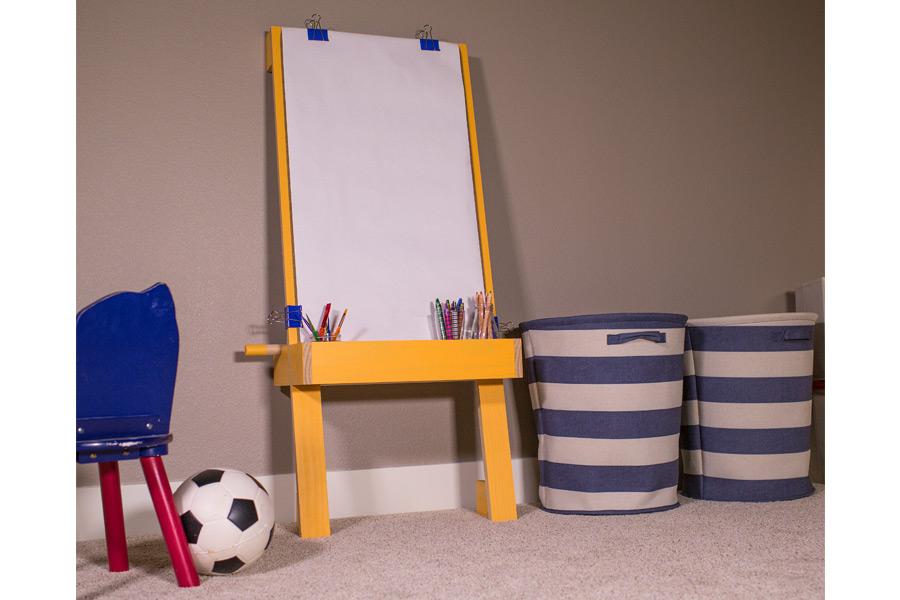
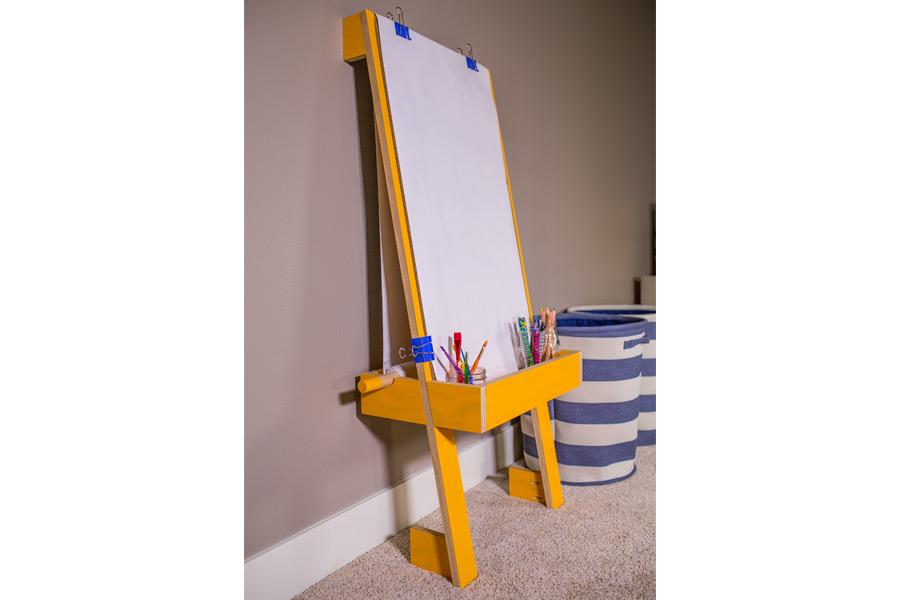
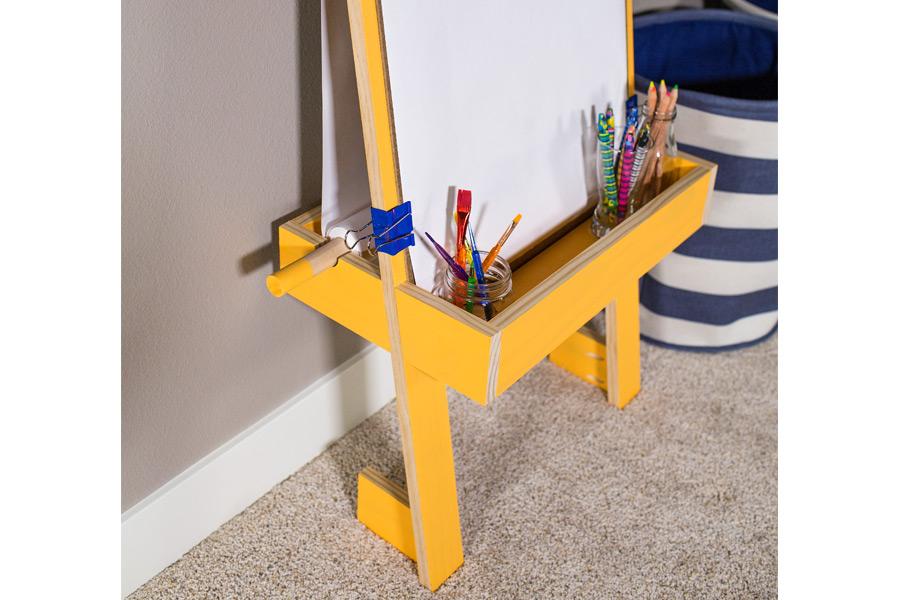
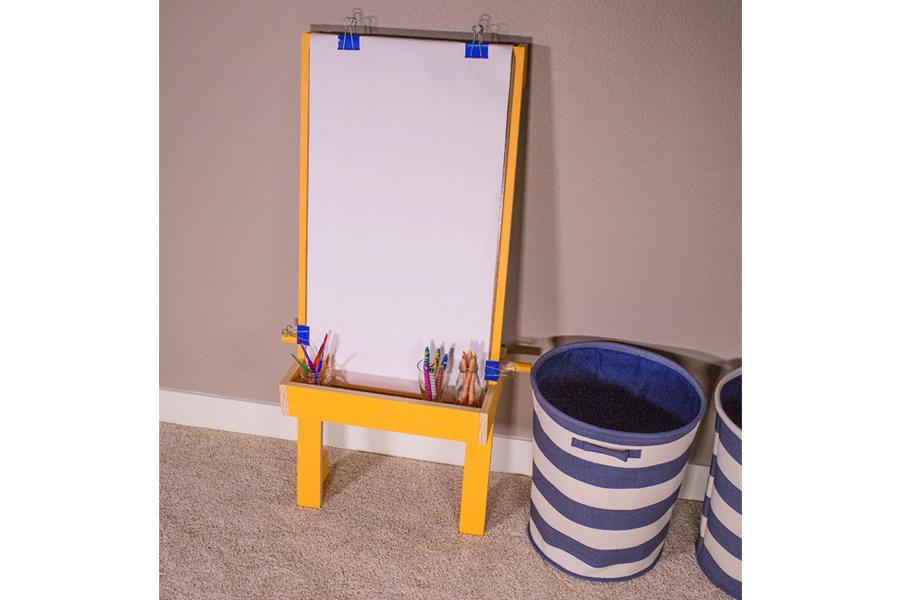
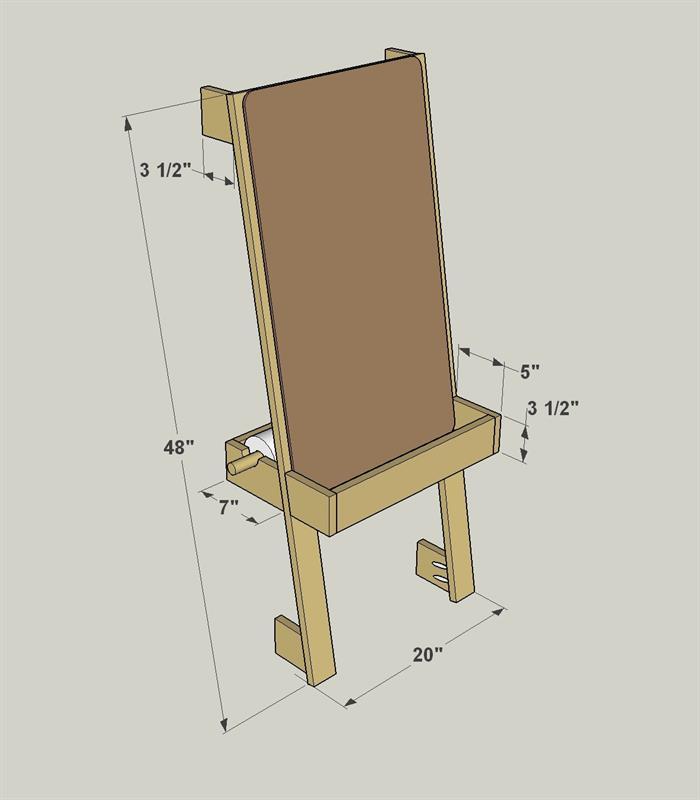
By Kreg ToolCreative kids deserve a creative place to pursue their artistic talents. This easel holds an 18″-wide paper roll, which you can pick up at a craft store, plus a tray to hold crayons and other art supplies. The easel is designed to lean solidly against a wall at a height that’s just right for kids.
Directions
-
Make the Legs and Rails
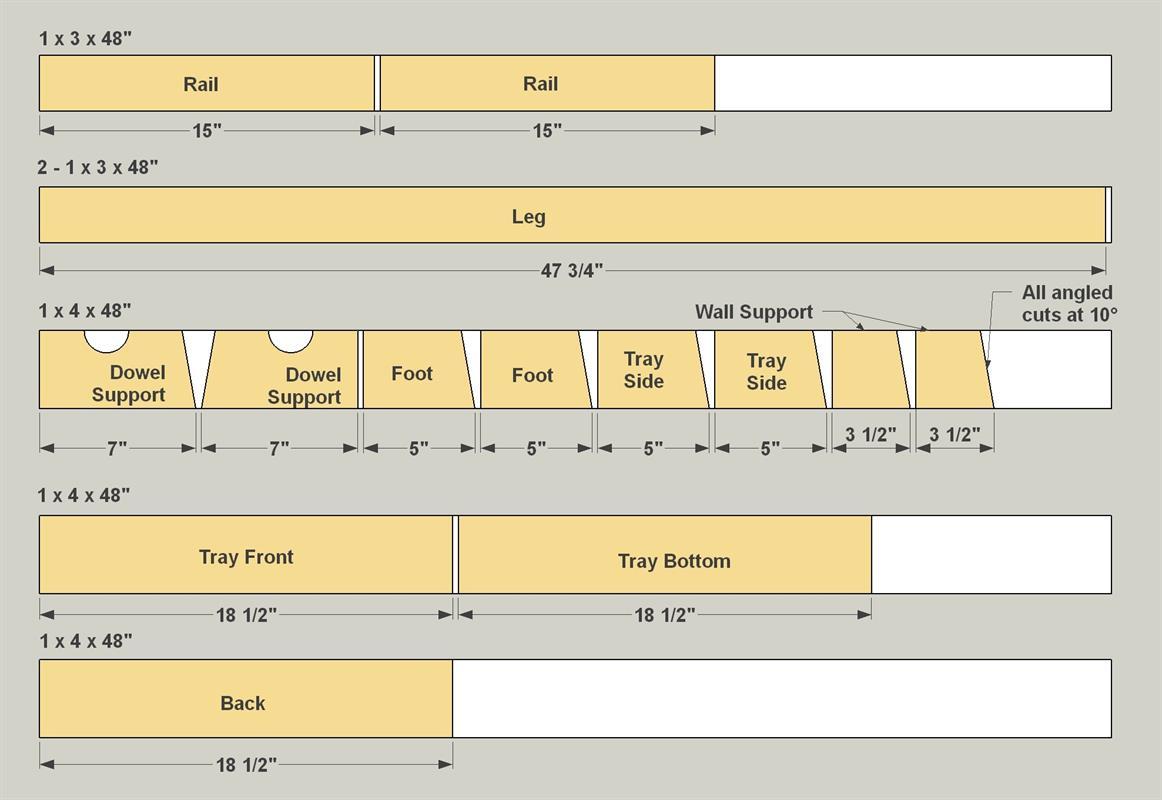
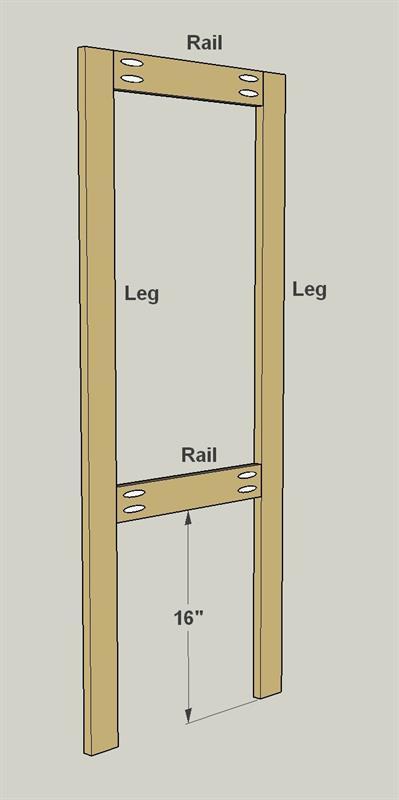
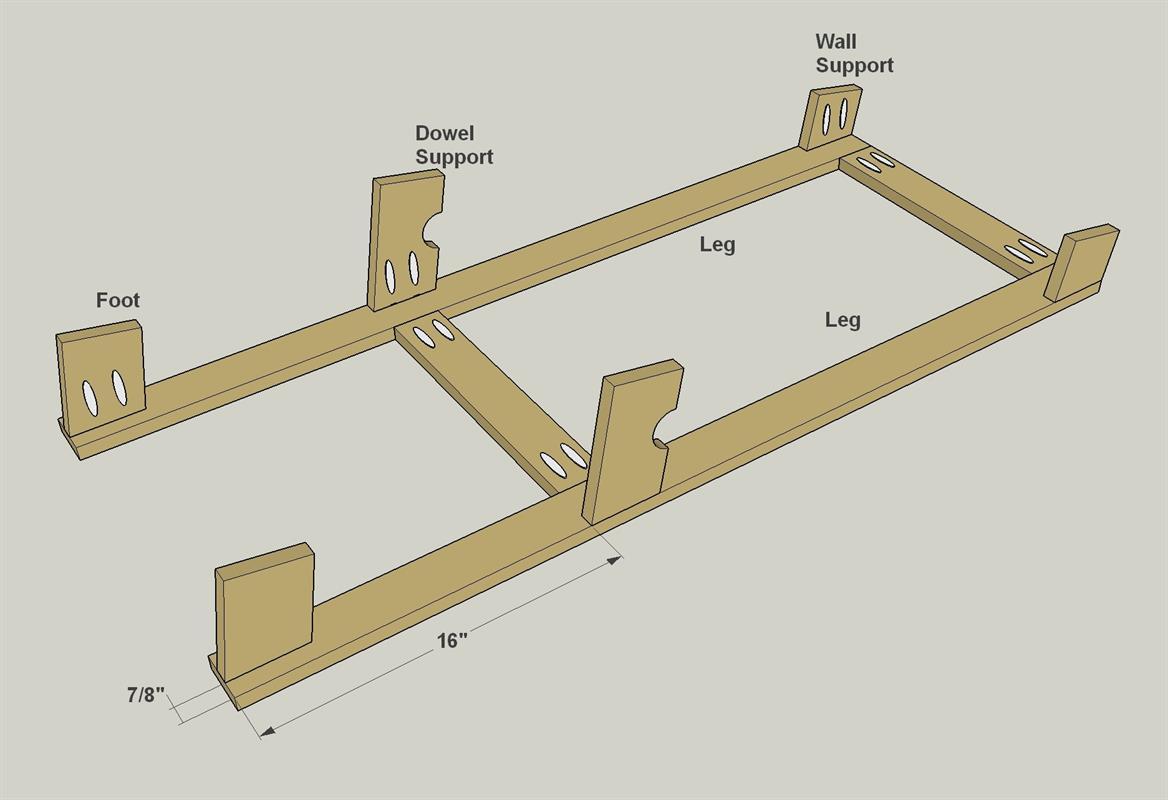
Cut two Legs and two Rails to length from 1x3 boards, as shown in the cutting diagram. With your pocket hole jig set up for 3/4" material, drill pocket holes in the Rails where shown.
-
Assemble the Legs and Rails
Now attach the Short Rails to the Legs using 1 1/4" coarse-thread pocket hole screws.
-
Create Supports, Sides and Feet
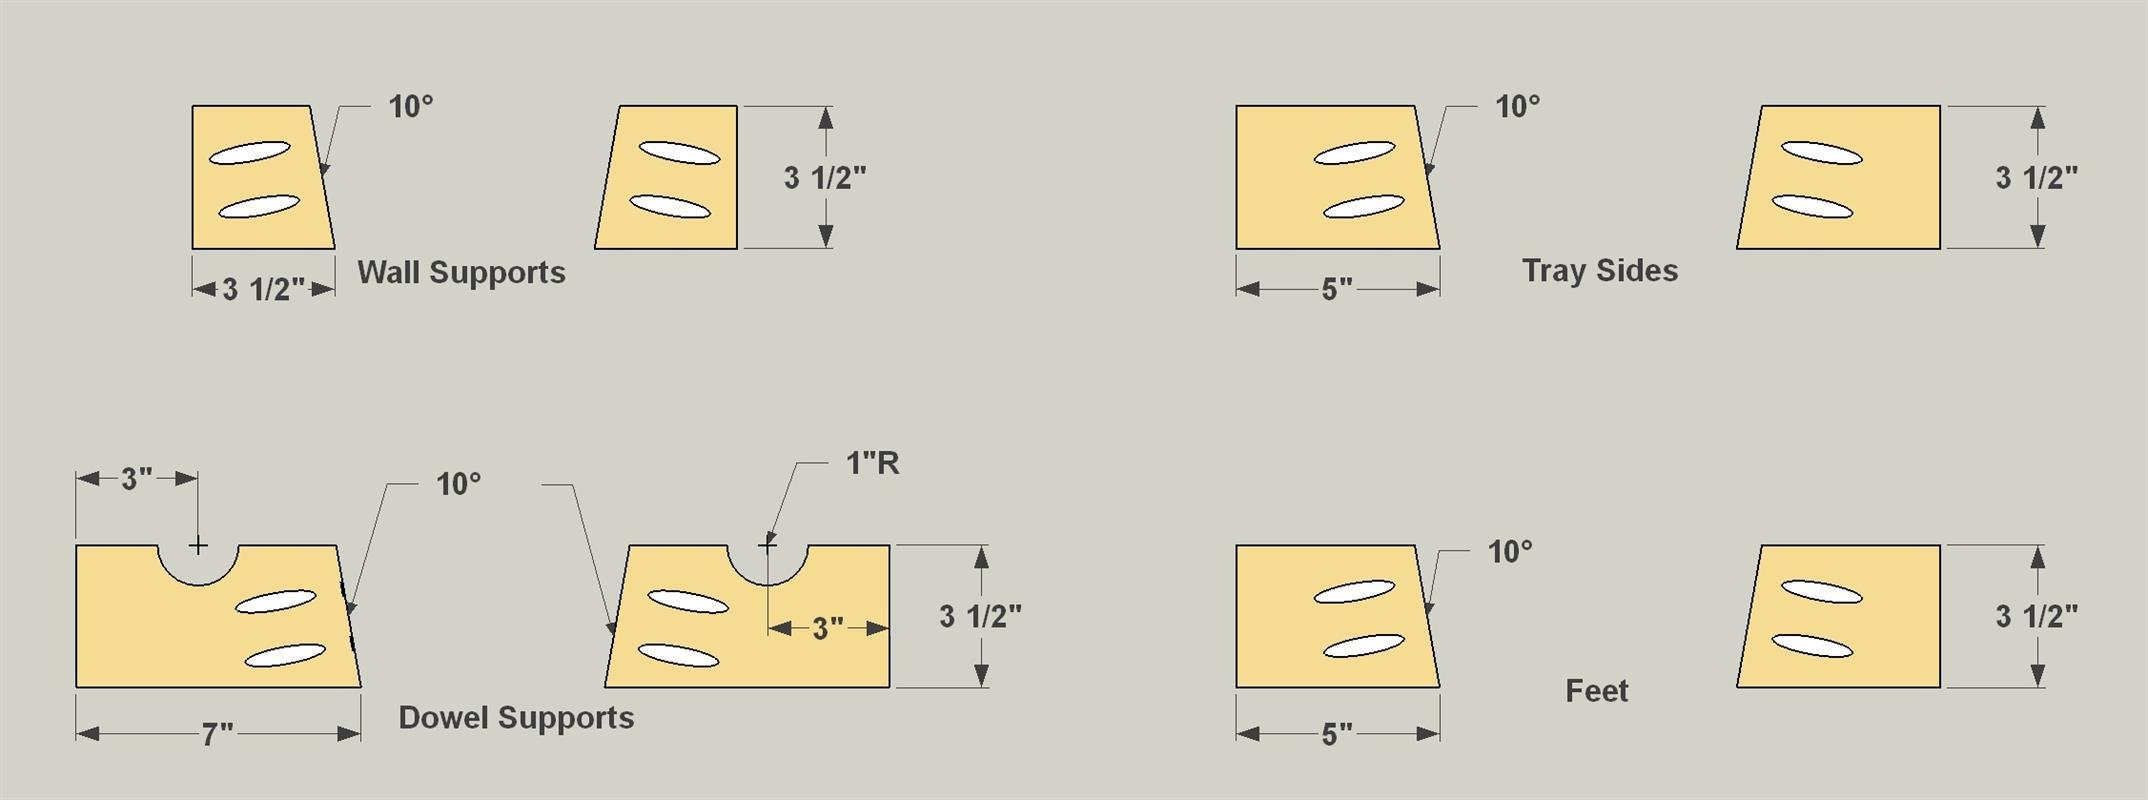
Next, you need to cut the angled parts for the Feet, Tray Sides, and Dowel Supports. Cut them all from a 1x4 board, as shown in the cutting diagram, with a square cut at one end and a 10° cut at the other end. After that, with your pocket hole jig set up for 3/4" material, drill pocket holes in the pieces where shown. You’ll also need to cut two arcs in the Dowel Supports. Just lay them out with a compass, and then cut them with a jig saw.
-
Attach the Supports, Sides and Feet
Now you can attach the Feet centered at the bottom of the legs, the Dowel Supports aligned with the lower Rail, and the Wall Supports at the top of the Legs. They’re all attached using 1 1/4" coarse-thread pocket hole screws.
-
Make the Front, Bottom and Back
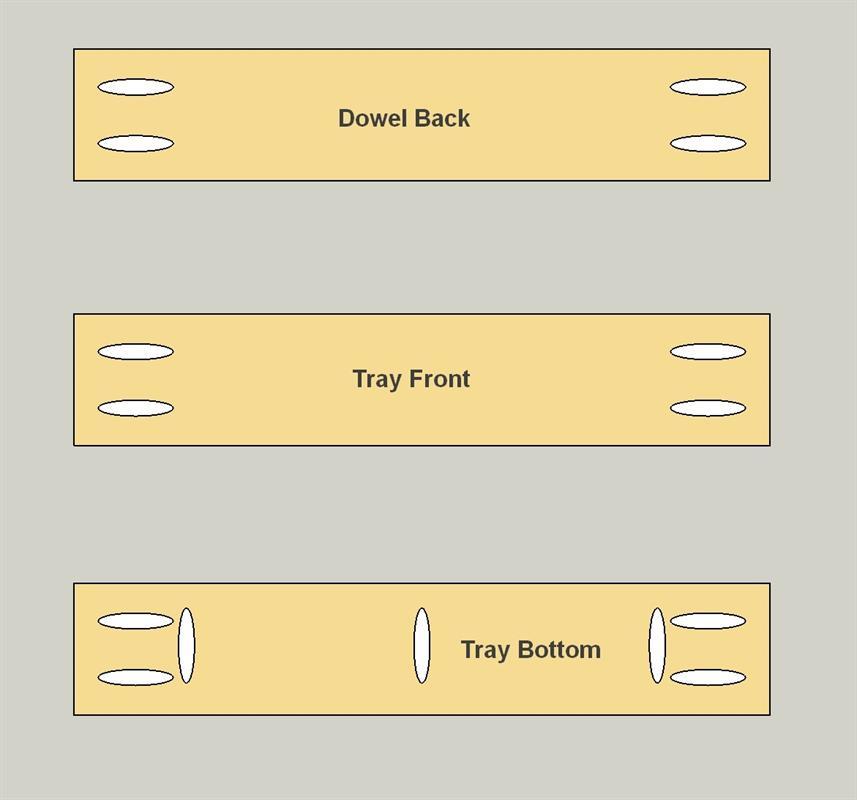
Cut a Tray Front, Tray Bottom, and Dowel Back to length from 1x4 boards, as shown in the cutting diagram. Also cut a Dowel to length to hold the paper roll. With your pocket hole jig set up for 3/4" material, drill pocket holes in these pieces where shown.
-
Attach the Dowel Back
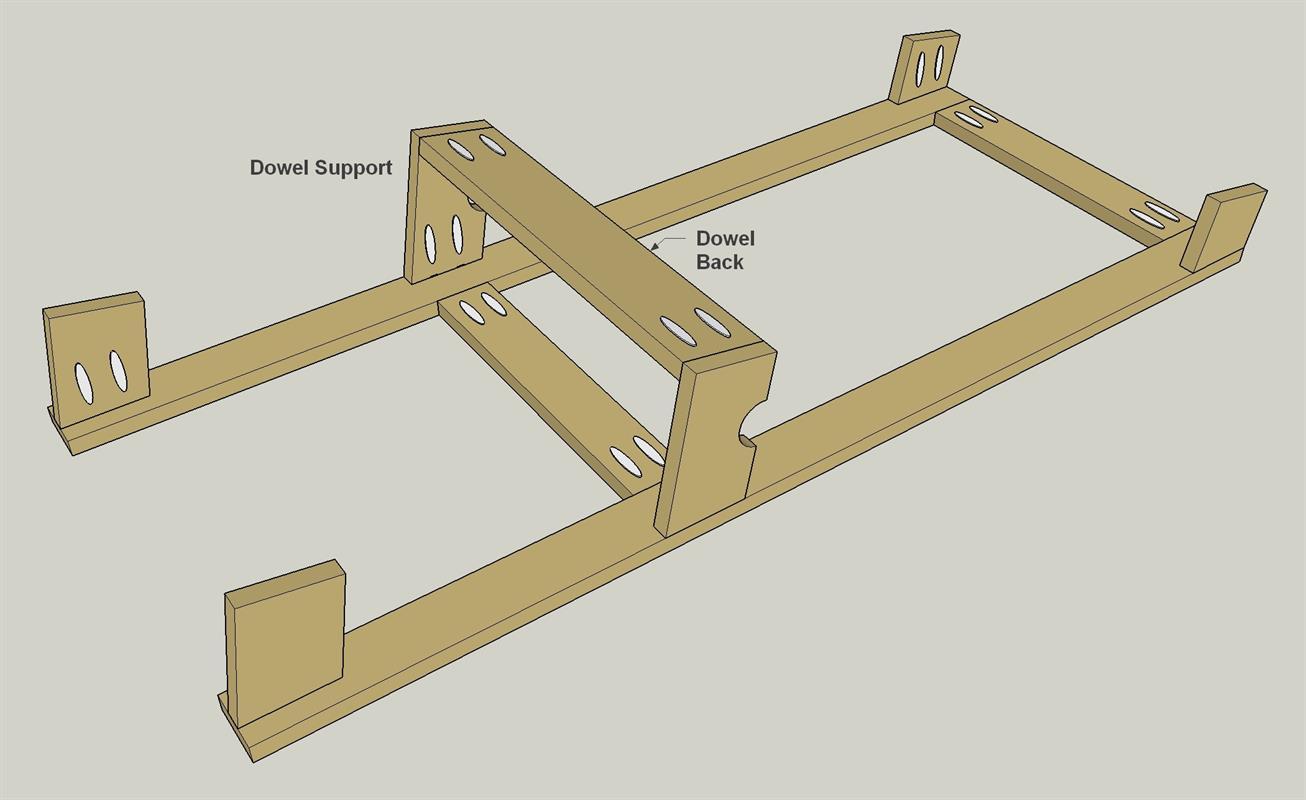
Attach the Dowel Back to the Dowel Supports, as shown, using 1 1/4" coarse-thread pocket hole screws.
-
Attach the Tray Front and Bottom
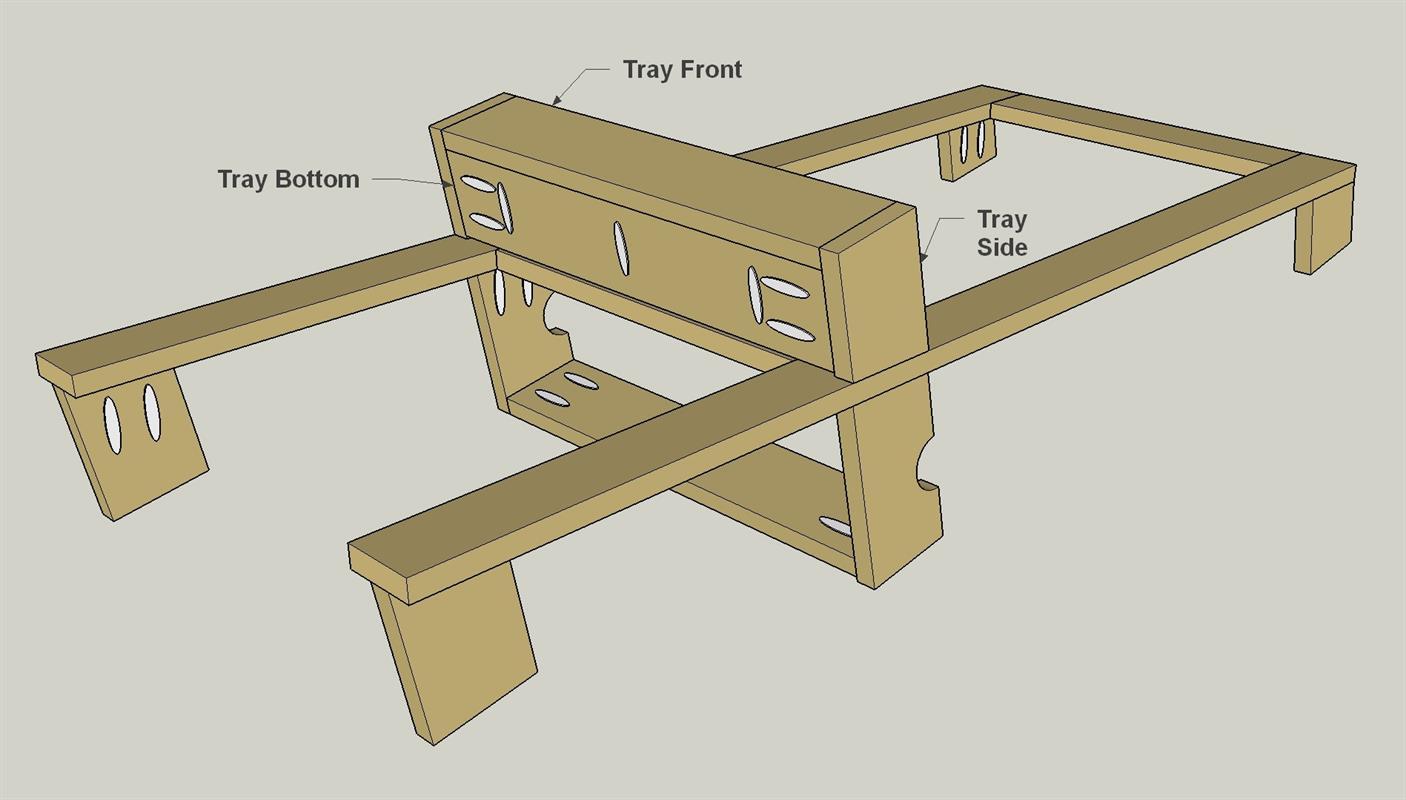
Next, attach the Tray Front and the Tray Bottom, as shown, using 1 1/4" coarse-thread pocket hole screws. At this point, you can sand the easel, and then apply stain or paint.
-
Create the Work Surface
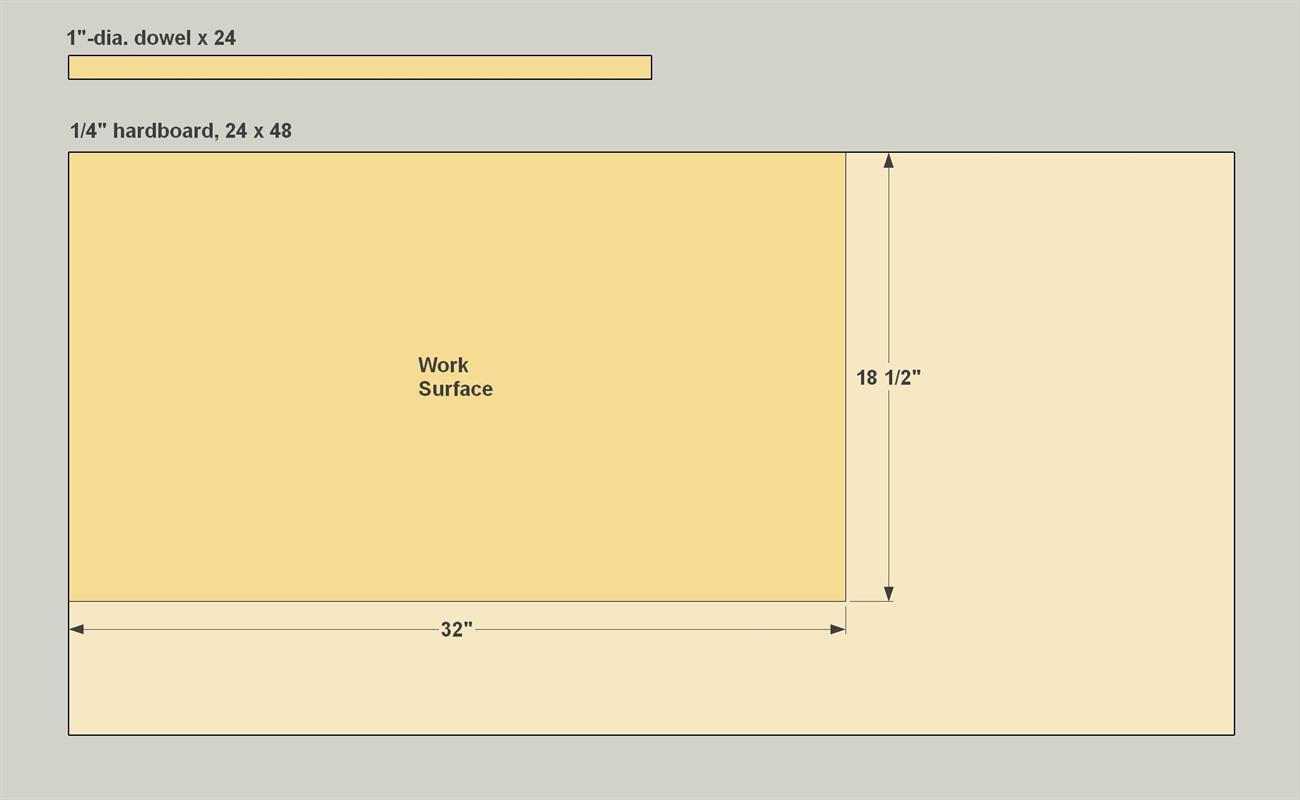
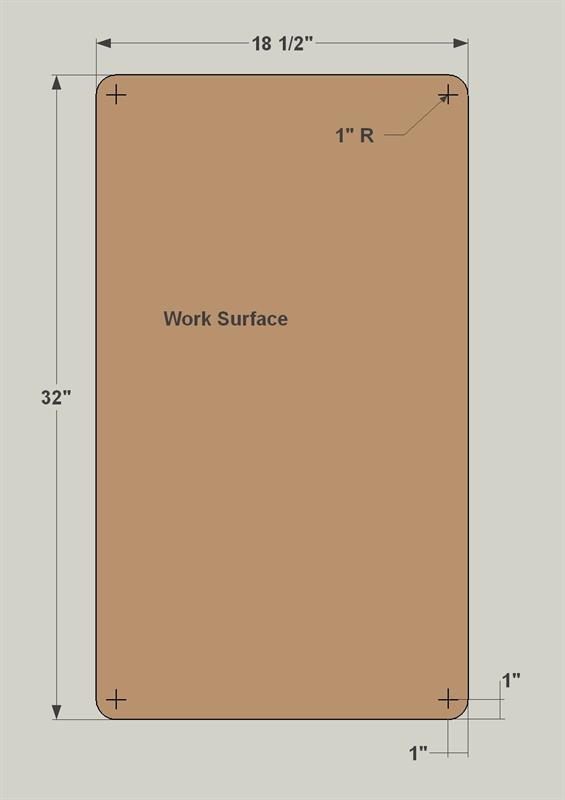
Cut the Work Surface to size from a sheet of 1/4” hardboard, as shown in the cutting diagram. Round over the corners using a jig saw, and then sand them smooth. Then you can rest the work surface in the easel. It can sit loose so that you can remove it to use elsewhere if desired, or it could be attached with a few short nails. With that, it’s time to turn your little artist loose!


