

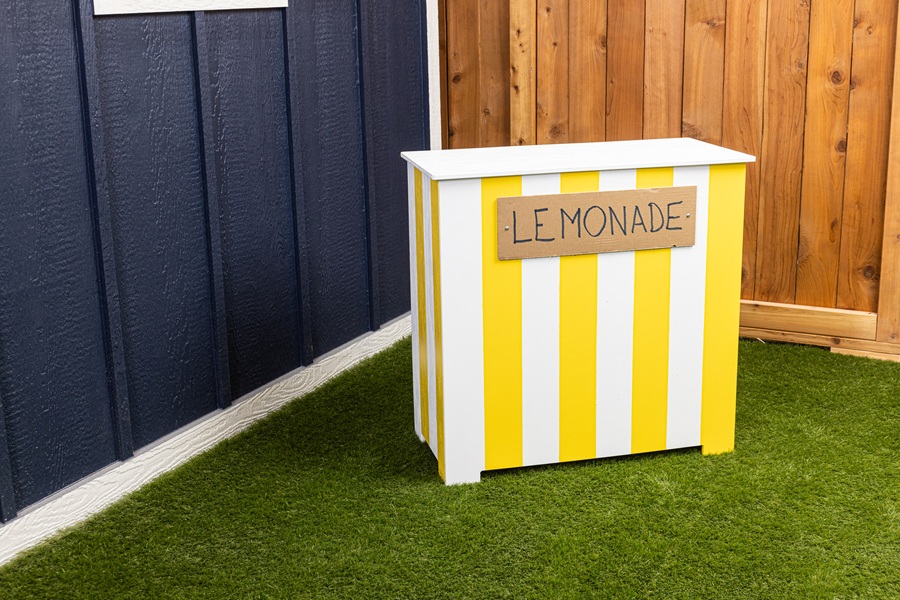


Build a simple lemonade stand with this beginner-friendly project plan. Using basic materials like plywood or boards, screws, and a few common tools, you can create a sturdy, portable stand in just a few hours. It’s a great project for DIYers of any skill level and a fun way to practice measuring, cutting, and assembly while creating something practical for outdoor use.
Tools
Kreg Tools


Other Tools
-
Phillips head screwdriver

-
3/4" drill bit
Materials
Wood Products
- 1 1/2" plywood , 4'x8' sheet
Hardware & Supplies
- 2 30" piano hinges
- 20 Piano hinge screws
- 4 1/2" wood screws
- -- Paint
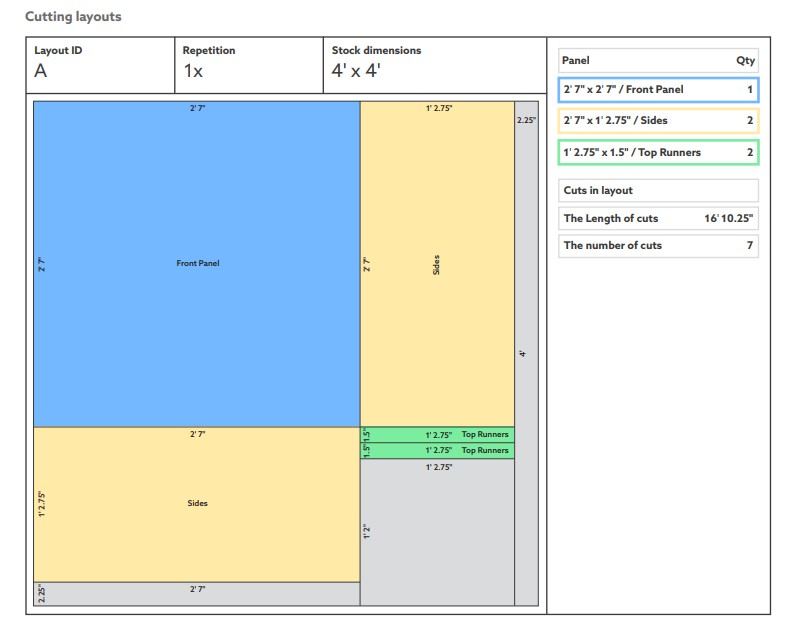
Cut List & Parts
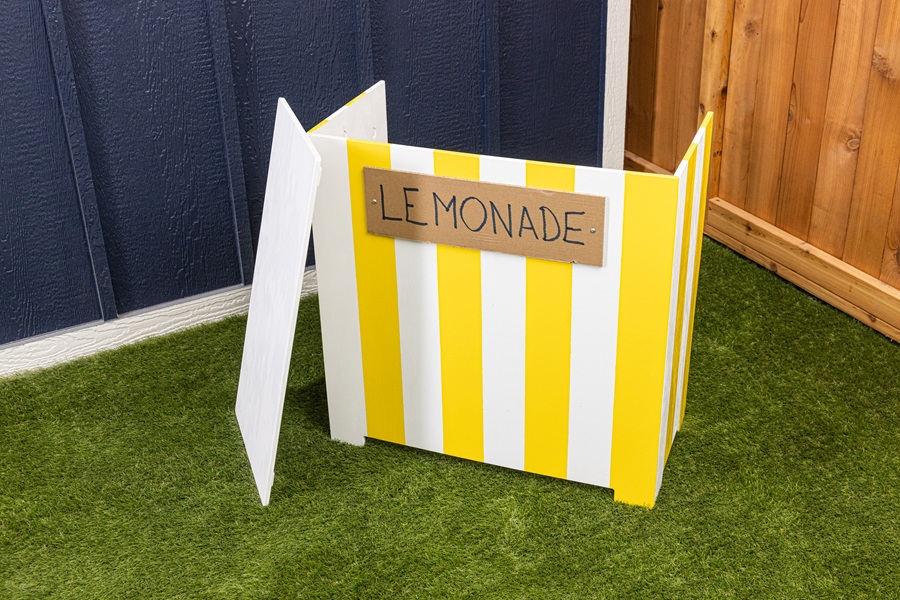
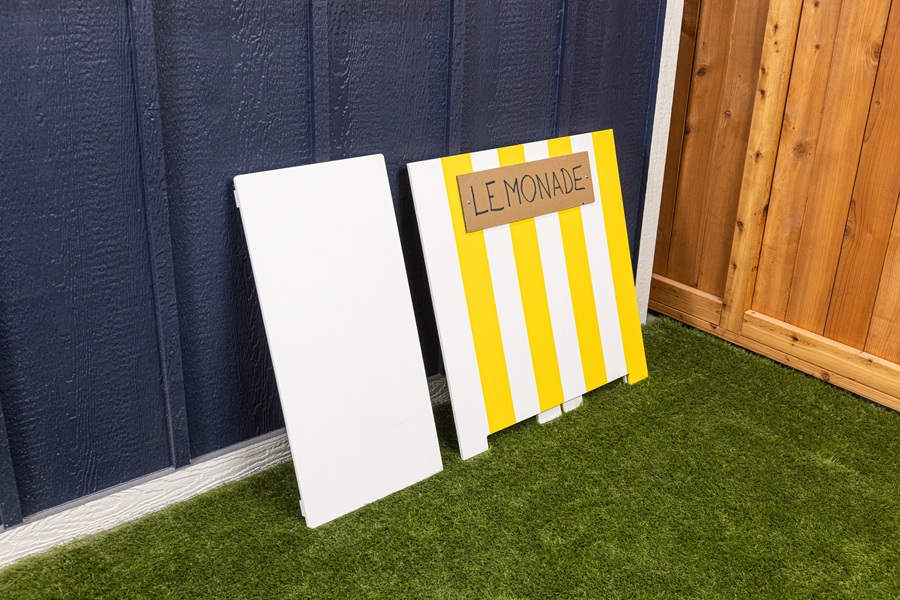
- 1 Front Panel , 31”w x 31”h
- 2 Side Panels , 14 ¾”d x 31”h
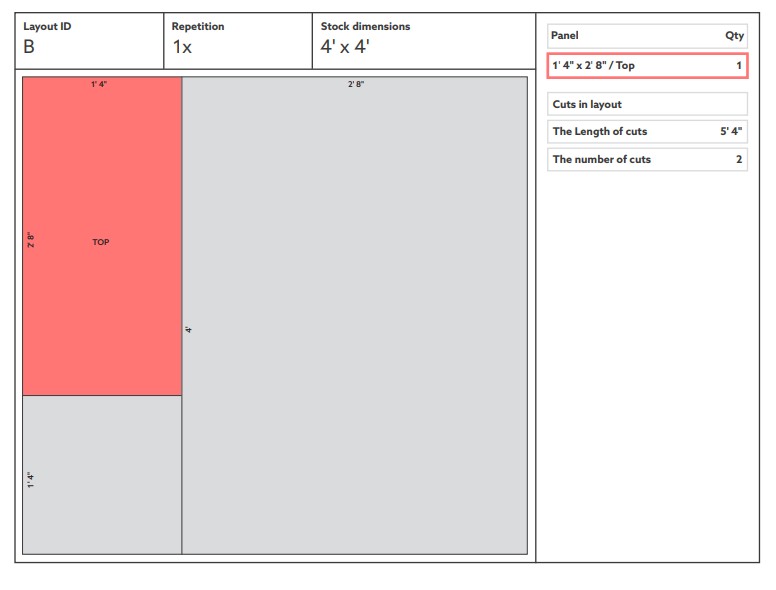
- 1 Top , 16”d x 32”w
- 2 Top Runners , 14 ¾”d x 1.5” w
Directions
-
Cut panels
Using a circular saw and a straight edge or a table saw with a fence, cut the individual panels to their finish dimensions.
-
Add "feet" - optional
If interested in adding “feet” to the bottom of the stand, drill a 3/4” hole 1.5” from the bottom and 3” from the edges of the side panels. On the front panel, drill the holes 1.5” from the bottom and 3.5” from the edges
-
Cut panel edges with jigsaw
Use a jigsaw to cut from the bottom of the panels to the outside edge of the holes. Sand our router the edges for a smooth finish.
-
Add piano hinges
Flip the panel pieces onto their tops. Place the side panels behind the front panel ½” and then screw in the piano hinges ½” from the top of each panel.
-
Add top runners
Fully assembled, set the open panels on the underside of the top panel. Fit the top runners inside so they are aligned to the back of top. Screw into the top with ½” wood screws.
Tip:
a. This placement will keep the top from shifting when oriented upright.
b. There should be a ¾” overhang on the front and side panels.
c. The top should be aligned to the back of the stand. -
Knock down any hard edges (optional)
Use a 1/8” roundover bit to knock down any hard edges.
-
Finishing - base coat
Apply a base coat of paint to the panels and top.
-
Finishing - stripes
To add stripes, measure 3 ¾” from the back and tape off a straight edge with painter’s tape. Measure another 3 ¾” to put another straight edge. Repeat the pattern.
For the front panel, place the first straight edge 3 7/8” from the edge. Repeat the pattern.
Check out lemonadeday.org for info on how to start your own lemonade stand!