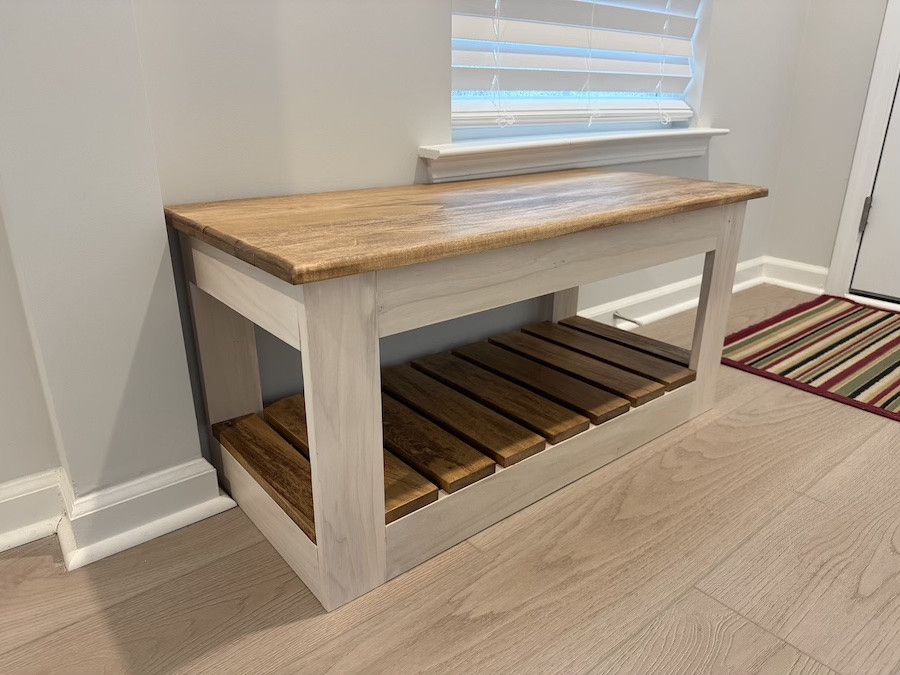


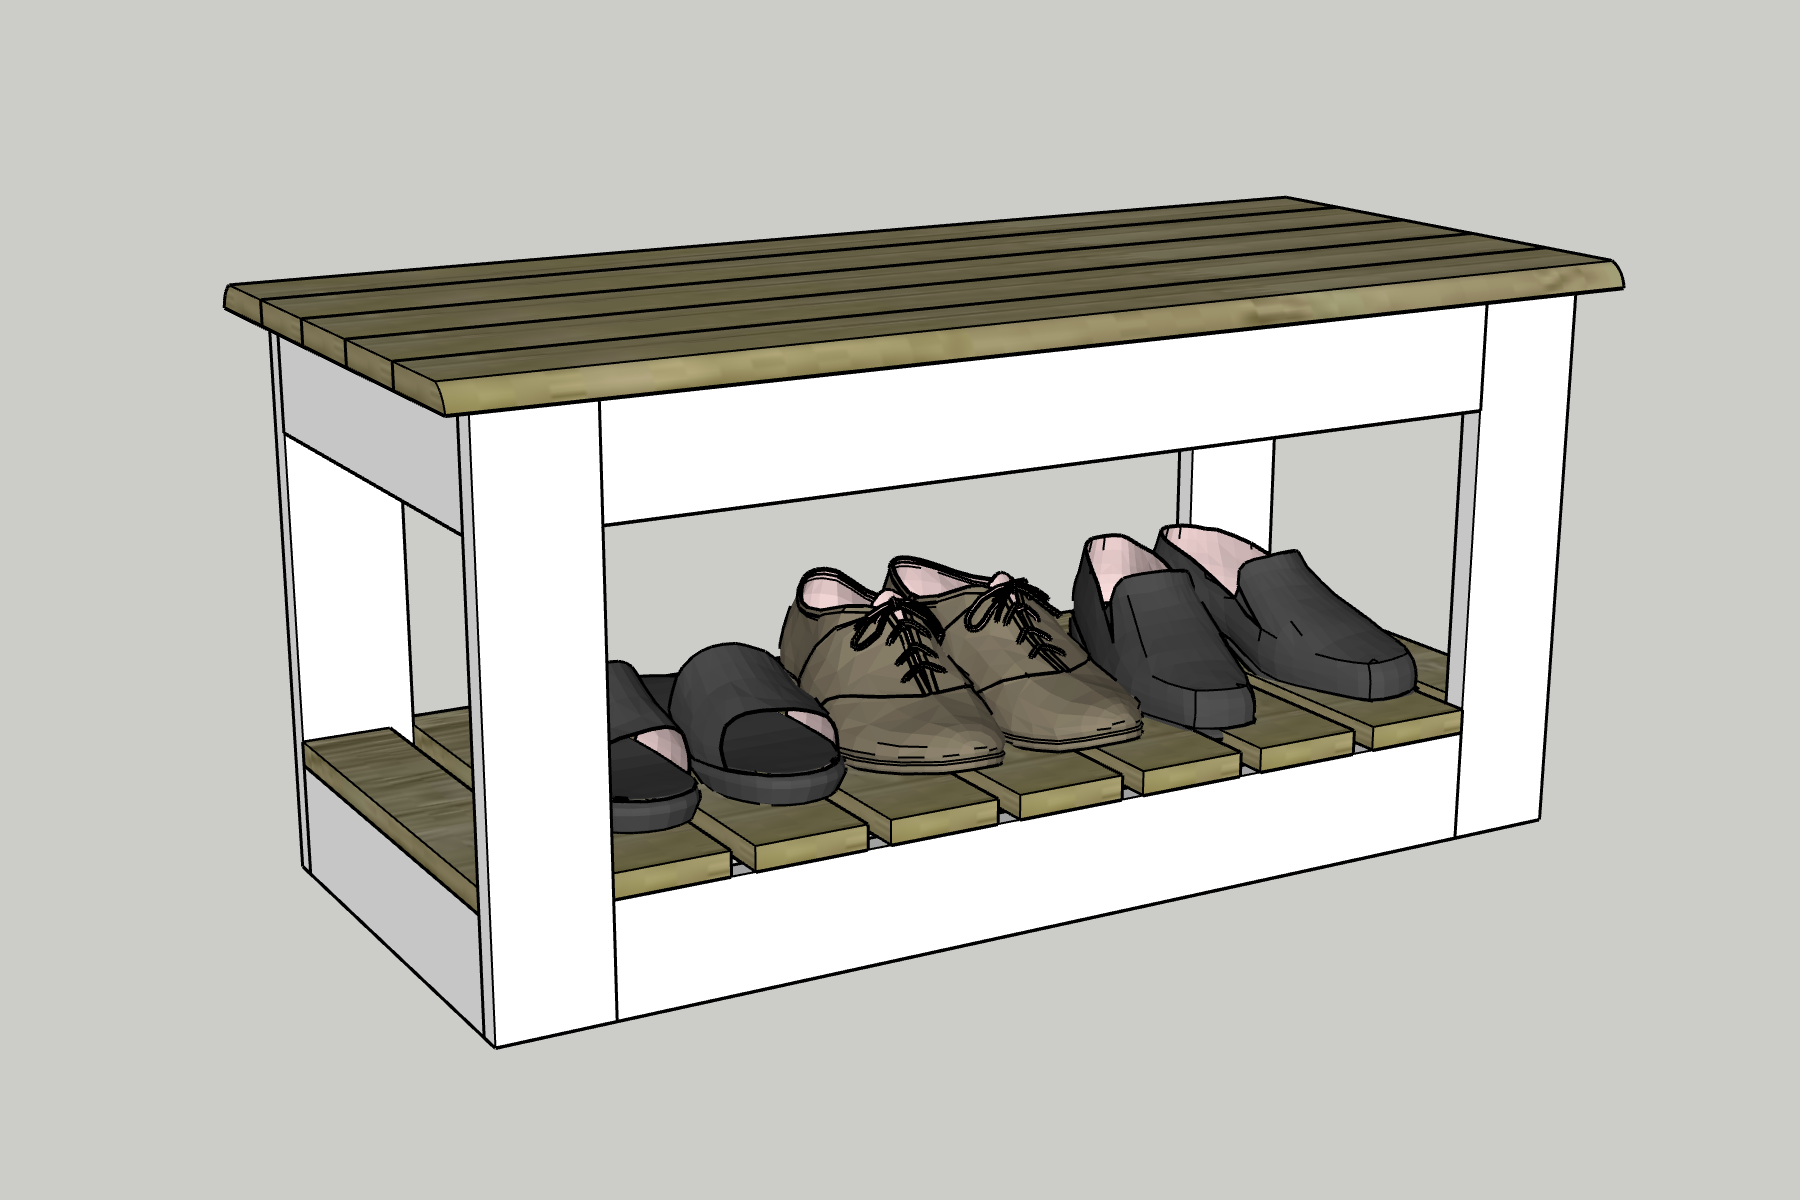


Looking for a place to sit and put on your shoes? This DIY shoe bench is a simple build that will let you store shoes, put them on, and look great in your entryway!
Tools
Kreg Tools


Other Tools
-
Miter saw

Materials
Wood Products
- 8 1x4 Boards , 3/4" x 3 1/2" x 8'
Hardware & Supplies
- 100 1 1/4" pocket hole screws
- 1 Wood glue
- 1 Stain
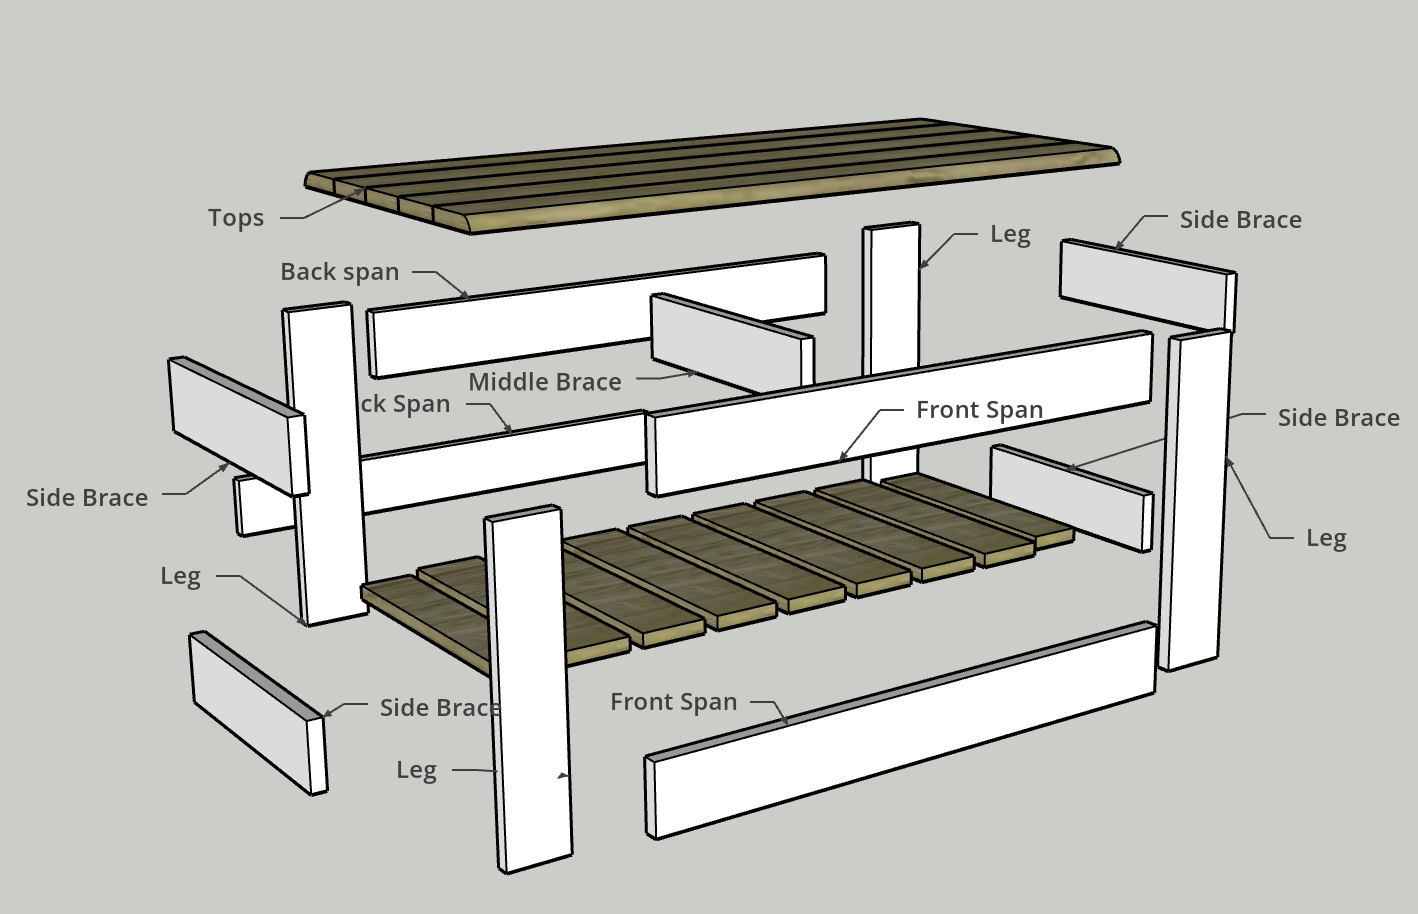
Cut List & Parts
- 4 Front/Back Span , 29" x 3 1/2" x 3/4"
- 4 Legs , 17 1/4" x 3 1/2" x 3/4"
- 4 Side Braces , 14" x 3 1/2" x 3/4"
- 1 Middle Brace , 14" x 3 1/2" x 3/4"
- 5 Tops , 38" x 3 1/2" x 3/4"
- 7 Slats , 15 1/2" x 3 1/2" x 3/4"
- 2 End Slats , 14" x 2 3/4" x 3/4"
Directions
-
Drill pocket holes
- Drill pocket holes in the following locations on these boards:
(2) Front/Back Spans- 2 on each end
(2) Front/Back Spans- 2 on each end and 3 along one long edge
(2) Side Braces- 2 on each end
(2) Side Braces- 2 on each end and 1 on one long edge
(1) Middle Brace- 2 on each end and 1 on one long edge
(4) Tops- 4 along one long edge
-
Front/Back Panels
- Using wood glue and pocket hole screws, attach a Front Span (that only has pocket holes on the ends) between two Legs at the base of the long edge of the Legs.
- Using wood glue and pocket hole screws, attach a Front Span (that has pocket holes along the long edge) between the two Legs with the pocket holes on the edge facing out.
- Repeat to create the back panel using the remaining Legs and Back Spans.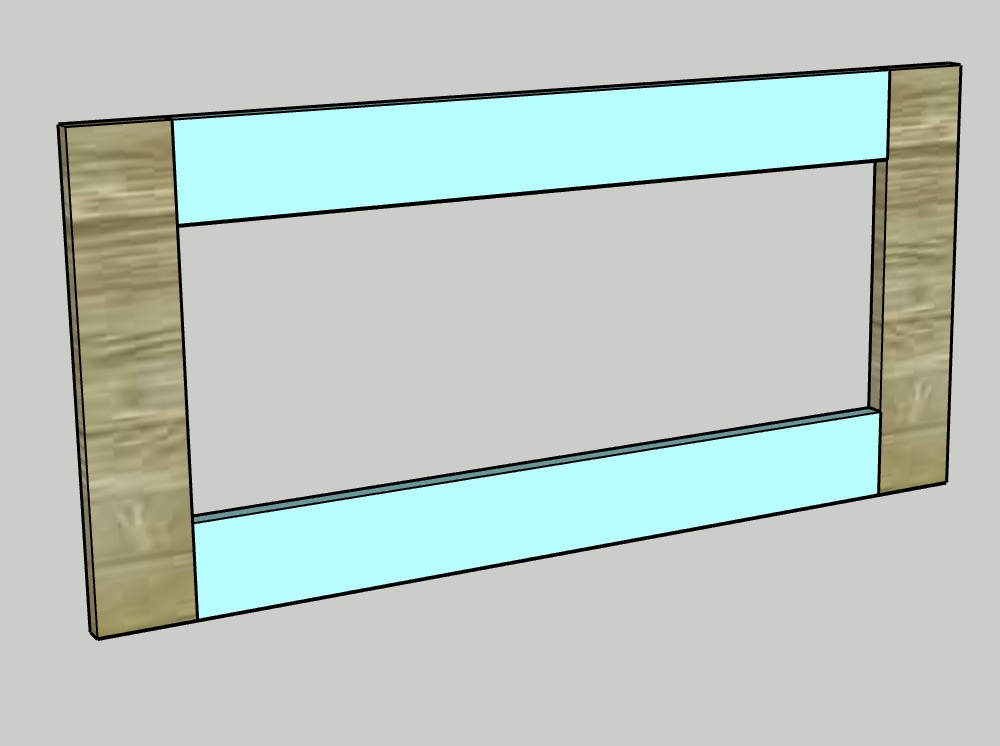
-
Attach side braces
- Using wood glue and pocket hole screws, attach the four Side Braces to the Back Panel with the pocket holes facing inward.
- Attach to the four outer corners of the Legs.
- Using wood glue and pocket hole screws, attach the Middle Brace to the Back Span on the top that has the pocket holes along the edges.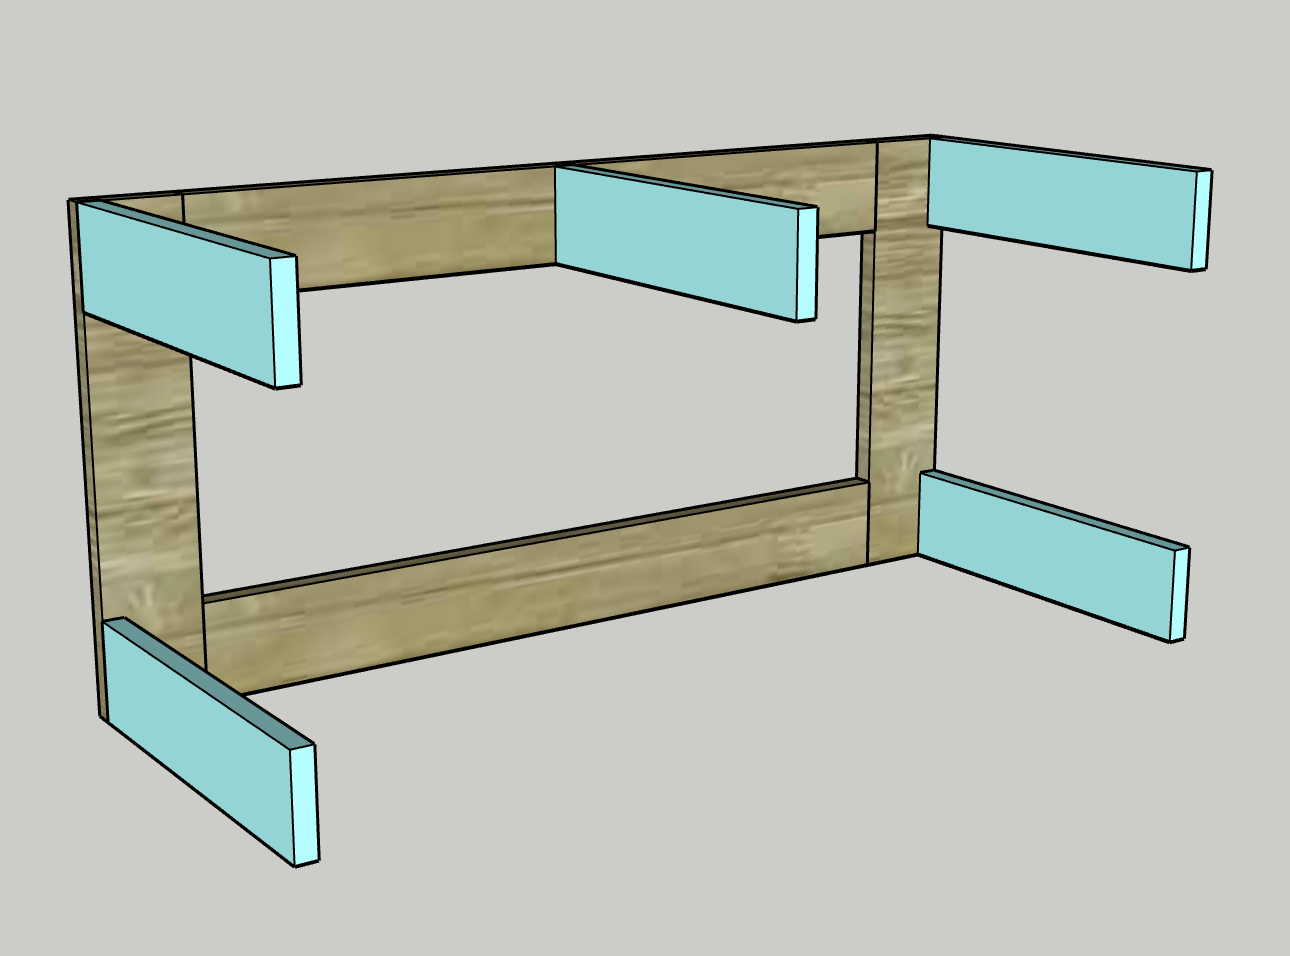
-
Connect front
- Lay the back panel down with the Braces facing up.
- Apply wood glue to the ends of the Side and Middle Braces.
- Lay the front panel on top of the Braces and align them in the same places as the back panel.
- Use pocket hole screws to attach the Braces into the front panel.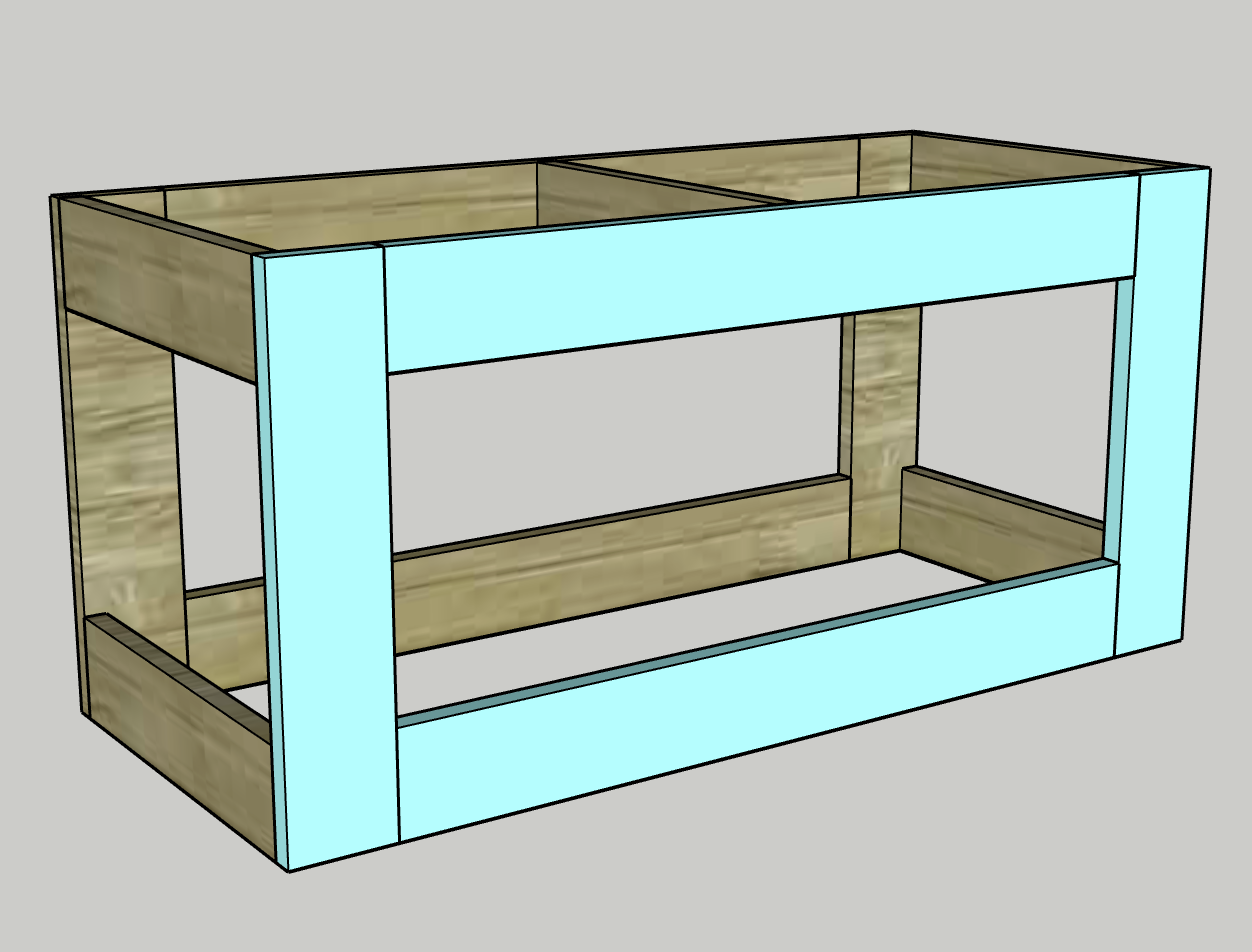
-
Assemble top
- Using wood glue and pocket hole screws, attach one Top into another, connecting along the edge of the second piece that doesn’t have pocket holes.
- Repeat for a second set of two Tops.
- Face the two edges of the sets of Tops with pocket holes into the remaining Top without pocket holes.
- Connect with wood glue and pocket hole screws.
- Use a round over bit around the top edge of the seat to smooth it out, then sand.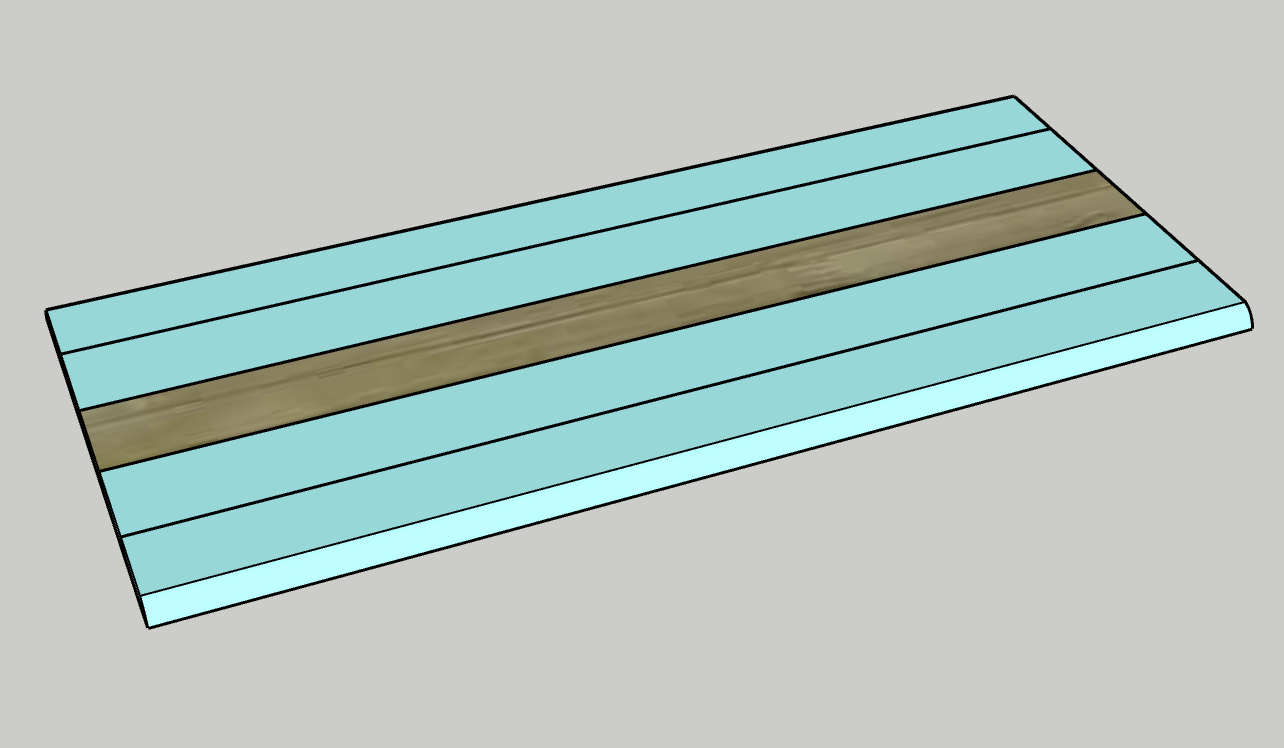
-
Stain/Paint
- If you want to make a two-toned look, stain now. Even if you want to stain all one color, it might be easier to stain now before it’s all put together.
- If going for a two-toned look, stain the Top and Slats one color and the frame another.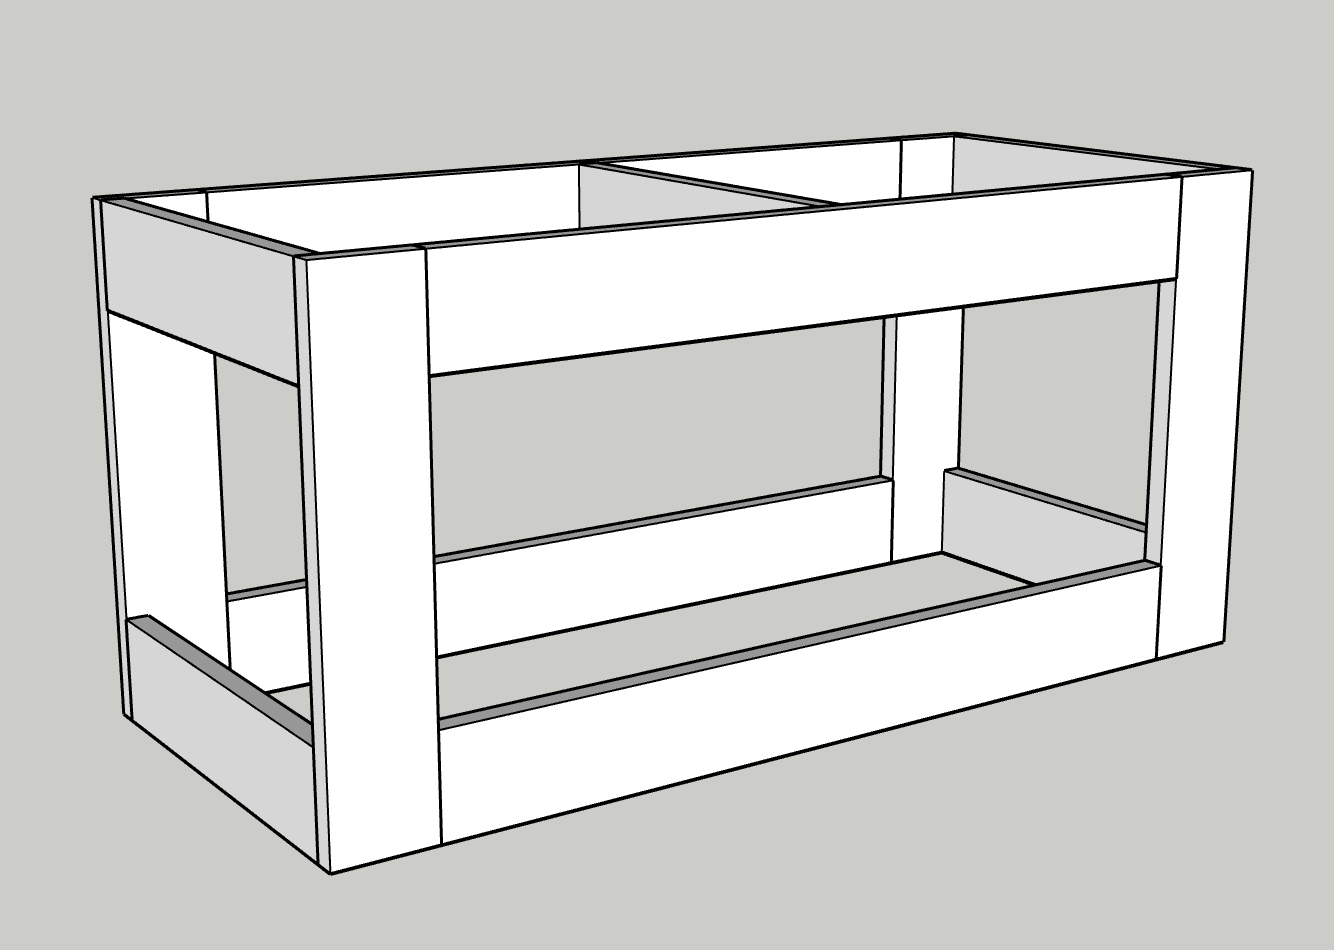
-
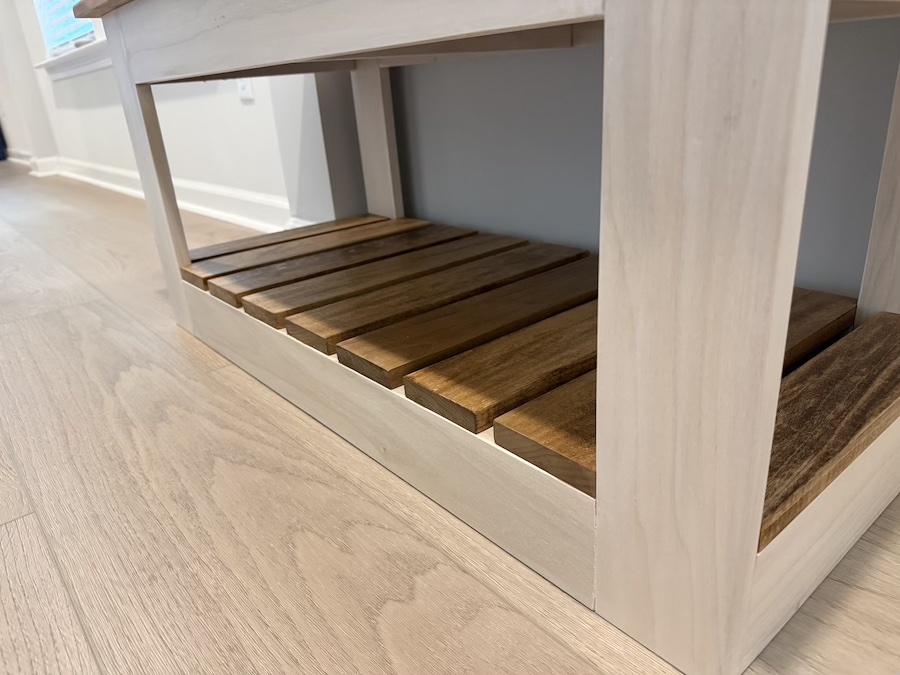
Attach slats to base
- Using wood glue and nails, attach the End Slats along the Side Braces on the ends of the base, between the Legs.
- Using a Slat as a 3/4" spacer, attach each Slat 3/4" apart using wood glue and nails.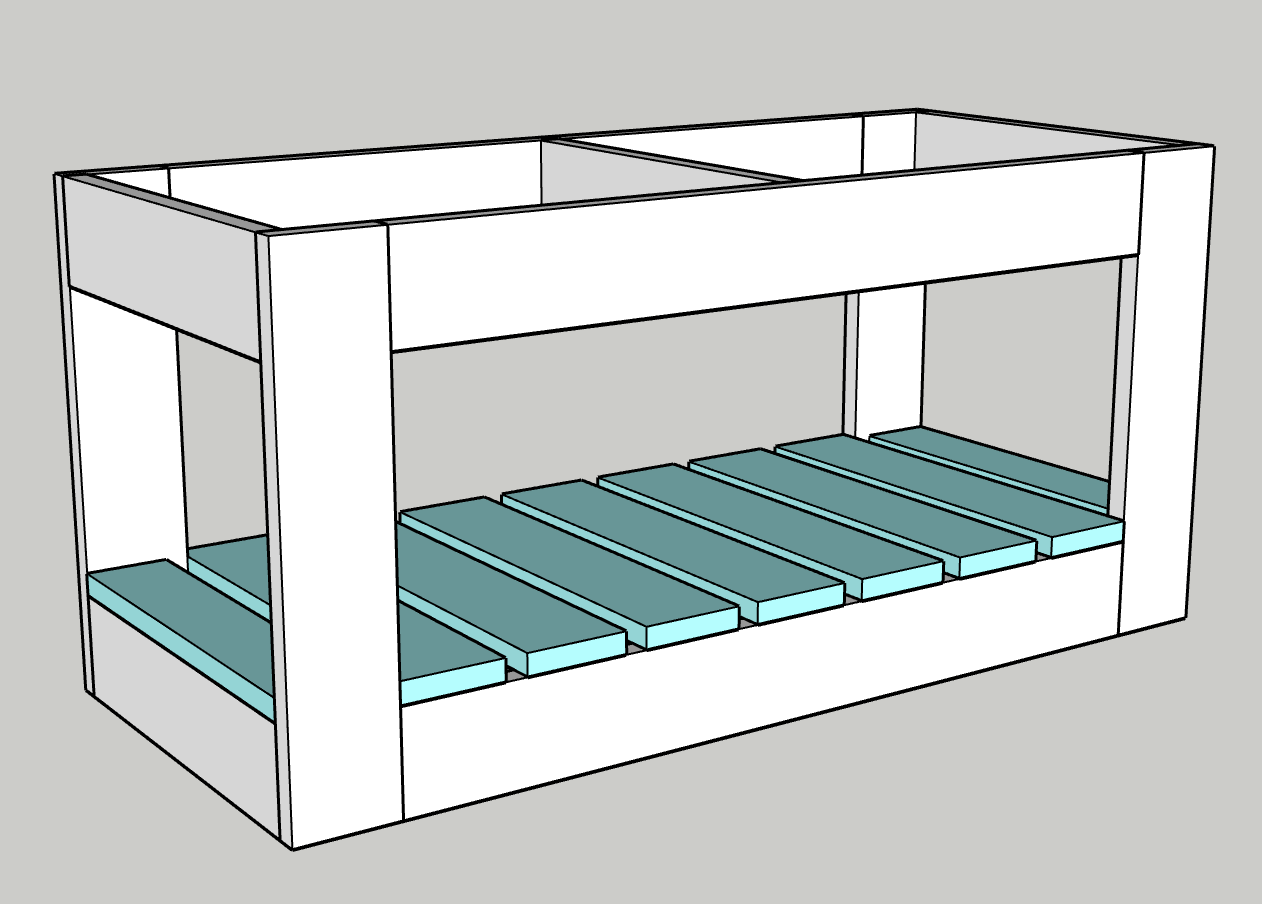
-
Attach top
- Put a bead of wood glue around the top edge of the base.
- Carefully align the Top on the base with 1” all the way around and clamp in place.
- Using pocket hole screws on the Front Span, Back Span and Side Braces, attach the Top.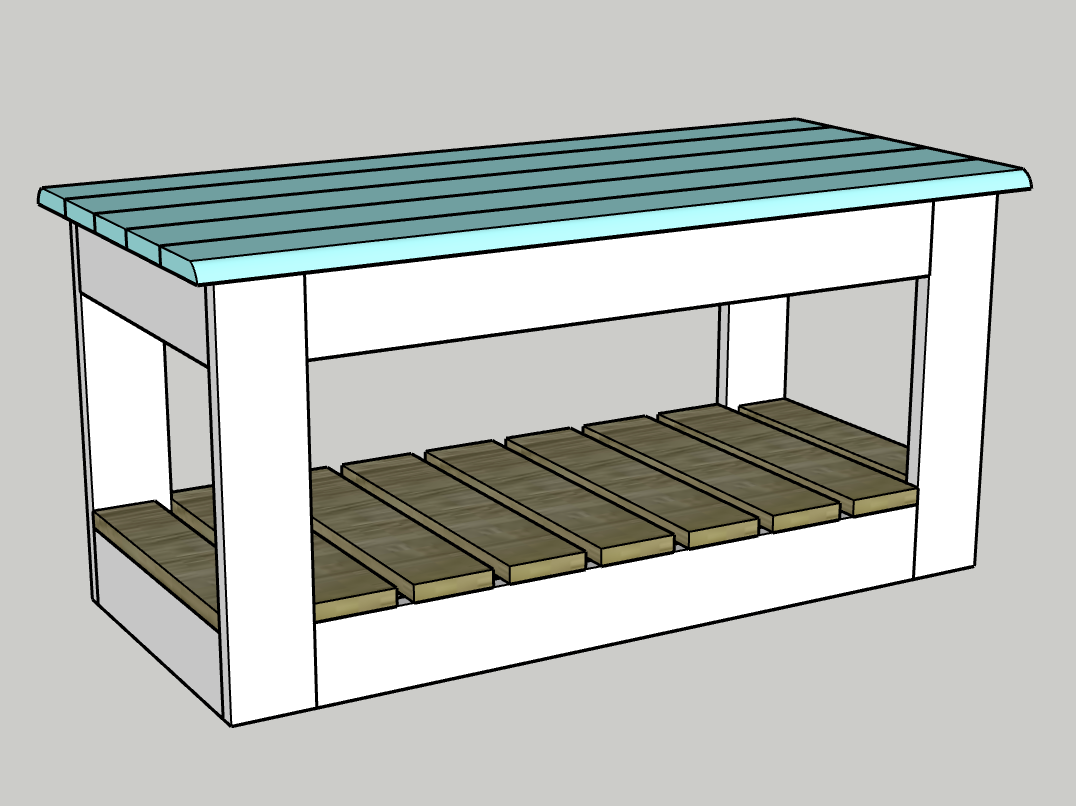
-
Finish
- Add a coat of polyurethane to the entire piece to protect it from the wear and tear it will receive.
- Give a light sanding.
-
Enjoy
Enjoy your handiwork and tag @CharlestonCraftedBuilds on Instagram with a picture!