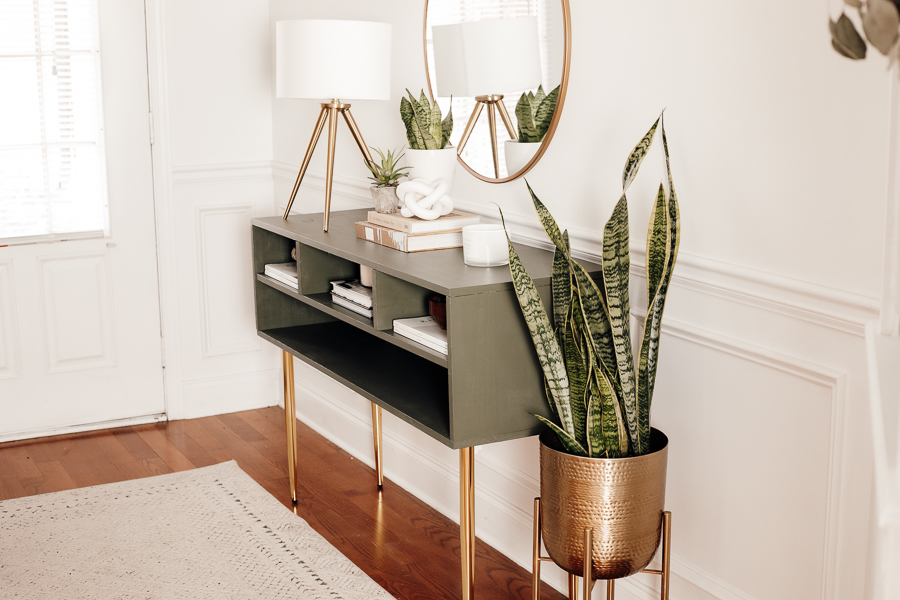


This DIY entryway table has a modern design and can be customized to whatever color and leg style you choose. (You could also add an optional drawer if you choose to modify the design.)
Tools
Kreg Tools


Materials
Wood Products
- 4 Project Panels , 15 13/16"x 48"
- 1 1x6 Board , 1"x6"x6'
Hardware & Supplies
- 18 1 1/4" Pocket Hole Screws
- 10 1 1/4" Wood Screws
- 1 Paint
- 4 Prefabricated Table Legs
- 16 1/2" Screws
Directions
-
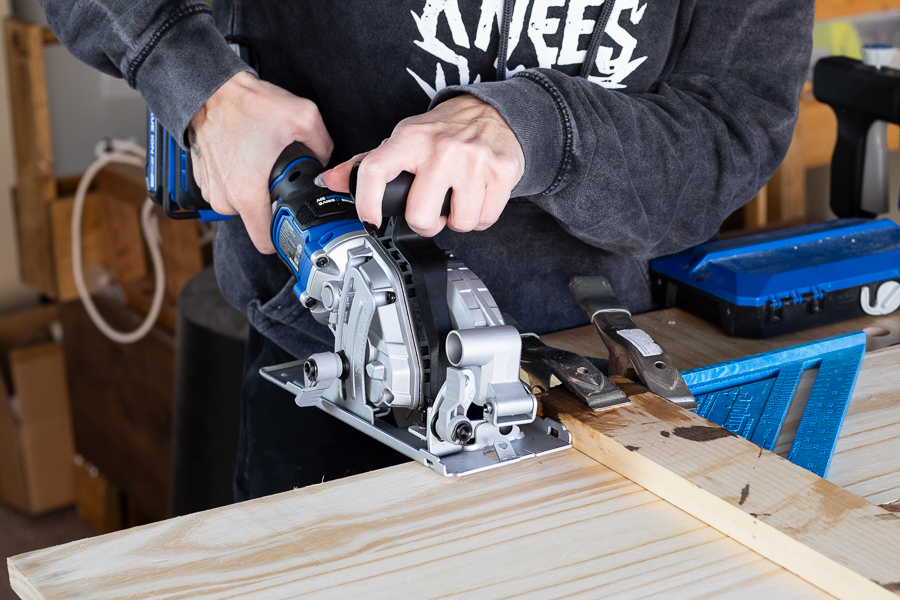
Cut Your Wood
Use your 4 1/2" circular saw (I clamped a speed square and a board down to use as a guide) to cut your wood to the specified dimensions.
-
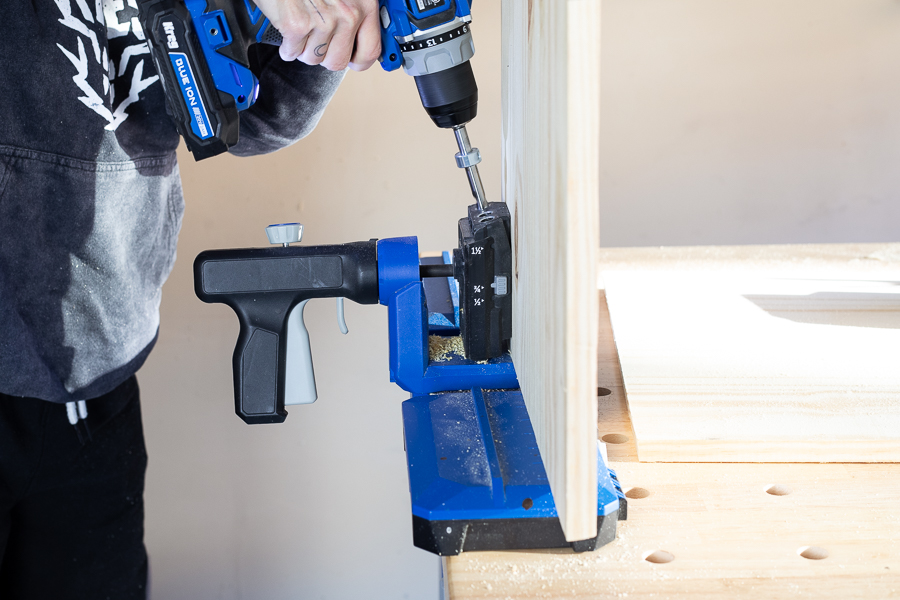
Drill Pocket Holes
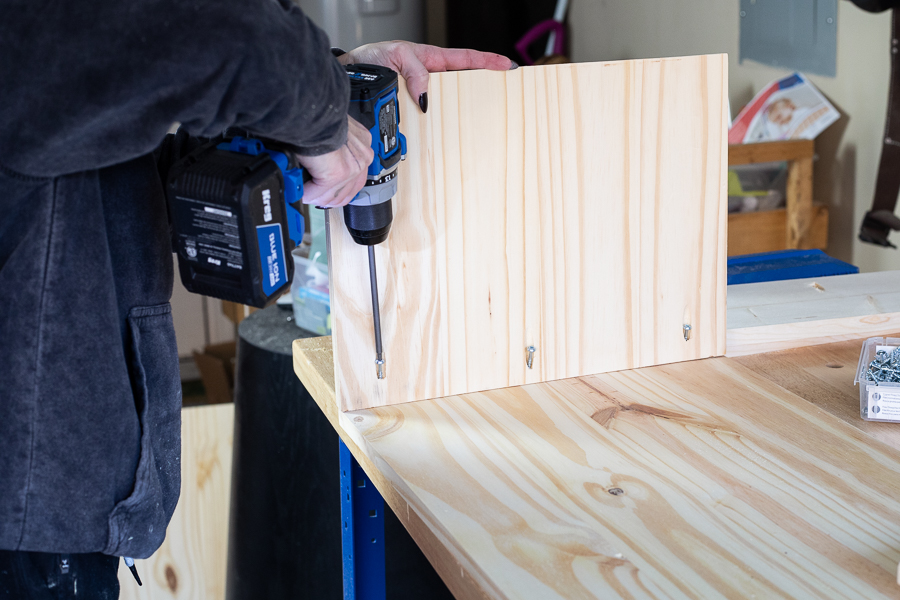
Drill pocket holes as follows: 3 at each end of your 46 1/2" long center shelf piece; 3 along one side of each of your 1x6 divider pieces; 3 at each end of your 12" long side pieces.
-
Sand Smooth
Sand everything smooth using a random orbit sander.
-
Assemble Sides and Dividers
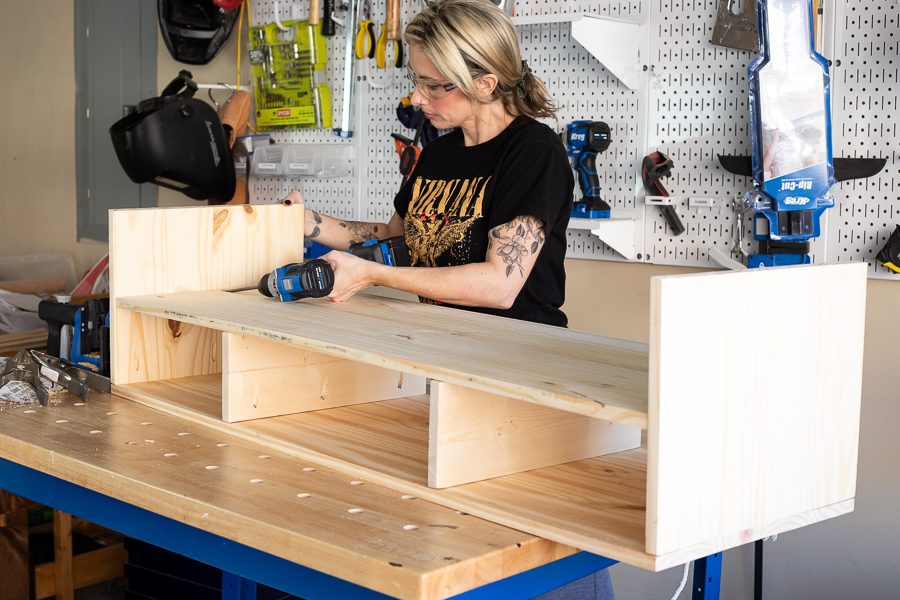
Working with the table upside down for now, attach the sides to one of your 48" long project panels using 1 1/4" pocket hole screws. Add your 1x6 divider pieces (I positioned mine 18" apart), also using 1 1/4" pocket hole screws.
-
Add Center Shelf
Attach your 46 1/2" project panel (center shelf) to the sides using 1 1/4" pocket hole screws, then use 1 1/4" wood screws to attach it to the 1x6 boards as well.
-
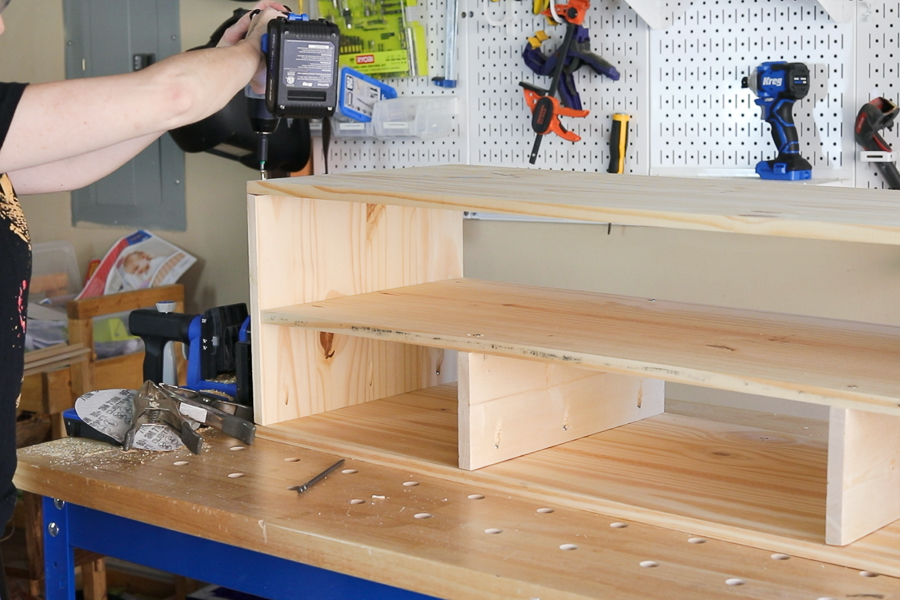
Add Bottom Panel
Add your bottom panel (remember we are currently working upside down and will flip it over), attaching it with 1 1/4" wood screws.
-
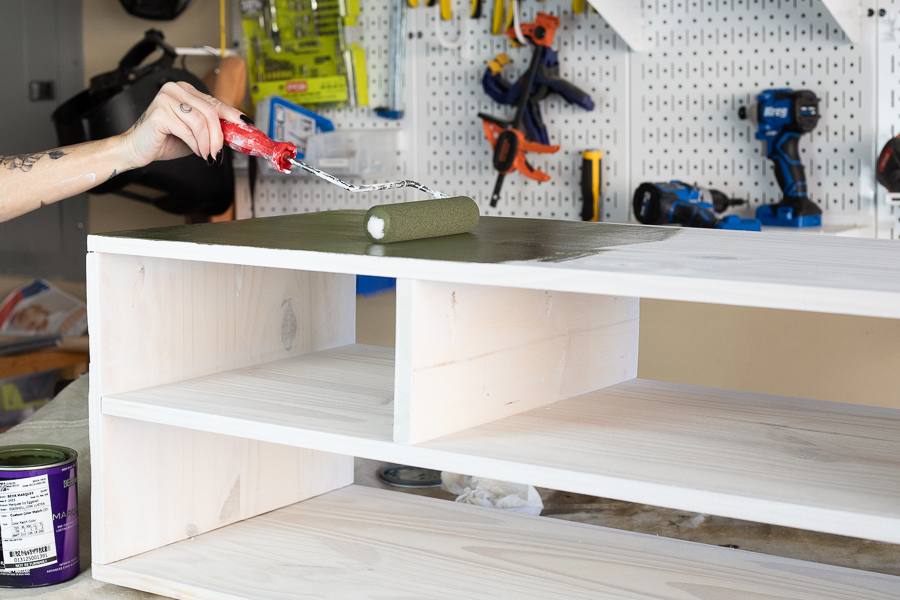
Prime and Paint
Flip over your table base and prime and paint (or stain) it. This one is painted a mountain olive green.
-
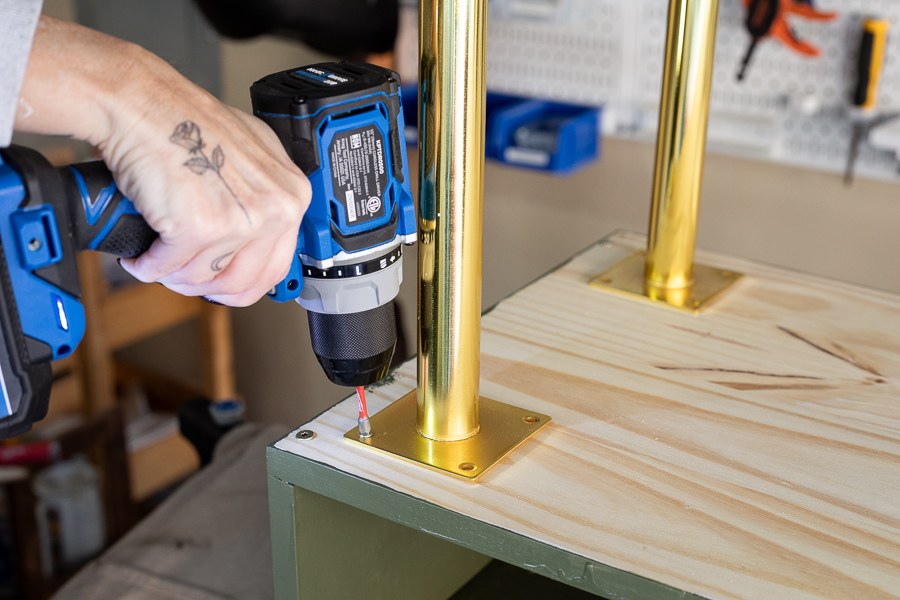
Attach Legs
Flip it back over and attach your prefabricated legs (these came from Amazon) using 1/2" wood screws.