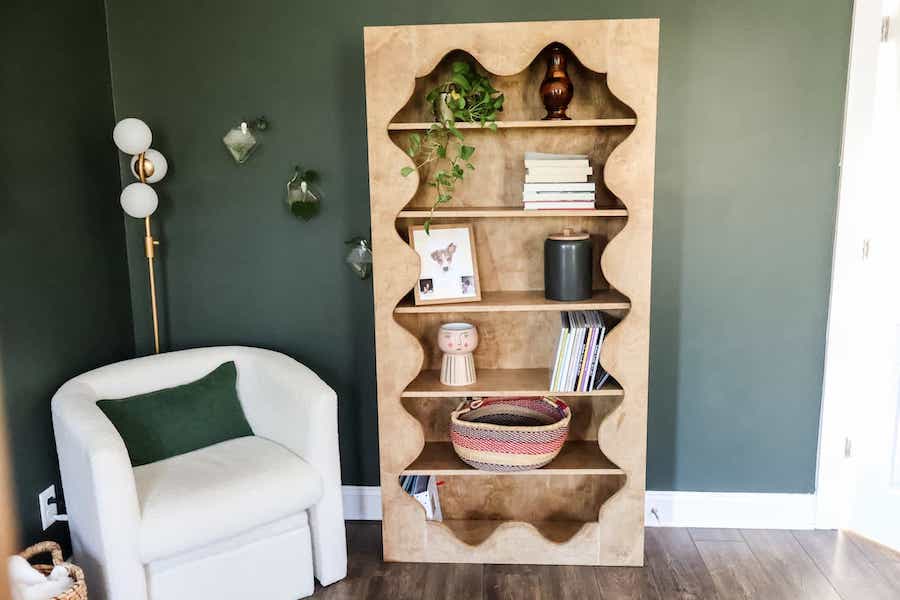
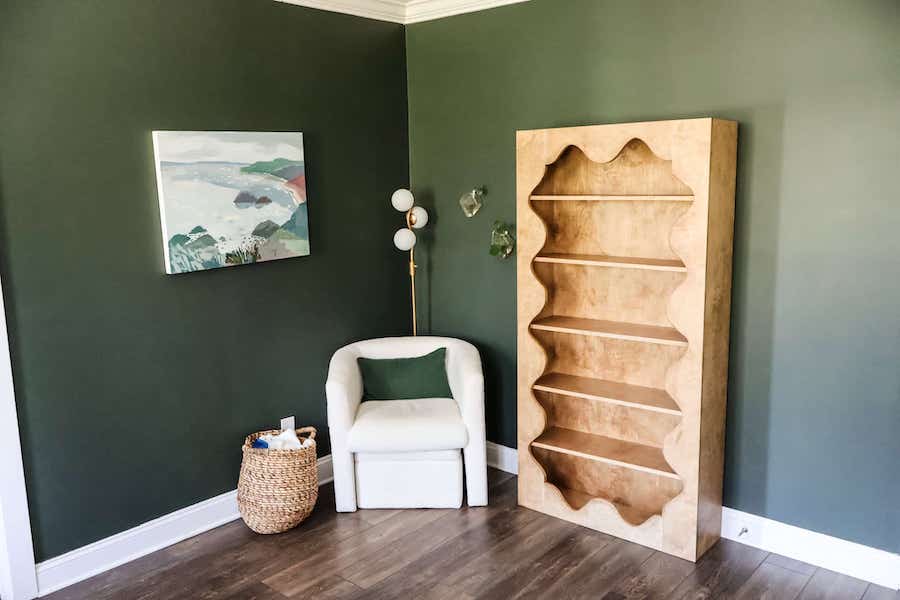
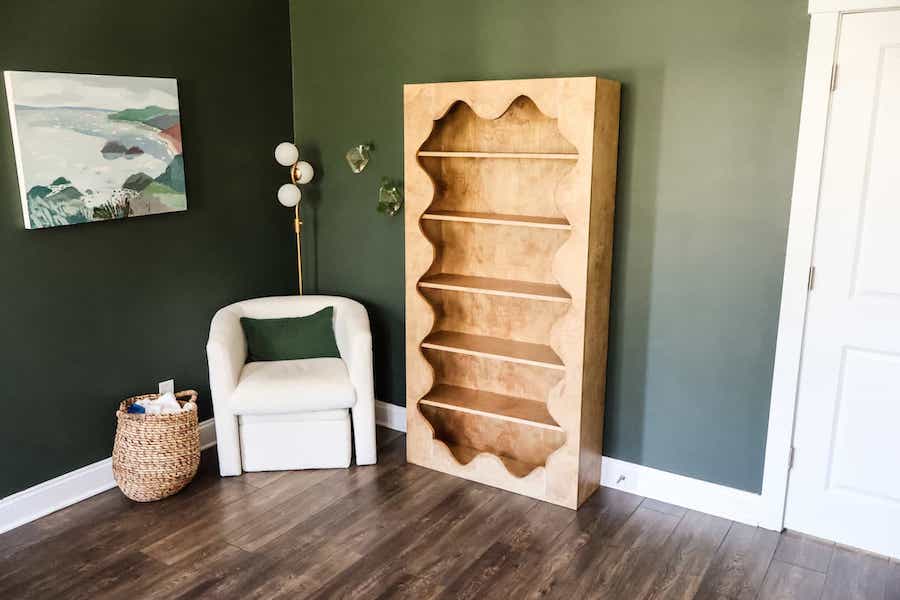


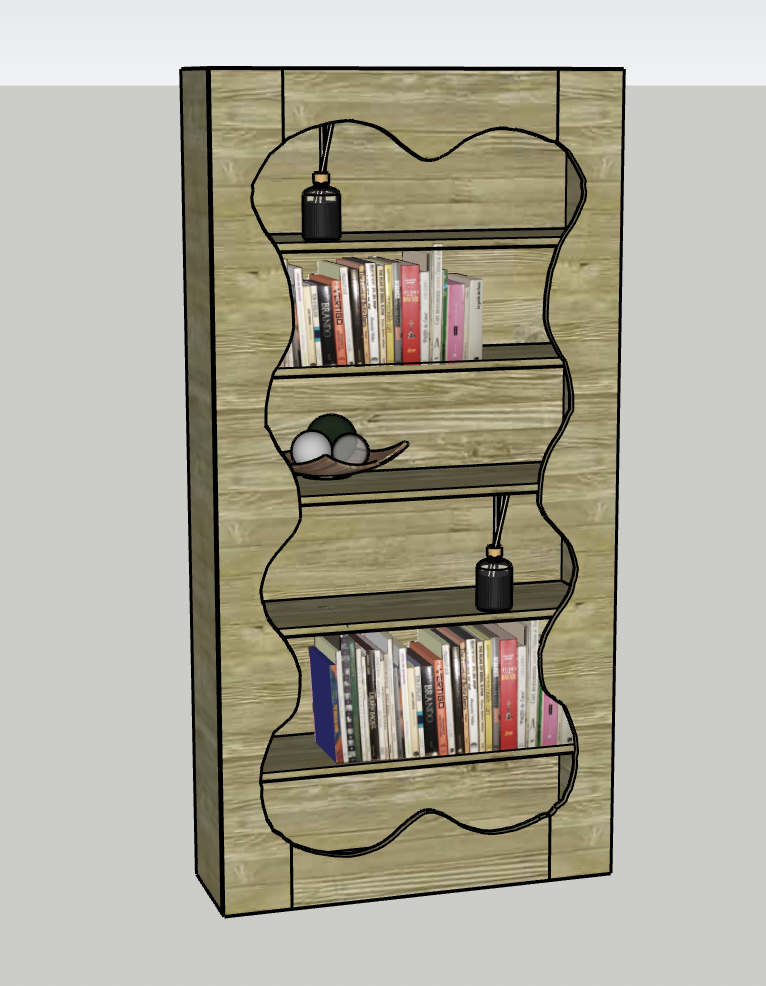
This DIY wavy scalloped bookcase is a trendy way to show off your books and decor. Scalloped edges break up the sharp lines for a beautiful look!
Tools
Kreg Tools

Materials
Wood Products
- 2 3/4" plywood , 4'x8'
- 1 1/4" plywood , 4'x8'
- 1 Edge banding
Hardware & Supplies
- 20 1 1/4" Kreg pocket hole screws
- 1 Wood glue
- 1 1" nails
- 1 Stain or paint
- 1 Polyurethane
- 16 1/4" shelf pins
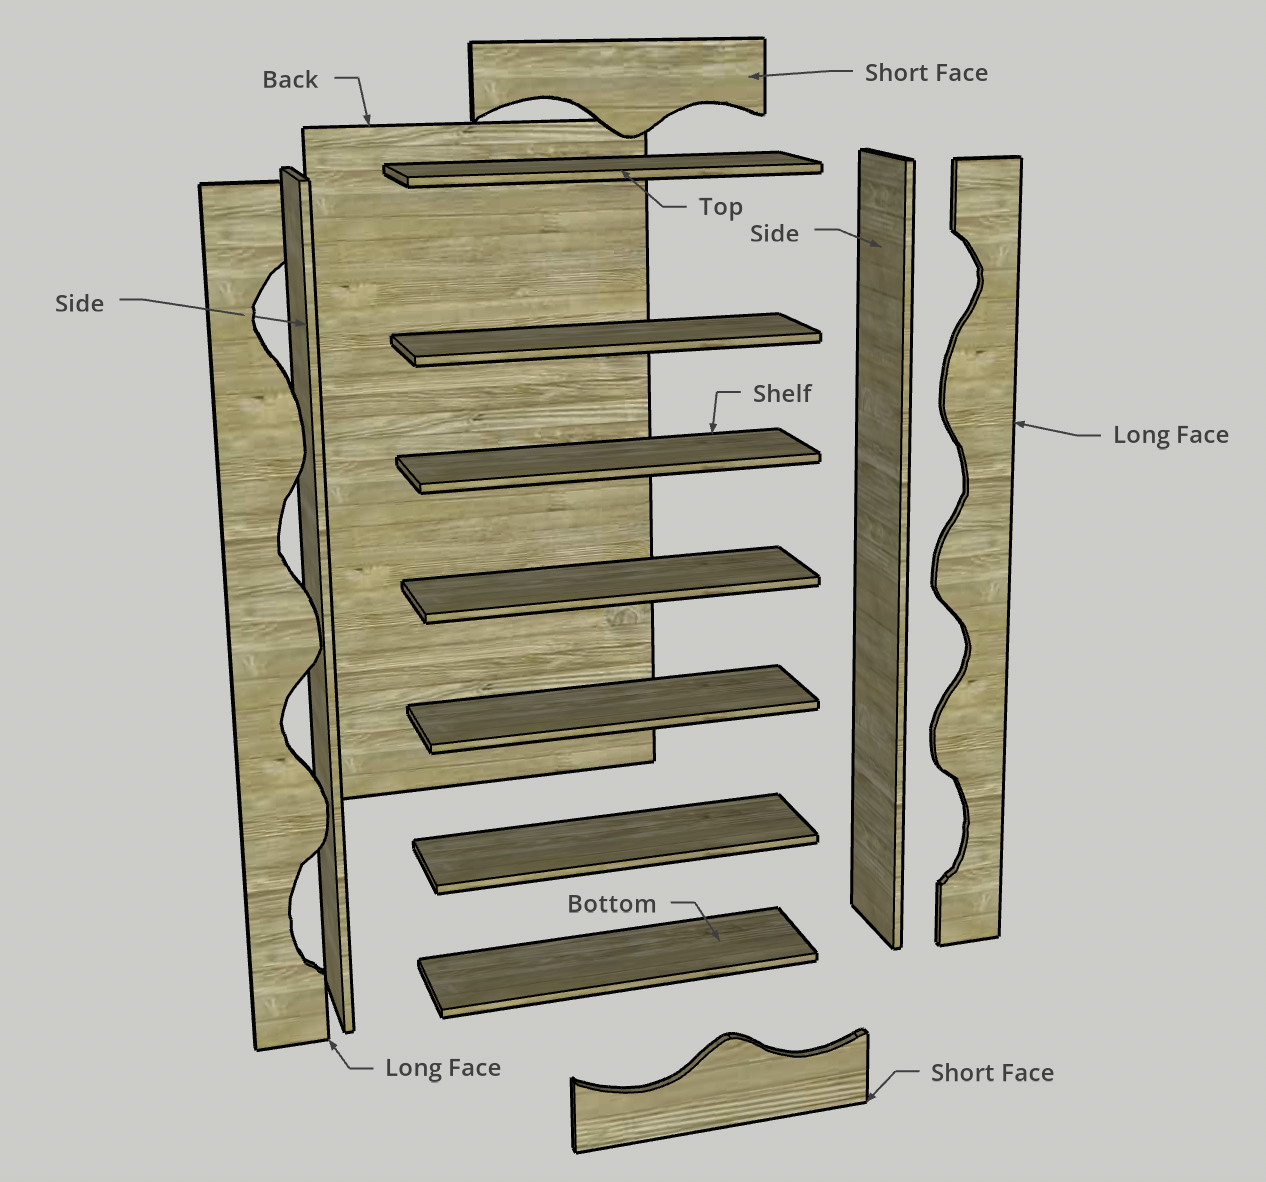
Cut List & Parts
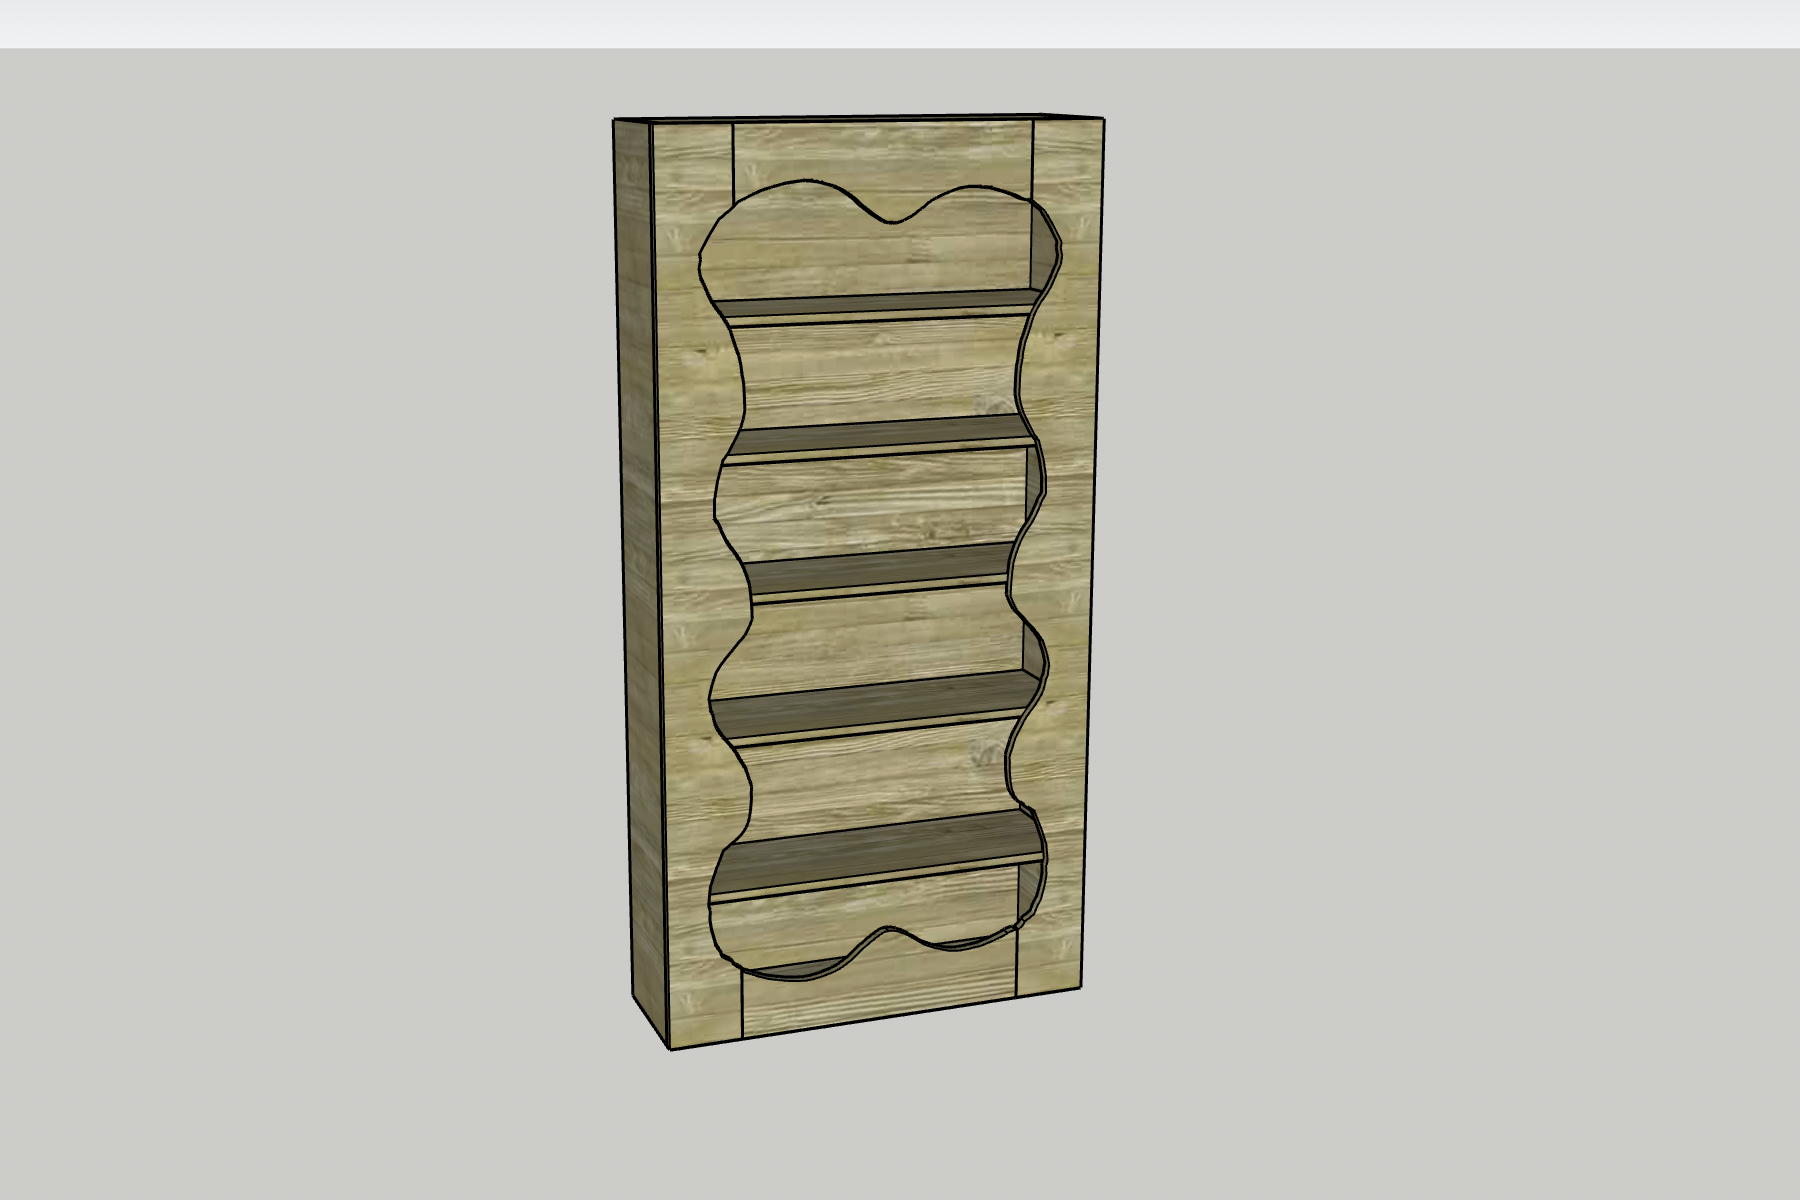
- 2 Sides , 10 1/2" x 72" x 3/4"
- 2 Top/Bottom , 10 1/2" x 34 1/2" x 3/4"
- 5 Shelves , 10 1/2" x 34 1/2" x 3/4"
- 2 Long Face , 8" x 72" x 3/4"
- 2 Short Face , 8" x 24" x 3/4"
- 1 Back , 35 1/2" x 71 1/2" x 1/4"
Directions
-
Drill pocket holes
- Drill pocket holes in the following locations on these boards:
Top- 2 on each end
Bottom- 2 on each end
(1) Shelf- 2 on each end
(2) Sides- 4 on one long edge at 4” and 30” from each end -
Cut scallops
- On the face of one Long Face, mark a point 6" x 6" from opposing corners.
- With a pencil, draw four waves between the two points on the board.
- On the face of one Short Face, mark a point 6" up the short edges.
- With a pencil, draw a wave between the two points on the board.
- Using a jigsaw, cut out the waves along the lines.
- Using these two cuts, trace matching waves on the other Long Face and Short Face boards and repeat the process.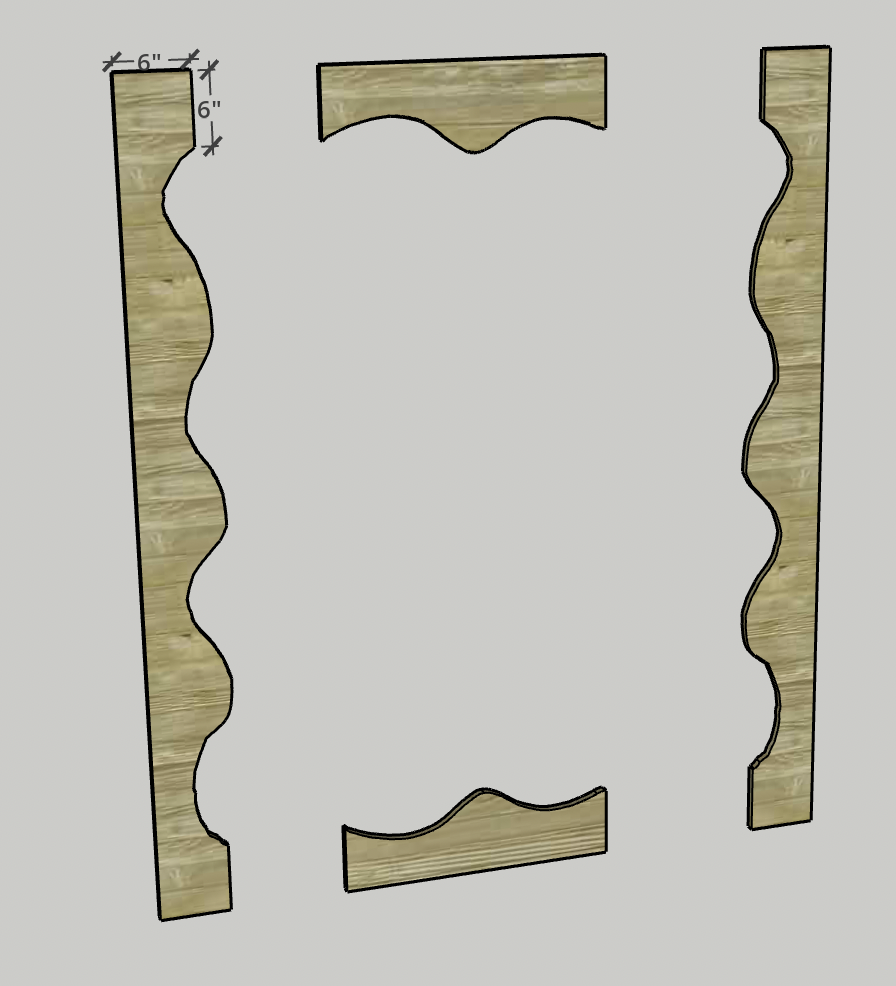
-
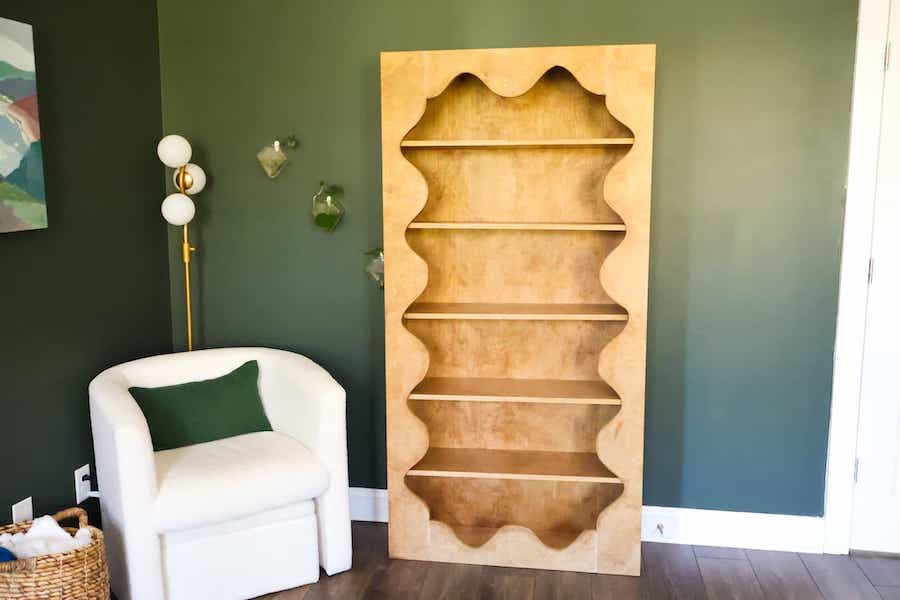
Assemble Box
- Using wood glue and pocket hole screws, attach the Top and Bottom between the two Sides flush at the ends.
- Using wood glue and pocket hole screws, attach the Shelf with pocket holes at the center between the Sides.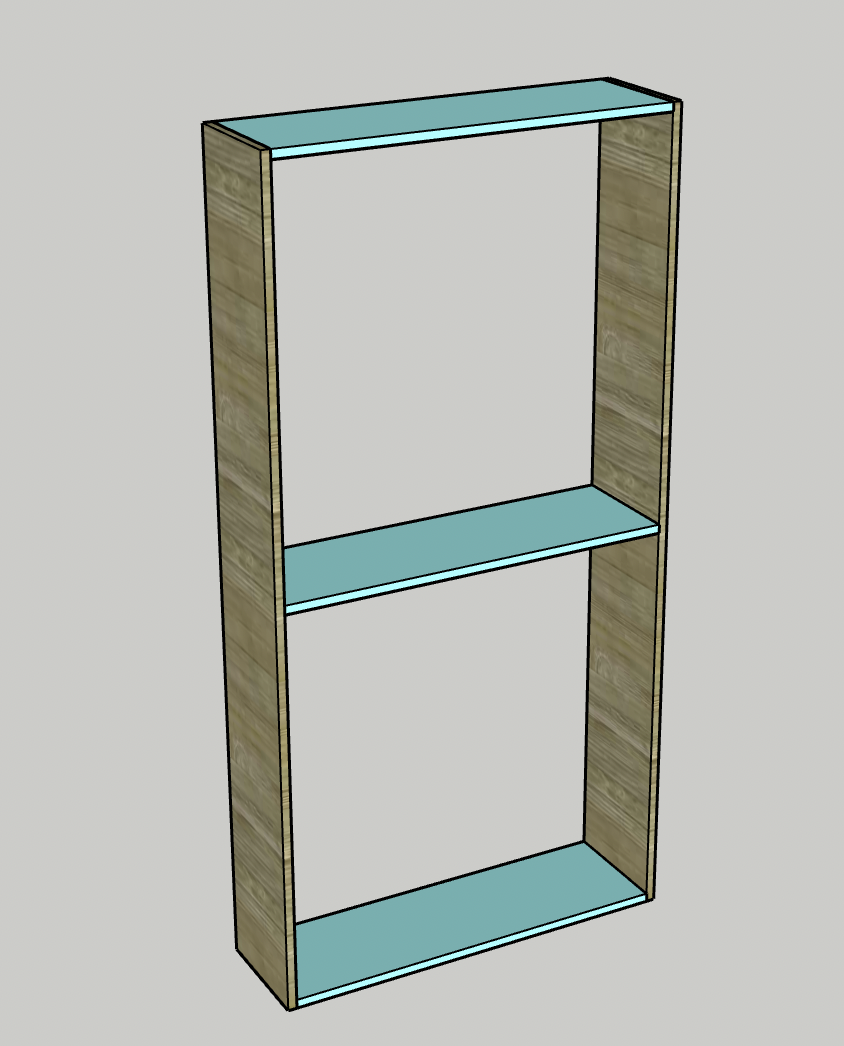
-
Drill shelf pin holes
- Using a Kreg Shelf Pin Jig, drill shelf pin holes up and down both Sides to prepare for adjustable shelves.
-
Assemble face
- Drill two pocket holes on each short edge of the Short Faces.
- Using wood glue and pocket hole screws, attach the Short Faces between the two Long Faces.
- These should line up with the 6" edges of the Short Faces attaching flush with the 6" cut in on the Long Faces.
-
Attach face
- Apply wood glue to the forward facing edges of the bookcase box.
- Using clamps, align and secure the scallop face to the front of the bookcase.
- Using pocket hole screws, attach the face using the pocket holes on the long edge of the Sides.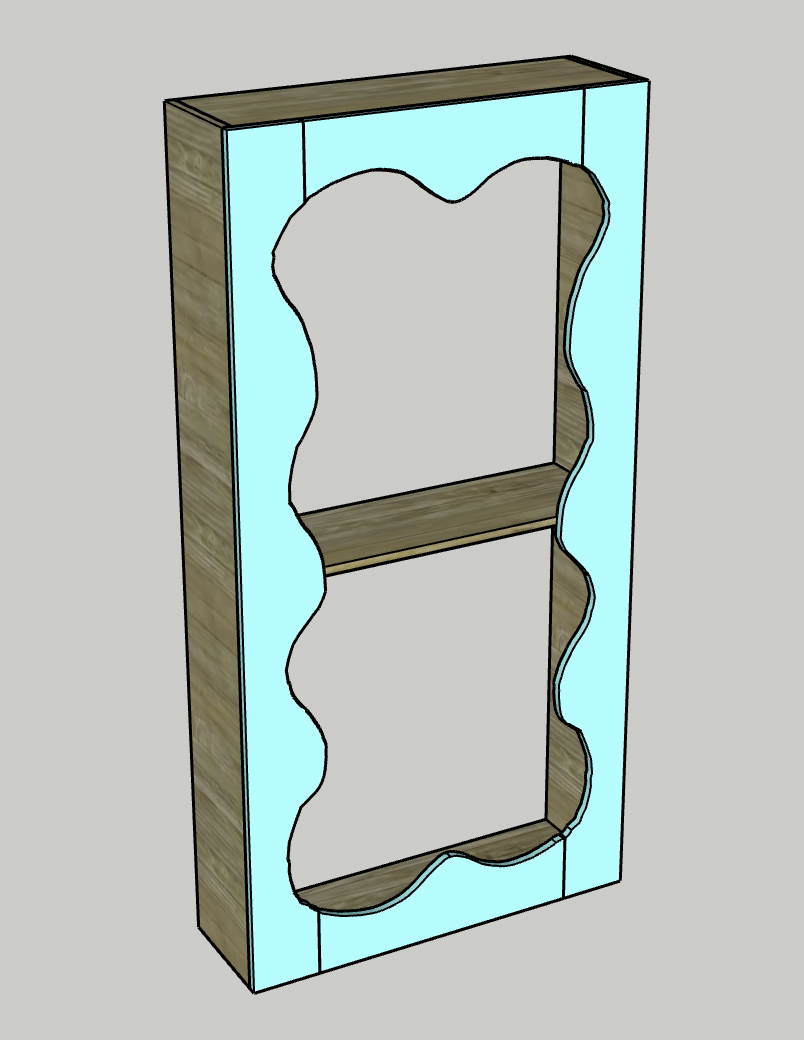
-
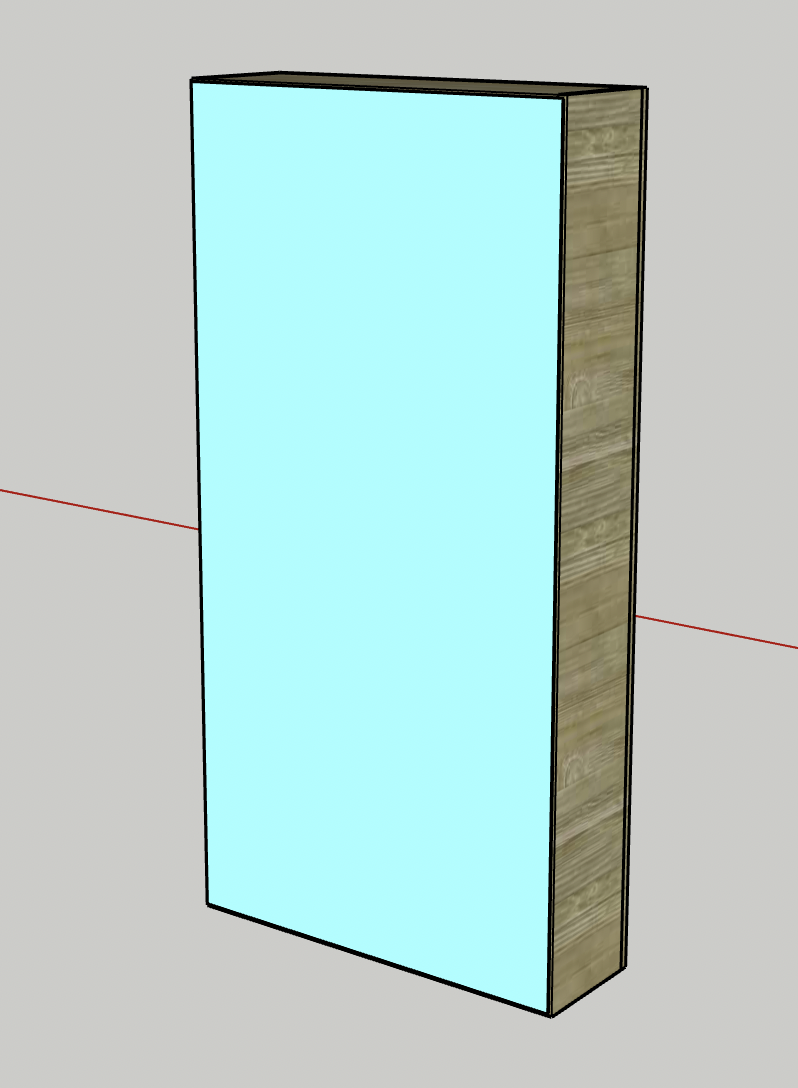
Attach back
Using wood glue and pin nails, attach the Back to the back edge of the bookcase.
-
Cover plywood edges
- If you don’t like the plywood edge look, apply edge banding to a long edge of each Shelf and the curves of the waves.
- To apply edge banding to curves, it’s difficult to use an iron like with a flat surface, so use a heat gun and a round dowel to press the banding into place. -
Stain/paint
- Apply stain or paint to the entire piece to match your decor style.
- Apply a coat of polyurethane to the entire bookcase and each removable shelf.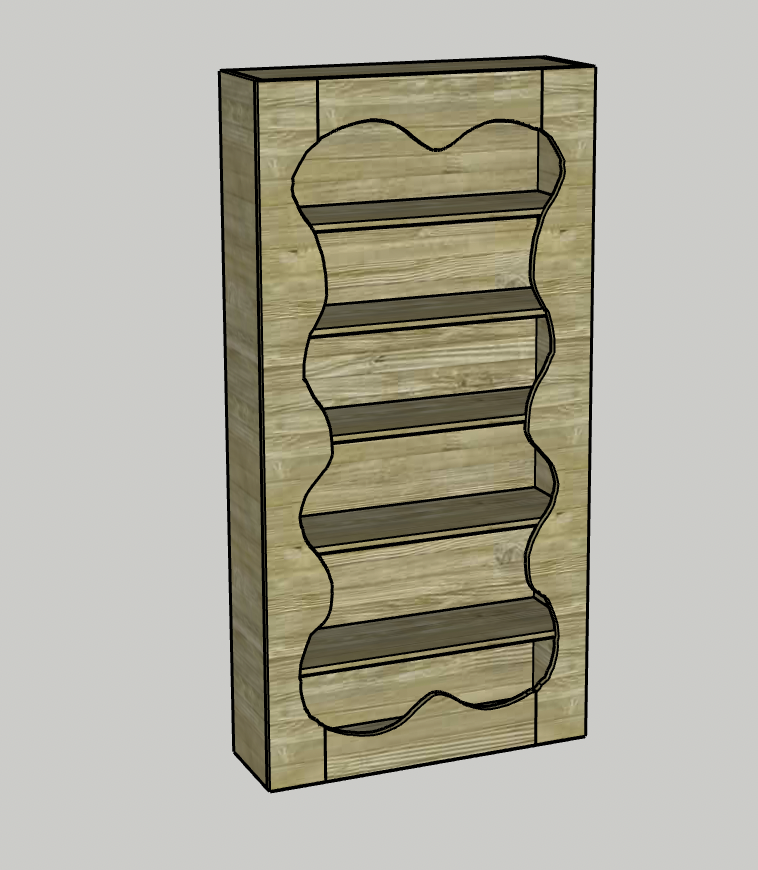
-
Add shelves
- Insert shelf pins into the holes at the points you want the Shelves to be.
- Slide the shelves into place above the pins. You’ll need to insert them at an angle because of the waves on the face.
-
Decorate
Style your bookcase with books, decor, photos or anything else you want to show off!
-
Enjoy!
Enjoy your handiwork and tag @CharlestonCraftedBuilds on Instagram with a picture!