


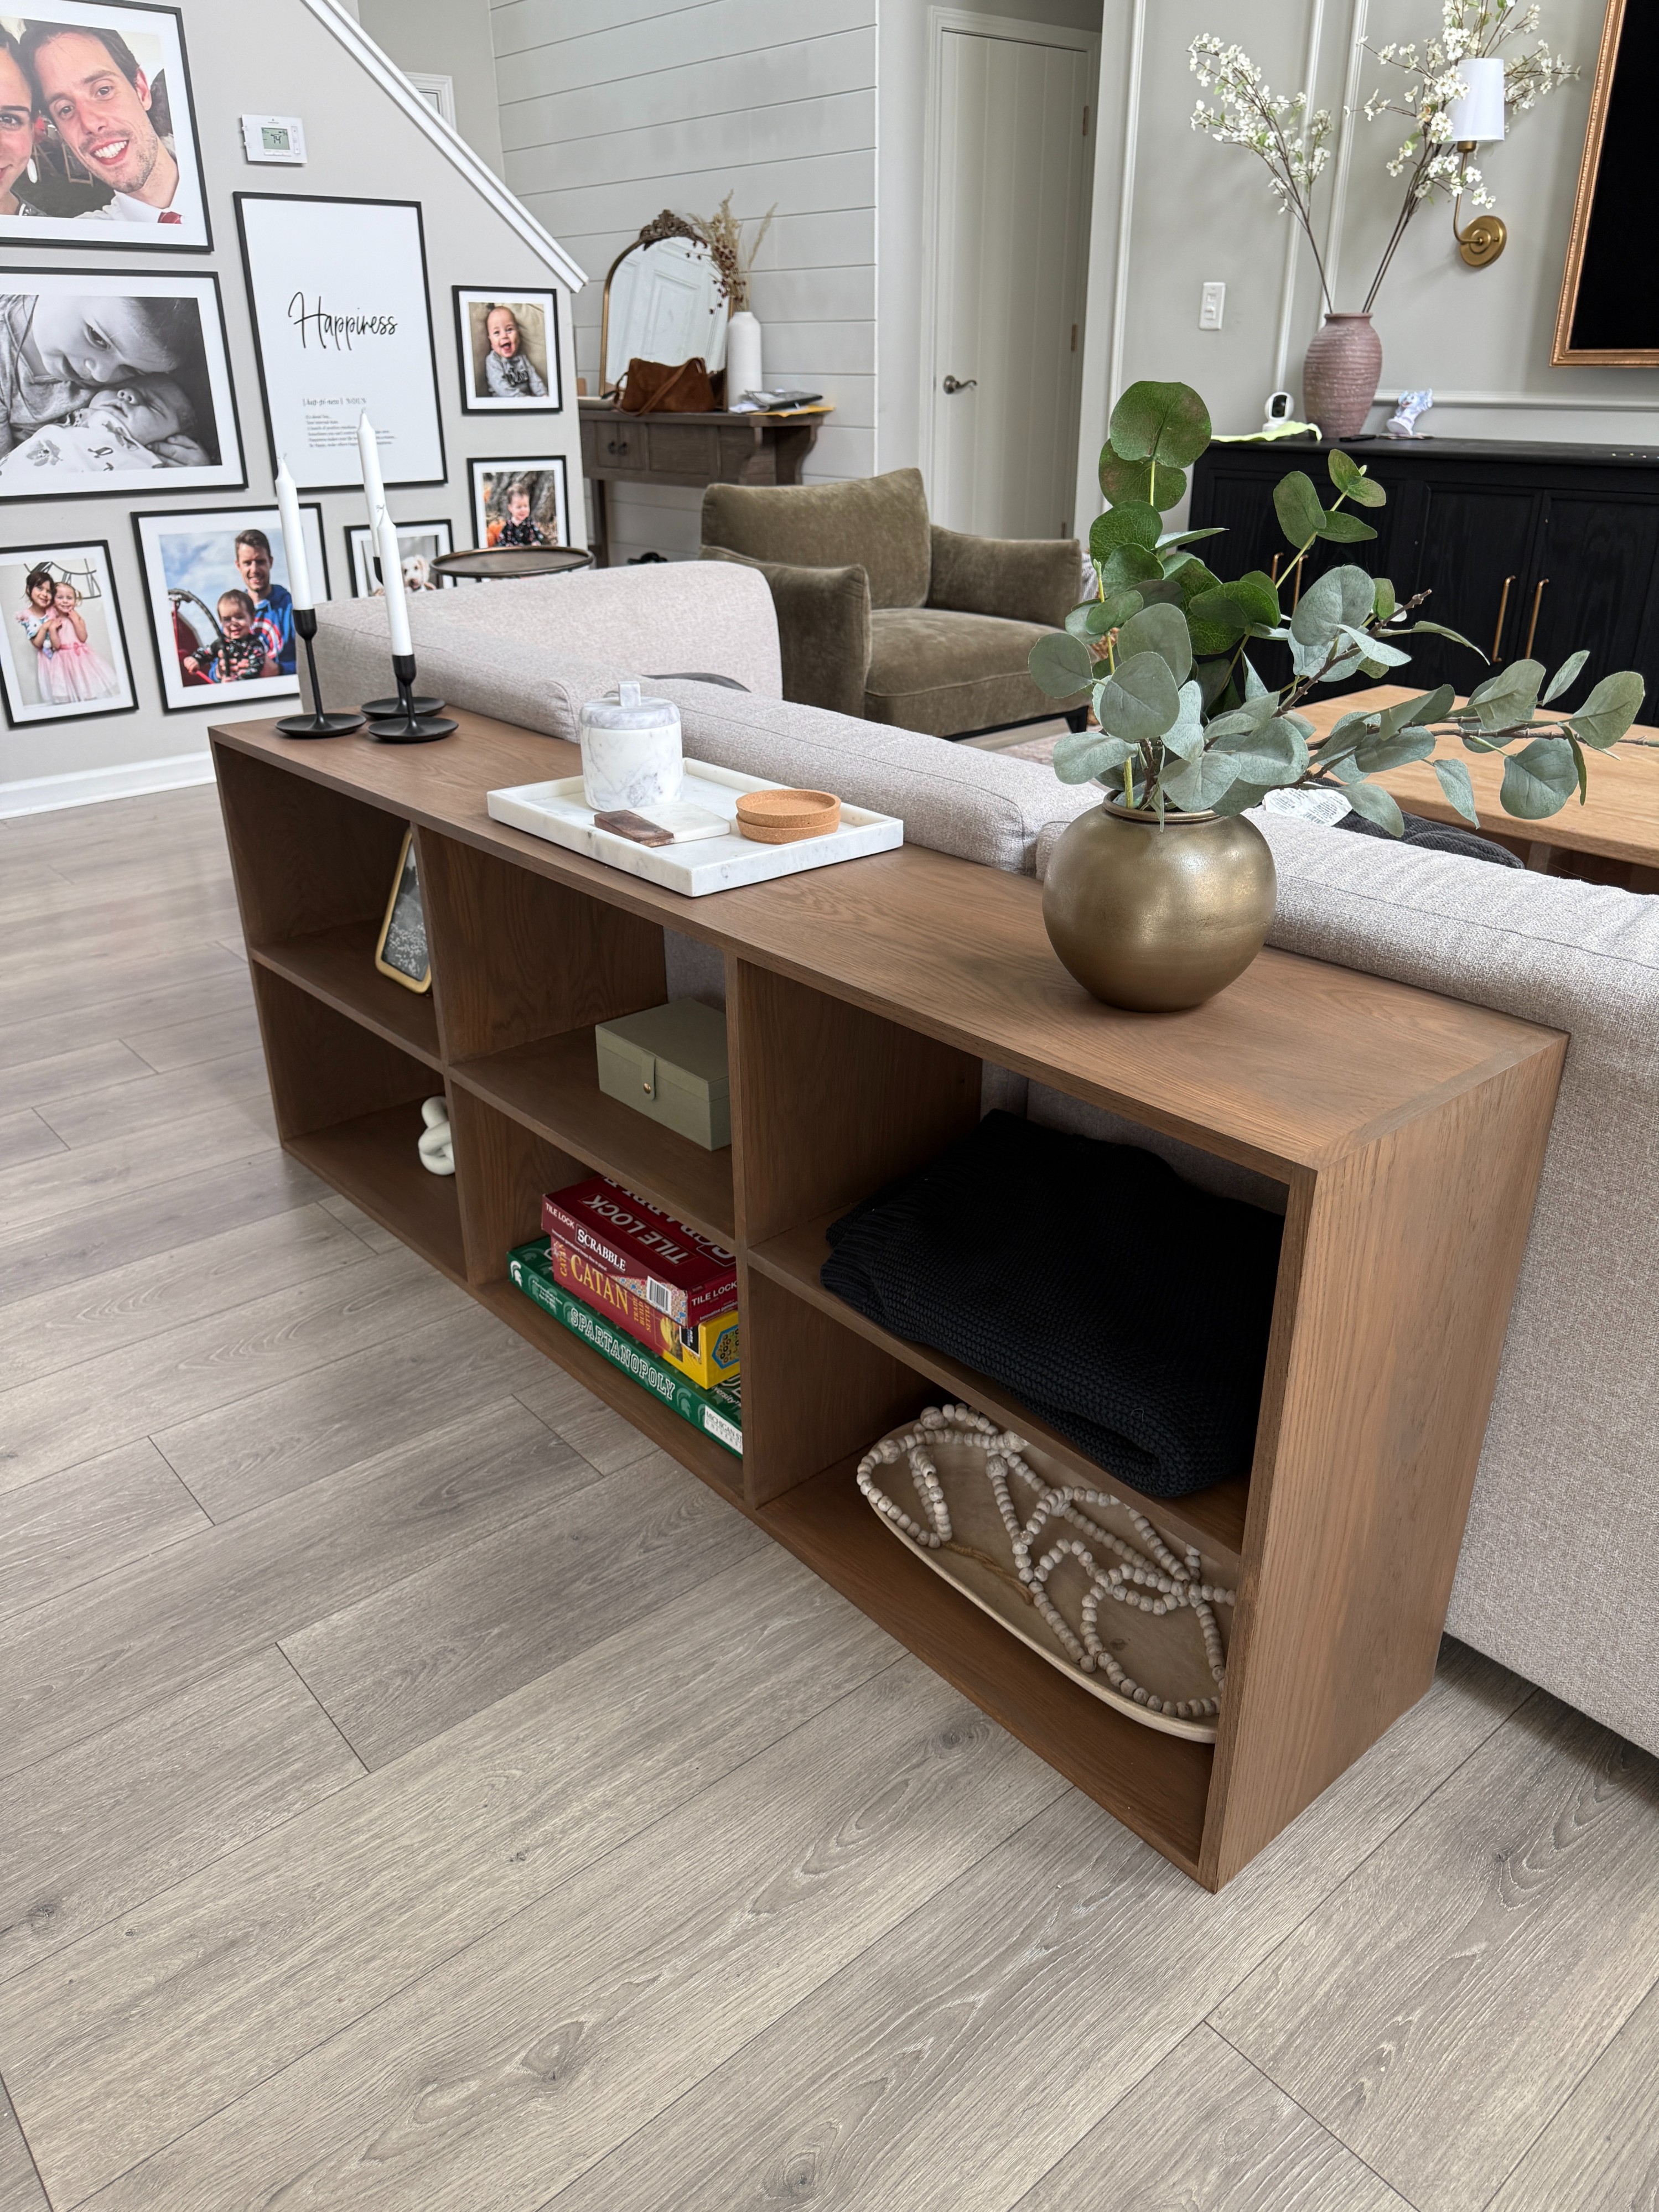


Build a sleek and low profile table that can double as a sofa table, console, or bookshelf. This easy to follow project uses basic materials and beginner techniques to create a sturdy piece that fits behind a couch, along a wall, or beneath a window. Customize the length and finish to suit your space and style.
Tools
Kreg Tools


Other Tools
-
Miter saw

Materials
Wood Products
- 4 1x12x8' , .75" x 12" x 96"
Hardware & Supplies
- 25 1 1/4" pocket screws
- 1 Countersink bits
- 1 Wood glue
- 25 1 1/4" wood screws
- 1 Optional: countersink bit
- 1 Optional: dowel/wood plug cutter bit
- 1 Optional: flush trim saw
Directions
-
1
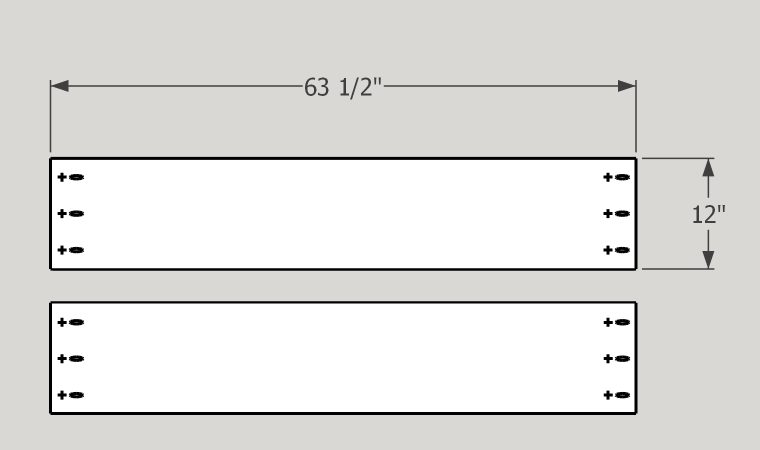
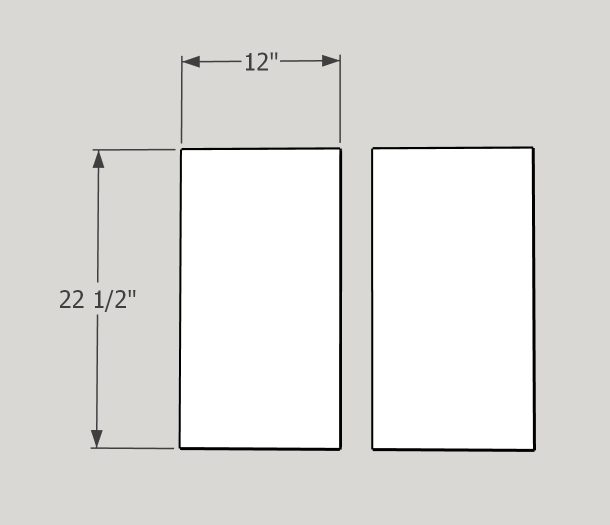
Cut the top and bottom to size.
I suggest using a miter saw or a track saw.Drill pocket holes on both ends of the top and bottom as shown in the picture. The pocket hole jig should be set to 3/4" and the drill collar should be set to 3/4".
-
2
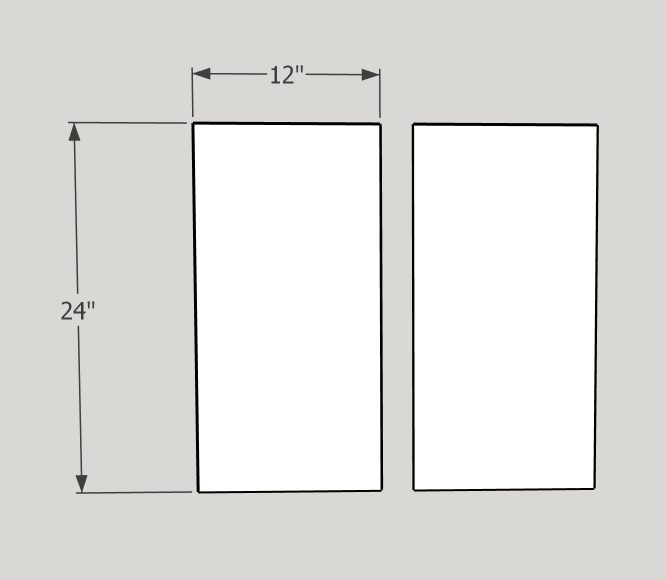
Cut the sides to size.
-
3
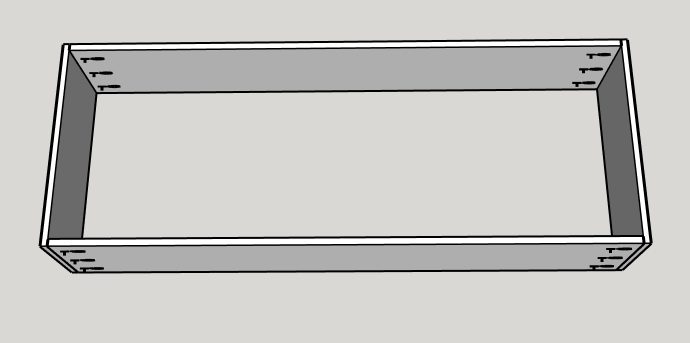
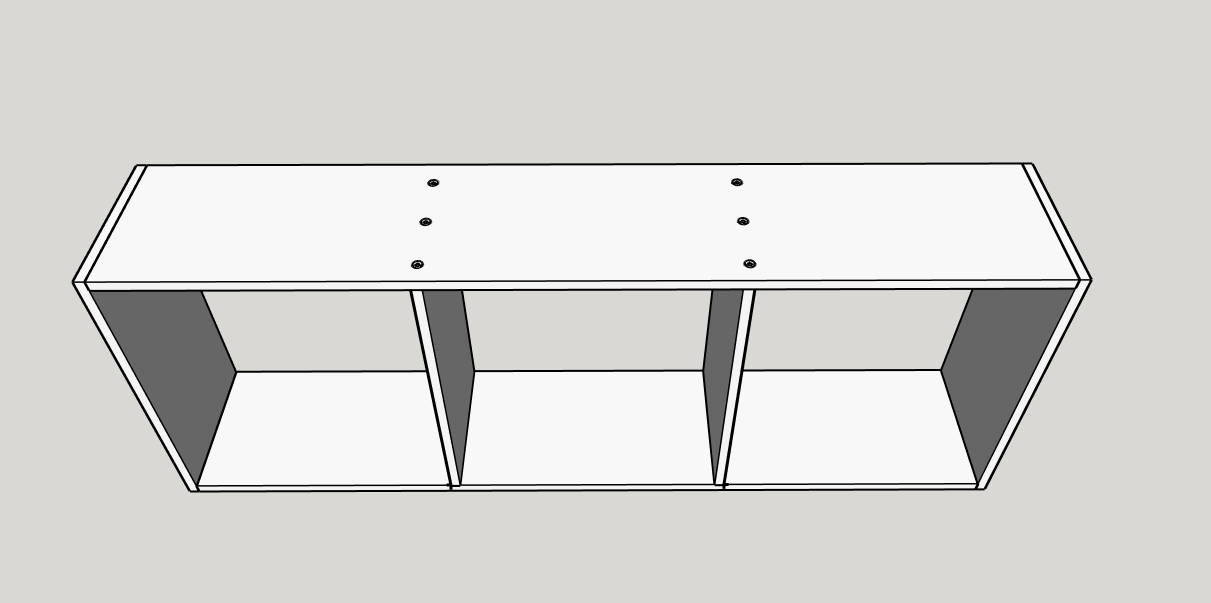
Attach the top and bottom to the sides using wood glue and 1 1/4" pocket screws.
Make sure the pocket holes face the bottom so they won't be visible when the table is finished.
Tip: clamps really help with this step!
-
4
Cut the vertical shelves to size.
-
5
Screw the vertical shelves into top and bottom of the table using 1 1/4" screws and wood glue.
Put 3 in the top and bottom as shown in the image.
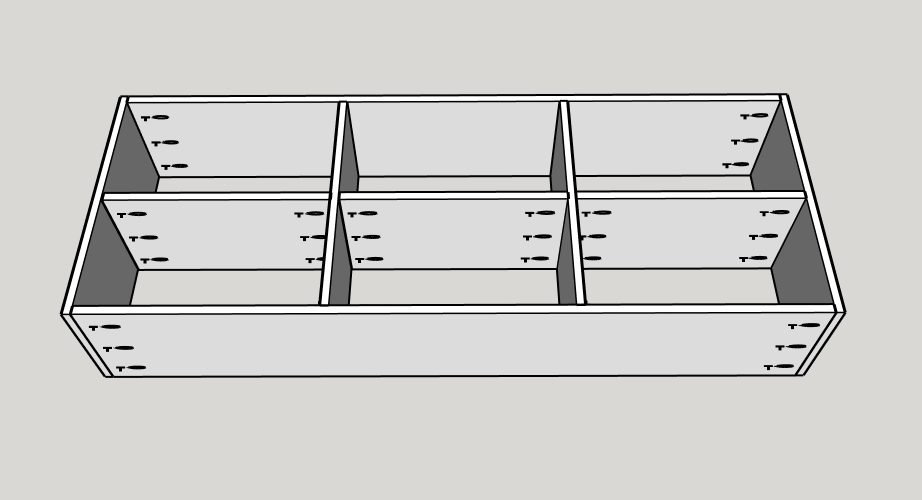
Optional: To hide the screw holes, use a countersink bit to first drill a hole deep enough to hide the screw top. Then screw the boards together and using either dowels that match the wood or a wood plug bit, glue in the wood and use a flush trim saw to trim it flush with the table.
See step 6 for the spacing between the vertical shelves and the sides.
-
6
Refer to the image for the spacing needed between the vertical shelves and the sides of the table.

-
7
Cut the horizontal shelves to size.

-
8
Attach the shelves with pocket holes and wood glue.
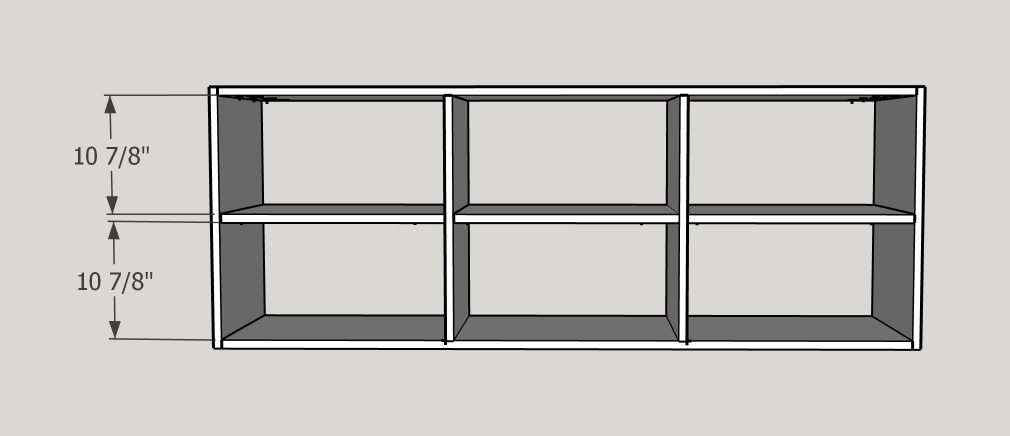
Refer to step 9 for the spacing between the shelves and the top and bottom of the table.
-
9
Refer to the image for equal distance spacing between the vertical shelves and the top and bottom of the table.
-
10
Sand and choose your favorite stain and you've made the perfect multi-functional table!